
HOUR 7
Creating and Using Libraries
What You’ll Learn in This Hour
![]() Understanding the different libraries
Understanding the different libraries
![]() Creating a picture library and a document library
Creating a picture library and a document library
![]() Different ways to add images and files
Different ways to add images and files
There are several different kinds of Libraries. This hour describes the differences between them and shows how to create a library and how to use it.
Different Types of Libraries
The list of libraries shown in Figure 6.2 (in Hour 6, “Using Libraries and Lists”) contains the following four library types:
![]() Document library . Standard library type used for the majority of file types. This is the most commonly used library type.
Document library . Standard library type used for the majority of file types. This is the most commonly used library type.
![]() Form library . Designed to be a storage location for forms created in InfoPath 2010. When you create a form in InfoPath 2010 and “publish” it, it publishes to a form library.
Form library . Designed to be a storage location for forms created in InfoPath 2010. When you create a form in InfoPath 2010 and “publish” it, it publishes to a form library.
![]() Wiki page library . Stores wiki pages.
Wiki page library . Stores wiki pages.
![]() Picture library . Stores images (previously this was called an image library).
Picture library . Stores images (previously this was called an image library).
All these library types store files. Each type enables versioning to be specified, but they differ in the kinds of files that they are designed to store.
A picture library differs from a standard document library mainly in the way the files are presented. For example, a thumbnail view and a slide view are available in picture libraries. Neither would make sense in a document library.
Creating and Using a Picture Library
In this section, we create a simple picture library and add images to it.
Creating the Picture Library
To create the picture library, go to the default site and select Site Actions > More Options; then scroll down to see the image for Picture Library. Click the icon to select Picture Library, add the name My Own Photos (see Figure 7.1), and click Create. You now have an empty picture library (see Figure 7.2).
FIGURE 7.1 Creating a picture library
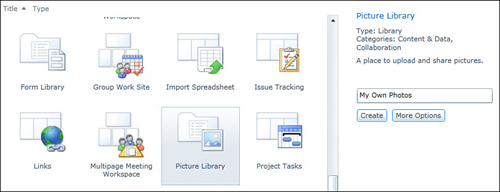
FIGURE 7.2 An empty picture library
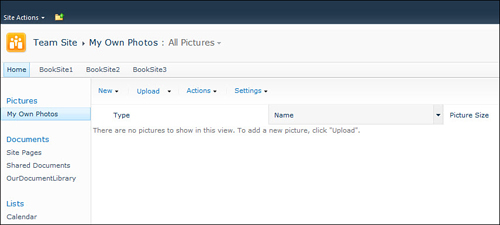
You need to add some files to the picture library. The most common way to add files (and this goes for a document library) is to use the browser.
Using the Single-Upload Method
To add files to your picture library using the single-upload method, you must first select the Upload option.
Here’s how you can upload one document at a time:
1. Select Browse.
2. Find a suitable image file. (A suitable image file can be any image file you have available—for instance a .jpg file).
3. Select the image file.
4. Upload the image file.
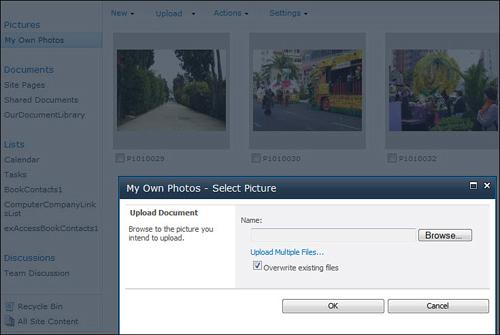
Add some more images by repeating the preceding steps. At this point—in TV cook style—I’ve uploaded three images. Now I’ll upload a fourth, still using the single-upload method (see Figure 7.3).
FIGURE 7.3 Adding a picture
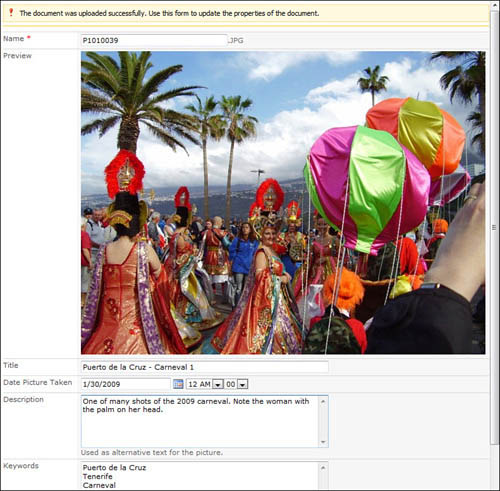
When you add a single picture, you get the chance to add metadata. In this case, the fields that can be completed are those included in the picture library as it is delivered. As you add another picture, fill in some of the fields as in Figure 7.4 and press Save to complete the action.
FIGURE 7.4 A single picture with fields to fill in
Using the Multiple-Upload Method
You can simultaneously add several files to your picture library by using the Upload Multiple Files link that was an option in Figure 7.3.
If you can’t see the Upload Multiple Files link, you are not using Internet Explorer as your browser or your client is not running a suitable Office version on your client system. (The Office versions that make Upload Multiple Files visible are Office 2003 Pro, Office 2007, and Office 2010.)
Follow these steps to upload multiple files using the Upload Multiple Files link:
1. Choose Upload Multiple Files, as was shown in Figure 7.3.
FIGURE 7.5 A request for authentication when starting Office Picture Manager
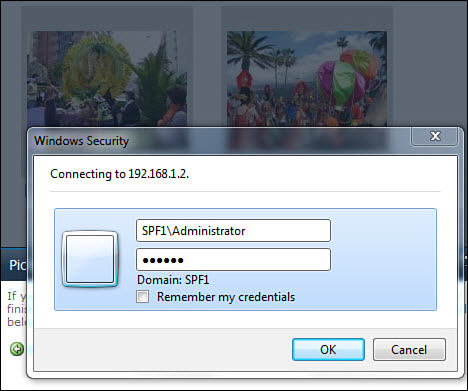
FIGURE 7.6 Choosing a directory in Office Picture Manager
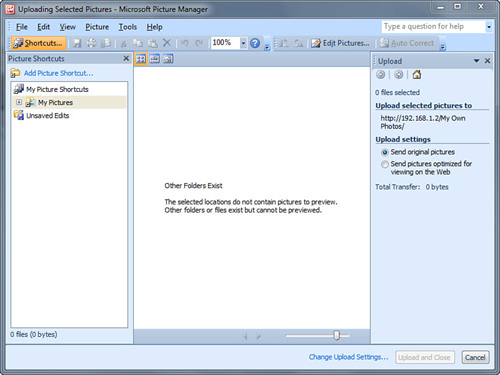
You need certain Office versions on your client PC to use Multiple Upload, which has previously been mentioned; however, the fact that a multiple upload will load the Microsoft Office Picture Manager is yet another reason for that requirement.
The Office Picture Manager screen is likely to show you images from a directory that you don’t want to select your photos/images from.
2. If the wrong directory displays, select Add Picture Shortcut (see Figure 7.6) to add to the My Picture Shortcuts list the directory containing the images you want.
In Figure 7.7, I’ve added (and selected) the MikePics2009 directory (see the leftmost column).
FIGURE 7.7 Selecting pictures in Office Picture Manager
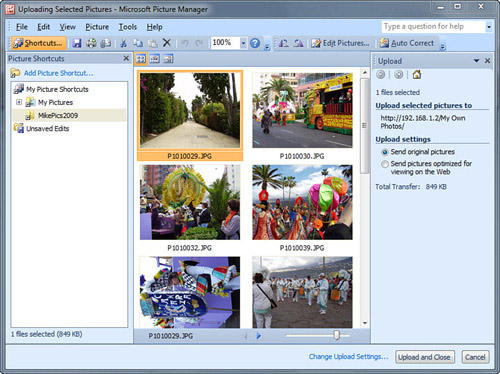
3. Scroll down the central section to the photos you want to use. Select them by clicking the first one and Ctrl-clicking subsequent images.
4. Select Upload and Close. The pictures upload to the picture library, and the Office Picture Manager application closes.
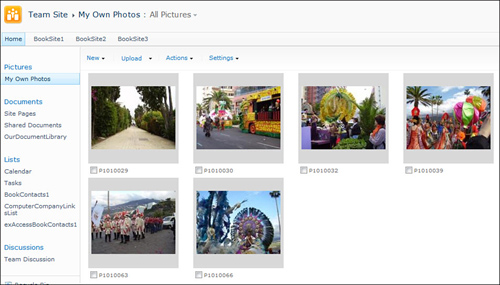
5. Before returning to the picture library, the Picture Library Information screen offers you the chance to go back to the picture library to select more images to upload. In this case, click Go Back to My Own Photos on that screen to return to the picture library (see Figure 7.8).
Although we added metadata to one of those pictures, all the pictures look the same. Nothing indicates that one picture has metadata associated with it.
FIGURE 7.8 The picture library with content
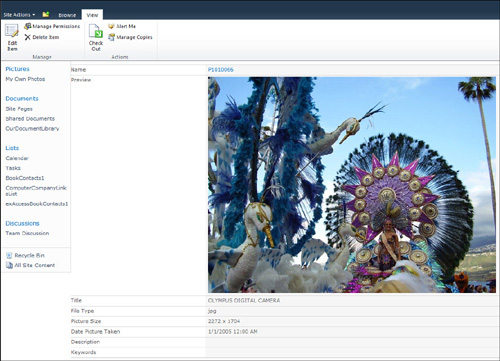
To see whether you have metadata, double-click a picture. If you want to amend or add metadata, select Edit Item in the menu line (see Figure 7.9).
FIGURE 7.9 Checking and adding metadata for a picture
You can upload documents to a library in other ways (as discussed in the document library coverage). Even so, only the browser-based, single-upload method means that metadata entry is possible as you upload to the library.
Creating a Document Library
A document library stores documents in the same way as a picture library stores images. Document libraries are more widely used than picture libraries, so throughout the rest of this book we concentrate almost entirely on them.
So that we have something to work with in our document library, I created several files (most with little content) in Acrobat, Excel, PowerPoint, Notepad (so, normal text files), and Word. (I did this on a PC running Office 2010 but saved the Office files in 2003–2007 format.) These files should give enough initial data to see how document libraries are used. If you don’t want to create files yourself (or can’t), you can find files in different formats on the Internet and use them.
Following are the files, the number of files, and the file types. The filenames indicate which company is associated with them:
![]() Excel (7) 2 HP, 3 IBM, 1 MS, 1 Oracle
Excel (7) 2 HP, 3 IBM, 1 MS, 1 Oracle
![]() PDF (4) 2 IBM, 2 MS
PDF (4) 2 IBM, 2 MS
![]() PowerPoint (1) MS
PowerPoint (1) MS
![]() Text (3) 2 HP, 1 MS
Text (3) 2 HP, 1 MS
![]() Word (5) 2 HP, 3 MS
Word (5) 2 HP, 3 MS
We start by creating a new document library (instead of using the existing one, Shared Documents):
1. If you aren’t at the default page, click Home and select Site Actions > New Document Library.
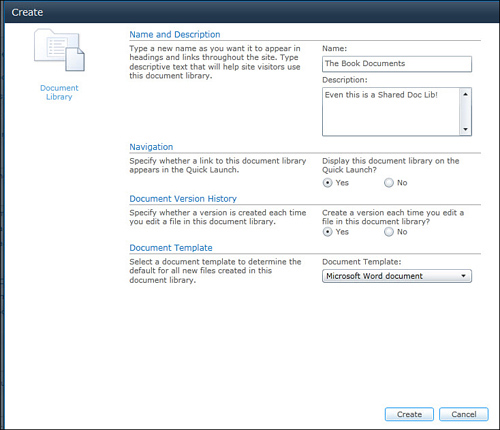
2. Add a Name and Description.
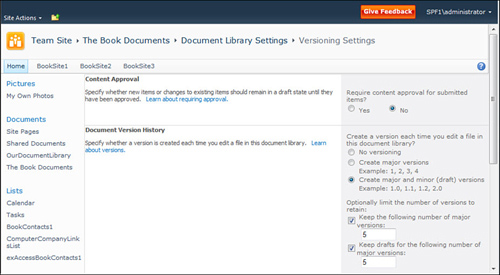
3. Leave the default as Display on the Quick Launch but amend the second radio button pair so that we have versions allowed.
(If you forget to do this—or want to fine-tune the Version settings—go to (Library) > Library Settings > Versioning Settings.
4. Leave the final drop-down at its default value. Notice that this specifies the type of document that will be created for this document library if you click New Document when opening the document library.
FIGURE 7.10 Creating a document library
5. Click Create.
Alternative Methods for Uploading Files to a Document Library
You just learned two ways to upload items to a library. In this section, those methods apply to files being uploaded to a document library.
Because the methods are the same, there’s no point in repeating them here. Instead, let’s look at a couple of alternative methods.
One method involves opening the document library in one window and going to Library > Open with Explorer (what used to be known as the Explorer view). (See the left-most and upper-right part of Figure 7.11.) Then open Windows Explorer in another window and select the files you want to upload (lower-right part of Figure 7.11).
FIGURE 7.11 Copying files to a document library using Explorer View
Often, you can just drag and drop the documents (in Figure 7.11). On a few client systems, however, this doesn’t work. In that case, select the files and then press Ctrl-C on the right side and Ctrl-V on the left (here, this is top) side (that is, copy and paste)—this alternative method always seems to work.
Just as with the multiple-upload option in the user interface, you won’t have yet had an option to fill in any fields with additional information about the documents being uploaded. All the system knows is that you uploaded the document, when, what the filename is (what kind of document it is), the file size, and a few more things we can’t see in Figure 7.12.
FIGURE 7.12 The refreshed All Documents view

After you copy the files, close the window created by Open in Explorer and go back to the Book Document page. To see the files you have just uploaded to this page, refresh the page and you get the list of files you see in Figure 7.12.
The second main way to perform multiple uploads (there are some less-usual methods that I don’t discuss) involves using local drives.
Here is an outline of how to use that second method:
1. Assign a document library to a local drive via a statement in the command line like this (where the URL of the document library is http://servername/xxx/doclib1):
Net use X:\servernamexxxdoclib1 (If this isn’t enough explanation for you, ignore this method.)
2. Copy your files from (for instance) your PC My Documents folder to X: or use the following method using My Network Places:
![]() Define the document library in My Network Places.
Define the document library in My Network Places.
![]() Open the My Network Places entry.
Open the My Network Places entry.
![]() Copy and paste (or drag and drop if it works) the files from Windows Explorer to it.
Copy and paste (or drag and drop if it works) the files from Windows Explorer to it.
The problem mentioned in the “By the Way” sidebar is actually something the administrator can fix quickly by following the steps that follow:
1. Create (or find) a PDF image of the right size.
2. Go to the server.
3. Find the directory that contains the other images.
4. Copy the new PDF image to it.
5. Amend a file in another directory that lists file types (and adding a line for PDF files).
If you want more detailed instructions, track down a Microsoft article with more details: Go to www.microsoft.com and use the search term pdf icon sharepoint, which should give you KB article 837849.
Summary
Here we looked at a picture library and a document library. It showed how files are uploaded to them, which data is available on those files, and how the files are displayed on the default page for the library.
Q&A
Q. What is the point of adding metadata? I just want to quickly add content, so surely uploading a lot of files simultaneously is the best method even if I can’t in the same process add metadata.
A. Adding metadata both enables you to set up meaningful views (see Hour 8, “Creating and Using Views and Folders”) and to improve the quality of your searches (Hour 14, “Improving Searches”).
There’s a discussion later (in the section about folders in Hour 8) about why it’s not a good idea to attempt to replace the file system by uploading large quantities of files in bulk.
Q. You talked about creating a template for use in a document library. What are the steps for doing this?
A. Here is what you do:
1. Open the document library.
2. Choose Library.
3. Choose Library Settings.
4. Choose Advanced Settings (leftmost column).
5. Select Edit Template (second section down on the far-right of the screen).
This opens the default template in Word, and you can amend it. (It’s probably an empty page; see what happens if you write a text into it like My New Template).
6. Save as the template with a new name (MyTemplate.dotx).
This saves the template in Forms alongside default.dot. (That is, both templates are stored in Forms, so default.doc is still available if you want to change back to it.) In this case the new template is a Word 2010 format template. To avoid this, follow the warning on saving the template to specify a template that is compatible with older versions.
You are then taken back to the Advanced Settings page, where you see the effect of the change. You need to change the name of the default template to MyTemplate.docx. Click OK.
Now when you click New in the document library, you see your new template (perhaps with your company logo) rather than the old standard one.
Workshop
Quiz
1. What are two main ways to upload files to a library when using the user interface?
2. When is the Multiple-Upload option not available?
3. What is the major problem with using the Multiple-Upload option?
Answers
1. The single-upload method and the multiple-upload method.
2. If the client system is not running Internet Explorer (5.x and later) or is running Internet Explorer but isn’t running Office 2003 Pro, Office 2007, or Office 2010.
3. Metadata cannot be added during the upgrade process when using the Upload Multiple Files option.