Chapter Five. Pro Tips for Shooting in Natural Light: How to Take Advantage of the Most Beautiful Light on Earth
SHUTTER SPEED: 1/125 SEC F-STOP: F/2.8 ISO: 800 FOCAL LENGTH: 70MM PHOTOGRAPHER: SCOTT KELBY

You know what I like best about shooting in natural light? It’s free. That’s right, you don’t need a wireless trigger, or light stands, or batteries, or gels, or softboxes, or any of the other stuff photographers lug around in Pelican cases, and that takes forever to set up, and then, invariably, doesn’t fire, or doesn’t fit, or you forget to bring it. Because, then, you wind up yelling at your assistant, but your assistant isn’t really your employee—it’s your friend that’s just helping you out. And now you’ve gone and yelled at her, so you look like you’re “in charge” on the set, and while that might be fine with an employee who is kind of paid to put up with your BS (belligerent shouting), she is actually someone you met at Applebee’s when you were on your lunch hour, and your friend Mark knew her from when he worked at the mall. So, really, she’s just helping you out to be a friend, and she’s not even a real photography assistant at all, so you couldn’t expect that she’d just somehow know exactly how high to put that light stand, because after all, she’s a clothing designer, and what she really wanted to do was the styling for the shoot. But, here she is futzing around with a light stand, which was exactly what she didn’t want to be doing on a Thursday afternoon, but now she’s doing something she didn’t want to be doing in the first place, and she’s only there as a favor to Mark, who introduced the two of you, and you’re yelling at her about something she has never been trained on. Now she’s got tears in her eyes, because this whole thing reminds her of the time her ex-boyfriend wanted to take her jet skiing, but then he yelled at her when she untied the line, because he never told her when to untie it. So, now she’s bawling and you’re mad, and this whole thing could have been avoided if you had either: (a) shot in natural light or (b) eaten at Chili’s that day instead.
Beautiful Backlit Shots
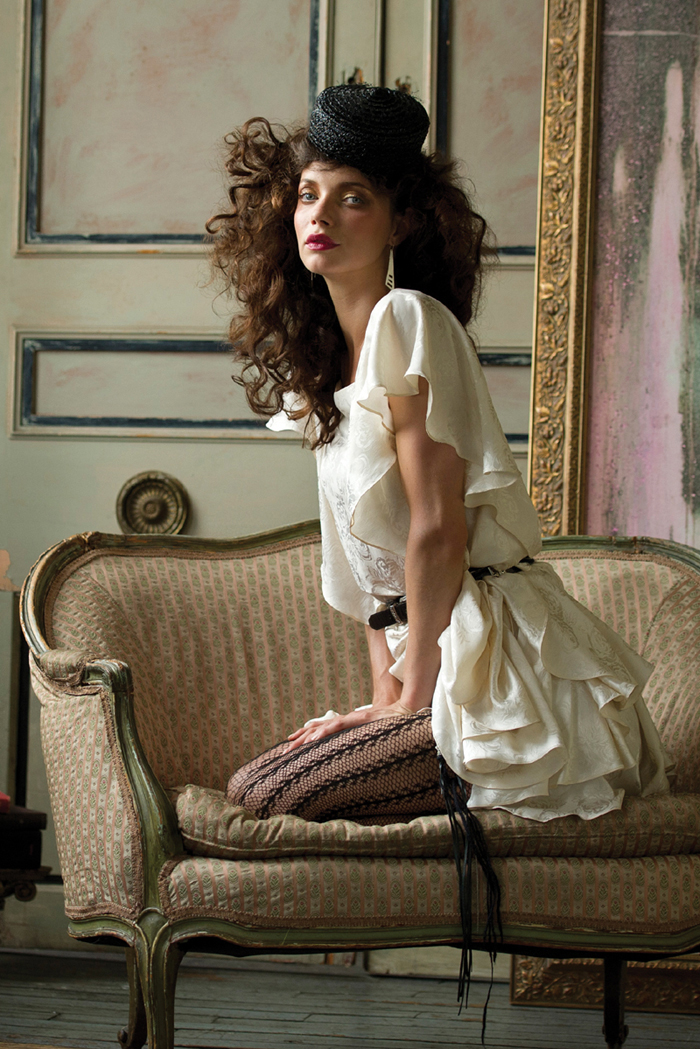
If you want to add some visual interest to your outdoor shots, look for backlight opportunities, especially when shooting people. Backlit images bring a drama and dimension you don’t often see, except from pros. How do they do it? First, position your subject so the sun is directly behind them, with no light falling on their face, so they look like a silhouette. Then, switch your camera’s metering mode to Spot Metering, and aim your focus point on your subject’s face. By doing this, you’re telling the camera, “This is the most important thing in the photo—make sure it’s properly exposed.” Now, when you take the photo, it will make your subject’s face much brighter. The rest of the photo will get brighter, too, but in most cases that’s okay, because what’s behind your subject is the sun (which is usually pretty bright anyway). If you’re shooting in aperture priority mode (which is what I shoot in outdoors in natural light) and you think the entire photo is too bright, back it off by using exposure compensation (where the camera makes what it thinks is the proper exposure, but once you look at it, you disagree and want to override that and make the photo darker or lighter). On a Nikon, hold the exposure compensation (+/–) button on the top, and then move the command dial on the back to the right to either –0.3 or –0.7 (you’ll see this in the top control panel), and then take another shot (the whole shot will either be ⅓ or ¾ of a stop darker). On a Canon, turn the power switch to the top position (above On), look at the LCD panel on top, then use the quick control dial on the back to override the exposure either –0.3 or –0.7, and then take the shot and see if you need it darker—if it’s too dark, try again.
Shooting Silhouettes
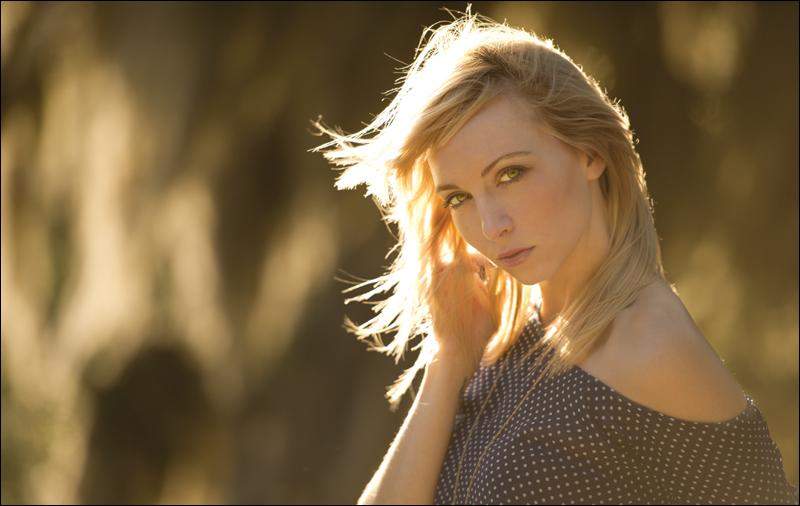
© ISTOCKPHOTO/DAVID MATHIES
Backlit silhouettes of your subject (whether your subject is a person or a flower, or a horse, or a cowboy, and so on) can look wonderful as long as the shape of your subject makes it instantly obvious exactly what it is. This is why subjects that are by themselves often work best. If two people are together hugging, a black silhouette of them sometimes just looks like one big blob—you don’t see them as two people hugging. As for your camera, the trick to getting great silhouette shots is to pretend your subject isn’t there, and just shoot the scene like you were shooting a landscape shot (so I would shoot it in aperture priority mode, or you can switch your camera to landscape scene, if your camera has that). If you try to expose for your subject, your camera will try to properly expose for your subject (let’s say it’s a cowboy at sunset), and then it won’t actually be a solid silhouette. So, just pretend you’re there to shoot the sunset, and the rest will fall into place. Remember the trick—pretend your subject isn’t there, and just shoot it like you would a landscape (with the sun behind your subject), and you’re gold!
Jay’s Trick for Not Missing the Shot
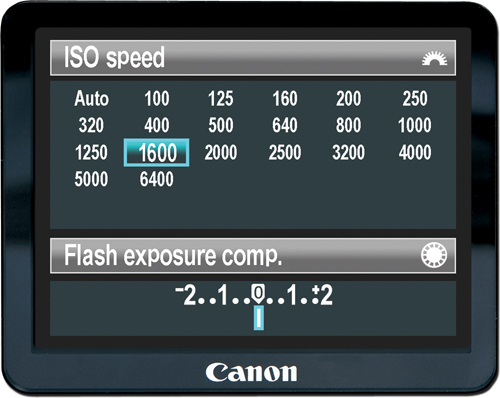
I learned this tip the hard way from my friend Jay Maisel, who is one of the living legends of American photography, as he showed me a shot he had taken while the two of us were walking around in downtown New York City one afternoon. I had the same shot. His was tack sharp. Mine wasn’t. We had the same exact camera make and model. He asked me what ISO I was shooting at. I was at 200 ISO. He was at 1600 ISO (which means his shutter speed was fast enough to get a really sharp hand-held photo. At 200 ISO, mine wasn’t). He chuckled at me and kept walking. I now shoot at 1600 when I’m walking around, because I’m not going to miss the shot next time because it’s a little blurry. If you ever get the choice between a little noisy (from the high ISO) or a little blurry, choose a little noisy.
How to Make Sure Your Sunset Looks Dark
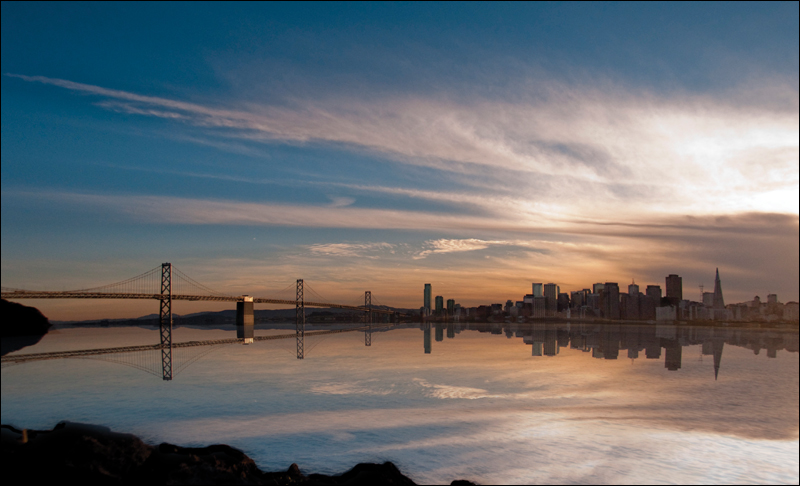
If you’re shooting a sunset, it should look dark, right? But if you’re shooting in aperture priority mode (that’s the mode I shoot in when I’m shooting in natural light), or maybe programmed (or program) mode, your camera is probably going to try to make a “proper” exposure, because it doesn’t really realize that you’re trying to shoot a sunset, and you’ll wind up with a sunset that’s more like an hour or so before sunset. The trick is to force your camera to take a darker shot. You can do this using the exposure compensation trick I talked about on page 74 (about shooting backlit shots), or you can do this: Switch to programmed mode (on a Nikon; program mode on a Canon), aim at the sunset (focus on a cloud to the left or right of the setting sun, if possible), then press-and-hold your shutter button down halfway. Look inside your viewfinder and see what f-stop and shutter speed your camera chose for this shot (let’s say it’s f/8 at ![]() of a second). Remember that setting (f/8 at
of a second). Remember that setting (f/8 at ![]() of a second) and switch to manual mode (don’t freak out—this is easy stuff). Then, set your aperture to f/8 and your shutter speed to 200 (it generally doesn’t say
of a second) and switch to manual mode (don’t freak out—this is easy stuff). Then, set your aperture to f/8 and your shutter speed to 200 (it generally doesn’t say ![]() of a second. It’ll just say 200). Now, your job is to make the sky darker. Easy—just change your f-stop from f/8 to f/11 and voilà—your sky is darker than your camera would have taken in program or aperture priority mode, and your sunset looks great. If you want it even darker, try f/14 or f/16, and you’ll see a rich, dark, beautiful sunset.
of a second. It’ll just say 200). Now, your job is to make the sky darker. Easy—just change your f-stop from f/8 to f/11 and voilà—your sky is darker than your camera would have taken in program or aperture priority mode, and your sunset looks great. If you want it even darker, try f/14 or f/16, and you’ll see a rich, dark, beautiful sunset.
Tips for Using a Reflector Outdoors
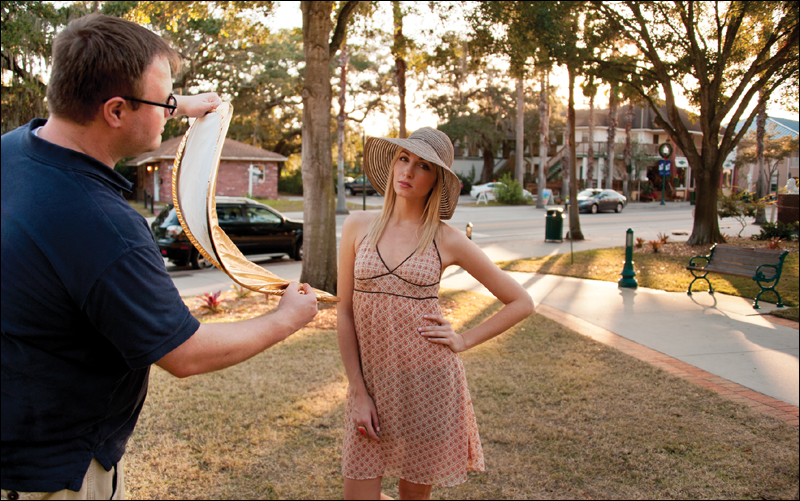
If you want your reflector panel to be your main light outdoors (bouncing the sunlight back toward your subject), then you need to position your subject so they’re in the shade. Not deep in the shade, just near the edge of whatever you have them standing under. So, if they’re standing under the overhang of a building, have them stand where they’re almost out in the sun. If it’s under a tree, don’t let them get way under it—the best “shade light” is out near the edges of the tree. Now that they’re in the right position, put your reflector in the right position. First, don’t hold it down below them bouncing the light up into their face. This unflattering “up lighting” is usually reserved for Halloween, as it tends to make people look a bit creepy. Your job with the reflector is to mimic the sun, so hold it up high (over your head, or ideally, have your assistant hold it over their head) and tilt it so the reflected sun hits your subject from above. Next, when shooting outdoors, don’t use a white- or silver-sided reflector—use a gold reflector, so your light doesn’t look too white, like you took a studio strobe on location. Also, don’t forget you can bend the edges of your reflector, so you don’t evenly light your subject—if you just want to light their face, bend the bottom of the reflector up a bit, so it doesn’t light their body. Lastly, if you’re shooting right out in the midday sun, instead of using it to reflect light, use it to block the sun—put it right over the subject’s head (the closer the better, but just outside your frame), so it’s between the sun and your subject. Now, although you might have to raise your ISO a bit (to raise your shutter speed) to shoot in the shade of your reflector, at least the quality of your light is dramatically better.
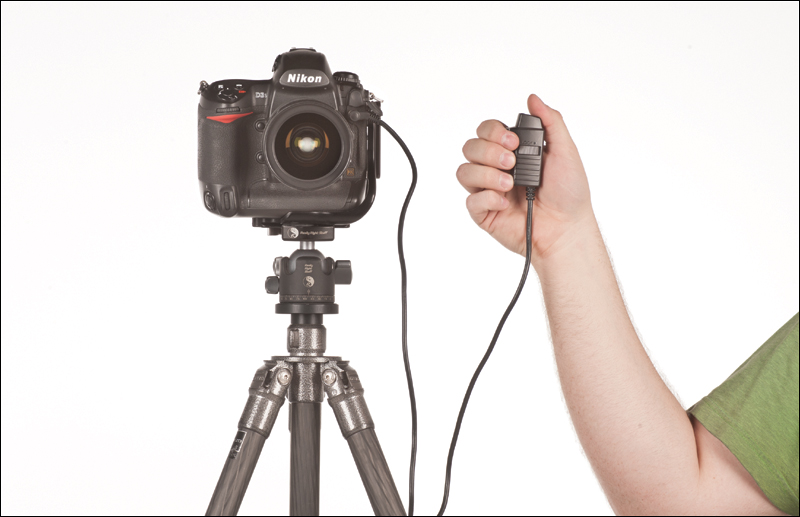
Control the “Power” of Your Reflector
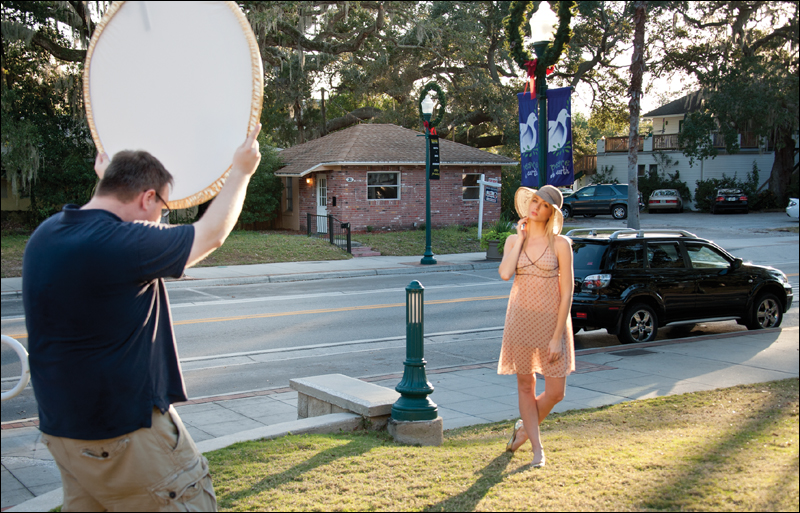
One of the handiest tools for controlling light outdoors is a basic $20 reflector. It’s incredibly handy because it’s lightweight, folds up to a small size, and most importantly, you don’t have to plug it in, and its battery never runs out (well, since it doesn’t have a battery). But, over the years, I’ve heard people say that the weakness of the reflector is that you can’t turn the power up/down like you can with a flash. Well...that’s only kinda true, because you actually can control the amount of light a reflector reflects onto your subject by how far away the reflector physically is from your subject. The closer it is, the brighter the reflected light becomes. So, if the reflected light is too bright, then just move the reflector farther away. What’s a good distance for a reflector used outdoors to bounce some sunlight back into your subject? About 8 to 10 feet from the subject is a great starting place. If you want the reflected light brighter, move in tighter, as seen above. Easy enough.
How to Deal with Underexposed Daytime Shots
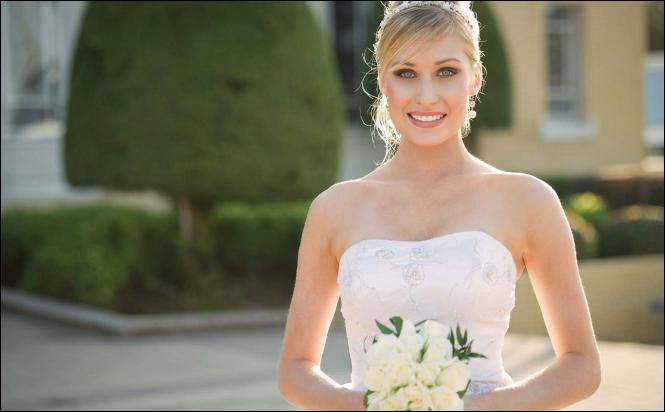
Here’s a tip I learned from wedding photographer Cliff Mautner, who is an absolute genius when it comes to shooting outdoors in direct sun in aperture priority mode (which is what I recommend and use for shooting outdoors in natural light). If your subject is wearing light clothes (like a bride in a white gown, for example), your camera’s meter is going to see all that brightness in the gown and adjust the shutter speed to make the shot dark (which will make your subject’s face dark, especially if you have your subject positioned so the sun is behind her, which it should be, by the way—don’t shoot people with the sun over your shoulder, the sun should be behind them). The trick is to override what the camera thinks the proper exposure should be (it thinks it should be dark) and use exposure compensation to increase the exposure by ⅓ or ¾ of a stop (or maybe even 1 full stop or more). Here’s how it’s done: On a Nikon, hold the exposure compensation (+/–) button on the top of your camera, and then move the command dial on the back to the left to either +0.3 or +0.7 (you’ll see this on the top control panel) and then take a shot (the whole shot will either be ⅓ or ¾ of a stop brighter). On a Canon, turn the power switch to the top position (above On), look at the LCD panel on top and use the quick control dial on the back to override the exposure by either +0.3 or +0.7, then take the shot and see if you need it brighter. If your subject’s face doesn’t have enough light on it, increase that exposure compensation a bit more (to +1.0; a full stop), and take a test shot to see where you’re at, and so on, until you nail it. So, in short, the trick is: if the scene is too dark, use exposure compensation to override the camera and then overexpose the image a bit.
The Trick for Shooting at Night
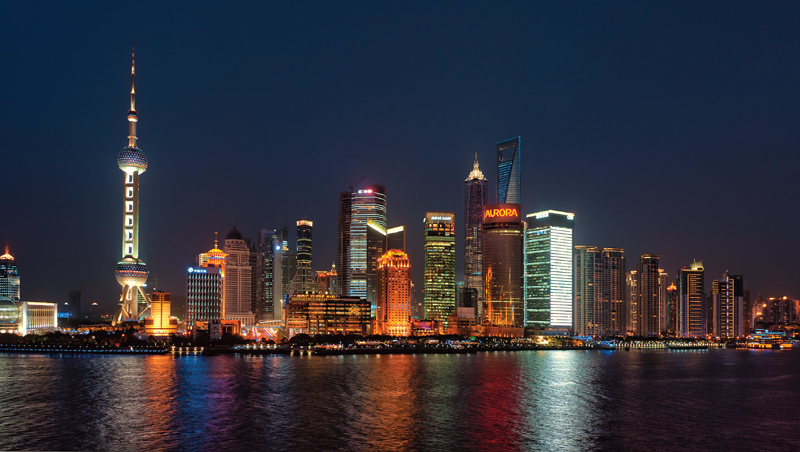
If you’re shooting outdoors at night, one of the best tips I can give you is to not shoot with one of your camera’s standard modes, like aperture priority (A on a Nikon or Av on a Canon), or any of the preset modes, like landscape or portrait. Those all work pretty well during the day, but shooting at night, and getting the night sky to be that really dark blue or black that you’re seeing with your eyes, often isn’t going to happen with one of those modes, because they’ll make the whole image too bright. After all, your camera doesn’t know it’s night, so it’s just doing its job of trying to make a proper exposure. That’s why I feel that the real secret to shooting at night is to shoot in manual mode. To do that, you’ll need to use the meter inside your camera’s viewfinder (this is so easy to do, you’ll be amazed, so don’t let this freak you out one little bit). So, switch to manual mode and dial in a starting shutter speed (at night, you’ll be on a tripod, so try something like ![]() of a second to start). Let’s also choose an f-stop to start with. How ‘bout f/8? Okay, good. Now, look in your camera’s viewfinder. On a Nikon, the meter shows up either on the far right or bottom of your viewfinder; on a Canon, it appears at the bottom of the viewfinder. There’s a big line in the center of your meter, and then little lines that go above it and below it (or to the left and right). If you see lines above the line, it means that if you shot right now, your shot would be too bright (overexposed), so try moving your sub-command dial (or quick control dial), which chooses the f-stops, until you see those lines go away (which means—perfect exposure). Now, that may be correct (technically), but if that night sky isn’t nice and black (or dark blue), keep turning that dial until it underexposes.
of a second to start). Let’s also choose an f-stop to start with. How ‘bout f/8? Okay, good. Now, look in your camera’s viewfinder. On a Nikon, the meter shows up either on the far right or bottom of your viewfinder; on a Canon, it appears at the bottom of the viewfinder. There’s a big line in the center of your meter, and then little lines that go above it and below it (or to the left and right). If you see lines above the line, it means that if you shot right now, your shot would be too bright (overexposed), so try moving your sub-command dial (or quick control dial), which chooses the f-stops, until you see those lines go away (which means—perfect exposure). Now, that may be correct (technically), but if that night sky isn’t nice and black (or dark blue), keep turning that dial until it underexposes.
Shooting Light Trails
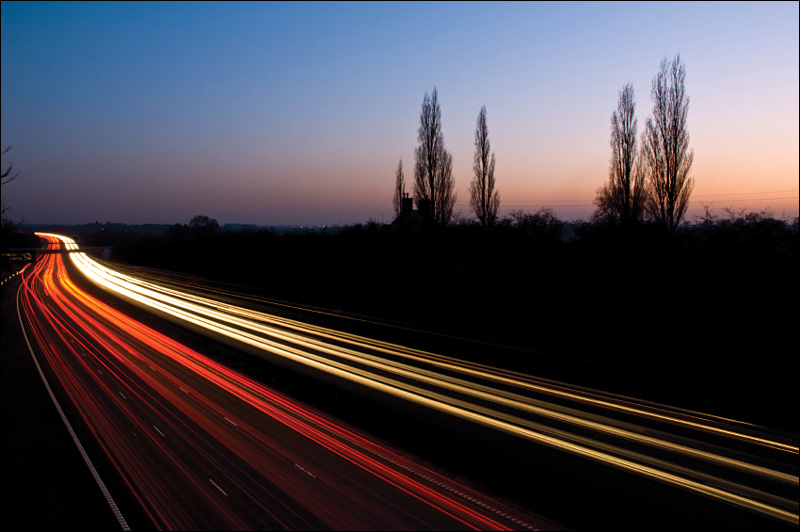
©ISTOCKPHOTO/CHRIS HEPBURN PHOTOGRAPHY
When I think of light trail shots, I always think of the light trails from cars driving at night, and they’re easier to shoot than you might think. You just need a tripod and cable release (to keep everything from moving even a little bit while your shutter is open, and it’s going to be open for a few seconds—long enough for the lights to move. By the way, the longer your exposure, the longer those light trails will be). Once your camera is on the tripod, and your cable release is ready to go, change your shooting mode to manual, then dial in an f-stop that makes everything in focus (like f/11), and then start with a shutter speed of 15 seconds (you may have to increase it a bit to 20 seconds or more, but this is a good starting place). Make sure your ISO is at its cleanest setting (for most Nikon DSLRs that would be 200 ISO, and for Canons 100 ISO). When you see a car coming into your view, just press your cable release, wait 15 seconds, then take a look at the image on your LCD and decide if you need to increase your shutter speed to 20 seconds or so (remember, longer shutter speeds mean longer light trails, so it’s at least worth a try). That’s pretty much all there is to it.
Shooting Star Trails
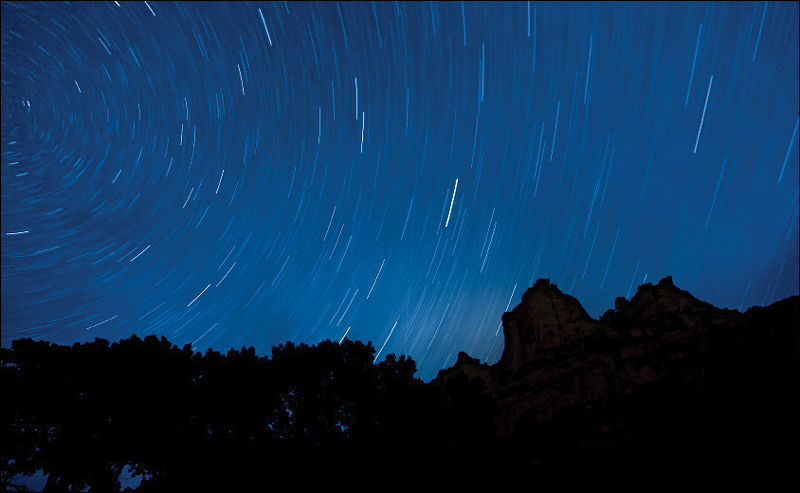
©ISTOCKPHOTO/JACOM STEPHENS
Start by choosing a clear night sky for shooting, far away from the lights of the city, and try to compose your shot so there is something low in the foreground (like the tops of mountains, or a silhouette of treetops, or even houses), and compose it so the moon isn’t visible in the shot (its reflected light will mess up the rest of the shot). Next, you’ll want to set up your camera (which should be on a tripod, with a cable release attached) facing north (use a compass or a compass app on your smart phone to figure out which way to aim), then find the North Star and put it in the center or on the very edge of your image. Set your lens’s focus to “Infinity” by switching your lens to Manual mode (flip the switch right on the lens), then turning the focus ring on the camera all the way until you see the infinity symbol (which looks like this: ∞) on the top of the lens (that way, your lens doesn’t try to refocus at some point, which would trash the image). Then, set your ISO to 200 (for Nikons) or 100 (for Canons) to get the cleanest image possible. Next, switch your shooting mode to manual, and set your aperture to as low a numbered f-stop as your lens will allow (for example, f/4, f/3.5, or f/2.8) to let as much light in as possible. Now, set your shutter speed dial to bulb mode (which means the shutter will stay open as long as you hold the shutter button down), then press the shutter button on the cable release, turn on the lock, and start your timer, then unlock at the amount of time you’re willing to invest (no less than 20 minutes, but ideally an hour or more) and you’re there! On the next page, we’ll talk more about the gear you’ll need for shooting star trails.
The Gear for Shooting Star Trails
This isn’t a lesson in shooting long-exposure images, this is a lesson in shooting really, really, really long-exposure images (like 1 hour or more). Because you’ll need to keep your camera absolutely still for a minimum of 20 minutes, but probably more like an hour or more (the longer the exposure, the longer the star trails will be), you want to use a really sturdy tripod, and use a ballhead that won’t slip even a tiny bit during that hour (or two or more). You’re also going to need a cable release, so you don’t have to stand there holding your shutter button down for an hour (a cable release can lock your shutter down for as long as you need). Also, depending on the time of year, and your location, it might get quite cold out where you’re shooting, and you could get a frost buildup on your lens. Believe it or not, your exposure is so long that you can wipe your lens with a cloth and it won’t affect the shot, so if frost is a possibility, you’d better bring along a clean cloth. If you do bring a small flashlight (it’s going to be mighty dark out there), make sure you don’t shine it into the lens when you’re wiping away that frost—keep that far away.
Another Reason to Avoid Shooting at High ISOs
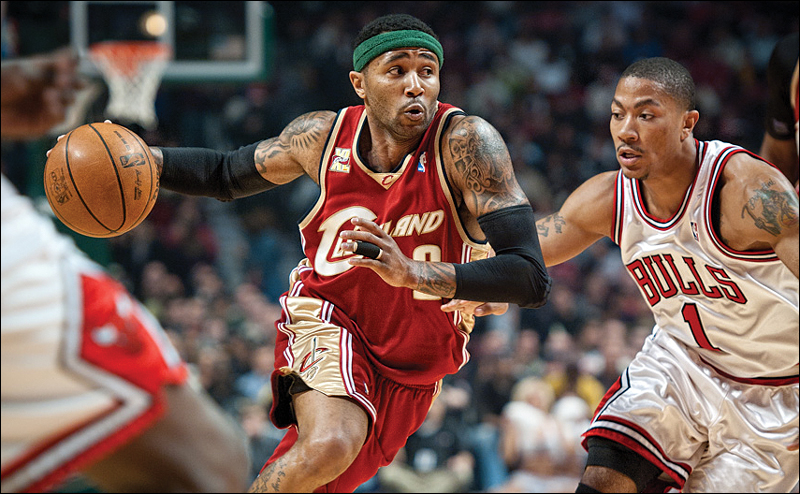
Today’s higher-end cameras are getting better and better at shooting at high ISOs with very low noise, and today, with my Nikon D3S, I routinely shoot at 4000 ISO for nighttime or indoor sporting events, and people always comment that they can’t see any noise. It’s true. You can hardly tell there’s any noise there at all, and what’s there is absolutely minimal—less than shooting at 400 ISO on a film camera. So, if you can hardly see any noise at 4000 ISO, why do I hate shooting at 4000 ISO? It’s because at 4000 ISO (or almost anything above 2000 ISO), you lose color saturation, your image has visibly less contrast, and you lose some detail, too. Sure, you don’t have all that noise, but you don’t have as good a quality photo as you’d have at lower ISOs. So, although sometimes to freeze motion under the lights, I have to shoot at 4000 ISO (to get my shutter speed to ![]() of a second), you can definitely see a difference in the quality of your image and that’s why before you think, “Hey, I’ll just bump the ISO way up,” know that there’s a bit of a tradeoff. It’s certainly not unacceptable, but just so ya know—it’s there.
of a second), you can definitely see a difference in the quality of your image and that’s why before you think, “Hey, I’ll just bump the ISO way up,” know that there’s a bit of a tradeoff. It’s certainly not unacceptable, but just so ya know—it’s there.