Chapter Ten. Pro Tips for Shooting DSLR Video: How to Get the Most Out of Your Built-In Video Capabilities

SHUTTER SPEED: 1/2500 SEC F-STOP: F/5.6 ISO: 200 FOCAL LENGTH: 50MM PHOTOGRAPHER: SCOTT KELBY

This is the first book in this series that has a chapter dedicated to shooting DSLR video, and when you think about it, it makes sense because you can hardly find a DSLR these days that doesn’t have built-in HD video capabilities, so I thought it was time. But before you dive into becoming a DSLR filmmaker, there is a sad truth about the video industry that you’ll need to come to grips with first, and that is: video accessories aren’t like photographic accessories. They are insanely expensive. I think it’s because, for years, anything to do with shooting or editing video had been so incredibly expensive (only big corporations with huge budgets could afford to create their own videos), and even though every DSLR now has video, the video industry really wants to embrace these photographers so they feel like real video producers. Of course, the only way to really experience the pain and suffering real video producers go through is to let them purchase a piece of video gear. Any piece of gear. It’s a real shock to photographers, but if you don’t believe me, try this: go to an online photo store and find a common accessory, like a polarizing filter, and write down its price (let’s say it’s $29). Now, go to an online video camera store and search for a similar polarizing filter for video cameras. The price will be around $300. This is why selling video equipment has been traditionally more profitable than running a Las Vegas casino. It’s not just polarizers, though, because video production people have become accustomed to paying insane amounts for just about anything. For example, a box of paper clips, if purchased from a video accessories store, can run as much as $60. Maybe more. And forget about ordering things like a tube of toothpaste or some frozen waffles—they will require you to complete a credit application in advance. So, my advice to you is: never actually shoot video with your DSLR unless you are a rich doctor, lawyer, or you own a video accessories store.
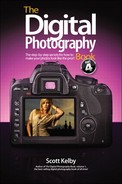
You’re Gonna Want an Eyepiece
If you’re going to be using your DSLR as a video camera for any length of time at all, you’re really going to want an eyepiece (something that covers the LCD monitor, so you can hold it up to your eye like you would a regular video camera). Not only is it more comfortable and easier to see when you’re out in daylight, but by resting the eyepiece against your face, it helps steady your camera big-time by adding another point of contact to your body. You can spend a bundle on an eyepiece, but the one I like is pretty affordable (well, for a video accessory anyway, and if you think photo gear is expensive, video gear is for oil barons), because it starts by using a Hoodman HoodLoupe (I talked about these back in volume 2 of this book series, and basically it’s a hood you hold over your LCD monitor so you can see it clearly, even in bright sunlight, that runs around $80). Then, you pick up their Cinema Strap accessory (around $20), which easily holds that loupe in place right over the LCD monitor, so it feels more like you’re using a regular video camera, and it really makes a big difference. In fact, it’s a big enough difference that if you’re going to be shooting a lot of DSLR video, it’s totally worth the hundred bucks (if you just said, “100 bucks??” in disbelief, welcome to the wonderful world of video accessories. A good rule of thumb I use is this: whatever you think an accessory would cost if it was just for photography, add a zero at the end for video).
Learn the Popular “Rack Focus” Technique
©ISTOCKPHOTO/MAXIMKABB
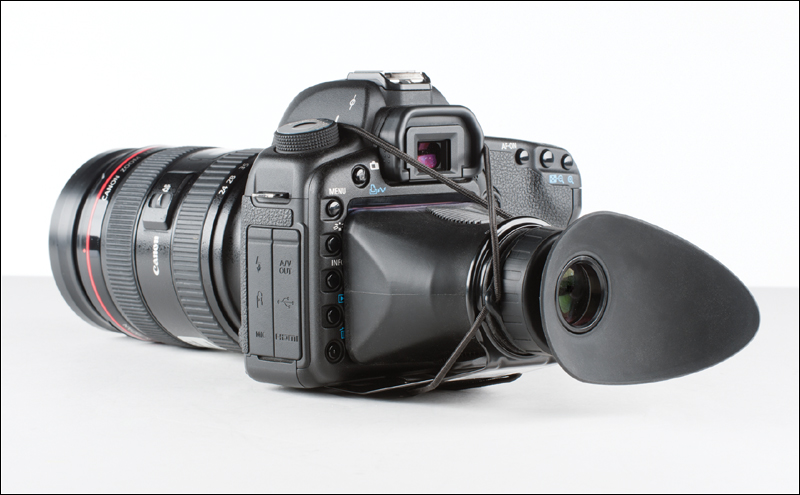
One of the most popular DSLR video effects makes use of perhaps the best thing about DSLR—the shallow depth of field you can get with camera lenses. The trick is to focus on something close to the camera (so your distant subject is out of focus), and then slowly focus on your subject. (I posted a video of this effect on the book’s companion website mentioned in the introduction.) This is basically an unfocusing, then refocusing effect (called “rack focusing” in movie terms). It’s simple to do, but you have to do it smoothly because it’s done by manually turning the focus ring on the end of the lens until your subject looks sharp. Start by choosing an f-stop that will give you a shallow depth of field, like f/2.8 or f/1.8, leaving autofocus on for now, and focus on an object close to you in the foreground (if the object isn’t fairly close, you’ll lose the shallow depth of field effect). Once it’s in focus, turn the autofocus off (right on your lens) and start your video recording. After a couple of seconds, smoothly rotate the focus ring on your lens until your subject is in focus. It seems kind of anti-climactic when you’re doing it, but it looks very cinematic in playback.
Adding Effects to Your Video in Your Camera
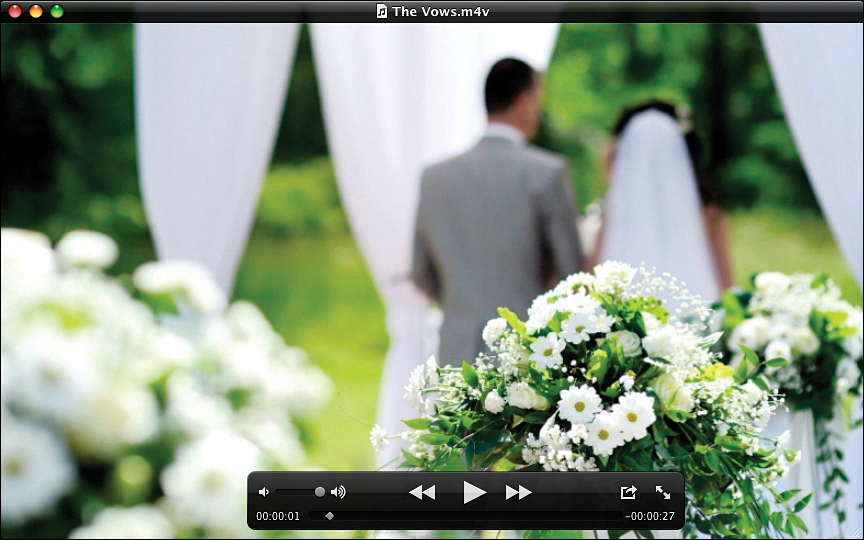
Although I generally don’t recommend using any of your camera’s built-in tint filters or effects (like B&W, Sepia, Cyanotype, etc.) for still images (you’re always better off shooting in full color and then, if you want to try any of those effects, adding them later in Photoshop, Lightroom, iPhoto, or whatever photo editing software you have. That way, you’ve still got the original full-color image), when it comes to shooting digital video, that’s one place where I think the built-in filters come in handy. Especially for people who don’t want the hassle or complexity of learning a whole video editing program just to be able to apply these effects, but still want these types of looks. If that sounds like you, then just apply them in-camera right onto your video by simply turning them on before you shoot your video. On Nikon DSLRs, you turn on these effects by going under the Shooting menu, choosing Set Picture Control, and then going under Monochrome, and choosing the effect you want to apply to your video. On Canon DSLRs (like the 7D), press the Picture Style Selection button, choose Monochrome, and then choose the effect you want to apply.
Shooting DSLR Video Drains Your Batteries Faster
Because your camera is working continuously when you’re shooting video (instead of just coming to life for ![]() of a second here and there), it drains your batteries faster, so make sure you keep a spare camera battery with you.
of a second here and there), it drains your batteries faster, so make sure you keep a spare camera battery with you.
Why You Want an External Mic
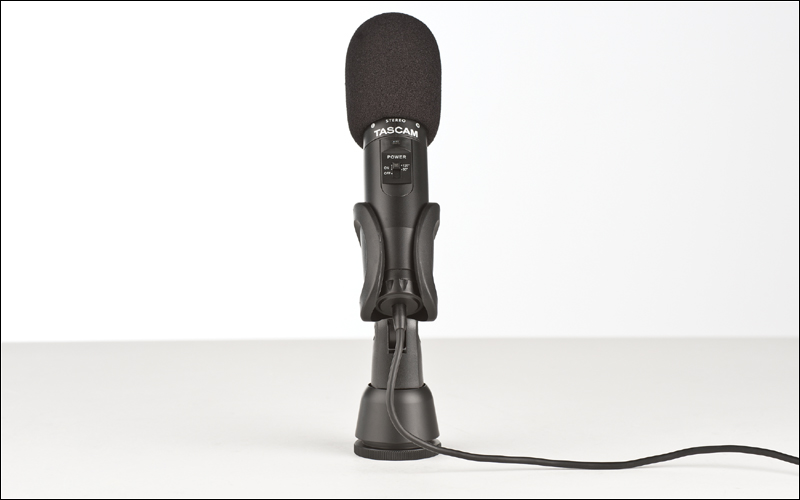
The built-in audio mic on your DSLR is...well...there’s no polite way to say it, so let’s just say if you actually want to hear what your subjects are saying, you should consider picking up an external mic that plugs right into your DSLR. Most DSLRs these days have a standard ⅛" mic jack (the size of a small headphone jack), so you can plug a better mic right in (see, even they know their mics are lame). You don’t have to spend an arm and a leg to get a decent mic—the popular Tascam TM ST1 mic runs around $30, and it’s small, lightweight, records in stereo, and is a big step up from your DSLRs built-in mic.
Bad Audio = Bad Video
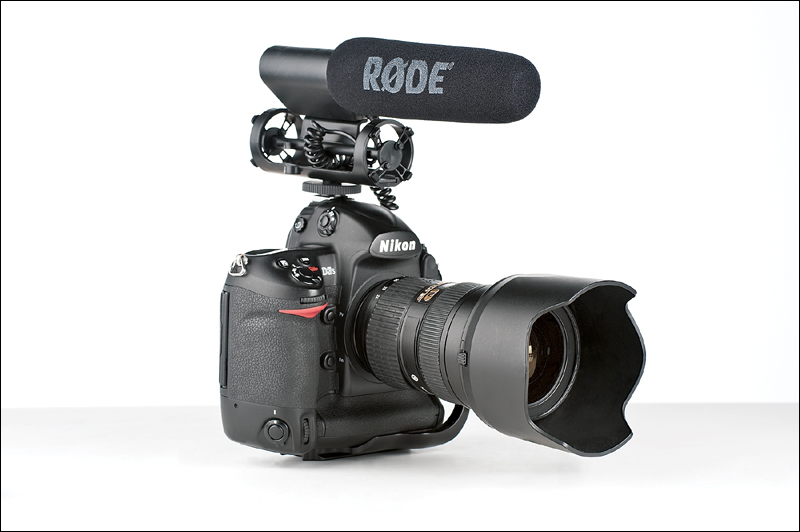
The quality and cinematic look of the video that today’s DSLR cameras create is so good right out of the camera that you really don’t have to work hard to make it look good—it’s gonna look good. So what’s the thing that’s going to make your great-looking video come off cheap and amateurish? If it’s anything, it’s the audio. This is one big area that separates the pros from the amateurs—the pros have audio that matches the quality of the video, and if you have one without the other, it’s not going to have that pro look in the end. Think of it this way: if you opened an Italian restaurant and you made your pasta fresh from scratch, would you then just open a jar of cheap spaghetti sauce and pour it on top? Of course not, because that cheap sauce would hide how great your handmade pasta really is. You have to have great pasta and a great sauce to make a pasta dish that’s really special. It’s the same way with video: it takes both parts—great video and great audio—to make a movie that’s really special. So, if there’s an area where you don’t want to cut corners, it’s the audio. If you can invest around $150, check out the Rode VideoMic shotgun mic, which mounts right on top of your camera or on a boom pole, and comes with a shock mount so you don’t hear the rustling of the mic on the video as you move the camera. Nikon also has one, the ME-1, for $130. When you’re ready to take your overall video quality up a big notch, this is the place to start.
Making Certain You’re In Focus
Most DSLRs require you to manually focus on your subject when shooting video, and that’s made even trickier by the fact that you’re not looking through your viewfinder to focus—instead, you’re using the LCD monitor on the back of your camera, and if you’re subject isn’t really large in the frame, there’s a fair chance they’ll be at least a little out of focus. So, since you’re already looking at the LCD monitor before you start recording, why not use the zoom button (the little magnifying glass with the plus sign) to zoom in tight on your subject and make certain they’re in really sharp focus before you hit the depth-of-field preview button (on a Nikon) or the Start/Stop button (on a Canon). Of course, don’t forget to zoom back out before you actually start recording (you knew that, right?).
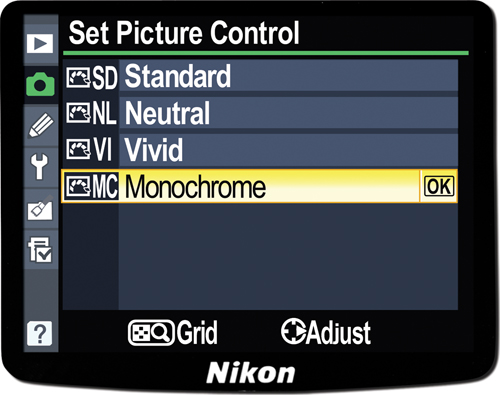
Don’t Shoot Video Vertical
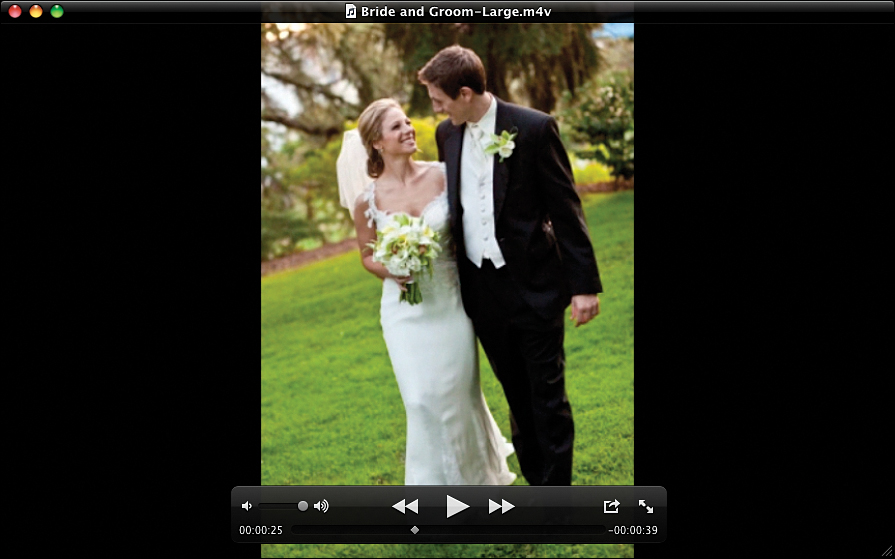
©ISTOCKPHOTO/SJHARMON
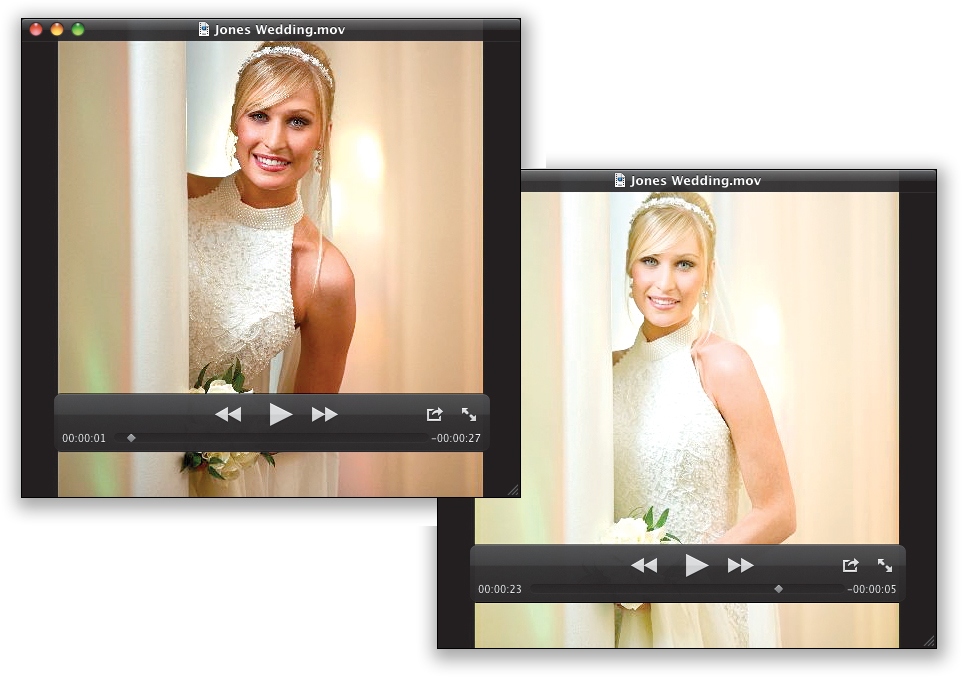
I see photographers do this all the time, because we’re so used to shooting in portrait orientation for stills, and while portrait (tall) shots look great in photography, a tall, thin rectangle is not how people are used to seeing movies and, not only does it make your video appear significantly smaller onscreen, it kind of freaks people out to see video in that format. Just remember: when you’re shooting video, stay wide.
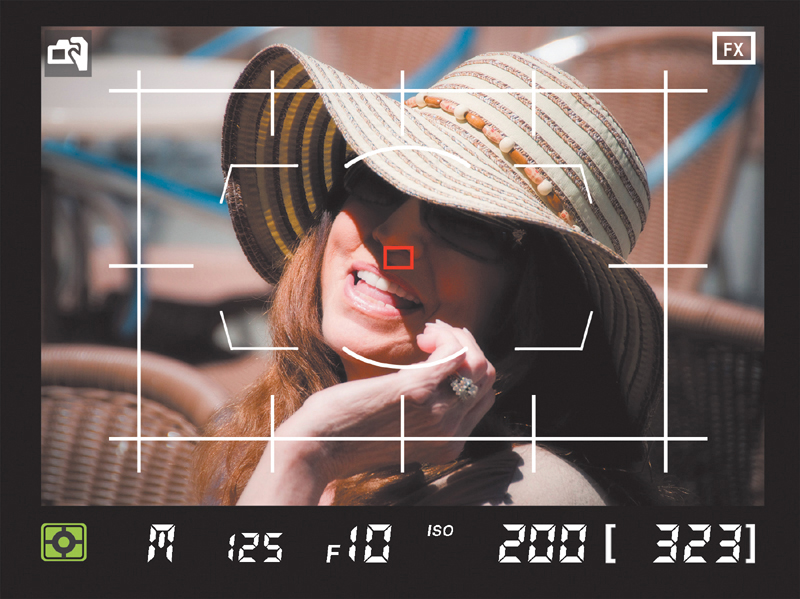
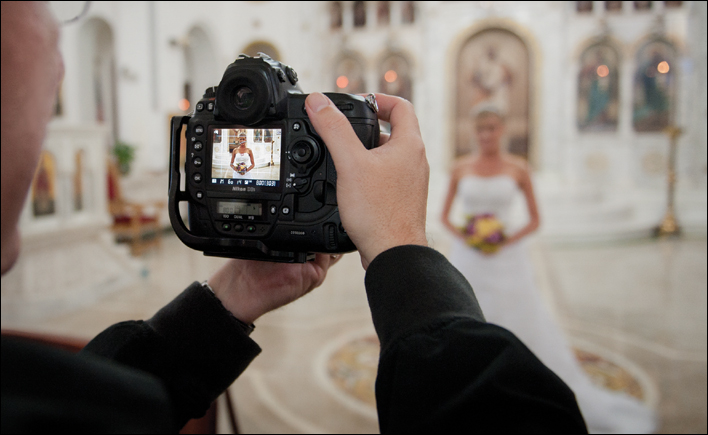
Why You Need to Lock Your Exposure

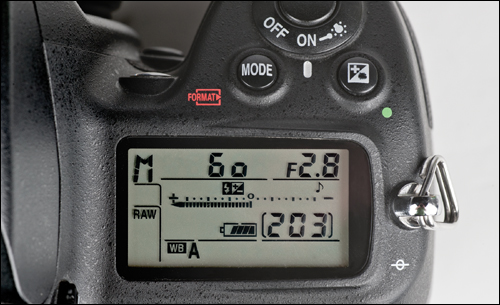
When we’re shooting stills in anything other than manual mode, we want the camera to examine each scene and pick the right exposure for what we’re aiming at, and if we aim to the left or right, we expect it to adjust, right? Of course. While that works great for still images, it creates a disaster with video, because you don’t want the brightness in the video changing every few seconds as you move the camera—it makes it look like the light in your scene is pulsating up and down, which is annoying as all get out. The way around this is to lock your exposure before you start recording, and that way your exposure will stay constant and you’ll be side-stepping one of the biggest problems DSLR video shooters complain about. To lock your exposure, first get your exposure the way you want it before you start recording by aiming your camera at the scene, and then holding your shutter button halfway down to set the exposure. Now, on Canon cameras, you’ll press-and-hold the AE Lock button (on the top right back of the camera, shown above on the left), and once it’s locked, you can start recording. On Nikon cameras, it works best if you switch your metering mode to Center Weighted (it’s the middle choice) before you press the shutter button halfway down to get your exposure set, so turn your Metering Selector on the top side of the camera to Center Weighted, then press the shutter button down halfway to set the exposure. Now, press the AE-L/AF-L button (shown above on the right), to lock that exposure and now you can begin recording without worrying about your brightness pulsating.
F-Stops Matter Here, Too, But...
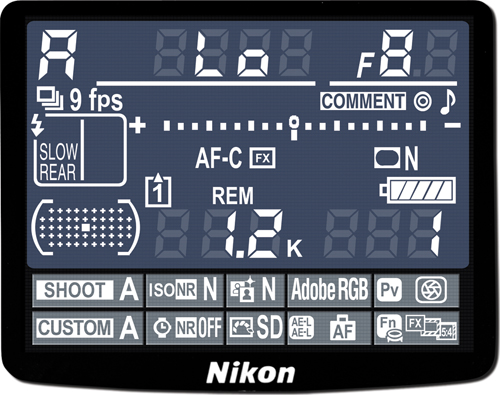
Choosing your f-stop when shooting video matters just like it does when you’re shooting stills—if you want the background to be soft and blurry (a shallow depth of field), then shoot at an f-stop like f/1.8, f/2.8, f/4, and so on, and if you want everything in focus, f/8 works great. But, there’s something to keep in mind when shooting video, and that is: you can’t just throw a flash up if you want to shoot at f/16 or f/22. If you want to shoot at f-stops like that (where everything’s in focus for a very long range, like when you’re shooting landscape stills), you’ll need to be outdoors in really bright light, or you ‘re going to have some really dark video. That’s why, most of the time, you’ll be shooting at f/8 or a lower numbered f-stop—you need a lot of light for video, so those higher numbered f-stops are usually only available to you outdoors in the daytime.
How to Avoid “Flicker” While You’re Shooting
If there are fluorescent or mercury vapor lamps visible in your scene (pretty typical in stores, warehouses, and offices), or if you see televisions or computer screens anywhere in your scene, then you’re probably going to see some flickering or pulsating from either or both of these. It’s caused by the flow of electrical current, but luckily it’s easy to fix. First, check to see if your camera has a flicker fix control (for example, the Nikon D5100 has a Flicker Reduction option found under the Setup menu. When you choose Flicker Reduction, it has a number of different frequency choices—just try each one to see which one works best). If your camera doesn’t have any type of flicker reduction, you can do it yourself by adjusting your shutter speed. For example, in the U.S., the electrical system is based on 60 hz, so we have to shoot at a shutter speed of ![]() of a second (or any derivative thereof, like
of a second (or any derivative thereof, like ![]() of a second, or
of a second, or ![]() of a second, and so on). In Europe, the electrical system is at 50 hz, so you need to shoot at a derivative of
of a second, and so on). In Europe, the electrical system is at 50 hz, so you need to shoot at a derivative of ![]() of a second (like
of a second (like ![]() of a second,
of a second, ![]() , and so on). That should do the trick.
, and so on). That should do the trick.
Want More of a “Film” Look?
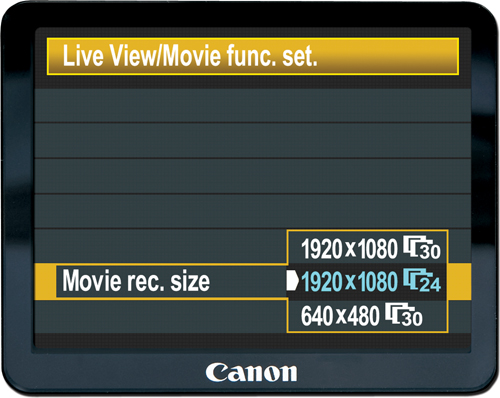
By default, many cameras are set to shoot video at 30 frames per second, which is a pretty standard frame rate for video, but a trick the pros use to get more of a film look (and less of a videotape look) is to slow the frame rate down to 24 frames per second. To do this on Canon cameras (like a 7D), go to your Movie menu (or Settings-2 menu, under Live View/Movie Function Settings), and when you choose your Movie Recording Size, choose 1920×1080 Full HD and choose 24p as your frame rate. That’s all there is to it. On Nikon cameras, except for the D4, your frame rate is already set to 24 frames per second, so you’re good to go.
Don’t Touch That Aperture
When we’re shooting stills, if we think we need a different aperture, we just change it, right? But when you’re shooting video, you don’t ever want to change apertures while you’re recording or you’ll see a very obvious lighting change right in the middle of your clip, which is generally a big no-no in video circles. So, don’t do this unless you want people pointing at you at video parties and whispering, “She changed apertures in the middle of a clip.” Nobody wants that.
Why Zooming on Your DSLR Is Different
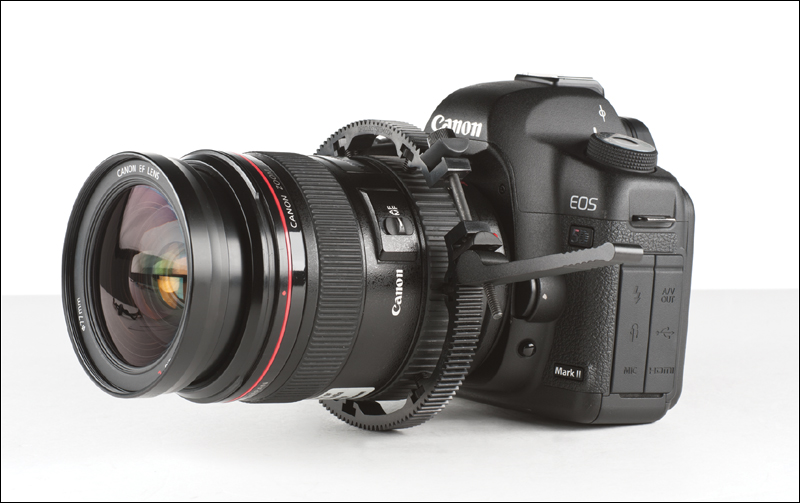
When you zoom in/out on a traditional video camera, the zoom is very smooth because it’s controlled by an internal motor—you just push a button and it smoothly zooms in or out, giving a nice professional look. The problem is that there’s no internal motor on your DSLR—you have to zoom by hand, and if you’re not really smooth with it, and really careful while you zoom, you’re going to wind up with some really choppy looking zooms. In fact, since it’s so tough to get that power-zoom quality like we’re used to with regular video cameras, there are a bunch of companies that make accessories so you can make it look like you used a power zoom, like the Nano focus+zoom lever from RedRock Micro. It’s two pieces (sold separately, of course, because this is video gear and therefore a license to print money), but luckily, neither is too expensive. First, you need the focus gear, which is sized to fit your particular zoom lens, and that runs around $45, but that’s just for focusing (very nice to have, by the way), but then you add this zoom handle to it, for another $35 or so (also worth it), so you’re into both for only around $80, but it sure makes zooming smoothly a whole lot easier.
How to Use Autofocus for Shooting Video
As you’ve probably learned, many DSLR cameras don’t autofocus when you’re shooting DSLR video, so then it’s a manual thing, but that doesn’t mean you can’t use Autofocus to help you out. The trick is to use Autofocus before you start shooting, so basically, you turn on Live View mode, but don’t start recording yet—instead, aim your camera at your subject, press the shutter button down halfway to lock the focus, then move the Auto-focus switch on the barrel of your lens over to “M” (Manual) mode, and you’re all set. Now, the only downside is if your subject moves to a new location (even if it’s two feet away), you have to do this process again (luckily, it only takes a few seconds each time you do it, and you get pretty quick at it pretty quickly).