
12. Using Android Web APIs
Mobile developers often rely on web technologies to enrich their applications, provide fresh content, and integrate with popular web services such as social networks. Android application can harness the power of the Internet in a variety of ways, including adding browser functionality to applications, using the special WebView control and ext, and ending web-based functionality using standard WebKit libraries. Android devices can also run Flash applications. In this chapter, we discuss the web technologies available on the Android platform.
Browsing the Web with WebView
Applications that retrieve and display content from the Web often end up displaying that data on the screen. Instead of customizing various screens with custom controls, Android applications can simply use the WebView control to display web content to the screen. You can think of the WebView control as a browser-like view.
The WebView control uses the WebKit rendering engine to draw HTML content on the screen. This content can be HTML pages on the Web or it can be locally sourced. WebKit is an open source browser engine. You can read more about it on its official website at http://webkit.org.

Many of the code examples provided in this section are taken from the SimpleWeb application. The source code for this application is provided for download on the book’s websites.
Using the WebView control requires the android.permission.INTERNET permission. You can add this permission to your application’s Android manifest file as follows:
<uses-permission android:name="android.permission.INTERNET" />
When deciding whether the WebView control is right for your application, consider that you can always launch the Browser application using an Intent object. When you want the user to have full access to all Browser features, such as bookmarking and browsing, you’re better off launching into the Browser application to a specific website, letting users do their browsing and having them return to your application when they’re done. You can do this as follows:
Uri uriUrl = Uri.parse("http://androidbook.blogspot.com/");
Intent launchBrowser = new Intent(Intent.ACTION_VIEW, uriUrl);
startActivity(launchBrowser);
Launching the Browser via an Intent does not require any special permissions. This means that your application is not required to have the android.permission.INTERNET permission. In addition, because Android transitions from your application’s current activity to a specific Browser application’s Activity, and then returns when the user presses the Back key, the experience is nearly as seamless as implementing your own Activity class with an embedded WebView object.
Designing a Layout with a WebView Control
The WebView control can be added to a layout resource file like any other view. It can take up the entire screen or just a portion of it. A typical WebView definition in a layout resource might look like this:
<WebView
android:id="@+id/web_holder"
android:layout_height="match_parent"
android:layout_width="match_parent"
/>
Generally speaking, you should give your WebView controls ample room to display text and graphics. Keep this in mind when designing layouts using the WebView control.

The Eclipse Layout Resource Editor does not display the WebView control properly. You need to run either the Android emulator or a device to make sure the layout displays properly.
Loading Content into a WebView Control
You can load content into a WebView control in a variety of ways. For example, a WebView control can load a specific website or render raw HTML content. Web pages can be stored on a remote web server or stored on the device.
Here is an example of how to use a WebView control to load content from a specific website:
final WebView wv = (WebView) findViewById(R.id.web_holder);
wv.loadUrl("http://www.perlgurl.org/");
You do not need to add any additional code to load the referenced web page on the screen. Similarly, you can load an HTML file called webby.html stored in the application’s assets directory like this:
wv.loadUrl("file:///android_asset/webby.html");
If, instead, you want to render raw HTML, you can use the loadData() method:
String strPageTitle = "The Last Words of Oscar Wilde";
String strPageContent = "<h1>" + strPageTitle +
": </h1>"Either that wallpaper goes, or I do."";
String myHTML = "<html><title>" + strPageTitle
+"</title><body>"+ strPageContent +"</body></html>";
wv.loadData(myHTML, "text/html", "utf-8");
The resulting WebView control is shown in Figure 12.1.

Figure 12.1. A WebView control used to display HTML.
Unfortunately, not all websites are designed for mobile devices. It can be handy to change the scale of the web content to fit comfortably in the WebView control. You can achieve this by setting the initial scale of the control, like this:
wv.setInitialScale(30);
The call to the setInitialScale() method scales the view to 30 percent of the original size. For pages that specify absolute sizes, scaling the view is necessary to see the entire page on the screen. Some text might become too small to read, though, so you might need to test and make page design changes (if the web content is under your control) for a good user experience.
If you want an entire screen to be a WebView control, you can simply create a WebView programmatically and pass it into the setContentView() method in the onCreate() method of your Activity.
Adding Features to the WebView Control
You might have noticed that the WebView control does not have all the features of a full browser. For example, it does not display the title of a webpage or provide buttons for reloading pages. In fact, if the user clicks on a link in the WebView control, that action does not load the new page in the view. Instead, it fires up the Browser application.
By default, all the WebView control does is display the web content provided by the developer using its internal rendering engine, WebKit. You can enhance the WebView control in a variety of ways, though. You can use three classes, in particular, to help modify the behavior of the control: the WebSettings class, the WebViewClient class, and the WebChromeClient class.
Modifying WebView Settings with WebSettings
By default, a WebView control has various default settings: no zoom controls, JavaScript disabled, default font sizes, user-agent string, and so on. You can change the settings of a WebView control using the getSettings() method. The getSettings() method returns a WebSettings object that can be used to configure the desired WebView settings. Some useful settings include the following:
• Enabling and disabling zoom controls using the setSupportZoom() and setBuiltInZoomControls() methods
• Enabling and disabling JavaScript using the setJavaScriptEnabled() method
• Enabling and disabling mouseovers using the setLightTouchEnabled() method
• Configuring font families, text sizes, and other display characteristics
You can also use the WebSettings class to configure WebView plug-ins and allow for multiple windows.
Handling WebView Events with WebViewClient
The WebViewClient class enables the application to listen for certain WebView events, such as when a page is loading, when a form is submitted, and when a new URL is about to be loaded. You can also use the WebViewClient class to determine and handle any errors that occur with page loading. You can tie a valid WebViewClient object to a WebView using the setWebViewClient() method.
The following is an example of how to use WebViewClient to handle the onPageFinished() method to draw the title of the page on the screen:
WebViewClient webClient = new WebViewClient() {
public void onPageFinished(WebView view, String url) {
super.onPageFinished(view, url);
String title = wv.getTitle();
pageTitle.setText(title);
}};
wv.setWebViewClient(webClient);
When the page finishes loading, as indicated by the call to onPageFinished(), a call to the getTitle() method of the WebView object retrieves the title for use. The result of this call is shown in Figure 12.2.
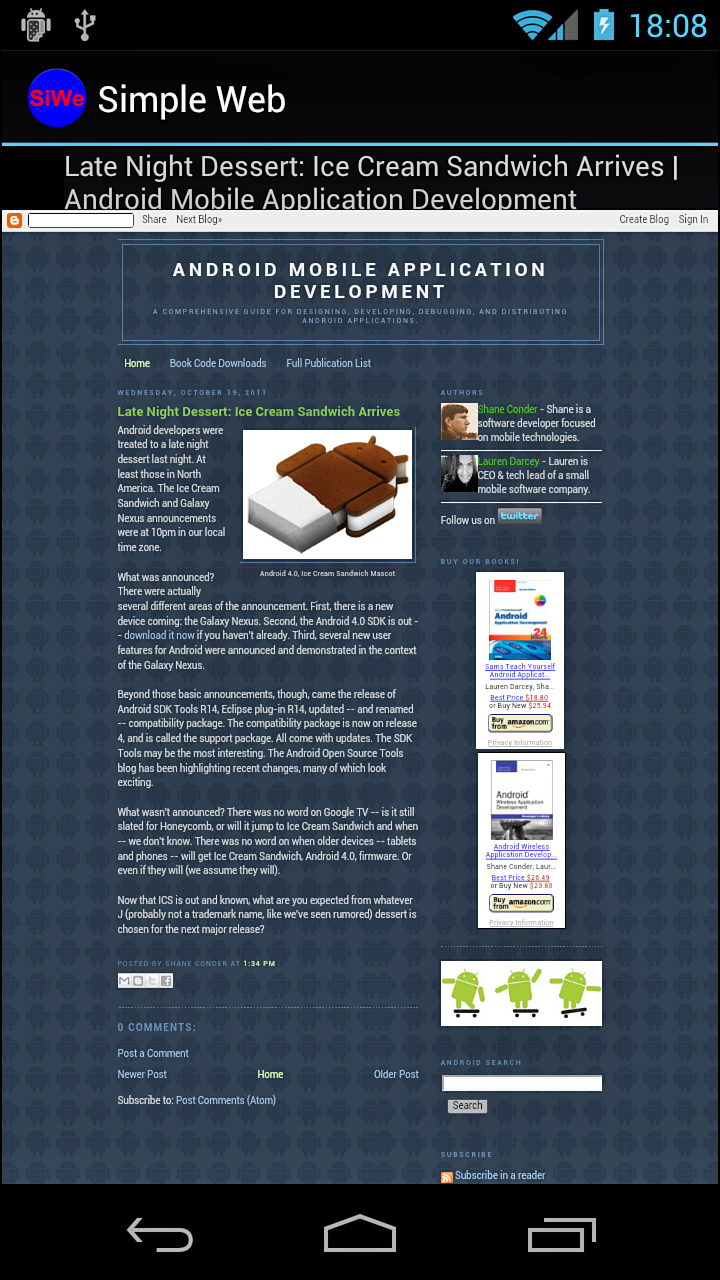
Figure 12.2. A WebView control showing page title.
Adding Browser Chrome with WebChromeClient
You can use the WebChromeClient class in a similar way to the WebViewClient. However, WebChromeClient is specialized for the sorts of items that are drawn outside the region in which the web content is drawn, typically known as browser chrome. The WebChromeClient class also includes callbacks for certain JavaScript calls, such as onJsBeforeUnload(), to confirm navigation away from a page. A valid WebChromeClient object can be tied to a WebView using the setWebChromeClient() method.
The following code demonstrates using WebView features to enable interactivity with the user. An EditText and a Button control are added below the WebView control, and a Button handler is implemented as follows:
Button go = (Button) findViewById(R.id.go_button);
go.setOnClickListener(new View.OnClickListener() {
public void onClick(View v) {
wv.loadUrl(et.getText().toString());
}
});
Calling the loadUrl() method again, as shown, is all that is needed to cause the WebView control to download another HTML page for display, as shown in Figure 12.3. From here, you can build a generic web browser in to any application, but you can apply restrictions so that the user is restricted to browsing relevant materials.
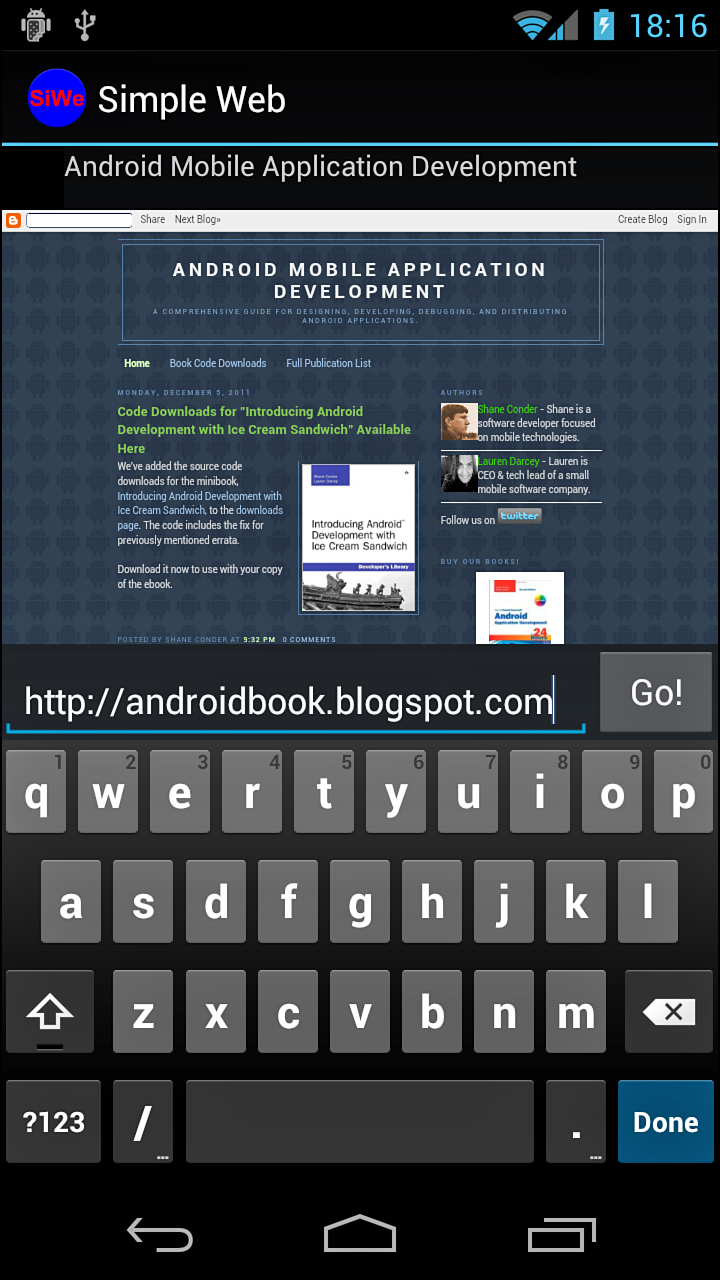
Figure 12.3. WebView with EditText allowing entry of arbitrary URLs.
Using WebChromeClient can help add some typical chrome on the screen. For instance, you can use it to listen for changes to the title of the page, various JavaScript dialogs that might be requested, and even for developer-oriented pieces, such as the console messages.
WebChromeClient webChrome = new WebChromeClient() {
@Override
public void onReceivedTitle
(WebView view, String title) {
Log.v(DEBUG_TAG, "Got new title");
super.onReceivedTitle(view, title);
pageTitle.setText(title);
}
};
wv.setWebChromeClient(webChrome);
Here, the default WebChromeClient object is overridden to receive changes to the title of the page. This title of the web page is then set to a TextView visible on the screen.
Whether you use WebView to display the main user interface of your application or use it sparingly to draw such things as help pages, there are circumstances where it might be the ideal control for the job to save coding time, especially when compared to a custom screen design. Leveraging the power of the open source engine, WebKit, WebView can provide a powerful, standards-based HTML viewer for applications. Support for WebKit is widespread because it is used in various desktop browsers, including Apple Safari and Google Chrome; a variety of mobile browsers, including those on the Apple iOS, Nokia, Palm WebOS, and BlackBerry handsets; and various other platforms, such as Adobe AIR.
Managing WebView State
On API Level 11 and higher, be sure to make the appropriate calls to the onPause() and onResume() methods of the WebView object. The onPause() call reduces or stops unnecessary processing activity, such as those from plug-ins and JavaScript. Without making these calls, or in previous API versions, processing would continue in the background. These methods should be called from your Activity class’s onPause() and onResume() methods, at minimum.
When running on older versions of the platform, you can terminate the WebView instance entirely. If that’s too much, you can make a call to pauseTimers(), which stops some processing but also affects all WebView instances. Keep in mind that the rest of the device performance might be adversely affected if you don’t do what you can to reduce processing. If your WebView doesn’t allow plug-ins or JavaScript, then only layout and parsing would continue.
You can have code such as the following in your onPause() method:
WebView wv = (WebView) findViewById(R.id.web_holder);
if (Build.VERSION.SDK_INT >= Build.VERSION_CODES.HONEYCOMB) {
wv.onPause();
} else {
wv.pauseTimers();
}
During testing, you must recognize that the behavior is not identical and should be tested as such.
Building Web Extensions Using WebKit
All HTML rendering on the Android platform is done using the WebKit rendering engine. The android.webkit package provides a number of APIs for browsing the Internet using the powerful WebView control. You should be aware of the WebKit interfaces and classes available, as you are likely to need them to enhance the WebView user experience.
These are not classes and interfaces to the Browser app (although you can interact with the Browser data using contact providers). Instead, these are the classes and interfaces that you must use to control the browsing abilities of WebView controls you implement in your applications.
Browsing the WebKit APIs
Some of the most helpful classes of the android.webkit package are
• The CacheManager class gives you some control over cache items of a WebView.
• The ConsoleMessage class can be used to retrieve JavaScript console output from a WebView.
• The CookieManager class is used to set and retrieve user cookies for a WebView.
• The URLUtil class is handy for validating web addresses of different types.
• The WebBackForwardList and WebHistoryItem classes can be used to inspect the web history of the WebView.
Now let’s take a quick look at how you might use some of these classes to enhance a WebView.
Extending Web Application Functionality to Android
Let’s take some of the WebKit features we have discussed so far in this chapter and work through an example. It is fairly common for mobile developers to design their applications as web applications to reach users across a variety of platforms. This minimizes the amount of platform-specific code to develop and maintain. However, on its own, a web application cannot call into native platform code and take advantage of the features that native apps (such as those written in Java for the Android platform) can, such as using a built-in camera or accessing some other underlying Android feature.
Developers can enhance web applications by designing a lightweight shell application in Java and using a WebView control as a portal to the web application content. Two-way communication between the web application and the native Java application is possible through scripting languages such as JavaScript.
Many of the code examples provided in this section are taken from the SimpleWebExtension application. The source code for this application is provided for download on the book’s websites.
Let’s create a simple Android application that illustrates communication between web content and native Android code. This example requires that you understand JavaScript.
To create this application, take the following steps:
1. Create a new Android application.
2. Create a layout with a WebView control called html_viewer and a Button control called call_js. Set the onClick attribute of the Button control to a method called setHTMLText.
3. In the onCreate() method of your application activity, retrieve the WebView control using the findViewById() method.
4. Enable JavaScript in the WebView by retrieving its WebSettings and calling the setJavaScriptEnabled() method.
5. Create a WebChromeClient object and implement its onConsoleMessage() method to monitor the JavaScript console messages.
6. Add the WebChromeClient object to the WebView using the setWebChromeClient() method.
7. Allow the JavaScript interface to control your application by calling the addJavascriptInterface() method of the WebView control. You need to define the functionality that you want the JavaScript interface to control and in what namespace the calls will be available. In this case, we allow the JavaScript to initiate Toast messages.
8. Load your content into the WebView control using one of the standard methods, such as the loadUrl() method. In this case, we load an HTML asset we defined within the application package.
If you followed these steps, you should end up with your activity’s onCreate() method looking something like this:
@Override
public void onCreate(Bundle savedInstanceState) {
super.onCreate(savedInstanceState);
setContentView(R.layout.main);
final WebView wv = (WebView) findViewById(R.id.html_viewer);
WebSettings settings = wv.getSettings();
settings.setJavaScriptEnabled(true);
WebChromeClient webChrome = new WebChromeClient() {
@Override
public boolean onConsoleMessage(ConsoleMessage consoleMessage) {
Log.v(DEBUG_TAG, consoleMessage.lineNumber()
+ ": " + consoleMessage.message());
return true;
}
};
wv.setWebChromeClient(webChrome);
wv.addJavascriptInterface(new JavaScriptExtensions(), "jse");
wv.loadUrl("file:///android_asset/sample.html");
}
A custom WebChromeClient class is set so that any JavaScript console.log messages go out to LogCat output, using a custom debug tag as usual to enable easy tracking of log output specific to the application. Next, a new JavaScript interface is defined with the namespace called jse—the namespace is up to you. To call from JavaScript to this Java class, the JavaScript calls must all start with namespace jse., followed by the appropriate exposed method—for instance, jse.javaMethod().
You can define the JavaScriptExtensions class as a subclass in the activity as a subclass with a single method that can trigger Android Toast messages, as follows:
class JavaScriptExtensions {
public static final int TOAST_LONG = Toast.LENGTH_LONG;
public static final int TOAST_SHORT = Toast.LENGTH_SHORT;
public void toast(String message, int length) {
Toast.makeText(SimpleWebExtension.this, message, length).show();
}
}
The JavaScript code has access to everything in the JavaScriptExtensions class, including the member variables as well as the methods. Return values work as expected from the methods, too.
Now switch your attention to defining the web page to load in the WebView control. For this example, simply create a file called sample.html in the /assets directory of the application. The contents of the sample.html file are shown here:
<html>
<head>
<script type="text/javascript">
function doToast() {
jse.toast("'"+document.getElementById('form_text').value +
"' -From Java!", jse.TOAST_LONG);
}
function doConsoleLog() {
console.log("Console logging.");
}
function doAlert() {
alert("This is an alert.");
}
function doSetFormText(update) {
document.getElementById('form_text').value = update;
}
</script>
</head>
<body>
<h2>This is a test.</h2>
<input type="text" id="form_text" value="Enter something here..." />
<input type="button" value="Toast" onclick="doToast();" /><br />
<input type="button" value="Log" onclick="doConsoleLog();" /><br />
<input type="button" value="Alert" onclick="doAlert();" />
</body>
</html>
The sample.html file defines four JavaScript functions and displays the form shown in the WebView:
• The doToast() function calls into the Android application using the jse object defined earlier with the call to the addJavaScriptInterface() method. The addJavaScriptInterface() method, for all practical intents and purposes, can be treated literally as the JavaScriptExtensions class as if that class had been written in JavaScript. If the doToast() function had returned a value, we could assign it to a variable here.
• The doConsoleLog() function writes into the JavaScript console log, which is picked up by the onConsoleMessage() callback of the WebChromeClient.
• The doAlert() function illustrates how alerts work within the WebView control by launching a dialog. If you want to override what the alert looks like, you can override the WebChromeClient.onJSAlert() method.
• The doSetFormText() function illustrates how native Java code can communicate back through the JavaScript interface and provide data to the web application.
Finally, to demonstrate making a call from Java back to JavaScript, you need to define the click handler for the Button control within your Activity class. Here, the onClick handler, called setHTMLText(), executes some JavaScript on the currently loaded page by calling a JavaScript function called doSetFormText(), which we defined earlier in the web page. Here is an implementation of the setHTMLText() method:
public void setHTMLText(View view) {
WebView wv = (WebView) findViewById(R.id.html_viewer);
wv.loadUrl("javascript:doSetFormText('Java->JS call'),");
}
This method of making a call to the JavaScript on the currently loaded page does not allow for return values. There are ways, however, to structure your design to allow checking of results, generally by treating the call as asynchronous and implementing another method for determining the response.
Keep in mind that opening up the Android application to a JavaScript control using the addJavascriptInterface() method must be done securely. Make sure your WebView loads only the content under your control—not just any content on the Web. Also, the JavaScript interface does not run on the UI thread, so you need to employ normal cross-thread communication techniques, such as using a handler to post messages back to the other thread in order to communicate.
Figure 12.4 shows how this application might behave on an Android device.

Figure 12.4. A simple Android application with a JavaScript interface.
This style of development has been popularized by the open source PhoneGap project, which aims to provide a set of standard JavaScript interfaces to native code across a variety of platforms, including iOS, Android, BlackBerry, Symbian, and Palm. Learn more about PhoneGap at http://phonegap.com.
Working with Flash
For those web developers wanting to bring their Flash applications to mobile, Android supports Adobe Flash 11 (as opposed to Flash Lite, a common mobile variant of Flash that’s limited). However, there are both benefits and drawbacks to including Flash technology on the platform. Let’s look at some of the facts:
• Flash might not be the future, but it’s the status quo in some web circles. There are millions of Flash applications and websites out there that can now be accessed from Android devices. This makes users happy, which should make the rest of us happy.
• Flash on mobile browsers is most definitely not the future. Adobe has decided that they will not continue to create new mobile browser plug-ins. Instead, developers can use their tools to create HTML5 websites that work on mobile. Developers who use Adobe AIR to create packaged applications using Flash are not affected by this. See http://blogs.adobe.com/conversations/2011/11/flash-focus.html (http://goo.gl/grIct) for more information.
• Native Android applications are always going to perform better, use fewer resources (read: drain the battery slower), provide tighter platform integration, have fewer platform prerequisites, and support more Android devices than Flash applications.
• Deciding to build Flash applications for the Android platform instead of native Java applications is a design decision that should not be taken lightly. There are performance and security tradeoffs as well as limited device support (and no backward compatibility) for Flash.
• You can’t expect all Flash applications to just load up and work. All the usual mobile constraints and UI paradigms apply. This includes designing around such constraints as a touch interface on a small screen, a relatively slow processor, and interruptions (such as phone calls) being the norm.
Still, there are those millions of great Flash applications out there. Let’s look at how you can bring these applications to the Android platform.
Enabling Flash Applications
Android devices with Android 2.2 and higher can run Flash applications (currently Flash 11). In order to run Flash, the Android device must have Adobe’s Flash Player for Android installed.
Users can download the Adobe Flash Player for Android application from the Android Market. Android handsets might also ship with the Adobe application pre-loaded. Keep in mind that only the faster, more powerful Android devices are likely to run Flash smoothly and provide a positive user experience. After it’s installed, the Flash Player for Android application behaves like a typical browser plug-in. Users can enable or disable it, and you can control whether plug-ins are enabled or not within your screens that use the WebView control.
Building AIR Applications for Android
Adobe has created tools for developing cross-platform applications using its AIR tool suite in ActionScript 3, which is Adobe’s web scripting language for web and Flash applications. The company recently announced Adobe AIR for Android, which enables developers to create AIR applications that can be compiled into native Android APK files that can then be published like any other Android application. Developers use Adobe’s Flash Professional CS5 tools with a special extension to develop AIR applications that can be compiled into Android package files and distributed like native Android applications.
Summary
Android developers can add browser support to their applications using the versatile WebView control. Applications that require more control can enhance their applications with web features using powerful yet familiar technologies such as WebKit. In Android 2.2 and later, Flash support is available on the Android platform in the form of an Adobe application. Adobe has also developed a tool suite that allows ActionScript applications to be compiled into Android APK files and distributed as native Android applications.
References and More Information
WebKit Open Source Project:
W3School’s JavaScript tutorial:
http://www.w3schools.com/js/js_intro.asp
Adobe AIR tool suite: