
28. Enabling Application Statistics with Google Analytics
Most Android developers want to know what their users are up to. How long do users spend in the application? How often do they use it? What features of the application are they using and not using? Is the user interface designed so that users can find what they need? What sorts of devices are users using? In this chapter, we discuss how application developers can use the Google Analytics SDK for Android to collect and track information about their application users in a consistent, robust fashion.
Creating a Google Account for Analytics
To send data to the Google Analytics service and later access the statistics your application gathers on the Google Analytics Dashboard, you need to create a developer account at http://www.google.com/analytics. Much like your Android Market account, your Google Analytics account must be tied to an underlying Google Account. The accounts are free to start.

The account setup is primarily targeted at website statistics tracking, but mobile developers use the same workflow so don’t get confused and think you’re in the wrong place.
As part of the account creation, you’ll be asked to log in with your Google account. Then you’ll be prompted to enter some information. When you are prompted to enter a website for tracking purposes, choose a fake name (ideally including the name of your app and company domain, such as http://simplestats.androidbook.com). You also need to set the territory and time zone you want to normalize statistics to. Next, you enter contact information for the account. Finally, you need to agree to the terms of service.

For the same reason as with the Android Market, it’s recommended that you create your Google Analytics account with a generic Google Account, such as one for a company entity, as opposed to an individual’s account, so you’re not trying to track down a specific person’s log in information on a weekend, and so on. It’s just more professional that way. The analytics account settings can be used to add other people to it, too.
The resulting account creation generates a block of JavaScript for dropping into your “website” for tracking. For mobile developers, you’re interested only in the unique Web Property or UA number associated with your account. This number is located in the JavaScript and starts with UA- followed by some numbers. Save off this information—you will need to use this number in your application to send statistics to the proper Google Analytics account. You can create different accounts with different tracking identifiers from your Google Analytics account, or use the same one for all your apps. It depends on what you want out of the reports.
Many of the code examples provided in this chapter are taken from the SimpleStats application. The source code for this application is provided for download on the book’s websites.
For that reason, you may be greeted with an empty dashboard when you first log in to your account, as shown in Figure 28.1.
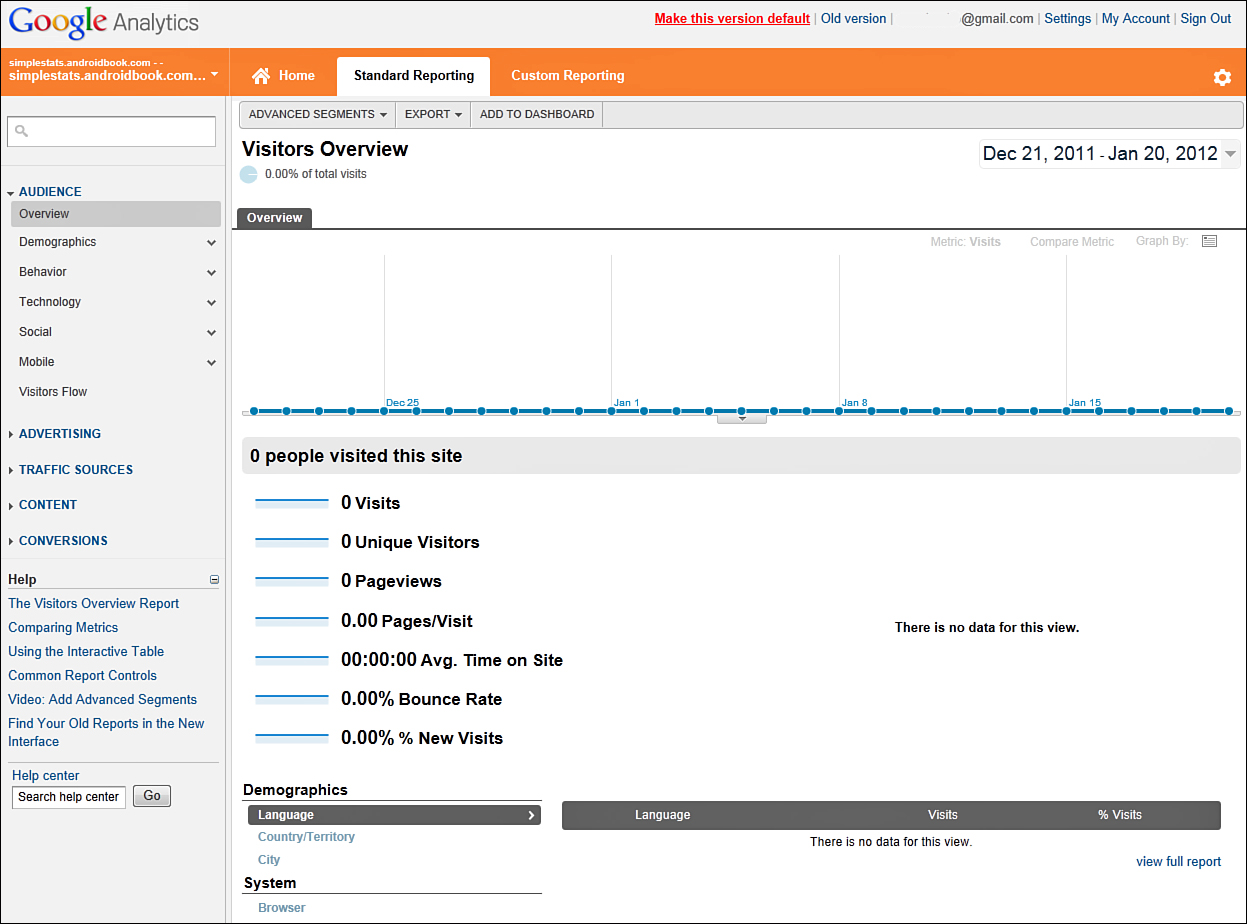
Figure 28.1. The Google Analytics Dashboard (no data).
Adding the Library to Your Eclipse Project
Now you’re ready to download the Google Analytics SDK for Android. This library is now available via the Android SDK Manager. When installed, the library is located in the SDK directory under extras, Google, analytics_sdk.
At the time of this writing, we used the Analytics SDK for Android release 2 with Version 1.4.2 listed in the ReadMe.txt file.
Create a /libs directory in your Android project and copy the libGoogleAnalytics.jar file to that directory from its installed directory. To use the Google Analytics SDK for Android, you need to add the library to your Android project. To integrate the SDK into your Eclipse project, follow these steps:
1. Add the libGoogleAnalytics.jar to your project.
2. Add two permissions to your Android manifest file.
Adding the jar file to your project in Eclipse is easy. Simply:
1. Click on the Project properties for your Android project.
2. Under the Java Build Path settings, select the Libraries tab.
3. Click the Add JARs button and choose the jar within the /libs directory.
Because you are sending information over the network, you need to add two permissions to your application. To do this, follow these steps:
1. Click the Permissions tab of the Android manifest file for your application.
2. Add the permission called android.permission.INTERNET.
3. Add the permission called android.permission.ACCESS_NETWORK_STATE.
4. Save your Android manifest file.
You can now start using the classes in the Google Analytics SDK for Android.
There is also a simple library to help generate basic application tracking events, called Easytracker library. You basically have all your Activity classes inherit from the TrackedActivity class and it does all the tracking for you. This is a simple, all-or-nothing solution, allowing you to avoid collecting data from your applications manually, as we describe later in this chapter. Find out more at http://code.google.com/p/analytics-api-samples/downloads/list.
Collecting Data from Your Applications
Now that you’ve created an account and added the Google Analytics SDK for Android library to your project, you’re ready to start using it to track events and other information in your application. To start tracking in an Activity class, retrieve an instance of the GoogleAnalyticsTracker. You typically want to start tracking in the onCreate() method of your Activity, track various events throughout your Activity lifecycle, and stop tracking in your onDestroy() method. To start tracking, supply your UA account number and an interval (seconds) at which to dispatch events to the server, such as this:
GoogleAnalyticsTracker tracker = GoogleAnalyticsTracker.getInstance();
tracker.startNewSession("UA-1234567-89", 30, this); // Param1 is UA num
You can also start a session with a specific dispatch interval in seconds. At each dispatch interval, all queued up tracking activity is dispatched to the Google Analytics servers. You can also manually force a dispatch using the dispatch() method, but you want to minimize your dispatches (batch them) to avoid draining the device battery or connecting too often to the Internet.
When you’re done tracking, stop the tracker:
tracker.stopSession();
Stopping a tracking session is commonly performed in the onDestroy() callback method of your Activity class.
Logging to the GoogleAnalyticsTracker event tracking class is a blocking operation that uses an underlying database. Calls should not occur on the main UI thread. As with some other APIs, such as OpenGL, the GoogleAnalyticsTracker class requires all tracking calls to be made on the same thread.
Logging Different Events
Now that you have the SDK set up and working with your application, you want to look into the different types of events you can log with the Google Analytics SDK for Android. You can log page views, events, eCommerce events, and other useful information. The logging methods are flexible enough that you can adapt them to your needs.

Google Analytics was originally developed to track website statistics, not app stats. Therefore, some of the method names lean in that direction. You simply adapt the call content for your own needs. For example, page views might better be called screen loads, or Activity or Fragment loads, when used with Android. How you map this user activity in your application is up to you.
During a valid tracking session, you can track page views by supplying the name of the page or screen:
tracker.trackPageView("/ClickTracker-Main-Screen");
You can also track events by specifying a category, action, label, and value (all developer-defined fields):
tracker.trackEvent("Clicks", "Button", "Red", 0);
Using the Google Analytics Dashboard
After users begin to use your application, the statistics are collected for each of the event hooks you have put in place in your application. This data is then sent to the Google Analytics servers and it’s time to head over to the Google Analytics Dashboard and interpret the results.
Luckily, some of the statistics collected by Google Analytics are now shown in real time. Earlier versions had up to a 24-hour delay between when you log an event and when it shows up in the data on the Dashboard. Real-time statistics are still in beta at the time of this writing.
When your data has been collected and run through the Google Analytics servers, your Dashboard should show the data on the Home screen overview, as shown in Figure 28.2.
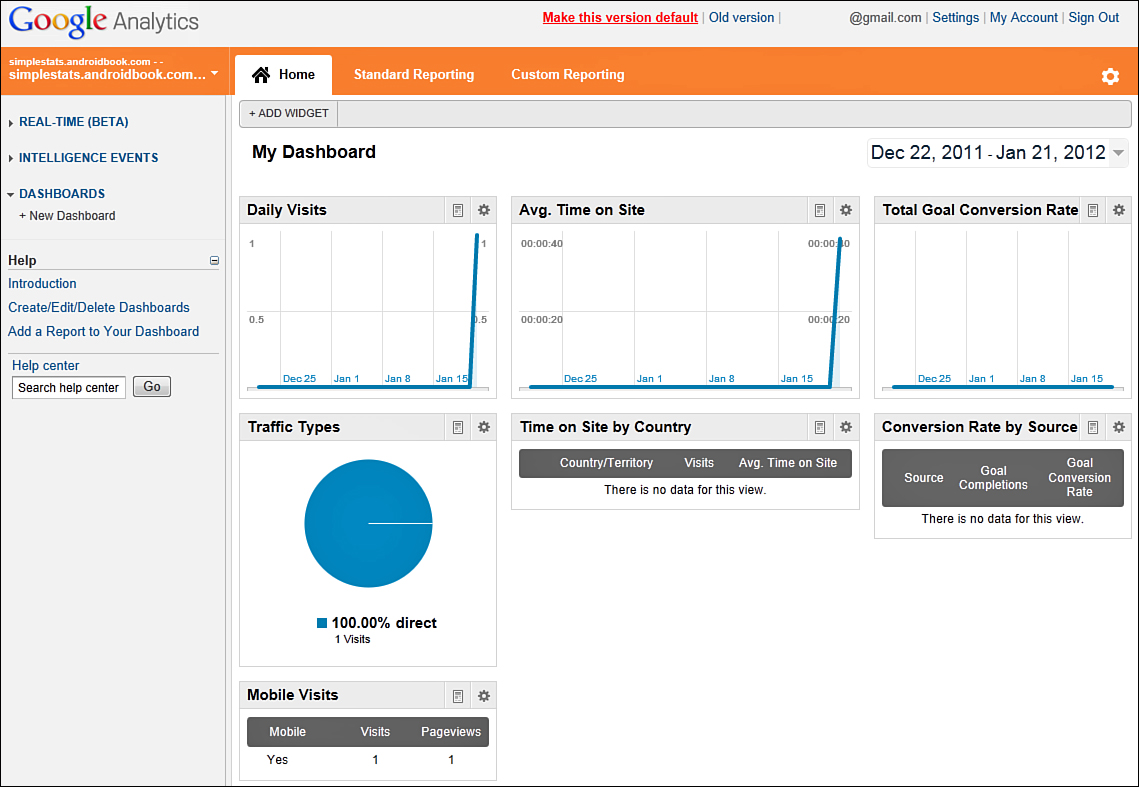
Figure 28.2. The Google Analytics Dashboard (with data).
You can review the page view details by clicking on the Standard Reporting tab and choosing Content, Overview, as shown in Figure 28.3.
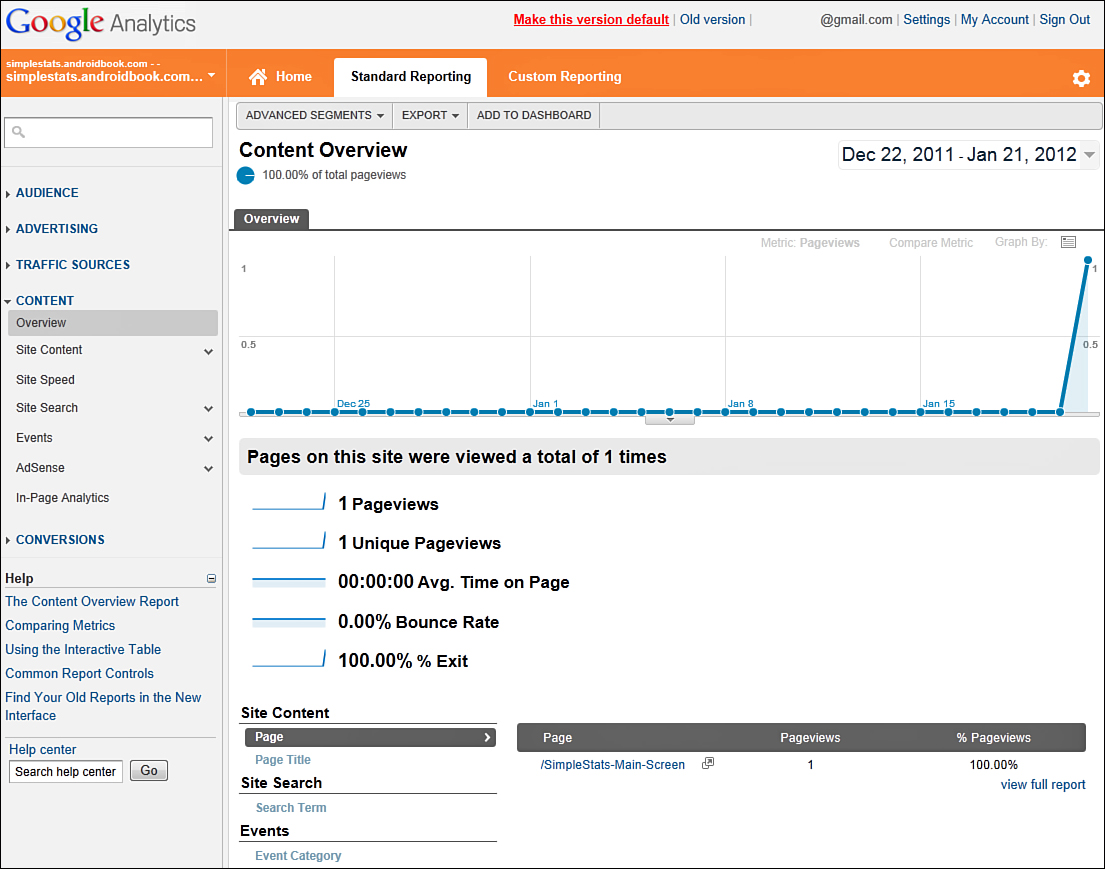
Figure 28.3. A Google Analytics Content Overview report.
You can drill down to the individual button click events by clicking on the Standard Reporting tab and choosing Content, Events, Overview and then drilling down by clicking on the Top Events, Event Label link. This displays the Red and Blue button click events, as shown in Figure 28.4.
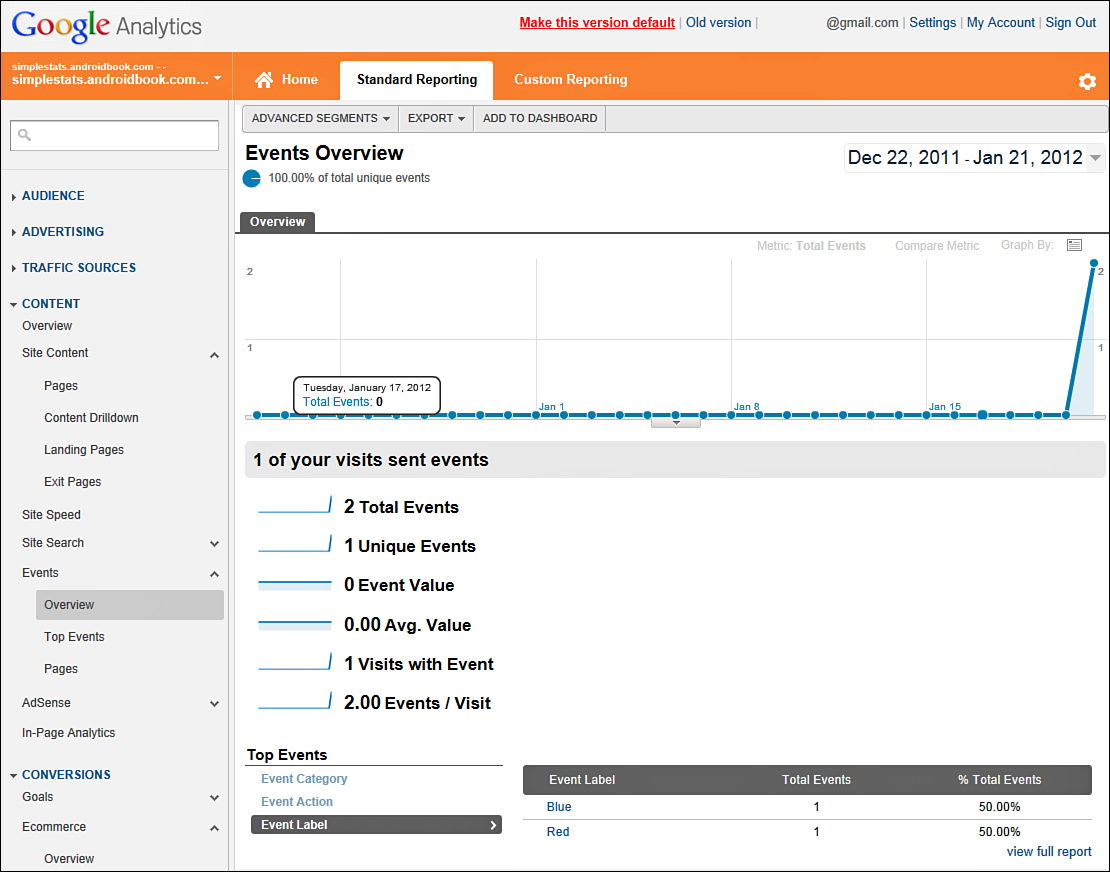
Figure 28.4. A Google Analytics Events Overview report.
The Google Analytics Dashboard has a variety of useful features. We recommend reading through the documentation and messing around with where you put your event hooks in the application prior to publication, as you may want to adjust your analysis strategy to get the reports you desire. For a nice general Google Analytics reference, we recommend Sams Teach Yourself Google Analytics in 10 Minutes by Michael Miller (Sams Publishing, 2010, ISBN-13: 9780672333200).
Gathering eCommerce Information
You can also use the Google Analytics SDK for Android to track eCommerce data. This data includes store transactions, purchase data, and other useful information for eCommerce services, which can just as easily include tracking in-app billing data or virtual purchases in a game.
This type of tracking is not enabled by default. You need to log in to your Google Analytics Dashboard and enable E-Commerce Tracking under the profile settings of your specific account.
Logging eCommerce Events in Your Applications
To start tracking eCommerce information, you must still instantiate the tracker as with other types of events. Then, when you are processing in-app payments or the like, you can use the Transaction class to log information about a user purchase. Basically, think of a Transaction as a shopping cart instance, and the Item class is used to specify the individual items purchased in the cart. Here is the sample code necessary to build up a transaction with two items for purchase.
String orderID = "1001" + new Date().toString();
Transaction.Builder transactionBuilder = new Transaction.Builder(
orderID,
2.99) ;
transactionBuilder.setStoreName("My Game Store");
transactionBuilder.setShippingCost(0);
transactionBuilder.setTotalTax(0);
mTracker.addTransaction(transactionBuilder.build());
Both the Transaction and Item classes have helper Builder classes.
// Item #1
Item.Builder itemBuilder = new Item.Builder(
orderID,
"SKU_123",
1.99,
1);
itemBuilder.setItemCategory("GAME CREDITS");
itemBuilder.setItemName("1 Game Credit");
mTracker.addItem(itemBuilder.build());
// Item #2
Item.Builder itemBuilder2 = new Item.Builder(
orderID,
"SKU_345",
0.99,
1);
itemBuilder2.setItemCategory("LIFE POINTS");
itemBuilder2.setItemName("1 Life Point");
mTracker.addItem(itemBuilder2.build());
When you’re ready to commit the transaction and dispatch the results to the Google Analytics servers, simply use the trackTransactions() method of the GoogleAnalyticsTracker class.
mTracker.trackTransactions();
Reviewing eCommerce Reports
After you have logged some eCommerce events, you can check out the reports on the Google Analytics Dashboard (assuming you enabled eCommerce tracking in your profile). You can find these reports on the Standard Reporting tab, under the Conversions, Ecommerce. Figure 28.5 shows an Ecommerce Overview report after a single click of the Buy button in the sample application running the Transaction code shown earlier.

Figure 28.5. A Google Analytics Ecommerce Overview report.
Tracking Ad and Market Referrals
The SDK supports several types of campaign tracking, which allows you to keep track of installation referrals through the Android Market and otherwise. To participate in the Android Market campaign tracking, see the online documentation: http://code.google.com/apis/analytics/docs/mobile/android.html#campaigns.
Gathering Statistics
Now let’s talk about some strategies, as well as tips and tricks, for gathering relevant, useful statistics with Google Analytics. Much of the “magic” involves dropping statistics-gathering hooks at clever places in your specific applications. The trick is to place your event hooks at exactly the right places in your application that mean something to you, the developer. Place the hooks in the wrong code locations, and you’re going to generate erroneous statistics. It’s a bit of an art to do this well, and it’s not really something we can give you examples for, but we can talk about some common-sense approaches. For example:
• Develop, document, and test your event tracking strategy and make it consistent. When you track events, you can provide a category, action, label, and value. Use these features consistently throughout your application so that the creation of reports is done in a similar fashion, regardless of who added the event hooks in that part of the application. We see a lot of tracking solutions that generate tons of data but little of real value.
• Know all your application entry points. Most users launch your application from the application tray, but you might have other entry points as well, via notifications or live folders and other intents. If you’re trying to log application launches, you need to log for each entry point to get an accurate result.
• Remember your application and Activity lifecycle events. You might want to log each time an Activity runs. Make sure you do this in a callback that runs only once per Activity, such as the onCreate() callback. You probably want to avoid logging in onResume(), as it may be called repeatedly during the lifetime of an Activity. Even so, keep in mind something as simple as rotating the screen will result in a new call to onCreate().
• Gather only the statistics you need, and don’t store them if you can avoid it. Gathering excessive information from the user creates and exacerbates a number of issues regarding performance and privacy.
• Consider tracking behavior rather than page views. For example, ranking the difficulty of a game can be done through tracking actions of restarting, dying, quitting frequently, opening help or forum links, and so on. Higher frequencies of these compared to a “completion” action might indicate a higher level of difficulty. In a newsreader application, tracking views that last longer than 30 seconds or involve scrolling down to more content might be more useful than just loading up an article. In fact, behavior is often what analytics tries to glean from page views. You’re writing a full application and can more directly indicate behavior through careful creation of tracking events.
• Always verify your assumptions that any unique data you use is unique. Timestamps are not globally unique. Handset device identifiers are available on smartphones, but not tablets and other types of devices.
Protecting Users’ Privacy
When you collect user statistics, you need to make sure that the users are aware of your activities, so that privacy concerns are addressed. The Google Analytics Terms of Service require that you indicate to your application users that you reserve the right to anonymously track and report a user’s activity inside of your application. By signing up for a Google Analytics account, you agree to these terms. Send only anonymous information to the Google Analytics servers that can be aggregated. Do not send private user information. This isn’t the only item you must comply with in the terms of service, of course. Be sure to read and understand it before adding instrumentation to your code with many calls.
Summary
The Google Analytics SDK for Android is an effective way to generate helpful information about how users are using your applications. It’s flexible, powerful, and easy to integrate into your applications. As with any logging, you should always inform your users that you are tracking their behavior in the application and have a well understood privacy policy. How you take advantage of the Google Analytics SDK for Android depends on what you’re hoping to determine from your users. Heavy analytics may be appropriate for beta projects, whereas lightweight informational logging might be more appropriate for published applications.
References and More Information
Google Analytics documentation:
http://code.google.com/apis/analytics/
Google Analytics account signup (requires a Google account):
http://www.google.com/analytics/sign_up.html
Google Analytics documentation for event tracking:
http://code.google.com/apis/analytics/docs/tracking/eventTrackerGuide.html
Google Analytics documentation for eCommerce tracking:
http://code.google.com/apis/analytics/docs/tracking/gaTrackingEcommerce.html
Google Analytics documentation on tracking campaigns:
http://code.google.com/apis/analytics/docs/mobile/android.html#cacampaig
The Easytracker library for Android, Version 1.0:
http://code.google.com/p/analytics-api-samples/downloads/list