
6. Off to the Presses

How to Create Your Own Photo Book
Up to this point in the book you have been working on the basics of the photographic workflow. You have imported and organized and then processed and enhanced. Now it’s time to do something with all those great-looking photos. If you are working with a version of Lightroom earlier than version 4, I’m sorry to say that you won’t get much from this chapter (except maybe an urge to upgrade). The reason is that Adobe added a great feature to Lightroom 4—the ability to create custom photo books that can be electronically transmitted to Blurb for printing or just converted to a PDF file for sharing. Either way, it’s a feature that is well worth the price of the upgrade.
Poring Over the Picture
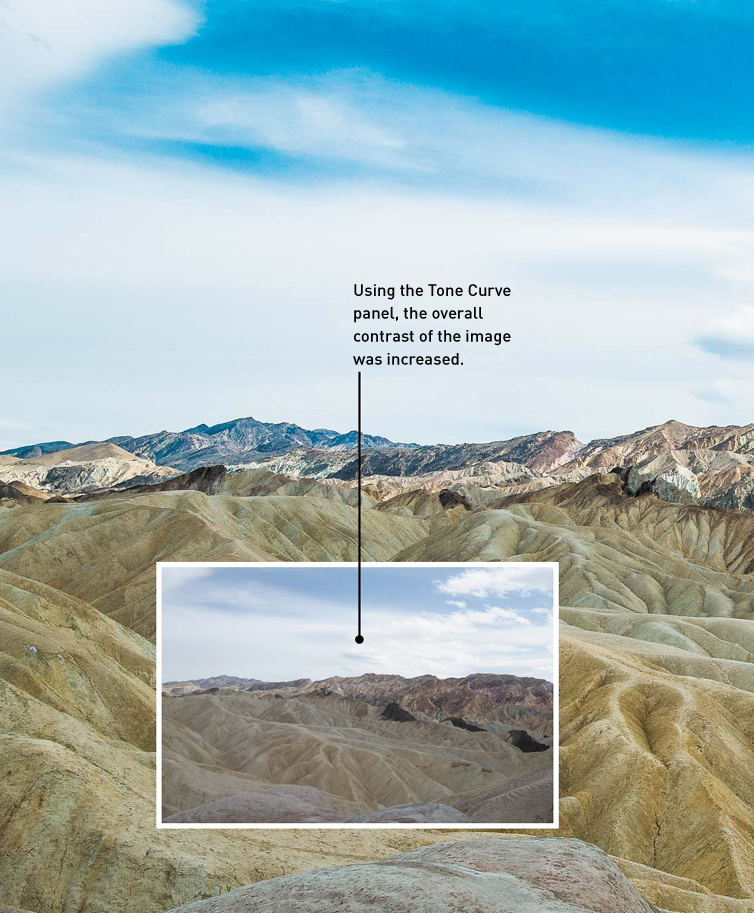
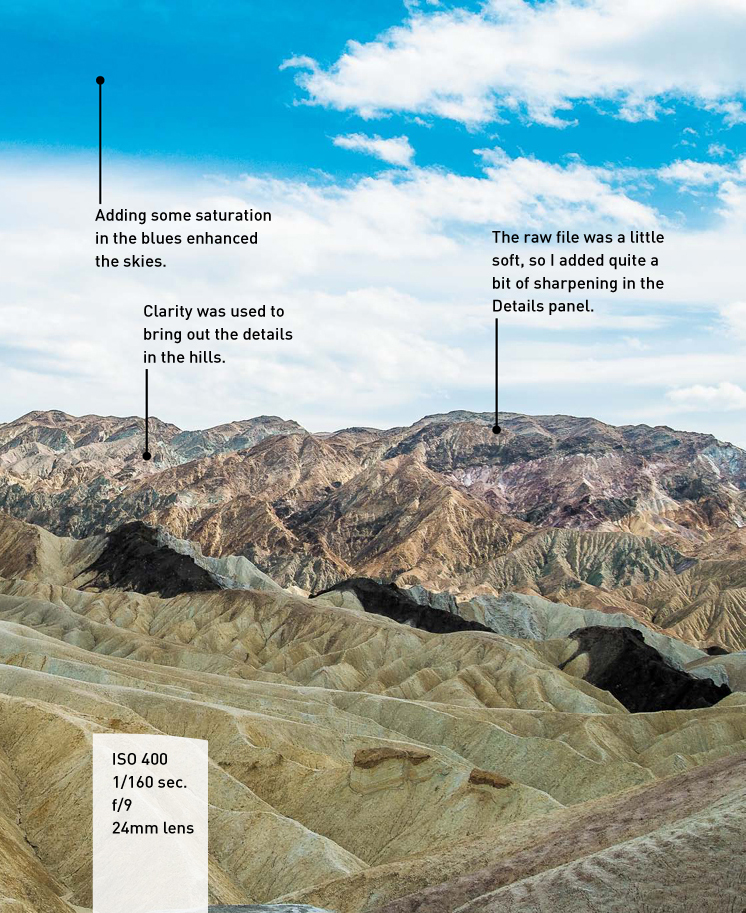
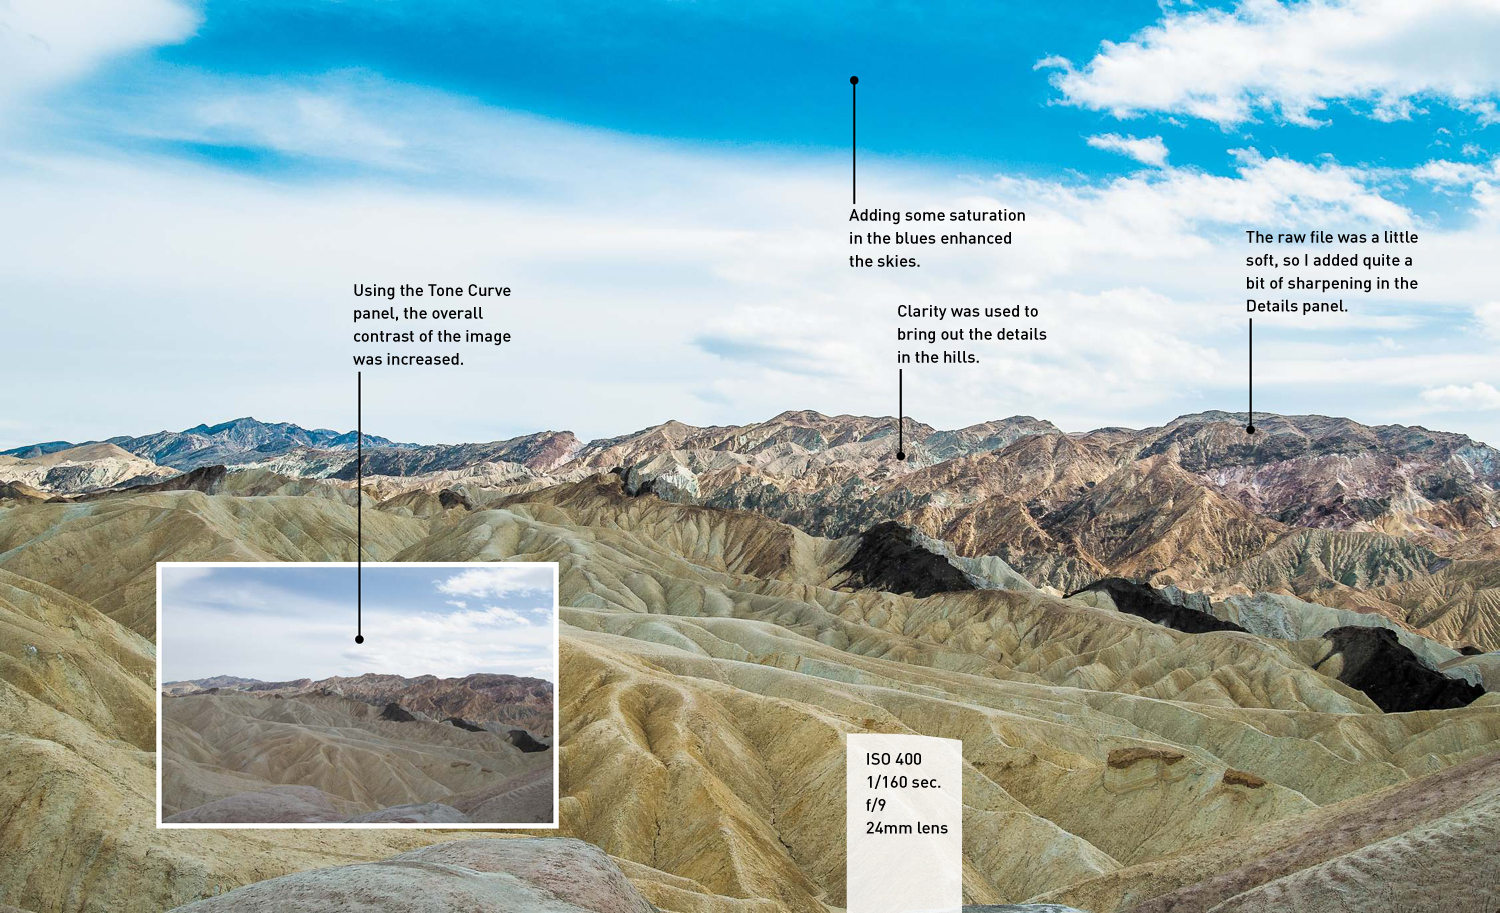
Death Valley is one of those places that I had always heard of but never really thought of as a must-visit location. That is until last year when I had a free day in Nevada and decided to make the drive. I had no idea that the scenery would be as magnificent and varied as it is, and I’m just glad that I had my camera with me. After spending a day driving through the park, I couldn’t wait to relive the experience and share it with friends through my photos.
Starting Off with the Book Module
There are many ways to use the Book module in Lightroom, in large part because of all the options available for customizing your project. Unfortunately, to cover every possible option would use most of the pages available in this book. So instead, let’s lay out a book project from beginning to end so that you can see just how easy it is. Then, when you get to the end of the chapter, you can start exploring the different options and start creating your own book.
Begin with a Collection
The easiest way to start creating a photo book is to organize the images that you want included into a collection. When you open the Book module by clicking its name in the Module Picker, you’ll find the Collections in the left panel along with a preview window. By organizing all the photos you want to use into one collection, you’ll have a much easier time accessing them (Figure 6.1). Of course, you could use another method, like flagging or keywords, but I find that creating a collection first is the easiest way to organize my photos for a book. If you need a quick review on creating collections, flip back to Chapter 2.
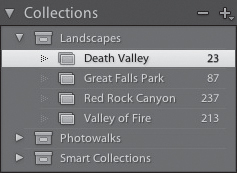
Figure 6.1 Creating a collection is the easiest way to start making a book.
Viewing Photos in the Filmstrip
Unlike the Library module, which pulls your images into the Grid for viewing, when you select your collection from the Collections panel, the images will appear in the Filmstrip at the bottom of the screen. From there you can slide side to side and see all of the images available to you to place into your book. If you don’t see the Filmstrip, it is probably in auto-hide mode. To show it, you can either click the small reveal triangle at the bottom of the screen or press Shift+Tab a couple of times.
Tip
You can make the photos in the Filmstrip larger by placing your cursor between the Filmstrip and the preview window until it turns into an up and down facing arrow. Then click and drag upward to increase the size of your thumbnails.
Choosing Your Book Settings
You’ll first need to decide whether or not you’ll be creating a Blurb book or saving your project as a PDF file. I prefer to choose the Blurb book because I can always save it as a PDF when I am done, and if I choose to have it printed, my preferences are already set up. After choosing Blurb in the Book Settings panel (Figure 6.2), you should set the other options too. The most important setting is probably the size of the book. The Blurb books come in five different sizes—from 7×7 inches up to 12×12 inches. Three landscape-oriented books fall in between the smallest and largest settings. It’s important to remember that book size will be one of the main determining factors in the price of your printed book. Lightroom offers a cost estimate for you at the bottom of the panel so you can keep track of the costs.
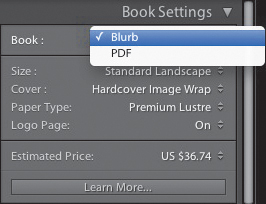
Figure 6.2 You can choose to print a Blurb book or choose PDF in the Book Settings panel.
If you change book sizes after you start laying out your book, a warning screen will appear indicating that some of your content may not fit after migrating to the new size (Figure 6.3). That’s why I like to choose my book size before I start the layout process. For this project, I’ll choose the Large Landscape book (13×11 inches) with a Hardcover Image Wrap using Premium Lustre paper. The Logo Page option includes a blank page at the end of the book with the Blurb logo. You can deselect this option to not include the logo page, but you get a slight discount for having it in there.
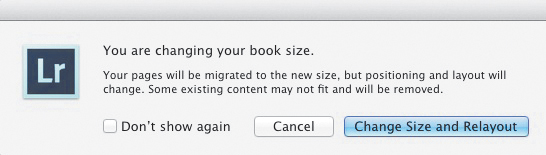
Figure 6.3 If you change your book layout, you will be warned about possibly losing content.
Set Your Preferences
While setting your options, it’s a good time to also set the book preferences by clicking the Book menu option and then clicking Book Preferences. There aren’t a whole lot of preferences to set, but it’s best to set them before you start working on your first book. You can always alter the preferences in the book layout if you need to (Figure 6.4).
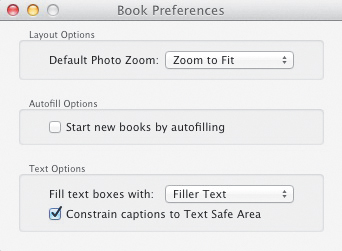
Figure 6.4 The Book Preferences dialog.
The first preference includes the Layout Options. In the Default Photo Zoom setting, you can choose between Zoom to Fill or Zoom to Fit. I prefer the Fit option to ensure that my photos don’t get cropped inside of a window. I can always enlarge them in the layout later on if I want them to fill the cell.
Next, you’ll need to decide on whether to select the Autofill option. If it is enabled, Lightroom will use the Auto Layout settings and populate your book automatically with however many pages are needed for the number of photos you have. So if you have the Auto Layout set to two photos per page and you have 24 photos, it will automatically open 12 pages and fill them with your images. I prefer to leave this deselected and create my book layout as I go. You can always go back after autofilling and change the layout if you want.
The third preference includes the Text Options. Some of the page layouts let you add text along with your photos. You have three choices for how the book handles any text that you want to include with your layouts. The first is to add Filler Text. This is just a placeholder and will not appear in your final book if you choose not to use any text. The second will fill text blocks with any Title metadata that you have, like a filename. The third option will fill the text with caption metadata. You can use this option if you’ve already created captions for your images in the metadata section of the Library. I prefer to add text as I go, so I leave this preference set to Filler Text.
After setting all the preferences, just close the window. There is no Save button to worry about. You can also go back at any time and change your preferences to suit your needs.
Using Auto Layout
Earlier I mentioned that I like to manually lay out my book pages, but let’s start with the Auto Layout option so you see how to set it up as well. If you click the Auto Layout panel, you’ll find that there isn’t much to it, at least on the surface. There are two buttons to choose from—one to start the Auto Layout process and one to clear any layouts that you may have already begun. The key to using this feature is to make sure you are using the right preset. Click Presets to see the options you have to choose from. You can alter these presets by clicking the preset name and then selecting Edit Auto Layout Preset (Figure 6.5).
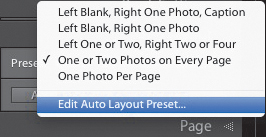
Figure 6.5 You can use one of the preset layouts or edit any of them to fit your needs.
When the Preset Editor dialog opens, you’ll see that it is divided into two halves (left and right). These represent the left- and right-facing pages in your book. These page settings will reflect whatever the current preset is that is listed in the Presets drop-down list. You can choose another preset if you like or start modifying the pages as desired.
Each page has four layout options to choose from. You can choose Fixed Layout, which lets you determine the way a layout will look by choosing it from the examples. Just choose the number of photos to use, and you’ll be presented with a number of layout choices for the page (Figure 6.6).
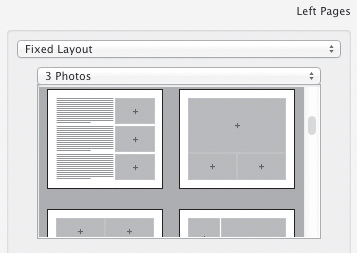
Figure 6.6 Fixed Layout lets you choose exactly which layout to use.
If you select Random From Favorites, you’ll be able to choose the number of photos you want to use, which can be one, two, three, or four images, or any combination thereof (see the next section, “Selecting Favorite Layouts”). Select the check box, and the Auto Layout will randomly select one of the appropriate layouts while mixing and matching the number of photos used, assuming you have more than one image (Figure 6.7).
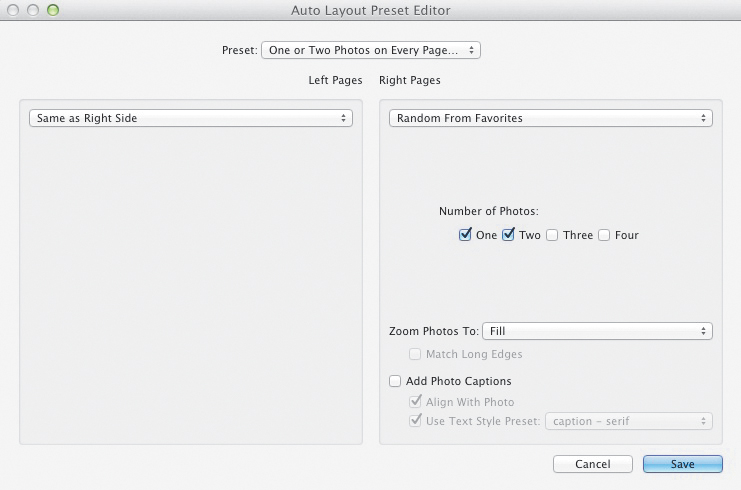
Figure 6.7 Choose the number of photos you want to use with the Favorites preset.
With these two options you have some additional layout choices that you can make. One is whether to fill or fit your photos, and the other is whether to (and how to) add captions. Just choose the options appropriate for your project (Figure 6.8).
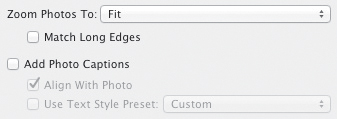
Figure 6.8 You can select the default way that images are inserted into the layouts, fill or fit.
The other two page layout options for Auto Layout are Same as Left (or Right, depending on which page side you are laying out). This option will mirror the choices from the opposite page layout. The other option is Blank Page, which is pretty self-explanatory.
When you are done creating your edited page layout, save and then name it so it appears in the Auto Layout Preset list for you to select.
Selecting Favorite Layouts
To have Auto Layout populate your pages using the Random From Favorites option, you first need to add some favorites. You can do this in a couple of ways. One way is to go to the Page panel and click the disclosure triangle (it’s that small down-facing triangle to the right of the layout). A window opens that displays all the available layouts (Figure 6.9). Select the number of images you want the layout to contain, and then scroll down through the different options. When you see one you like, Control-click or right-click on it and choose Add Layout To Favorites (Figure 6.10).
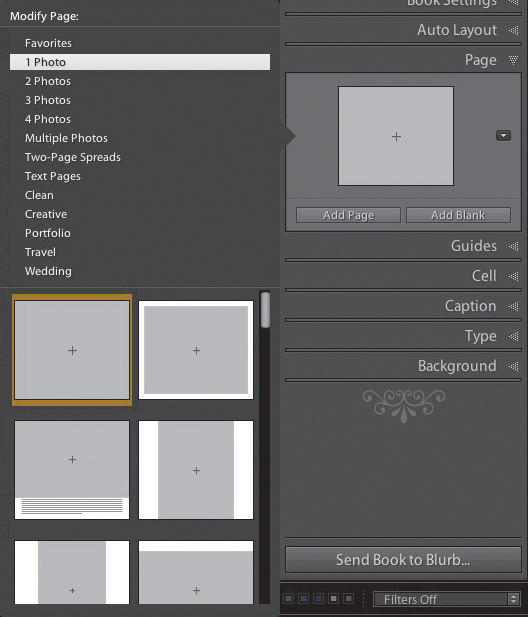
Figure 6.9 Click the disclosure triangle to see the layout options.
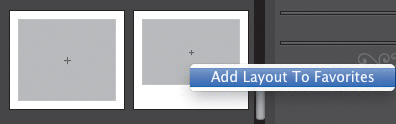
Figure 6.10 Control-click or right-click on a layout and make it a favorite.
The other way to do this is almost the same except rather than clicking the Pages panel, click the disclosure triangle on the layout in the preview window. The same layout preview panel found in the Page panel opens. Click the number of photos, and Control-click or right-click to add it to the favorites list.
I prefer this method because I like to drag a photo into the actual layout preview so that I can see just how it will look with a photo in it. If it requires two photos, I pick one from the two-photo layouts and drag two photos in from the Filmstrip. It is easier for me to visualize the layouts when they have photos in them (Figure 6.11). To make it even easier to see the layout, look at it in Single-Page view by pressing Command+T (Ctrl+T) (Figure 6.12). To go back to the Multi-Page view, press Command+E (Ctrl+E). When you are done looking at the photos in the layout, you can click on them and then press Delete (Backspace) to remove them from the layout.
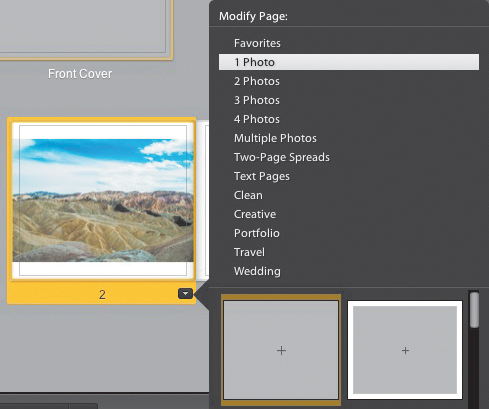
Figure 6.11 Moving a photo into a cell can make it easier to see the different layouts.
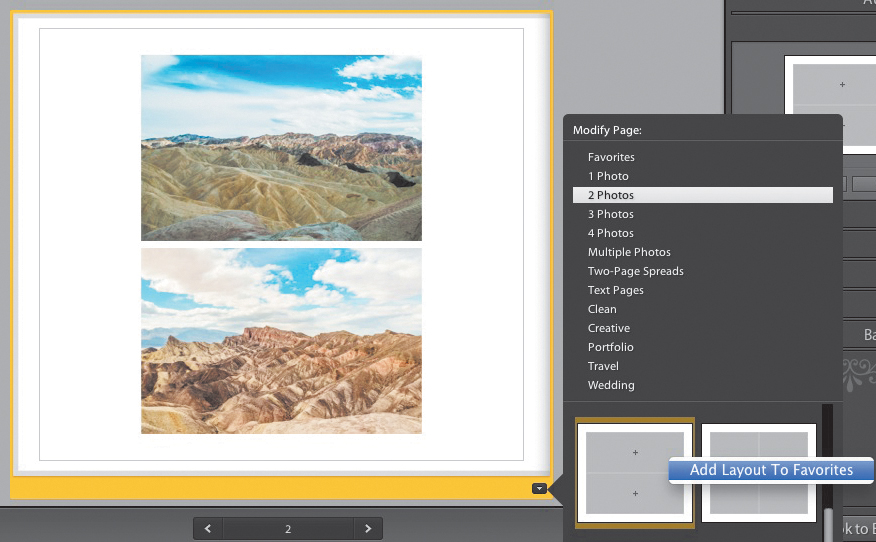
Figure 6.12 Use the Single-Page view to get a better look at the layout.
Tip
Remember that you need to have favorites selected that will cover the number of prints you decided on when setting up your preset. If you selected the check box to add four favorites, you’ll need to add at least one four-image layout to your favorites list; otherwise, you will get an error message.
Manual Layouts
For this book, let’s have a full-page image on the cover and text on top of the image. Select that layout from the Cover layouts. You can browse these layouts by clicking the disclosure triangle on the cover layout preview (Figure 6.13). After selecting the cover layout, make it larger by pressing Command+R (Ctrl+R) to switch the preview to Spread view. You can then see both the front and back cover of the book, or a two-page spread if you’re looking at the interior pages.

Figure 6.13 Reveal alternate book cover layouts by clicking the disclosure triangle.
Because you selected a text layout, a text box is available that you can click in to add the book title. The text is fairly small in the layout, which is OK because you’ll change it using the Type panel.
Customizing Text
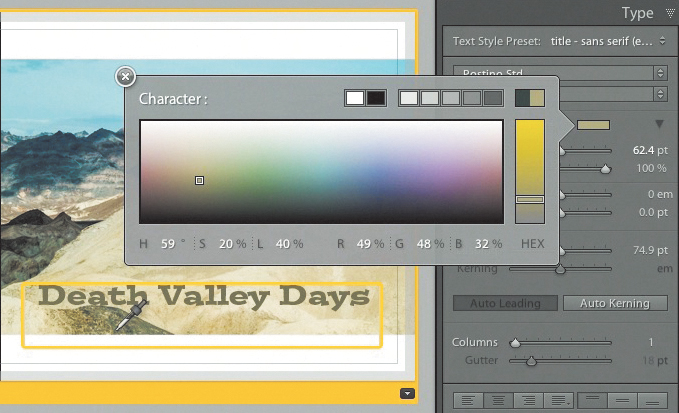
Customizing text in the Book module is really no different than using a word processing program. The Type panel has some preset options that you can choose from, or you can just start making changes to the options. If you’ve already entered some type in the text box, you’ll need to select it by clicking and dragging across the text prior to changing any of the Type options. Once the text is selected, you can change the Font type and weight, the color, size, and even opacity.
At the bottom of the panel are several justification blocks for you to choose from with many available options. For even more advanced options, click the panel expansion triangle located to the right of the font color picker block (Figure 6.14). These type options work for any text that you have in the book, not just on the front and back covers.
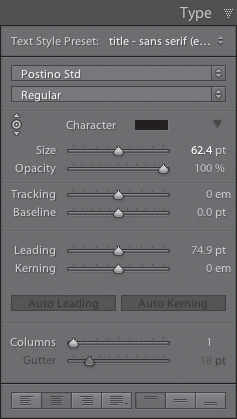
Figure 6.14 The Type panel allows you to change all of the type properties.
For this book, I chose the Postino Std font with a size of 62.4 points and center justification. You may have different fonts than I do, so you need to choose from the list that you have.
Make Some Space with Cell Padding
If you want to change the position of the text in the text title area, you can use the Padding sliders. Padding adjusts the amount of space between an object and the cell. In this case, let’s move the text down. Click the panel expansion triangle to reveal the additional padding options. To change only the top padding, click the Link All box to unlink the four sliders and then click Top to activate it. Then all you have to do is move the slider to adjust the padding for the text (Figure 6.16).
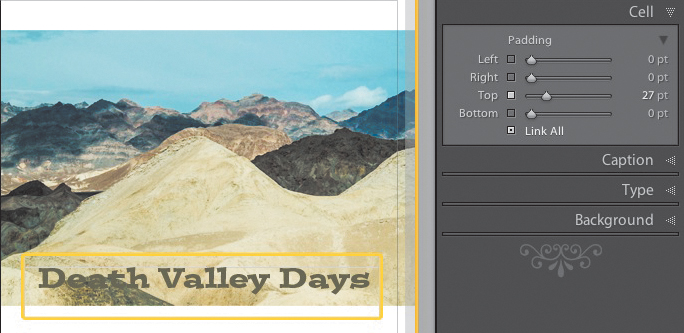
Figure 6.16 Change the padding to move the text within the cell.
Cell Padding also works if you want to adjust the padding for a photograph in a layout cell. The sliders can be adjusted individually, but if they are all linked together, the padding will be added equally to all sides.
Adjusting Image Sizes in the Cells
Even though the photos were set to fit inside the cells instead of filling them, there might be times when you want them to fill. This doesn’t mean that the preferences need to be changed. Instead, options are available inside the layout view that will let you make these adjustments. For example, the cover layout in the book example calls for a full-page image, but the image is fitting inside the cell and needs to be stretched. To change the option from Fit to Fill, Control-click or right-click on the image and then choose Zoom Photo To Fill Cell (Figure 6.17). This will stretch the photo in whatever direction is necessary to fill the cell. You can click and move the image around in the cell to position it the way you want. If you want the image to be larger (or smaller) than the Fill option, you can move the Zoom adjustment slider. It will appear above your image whenever you click on a photo in a layout cell (Figure 6.18).
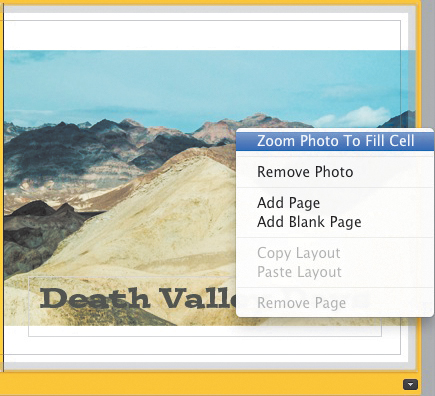
Figure 6.17 You can change the image from fit to fill by Control-clicking or right-clicking on it.
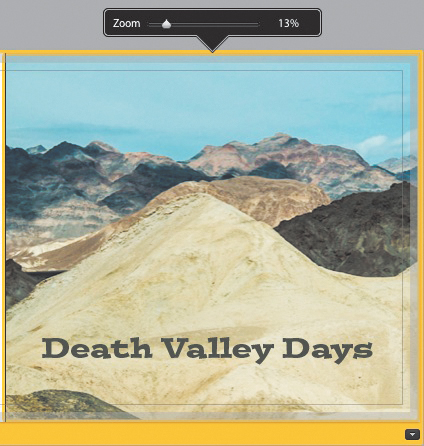
Figure 6.18 When you click on an image, a Zoom resizing slider appears above it.
Saving Your Project
Before you start making more layout changes and populating the book with photos and text, it’s probably a good time to save the book. The document bar above the layout preview window shows you the status of your book (Figure 6.19). If you have not yet saved the book, the words Unsaved Book appear to the left of the bar. Saving the book allows you to quickly access it in your Collections panel later on. Also, after you save your book, you never have to save it again. Lightroom will continually update the saved file with every change you make. Also, if you want to create two versions of your book, you can save it with a different name and take your layout in a completely different direction.
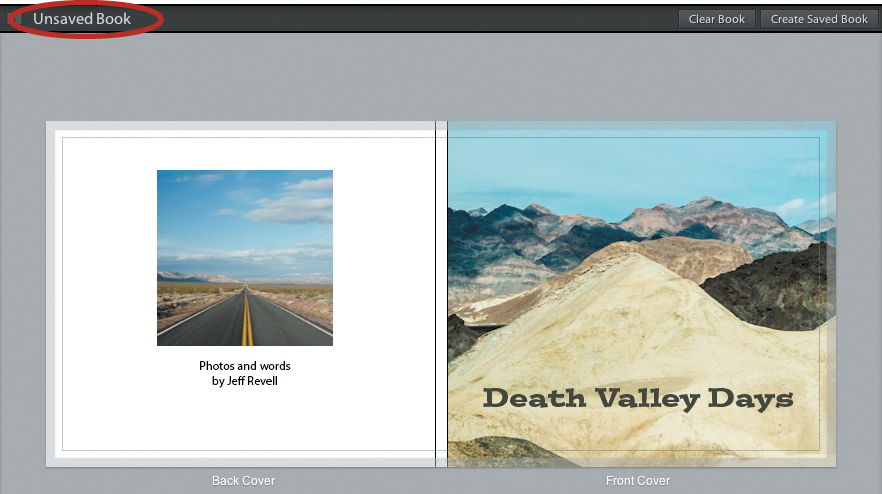
Figure 6.19 The document bar indicates whether or not you have saved your book.
To save the book, click the Book menu and then choose Create Saved Book. You can also save by pressing Command+S (Ctrl+S).
When the Save dialog opens, name your book project. Then decide if you want it to appear next to your collection or actually reside inside your collection, which is like a subset of the collection. In the Book Options section, you can decide which photos will be included with your saved book. I deselect this option because I want to see all of the photos that I plan on using in the book. If the option is selected, only the photos that are already placed in the layout will appear in the Filmstrip. This doesn’t mean you can’t add more; it’s just more of a convenience thing. There is also an option to create virtual copies of the images you are using. This can be handy if you want to edit the images for the book but don’t want those edits to be applied to the regular images in the library. I typically leave this option deselected as well (Figure 6.20). After you’ve saved your book, its name appears in the document bar as well as the Collections panel.
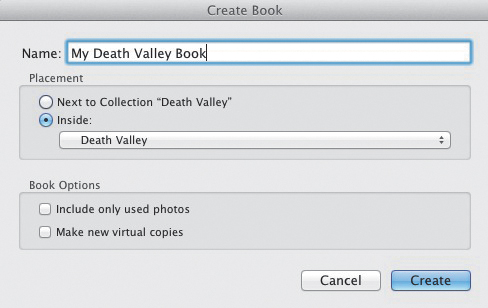
Figure 6.20 The Create Book options dialog.
Tip
Aside from tracking all of your layout changes, there is another benefit to saving your book project. Before saving, you cannot reorder the images in the Filmstrip. However, after saving, you can drag them around and place them in the order that you want them to appear in the book. This can be a big time-saver, especially if you’ll have Lightroom auto fill your pages.
Adding Pages to the Layout
Up to this point, you’ve done a lot of preparation for the book, but now it’s time for the fun part—laying out the pages. When you start a new book, you begin with a front/back cover layout, one interior page, and a back page. If you use the Auto Layout option, Lightroom will add however many pages are needed to accommodate the number of images in your Filmstrip. However, if you choose to manually lay out your book, you’ll need to add pages, choose the layout, and add the photos.
Let’s start by changing the layout of the first page. To do this, click the disclosure triangle to reveal the layout options and then select the layout that you want (Figure 6.21). For this example, choose a horizontal image with a text block next to it. After selecting the new page layout, drag a photo from the Filmstrip into the photo cell and then add the type you want to the page (Figure 6.22).
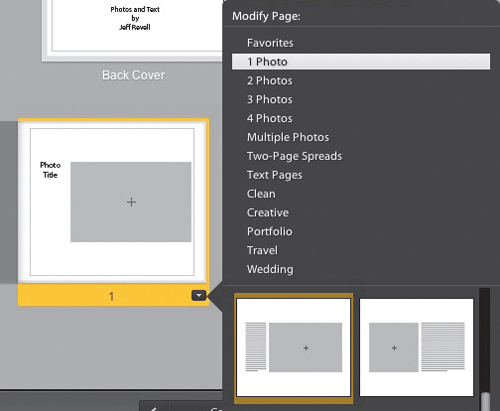
Figure 6.21 The default page layout is changed to one with text.
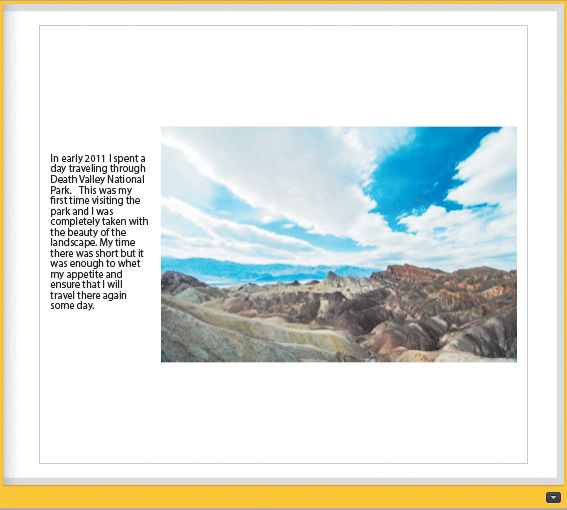
Figure 6.22 A single image layout with a text cell.
Because there is only one default page, it is necessary to add more. You can Control-click or right-click on the page and choose to add a page, but this would add the new page in front of the currently selected page. Instead, select the current page layout by clicking on it (selected pages have a yellow border around them), go to the Page panel, and click Add Page or Add Blank (Figure 6.23). Add Page adds a page with the same layout as the previous page, which is why I prefer to add a blank page and then select the layout I want. Clicking either choice will add a new two-page spread into your layout view. However, if you are adding a page in the middle of the book, adding a page will just add one photo page to the layout. Then it’s just a matter of setting the page layout, adding photos from the Filmstrip, and annotating any text that needs to be added.
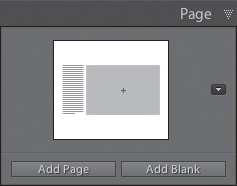
Figure 6.23 You can add new pages to the layout in the Page panel.
Spanning Two Pages
There may be times when you have a photo that you really want to see in a large-size spread across two pages. For those instances, you can select from quite a few two-page spread options. Click the disclosure triangle at the bottom of your layout page and then click the Two-Page Spreads collection. Several different options are available to choose from, including multiphoto options. Just be sure that the photo you choose is of a high enough quality to use in a two-page spread. I usually use a two-page spread for showing off my panorama images (Figure 6.24).
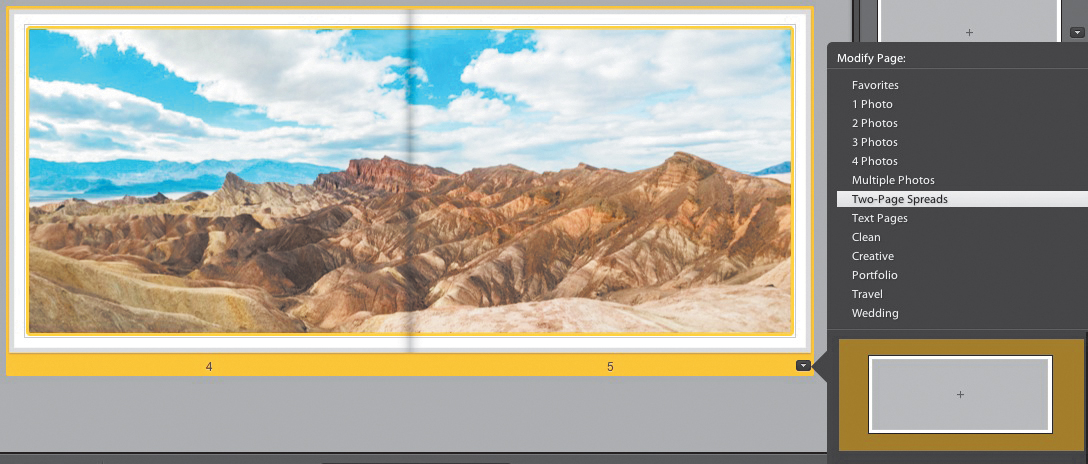
Figure 6.24 Panorama photos look great as two-page spreads.
Time to Rearrange
As you start adding photos to your layout, the thumbnails will be tagged with a number in the Filmstrip. This number indicates if the image has been added to the book and if so how many times it has been used (Figure 6.25). As mentioned earlier, you can rearrange your images in the Filmstrip after you’ve saved your book project, but you can rearrange them inside the page layouts as well.
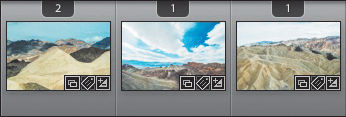
Figure 6.25 The Filmstrip helps you keep track of which photos have been added to the layout.
After moving your photos into the page layouts, you may decide that you want to move images around a bit by moving a photo from one page to another. This is easily done by clicking the image in one page and dragging and dropping it in a photo cell on a different page (Figure 6.26). You can also drag and drop images within a single page if you have multiple images in the page layout. The image that was in the photo cell will switch places with the image that you are moving.
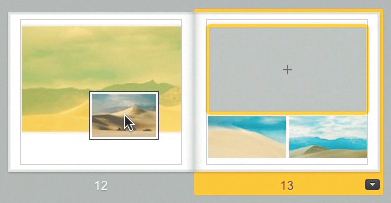
Figure 6.26 You can easily rearrange photos by dragging them from one page to another.
You aren’t just limited to moving images. If you want to reorder the pages in your book, click on the page you want to move to select it and then drag it by clicking on the page number and moving it to the desired location. A yellow line appears between the pages where the page will land when you release the mouse button (Figure 6.27).
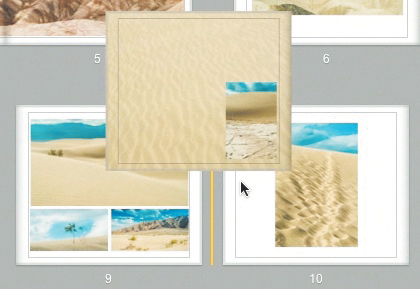
Figure 6.27 You can drag entire pages around the layout and drop them in a new location.
Tip
If you want to adjust a book photo in the Develop module, just highlight it in the layout or in the Filmstrip and press D. When you’re done with your edits, click Book in the Module Picker to go back to your layout.
Finishing Touches
Even though the bulk of the book creating process is done at this point, there are a few enhancements you can make to the look and content. I generally like to lay out my entire book and then go back and make small additions, like adding captions or labels. It helps me to see the project as a whole so I know where I want to make some minor additions.
Adding Captions
You can add captions to any of your photos or pages at any time in your layout process by using the Caption panel. The panel offers two options for adding a caption. You can add captions to photos, pages, or both if you desire. Adding captions is pretty simple. If you want to add a caption to a photo, click the photo cell that you want to apply the caption to and then select the Photo Caption check box to add a text box for the caption. You can select the Offset value (to indicate how far away the text is from the photo), whether or not to align the caption with the photo, and where the caption will appear in relation to the photo (Figure 6.28).
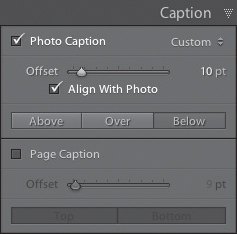
Figure 6.28 Use the Caption panel to add a caption to your photos and pages.
The page captions are similar to the photo captions, but they can only appear at the top or the bottom of the page. You can modify the text in the captions by using the options in the Type panel.
Backscreening and Backgrounds
Another great way to dress up your pages is to add a background graphic, a backscreened photo, or even a background color for the page. All of these items can be added using the Background panel and can be applied to individual pages or globally to every page in the book. To apply an effect globally, select the Apply Background Globally check box. Be sure to clear the check mark if you want to apply the effect only to individual pages.
If you want to use a photo as a background graphic, drag it into the box in the Background panel. This is referred to as backscreening, and it is generally most effective when you lower the opacity of the background photo to about 20%. One neat effect using this method is to choose a single small photo to display on a page and then use the same image as a backscreen. This is extremely popular for wedding albums, but looks good with other subjects as well (Figure 6.29).
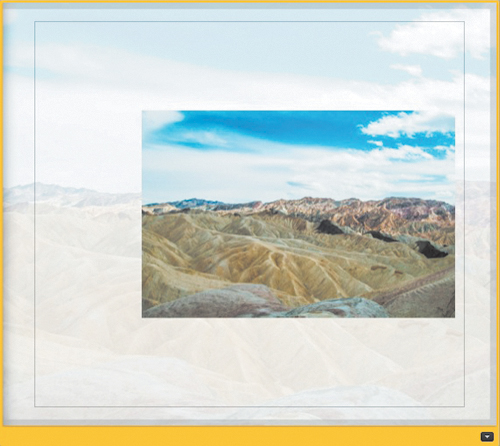
Figure 6.29 Adding a backscreen image is accomplished in the Background panel.
A number of pretty nice background graphics are provided for you to use in your travel or wedding books. Click the disclosure triangle in the Background panel, select either the Travel or Wedding group, and then choose the graphic you want to apply to your images. The Travel group includes some appealing map-type graphics, and the Wedding graphics include some attractive accent swirls. As with the backscreen photo, you can apply these backgrounds to individual pages or globally to the entire book.
Adding a Splash of Color
Another option in the Background panel is Background color. This is similar to selecting text color in that when you select the check box and then click in the color box, a color palette opens along with an eyedropper for you to select your color of choice. You can move the vertical slider on the right side of the palette to change the saturation level (it starts off gray, so move the slider up to reveal some color choices). You can also use the little trick you learned earlier in the chapter and click the eyedropper in the palette and then drag it onto the photo. Then you can use a color from your image as a background color (Figure 6.30). You can also use the background color to set all the page colors to black or dark gray for a professional portfolio look.
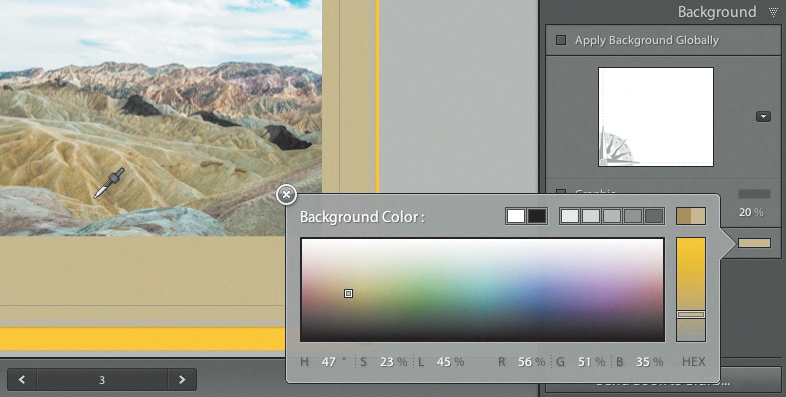
Figure 6.30 The background color can be taken directly from an image using the eyedropper.
Uploading Your Project
When you’ve completed the layout of your book, all that’s left to do is send it on its way to Blurb. When you click the Send Book to Blurb button, a sign-in dialog opens. If you’ve already signed up for Blurb printing services, all you need to do is enter your email address and password, and then click Sign In (Figure 6.31). If you aren’t a member, click the Not a Member link in the lower-left corner to set up your account. When the registration dialog opens, enter your email, a username, and a password, and then click Register (Figure 6.32).
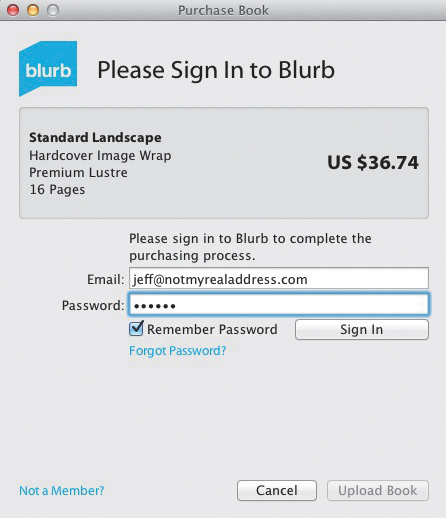
Figure 6.31 You must sign in to Blurb to send in the book for printing.

Figure 6.32 If you don’t have an account, you must register using this dialog.
After you’ve registered, you’ll need to add one more bit of information before uploading your book. In the final Blurb dialog, enter your book title, the subtitle if you have one, and the author’s name (Figure 6.33). Finally, click the Upload Book button and Lightroom will start to render your layout into images and upload the project to the Blurb servers for processing. When the book has been processed, you’ll be taken to the Blurb website where you can preview your book and finalize the purchase (Figure 6.34).
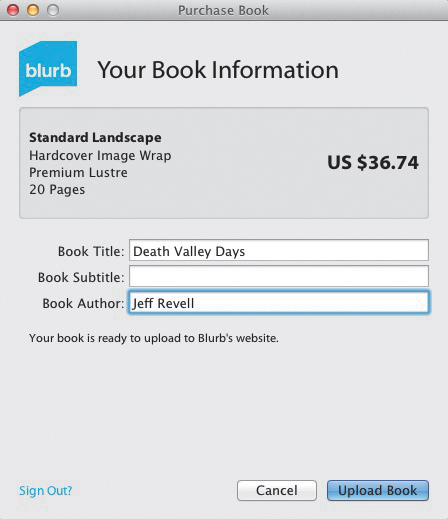
Figure 6.33 Fill in your book title and author info before starting the upload process.
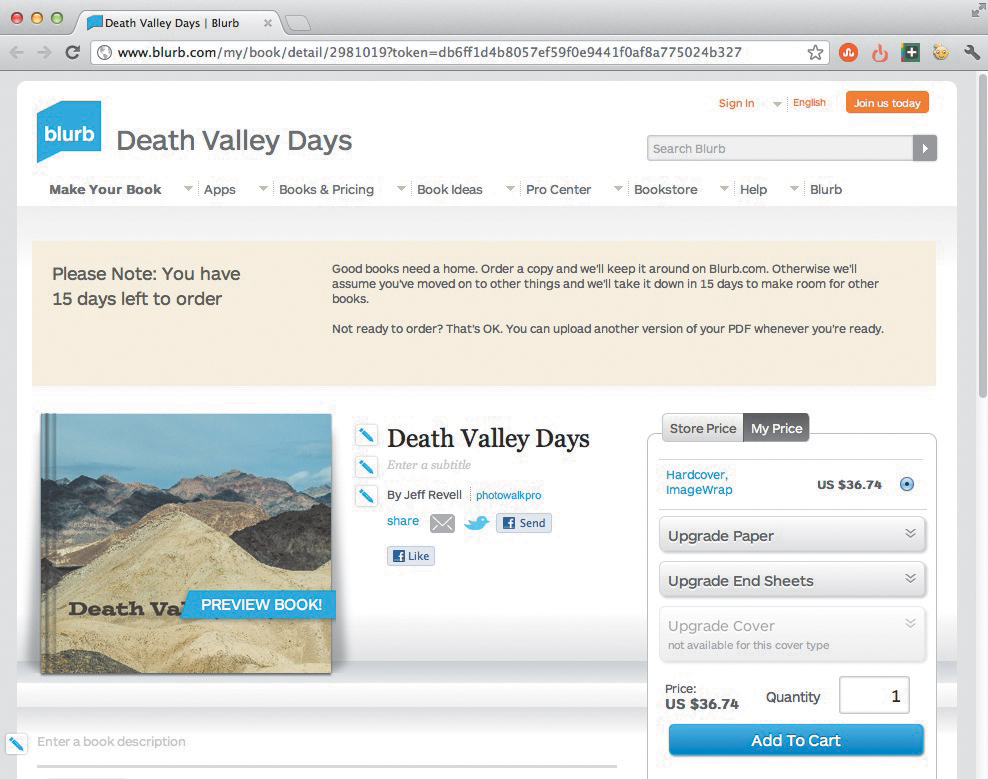
Figure 6.34 After the book is uploaded, you must complete the purchase on the Blurb website.
Creating a PDF
Even though you set up this book for Blurb printing at the beginning of the chapter, you can still save an electronic copy without having to change any of the settings. In the lower portion of the left panel, click the Export Book to PDF button. A Save dialog opens where you specify the filename and destination to save to. Lightroom then begins the rendering process and compiles the final images into a single PDF file that you can share with friends and family. You could even sell it!
Chapter 6 Assignments
Creating a photo book isn’t just about showing off your pictures. It’s about creating a story. The best part is that you get to be the author and illustrator, and you can take the book in any direction you want. Making books is not only fun, it’s also a great tool to help you become a better storyteller through your photography.
Start with a Collection
When creating a book, it’s best to start with a collection. Try making a Smart Collection and use a red color label as your criterion for automatically adding images to the Smart Collection. Then review your images. When you see one you want in your book, click on the photo to select it and press the number 6 to apply the red label and add it to your collection.
Try an Auto Layout
I enjoy laying out my own books, but sometimes it’s fun to let the program do it for you just to see what it comes up with. Try Auto Layout. It can give you a good place to start.
Try Some Creative Layouts
Someone at Adobe took the time to make some pretty amazing layouts. Try using one of the two-page spreads and setting your image to fill the page. Or, check out some of the framed layouts. They look amazing and can add some real flair to your books.
Get a Book Printed
Seriously, why go though all the effort of laying out a book without ever printing one? You don’t have to spring for the big-dollar, max-size book. Try making a little 7×7, softcover, coffee table book. The cost is pretty reasonable, and you’ll love being able to show off your printed photo book to your friends and family.
Share your results with the book’s Flickr group!
Join the group here: flickr.com/groups/photoshoplightroomfromsnapshotstogreatshots