
iMovie for iPhone and iPad
Introduction
iMovie for iOS brings HD editing to your iOS devices. Video clips, photos, and music from your iPhone 4 or later, iPod Touch (4th generation), and iPad 2 or later can be combined to create your own video project. This eBook walks you through creating, editing, and sharing your own iPad- or iPhone-edited movie.
Now you can create and share HD video of any event on the spot. With an iPhone and/or iPad plus iMovie, you hold production and post-production tools wherever you are. No longer do you have to record the game from the sidelines and then run home to edit the action. Shoot and edit a highlight video of the soccer game and have it posted to the web before the team gets home. Catch some breaking news event on your phone, edit it together with high-quality graphics and post to CNN iReport within minutes...while on scene.
As most movies and television shows today are viewed at a 16:9 aspect ratio, a best practice is to acquire your footage in landscape mode (iOS device turned on its side). This eBook approaches editing from a landscape perspective; holding the iOS device sideways. There are interface differences between holding a device in landscape versus portrait. For one, you will find faster access to controls when in landscape.
iMovie on an iPad or iPhone uses touch-based software, which allows the use of gestures rather than keyboard shortcuts to navigate the interface. This eBook utilizes an illustrative convention to represent using iMovie, as shown below.
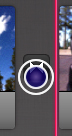
Tap items to select them. The blue dot inside a circle indicates where you should tap the interface. In iMovie, this gesture is used to select clips for trimming, add photos or music to a project’s timeline, or activate interface buttons.

Some features of iMovie may be activated via a double-tap. A double-tap is indicated by the blue dot inside two concentric circles. Double-tapping a clip in the timeline gives access to clip-specific features such as audio playback levels.

Swipe to scroll the interface. A blue dot with an arrow indicates a swipe action. In the above example, a swipe-right action is achieved by moving your finger smoothly from left to right. The interface responds by revealing more information from the left side of the screen, if available, similar to flipping backwards through earlier pages of a book. iMovie uses this gesture to scroll the project screen, scroll clips in the Media Library, and position the timeline playhead.
Drag items to a location. The blue dot inside a circle with an arrow represents a drag motion. Touch and hold the item under the dot, and then drag the item to the tip of the arrow before releasing the item. This is used in iMovie to change the order of clips in the timeline.

You can zoom in and out on items by pinching. Place two fingers on the screen, as shown by two dots, and move your fingers away from or toward one another. Zooming in and out on the timeline is handy when making precise edits or to see the complete timeline. Pinching is alsoused to set up the Ken Burns effect for photos.
Note
The first time you start iMovie, you will be asked about using your current location. Location Services must be active in order to access all of your Media Library’s contents. You can verify Location Services status for iMovie in the Settings app on your device under Location Services.
The Interface
iMovie for iOS works on iPhone 4 and later, iPad 2 and later, and 4th-generation iPod Touch. These three devices share the same interface, with a few tweaks due to the differences in screen size.
Both the iPad and iPhone share the same project screen:
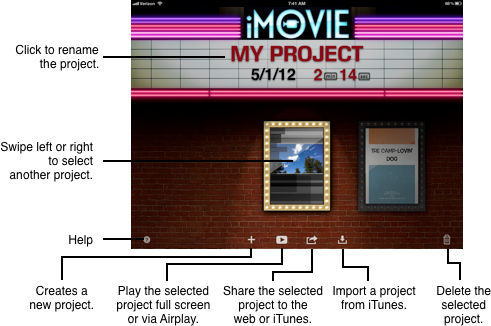
Project Screen on an iPad
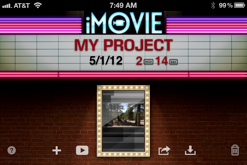
Project Screen on an iPhone
But there are a few differences when looking at the main screen on the two different sizes.
The iMovie interface on an iPad takes advantage of the available screen real estate. The main screen consists of three areas: the Media Library, viewer, and timeline.
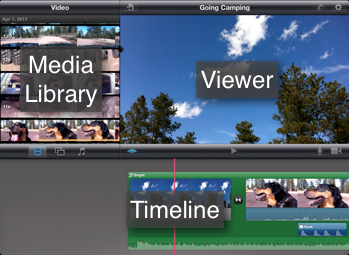
The Media Library accesses the video footage, still photos, and audio files stored on your device.

Note
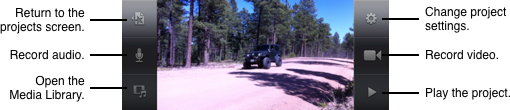
iMovie on the iPhone does not display the browser on the main screen. Tap the Media Library icon to access the video, photo, and audio files available on the device.

The timeline is where you organize the raw footage from the Media Library into your edited video. Here is where you tell your story by joining together the video clips with photos and additional audio files.

The playhead indicates which portion of the timeline’s visuals are currently displayed in the viewer. The playhead’s position is used as the insertion point when adding new media to the timeline.
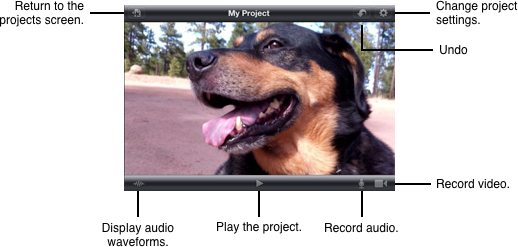
The viewer is where you monitor the progress of your editing and change project and display settings.
Note
On the iPhone, the viewer buttons are arranged differently and do not include a Waveforms button.
Tip
Remember, this eBook uses the landscape orientation for editing.
Managing a Project
For every video you wish to share with others, you need a project in iMovie. A project is used to assemble your raw video and audio footage into an edited video to share with others. iMovie starts you at the project screen where you can create a new project or open an existing project to continue prior editing.
Note
If iMovie launches with an active project, tap the My Projects button to return to the project screen.
My Projects button on iPad

My Projects button on iPhone
Creating a New Project
After you’ve shot raw footage of a new event, you’ll create a new project to edit these raw clips together. For new footage you want to add to an existing project, skip to the Using an Existing Project section.
1. Tap the Add button (plus sign) to reveal your choices..

iMovie displays a pop-up of two choices. Select New Project to create a project from scratch. Select New Trailer to use the iMovie movie trailers as your project. See the later section on using the Trailers feature within iMovie later in this book.
2. After selecting New Project, go to the “Insert Media into a Project” section to start inserting media into your project.
There’s no need to worry about saving or naming anything. iMovie is ready to start editing!
Using an Existing Project
iMovie allows you to quickly edit and share a video with the world while on the go; however, sometimes you don’t have all the footage yet or have just run out of time to finish editing at the moment. You can easily access prior projects from the project screen.
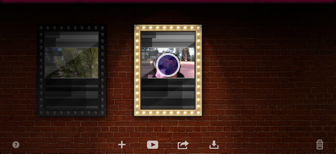
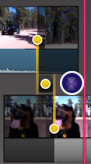
1. On the projects screen, swipe left or right to bring the desired project up as the centered, lighted poster frame.
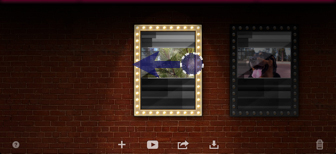
2. Tap the poster frame to open the project.
Tip
If you opened the wrong project, tap the My Projects button to return to the project screen.
Renaming a Project
iMovie names and saves your project as My Project when you first create it. When you have more than one project, you may wish to rename your project as something more meaningful.
1. On the projects screen, swipe left or right to bring the desired project up as the centered, lighted poster frame.

2. Rename the project by clicking the project’s name in the marquee.
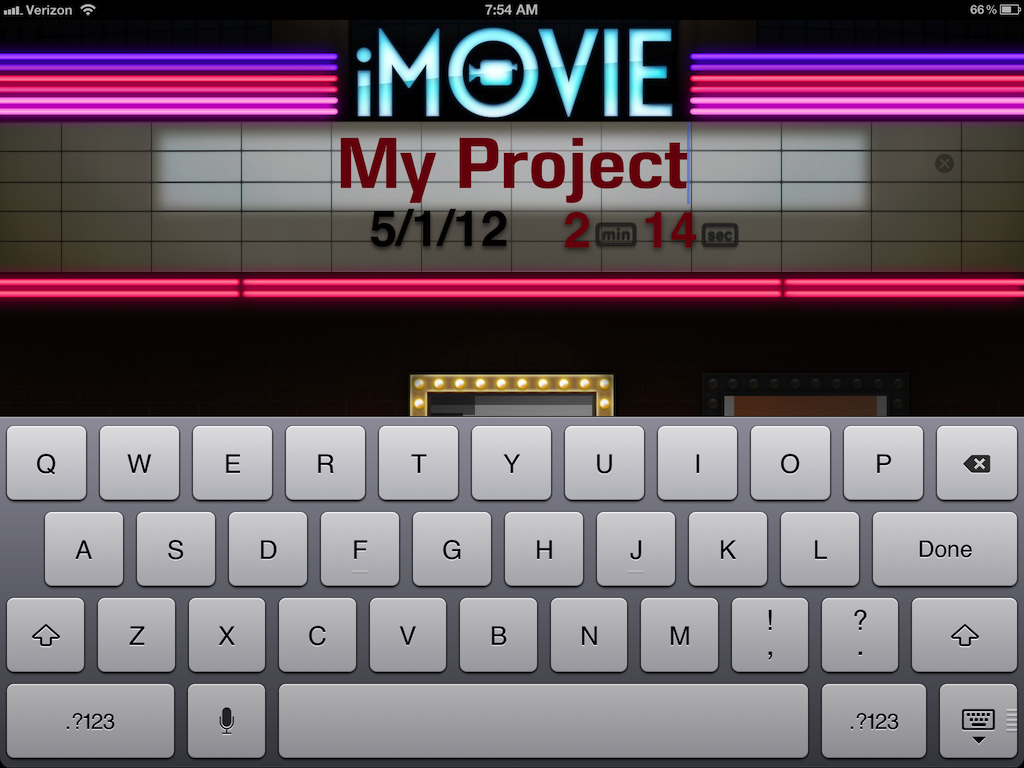
The project’s name will light up, and a text cursor and the keyboard will appear for typing in the name.
Tip
If you mistakenly tap a project’s name you do not wish to change, tap Done on the keyboard without changing the text.
3. Tap the X to the right of the project’s name to quickly clear the default name, and then enter the desired name. Tap Done when finished.
Inserting Media into a Project
iMovie works like other editing systems: select source media from a browser window, add them to a project’s timeline, trim as necessary to use only the best of those clips, and then share the finished video with others. Amateur and professional editors everywhere use this same workflow.
After creating a project, it’s time to add footage as clips to your iMovie timeline. To start, you must have acquired footage with your iPhone’s, iPod Touch’s, or iPad’s camera. You may easily edit the footage on the device that captured it or transfer that footage from one device to another.
Adding Media from the Library
The main screen has a library area on the upper left that allows you to access your videos, photos, and audio available on the device. A simple tap adds the selected media to your timeline. Before adding footage to your timeline, pay attention to the timeline’s playhead position. The playhead determines where iMovie will insert the footage you are adding to the timeline.
1. Swipe the timeline to position the playhead where you want to edit footage into the timeline.

If this is your first edit, the playhead is already at the beginning of the timeline. When adding additional footage, iMovie adds the footage before or after existing timeline clips depending upon the playhead’s location.
2. From the Media Library, select the desired category of media by tapping the respective button: Video, Photo, Audio.
On an iPhone, tap the Media Library button (above and to the left of the timeline) to access the library.

3. You may preview video footage or a photo by holding your finger down on the footage until a preview appears. For video footage, drag your finger to watch the footage play back.

On an iPad, the preview will appear in the viewer.

On an iPhone, the preview will appear around your finger.
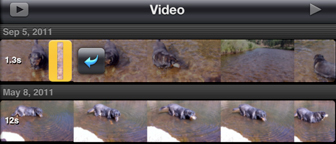
4. To add video footage to your timeline, tap the footage to select it, and then tap the insert arrow.

After you have added video footage to the timeline, an orange stripe appears along the bottom of the footage in the library.
Tip
To quickly add video footage to your timeline, double-tap the footage in the library.
5. To add a photo, tap the photo in the library.
Recording Video or Photos into the Timeline
When on the run, you can record video or take photos for immediate insertion into your iMovie project. This is a great feature when you need to add a quick clip or on-camera soundbite directly into your in-progress timeline.
1. Swipe the timeline to position the playhead where you want to add the new footage or photos into the timeline.
2. Tap the camera button above the timeline.
iPad
iPhone
3. Select which camera mode you wish to use: photo or video.

4. To take a picture or start video recording, tap the Record button. To stop video recording, press the Record button again.

5. After taking a photo or recording video, a preview window is displayed to review the new footage. If video was recorded, tap the Play button to review.
6. If you want to discard the photo or video and try again, tap the Retake button.
7. Tap the Use button to add the last photo or video recorded to the timeline.
Note
Photos or videos recorded directly into the iMovie timeline do not appear in the device’s Camera Roll. Refer to the “After the Edit” section about saving the video recordings to the Camera Roll.
Transferring Media from iPhone to iPad
Although iMovie for iPhone is convenient and easy to use, sometimes you may want to transfer iPhone-acquired footage to iMovie on an iPad. The iPad can act as a central repository for gathering footage from several shooters using multiple iPhones. This feature requires the purchase of the Apple iPad Camera Connection Kit, available from www.apple.com, and use of your iOS device’s sync/charge cable.
1. Attach the iPad Camera Connector (USB port) to the iPad’s dock connector.
2. Connect the USB end of the Apple dock connector to the USB cable that came with your iPad or iPhone. Then connect this to the iPad Camera Connector attached in step 1.
3. Connect the dock connector of the cable to the iPhone’s dock connector.
4. If your iPad is asleep, press the Home button, and then unlock the screen.
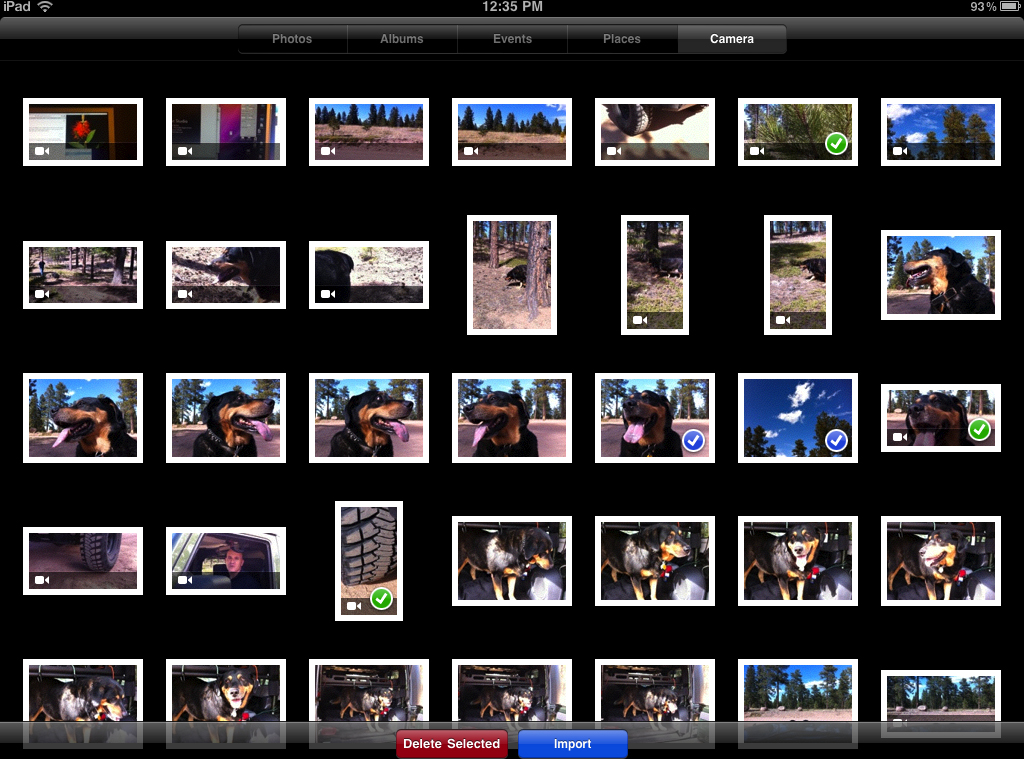
The iPad will automatically detect the iPhone and launch the importer screen (whether or not the iPhone is awake).
5. Tap the photos and/or videos you wish to copy to the iPad.

A blue check mark indicates the items selected for import.
Tip
To deselect an item for import, tap the blue check-marked item again.
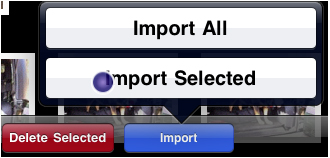
6. After selecting the items for import, tap the Import button. A pop-up appears asking whether you wish to Import All or Import Selected. Tap Import Selected.
A small progress indicator appears as an item is copied to the iPad.

A green check mark appears for items that have been imported.

7. When the import has completed, a notification appears asking if you want to delete the items off the iPhone from which you imported or to keep them on the iPhone. If you want to keep the original footage on the iPhone for later transfer to other iOS devices or to iPhoto on your Mac via iTunes, tap Keep.
8. Disconnect the iPhone from the iPad.
Playing the Timeline
You can play the timeline at any time to see your editing progress. The video will be displayed in the viewer while the audio is heard via the device’s speaker or headphone jack if being used.
1. Swipe the timeline to cue the playhead at the desired portion to view. For example, if you wish to view from the beginning, swipe right until the playhead is cued to the start of the video.
2. Tap the Play button to start playback. To stop playback, tap the Play button again.
iPad
iPhone
Trimming Clips in the Library
In this section, you will learn how to trim, or cut –out, extraneous footage in the timeline. Another approach is to trim video footage in the Media Library before adding the video as a clip to your timeline. Whether you do this video trimming in the library or timeline is up to you; either way is not a wrong way to edit.
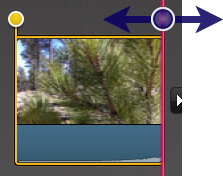
1. In the library, tap to select a clip for trimming.

The clip appears with yellow trim handles at the start and end of the clip.
2. Drag the left trim handle to change the start frame. You may, in addition to or instead of adjusting the start frame, touch and drag the right trim handle to change the end frame. On an iPad, the new start or end frame appears in the viewer as you drag the respective trim handle.

Tip
The duration between the trim handles appears at the beginning of the footage.
3. Tap the trimmed clip to add to the project timeline at the playhead’s position.

Note
An orange stripe appears over the browser footage indicating which portion you have used in the timeline. You may use the same or different portions of a clip within the timeline multiple times.
Edit Clips Within the Timeline
You can further refine your clips after they are in the timeline. A great edit shows enough footage per clip to tell the story; nothing more, nothing less. Whether you trim video footage in the browser (as explained at the end of the previous section) or in the timeline, each clip should be checked for appropriate content and length.
Trim Video and Audio Clips in the Timeline
Trimming in the timeline allows you to change the duration of video clips, audio clips, and photos. With audio and video clips, you are affecting duration and content of the clip within the timeline.
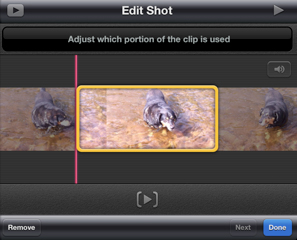
1. Tap a timeline clip to select it for trimming.

The clip appears with yellow trim handles at the start and end of the clip.
2. Touch and drag the left handle to change the start frame of the clip or the right handle to change the end frame.
As you drag the handles, the new frame will appear in the viewer. Also appearing in the top of the viewer is the new duration for the clip. Adjusting these handles changes the duration and playable content of video and audio clips.
3. Tap an empty area of the timeline to deselect the clip.
Tip
Exercise care when trimming video and audio clips, as you may remove content you need to keep (the beginning of a song or end of a spoken sentence, for example).
Trim and Adjust Movement of Photos
When adjusting the trim handles of a photo, you are adjusting only the duration of the photo. To do so, follow the steps in the previous “Trim Video and Audio Clips in the Timeline” section. Beyond changing a photo’s duration, iMovie applies default movement to the photos that you can alter. This movement is referred to as the Ken Burns effect.
1. Tap a photo in the timeline to adjust the applied Ken Burns effect. The viewer displays the photo with four overlays for altering the Ken Burns effect.

2. Tap the Start overlay and adjust the photo’s start framing.
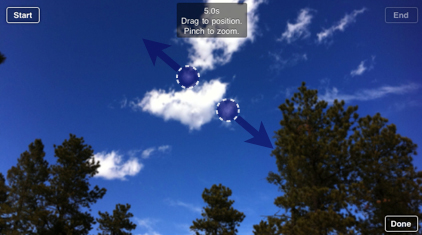
Pinch the photo to zoom in to or out of the photo.
Touch and drag the photo to reposition the photo within the frame.
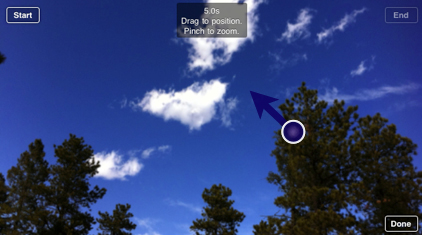
3. Tap the End overlay and adjust the photo’s end framing.
4. Tap Done to exit the Ken Burns effect.
Use the iPad’s Precision Editor
The Precision Editor, available on an iPad 2, allows for advanced trimming of each clip at a transition point. The trim handles used earlier focused on changing the beginning and ending of one clip. The Precision Editor allows you to focus on how the clip preceding the transition segues into the clip following the transition.
Note
There are three different transition icons in iMovie. Refer to the “Refine Transitions” section for more information.
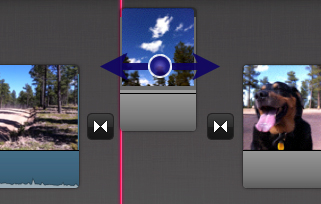
1. Open the Precision Editor one of two ways:
• Tap the transition between the clips, and then tap the elevator arrows that appear.

• Over the transition icon, pinch open in a vertical direction.

Note
Pinching open in a horizontal direction zooms in the timeline.
2. Drag the top trim handle to adjust the ending of the preceding clip. This gesture changes at which frame the transition begins.
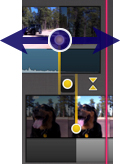
3. Drag the bottom trim handle to adjust the beginning of the following clip. This gesture changes at which frame the transition ends.
4. If necessary, you can change both trim handles simultaneously by dragging the center of the transition.

5. Close the Precision Editor by tapping the reversed elevator arrows or by pinching the editor closed.
Rearrange Clips
Clips can be re-ordered in the timeline via a simple drag gesture.
1. Touch and hold a clip in the timeline.

The clip will lift out of the timeline.
2. Drag the clip to its new position in the timeline and release.
Split a Clip
There are instances where you have edited a long clip into the timeline but need to break the clip up into two or more separate clips (you panned over to a second object of interest or need to remove a lull in the action).
1. Swipe the timeline to position the playhead at the split point over the clip.
2. Tap the clip to select it.
3. At the playhead, swipe down.
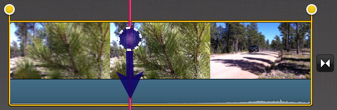
iMovie will split the clip into two pieces and place a cut (None) transition between them.

If removing a lull in the action, you may need to perform additional split edits and delete the unwanted, resulting clips. Alternatively, you may need to trim the resulting clips to remove extraneous footage.
Tip
Refer to the “Refine Transitions” section for instructions on changing the transition type, if desired.
Delete a Clip from the Timeline
Sometimes a clip simply doesn’t fit into the story you are trying to tell. There are two ways to delete a timeline clip.
• Touch and hold a timeline clip until it lifts off the timeline. Drag the clip out of the timeline. Release the clip when the remove icon (puff of smoke) appears over the clip.

• Double-tap a clip. In the pop-up that appears, tap Delete Clip.
Note
Deleting a clip from the timeline does not delete the original clip from the Media Library(if the clip came from there). Deleting clips you recorded directly into the timeline permanently deletes them.
Undo and Redo Actions
“Oops” is not a fatal word in iMovie. If you delete a clip, make a gesture, or tap something and don’t get the result you expect...don’t panic. Simply shake the device and a notification will appear asking if you want to Undo the last command. After performing an Undo, you can shake the device again and have the option to Undo again or Redo the last undo. You can undo every action performed since you launched or returned to iMovie.
Note
On an iPad, you may also use the Undo button above the viewer. Press and hold the Undo button to reveal a pop-up with undo and redo options.
Refine Transitions
iMovie includes three types of transitions:
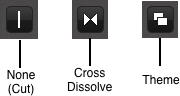
The default transition, Cross Dissolve, is automatically applied between all clips in the timeline. iMovie allows you to alter transitions individually.
Note
Changing the theme applied to a project will alter all timeline transitions that are set to the Theme type.
Change Transition Type or Duration
You can easily change a transition’s type or duration.
1. Double-tap a transition in the timeline.
2. From the Transition Settings pop-up that appears, select the desired type and duration.

3. Tap outside the pop-up to close it.
Note
Transitions cannot be deleted. Set the type to None to create a cut between clips.
Add a Fade-In/Fade-Out
Fading in from black at the beginning and out to black at the end of your project is a great way to start and finish your project.
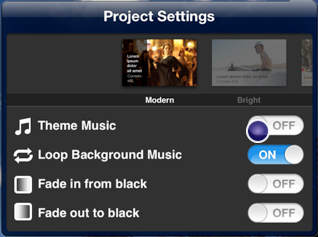
1. Tap the Project Settings button at the top right of the main screen.
2. In the settings pop-up, tap the Fade in from black and Fade out to black switches to activate the desired effects.
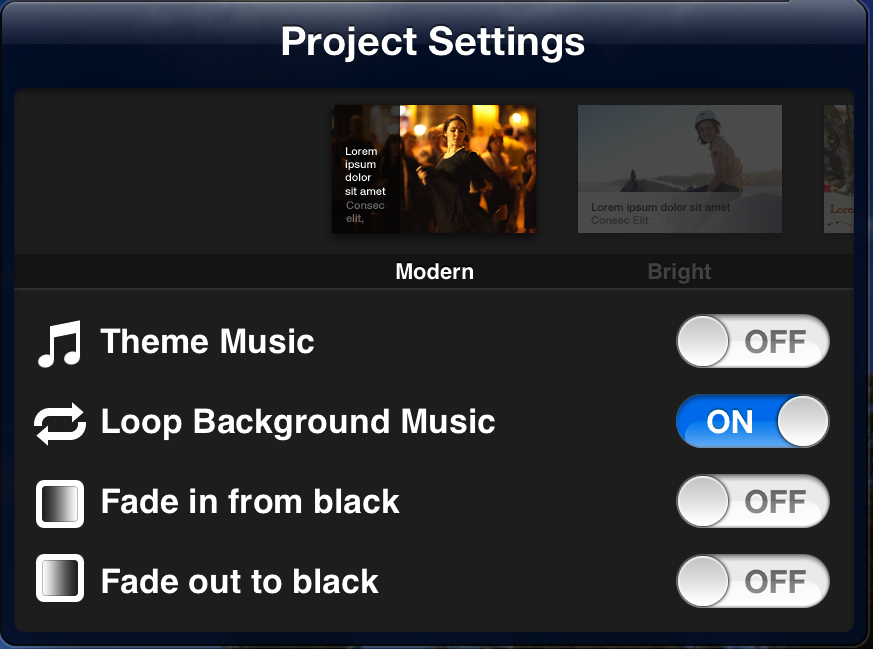
3. To close the window on an iPad, touch outside the window; on an iPhone, tap Done.
Fade icons are added to the beginning and ending clips.
Adjust Audio
Your project is not yet complete. Audio is just as important as the video. iMovie gives you options to add music or sound effects and to adjust the audio level of each clip.
Add Theme Music
iMovie includes music for each theme available in Project Settings. The theme music is off by default.
Note
iMovie uses only one music track type per project, either the default theme music or your music tracks you select.
1. Tap the Project Settings button.
2. Switch the Theme Music to On.
By default, the theme music will loop to cover the length of your project.
3. To close the window on an iPad, touch outside the window; on an iPhone, tap Done.
Add Custom Music
Rather than use a theme’s default music track, you can customize the background music. Use the Media Browser to manually select your own music or theme music tracks for your project.
1. If necessary, tap Project Settings and then switch Theme Music to Off.
2. Switch Loop Background Music to Off if you wish to use more than one piece of music.
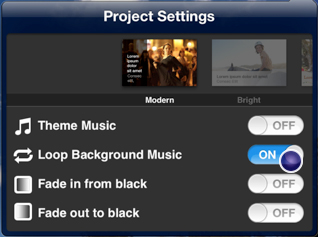
3. Tap outside the window to close Project Settings.
4. In the Media Library, tap the Audio button.
Note
Tap the Media Library icon to access the Audio browser on an iPhone.

5. Tap to select the correct category or playlist.
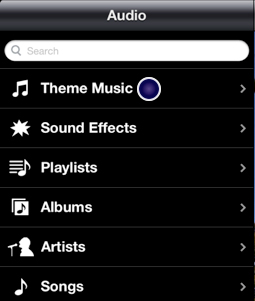
6. Tap an audio file to add the clip to the project.
The music track will appear at the start of the timeline or following a previously added music track. See “Trim or Move Audio Clips” later in this section to learn how to trim music tracks.
Tip
Gaps are not allowed between music tracks. If you need a sound break between music tracks, add a music track trimmed to the duration of the needed gap, and then deactivate the audio clip as discussed later in this section.
Add Sound Effects
You can add more depth to your project by utilizing sound effects. iMovie includes a variety of sound effects in the Audio browser.
1, Swipe the timeline to position the playhead where you want to add the sound effect.
2. In the Media Library, tap the Audio button.
Note
Tap the Media Library icon to access the Audio browser on an iPhone.
3. Tap the Sound Effects category, and then tap the desired sound effect.
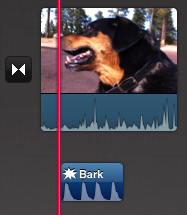
The sound effect is added to the timeline at the playhead’s location. You can trim or move the sound effect in the timeline. Refer to “Trim or Move Audio Clips” later in the section.
Note
iMovie allows you to add up to three audio clips (along with the background music and the video clip’s audio) for simultaneous playback in the timeline.
Tip
On an iPad, choose to display waveforms to aid in aligning sound effects to other clips.
Record Audio into the Timeline
iMovie allows you to record audio directly into your timeline. This feature is great for adding narration (voiceover) describing the visuals or for creating custom sound effects.
1, Swipe the timeline, positioning the playhead where you want to add an audio recording.
Note
The Record Audio feature will not record successfully if the timeline already has three tracks.
2. Tap the Record button above the timeline.

iPad

iPhone
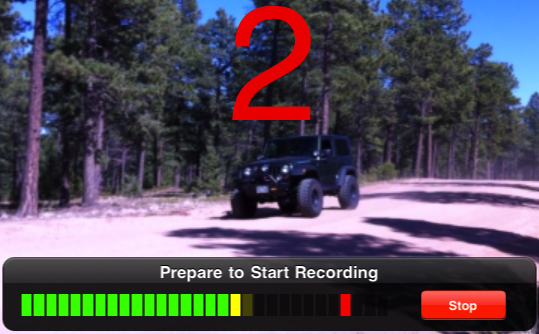
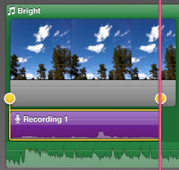
An audio meter appears so you may do a sound check. Speaking at a volume that registers yellow, but not red, yields a good level.

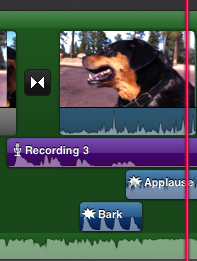
3. Tap Record. iMovie will count you down to start the recording. As iMovie is recording, the timeline will play and highlight the recording portion of project.
4. Tap Stop to finish the recording. A Recording Finished pop-up appears.

As the name of each option implies, you can Discard the recording (deleting the recording and exiting the Record Audio function), Retake the recording (deleting the last recording and immediately starting a countdown to record a new take), Review the last recording (which plays the timeline section with the last recording), or Accept the recording.
5. Tap Accept to finish the recording and close the Record Audio function.
Raise or Lower Audio Levels
Sometimes an on-camera interview is a little too loud or soft. Or maybe the wind was a little strong while you were recording outside. You can raise or lower the volume level for each clip in your timeline.
Note
Photos do not have audio level settings.
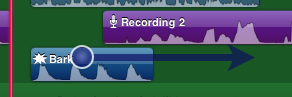
1. Double-tap a timeline clip to access the clip’s settings.
Tip
To access the level of the music clips on an iPad, double-tap the upper or lower stripes of the music clips.
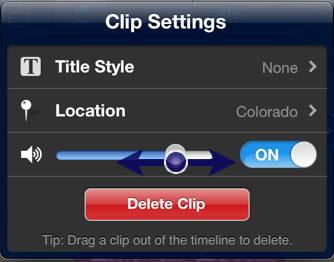
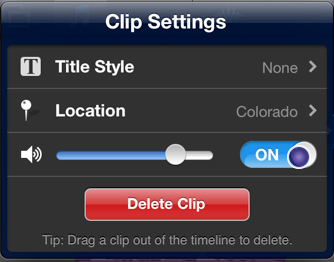
2. Drag the audio level slider left to lower the clip’s audio level and right to raise the level.
3. To close the window on an iPad, touch outside the window; on an iPhone, tap Done.
Deactivate an Audio Clip
When using music in your project, iMovie automatically ducks, or lowers, the volume of the music while the playhead is over a video clip that has active audio. For some edits (like a music video), you may not want this ducking to occur. You can deactivate a clip’s audio track via Clip Settings.
1. Double-tap a timeline clip.
2. In the settings window that appears, switch the audio level to Off.
3. To close the window on an iPad, touch outside the window; on an iPhone, tap Done.
A Mute icon appears on video clips with deactivated audio.
Trim or Move Audio Clips
iMovie lets you adjust the duration and position of audio clips similar to video clips. One exception is that music clips cannot be positioned with gaps between them.
To trim an audio clip:
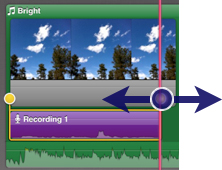
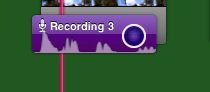
1. Tap the clip to select it.
The clip appears with yellow trim handles at the start and end of the clip.
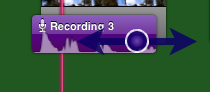
2. Drag the left handle to change the start of the clip or the right handle to change the end.
3. Tap an empty area of the timeline to deselect the clip.
To move an audio clip:
1. Touch and hold a clip until it lifts out of the timeline.
2. Drag the clip to its new location within the timeline, and then release.
Delete a Sound Effect or Music Clip
When editing, things end up on the cutting room floor. Audio clips are not immune to this truth.
1. Touch and hold an audio clip until it lifts out of the timeline.

2. Drag the clip up until the remove icon (puff of smoke) appears, and then release the clip to delete it from the project.
Note
Deleting from the timeline does not delete the original clip from the Media Library (if the clip came from there). Deleting clips you recorded directly into the timeline permanently deletes them.
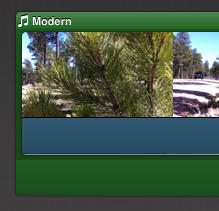
Modify a Theme
iMovie includes themes you can apply to your project. The theme you choose can affect the look of Theme transitions and any titles you apply to your clips. Optionally, you can choose to use a theme’s supplied background music.
Tip
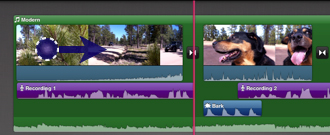
The Modern theme is applied to your project by default. This theme choice is not visibly evident until you choose a Theme transition type or add a title.
The theme applied to a project is set via the Project Settings.
1. Tap the Project Settings button at the top right of the main screen.
2. Swipe the theme thumbnails to select the desired theme.

3. Additionally, you can choose to use the theme’s music by activating the Theme Music switch.
4. To close the window on an iPad, touch outside the window; on an iPhone, tap Done.
Add Titles
Titles allow you to give more context to your project. Who is talking? Where are we? When did this happen? iMovie has three title types per theme in iMovie: Opening, Middle, and End. The type names suggest where they can be used within your project; however, iMovie allows you to use them wherever you wish. The style of text and any accompanying graphics are controlled by the project’s theme.
Create a Title
You create titles by adding them to a video clip or photo.
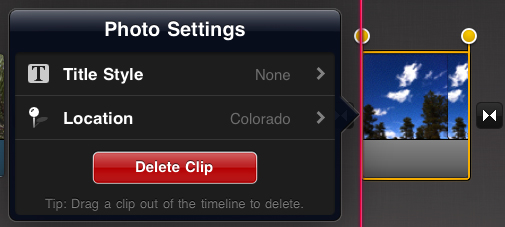
1. Double-tap a video clip or photo in the timeline.
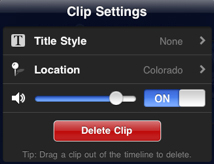
The Clip Settings (or Photo Settings) pop-up appears.
2. Tap the Title Style option.
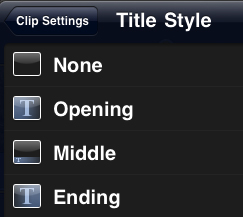
3. Tap the desired Title Style in the pop-up.

The title editor appears in the viewer.
4. Tap inside the outlined text box.
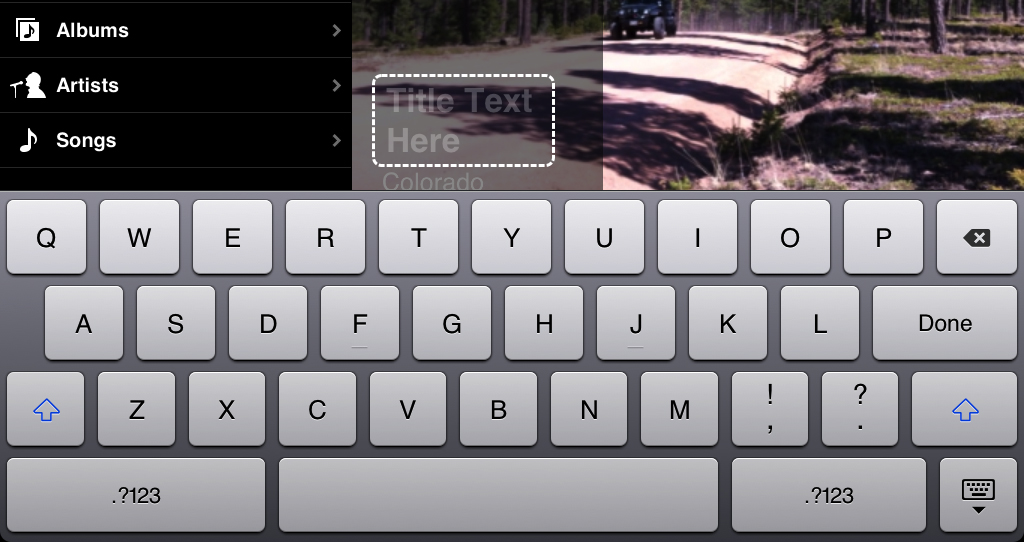
The keyboard will appear along with a text entry cursor inside the text box.
5. Enter the desired text for the title, and then tap Done on the keyboard.
6. If necessary, swipe right to cue the timeline playhead back before the clip with the title, and then play the timeline.
A Title icon indicates a title has been applied.
Tip
If you want a title over a black screen, record into the timeline with your finger over the camera lens. Add a title to this new “black” clip.
Edit Existing Titles
Easily change the text of a title in the viewer without double-tapping.
1. Swipe the timeline until the playhead is cued over the titled clip and the title is visible in the viewer.
2. Tap the text in the viewer to activate the title editor.
3. Edit the text via the keyboard, and then tap Done to accept the changes.
Tip
The title editor accepts the iOS select and copy/paste functions. Touch and hold the text to select specific characters and access copy/paste.
Set a Video Clip’s or Photo’s Location
GPS information is recorded when you shoot a video or photo with an iPhone or iPad. This locator information is displayed in the viewer for some of the title styles. You can alter the displayed info in the clip’s or photo’s settings.
Note
Location Services for iMovie must be enabled for iMovie to access your Media Library. You can activate this for iMovie in the devices Settings app under Location Services.
1. Double-tap a video clip or photo.
2. In the settings window, tap the Location item.
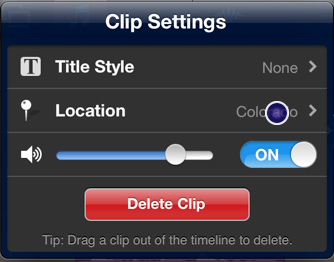
3. Use one of three methods for changing the location:
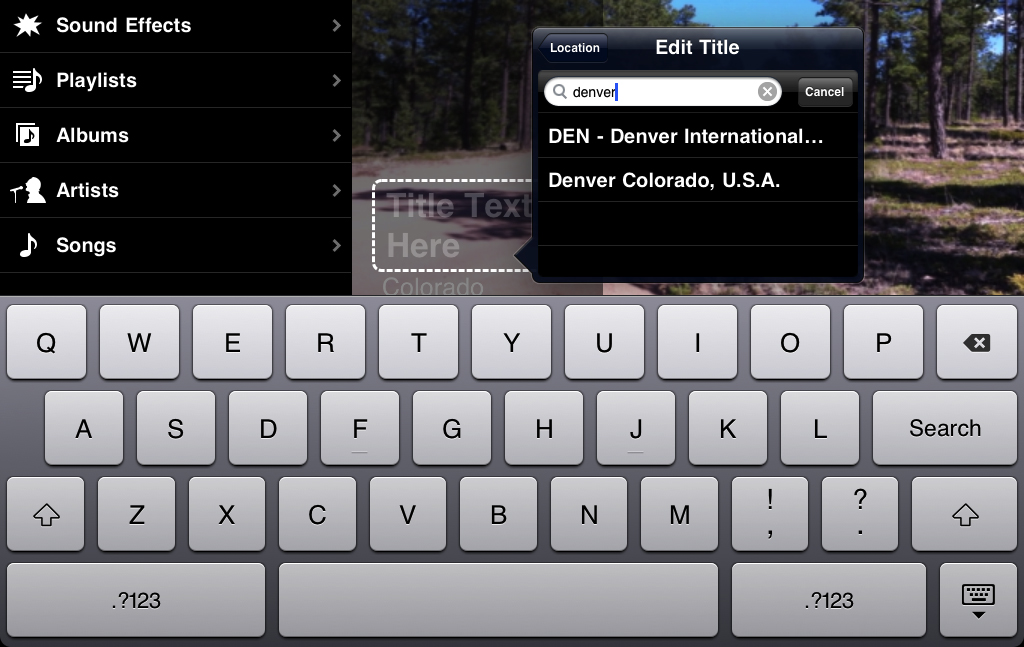
• Tap the stored location to manually enter new information via the keyboard.
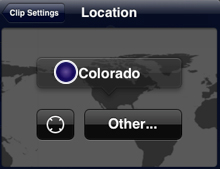
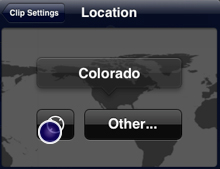
• Tap the Current Location target to automatically enter your location referenced to the iMovie database.
• Tap Other, and then search for a standard location in the iMovie database.
4. To close the window on an iPad, touch outside the window; on an iPhone, tap Done.
Create a Trailer
Time to promote your movie! iMovie includes movie trailer templates that let you create a Hollywood-style, blockbuster movie trailer in minutes.
1. If necessary, return the project screen by tapping the My Projects button.
2. Tap the Add button (plus sign) to reveal your choices..

3. Select New Trailer.
A movie theatre appears where you will choose the desired movie trailer template.
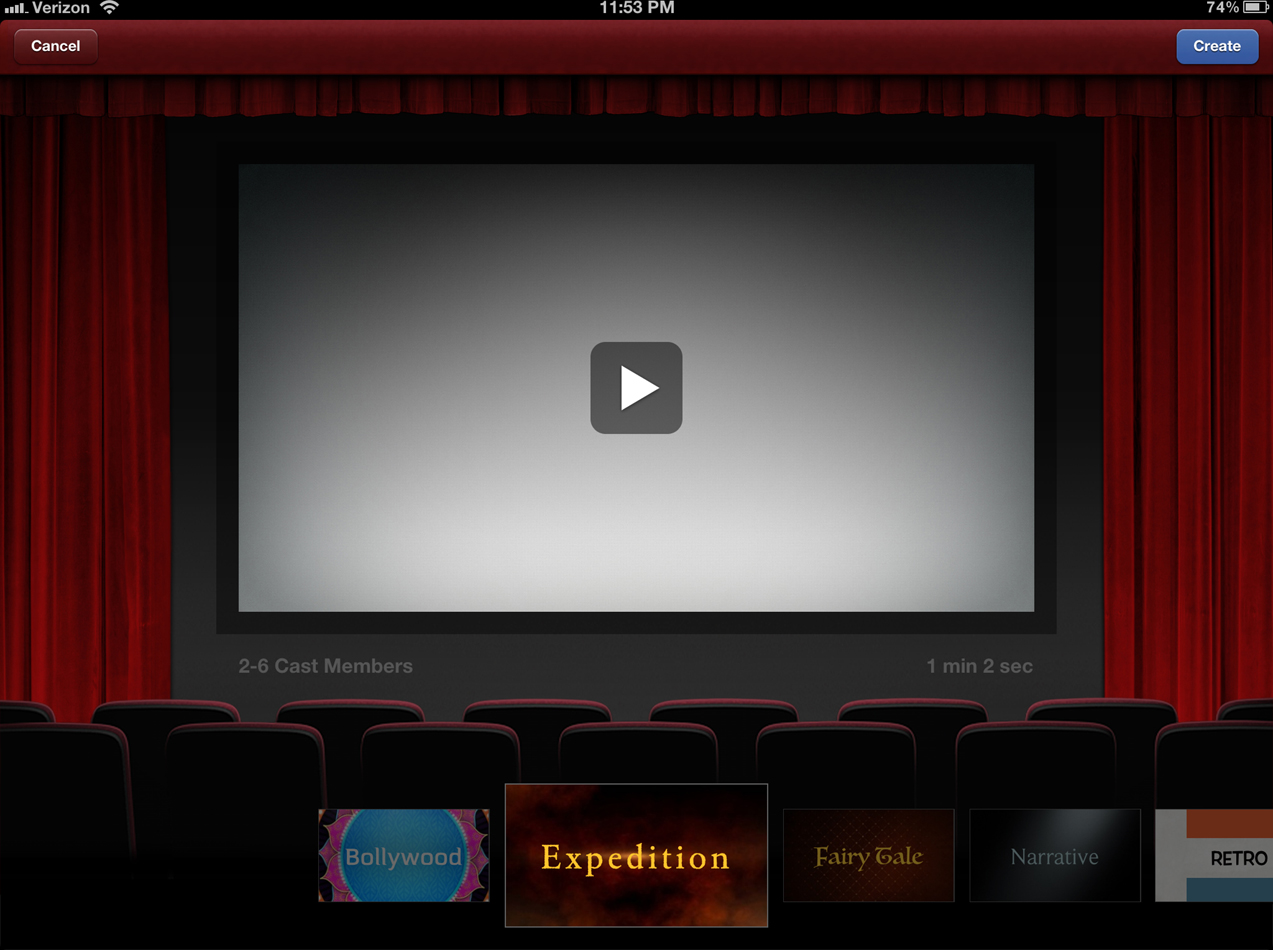
4. Swipe left or right to select a different template.

5. Tap the Play button in the center of the movie screen to preview the trailer.

6. Once you have decided on a trailer template, tap Create to start customizing the trailer.

Complete the Outline
iMovie presents your new trailer in two tabs for editing, the Outline and the Storyboard. The Outline presents the basic information about who is starring in your movie and who was involved in creating your movie. Begin editing the contents of the trailer by completing the Outline.
1. If not already selected, tap the Outline tab.
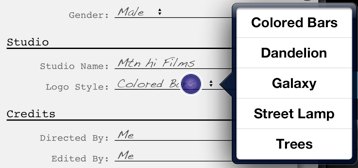
2. Complete each of the Outline text items by tapping a field, and then entering text when the keyboard appears.

A couple of special fields present pop-up menus for entering information such as Gender and Logo Style (which presents a variety of studio logos for use within the trailer.
Edit the Storyboard
The Storyboard tab lets you edit the trailer’s text and video clips. The controls will change slightly depending on your tapping of a text field or a video well.
1. If not already selected, tap the Storyboard tab.
2. Tap a text field (the blue bars) to enter your title information, and then tap the Done key.

3. Tap a video well to replace the placeholder with one of your video clips.
4. From the Video Browser, select a clip.
A selection of the clip is marked based on the duration of the chosen video well.
5. Drag the clip’s selection to find the best portion for the trailer’s video well.
6. Tap the arrow to drop the selection into the chosen video well.

You may modify the video within a well by tapping the well and then selecting a different portion of the clip by dragging the selection indicator, activating/deactivating the clip’s audio, or removing the clip from the well.
Also, you may record a video directly into a selected video well by choosing the camera icon in the browser.
Note
You can preview the trailer from a specific title or video well by having the item selected, and then tapping the Play button.
Completing the Trailer
After you have filled out the Outline and Storyboard tabs, you may use the Play buttons in the viewer to watch the trailer. Now that you finished the editing, return to the project screen for the last steps.
1. Tap the My Projects button above or next to the viewer.
2. With your new trailer selected, you may tap the marquee text to rename the trailer, tap the Play button to watch your trailer fullscreen, or tap the Share button to upload your trailer to the web. More on Sharing in the next section
Share the Project
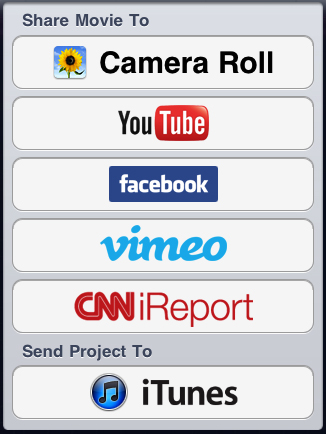
After completing your movie, it’s time to show off your project to others. iMovie’s built-in Share features include sharing to the web, iTunes, and Apple TV.
Web
iMovie lets you quickly share your project via web services such as YouTube, Vimeo, Facebook, and CNN iReport. These built-in services allow you to upload your finished video to your account with just a few taps.
1. If necessary, return the project screen by tapping the My Projects button.
2. Swipe the project posters to highlight the project to be shared.
3. Tap the Share button.

4. Select the desired web-based option from the list (YouTube, Facebook, Vimeo, or CNN iReport).
5. Enter your username and password, and then tap Sign In.
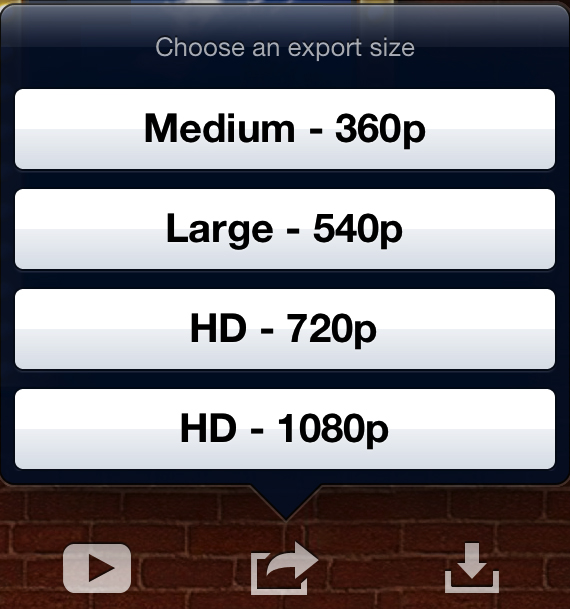
6. Depending on your selection in step 4, you may be prompted to choose a size for the video. Select the desired size.
7. Also depending on your selection in step 4, you may be asked to enter metadata about your movie such as title and tags. Enter any relevant metadata.
8. After entering the required or any optional information, tap the Share button.
iMovie processes your project and uploads the edited video and supplied information to the selected web service.
iTunes
The Send Project To iTunes Share feature gives you a way to archive your project on your computer. This feature also allows you to move a project from one device to another via iTunes on your computer.
1. If necessary, return to the project screen by tapping the My Projects button.
2. Swipe the project posters to highlight the project to be shared.
3. Tap the Share button.

4. Select iTunes from the bottom of the list.

iMovie prepares your project for transfer to iTunes during your next sync.
5. When completed, tap OK in the notification that appears.
6. To perform the transfer, connect and sync your device with your computer.
Tip
To transfer the project to another device, see the Help documentation topic “Import a Project from iTunes.”
Apple TV
AirPlay allows you to share your project live on your HDTV via an Apple TV. The project is streamed wirelessly between your iPad or iPhone and the Apple TV.
Note
The Apple TV and iMovie device must be on and connected to the same wireless network. The Apple TV must be connected via HDMI to your HDTV.
1. If necessary, return to the project screen by tapping the My Projects button.
2. Swipe the project posters to highlight the project to be displayed via AirPlay.
3. Tap the Play button.

Your project begins playing full-screen on your device.
4. Tap the AirPlay button.
iMovie begins processing your video for AirPlay. This may take a few minutes depending on the length of the movie and the device if you have not recently shared the movie with this Apple TV.
Tip
If the video controls disappeared, tap the video to reveal the controls.
5. After processing, tap the AirPlay button again to choose an AirPlay device such as an Apple TV for streaming.

The video will appear on your HDTV and begin caching.
6. The movie will begin playing after being partly cached.
7. When playback has completed, tap Done at the top left to exit AirPlay.
Camera Roll
Another Share option is to package the finished movie into a file that can play back outside of iMovie. Here are some advantages:
• iMovie is not required to play back the file.
• The original footage, music, and photos can be removed from the device and the Camera Roll version will still play back.
• The Camera Roll version is a finished version of the movie that will transfer to your computer via iPhoto upon your next sync. From there, your finished movie can be played on any device or computer that has QuickTime.
1. If necessary, return to the project screen by tapping the My Projects button.
2. Swipe the project posters to highlight the project to be displayed via AirPlay.
3. Tap the Share button.

4. Tap the Camera Roll option.

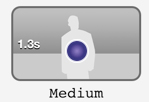
A pop-up appears with export size options. Medium exports a file that is smaller than the others both in frame size and file size. This could be a great choice for uploading later to a website; however, for creating an archive and for later repurposing, a best practice is to choose the HD size.
Tip
You can always downsize the file later, but once you “throw away” the HD quality during export, the resulting file cannot be full-quality HD again.
5. Select the desired export size via a tap.
iMovie copies the movie to your device’s Camera Roll.
6. Tap OK to the completion notification.
7. Connect and sync your device with your computer to transfer the exported file to iPhoto.
Tip
You will find the exported movie in the camera importer of iPhoto.
8. After importing the movie via iPhoto, you will find the movie file in the iPhoto Library.
Now that the movie file is on your computer, you have additional options for sharing or posting as provided by your software.
After the Edit
When the edit is complete and the movie has been shared, you may to want to clean up your device. Do you need all of that raw footage any longer? Do you even need the iMovie project for future editing?
Here are some points to keep in mind:
• If you delete a photo, raw video footage, or music from a device’s Camera Roll either manually or during sync with iTunes/iPhoto, the timeline clip using that media will go offline.

• Sync your device with iTunes and import all of the Camera Roll’s contents if you need to keep the media after the project is completed.
• If you want to keep all of the project available for future editing, but want to clear the project from the device, see the iTunes portion of the “Share the Project” section.
• To permanently erase a project from a device, tap the Delete button with the project selected on the project screen.
Moving Media to the Camera Roll
Video clips recorded directly into iMovie’s timeline are not saved in the device’s Camera Roll. These video clips are therefore not available to other projects and more importantly, not transferred to your computer during sync—once you delete the clip it is gone forever. After a timeline direct recording, you can move the video to the Camera Roll.
1. In the Media Library, tap the Video button.
2. Tap Edit.

3. Tap the blue folder button for each clip you want to move to the Camera Roll.
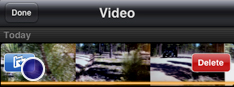
4. Tap Done.
iMovie on your iPad and iPhone makes HD editing possible wherever you are. And with the popularity of iOS devices, you’ll find many other users editing as well. When you have questions, and no fellow iMovie editor sitting nearby, check out www.apple.com/support/ipad/imovie/. Here you’ll find How-To’s, User Discussions, and Troubleshooting tips.