
Creative Techniques
Here are some fun ways you can play around with light and composition to get interesting results. Remember that there is no “right” way to take a photo. Having the skills that allow you to think outside the box is where the fun truly is.
Zoom-Panning
In Chapter 4, I walked you through a technique known as panning, in which you capture motion blur by following your subject with your camera as they move across your frame. Generally, panning requires that your subject move horizontally across your scene to be effective, but that certainly isn’t the only way to depict motion with a panning technique (Figure 10.8).
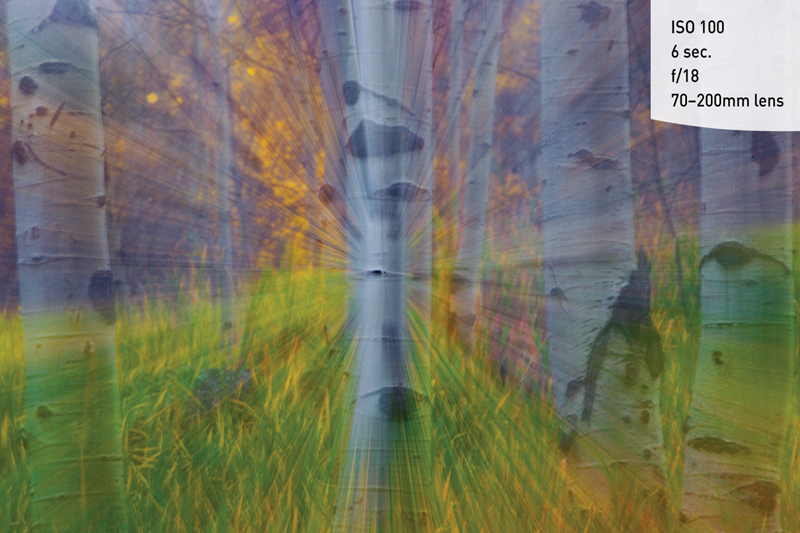
Zoom-panning creates the illusion of movement toward your camera. By using a slow shutter speed and adjusting the zoom level of your lens while the image is being taken, you can create unique images that seem to jump out at the viewer (Figure 10.9). This is a great technique to use when you are shooting a scene that might otherwise be uninteresting.
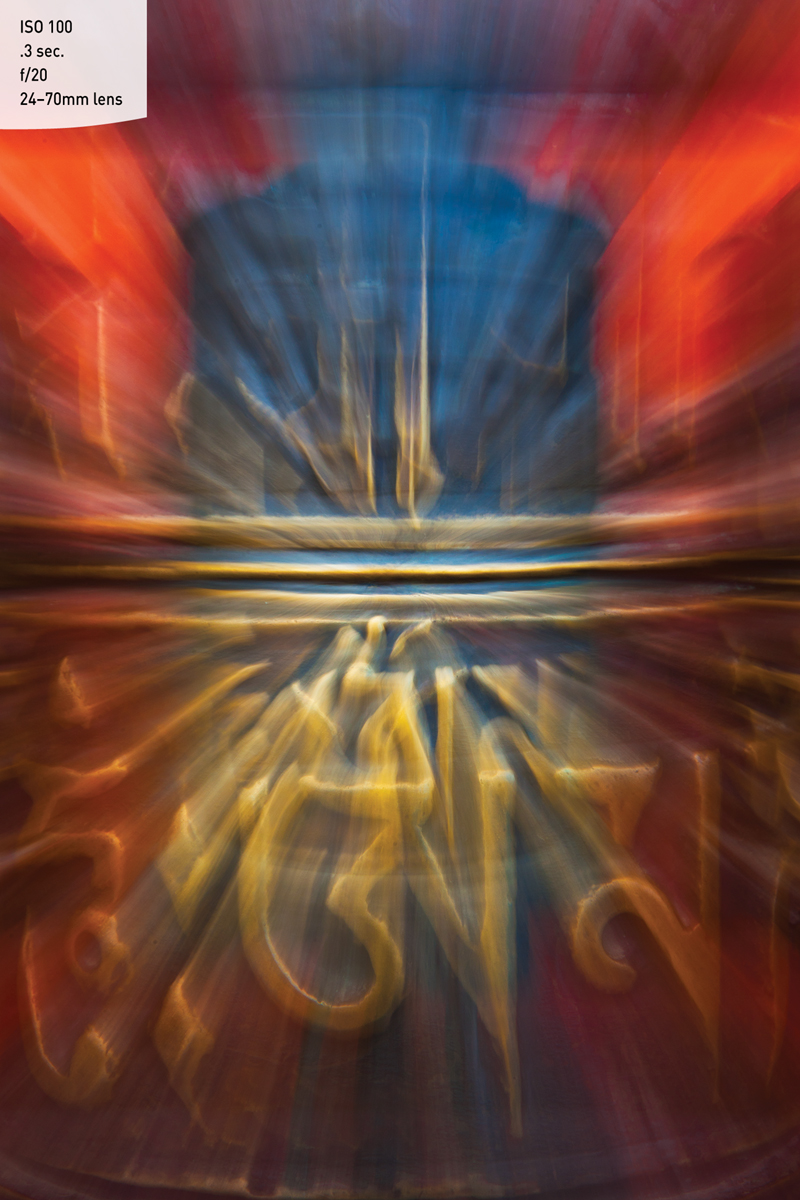
Figure 10.9. This Buddhist prayer wheel in Kathmandu was interesting, but capturing its beauty called for a more creative approach.
Creating the Zoom-Panning Effect
1. Set your ISO to 100 to ensure that you can use a shutter speed that’s long enough to capture the zoom-panning effect.
2. Set your camera to Tv mode, and start with a shutter speed of from 1/5 of a second to 2 seconds. This forces your camera to use a very narrow aperture (f/22, for example).
3. Center your subject in the frame, and zoom out until you are happy with the composition.
4. Press the shutter button halfway to set focus.
5. While pressing the shutter button, zoom in toward your subject. You want the zoom to happen while the shutter is open.
6. Look at the results, and adjust your settings accordingly. The challenge is in finding the right zoom speed.
Light-Painting
Another fun technique that is worth experimenting with is light-painting (Figure 10.10). It is practiced in the dark, such as in the middle of the night. You will need a tripod (because you will need to use long exposures) and a powerful flashlight or some other light source.
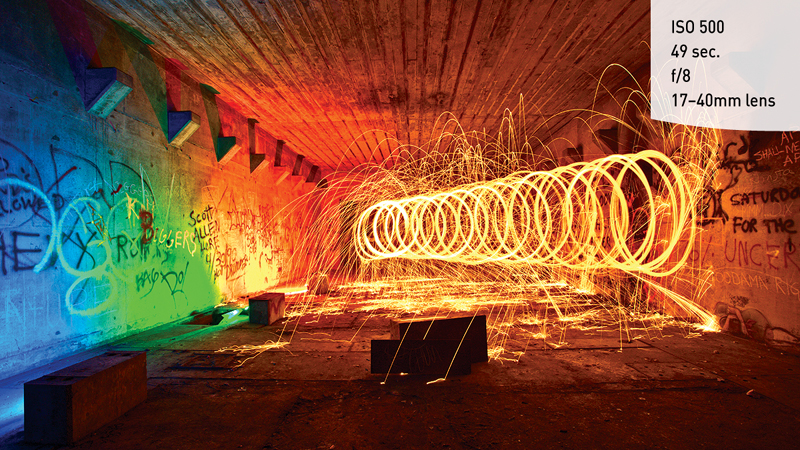
Figure 10.10. By using a very long exposure and adding additional light to a scene, you can make some truly creative photographs. (Photo by Michael Bonocore)
In essence, you paint with light while your camera takes the image with a long shutter speed (Figure 10.11). Some of the most common light sources used in light painting are flashlights, LED laser pens, and even steel wool that has been set on fire (although I suggest you use caution with the latter). Because you are working in the dark, you can even step into the frame while your image is exposing, and you won’t appear in the final image unless you shine light on yourself.

Figure 10.11. I lit up the foreground and the outside of the tent with my flashlight, and my wife lit up the inside of the tent with her flashlight.
Setting Up and Shooting for Light-Painting
1. Place your camera on a tripod in a dark environment.
2. If the environment is extremely dark, set your camera to Bulb mode with a large aperture. If there is some ambient light, set your camera to Av mode and use an aperture that is large enough to capture your light-painting but small enough for a shutter speed of at least several seconds.
3. Using a cable release or the self-timer, press the shutter button. (If you’re using Bulb mode, you’ll need a cable release.)
4. With the shutter open, use a flashlight, sparkler, LED laser, or any other powerful light source to create your image. The creative possibilities are endless!