
4. Set Your White Balance
White balance correction is the process of rendering accurate colors in your final image. A light source emits a certain color cast. For example, a sunrise emits a warm color cast (which generally involves yellows and oranges), whereas sunlight on an overcast day emits a colder, or bluish, tone. The white balance setting on your camera attempts to equal out this color cast and produce a more balanced image.
When you select a white balance, you are selecting changes in the color temperature of your frame, which is measured along the Kelvin (K) temperature scale. Kelvin temperatures refer to colors in the visible spectrum. The visible spectrum is the range of light that the human eye can see (think of a rainbow or the color bands that come out of a spectrum). The Kelvin temperature scale identifies the thermodynamic temperature of a given color of light. Put simply, reds and yellows are “warm” and greens and blues are “cool.” Even more confusing can be the actual temperature ratings. Warm temperatures are typically lower on the Kelvin scale, ranging from 3000 degrees to 5000 degrees, while cool temperatures run from 5500 degrees to around 10000 degrees.
While the vast majority of photographers leave their white balance setting on Auto, you can always manually set it if you are not getting the results you want in a given scene. For example, you can use the Shade setting when you are shooting in a covered area to add more warm tones to your image and cancel out the colder blue tones that might be prevalent.
Here is a list of your white balance options:
• Auto: This is the default setting. The camera will determine what the color temperature of your image is and attempt to balance the color cast with the appropriate setting.
• Daylight: Used when you are shooting in daylight/sunlight.
• Shade: Used when working in shaded areas that are still using sunlight as the dominant light source.
• Cloudy: The choice for overcast or very cloudy days.
• Tungsten: Used when shooting inside a building with standard household lights.
• Fluorescent: If there is a fluorescent light source in your image, this setting will allow you to get rid of the blue/green color cast.
• Flash: If you are using a flash in your image, this setting will account for the colder color tones common to flash units.
• Custom: Allows you to set the white balance for a specific light source. You take a photo of something that is pure white, and the camera adjusts the white balance based on that image.
• Color Temperature: Allows you to manually set the Kelvin color temperature for a given scene.
1. Turn the camera on.
2. Press the Menu button on the back of your camera.
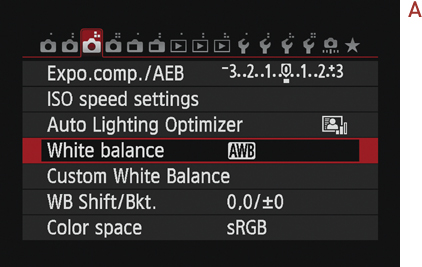
3. Use the Main dial to select the third menu tab from the left.
4. Use the Multi-Controller to select the White balance setting, and hit the Set button (A).
5. Use the Multi-Controller to select the appropriate white balance (B).
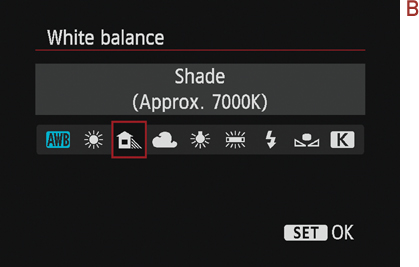
6. Hit the Set button to confirm, and hit the Menu button to exit the menu system.