
Picture Styles
Picture styles on the 6D allow you to enhance your images in-camera. For example, if you choose the Landscape picture style, you will notice an increase in the saturation of the blues and greens in your image. In the Basic zone modes, the picture style is automatically selected for you; in the Creative zone modes, you can choose which picture style to apply (if any).
Note that when you are shooting in the RAW file format, the picture styles don’t “stick” to your images: When you review the image on your rear LCD monitor, the picture style will look as if it has been applied, but once you bring the RAW file into a photo-editing application, you can change the picture style to any of the other options without losing image quality. But when you’re shooting JPEGs or video, the picture style you select will be permanently embedded in the file. This is especially important to keep in mind when you are using the Monochrome picture style, since you will permanently make your JPEG or video black and white, losing all color data in the process.
There are six styles to choose from:
• Standard: This general-purpose style is used to create crisp images with bold, vibrant colors. It is suitable for most scenes.
• Portrait: This style enhances the colors in skin tones and decreases sharpness for a softer-looking image.
• Landscape: This style enhances blues and greens, two colors that are typically visible in a landscape image.
• Neutral: This style creates natural colors and is a good choice if you intend to edit your photos on the computer.
• Faithful: This picture style is similar to the Neutral style but creates better color when shooting in daylight-balanced light. It’s also a good option if you prefer to edit your photos on the computer.
• Monochrome: This style creates black and white images. If you use this style in JPEG or video mode, you cannot revert back to color.
Setting the Picture Style in the Menu
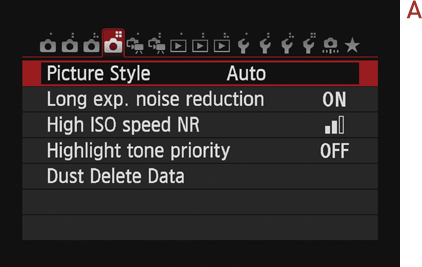
1. Press the Menu button on the back of the camera, and then use the Multi-Controller to get to the fourth Camera menu tab (A). Press the Set button.
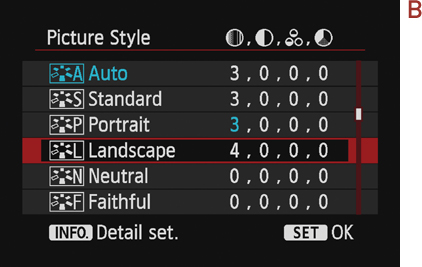
2. Use either the Main dial or the Quick Control dial to scroll through the styles (B). When you’ve selected the one you want to use, press the Set button.
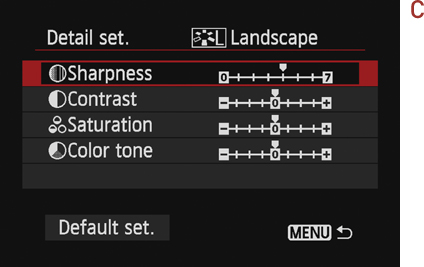
3. To edit any of the picture styles, select the one you want to change and then press the Info button on the back of your camera. You can then adjust that picture style’s sharpness, contrast, saturation, and color tone (C).
Setting the Picture Style in Live View
1. Press the Live View Shooting button to go into Live View mode.
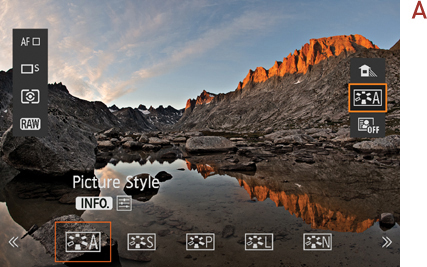
2. Press the Quick Control button on the back of the camera, and then use the Multi-Controller to scroll down to the picture style icon (A). Press the Set button.
3. Use the Main dial on the top of the camera to select a picture style.
4. To edit the selected picture style, press the Info button, use the Multi-Controller or the Quick Control dial to select a parameter, and use the Main dial to make changes (B). Press the Set button to lock in your changes.
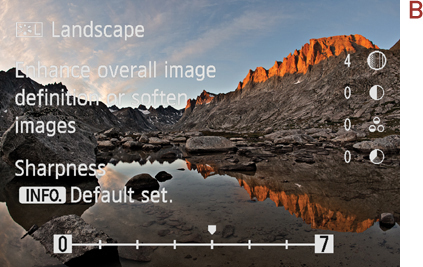
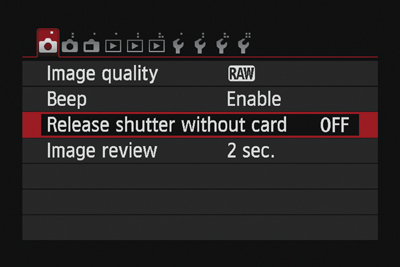
Figure 3.2. Your access to the settings in the menu system is limited when you are in Basic zone shooting modes.