
Hour 21. Customizing Bootstrap and Your Bootstrap Website
What You’ll Learn in This Hour:
![]() How to use your own CSS to customize Bootstrap sites
How to use your own CSS to customize Bootstrap sites
![]() How to customize the Less files and jQuery plugins your site uses
How to customize the Less files and jQuery plugins your site uses
![]() How to customize the CSS with the Bootstrap Less variables
How to customize the CSS with the Bootstrap Less variables
![]() How to download your customizations with the Bootstrap Customizer
How to download your customizations with the Bootstrap Customizer
Bootstrap is a very flexible framework that you can use to create responsive websites. It comes with a standard design and color scheme that many people like. But if you want to create a site that is more customized, there are several ways to do it. You can write your own CSS and apply that after the Bootstrap CSS. Or you can use the Bootstrap customization page to create a custom build of Bootstrap that has the styles and colors you need for your website.
In this hour, you learn how to add your own custom CSS files to Bootstrap web pages. You also learn how to go through the entire Bootstrap customization form to create a custom build for your website.
Using Your Own CSS
The easiest way to customize Bootstrap is to use your own CSS. To do this, download the standard Bootstrap files (refer to Hour 2, “Downloading and Installing Bootstrap”) and then add your own CSS to the pages.
You can add your own custom CSS in three ways:
![]() In the HTML elements using the
In the HTML elements using the style attribute
![]() In the
In the <head> of your pages using the <style> element
![]() In a linked style sheet
In a linked style sheet
Using the style attribute is the easiest way. You simply place the styles you want as a value for the attribute. For instance, if you want to change a paragraph color to red, you write
<p style="color: red;">
But if you use the style attribute, you have to add it to every element you want to change. A better method is to use a <style> element in the head of your document. You can use this to style every paragraph on the page or just the ones with a specific class or ID, or you can use it to set up more complex CSS selectors.
Note: Learning CSS
If you don’t know CSS, there are a few things you can do. You should focus on understanding selectors. For instance, a class selector starts with a period (.) and an ID selector starts with a hash (#). Don’t worry as much about memorizing the style properties. It’s easier to find a site you like that lists CSS style properties and reference that when you need one. A good book to get started with CSS is Sams Teach Yourself HTML and CSS in 24 Hours by Julie C. Meloni.
To style a paragraph to have red text, you must add the class .red to it (<p class="red">) and then add the following CSS to the head of your document, below the Bootstrap CSS link:
<style>
.red { color: red; }
</style>
But the best way to add CSS to your web pages is with an external style sheet that is linked in the <head> of the document:
<link href="css/styles.css" rel="stylesheet">
Just make sure that the href points to your style sheet file. Then, insert your styles just like in the <style> element:
.red { color: red; }
The most effective way to use your own style sheets with a Bootstrap site is to style the same classes that Bootstrap does. Don’t forget to use media queries to affect specific device sizes. Figure 21.1 shows a Bootstrap page with no additional styles. As you can see, right out of the box, Bootstrap does a lot to help your pages look great.
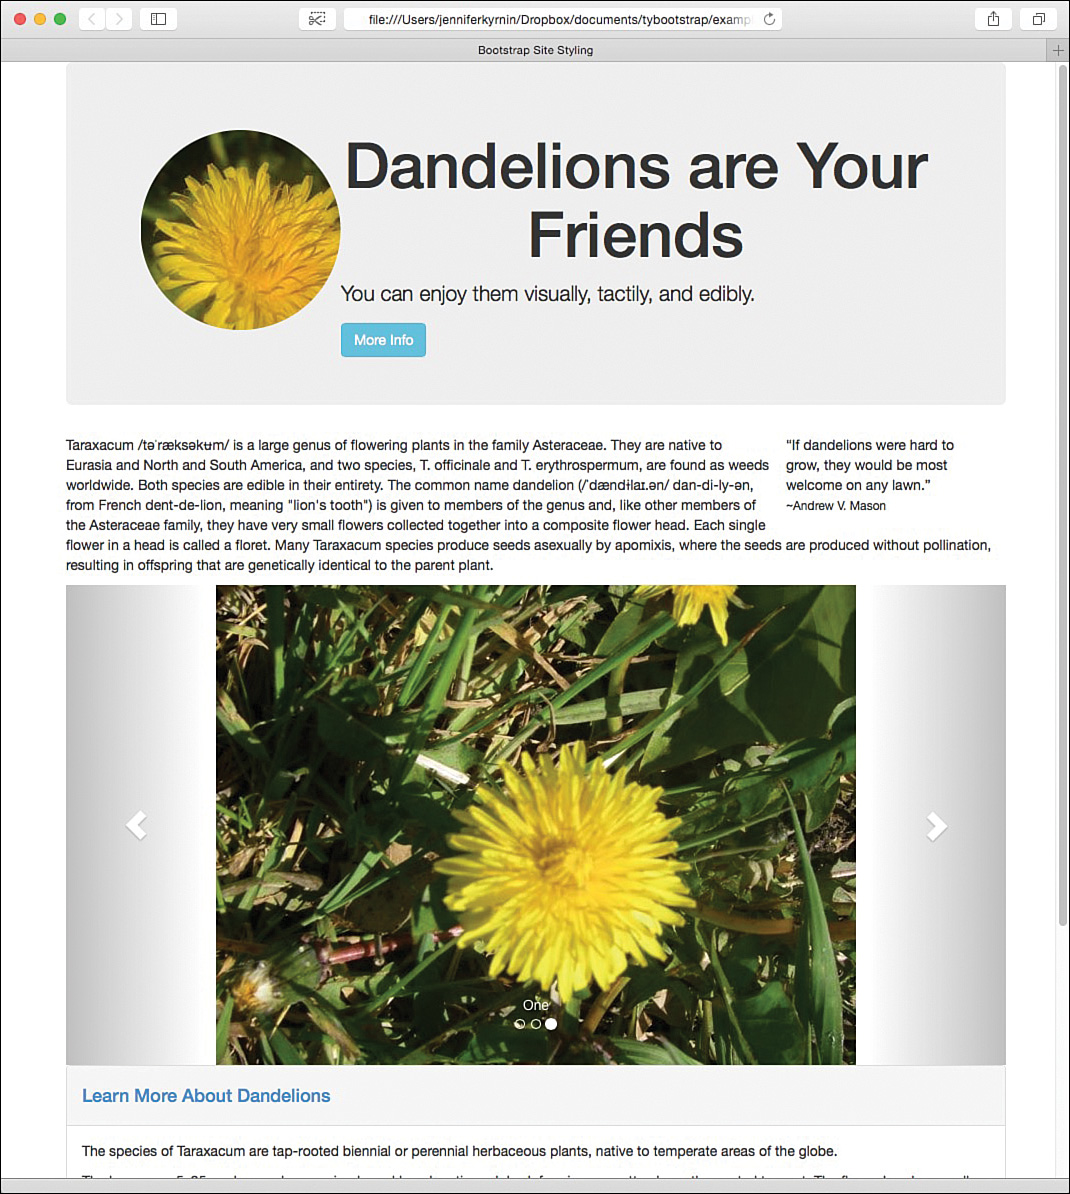
The challenge is that with no changes, every Bootstrap site looks the same—and that can get a bit bland. Figure 21.2 shows the same site as in Figure 21.1 but with a few colors changed with CSS.

Listing 21.1 shows the CSS I used to create Figure 21.1. This is the most basic of style sheets and would not be sufficient to style an entire Bootstrap website, but it works great for a start.
LISTING 21.1 CSS to Style the Dandelion Site
body {
background-color: #4C521D;
}
body > .container {
background-color: #fff;
}
.jumbotron {
background: #6c702d;
background: -moz-linear-gradient(top, #6c702d 0%, #dfdfdf 100%);
background: -webkit-gradient(linear, left top, left bottom,
color-stop(0%,#6c702d), color-stop(100%,#dfdfdf));
background: -webkit-linear-gradient(top,
#6c702d 0%,#dfdfdf 100%);
background: -o-linear-gradient(top, #6c702d 0%,#dfdfdf 100%);
background: -ms-linear-gradient(top, #6c702d 0%,#dfdfdf 100%);
background: linear-gradient(to bottom, #6c702d 0%,#dfdfdf 100%);
filter: progid:DXImageTransform.Microsoft.gradient(
startColorstr='#6c702d', endColorstr='#dfdfdf',
GradientType=0 );
color: #000;
}
.jumbotron h1 {
color: #D8AA10;
text-shadow: 4px 4px 4px #000;
}
.quote {
background-color: #6C702D;
color: #ddd;
}
.carousel-control.left {
background-image: -webkit-linear-gradient(left,
rgba(170,140,23,1) 0,rgba(0,0,0,.0001) 100%);
background-image: -o-linear-gradient(left,rgba(170,140,23,1) 0,
rgba(0,0,0,.0001) 100%);
background-image: -webkit-gradient(linear,left top,right top,
from(rgba(170,140,23,1)),to(rgba(0,0,0,.0001)));
background-image: linear-gradient(to right,rgba(170,140,23,1) 0,
rgba(0,0,0,.0001) 100%);
filter: progid:DXImageTransform.Microsoft.gradient(
startColorstr='#80000000', endColorstr='#00000000',
GradientType=1);
}
.carousel-control.right {
background-image: -webkit-linear-gradient(left,
rgba(0,0,0,.0001) 0,rgba(170,140,23,1) 100%);
background-image: -o-linear-gradient(left,rgba(0,0,0,.0001) 0,
rgba(170,140,23,1) 100%);
background-image: -webkit-gradient(linear,left top,right top,
from(rgba(0,0,0,.0001)),to(rgba(170,140,23,1)));
background-image: linear-gradient(to right,rgba(0,0,0,.0001) 0,
rgba(170,140,23,1) 100%);
filter: progid:DXImageTransform.Microsoft.gradient(
startColorstr='#00000000', endColorstr='#80000000',
GradientType=1);
}
h1, h2, h3, h4, h5, h6, a, a:link {
color: #D8AA10;
}
.panel-default>.panel-heading {
background-color: rgba(179,196,170,.25);
}
.btn.btn-info {
background-color: #d8aa00;
border-color: #aa8c10;
}
Try it Yourself: Changing Bootstrap Styles
1. Build your web page using Bootstrap, and then open it in Chrome or Safari.
2. Right-click the web page element you want to style, and select Inspect Element, as in Figure 21.3.

3. Click the element in the HTML column (on the left); you will see the CSS that styles it on the right.
4. Copy the applicable CSS into your style sheet.
5. Change the styles to reflect your design.
Using CSS to customize your Bootstrap site is a quick and easy way to do it. Although you can use the style attribute, the <style> tag, or external style sheets to get the styles onto the page, the best method is to use external style sheets. This helps your pages to load more quickly, and you can share more styles across all the pages of your site.
Using the Bootstrap Customizer
Your other option to customize your Bootstrap website is to customize your Bootstrap files themselves. This can take more time than just updating a few CSS styles, but it has a few advantages:
![]() Custom Bootstrap files will be smaller than original files combined with custom CSS, so your site will load more quickly.
Custom Bootstrap files will be smaller than original files combined with custom CSS, so your site will load more quickly.
![]() By customizing the JavaScript, you can reduce the size even more.
By customizing the JavaScript, you can reduce the size even more.
![]() The CSS will be more comprehensive, making future changes more likely to just work.
The CSS will be more comprehensive, making future changes more likely to just work.
![]() You can change features that aren’t localized so that your site is more consistent.
You can change features that aren’t localized so that your site is more consistent.
But as with everything, there are also some drawbacks to using the Bootstrap customization script:
![]() Because you have to use the generator, it can be a different workflow and thus slow down your design schedule.
Because you have to use the generator, it can be a different workflow and thus slow down your design schedule.
![]() The online generator does not have any way to preview your styles, so it can be difficult to know whether your changes will look good.
The online generator does not have any way to preview your styles, so it can be difficult to know whether your changes will look good.
![]() When Bootstrap is updated, you have to rebuild your files with your styles.
When Bootstrap is updated, you have to rebuild your files with your styles.
To customize the Bootstrap files, you should use the generator from Bootstrap (http://getbootstrap.com/customize/). The following sections describe how to use the customizer.
Caution: Customizer Doesn’t Work in Safari
If you browse with Safari, you will need to get a different browser to use the customizer. In Safari saving the generated zip file doesn’t work. The script then opens the zip in a second tab as a data URI that has to be manually saved. Because this is very confusing and difficult, the Bootstrap team decided to disable Safari. If you normally use Safari, you need to switch to Chrome, Firefox, or Opera to customize Bootstrap.
Less Files and jQuery Plugins
The first part of the customizer, as shown in Figure 21.4, is the Less files you want to include in your website.

This section customizes the Less files for the CSS, components, and JavaScripts of Bootstrap. These were all covered in the previous hours of this book.
To create the most efficient set of Bootstrap files, you should deselect all the items you don’t use and don’t plan on using on your website. Remember that you can always recompile your customizations if you want to add something back later.
The jQuery plugins section (pictured in Figure 21.5) enables you to customize the JavaScript for your site. If you removed a component or JavaScript from the Less files, you should remove them from the JavaScript as well.

The customizer produces two JavaScript files: bootstrap.js and bootstrap.min.js. It’s best to use the minified file (bootstrap.min.js) in production because it’s smaller and more efficient.
Remember that even the customized JavaScript requires jQuery installed on the site as well.
Less Variables
This is the part of the customization form that gets interesting. As you can see from the navigation in Figure 21.6, there are more than 30 types of things you can customize.

The first thing you should do is come up with your color scheme. Here are two free online tools that let you create a color scheme from a color or from a photo:
![]() Paletton (http://paletton.com/)—Paletton lets you pick a color scheme with a starting color and a configuration (such as monochromatic or complementary). This is a great generator for when you have a color you’d like to focus your palette on.
Paletton (http://paletton.com/)—Paletton lets you pick a color scheme with a starting color and a configuration (such as monochromatic or complementary). This is a great generator for when you have a color you’d like to focus your palette on.
![]() PaletteGenerator (http://palettegenerator.com/)—PaletteGenerator lets you upload an image, select a section of it, and generate a palette of 2–10 colors.
PaletteGenerator (http://palettegenerator.com/)—PaletteGenerator lets you upload an image, select a section of it, and generate a palette of 2–10 colors.
After you have your colors, you can start playing with the customizer Less variables. Some of the colors you will need to define with your palette include
![]() Contextual colors—These are the
Contextual colors—These are the @brand-* colors in the first section. You must define a color for primary, success, info, warning, and danger.
![]() Background, text, and link colors—These are set in the Scaffolding section. The defaults for these values are white (
Background, text, and link colors—These are set in the Scaffolding section. The defaults for these values are white (#fff), dark gray using the @gray-dark variable, and whatever you set for @brand-primary. You also can change the link hover color, but leaving it darken(@link-color, 15%) uses a Less mixin to use the same link color only 15% darker. You will learn more about Less mixins in Hour 23, “Using Less and Sass with Bootstrap.”
![]() All the other components—This includes tables, buttons, forms, dropdowns, navbars, navs, tabs, pills, pagination, pagers, the Jumbotron, form states and alerts, tooltips, popovers, labels, modals, alerts, progress bars, list groups, panels, thumbnails, wells, badges, breadcrumbs, carousels, close, code, and type.
All the other components—This includes tables, buttons, forms, dropdowns, navbars, navs, tabs, pills, pagination, pagers, the Jumbotron, form states and alerts, tooltips, popovers, labels, modals, alerts, progress bars, list groups, panels, thumbnails, wells, badges, breadcrumbs, carousels, close, code, and type.
Note: Keep Your Colors Consistent
One good rule of thumb is to use the same colors for similar things. The Bootstrap Less variables make that easier because you need to define a variable only once and then you can use it in all the other similar variables. For example, if you want all your @*-primary elements to be colored #D1A40C (a dark mustard yellow), you can define @brand-primary in the “Colors” section and then use @brand-primary instead of a color code in the rest of the customization form. I don’t know about you, but it’s much easier for me to remember @brand-primary than #D1A40C.
Another way that you can customize your designs so they don’t look like a typical Bootstrap site is to adjust the typography and fonts. The “Typography” and “Iconography” sections are the first place to start. You should come up with three font stacks:
![]()
@font-family-sans-serif—Sans-serif fonts like Helvetica Neue and Arial
![]()
@font-family-serif—Serif fonts like Times New Roman and Georgia
![]()
@font-family-monospace—Monospace fonts like Courier New and Monaco
Bootstrap uses the sans-serif font stack as the default font family. But you can change this to either the serif or the monospace fonts by changing the variable in the @font-family-base.
Another thing you’ll notice in the “Typography” section are the terms ceil and floor. These refer to rounding numbers up or down, respectively. For example, @font-size-large is defined as ceil((@font-size-base * 1.25)). This means that the large font size is the base font size (@font-size-base) times 1.25 and then rounded up (ceil). The floor term means the number should be rounded down.
Finally, you can look at the layout designs. You can use variables to adjust the media query breakpoints, the grid system, and container sizes. These let you customize your layout including how many columns in your grid, the different widths for media queries, and the size of your containers. I recommend not changing the @screen-*-max variables. They are currently set to one pixel smaller than the next highest size. In other words, the maximum for extra small screens is the minimum for the small screens minus one. This ensures that there aren’t any gaps in the breakpoints that wouldn’t be styled.
Downloading and Installing Your Customizations
After you’ve filled out all your customizations, you download the files by clicking the Compile and Download button shown in Figure 21.7.

After your configuration has been compiled, a zip file is downloaded to your computer and you’re given a URL where you can go back and continue to edit that custom build as necessary.
When you open the zip file, you’ll find a config.json file you can use to upload your configuration later. You’ll also have custom CSS, fonts, and JavaScript files. Install those on your website just like you did in Hour 2.
The rest of the files in the zip file look exactly like the file listing you get when you install a standard version of Bootstrap. You will get both full and minified versions of the JavaScript and CSS as well as multiple copies of the icon fonts. Best practices suggest that you use the minified versions of the files in production to keep your download speed as fast as possible.
Using a Third-Party Bootstrap Customizer
Many people find the default customizer on the Bootstrap website to be annoying because it doesn’t offer any way to preview your theme choices before you download the files.
Luckily, a lot of customizers are available on the Web that can help you see your styles before you load them on your website. I go into more detail on several Bootstrap customizers in Hour 24, “Going Further with Bootstrap.”
Summary
This hour explained how to customize Bootstrap so your site can look and act more like a unique website and less like every other Bootstrap site out there. You learned how to add your own CSS styles in the document in style attributes, <style> elements, and external style sheets. Then you learned how to use the Bootstrap customizer to create and compile your own custom version of Bootstrap.
Workshop
The workshop contains quiz questions to help you process what you’ve learned in this hour. Try to answer all the questions before you read the answers.
Q&A
Q. When I added my custom CSS, it didn’t override the Bootstrap styles. What can I do?
A. The most common reasons custom CSS doesn’t override the Bootstrap ones are
![]() The custom CSS is loaded before the Bootstrap CSS—Your CSS style sheet must be the last style sheet loaded so that its styles override any others. You can ensure this by putting the style sheet right before the closing
The custom CSS is loaded before the Bootstrap CSS—Your CSS style sheet must be the last style sheet loaded so that its styles override any others. You can ensure this by putting the style sheet right before the closing </head> tag in your document.
![]() The Bootstrap styles are more specific than your styles—For example, say you had a Jumbotron with an
The Bootstrap styles are more specific than your styles—For example, say you had a Jumbotron with an <h1> element with a <small> element inside it. You could change the color of the <h1> by simply assigning a text color to the Jumbotron with .jumbotron { color: #D8AA10; }. But the <small> text would not be the correct color, as shown in Figure 21.8, because Bootstrap has a more specific style, h1 small { color: #777; }. It is more specific because it styles all <small> elements that are inside an <h1> not just any text in a Jumbotron.

You can learn more about CSS specificity on the W3C website http://www.w3.org/TR/css3-selectors/#specificity.
Q. Why would I want to use my own custom CSS? It seems like there are a lot of drawbacks to it.
A. Yes, custom CSS can be difficult to add and not cover every situation, but it is often a lot faster to use. Custom CSS is often easier to include in how you normally build web pages, and if you come across a problem like the font color in Figure 21.8, you can quickly fix it. You don’t need to know Less or understand the variables. I generally use custom CSS for my design phase, and after the entire site is designed, I work on a custom build of the Bootstrap files.
Quiz
1. Is this HTML a good way to override the Bootstrap CSS with your own?
<link href="styles.css" rel="stylesheet">
<link href="css/bootstrap.min.css" rel="stylesheet">
a. Yes, this would work perfectly.
b. No, both lines are missing a required attribute.
c. No, they are in the wrong order; the Bootstrap file should be first.
d. No, the custom style sheet must be in the same directory as the Bootstrap file.
2. Which of the following style properties are not allowed with Bootstrap?
a. CSS speech properties
b. All CSS3 properties
c. All of the above
d. None of the above
3. Which of these is the best way to override Bootstrap style properties?
a. Inline styles using the style attribute.
b. In page styles using the <style> property.
c. External style sheets.
d. None; they are all equally good.
4. Which of these is not a benefit to using the Bootstrap customizer?
a. The CSS is automatically updated.
b. The file size is smaller.
c. You can load only the plugins you need.
d. You can be sure to adjust every feature, even ones you aren’t using right away.
5. Which is a reason you wouldn’t want to use the customizer?
a. It doesn’t work on Macintosh computers.
b. It doesn’t include a preview to check your styles.
c. It forces you to use some components and plugins you might otherwise remove.
d. It customizes only some of Bootstrap.
6. Why would you deselect one of the Less files?
a. It includes a plugin you don’t need.
b. It includes a plugin that breaks your site.
c. It includes a component you don’t need.
d. It includes a component that breaks your site.
7. True or False: You can compile Bootstrap to include jQuery with the customizer.
8. Which of these is the name of the file created by the customizer that would include the Bootstrap Tooltip plugin on the site?
a. bootstrap.css
b. bootstrap.js
c. tooltip.css
d. tooltip.js
9. True or False: You must know Less to use the Bootstrap customizer.
10. What do the Less variables configure?
a. The jQuery plugins
b. How the Bootstrap minifies the JavaScript
c. Only the website colors
d. All the Bootstrap CSS
Quiz Answers
1. c. No, they are in the wrong order; the Bootstrap file should be first.
2. d. None. You can use all CSS properties with Bootstrap.
3. c. External style sheets.
4. a. The CSS is automatically updated.
5. b. It doesn’t include a preview to check your styles.
6. c. It includes a component you don’t need.
7. False.
8. b. bootstrap.js. The customizer creates a bootstrap.js file that includes the tooltip.js information.
9. False. Although it might help, most of the variables are fairly self-explanatory.
10. d. All the Bootstrap CSS.
Exercises
1. Add some custom styles to your Bootstrap site using an external style sheet or <style> tag.
2. Make some customizations with the Bootstrap customizer, and download and install them on your site. Remember that if you don’t like them, you can always revert to the original by downloading the full Bootstrap files.