
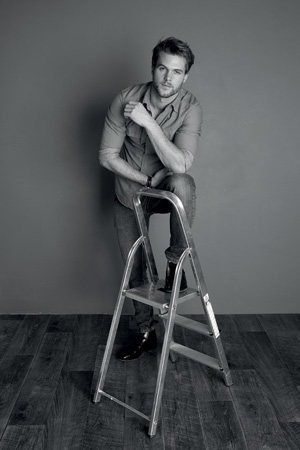
5. Say Cheese!

ISO 400 • 1/35 sec. • f/2 • 23mm lens
Settings and features to make great portraits
What’s the most photographed subject on the planet? Yes, you guessed it: people. Many of you will have purchased the Fujifilm X100S to capture some lovely portraits of friends and family. Although the X100S has a fixed lens, it offers a range of versatility beyond that of many other cameras, which makes using the X100S to photograph people and make engaging portraits easy and fun.
Shooting portraits involves much more than just awareness of your camera settings—it’s also about human interaction, backgrounds, and lighting. Taking pictures of people is one of the great joys of photography. You should experience a great sense of accomplishment when you capture the spirit and personality of someone in a photograph. In this chapter, we will cover all the key factors in making you a great portraitist.
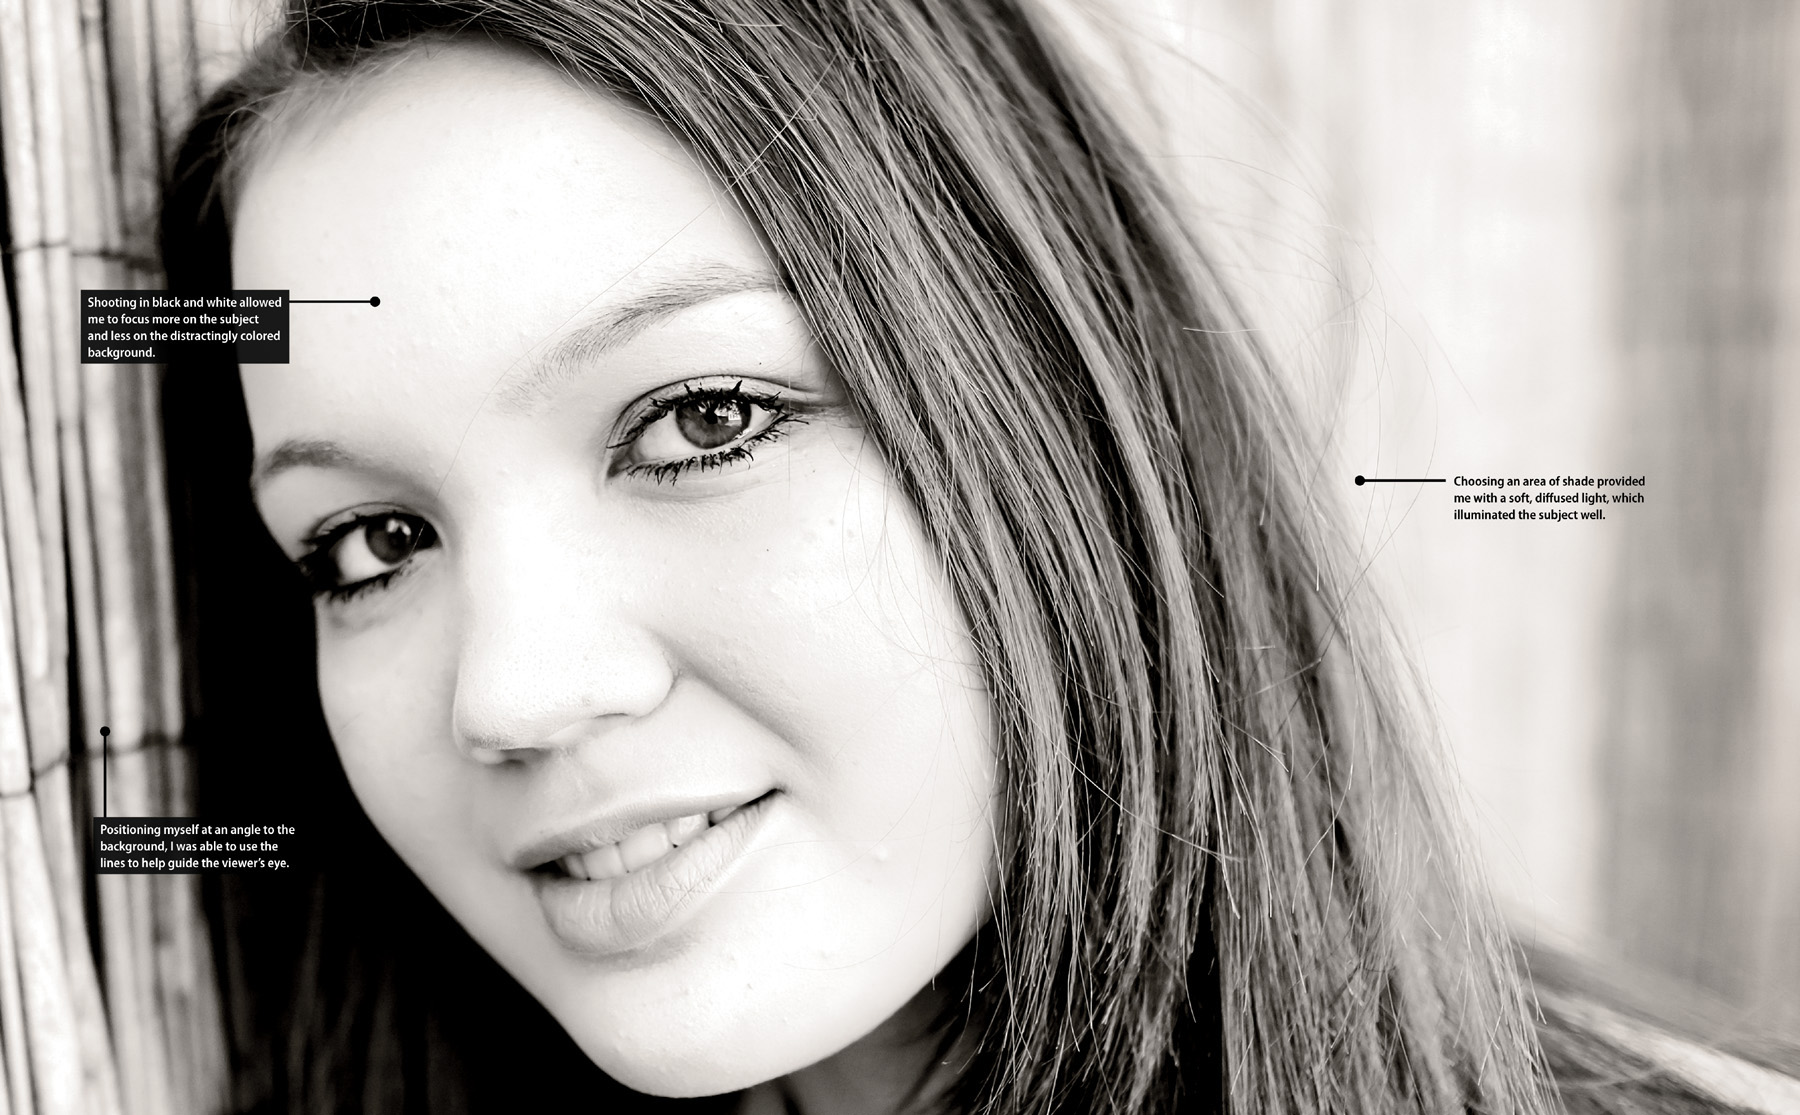
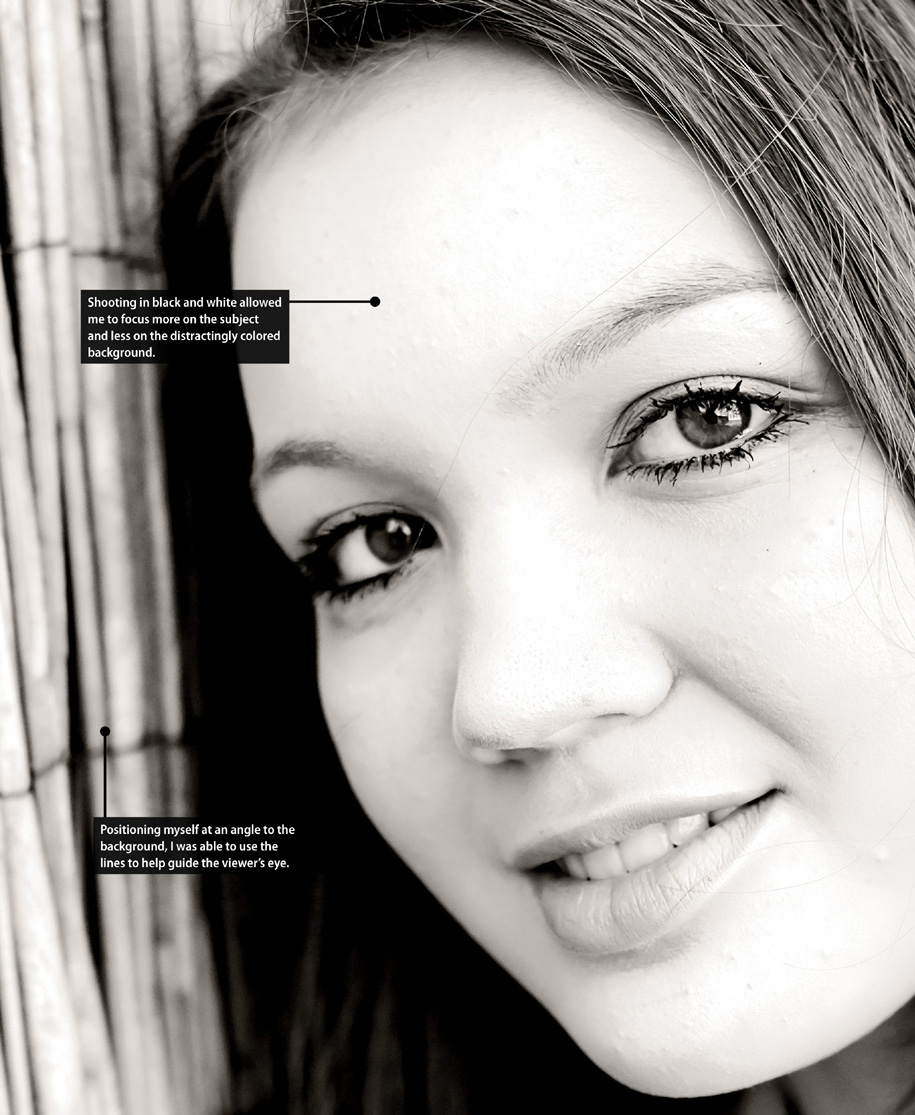
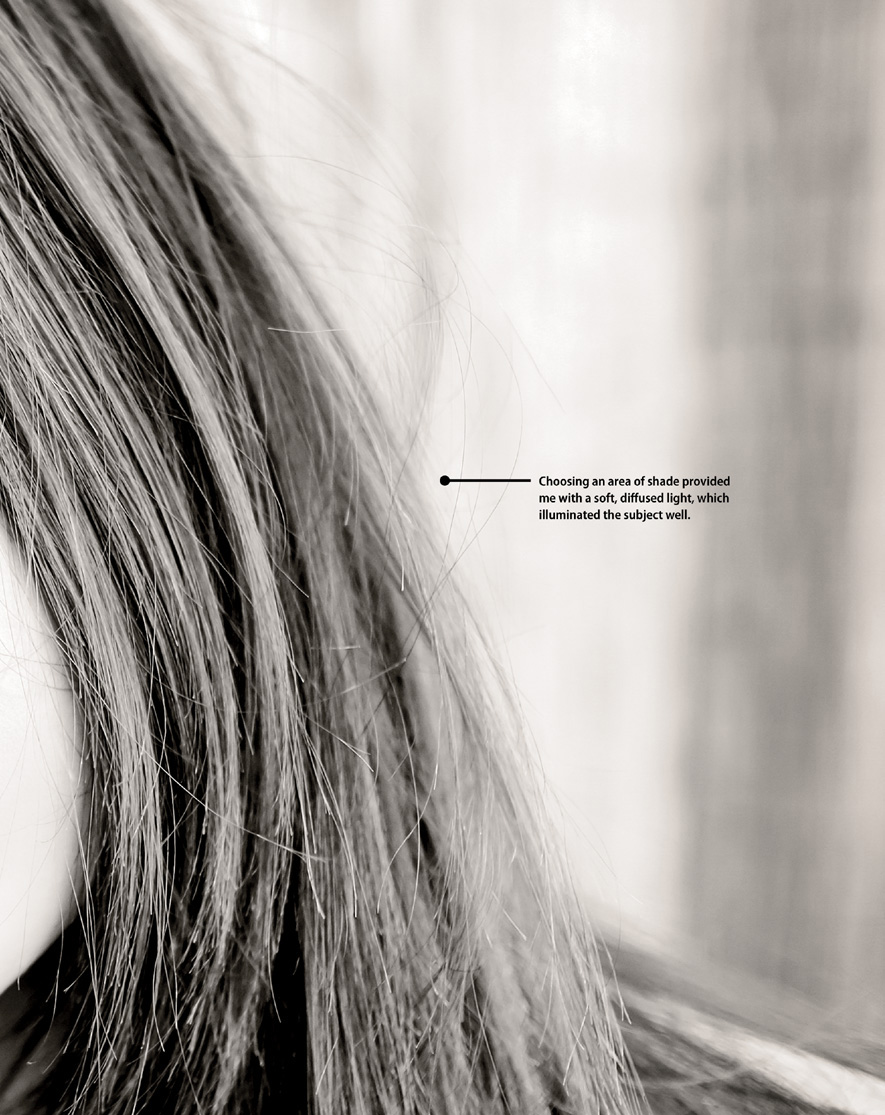
Poring Over the Picture
To emphasize my niece, Katie, I moved in close and used a large aperture to minimize the depth of field, which blurs the background. By focusing on her eyes, I was able to ensure critical sharpness while making the eyes the focal point of the image.
ISO 200 • 1/500 sec. • f/2 • 23mm lens
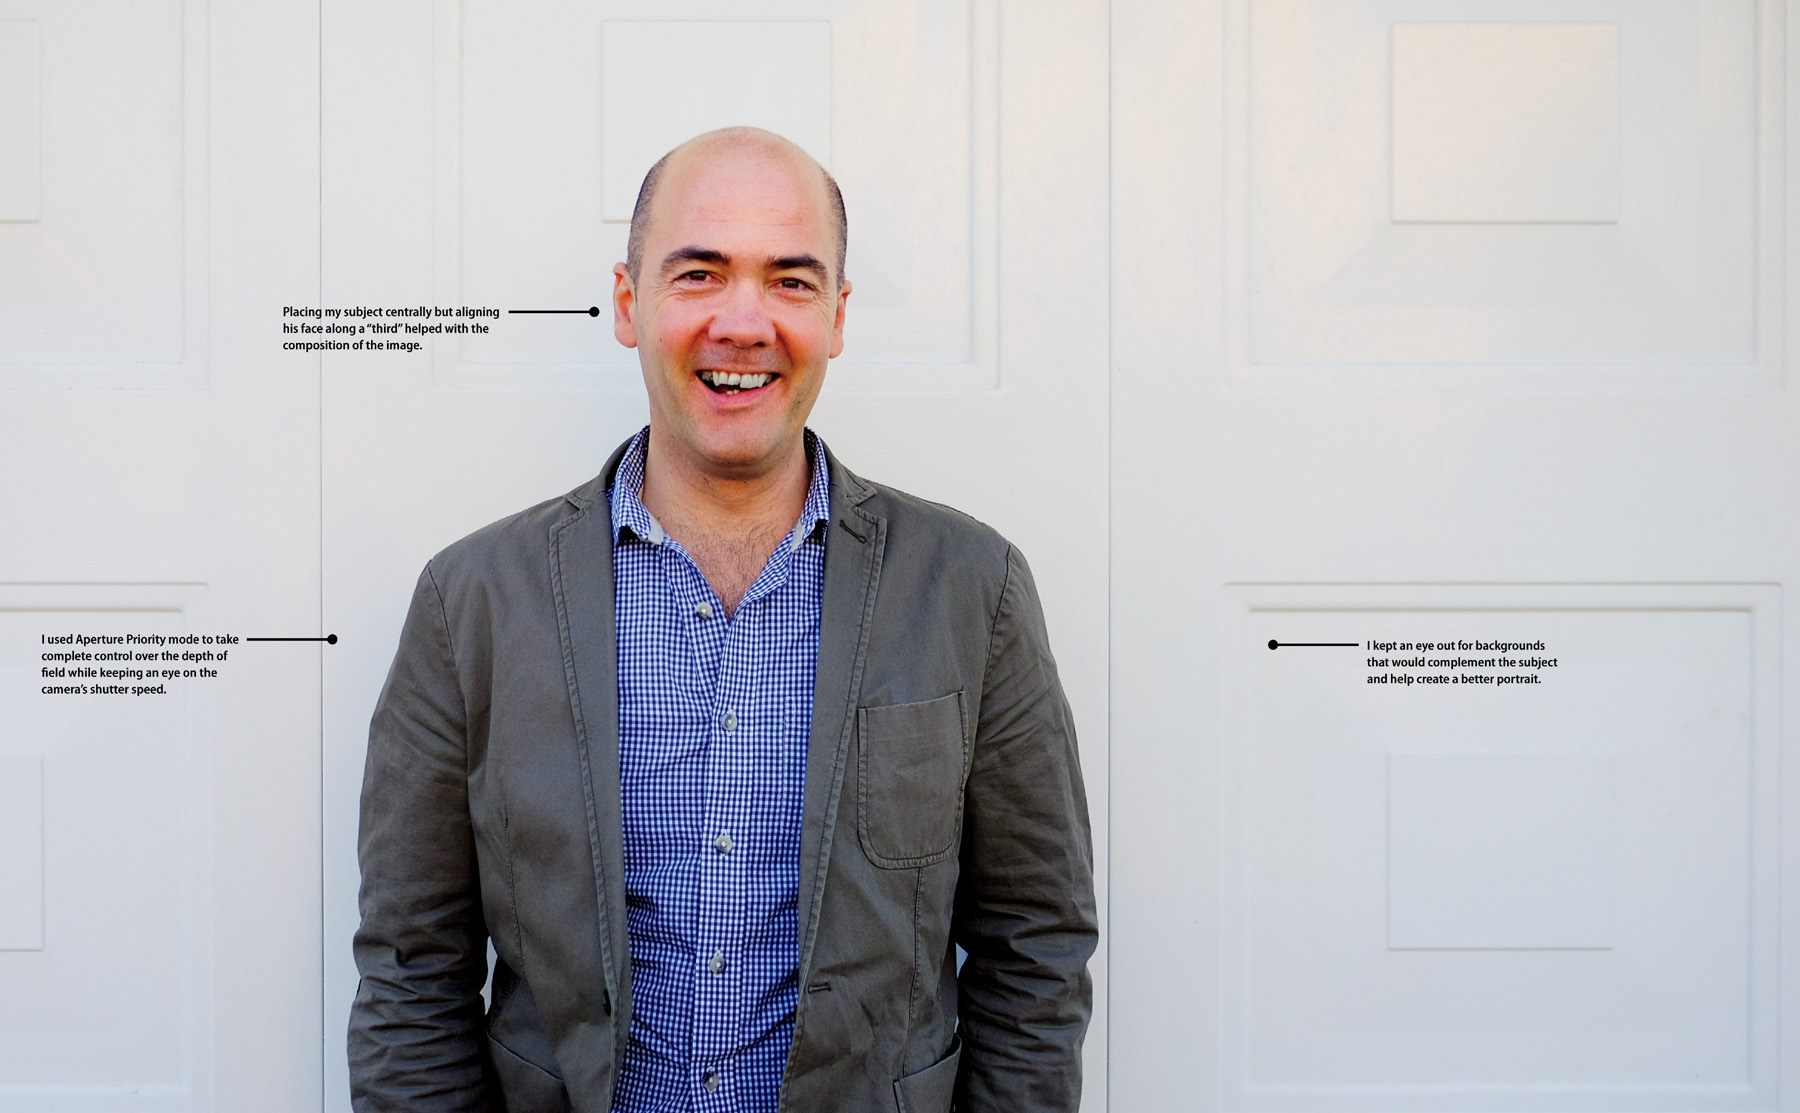
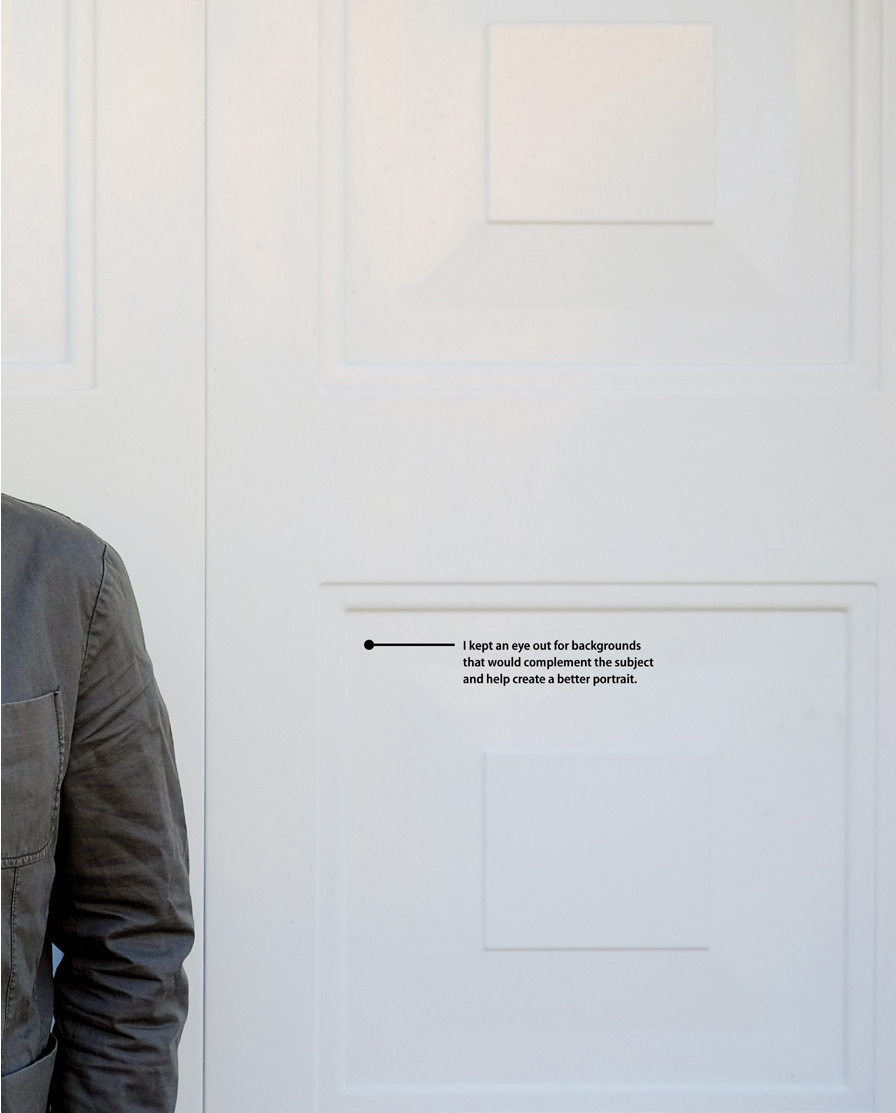
Poring Over the Picture
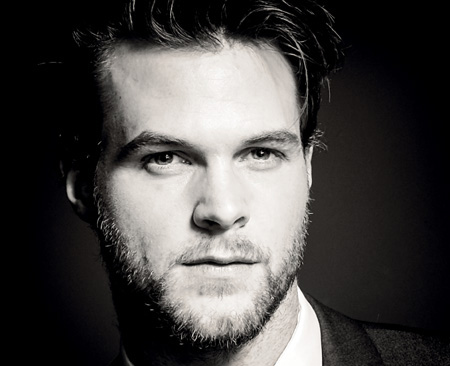
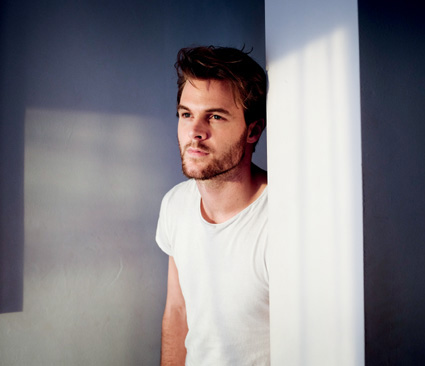
The background is often just as important as the subject. A poor choice in background, as well as poor lighting, can destroy an image. In this image, I used a simple garage door to help frame my subject, Tim. The contrast between the white garage and the clothes he is wearing helps draw the viewer’s eye to my subject and his expression.
ISO 200 • 1/2000 sec. • f/8 • 23mm lens
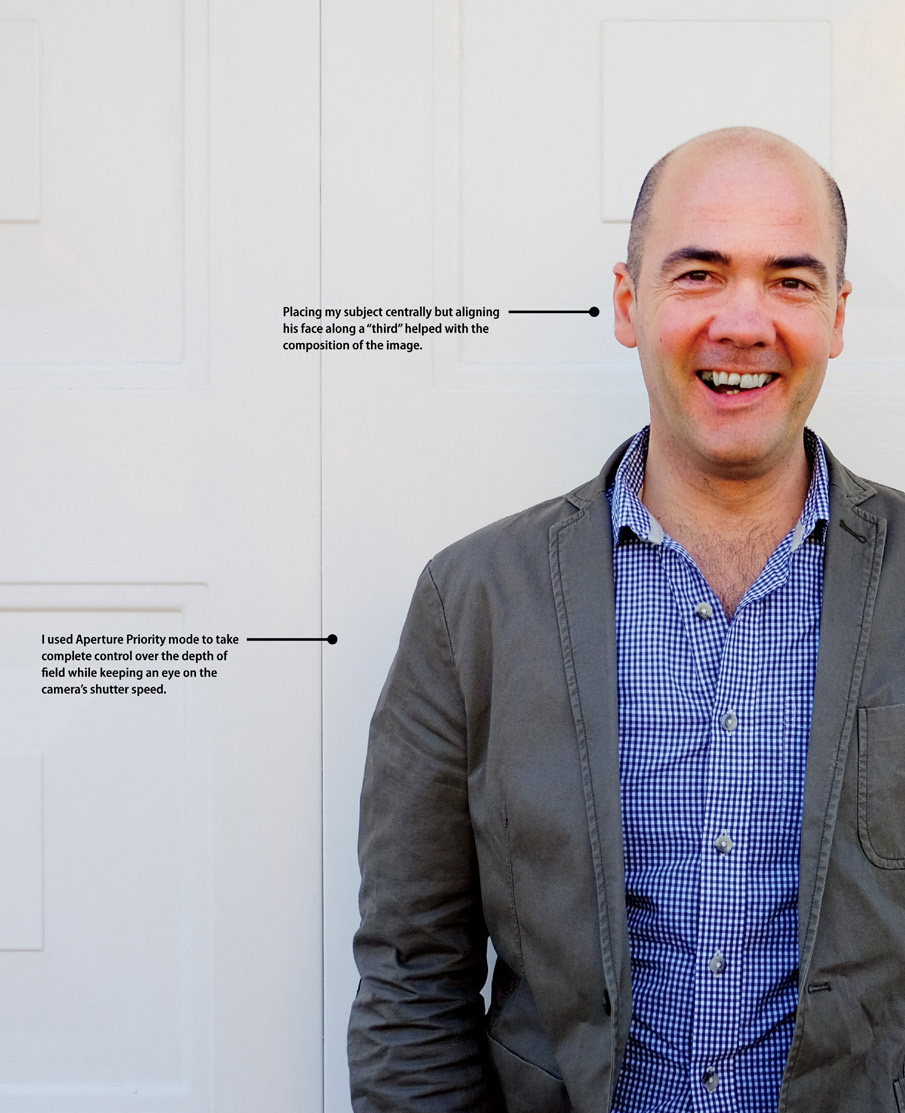
Using Aperture Priority Mode
Aperture Priority (A) mode, discussed at length in Chapter 4, “The Professional Modes,” is the mode that is most often the best choice for creating portraits. Even though the X100S has a fixed lens, Aperture Priority still gives you complete control over depth of field and allows you greater control over the look of your image, whether it’s a tightly framed headshot or a wide environmental portrait (Figure 5.1). The choice of aperture achieves more than simply a good exposure; it also becomes the means by which you begin to creatively control the look of your portraits (Figure 5.2).
ISO 640 • 1/125 sec. • f/2 • 23mm lens
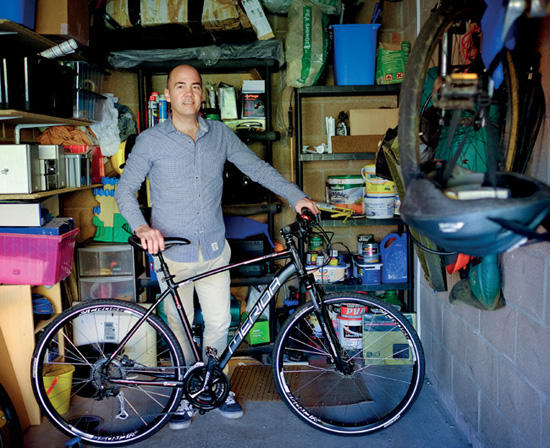
Figure 5.1 Choosing to place my subject inside the garage added context to this environmental portrait.
ISO 200 • 1/800 sec. • f/2 • 23mm lens
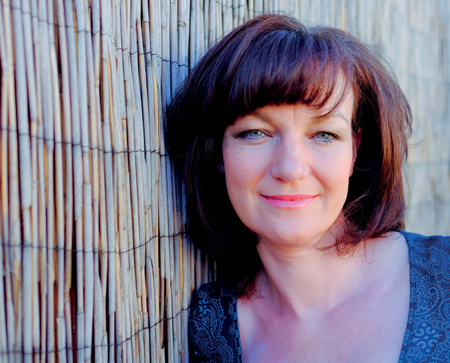
Figure 5.2 Using Aperture Priority mode to control depth of field allowed me to make an engaging portrait with the background blurred, drawing more attention to the subject.
Not only will a large aperture such as f/2 give you the narrowest depth of field, but it will also allow you to shoot in lower light with lower ISO settings. Of course, this doesn’t mean you always have to use the largest aperture for your portraits (environmental or otherwise). A good place to start is around f/4 or f/5.6. This will give you enough depth of field to keep the entire face in focus while also providing some background blur, also referred to as the “bokeh effect,” to eliminate potential distractions in the background.
Lighting and Background
Whenever you make a portrait, you should always consider the background and the lighting available to you. Even before I’ve shot an image I’m constantly thinking about the best location to shoot the portrait in terms of background and light.
Lighting can come from many sources: on-camera flash, off-camera flash, natural light, ambient light sources, etc. Generally, most of us shoot with available or natural light, perhaps with the added use of the on-camera flash for some fill light from time to time. When shooting outdoors during the day, usually an open shade area—generated by a building or a tree, for example—is going to result in the best and even light (Figure 5.3). Placing the subject just at the cusp of the shadow and light area generally will produce good results, as the subject is protected from the harsh light but also benefits from some softer light as it blends into shadow.

ISO 200 • 1/900 sec. • f/2 • 23mm lens
Figure 5.3 Shooting in the shade of a building or a tree not only creates a nice backdrop for the image, but also creates nice, even light across the subject.
The other major consideration when shooting portraits is the background. You should be able to address any issues with the background and distracting objects by either clearing the distractions, moving the subject, or using depth of field to mitigate the distractions (Figure 5.4). I usually try and choose as simple and clean a background as possible, and I won’t hesitate to ask my portrait subjects to move if it means the background—and the portrait—will be better.

ISO 400 • 1/15 sec. • f/2.2 • 23mm lens
Figure 5.4 Pets can be subjects too! In this portrait, it wasn’t possible for me to move my dog, nor address the background, so I resorted to a narrow depth of field for creative effect and to clear out the distracting background.
White Balance and ISO
If I’m shooting in open shade, I will usually set my white balance to the Shade setting. With this setting, the camera will attempt to maintain a flattering look in the skin tones. I find if the white balance is set to Fine, the images have a bluish tint because shade naturally has a bluish tint. Setting the white balance to Shade adds a little warmth to the image, which compensates for the colder shade colors (Figure 5.5).

ISO 400 • 1/1000 sec. • f/2.5 • 23mm lens
Figure 5.5 Keeping an eye on your white balance will reduce work in postproduction. When shooting in open shade, set your white balance preset to Shade.
When shooting in open shade, usually I will also end up increasing the ISO slightly. It may be only from 200 to 400—it depends entirely on the quality of the light available and how that is affecting my shutter speed. If I’m shooting at a smaller aperture, such as f/5.6 or even f/8, more than likely I will have to increase my ISO further to maintain a fast-enough shutter speed to keep the image sharp and in focus. With all these considerations made, I can concentrate on building the composition of the image and a rapport with my subject.
Metering Modes
The X100S has three different metering (or photometry) modes: Multi, Spot, and Average. Multi is regarded as the general setting useful for most shooting conditions and is where the camera will evaluate the brightness of the image throughout a scene, specifically how the bright areas are distributed through the scene itself.
Spot metering (discussed in further depth in Chapter 10, “Advanced Features”) takes into account only the light inside the middle section of the scene. Spot metering is very useful in difficult lighting conditions where harsh light may be falling on certain parts of the image and you want to meter for that.
The last metering mode is Average, when the camera takes an average of the measure of light across the whole scene to generate the exposure. Generally, this mode is useful for situations where there is not a lot of dramatic light contrast in a scene, such as landscapes and even portraits.
Changing the metering mode:
1. Press the AE button on the rear of the camera.
2. Using the command dial, select the metering mode you wish to use.
3. Using the command dial, select OK.

As mentioned, Multi metering mode is perfectly fine for most of my shooting requirements and generally results in usable exposures. If I’m using Aperture Priority, Shutter Priority, or even Program mode, I can always resort to exposure compensation (as we discussed in the previous chapter) to adjust my images accordingly.
On some occasions, however, I may switch to Average metering when I want to emphasize my subject for the basis of the exposure. This will take an even meter reading, meaning the camera will always meter for the subjects (Figure 5.6).

ISO 800 • 1/150 sec. • f/2.5 • 23mm lens
Figure 5.6 In this low-light scene, to ensure a good exposure for the portrait of my father and my son, I chose to meter the scene using Average metering mode.
If the area behind my subject is heavily backlit, then I will look at using Multi metering mode or even Spot metering to isolate the exposure on my central subject (Figure 5.7). In some cases, this may result in the background being blown out, which means the highlights are fully exposed. However, if the background is of little importance, it is often better to get a good exposure that focuses primarily on the subject.

ISO 1600 • 1/400 sec. • f/2.8 • 23mm lens
Figure 5.7 This was a test shot for a studio shoot, and the light coming from an open window behind me made for a tricky exposure before I switched to flash. In this case, Spot metering helped even out the exposure as the camera isolated the exposure on the model’s face.
Locking Exposure
Sometimes it’s handy to be able to lock your exposure settings in the camera to stop the meter from reevaluating the scene. This may come up, for example, if you want to recompose your image because you’re in an environment where there is sufficient lighting on your subject but the background is significantly darker (or brighter) (Figure 5.8). The metering in your camera will change depending on where the center of the viewfinder is aimed. If you try to compose the image so that the subject is off-center, the camera will meter for the wrong part of the scene.

ISO 200 • 1/1000 sec. • f/2 • 23mm lens
Figure 5.8 Because so much of this image contained shadow, it was important to lock the exposure to get a correctly balanced image in terms of shadows and highlights.
To alleviate this, you can meter for one part of the image (your subject), lock those settings so that they don’t change, then recompose the image and shoot the image. For more information on this, check out Chapter 4.
Getting Creative with Film Simulation
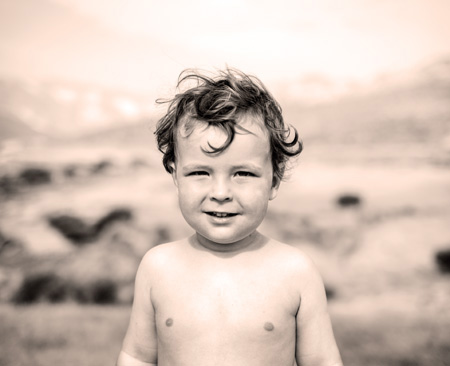
The X100S has an array of built-in film simulations, which I discuss several times throughout the book. These film simulation modes can give your portraits an added dimension and certainly help them stand out. I’m a big fan of monochrome and sepia images, and I often shoot my family portraiture using the Sepia setting (Figure 5.9). There is something very timeless about black-and-white portraits; this style eliminates the distraction of color, especially if the background is cluttered, and puts all the emphasis on the subject.
ISO 200 • 1/1000 sec. • f/2 • 23mm lens
Figure 5.9 In this image, I chose to use the Sepia film simulation to add an element of vintage film to the image.
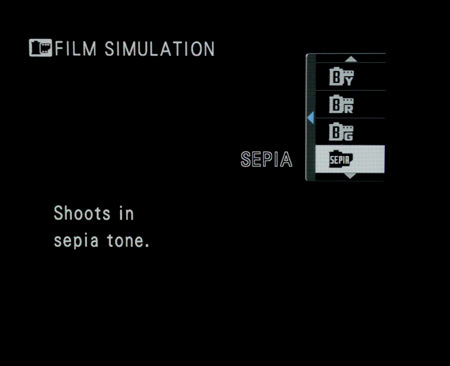
Selecting the Sepia film simulation:
1. Press the Menu/OK button.
2. Using the command dial, navigate to Film Simulation on Shooting Menu 1.
3. Press the command dial right.
4. Use the command dial to select Sepia.
5. Press Menu/OK to confirm your selection.
As mentioned in Chapter 10, there are ten film simulation modes in total, and I would encourage you to investigate them all. Each one will be subjective in its appeal, but often a film simulation can really make the difference between liking an image and loving an image.
The film simulation modes apply only to JPEG images. If you are shooting in RAW, the picture that shows up on the LCD panel or in the viewfinder during image review will resemble an image with the film simulation applied, but it will appear as a color image when you open it in any RAW processing software. So, for example, if you are using Adobe Lightroom to edit and process your images, the RAW image will appear as an unaltered, color image; you will have to use Lightroom to convert it to black and white.
If you want to compare how an image will look using three different film simulations, you can try the film simulation bracketing feature, discussed in Chapter 10.
Focus: It’s All About the Eyes
The eyes are, quite simply, the most important feature of any portrait. They are the very first place we are drawn to when we look at an image of a person. The same is true of paintings, and it’s no coincidence that the great artists took a lot of time and attention getting the perspective, size, and shape of the eyes in their masterpieces perfect.
As a result, eyes almost always need to be the sharpest element in the frame. If the eyes aren’t in focus, the viewer’s experience of the portrait can be diminished. In order to ensure they are in focus, you need to fully control your focusing because, regardless of how sophisticated the camera’s autofocusing is, it doesn’t guarantee that the subject’s eyes will always be the most in-focus part of the frame.
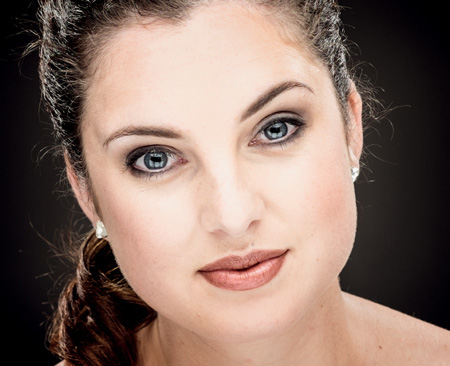
When it comes to making a portrait, I prefer to set up the camera with the smallest focus point, allowing me to really nail the focus on the eyes (Figure 5.10).
ISO 200 • 1/180 sec. • f/5.6 • 23mm lens
Figure 5.10 I used the smallest focus point to ensure I locked on the eyes and, thus, made them the sharpest part of the image.
Changing the focus point size:
1. Using the focus mode selector on the left side of the camera, switch the camera to single autofocus mode (AF-S).
2. Press the AF (up) button on the back of the camera to reveal the focus point selector.
3. Use the command control to decrease the size of the focus point.
4. Press Menu/OK to confirm your setting.

Using this focus mechanism enables you to really concentrate on getting those eyes in focus. Further, if shooting close-up portraits, using the smallest focus point and macro mode will allow you to get in close to your subject and create a very intimate portrait (Figure 5.11).
ISO 200 • 1/640 sec. • f/5.6 • 23mm lens
Figure 5.11 Getting in very close, and using a small focus point and macro mode, enabled me to create a very intimate portrait.
The images in Figures 5.9 and 5.10 were shot in a studio environment with subjects who were stationary, which helped me focus on their eyes. In such situations, using the smallest focus point is ideal. However, if you are shooting candid portraits or portraits of children who may not be so patient in front of the camera, you may need to experiment with the tolerance level of the focus point that suits you the most, given the shooting situation.
It may be worth noting at this point that the X100S does not feature “face detection” AF technology. Prevalent in many modern cameras, face detection helps track a face within the scene and automatically focus on it. There is a face-detection element of image playback, however. If the camera has detected a face within the scene when you are reviewing images on the LCD panel, it will inform you of this. However, there is no focus assist with face detection.
Focusing and Recomposing
Typically, I will use the single AF for focus selection when shooting portraits (as opposed to manual or continuous focus). There are 49 focus points on the X100S that allow you a great deal of choices when it comes to deciding where to focus within the frame.
However, personally I find it easier to place the focus point directly on the location where my critical focus should be established and then recompose the shot. Even though the focus point can be placed anywhere in the frame, generally it takes longer to figure out where the focus point should be in relation to the subject. By using the center point, I can quickly establish focus and get on with my shooting.
Setting your focus to a single point and shoot:
1. Using the focus mode selector on the left side of the camera, switch the camera to AF-S mode.
2. Press the AF (up) button on the back of the camera to reveal the focus point selector.
3. Using the left, right, up, and down buttons on the back of the camera, choose your active focus point (generally the center one for me).
4. To shoot using this focus point, place that point on your subject’s eye and press the shutter button halfway, until the focus is achieved.
5. While still holding down the shutter button halfway, recompose and take the photograph.

Using Fill Flash for Reducing Shadows
A common problem when taking pictures of people outside, especially during the midday hours, is that the overhead sun can create dark shadows under the eyes and chin. You could have your subject turn his or her face to the sun, but of course, that is not comfortable for the subject. So, how can you have your subject’s back to the sun and still get a decent exposure of their face?
The answer is by using the X100S’s built-in flash unit (discussed in more detail in Chapter 7, “Low Lighting”). Using the built-in flash can turn a shadow-filled image (Figure 5.12) into a more flattering image where the shadows are mitigated (Figure 5.13).

ISO 400 • 1/320 sec. • f/13 • 23mm lens
Figure 5.12 Without fill flash, there are harsh shadows across the nose and upper-lip area.

ISO 400 • 1/400 sec. • f/14 • 23mm lens
Figure 5.13 Applying fill flash on the camera mitigates much of the shadow across the face.
Using Off-Camera Flash
Despite its diminutive size, the X100S is a very capable studio camera. In fact, it has a flash sync speed in excess of 1/1000 of a second, which is far quicker than most DSLRs and significantly quicker than other cameras in the Fujifilm X-series range. The X100S can be used with professional studio lighting systems via the use of “triggers,” which sit in the camera’s hot shoe—a socket that is situated at the top of the camera and has contacts to allow it to connect to various accessories (such as triggers and flash units)—and are used to trigger the studio lights.
Although I rarely use flash photography, one of the accessories that accompanies me pretty much everywhere is the EF-X20 flash unit. This little gadget, with a guide number (GN) of 20, can sit in the hot shoe, or it can be used as a slave flash unit, meaning it can be triggered using the X100S onboard flash acting as a commander, and used very creatively (Figure 5.14). (The GN is an approximation of the strength of the light from the flash unit. As a rule of thumb, the higher the number, the stronger the light.)

ISO 400 • 1/1000 sec. • f/8
Figure 5.14 The EF-X20 flash unit on a boom arm in a studio lighting situation. The flash is triggered by the X100S’s onboard flash.
The setup and configuration of off-camera flash units is beyond the scope of this book, but I wanted to cover it a little here to give you an insight into the advanced flash control functionality that the X100S can offer.
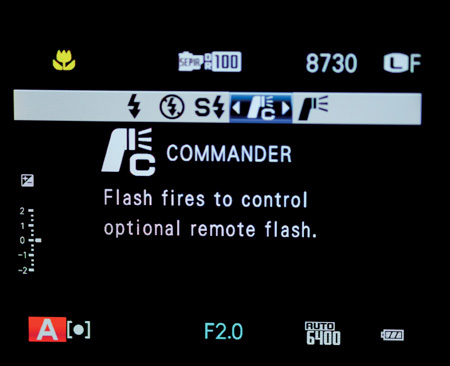
Setting up the X100S as a commander:
1. Press the flash/right button on the back of the camera.
2. Choose Commander.
Working with an off-camera flash can be fun and offers a great avenue for creative output. Using flash units that are more powerful than the X100S’s built-in flash will enable you to produce professional-level photographs. You can even use multiple flashes to set up shots such as that in Figure 5.15.

ISO 200 • 1/640 sec. • f/5.6 • 23mm lens
Figure 5.15 Using an off-camera flash can create very professional results, despite the X100S’s diminutive size.
Turning Off Exposure Preview
If you intend on using an off-camera flash with your X100S, I strongly advise you to ensure that your camera has the very latest firmware (see Chapter 2, “First Things First”). Introduced in the X100S’s firmware’s version 1.10 was the ability to switch off the image preview in Manual mode.
Before I explain how to do this, it may be worth explaining why you need to do it. In fact, many X100S users I have met who shoot with an off-camera flash are unaware of this feature.
When you are shooting manually in a studio or with an off-camera flash (or, in fact, the onboard flash unit), you will often underexpose the ambient light. For example, in a studio environment, you may configure the camera to 1/60 at f/5.6 knowing full well that the flash is going to provide the light necessary to illuminate the subject. When you press the shutter halfway to focus the image, the viewfinder will automatically give you an “exposure preview.” In general shooting conditions this is a good feature, but as you can appreciate, when shooting with a flash, the preview is going to be very dark—remember, the flash is going to illuminate the subject. This can make focusing and composing the image very difficult.
Fortunately, in firmware 1.10, Fuji introduced a menu option with which you can switch off the exposure preview in Manual mode.
Switching off the exposure preview in Manual mode:
1. Press the Menu/OK button.
2. Using the command dial, navigate to Screen Setup on Setup Menu 2.
3. Press the command dial right.
4. Use the command dial, select Preview Exp. In Manual Mode.
5. Set it to Off.
6. Press Menu/OK to confirm your selection.
Setting Preview Exp. In Manual Mode to Off instructs the camera not to show you the exposure preview when you press the shutter button halfway, which, in turn, allows you to continue to focus and compose your images.
Candid Portraits on the Move
As alluded to earlier, not all portrait subjects will sit still and wait patiently for you to press the shutter button. Sometimes you might want to get an action shot that says something about the person, similar to an environmental portrait.
Children especially are constantly on the move, and there is no need to fight this. When I’m creating portraits of children being children, I always make sure I’m in Shutter Priority (S) mode and set a relatively fast shutter speed of a minimum of 1/125 a second. I put the camera in continuous autofocus (AF-C) mode using the focus selector switch on the side of the camera. Then I put the camera in continuous shooting (or burst) mode and just fire the shots. As with most shoots that involve increased drive modes and focusing, there are quite a few throwaway images, but usually you can get some good shots that exhibit the behavior you are trying to capture (Figure 5.16).

ISO 6400 • 1/60 sec. • f/2 • 23mm lens
Figure 5.16 As my daughter rarely sits still, shooting in Continuous focus mode and burst shooting enabled me to get this shot, even in very low light conditions.
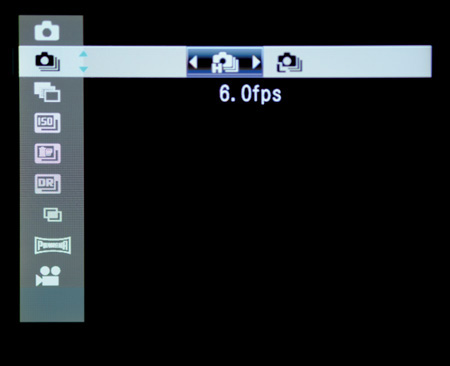
Setting up the camera to shoot fast-action portraits:
1. Using the focus selector switch on the side of the camera, select AF-C (continuous autofocus).
2. Press the Drive button on the back of the camera.
3. Using the command dial, scroll down to the second option and choose 6.0 or 3.0fps (frames per second).
4. Focus on your subject, and keep the focus point on the subject as it moves around.
5. Press and hold down the shutter button to take rapid, multiple images.
Shooting Better Portraits
Here are a few extra portrait-taking pointers that don’t necessarily have anything to do with the physical controls and settings of the camera. Many books and online resources cover subjects such as portrait lighting, posing, and so on, but here are a few general ideas that may make your portraits look a little better.
Look for the Light
Unless you are specifically shooting with flash units for creative reasons, you will still need to look for the best light for your images. As with landscape photography, the best light is often at the start or the end of the day. Using flattering soft light will enhance your portraits. Don’t be afraid to use blinds, curtains, and shades as light diffusers or mechanisms for sculpting the light onto your subject (Figure 5.17).
ISO 400 • 1/60 sec. • f/2 • 23mm lens
Figure 5.17 Using shades and blinds while keeping an eye on the natural light outside the room allowed me to create a well-composed portrait without the need of a flash.
Watch the Cutoff
There is an old rule about photographing people: Never crop the picture at a joint. This means ankles and knees if at all possible. If you have to crop the legs, the best place is mid-shin or mid-thigh (Figure 5.18).
ISO 200 • 1/500 sec. • f/5.6 • 23mm lens
Figure 5.18 A good crop for people is mid-thigh or mid-shin. Avoid cropping at ankles or knees.
Go with Portrait Orientation
Most people are longer than they are wide. And so it follows that most people will look better in a full-length portrait rather than a horizontal one (Figure 5.19).
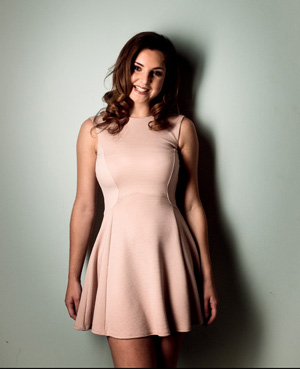
ISO 200 • 1/500 sec. • f/5.6 • 23mm lens
Figure 5.19 A vertical portrait orientation shot is often more flattering than a horizontal full-body shot.
Chapter 5 Assignments
Photographing people is fun—and people are probably the subjects you will spend most of your time capturing. We’ve covered a lot in this chapter and, hopefully, you will be able to move forward and take portraits with a greater knowledge of how to make them look good. Let’s put some of this newfound knowledge into practice.
Use depth of field in portraits
Start simple. Grab your partner or a friend and start experimenting with using different aperture settings. Shoot wide open at f/2 and then stop down to f/8 and f/16. Look at the difference in the images—specifically the depth of field.
Discover natural light
Wait for a nice sunny day and try shooting some portraits in the bright midday sun. Now move the subject into an open shade area where they are just enclosed in the shade, but still exposed to some of the sunlight. Notice how the hard shadows disappear and the light is much more flattering on the subject.
Meter correctly
Find a very dark or very light background and place your subject in front of it. Take a couple of shots, ensuring that plenty of the background is on show in the images. Now, using the Photometry options, switch between each of the three metering modes. What differences do you notice in the exposures?
Fill in the shadows
Again, wait for a bright sunny day and take your subject out for a photo shoot. Using the X100S’s onboard flash, try to eliminate any harsh midday shadows that may appear on your subject’s face.
Create a timeless black-and-white image
Using the Monochrome or Sepia film simulation, produce a timeless portrait where color is not a feature. Watch out for shadows and highlights, as they are often more prevalent in black-and-white images.
Share your results with the book’s Flickr group!
Join the group here: flickr.com/groups/fujiX100S_fromsnapshotstogreatshots