Lesson 9: Using the Roto Brush Tool
Changes in the behavior of new layers
Note
In After Effects 12.1 and later, a new layer is placed directly above the currently selected layer in the Timeline panel; if no layer is selected, the layer appears at the top of the stack. In previous versions of After Effects, new layers always appeared at the top of the stack. The following text replaces the first step in the “Adding animated tex” section, which is on page 242 in the printed book.
Adding animated text
1. Deselect all layers, and then move the current-time indicator to the beginning of the time ruler.
Mask Tracker feature
Note
The following Extra Credit exercise is added to the end of Lesson 9.
Extra Credit: Tracking a mask
After Effects 12.1 introduced the Mask Tracker feature, which allows you to apply effects to a moving target. You’ll have the best results if the object you’re tracking has a consistent shape, but the tracker is able to adjust the mask’s position, size, rotation, skew, and perspective as the object moves.
The mask tracker can track a track matte, an adjustment layer, or a layer with a source that can contain motion. It can’t work with solid-color layers or still images.
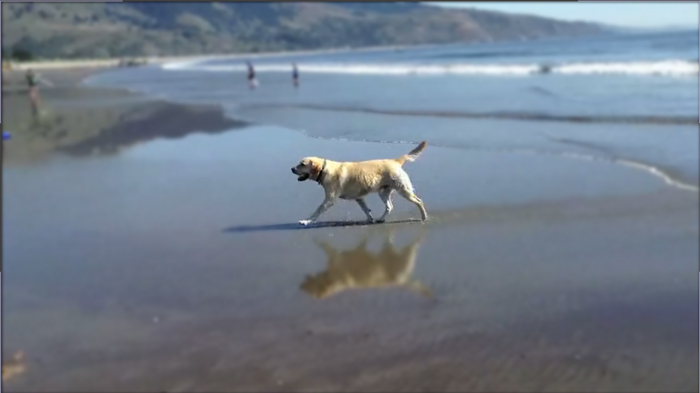
In this exercise, you’ll blur everything in a scene except a dog running on the beach. You’ll need to download the Happy_dog.mov project file from your Peachpit account on www.peachpit.com, if you haven’t already.
1. Open a new project in After Effects.
2. Double-click the Project panel, and then double-click the Happy_dog.mov file to import it.
3. Drag the Happy_dog.mov file onto the Create A New Composition button.
Photoshop creates a new composition and adds the Happy_dog.mov file to it.
4. Choose Layer > New > Adjustment Layer.
You’ll add a mask and effect to the adjustment layer.
5. Choose 200% from the Magnification Ratio pop-up menu in the Composition panel so you can see the dog clearly.
6. Select the Rectangle tool, and then draw a mask around the dog. Draw the mask fairly tightly so that After Effects will track the dog, not the ocean.
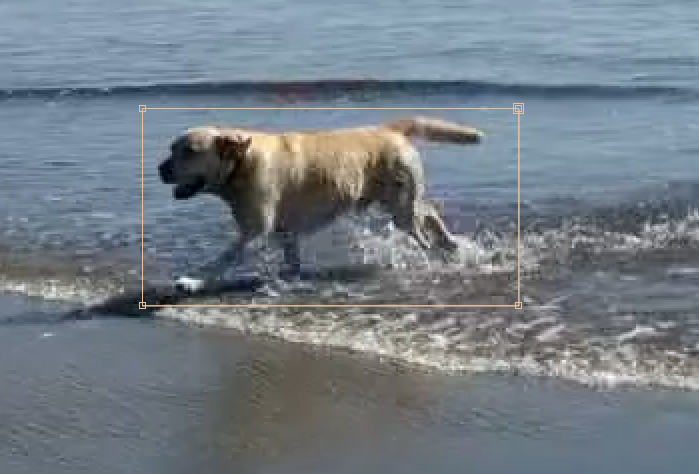
You can draw a more precise mask using the Pen tool, but because the dog moves so much, a rectangular mask is likely to give the best results for our purposes. You’ll adjust the mask to make up for any irregularities.
7. Right-click or Control-click Mask 1 in the Timeline panel, and choose Track Mask.
8. In the Tracker panel, choose Position, Scale & Rotation from the Method menu, and then click the Play button to analyze the clip.
The mask tracker analyzes the object throughout the clip, repositioning and rotating the mask to follow the dog’s movement.
9. In the Timeline panel, expand the Adjustment Layer, Masks, and Mask 1 to reveal the mask properties.
10. Increase the Mask Feather property to 60, 60 pixels, and the Mask Expansion property to 40 pixels.
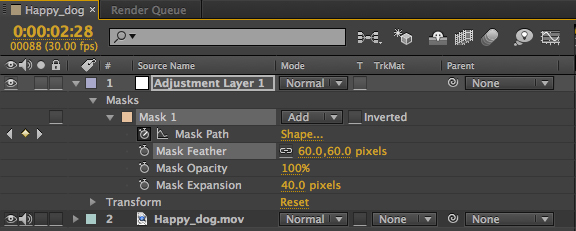
Remember that the mask tracker works best when the object maintains a consistent shape? In this clip, the dog’s legs and tail change position as he moves, and the rectangular mask may not always contain the entire dog. Expanding the mask makes it more likely the entire dog will be masked; feathering eases the transition between the blurred and non-blurred areas, so it’s less obvious if part of the dog escapes the mask. You can adjust the mask properties after you apply the effect.
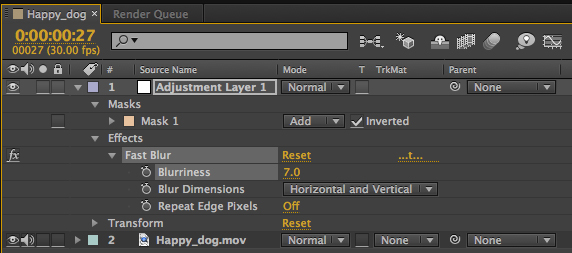
11. In the Effects & Presets panel, navigate to the Fast Blur effect. Drag it onto the Adjustment Layer in the Timeline panel.
12. Expand the Effects and Fast Blur properties, and increase the Blurriness value to 7.0.
The masked area is blurred. You want everything but the masked area to be blurred. You need to invert the mask.
13. Select Inverted next to Mask 1.
14. Zoom out to see the entire scene, deselect all layers, and preview your work. If you need to, you can make adjustments to the mask or effect.