24. Preferences

In This Chapter
Opening the Preferences dialogs
Transparency & Gamut Preferences
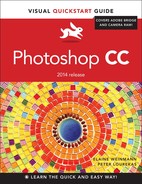
Guides, Grid & Slices Preferences
Experimental Features Preferences
Preferences are settings that you specify for various Photoshop application features, such as the gray shades for the Photoshop interface and measurement units for the rulers. Most preference changes take effect immediately (and are saved to the Photoshop Preferences file) when you exit/quit Photoshop, but a handful of preference changes don’t take effect until you relaunch Photoshop or Bridge; we note such exceptions.
Opening the Preferences dialogs
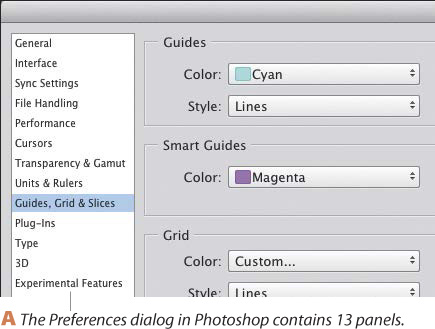
To open the Preferences dialog for Photoshop, press Ctrl-K/Cmd-K, or choose Edit/Photoshop > Preferences > General or another option from the submenu. In the dialog, click one of the 13 panel names on the left side, A or click Prev or Next, or press a shortcut between Ctrl-1/Cmd-1 and Ctrl-0/Cmd-0 (zero).
To open the Preferences dialog for Bridge, in Bridge, press Ctrl-K/Cmd-K or choose Edit/Adobe Bridge CC > Preferences.
Resetting All the Preferences
![]() To reset all the Photoshop preferences to their default settings, hold down Ctrl-Alt-Shift/Cmd-Option-Shift as you launch the program. If the User Account Control dialog appears in Windows, respond to it while continuing to hold down Ctrl-Alt-Shift. In Windows/Mac OS, when the alert dialog appears, release the modifier keys, then click Yes to delete (and reset) the Adobe Photoshop Settings file.
To reset all the Photoshop preferences to their default settings, hold down Ctrl-Alt-Shift/Cmd-Option-Shift as you launch the program. If the User Account Control dialog appears in Windows, respond to it while continuing to hold down Ctrl-Alt-Shift. In Windows/Mac OS, when the alert dialog appears, release the modifier keys, then click Yes to delete (and reset) the Adobe Photoshop Settings file.
![]() To reset the Bridge preferences, hold down Ctrl/Option as you launch Bridge. When the Reset Settings dialog appears, check Reset Preferences, then click OK.
To reset the Bridge preferences, hold down Ctrl/Option as you launch Bridge. When the Reset Settings dialog appears, check Reset Preferences, then click OK.
For the default Color Picker, choose either Adobe (the default setting) or your system color picker.
For the onscreen HUD (Heads-Up Display) Color Picker, choose a strip or wheel style and size. See page 204.
Choose a default Image Interpolation option for Photoshop edits that involve resampling or transforming, such as a use of the Crop tool: Nearest Neighbor (Preserve Hard Edges), the fastest and the best for hard-edged graphics but the least precise; Bilinear, for medium quality; Bicubic (Best for Smooth Gradients), higher quality but slower; Bicubic Smoother (Best for Enlargement); Bicubic Sharper (Best for Reduction); or the default setting of Bicubic Automatic (Photoshop determines the best method).
Options
Check Auto-Update Open Documents to have open Photoshop documents that you edit in other applications update automatically when you return to Photoshop, such as when you assign metadata to a file in Bridge.
Check Dynamic Color Sliders to have the colors above the sliders on the Color panel update as you move the sliders.
With Use Shift Key for Tool Switch checked, in order to access tools from a fly-out menu, you must press Shift plus the assigned letter (e.g., press Shift-B to cycle through the Brush, Pencil, Color Replacement, and Mixer Brush tools). If you uncheck this option (as we do), you can cycle through related tools simply by pressing their assigned letter. To learn the tool shortcuts, see pages 112–114 or use Tool Tips.
Check Animated Zoom for smooth, continuous zooming as you click and hold with the Zoom tool to zoom in, or hold down Alt/Option and click and hold to zoom out. Note: To use this feature, Use Graphics Processor must be checked in the Performance panel of this dialog; see pages 464–465.
If your mouse has a scroll wheel and you check Zoom with Scroll Wheel, you can change the zoom level by scrolling the wheel horizontally or vertically.
Check Enable Flick Panning to enable a magnified image to quickly float across the screen when you drag it with the Hand tool a short distance, then release the mouse (Use Graphics Processor must be checked in the Performance panel of this dialog; see page 464–465).
Check Beep When Done to have a beep sound when a command is done processing. This can be handy for commands that take a while to process (so you can take a break).
Check Export Clipboard to retain the current Clipboard contents on the system Clipboard when you switch between Photoshop and other programs.
Check Resize Image During Place to have images or graphics scale to fit the current canvas area automatically when they are imported via the File > Place Embedded or File > Place Linked command.
Check Always Create Smart Objects When Placing ![]() to have raster images that you bring into Photoshop via the Place Embedded command arrive automatically as Smart Objects (see page 266).
to have raster images that you bring into Photoshop via the Place Embedded command arrive automatically as Smart Objects (see page 266).
With Zoom Resizes Windows checked, a floating document window will resize when you change the zoom level via the Ctrl/Cmd- + (plus) or Ctrl/Cmd- – (minus) shortcut or the Zoom tool. You can also control this behavior for the Zoom tool via the Resize Windows to Fit check box on the Options bar. Note: With this option checked, as you change the zoom level, the document is also positioned over — but not docked into — the document window area of the Application frame.
Check Zoom Clicked Point to Center to have Photoshop center the image at the location you click when zooming.
With Vary Round Brush Hardness Based on HUD Vertical Movement checked, you can hold down Alt-right-click/Control-Option and drag vertically to change the brush hardness; with this option unchecked, the shortcut changes the brush opacity instead. This option affects the Brush, Pencil, Color Replacement, Clone Stamp, History Brush, Sharpen, and other tools (see page 129). HUD stands for “Heads Up Display,” and it refers to the ability of the user to choose settings via on-canvas controls. Note: To display the hardness or opacity value as a tint within the cursor, check Use Graphics Processor in the Performance panel of this dialog.
Check Snap Vector Tools and Transforms to Pixel Grid to have future vector paths that you create, and existing shapes that you transform, snap to the pixel grid for sharper rendering in onscreen output (see page 405).
History Log
Check History Log to have Photoshop generate a log of your editing activity from each work session. The log can be useful if you need to preserve an exact record of your editing steps or need to tally your billable hours for clients.
For Save Log Items To, choose where the log is to be saved: to the Metadata of a file, to a separate Text File, or to Both of the above. For either of the latter two options, choose a location for the text file in the dialog that opens automatically, then click Save.
From the Edit Log Items menu, choose what data is to be saved in the log: Sessions Only to log just the date and time when you launch or exit/quit Photoshop and which files were opened; Concise to log Sessions information plus a list of edits (states on the History panel); or Detailed to include all of the above data plus any actions used and the options and parameters used in each editing step.
Reset Warning Dialogs
Click Reset All Warning Dialogs to reactivate all alert dialogs in which you have clicked Don’t Show Again.
Appearance
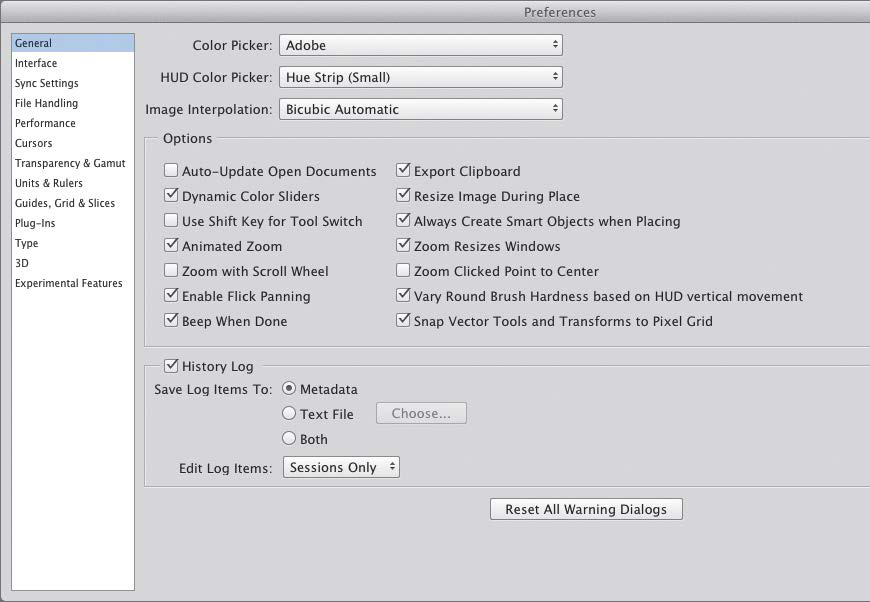
Click a Color Theme for the Photoshop interface, including the background and text color in the panels, Options bar, and Application frame, and the blank background behind the canvas area.
Via the Color menus next to Standard Screen Mode, Full Screen with Menus, and Full Screen, choose a shade or color for the area around the canvas for each screen mode: Default (the shade associated with the current Color Theme); Black or a Gray option; or Select Custom Color. For the latter option, choose a color from the Color Picker; thereafter, that color will appear if you choose the Custom option. For the Border around the canvas area, choose Line, Drop Shadow, or None. Note: For the Line and Drop Shadow options, you must also check Use Graphics Processor in Performance preferences. For the screen modes, see page 104.
Options
If Auto-Collapse Iconic Panels is checked and you open a collapsed panel, then click anywhere outside it, the panel will collapse back to an icon. With this option unchecked, the panel will remain expanded. See page 106.
Check Auto-Show Hidden Panels to allow panel docks that you have hidden to redisplay temporarily. In Standard Screen mode, you can hide the docks by pressing Tab or Shift-Tab, then redisplay them temporarily at any time by letting the pointer pause on the dark gray vertical bar at the right edge of the Application frame (or the left edge of the frame, for the Tools panel). Move the pointer away from the docks, and they will disappear again. In either of the Full Screen modes, let the pointer pause at the edge of your display to make the dark bar appear, followed by the docks.
Check Open Documents as Tabs to have documents dock automatically as tabs when opened instead of as floating windows (we recommend checking this option). Note: In the Mac OS, if you check this option but hide the Application frame, images will dock as tabs within one document window automatically.
Check Enable Floating Document Window Docking to allow a floating document window to be docked as a tab when you drag its title bar just below the Options bar in the Application frame or next to an existing document tab in a floating window. (We recommend keeping this option checked.)
Check Show Channels in Color to display RGB or CMYK channels in color thumbnails on the Channels panel and in the document window when clicked individually. Uncheck this option (as we do) to display the channels in grayscale, which is useful for judging luminosity values.
Check Show Menu Colors to activate the display of background colors that have been assigned to menu commands via Edit > Menus and to workspaces in which they were saved (e.g., the “What’s New” workspace).
If Show Tool Tips is checked and the pointer is currently hovering over a Photoshop feature (mouse button up), a label pertaining to that feature appears briefly onscreen. This is a good way to identify panel and dialog options, as well as tools and tool shortcuts.
Mac OS users: Check Enable Gestures if you have a laptop with a multi-touch trackpad (or are using a Magic Mouse or Magic Trackpad with any Macintosh computer) and you want to enable the capability of the trackpad to zoom, rotate, or flick images. Uncheck this option if you find that the gestures are causing unwanted highlighting or pointer movements.
Check Enable Text Drop Shadows to display a very subtle drop shadow behind text labels in panels.
If you’re using Photoshop on a laptop, check Enable Narrow Options Bar for a compact Options bar.![]()
Click Restore Default Workspaces to restore, to the Workspace menu, any predefined Adobe workspaces that were deleted via the Window > Workspaces > Delete Workspace dialog.
From the Show Transformation Values menu, choose a location (e.g., Top Left or Bottom Right) for the label that appears and updates dynamically as you transform objects, indicating the current rotation, scaling, or other values. Choose Never from the menu if you prefer to turn this feature off.
Text
As noted in the dialog, to implement these Text options, you must relaunch Photoshop.
If you are using a multilingual version of Photoshop, from the UI Language menu, choose a language for the interface.
From the UI Font Size menu, choose Tiny,![]() Small, Medium, or Large as the font size for features in the Photoshop user interface (panels, Options bar, etc.).
Small, Medium, or Large as the font size for features in the Photoshop user interface (panels, Options bar, etc.).
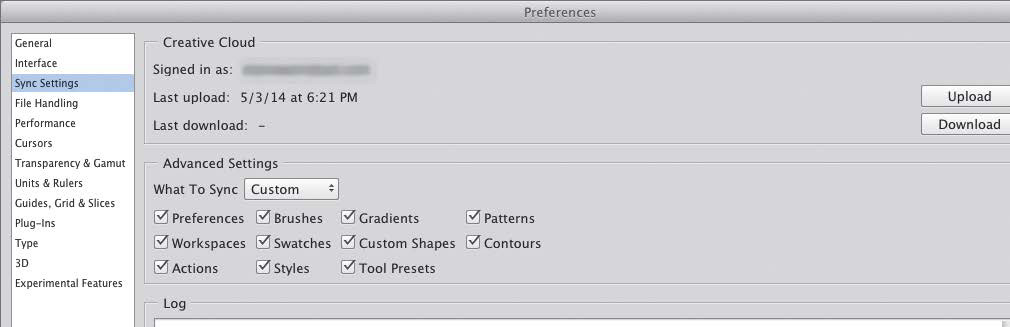
You can sync Photoshop settings between two computers in which the same Creative Cloud membership ID is being used. Via the Sync Settings panel in Preferences (or via commands on the Edit/Photoshop > [your Adobe ID] submenu), you upload the current Photoshop settings on one computer to the Creative Cloud server, then download the settings from the Creative Cloud to your second computer. See also pages 495–496.
Creative Cloud
The Signed In As info is your current Creative Cloud membership ID. Also listed are the date and time of the Last Upload and Last Download.
Advanced Settings
From the What to Sync menu, choose Everything (to check all the boxes); or choose Custom, then check the kinds of settings that you want to upload or download (Preferences, Workspaces, and presets for Photoshop panels and pickers).
Next, click Upload to upload the specified Photoshop settings from your computer to the Creative Cloud, or click Download to download the current settings in the Cloud to your computer.
Log
The Log lists settings that were uploaded and downloaded, and the times they were uploaded or downloaded. The log clears when you exit/quit Photoshop.
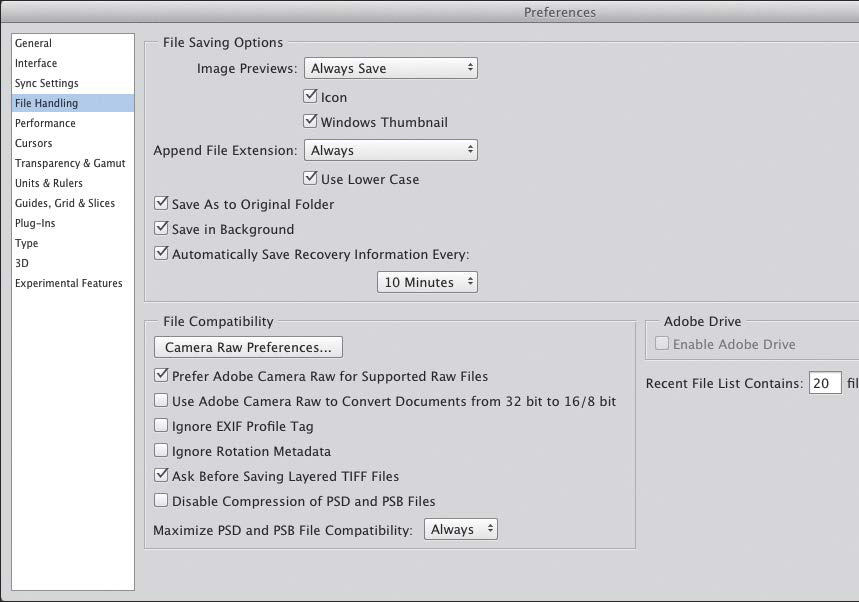
File Saving Options
Choose Image Previews: Never Save to save files without a thumbnail preview for the Desktop, or Always Save (our preference) to have an updated preview save with files each time they’re saved, or Ask When Saving to decide which previews to include via Image Previews check boxes when saving files via the Save or Save As dialog. See pages 18–20.
In the Mac OS, check Icon to have the thumbnails of files display as their icons on the Desktop and in the File > Open dialog. Check Windows Thumbnail to have the thumbnail for a file display when the file is selected in File > Open.
In the Mac OS, choose Append File Extension: Always (our preference) to have Photoshop include a three-letter abbreviation of the file format (e.g., .tif, .psd) automatically when you save a file via the Save As command; or Ask When Saving to be given the option to decide in each case whether to include the extension via File Extension check boxes in the Save As dialog. Extensions are helpful when converting files for Windows, and are necessary when saving files for the Web. Keep Use Lower Case checked to have file extensions appear in lowercase characters instead of in uppercase.
In Windows, choose File Extension: Use Lower Case or Use Upper Case.
Check Save As to Original Folder (as we do) to have the location in the Save As dialog always default to the existing location of the current file.
Check Save in Background to permit image editing to occur while Photoshop is saving a file.
Check Automatically Save Recovery Information Every, and choose a time interval from the menu, to let Photoshop save a temporary copy of the current document to your hard disk. If Photoshop exits/quits unexpectedly, the temp file will open by default upon relaunch.
File Compatibility
Click Camera Raw Preferences to open that dialog.
Check Prefer Adobe Camera Raw for Supported Raw Files to have raw files that you open via File > Open open into Camera Raw, as opposed to other conversion software. We keep this option checked.
Files that are 32-bit (e.g., the files that are produced by the Merge to HDR Pro command from multiple exposures), must be converted to 8- or 16- bit for export or printing. With Use Adobe Camera Raw to Convert Documents from 32 bit to 16/8 bit checked, 32-bit files will open into Camera Raw automatically when you convert them to a lower bit depth via the Image > Mode > 16 Bits/Channel or 8 Bits/Channel command, so you can apply color and tonal adjustments.
Ignore EXIF Profile Tag enables Photoshop to read a camera’s EXIF metadata color space data when opening files. This option is necessary only for files from early digital cameras, so we keep it unchecked.
Check Ignore Rotation Metadata to have Photoshop ignore any rotation settings that are applied to image thumbnails in Bridge.
Check Ask Before Saving Layered TIFF Files to have an “Including layers will increase file size” alert dialog appear when saving a layered file in the TIFF format. You can use this alert as a reminder to uncheck the Layers option in the Save As dialog.
Check Disable Compression of PSD and PSB Files to prevent Photoshop from compressing files when saving them in the PSD or PSB format. When this option is checked, documents save more quickly but have a larger file size.
To save your files so they can be opened in applications that don’t support layers, check Maximize PSD and PSB File Compatibility. Photoshop will save a composite preview with your layered files, along with a rasterized copy of any vector art. Although this option produces larger files (and the save process takes longer), it’s necessary for compatibility. Choose Ask to have Photoshop offer this as an option via an alert dialog when files are saved, or choose Always to have Photoshop produce compatible files automatically without an alert appearing. See pages 18–20.
Note: Upon saving a layered file, if Ask is the current Maximize PSD and PSB File Compatibility preference and you check Maximize Compatibility and Don’t Show Again in the Photoshop Format Options dialog, Photoshop will switch the preference setting to Always. If you uncheck Maximize Compatibility but do check Don’t Show Again in the alert, the preference setting will switch to Never.
For information on Adobe Drive, search for “adobe drive” at Adobe.com.
File list
In the Recent File List Contains [ ] files field, enter the maximum number of files (up to 100) that can be listed at a time on the File > Open Recent submenu in Photoshop.
Note: To implement changes made in this panel (except for Use Graphics Processor) you must relaunch Photoshop. For Use Graphics Processor, you must close and then reopen any open documents.
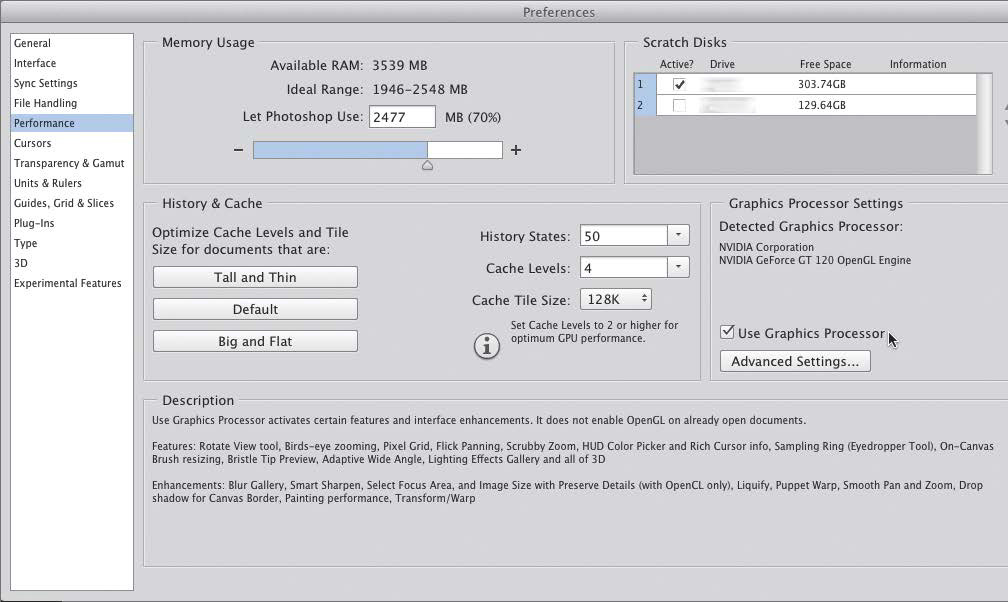
Memory Usage
The Let Photoshop Use field and slider control the maximum percentage of your computer’s RAM that can be used by Photoshop. We recommend keeping this value on the default setting.
Scratch Disks
Check which hard drives Photoshop may use as Scratch Disks when available RAM is insufficient for processing or storing image data. To change the sequence of drives that have a check mark, click a drive, then click the up or down arrow.
![]() Hold down Ctrl-Alt/Cmd-Option while launching Photoshop to open the Scratch Disk Preferences dialog.
Hold down Ctrl-Alt/Cmd-Option while launching Photoshop to open the Scratch Disk Preferences dialog.
![]() From the Info panel
From the Info panel ![]() menu in Photoshop, choose Panel Options, then check Efficiency under Status Information. When Photoshop is using the scratch disk, the Efficiency readout value on the panel is below 100%.
menu in Photoshop, choose Panel Options, then check Efficiency under Status Information. When Photoshop is using the scratch disk, the Efficiency readout value on the panel is below 100%.
History & Cache
Low-resolution versions of the current file are saved in cache buffers to help the image and histograms redraw more quickly onscreen. To optimize the cache levels and tile size for Photoshop, click a generic document type (not your body type!): Tall and Thin (for smaller documents that contain many layers), Default (best for general use), or Big and Flat (best for larger documents that contain few layers).
Enter the maximum number of History States the History panel can list at a time. When this number is reached, older states are deleted.
Choose a higher Cache Levels value for large files that contain few layers and a lower Cache Levels value for smaller files that contain many layers.
The Cache Tile Size value controls how much data Photoshop processes at a given time. If you need faster processing of large images, you can choose a higher value.
Graphics Processor Settings
The Detected Graphics Processor area lists the graphics card that is currently installed in your system.
Check Use Graphics Processor if your system has OpenGL capability and you want to use the OpenGL features of Photoshop, such as Animated Zoom, Scrubby Zoom, Flick Panning, Pixel Grid, HUD Color Picker, the Sampling Ring for the Eyedropper tool, a tint in the brush cursor for hardness and/or opacity, the Live Tip Brush Preview, the Rotate View tool, and better performance when using some commands or filters, such as the Blur Gallery. (For a complete list, rest your pointer in the Graphics Processor Settings option, and look in the Description area.)
Description
In the Description window at the bottom of the dialog, you can read about whichever feature your pointer is currently hovering over.
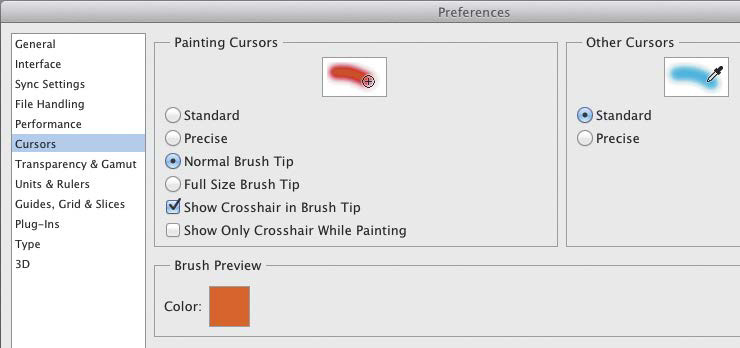
Painting Cursors
For the Painting Cursors (the Art History Brush, Background Eraser, Blur, Brush, Burn, Clone Stamp, Color Replacement, Dodge, Eraser, Healing Brush, History Brush, Mixer Brush, Pattern Stamp, Pencil, Quick Selection, Sharpen, Smudge, Sponge, and Spot Healing Brush tools), click the preferred cursor to be displayed onscreen: Standard for the tool icon; Precise for a crosshair; Normal Brush Tip for a circle that is half the size of the current brush; or Full Size Brush Tip for a circle that is the full size of the current brush. For either of the latter two options, you can also check Show Crosshair in Brush Tip to have a crosshair appear in the center of the circle and/or Show Only Crosshair While Painting to have only a crosshair display when the mouse is dragged, for faster performance when using large brushes.
Other Cursors
For the Other Cursors (all those not listed in the preceding paragraph, such as the Eyedropper and Crop tools), click Standard to have the tool icon display onscreen as you use the tool, or click Precise to display a crosshair instead.
![]() Press Caps Lock to turn a Standard cursor into a Precise cursor (crosshair) or, if Precise is the current Painting Cursors setting, to turn any Painting cursor into a Full Size Brush Tip (circle).
Press Caps Lock to turn a Standard cursor into a Precise cursor (crosshair) or, if Precise is the current Painting Cursors setting, to turn any Painting cursor into a Full Size Brush Tip (circle).
Brush Preview
Click the Color swatch and choose a color via the Color Picker to represent the current brush hardness or opacity as a tint in the brush cursor as you Alt-right-click/Control-Option drag vertically (Use Graphics Processor must be checked in the Performance panel).
Transparency & Gamut Preferences B
B Transparency & Gamut Preferences
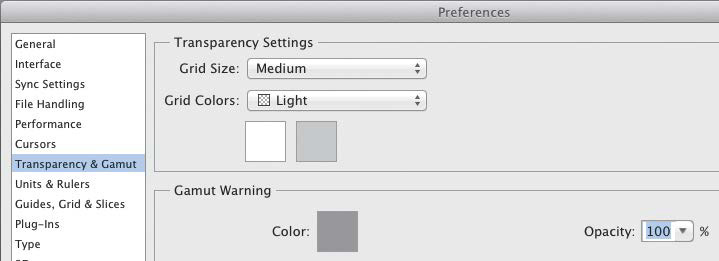
Transparency Settings
Choose a Grid Size for the checkerboard that Photoshop uses to represent layer transparency on the Layers panel and in the document window.
For the transparency checkerboard, choose one of the Grid Colors options from the menu, or click each color swatch and choose a color via the Color Picker.
Gamut Warning
To change the color that Photoshop uses to mark out-of-gamut colors when the View > Gamut Warning feature is on, click the Color swatch. You can also change the Opacity of the Gamut Warning color.
![]() To get directly to the Units & Rulers panel of the Preferences dialog, double-click either ruler in the document window.
To get directly to the Units & Rulers panel of the Preferences dialog, double-click either ruler in the document window.
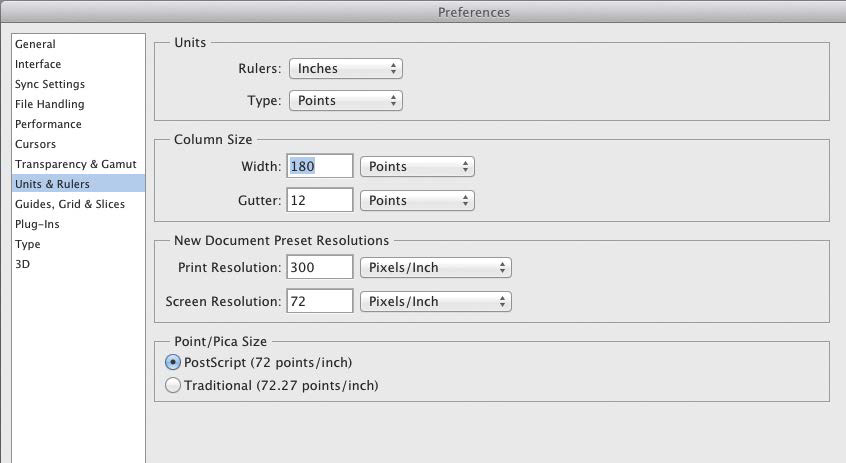
Units
From the Rulers menu, choose a unit of measure to display on the horizontal and vertical rulers; in dialogs, such as Image > Canvas Size; and on panels, such as the Info panel. To learn about the rulers in Photoshop, see pages 287–289.
![]() To change the ruler units without opening the Preferences dialog, right-click either one of the rulers in the document window and choose a unit from the context menu. When changed this way, via the Info Panel Options dialog, or via the Preferences dialog, the units change in all locations.
To change the ruler units without opening the Preferences dialog, right-click either one of the rulers in the document window and choose a unit from the context menu. When changed this way, via the Info Panel Options dialog, or via the Preferences dialog, the units change in all locations.
From the Type menu, choose Pixels, Points, or Millimeters as the unit of measure for the Character panel and Paragraph panels, and for the Font Size field on the Options bar when a type tool is selected.
Column Size
If you need to fit your Photoshop images into a specific column width in a page layout program, enter values in the Width and Gutter fields here. Thereafter, when you open the New, Image Size, or Canvas Size dialog and then choose Columns from the units menu next to the Width field, Photoshop will use your Width and Gutter preference values to calculate the Width.
New Document Preset Resolutions
Enter a Print Resolution value in either one of the available units to display as the Resolution setting when you choose one of the three print presets (such as U.S. Paper) in the New dialog; the default value is 300 ppi. For the Screen Resolution, enter a value to display as the Resolution when you choose the Web, Mobile & Devices, or Film & Video preset (the default value is 72 ppi). See pages 15–16.
Point/Pica Size
Click PostScript (the default, and recommended, setting) to have Photoshop use the standard PostScript value as the points-to-inch ratio.
Note: Changes made in this dialog will preview immediately in your document.
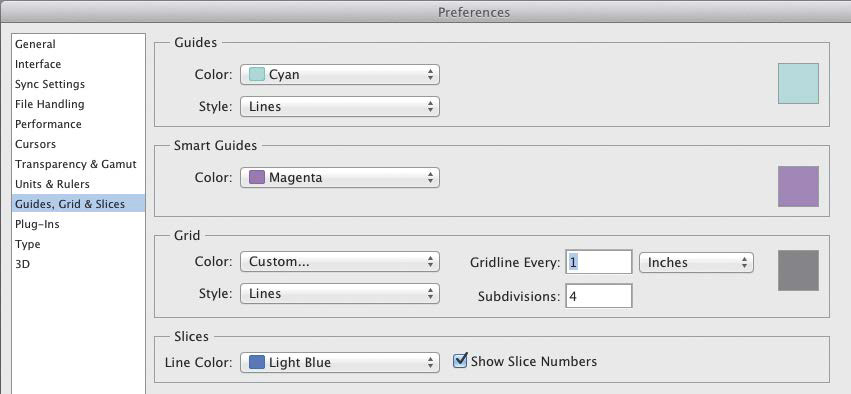
Guides
For ruler guides, choose a Color from the menu (or click the swatch and use the Color Picker), and choose a Style. See pages 287–288.
Smart Guides
For Smart Guides, temporary lines that display as you move a layer or selection, choose a Color from the menu (or click the swatch and use the Color Picker). See page 286.
Grid
For the nonprinting grid, choose a Color and a Style. (To show or hide the grid in your document, press Ctrl-’/Cmd-’.)
To display grid lines onscreen at specific intervals, choose a unit from the menu, then enter a Gridline Every value. If you choose Percent from the menu and enter a value, grid lines will appear at those percentage intervals of the document width, starting from the left edge of the canvas. To control the spacing between the thinner grid lines that fall within the main grid lines, enter a Subdivisions value.
Slices
Choose a Line Color for the slice boundaries. Check Show Slice Numbers to have Photoshop display a slice number in the upper-left corner of each slice. (To learn about the slice tools, see Photoshop Help.)
Plug-ins Preferences (A)
A Plug-ins Preferences
Note: To implement changes made in this panel, you must relaunch Photoshop.
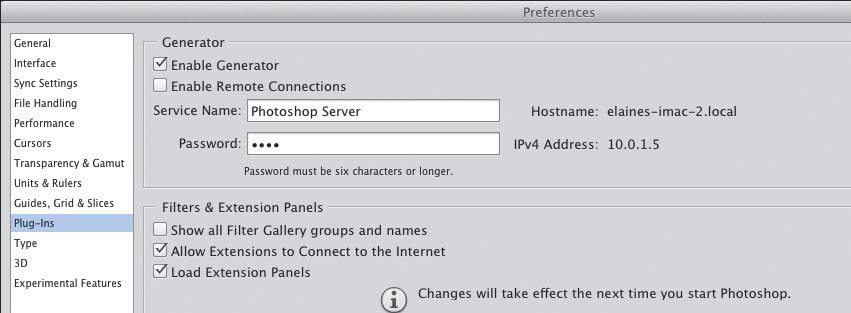
Generator ![]()
With Enable Generator checked, you can generate GIF, JPEG, PNG, or SVG image assets from Photoshop layers for output to the Web or mobile devices. See pages 489–494.
Check Enable Remote Connections to let Photoshop set up a wireless connection with companion apps (e.g., Adobe Nav, Color Lava, and Eazel) that run on tablets and iPads. To learn more about this feature, see “Companion Apps” in Photoshop Help.
Filters & Extension Panels
Check Show All Filter Gallery Groups and Names to list all Photoshop filters in the submenus on the Filter menu, including those that are accessible in the Filter Gallery. With this option off, the submenus list only the filters that are not in the Filter Gallery, and the menu is more streamlined.
Panels from Adobe and third-party suppliers are accessed in Photoshop via Windows > Extensions. Check Allow Extensions to Connect to the Internet here to enable those extension panels to connect to the Internet in order to access updated content.
Check Load Extension Panels to have the extension panels that are currently residing in the Plug-ins folder (within the Photoshop application folder) load automatically when you launch Photoshop.
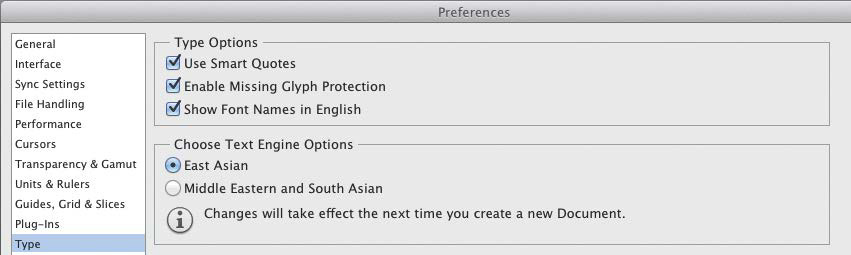
Type Options
Be sure to check Use Smart Quotes to have Photoshop insert typographically correct (curly) apostrophes and quotation marks automatically as you input type, instead of the incorrect (straight) foot and inch marks.
Check Enable Missing Glyph Protection to permit Photoshop to substitute Roman characters for missing glyphs, such as Japanese or Chinese characters.
Check Show Font Names in English to have non-Roman font names display in English on the Font menus (e.g., “Adobe Ming Std” instead of in the equivalent Chinese characters).
To display special language features on the Character and Paragraph panels and panel menus, click East Asian or Middle Eastern and South Asian here, then on the Type > Language Options submenu in Photoshop, check East Asian Features or Middle Eastern Features. (One of those two options will be listed in addition to the standard setting, which is Default Features.)
Note: A change in the Text Engine Options setting won’t affect existing documents, but will apply to new documents without your having to relaunch Photoshop.
Experimental Features Preferences 
Experimental Features
Here you can enable features that Adobe is currently working on (that are not officially part of Photoshop), that you want to experiment with. Click Learn More to get info about the current features in Adobe Help.
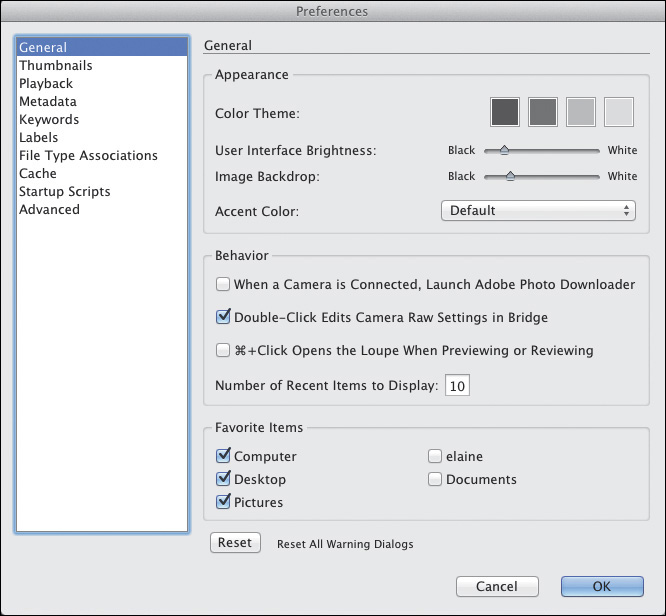
Appearance
Click a Color Theme for the Bridge interface.
Choose a gray value as the overall User Interface Brightness, which appears in the side panes.
Choose a gray value for the Image Backdrop, the area behind the Content and Preview panels. This value also displays as the background behind images when displayed in Full Preview View or in Slideshow or Review mode.
Choose an Accent Color for the highlight border around selected folders, thumbnails, and stacks, and for text that is selected in the panels.
Behavior
Check When a Camera Is Connected, Launch Adobe Photo Downloader to make the Downloader the default system utility for acquiring photos (this option is for Mac OS users only).
Check Double-Click Edits Camera Raw Settings in Bridge to have raw files open into Camera Raw, hosted by Bridge, when double-clicked. See page 52.
If Ctrl-Click/Cmd-Click Opens the Loupe When Previewing or Reviewing is checked, you have to hold down Ctrl/Cmd while clicking an image preview to make the loupe display. With this option unchecked, you can make the loupe appear simply by clicking the preview (see page 31).
For Number of Recent Items to Display, enter the maximum number of files (0–30) that can be listed at a time on the Open Recent File menu ![]() and on the Reveal Recent File or Go to Recent Folder menu
and on the Reveal Recent File or Go to Recent Folder menu ![]() on the Path bar.
on the Path bar.
Favorite Items
Check the items and system-generated folders you want Bridge to list in the Favorites panel.
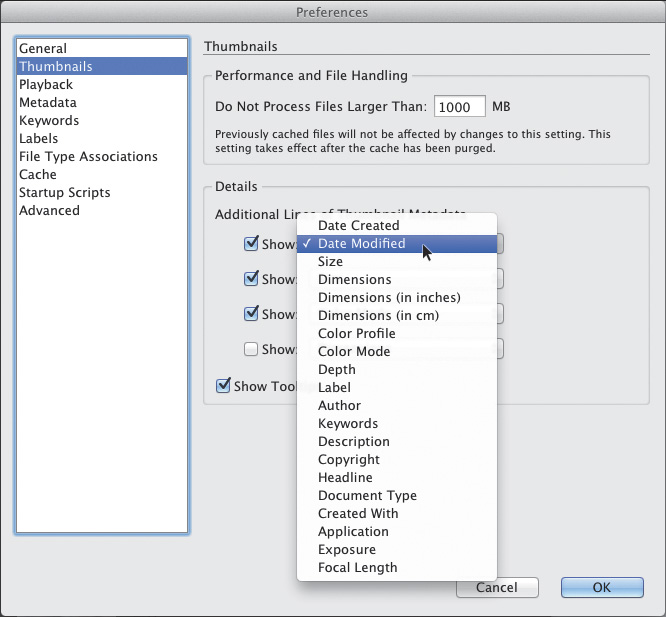
A Thumbnails Preferences, in Bridge
Performance and File Handling
Note: To implement a change to the Performance and File Handling setting, you must purge the folder cache by choosing Tools > Cache > Purge Cache for Folder [folder name].
For Do Not Process Files Larger Than, enter the maximum file size for which you will permit Bridge to display a thumbnail (the default value is 1000 MB). Bear in mind that large files preview slowly.
Details
For Additional Lines of Thumbnail Metadata, check Show for each line of metadata that you want Bridge to display, and choose the category of file information you want listed next to or below the image thumbnails in the Content panel (see page 37).
Check Show Tooltips to allow Tool Tips to display in Bridge, such as when you rest the pointer on an image thumbnail.
Playback Preferences
Stacks
Choose a Stack Playback Frame Rate to control the speed at which a stack of thumbnails plays back via the Play button.
Audio and Video
Choose options to control whether audio and video files will play automatically when previewed and/or loop automatically when viewed in the Preview panel.
Metadata Preferences
Check the categories of metadata you want Bridge to display in the Metadata panel.
Check Hide Empty Fields to hide any fields on the Metadata panel that are empty.
Check Show Metadata Placard to display camera data in a separate section at the top of the Metadata panel (see page 29).
Check Automatically Apply Parent Keywords to have the parent keyword also apply automatically when a subkeyword box is checked in the Keywords panel. If this option is on and you want to apply just a subkeyword, Shift-click the check box in the Keywords panel. See pages 38–39.
For Write Hierarchical Keywords, click an Output Delimiter character to be used to separate keywords in files that are exported from Bridge; and for Read Hierarchical Keywords, click an Input Delimiter character to be used to separate keywords in files that are imported into Bridge.
Labels Preferences
Check whether to Require the Control/Command Key [to be pressed in the shortcut] to Apply Labels and Ratings to selected file thumbnails (see page 40). You can also change the label names here, but not the colors.
File Type Associations Preferences
These settings tell Bridge the applications into which it may open files of different types. Don’t monkey around with these settings unless you know what you’re doing!
Cache Preferences
Options
Check Keep 100% Previews in Cache to save large JPEG previews of image thumbnails to disk for faster previewing when using the loupe and when previewing images in Slideshow mode at 100% or in Full Screen Preview view. We keep this option unchecked, because it uses a lot of disk space.
Check Automatically Export Caches to Folders When Possible to have Bridge export all cache files (in which metadata and thumbnail information is stored) to the same folders in which the images are located or to which they are copied. See page 48.
Location
If you need to specify a different location for the Bridge cache, click Choose, choose a folder, click Open, then relaunch Bridge. We recommend leaving this setting alone.
Manage
If you have a very large hard disk, you can use the Cache Size slider to increase the maximum number of items that Bridge can store in its cache.
Click Compact Cache to allow previously cached items that are no longer available to be removed from the cache, for improved performance.
Click Purge Cache to purge all cached thumbnails and previews from the central database, in order to free up space on your hard disk or as a remedy if Bridge is having trouble displaying your image thumbnails. Do this only when absolutely necessary.
Startup Scripts Preferences
All Startup Scripts that are checked in this dialog will be activated at startup. We recommend keeping all of them checked, unless you have a specific reason to uncheck any. Changes to these settings take effect when you relaunch Bridge.
Advanced Preferences
Miscellaneous
If (and only if) you encounter display problems in Bridge, check Use Software Rendering, then relaunch Bridge. This option turns off hardware acceleration for the Preview panel and Slideshow mode.
Check Generate Monitor-Size Previews to have Bridge generate previews based on the resolution of your display. In a dual-monitor setup, the previews are sized according to the resolution of the larger of the two monitors.
Check Start Bridge at Login if you want Bridge to launch automatically upon startup.
International
To implement a change in Language that you choose for the Bridge interface and/or for the Keyboard, you must exit/quit and relaunch Bridge.