9. Connecting to the Cloud
The Galaxy Tab 4 is a great tool for viewing web pages, whether you’re at home or you’re on the go. No matter which Galaxy Tab 4 model you use, the screen is much larger than a mobile phone so you can see more on the Galaxy Tab 4’s screen. Because you can touch the screen, you can interact with web content in ways that a computer typically cannot. This chapter covers the following:
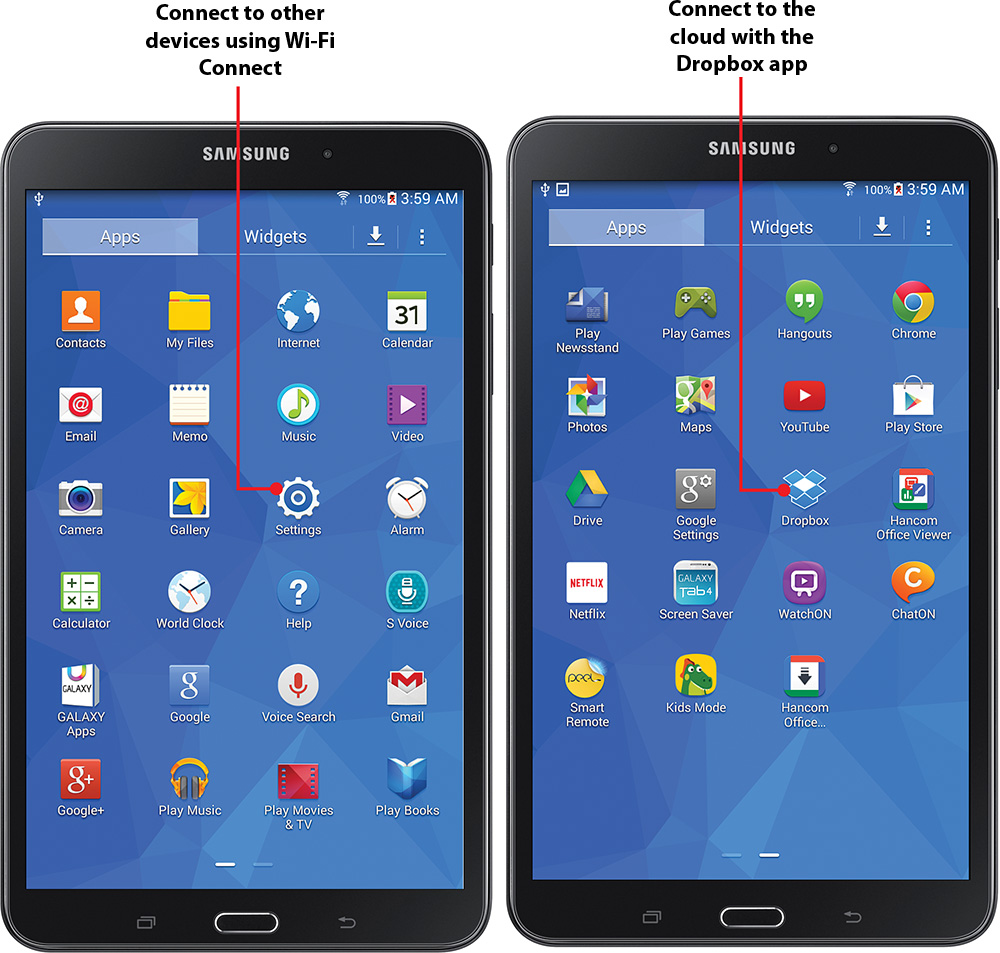
![]() Connecting using Wi-Fi Connect
Connecting using Wi-Fi Connect
Connecting Using Wi-Fi Direct
If you need to wirelessly transfer data to or connect with another device such as your smartphone, you don’t need to buy a cable or even a wireless router to connect your Galaxy Tab 4 to another device. You can use the Tab 4 Wi-Fi Direct feature to connect to another device that also has Wi-Fi Direct enabled.

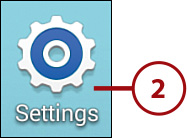
2. Tap Settings.
3. Tap the Wi-Fi option in the menu on the left side of the screen if the option isn’t selected already.
4. Tap Wi-Fi Direct.

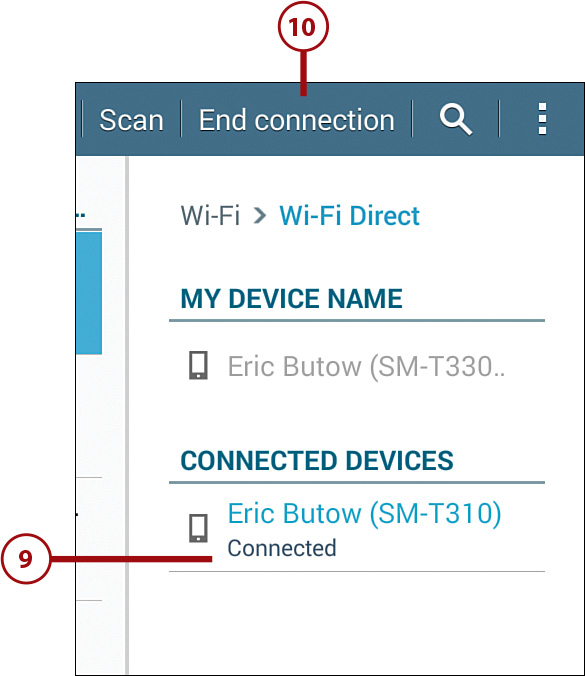
5. The name of your Galaxy Tab 4 appears in the My Device Name section of the Wi-Fi Direct setting options area.
6. The Tab 4 searches for available devices available near you and displays those devices in the Available Devices section.
7. Tap Multi Connect if you want to show only those devices that can connect to multiple devices through a Wi-Fi Direct connection, such as a wireless printer.
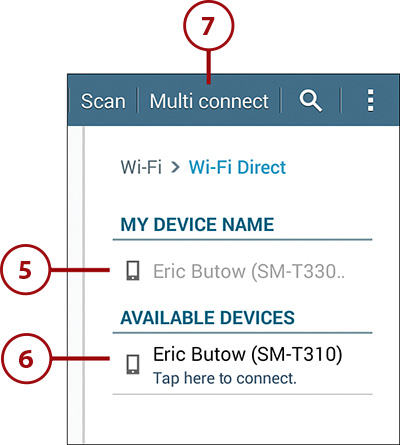
8. Tap the device name to which you want to connect.
9. The list shows the device is connected.
10. Disconnect from the device by tapping End Connection.

Printing Wirelessly
It’s easy to print a file such as a word processing document or spreadsheet from your Galaxy Tab 4. You don’t need any cables, and you don’t need to transfer your files to another computer, either. However, there are some limitations to the printing functionality built into the Tab 4, but you can download apps and use web-based services to get around those limits.
Connect a Wi-Fi Printer
Your Tab 4 automatically scans for wireless printers that are available through a Wi-Fi connection. Note that you might have to enable a Wi-Fi connection on the printer as well. For this example, I use my Hewlett-Packard (HP) Officejet Pro X576dw printer, which I refer to from here on out as the Officejet Pro. The Officejet Pro requires the user to enable HP Wireless Direct functionality on the printer before any device can see the printer.
1. Tap the Apps icon on the Home screen.

2. Tap Settings.
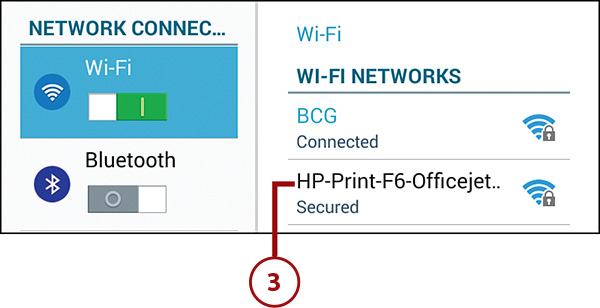
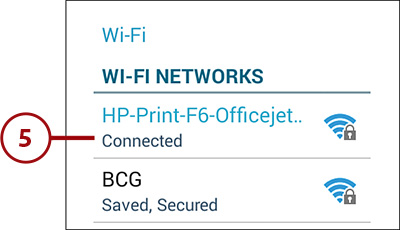
3. Connect to the printer by tapping the printer name in the Wi-Fi Networks list.
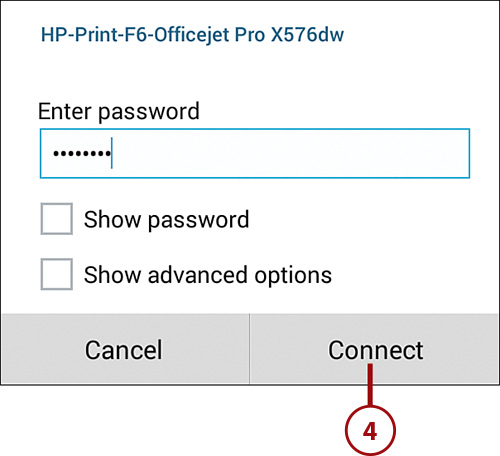
4. If you need to enter a password, type it in the window and then tap Connect.
5. The Tab 4 might take a few seconds to find the printer’s IP address; after it does, the printer appears at the top of the Wi-Fi Networks list and displays the Connected status.
Connect a Bluetooth Printer
If you have a Bluetooth printer, you can also connect that printer to your Galaxy Tab 4 so you can print wirelessly.
1. Tap the Apps icon on the Home screen.

2. Tap Settings.
4. Swipe the slider button from left to right to turn on Bluetooth connectivity. The Tab 4 finds your printer.
5. Tap the printer name.
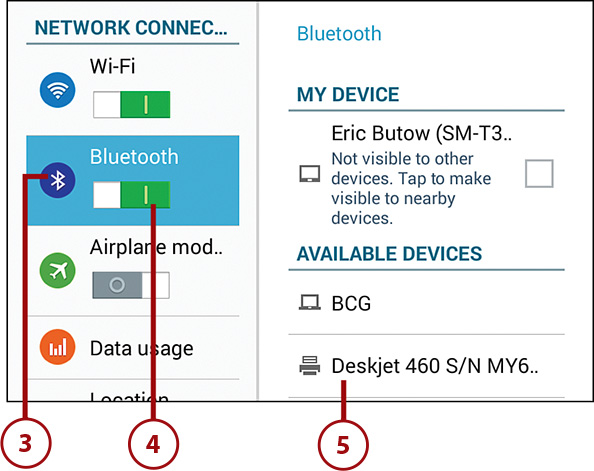
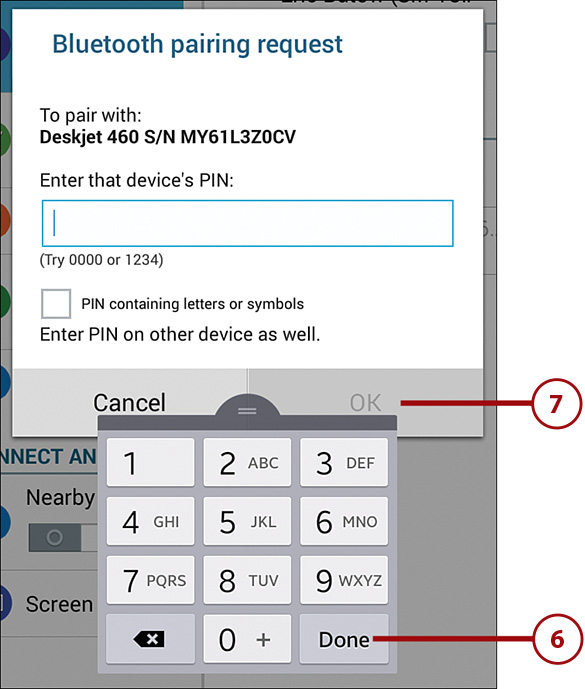
6. Type the printer PIN in the Bluetooth Pairing Request window using the keypad at the bottom of the screen. You will need to consult your printer documentation and/or the printer manufacturer’s website to find the PIN. When you’re finished, tap Done.
7. Tap OK.
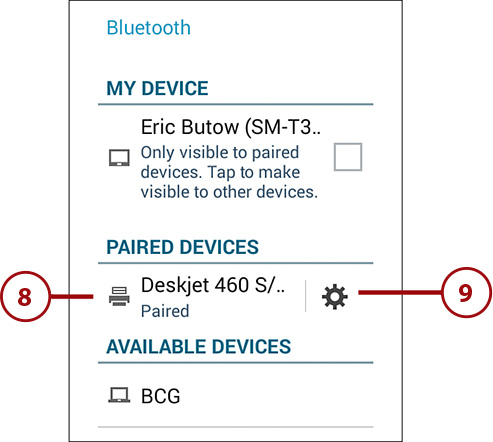
8. The paired Bluetooth printer appears in the Paired Devices section.
9. Tap the Settings icon to the right of the printer name to change the printer name and unpair, or disconnect, the printer from the Tab 4.
Sharing Files
A “cloud storage” service enables you to upload files onto its server computers. Cloud storage services make it easy for you to share large files with others, especially because the maximum file attachment sizes in email messages can vary depending on the email service you use. And downloading email messages with large file attachments can take a long time, anyway.
Use the Dropbox App
The Dropbox app came installed on your Galaxy Tab 4, and you might have set up your Dropbox account when you set up your Tab 4. You can give another Dropbox user access to one or more folders in your account so that other users can upload files to and download files from that folder. The Dropbox icon is available on the main Home screen and/or within the Apps screen.
Add Galaxy Tab 4 Images to Dropbox and Create an Album
1. Swipe to the second Home screen and then tap Dropbox.
2. Tap Sign In in the Welcome to Dropbox screen.
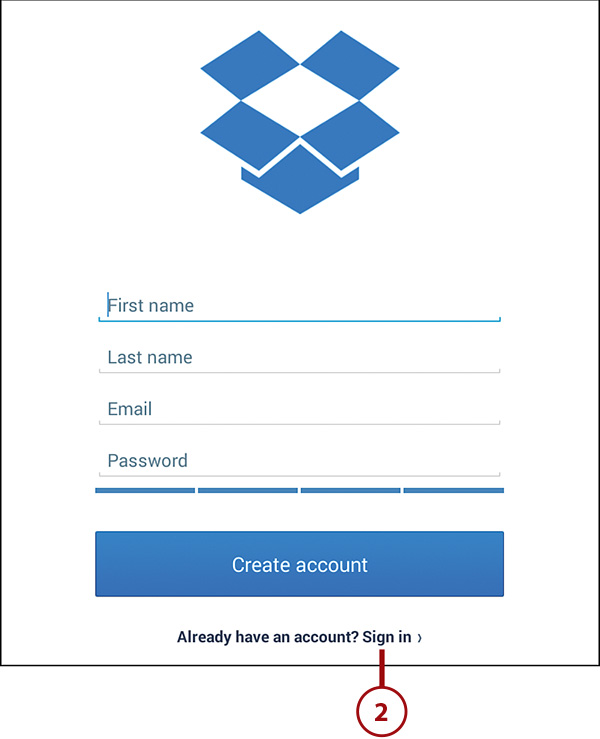
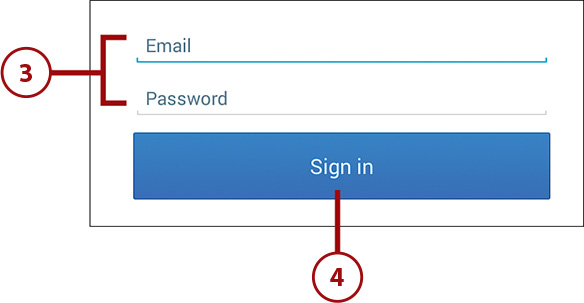
3. Type your Dropbox email and password in the Email and Password fields.
4. Tap Sign In.
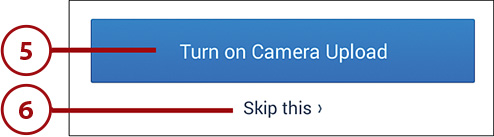
5. Tap Turn On Camera Upload (which is what this example does) to automatically upload all the images stored on your Galaxy Tab 4 to Dropbox.
6. Tap Skip This if you don’t want to upload your images to Dropbox.
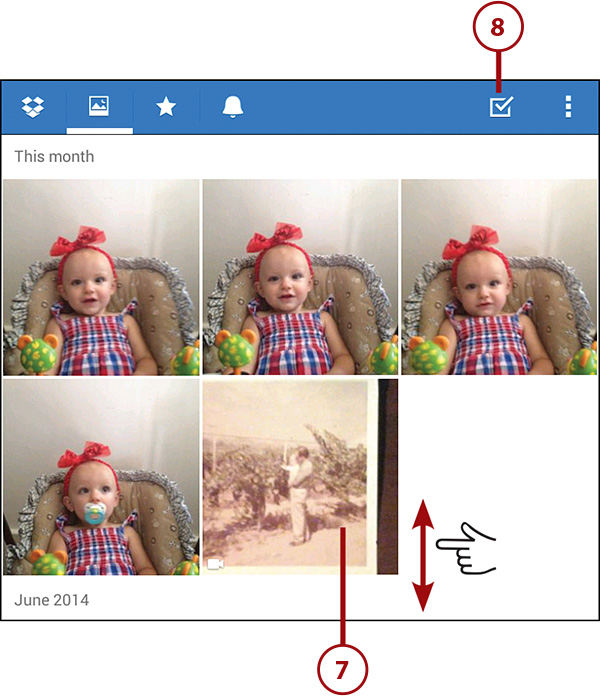
7. Swipe up and down in the Photos page to view all the photos that were uploaded to Dropbox.
8. Tap the Select icon to add photos to an album.
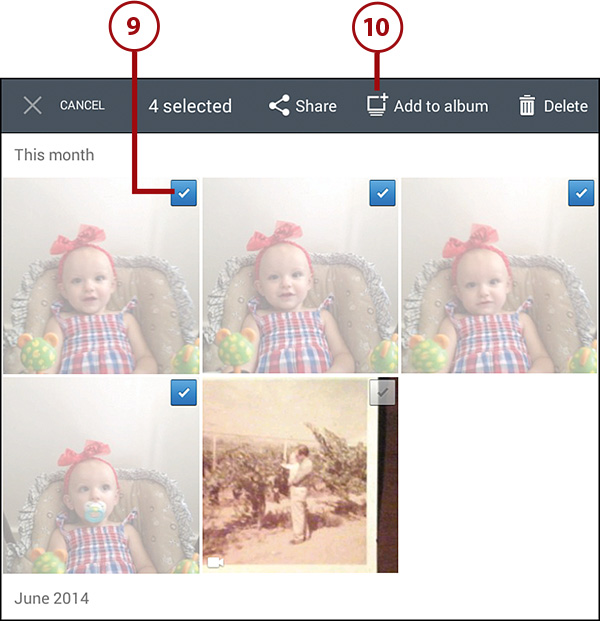
9. Tap the photo(s) you want to add to the album. Selected photos contain a blue checkbox in the upper-right corner of the photo.
10. Tap Add to Album.
11. In the Add to Album window, tap Create New Album.
12. Type the name of your album in the Name Your Album field.

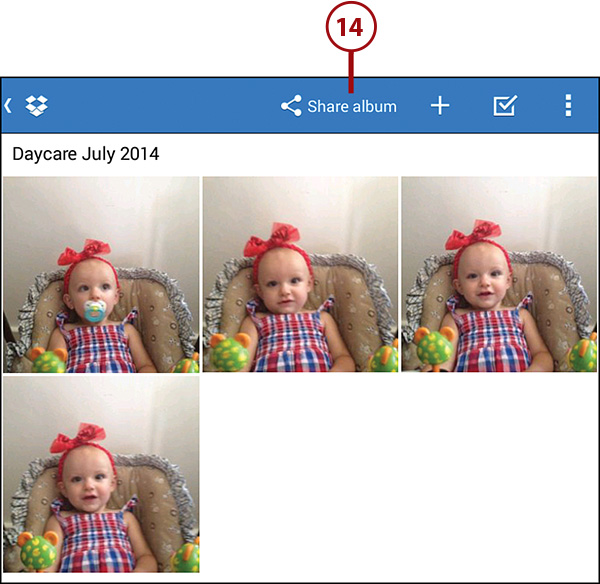
13. Tap Done in the keyboard. The completed album displays on the screen.
14. Tap Share Album to share a link to the album on your Dropbox account.
15. Tap the service or app you want to use to share the link. Tap See All at the bottom of the window to view all the services and apps.

16. For now, return to the album page by tapping on the screen outside the window and then tapping the Back touch button.
17. View your list of albums by tapping Albums.
18. View photos in the album within the album page by tapping the album name in the list.
19. Go to the Dropbox home screen by tapping the Dropbox icon in the menu bar.

View and Share Files in Dropbox
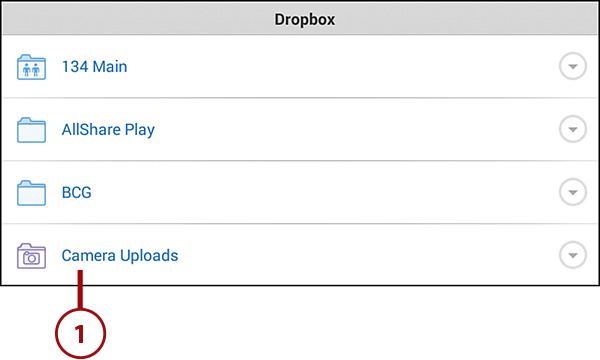
The Dropbox home screen contains all files and subfolders within the Dropbox folder.
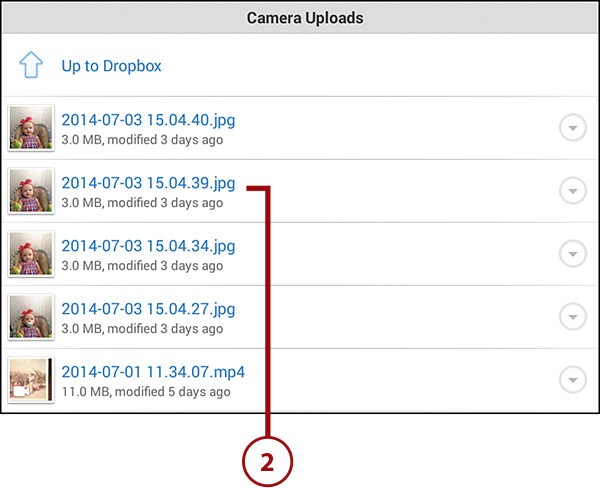
1. View files within a folder by tapping the folder name in the list.
2. Swipe up and down in the screen to view all the files within the folder. When you find a file that you want to view, tap the file to view it. If the file is a photo or image file as in this example then the file opens within the built-in Dropbox image viewer.
3. After a couple of seconds, the menu bar at the top of the image disappears so you can view the image in its entirety. Open the menu again by tapping on the image.
4. Tap the Trash icon to delete the image from Dropbox.
5. Tap the Share icon to share a link to the file.
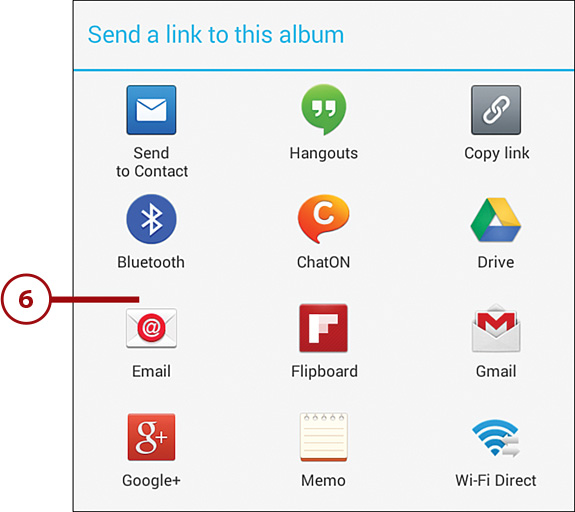
6. Tap the service or app you want to use to share the link in the Share a Link to This File message. For now, return to the image viewer screen by tapping the Back touch button.
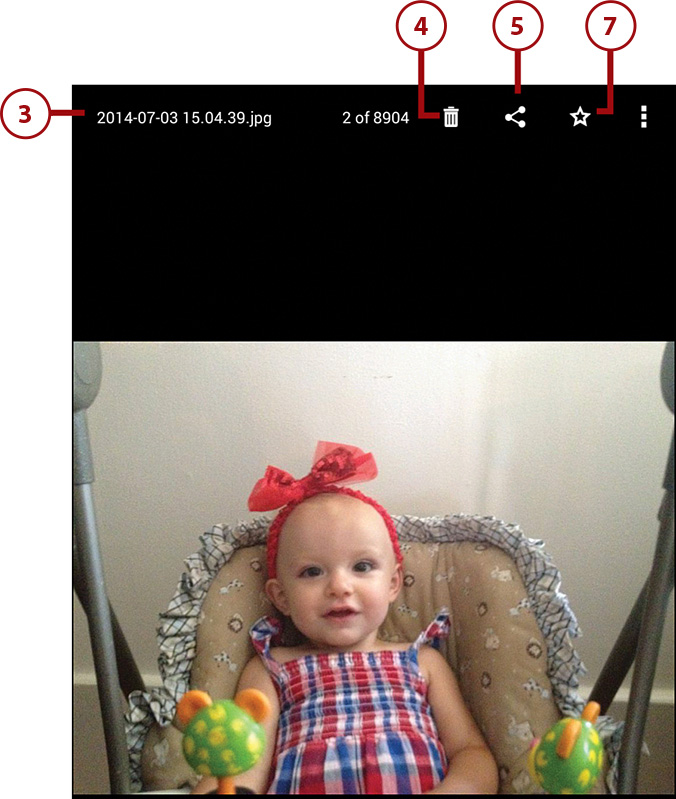
7. Tap the Favorites icon to add the image file you’re viewing to your Favorites folder and save the image file to your Tab 4 so you can access it when you don’t have a Wi-Fi connection to your Dropbox account.
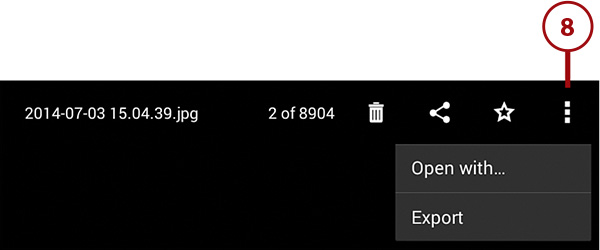
8. Tap the Menu icon so you can either open the file in another app (such as the image file) or export the file. You can export the file to an SD card, to a photo app, through a direct connection such as Bluetooth or Wi-Fi, in an email message, or on Google+.
9. Return to the folder page by tapping the Back touch button.
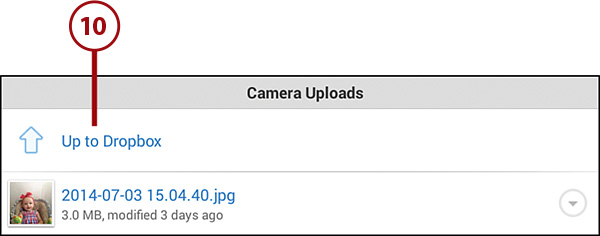
10. You can return to the main Dropbox folder by tapping Up to Dropbox at the top of the list or by tapping the Back touch button.
Access Menu Options
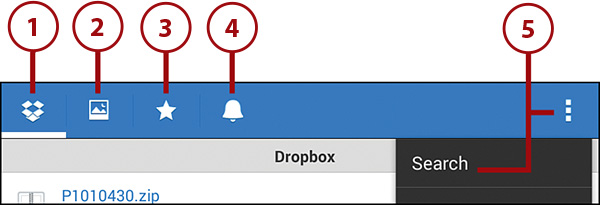
1. The Dropbox home screen icon appears by default and the icon contains a white line under it, which indicates that the home page is active.
2. Tap the Photos icon to view, add, and delete photos and albums in your Dropbox account.
3. Tap the Favorites icon to view all the files you marked as favorites in the Favorites screen.
4. Tap the Alerts icon to view recent alerts from Dropbox, such as a new file added to one of your Dropbox folders.
5. Tap the Menu icon and then tap Search to search for files in Dropbox.
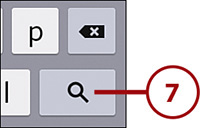
6. Type your search term(s) in the Search My Dropbox field.

7. Tap the Search button in the keyboard. Results display in the Search Dropbox screen.
8. Swipe up and down the screen to view all the files in the list. Tap on a file to view the contents on the screen.
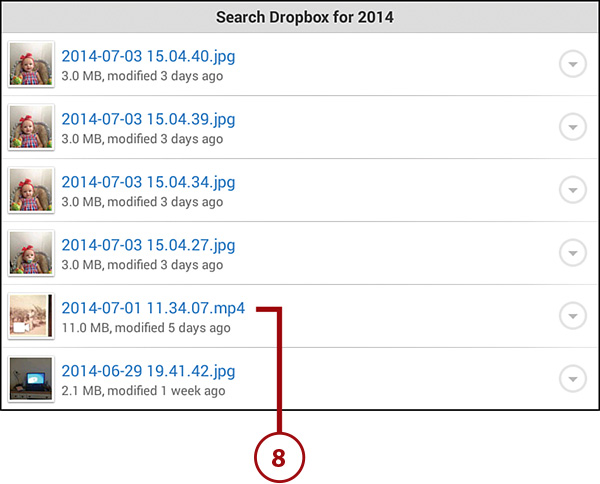
9. Return to the Dropbox home screen by tapping the Back touch button.
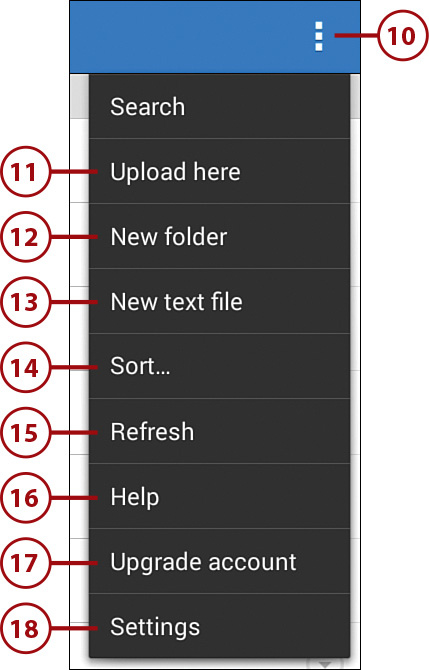
10. Open a menu with more options by tapping the Menu icon in the menu bar.
11. Tap Upload Here so you can upload files to the current folder you’re viewing.
12. Tap New Folder to add a new subfolder within the current folder.
13. Tap New Text File so you can type a new text file within the New Text File screen. This new text file will appear in the folder and is useful if you want another Dropbox user who has access to the folder to read important information.
14. Tap Sort to change the sort order. The default is alphabetical order, but you can change the order to list files from newest at the top of the list to oldest at the bottom.
15. Tap Refresh to refresh the list of files and/or subfolders.
16. Tap Help to get answers to your most common questions about Dropbox.
17. Tap Upgrade Account to pay for an upgrade your Dropbox account, such as to the Dropbox Pro plan with 100GB of space.
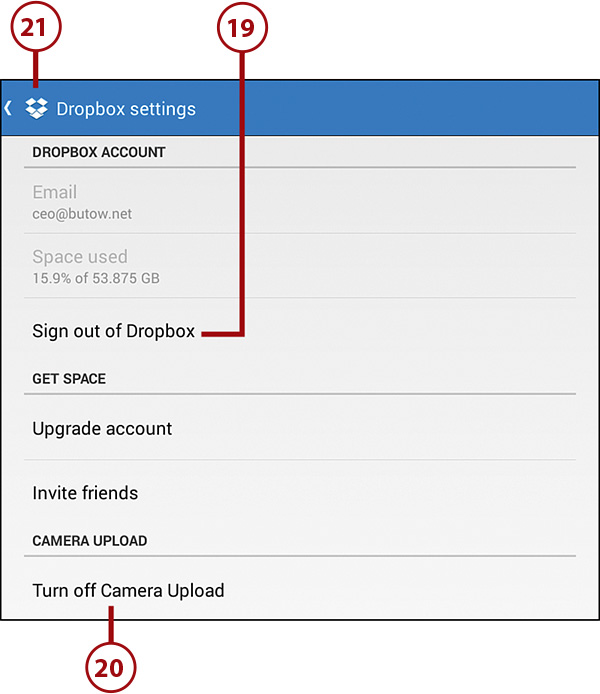
18. Tap Settings to get information about your account, change your account settings, and learn more about Dropbox.
19. Tap Sign Out of Dropbox if you don’t want to use Dropbox with your Tab 4 any longer but you still want to keep the Dropbox app.
20. Tap Turn Off Camera Upload to tell Dropbox not to upload anymore photos from the Tab 4.
21. Return to the Dropbox home screen by tapping the Dropbox icon in the menu bar.
Find Other Cloud Services
If you prefer to use another cloud storage app other than Dropbox, you can shop the Google Play Store for other cloud storage apps that are optimized for the Android operating system.
1. Tap Play Store on the Home screen.
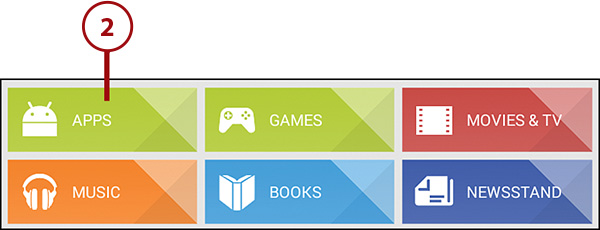
2. Tap Apps.
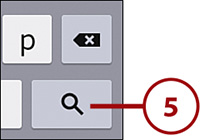
3. Tap the Search icon in the menu bar.
4. Type cloud storage in the Search Google Play field.

5. Tap the search button in the keyboard.
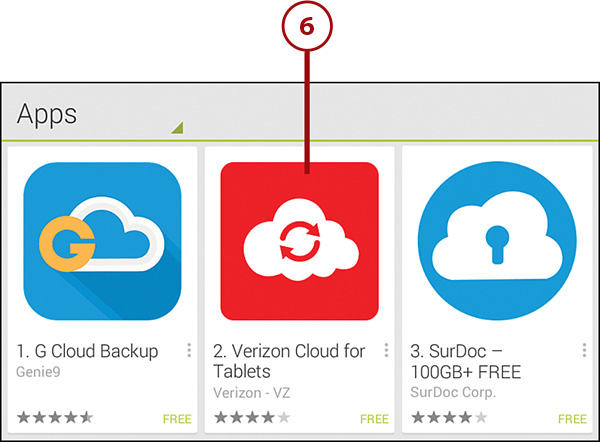
6. Swipe up and down within the list of apps in the search results screen. Tap a tile to view more information about the app. You learn more about shopping for apps in the Play Store in Chapter 16, “Finding and Managing Apps.”
Sharing Music and Video
There are a number of ways you can share your music and video between different devices or between your computer and your Galaxy Tab 4. If you have a computer that runs Windows, you can connect the Tab 4 to your computer and copy files with Windows Media Player. You can also connect your Tab 4 to your Windows computer and tell Windows that your Tab 4 is a storage device. One other alternative is to connect your PC or Mac to your Tab 4 using Samsung’s free Kies application.
Copy Files with Windows Media Player
When you connect your Galaxy Tab 4 to your PC with the data cable, you can choose how you want to connect and/or synchronize media files with your Tab 4. One option is to sync your computer and your Tab 4 with Windows Media Player. This example connects the Tab 4 to a PC running Windows 8.1.
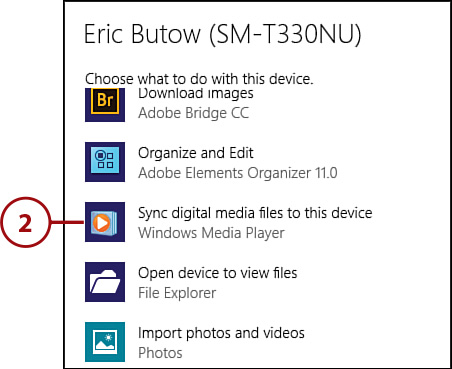
1. Connect the data cable from the Tab 4 to the USB port on your computer. An AutoPlay window opens.
2. Click the window and then click Sync Digital Media Files to this Device: Windows Media Player in the list.
3. Tap the Sync tab within the Windows Media Player window.
4. Click and drag the song title(s) you want to copy to the Sync list.
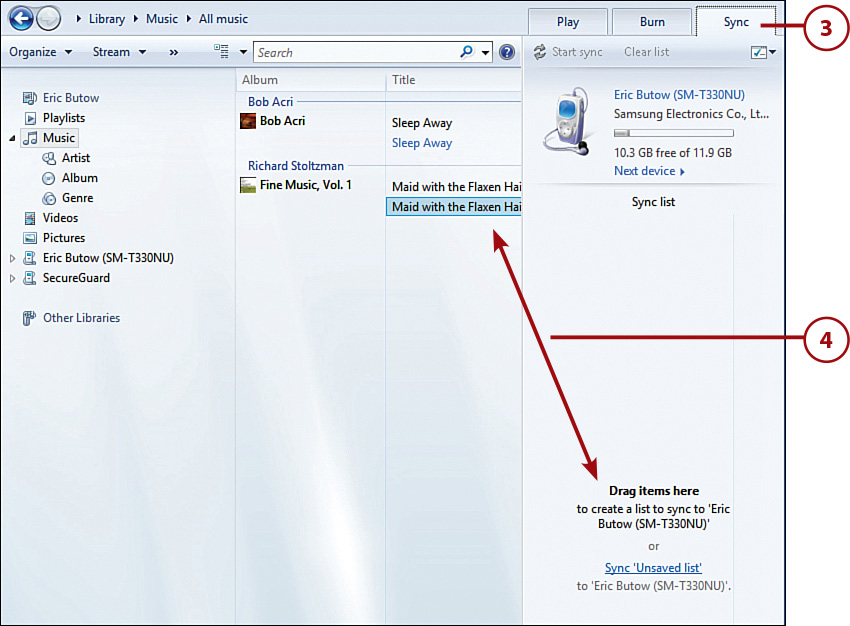
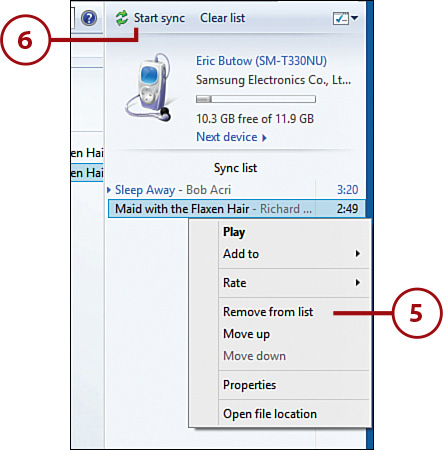
5. The list of music you select appears in the Sync list. All tracks in the albums are selected by default. You can deselect any songs that you do not want to copy by right-clicking the song and clicking Remove from List.
6. Tap Start Sync to begin copying the files from your PC to your Galaxy Tab.
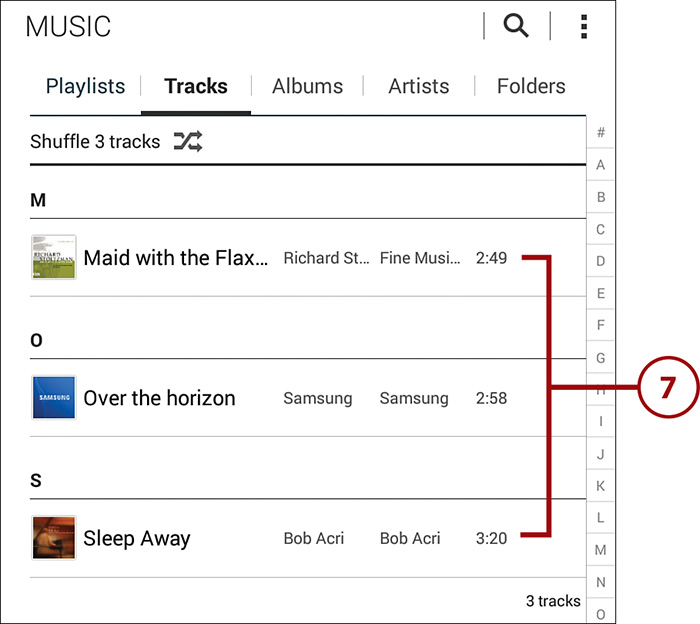
7. After sync is complete, the music is available for playback when you tap the Music app on your Tab 4.
Connect as a Mass Storage Device
You can drag and drop files from a PC to your Galaxy Tab 4 by connecting as a removable disk. Follow these steps to transfer music from your PC to your Tab 4.
1. Connect the data cable to the Tab 4 and the USB connector to the USB port on your computer. An AutoPlay window opens.
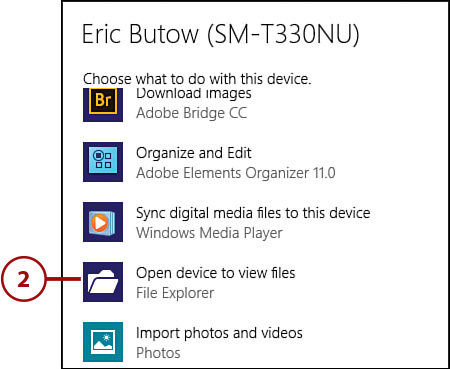
2. Click the window and then click Open Device to View Files: File Explorer in the list.
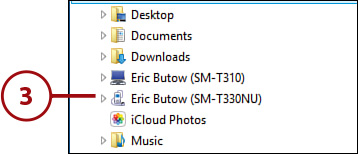
3. Your Tab 4 appears as a removable disk in the Computer section within the File Explorer window.
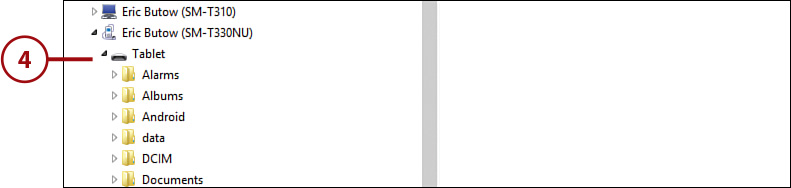
4. Display the home Tablet directory by clicking the folder name in the tree.
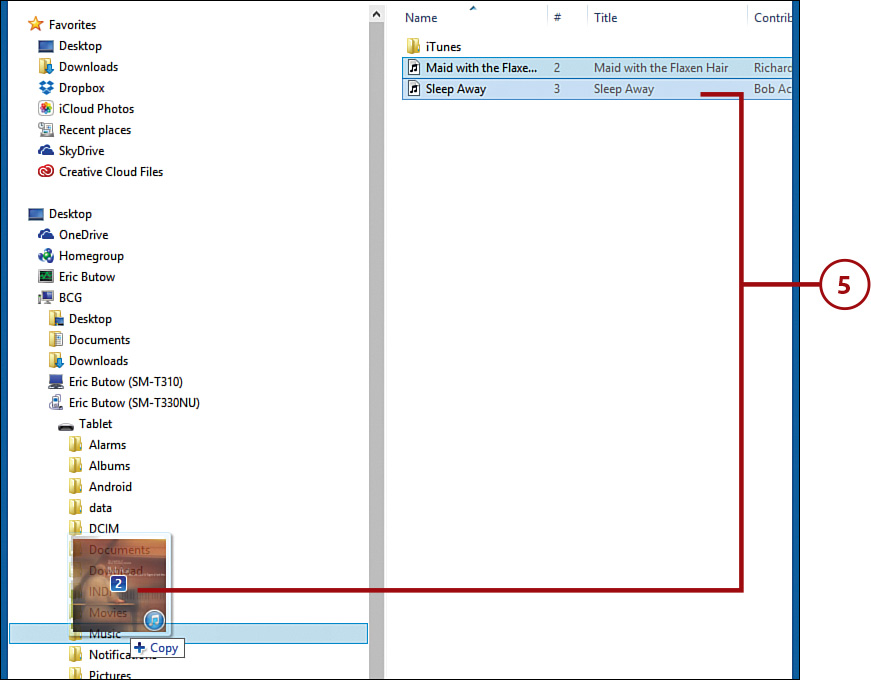
5. Locate the files that you want to transfer from your computer and then drag them to the Music folder on your Tab 4. The files are copied to your device.
6. After you have finished copying files to your Tab from your computer, remove the USB cable from the PC.
7. When you open the Music app on your Tab, the music you have transferred is available for playback.
Samsung Kies for PCs and Macs
The Samsung Kies application makes it easy for you to manage your music, movies, and photos between your computer and your Galaxy Tab 4. When you connect your Tab to your PC or Mac, Samsung Kies acts much like iTunes and Windows Media Player, enabling you to sync your content libraries.
1. After you have installed Samsung Kies onto your computer, connect your Tab to your PC or Mac.
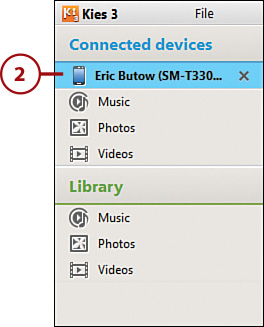
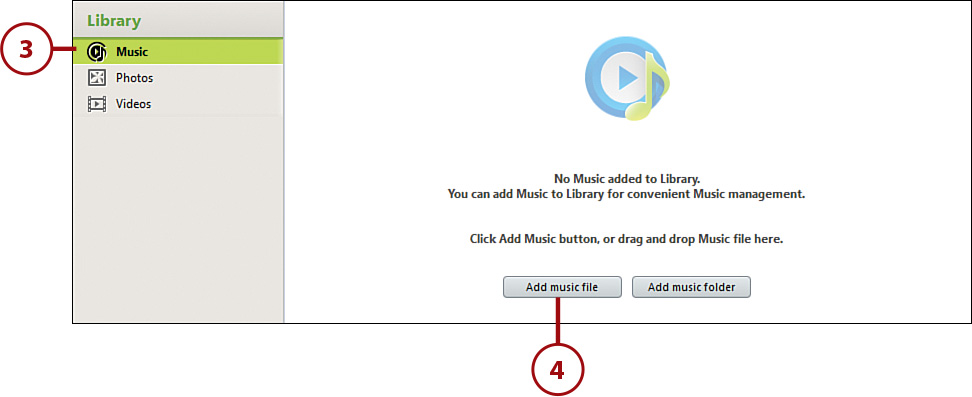
2. Launch Samsung Kies on your computer. Your Tab 4 opens under the Connected devices list in the sidebar on the left side of the window.
3. If this is your first time using Samsung Kies, you need to populate the library with music located on your computer. Click Music under Library.
4. Click the Add Music File button.
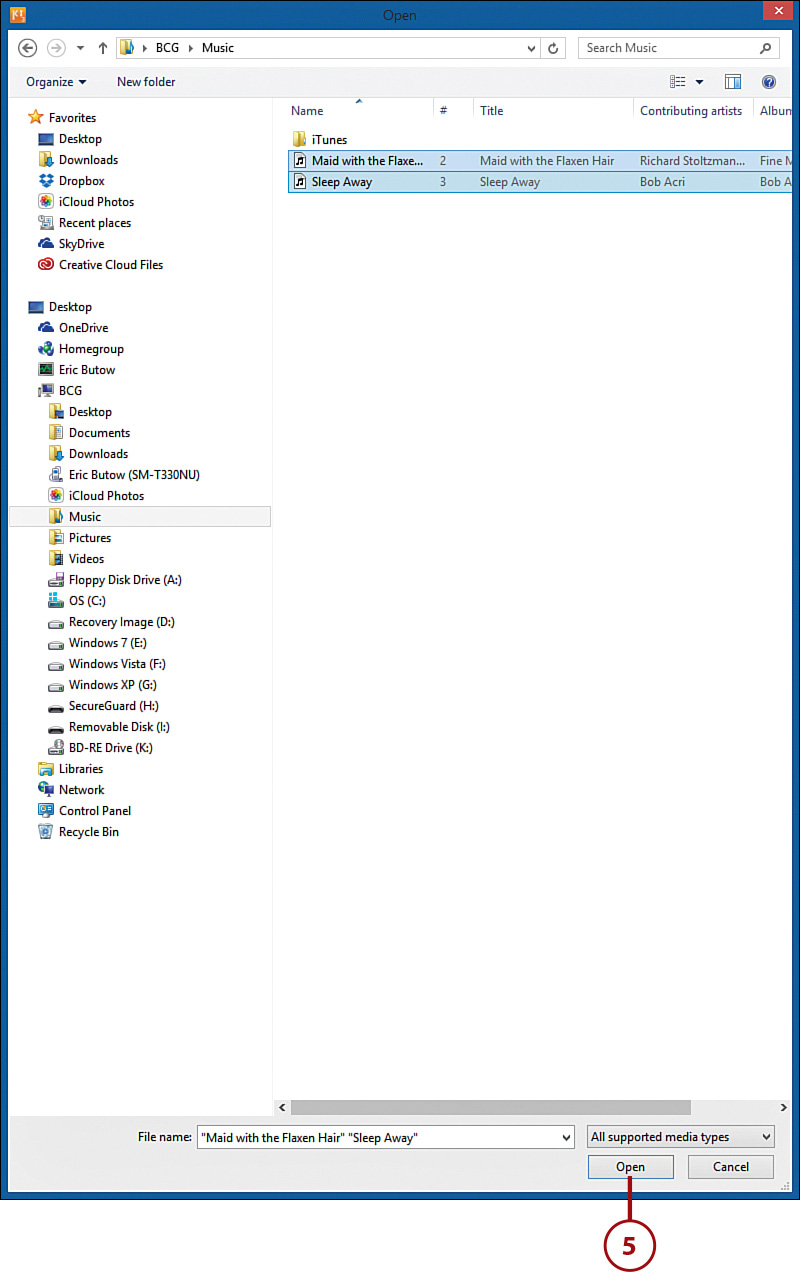
5. Go to the Music folder on your PC and select one or more files; when you’re done, click the Open button.
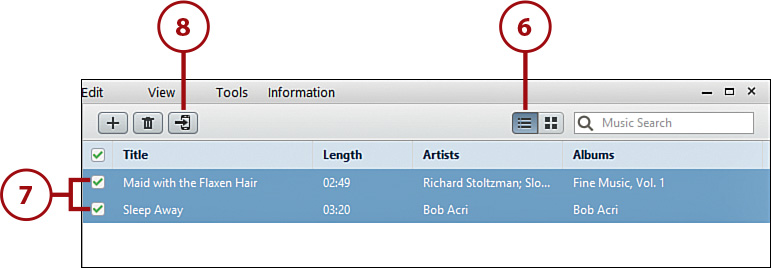
6. View the album titles without the covers by clicking on the Titles button.
7. Select files by clicking the check boxes to the left of the titles.
8. Click the Transfer to Device button.
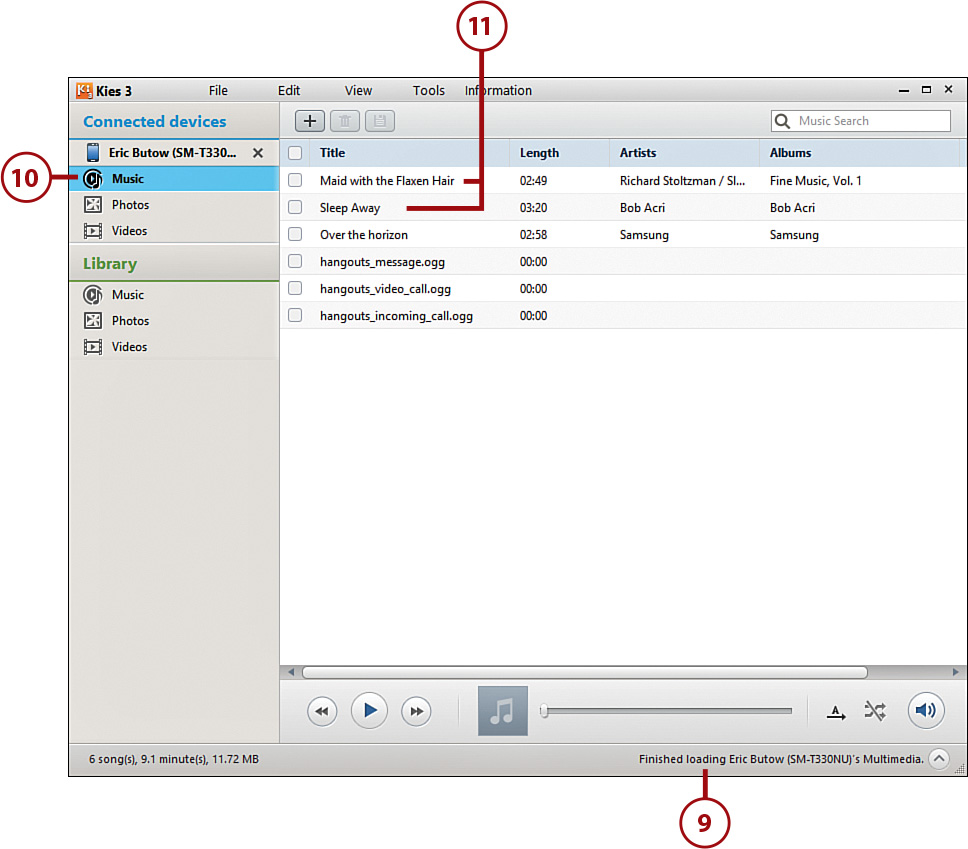
9. After Kies copies the file(s) to your Tab 4 successfully, a message appears in the status bar.
10. Click the Music folder under Connected Devices.
11. The copied files appear in your Music directory within Kies and on your Tab 4.
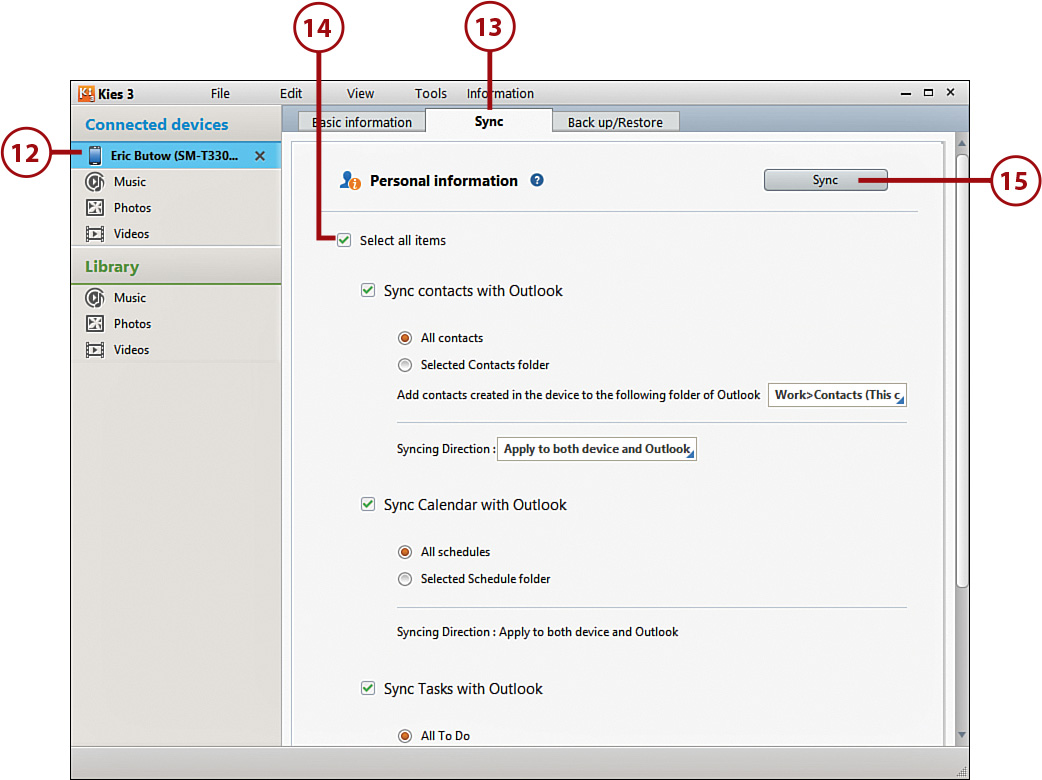
12. Click the Tab 4 name in the Connected Devices list.
13. Click the Sync tab.
14. Select the content that you want to sync to your Tab 4. As soon as you click the check box for a category, you are able to select all content for that category or select only specific content.
15. Click Sync. The content is synced to your Tab 4.