12. Sharing Your Photos and Videos
This chapter covers the ways you can share your pictures and videos online. You find out how to easily upload your pictures to Facebook, Flickr, and Twitter, and how to upload video to sites such as Vimeo. You also see how to send those pictures and videos via OS X’s Messages, AirDrop, and Mail and how to export your photos for use in other apps.
![]() Sharing your pictures on Facebook, Twitter, and Flickr right from Photos
Sharing your pictures on Facebook, Twitter, and Flickr right from Photos
![]() Sharing your videos on Facebook and Vimeo
Sharing your videos on Facebook and Vimeo
![]() Sending photos and videos via including Mail, AirDrop, and Messages
Sending photos and videos via including Mail, AirDrop, and Messages
![]() Exporting your photos for use in other apps
Exporting your photos for use in other apps
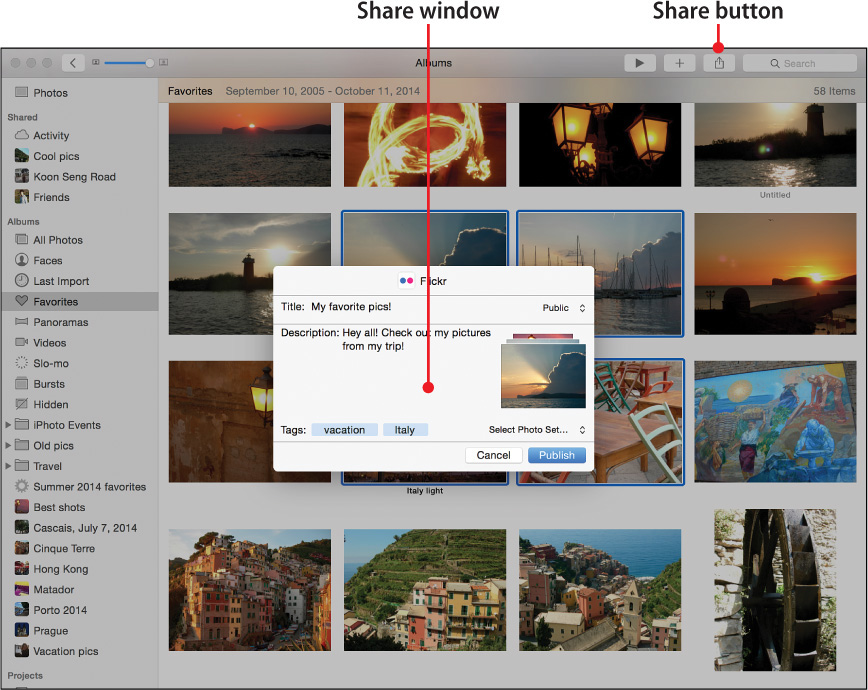
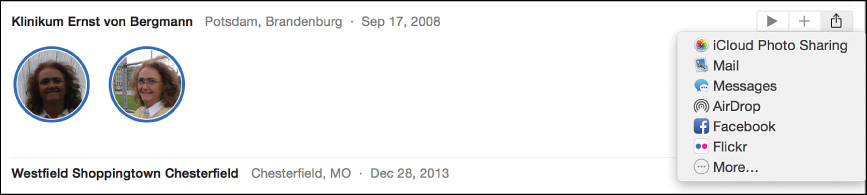
There’s no shortage of ways to share your pictures and videos in Photos, including via Apple’s iCloud Photo Sharing service, which is covered in Chapter 11, “All About iCloud.” But let’s face it—no matter how much Apple might want iCloud Photo Sharing to be the primary way you share your pics with others, you might already be using communities such as Facebook, Twitter, and Flickr, or you might prefer to use the other ways OS X already offers for sharing photos, such as email, Messages, and AirDrop. Thankfully, Apple was smart enough to include ways to share pictures and videos via all these other non-iCloud means with the Share button in Photos’ toolbar.
When you click the Share button, the Share pop-up menu displays a list of the available share options for your selected files. Your share options vary depending on the type and number of files in Photos you want to share.
In addition to the Share menu, Share buttons and menus actually appear in four other locations in the app:
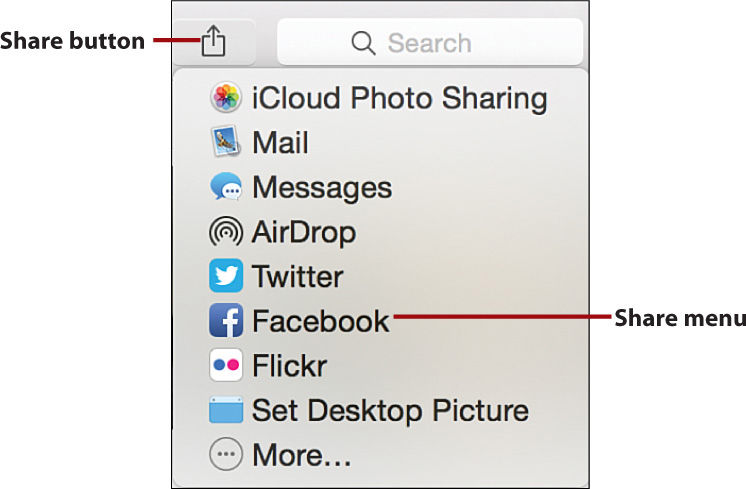
• When you right-click an image or video in Photos library you see a Share menu in the contextual menu that appears.
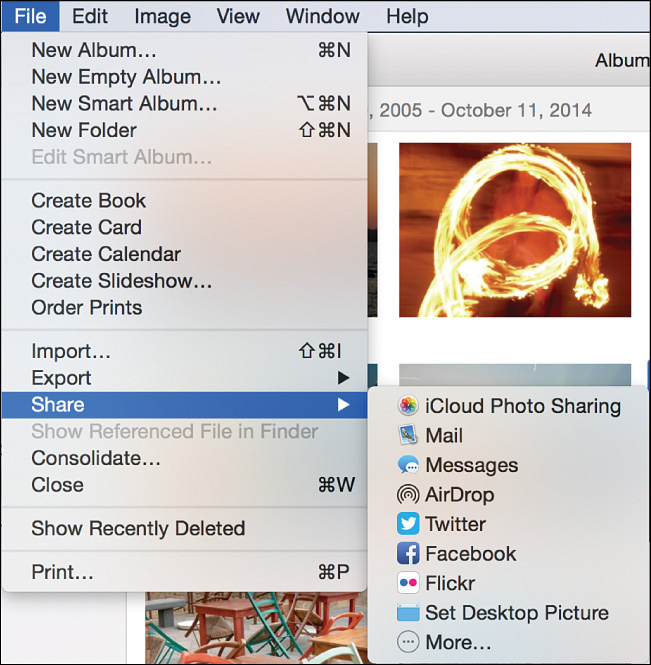
• You can use File, Share.

• When in a Moments grouping, when you move your mouse over the Moment’s header you see a Share button that enables you to share every file in that Moment via select services.
• The Share button also appears in a Face’s album’s header bar.
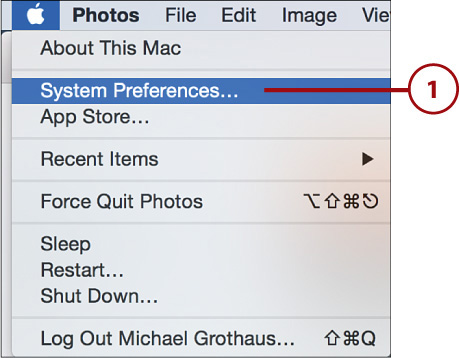
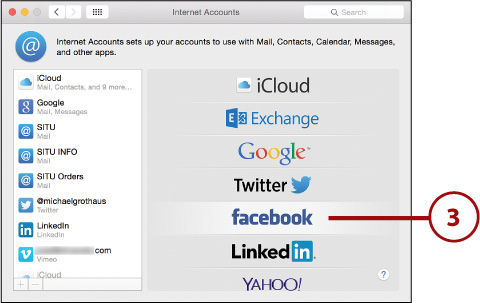
Setting Up Internet Accounts on Your Mac
Even if you already have accounts at Facebook, Flickr, or Vimeo, before you can use any of the sharing options in Photos you need to make sure these accounts are set up in OS X. Otherwise, you see a warning, like the example of sharing a picture using Facebook when no account has been configured.

You can click the Add Account button to log in to your account using your Mac’s Internet Account Settings in System Preferences, but it makes more sense to complete the setup before you start sharing your photos and videos.
2. Click the Internet Accounts button.
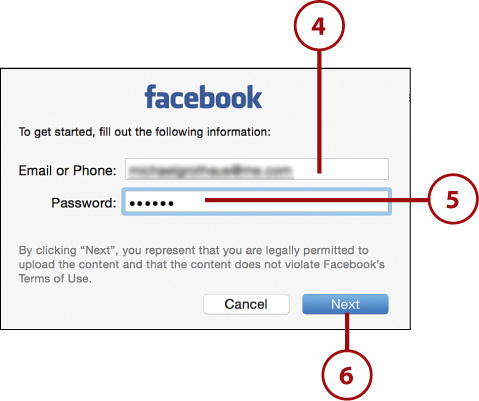
3. Click the Internet account you want to set up. Each set up process varies just a tiny bit depending on the account, but most are virtually identical. This example uses Facebook.
4. Enter your account ID. This is usually your username, email address, or sometimes a phone number.
5. Enter your password.
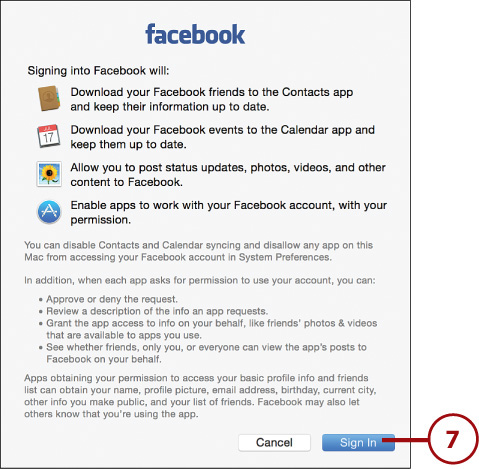
6. Click Next to see a window telling you what permissions you are granting to the Internet account.
Sharing Photos and Video with Social Media
There’s no shortage of social media sites out there, and it seems like new ones are cropping up each day. Yet when it comes to social media some of the biggest sites are still Facebook, Flickr, Twitter, and Vimeo, which is why the ability to share your pictures and videos on those sites is baked right in to Photos.
Share Photos and Videos via Facebook
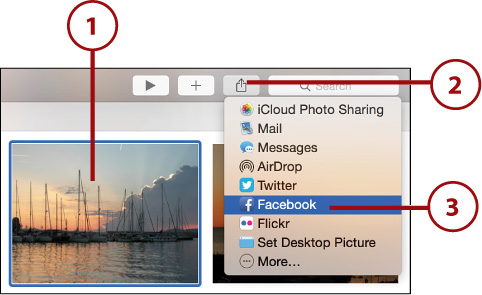
Unless you live under a rock, you’ve heard of Facebook. It’s the wildly popular social networking site that has more than a billion members. Facebook lets you keep in touch with your friends, send messages, chat, play games, and, yes, upload and post photos and videos. With Photos, you can upload up to 50 images at a time to Facebook, or you can upload a single video.
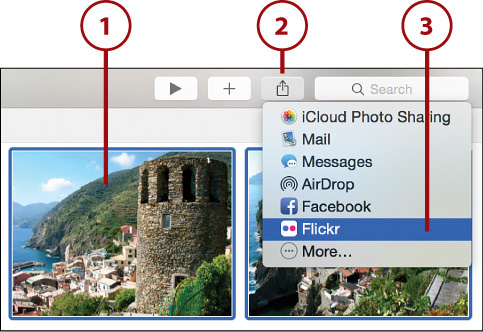
1. From anywhere in Photos, select the image, images, or video you want to share on Facebook.
2. Click the Share button.
3. Select Facebook.
4. Select which people you want to share the images or video with. Standard options include the Public, Your Friends, or Only Me. Any groups you’ve created on Facebook are also offered as options.
5. Select where on Facebook you want to share the images or video. Your options include your main Timeline or any previous album you’ve created on Facebook.
6. (Optional) Add a description to your post.
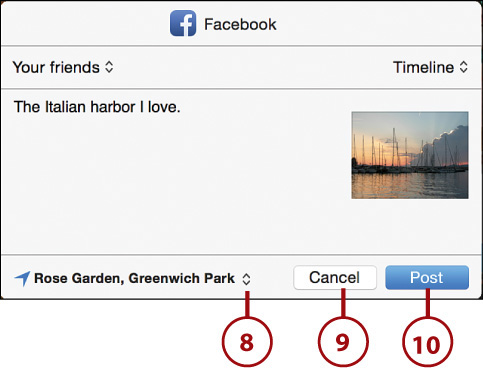
7. (Optional) Click the Add Location button to bring up a list of options for your current location.
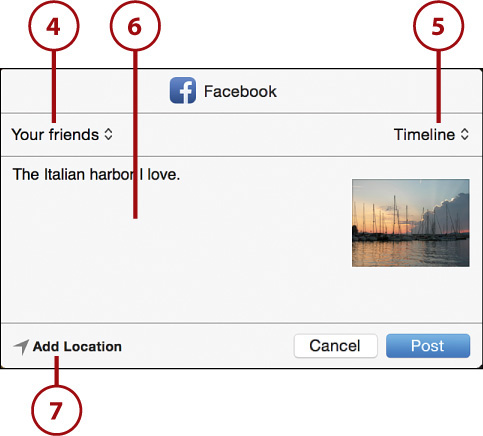
8. Select the most appropriate point of interest from the current location list.
9. (Optional) Click the Cancel button if you’ve changed your mind about entering a location.
10. Click Post to post the image or video to Facebook.
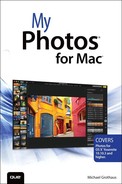
Share Photos and Videos via Flickr
Flickr (which is owned by Yahoo!) has been a popular image hosting site since its launch in 2004. With Flickr sharing in Photos, you can upload 99 images at a time. You can also upload a single video at a time.
1. From anywhere in Photos, select the image, images, or video you want to share on Flickr.
2. Click the Share button.
3. Select Flickr.
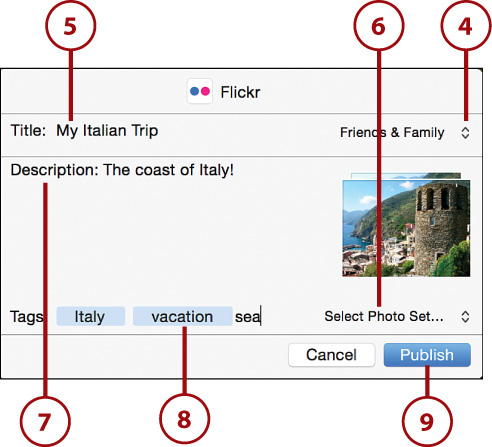
4. Select the privacy settings for the images or video. Options include Private, Public, Family, Friends, or Friends & Family.
5. (Optional) Enter a title for your images or video.
6. (Optional) Select an existing Photo Set to which the images or video will be uploaded.
7. (Optional) Write a description for the photos or video being uploaded.
8. (Optional) Add tags to all the photos or video being uploaded. After writing a tag press the Return key to set it. You can then write additional tags.
9. Click Publish to post the images or video to Flickr.
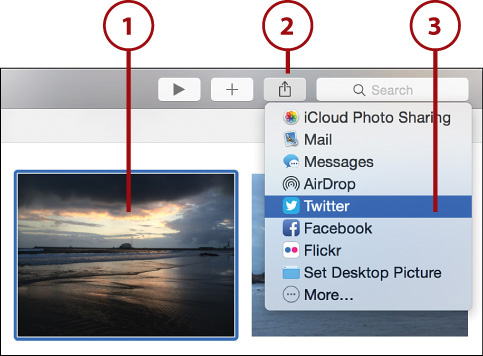
Share a Photo via Twitter
Twitter is the third-most popular social network on the Internet (behind Facebook and Instagram). If you have a Twitter account you can tweet one photo at a time right from Photos. Note, however, that each photo consumes 21 characters (for the image URL) out of your 144-character tweet limit.
1. From anywhere in Photos, select the image you want to tweet.
2. Click the Share button.
3. Select Twitter.
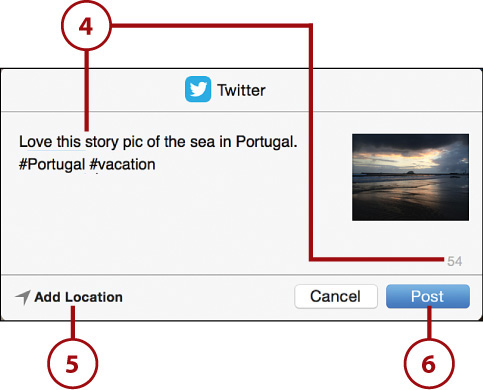
4. (Optional) Write a description to go along with your photo. Note that the counter in the lower-right corner shows how many characters you have left in your tweet.
5. (Optional) Click the Add Location button to add your current location to the tweet.
Where You Are Now
Remember that the Add Location feature puts in your current location rather than the location where the picture was taken.
6. Click Post to post the image to Twitter.
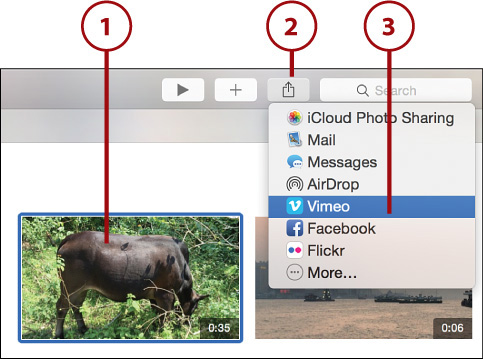
Sharing a Video via Vimeo
Vimeo is the popular video-sharing site that is the favorite of artists and filmmakers who want more control over access to the user interface elements of their online videos. Vimeo does not allow photo sharing, but you can upload one video at a time from Photos.
1. From anywhere in Photos, select the video you want to share on Vimeo.
2. Click the Share button.
3. Select Vimeo.
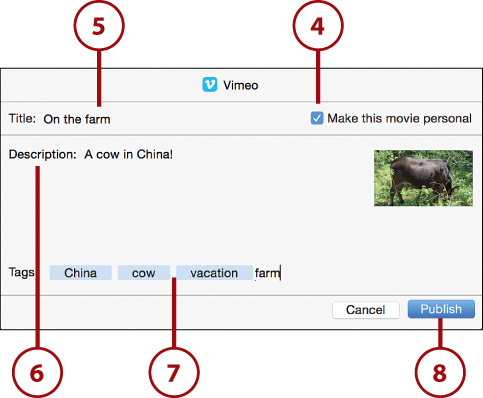
4. By default the Make This Movie Personal box is checked, which means the uploaded movie can only be viewed from your Vimeo account and other Vimeo accounts you’ve authorized. If you want to allow anyone to be able to view the video, uncheck this box.
5. (Optional) Enter a title for your video.
6. (Optional) Write a description for the video being uploaded.
7. (Optional) Add tags to the video being uploaded. After writing a tag press the Return key to set it. You can then write additional tags.
8. Click Publish to post the video to Vimeo.
Other Sharing Methods
Besides social media sites, there are numerous other ways to share your photos and video. Photos has the most-used ways built in, including via text messages and email. It also allows you to transfer your pictures and videos to other Mac and iOS users by using an Apple technology called AirDrop. And, of course, Photos enables you to export your images so you can use them in other apps or share them in other ways.
Sharing Photos and Videos via Messages
Messages is OS X’s instant messaging app. It comes free as part of OS X 10.10 Yosemite and later versions. With it you can chat with people via your GoogleTalk, iCloud, AIM, and Yahoo! messaging accounts, among others. You can also send up to 10 images or 1 video at a time using Messages.
Set Up Messages to Work with Photos
Before you can use the Messages sharing function in Photos, you must first have the Messages app on your Mac set up for use. To do this you need an existing Apple ID, or a GoogleTalk, Yahoo!, or AIM ID.
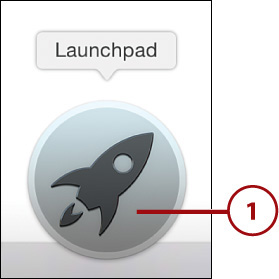
1. Click the Launchpad icon in the Dock.
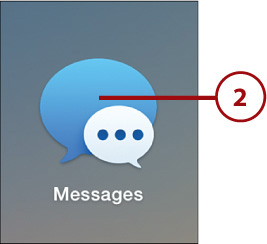
2. Click the Messages app.
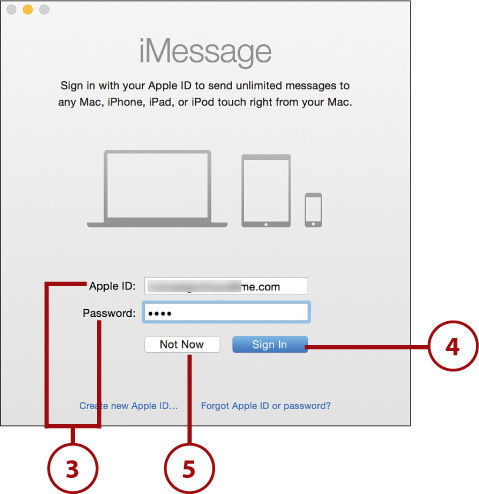
3. In the login window, enter your Apple ID username and password (this is your @icloud.com email or the same email address and password you use to log in to the iTunes Store).
4. Click the Sign In button.
5. (Optional) If you don’t want to use your Apple ID, click the Not Now button.
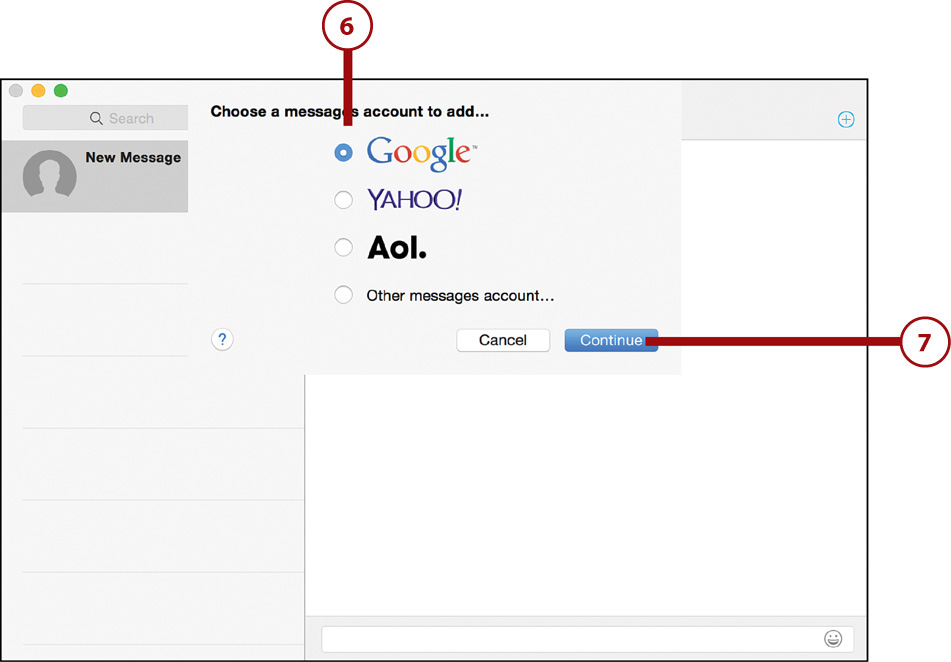
6. Select the service of the existing ID you want to use.
7. Click Continue and follow the steps for entering your username and password for that service.
Share a Photo or Video via Messages
1. From anywhere in Photos, select the images or video you want to share via Messages.
2. Click the Share button.
3. Select Messages.

4. Type the name of a contact you want to send the images or video to. When the name autofills, you can press enter on your keyboard to insert it into the To field. Continue to add other recipients. If you know the email address associated with the iCloud account of someone who uses Messages but who is not in your Contacts, you can enter the email address directly in the To field.
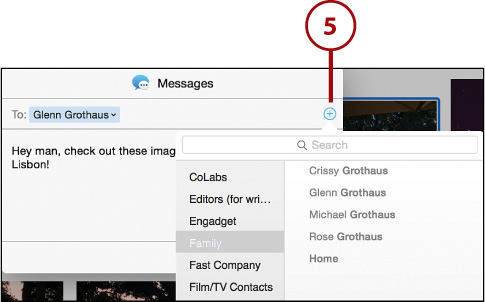
5. (Optional) Click the + button to select recipients from a list of all your contacts on your Mac.
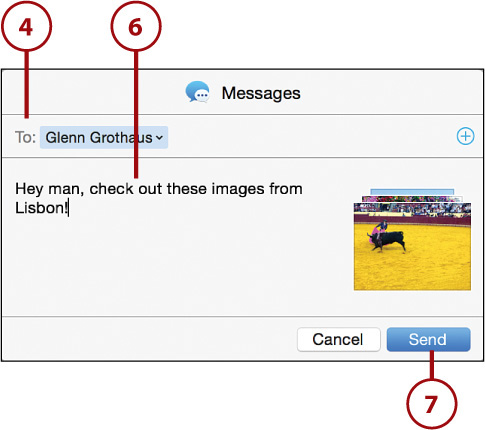
6. Enter a text message you want to send with the photos or video.
7. Click Send.
Share Photos and Videos via Email
Emailing your pictures and videos has some benefits over other sharing methods discussed in this chapter: You can send a mixture of 99 photos and videos per email (as long as your email service provider supports the total file size).
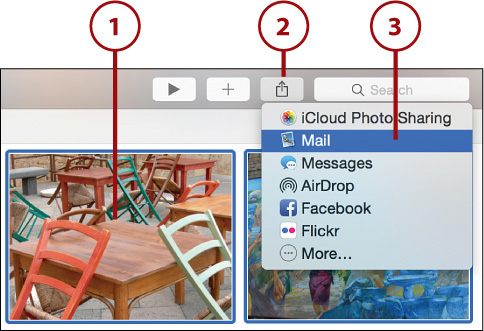
1. From anywhere in Photos, select the images or videos you want to share via email.
2. Click the Share button.
3. Select Mail.
4. A new message window opens in OS X’s Mail app.
5. Compose a new message as you normally would, entering the name of the recipient(s), selecting a subject, and entering text in the body of the email.
6. The images and videos you are sharing have been imported directly into the body of the email. The total message size for all the photo and video attachments is listed.
7. (Optional) If you’d like to change the image size, click the Image Size drop-down menu and select Small, Medium, Large, or Actual Size.
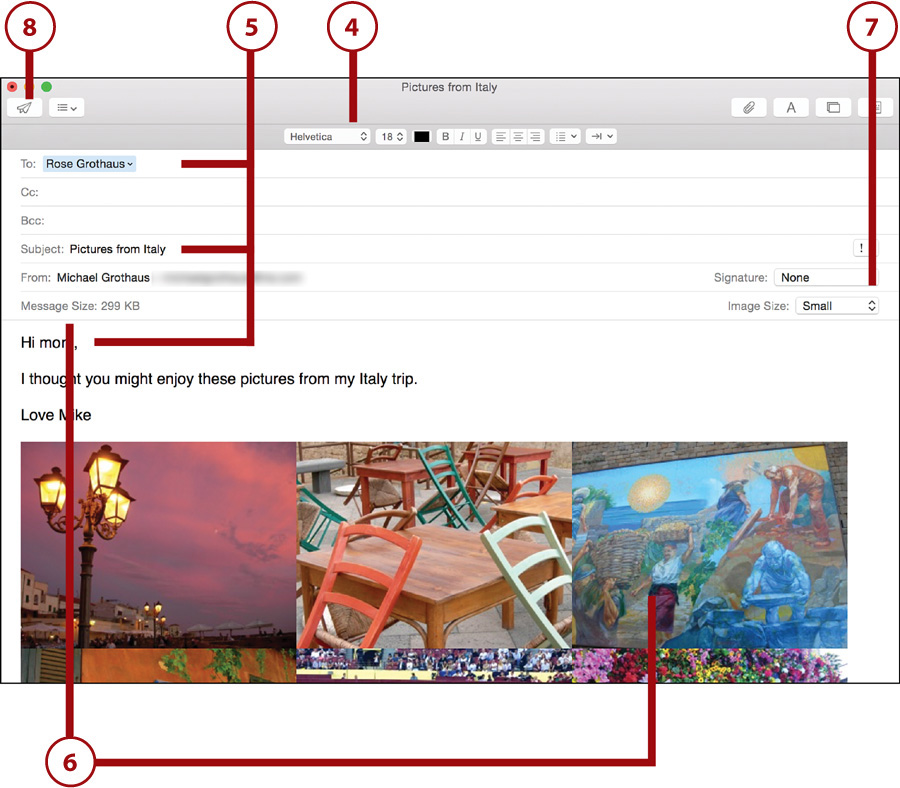
8. Click the Send button.
Set Up Before You Start
In order to use the Mail sharing feature in Photos, you need to have set up your email account in OS X’s Mail app. To do that open up the Mail app (you can find it in your Applications folder) on your Mac and follow the onscreen instructions.
Share Photos and Videos via AirDrop
When you want to simply transfer an image or video from one device to another on your local network—for instance, when you want to send a picture from Photos on your Mac to the iMac of a co-worker—the simplest way to do it is with Apple’s AirDrop. AirDrop is a system-wide ad-hoc wireless sharing technology built directly into both OS X and iOS that allows you to transfer files from one device to another on the same Wi-Fi network.
1. From anywhere in Photos, select the images and videos you want to transfer via AirDrop. You can select up to a combined 99 images and videos.
2. Click the Share button.
3. Select AirDrop.

4. Click the name of the person who owns the Mac or iOS device you want to transfer the file to.
5. (Optional) If the name of the person who you are trying to share your file with doesn’t show up in the AirDrop window, he or she might be using an older Mac (one manufactured before 2012). Click the Don’t See Who You’re Looking For button and click Search for an older Mac. As long as AirDrop is enabled on the Mac, the name should now show up.
6. Click Done.
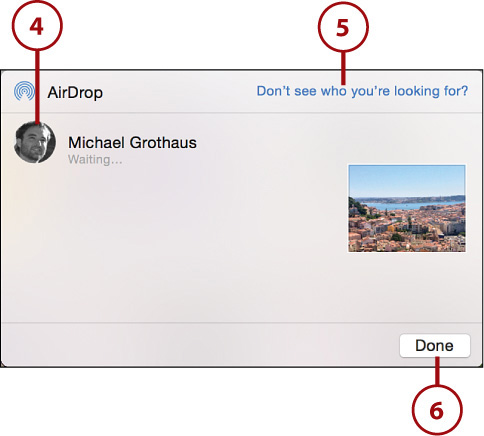
The word “Waiting” displays until the other person accepts the AirDrop file transfer. If you are sharing a photo or video with a Mac, the file appears in the user download folder on the Mac. If you are sharing a photo or video with an iOS device, it is added to that iOS device’s Photos Library.
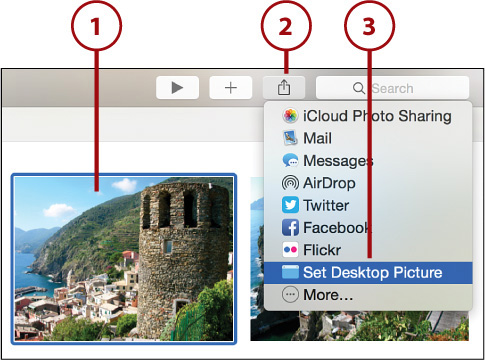
Set a Photo as Your Desktop Picture
Sometimes it’s just cool to display your favorite photo as your desktop picture.
1. From anywhere in Photos, select the image you want to set as your desktop picture.
2. Click the Share button.
3. Select Set Desktop Picture. Your desktop wallpaper changes to the image you selected.
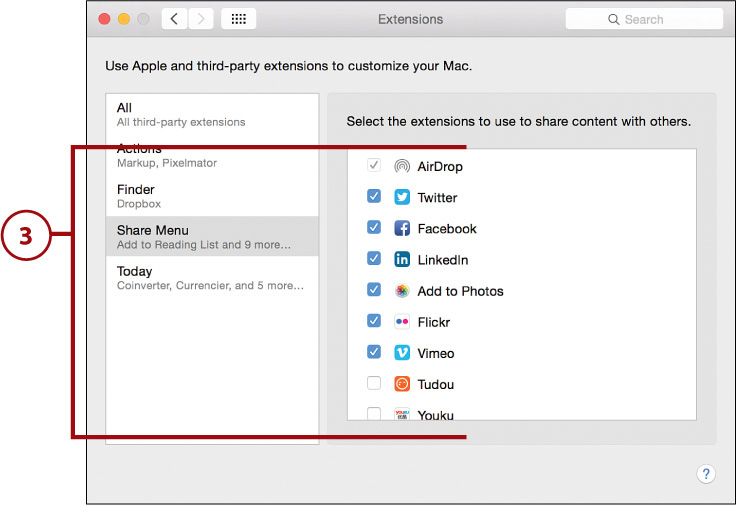
>>>Go Further: Adding Additional Share Extensions
1. Click the Share button in Photos.
2. Click More. The Extensions pane in System Preferences opens with the Share Menu Extensions selected.
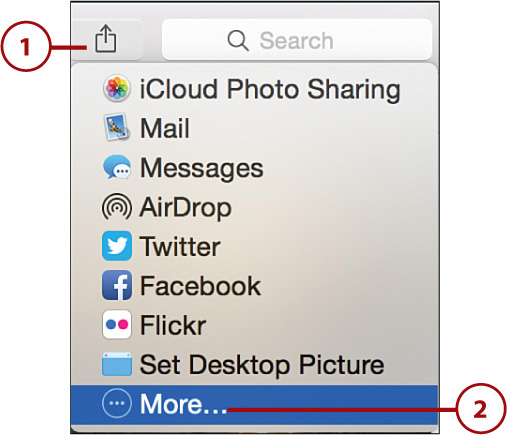
3. Scroll through all your available extensions, and toggle them on or off. For example, if you don’t have a Flickr account, you may want to toggle that extension off so you never see the Flickr share option in Photos again.
Exporting Your Photos
There’s one last way to share you pictures using Photos—by exporting them. Exporting your images means you can move the files one at a time or in bulk—and change the file type in the process, if need be—out of Photos and onto your Mac’s hard drive for use in any app you want. Chapter 10, “Viewing and Editing Your Videos,” explores Photos’ export options as they relate to videos, but the same export functionality is available to your pictures as well.
Export Photos
1. Select a picture or pictures you want to export from your Photos Library.
2. Select File, Export, Export Photos from Photos’ menu bar.
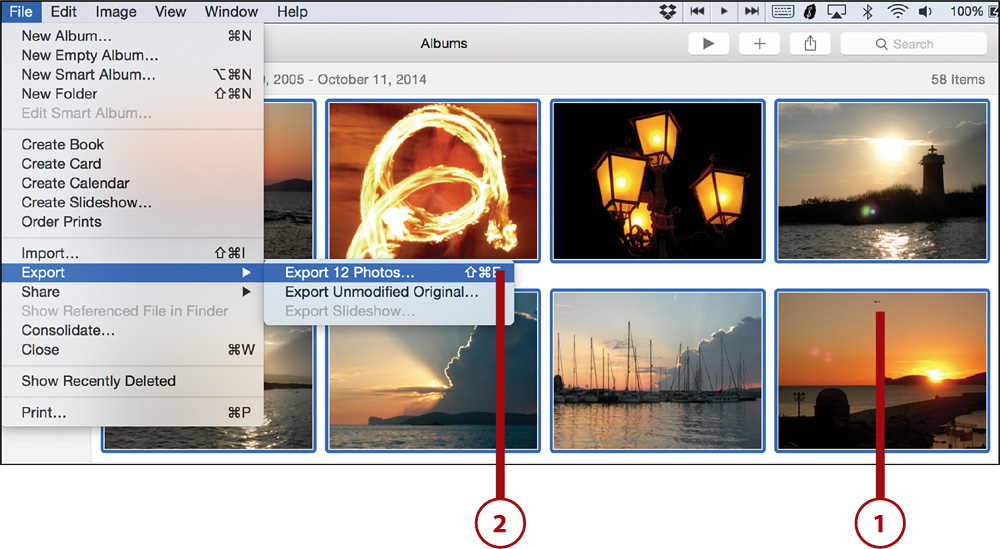
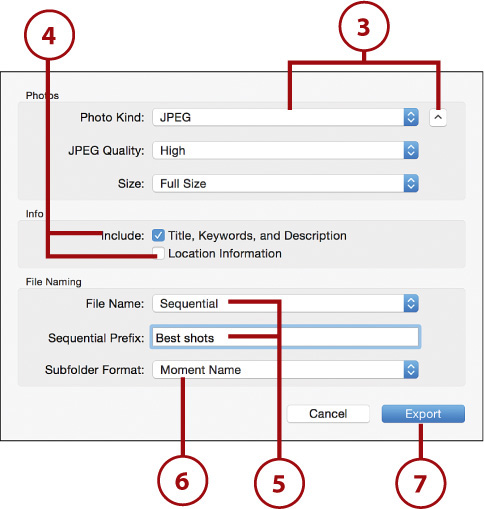
3. Select the kind of file you want to export your photos as. Click the drop-down button to see more options based on the file type you selected. For example, if you’ve selected JPEG, you can set its quality and size.
4. Choose which metadata you want to embed in the file of the exported image.
5. Choose what filename you want to use for the photos. Your choices are to use the photo’s title; filename; the album name the photo appears in along with a number; or a sequential name, which you then choose to add a prefix to if you like.
6. If you are exporting a lot of photos you might want to export them in a folder. In that case, choose Moment Name in the Subfolder Format drop-down menu.
7. Click Export.
8. Select your export location in the Finder window.
9. Click Export.

Other Ways To Export
You can also drag any photo or video directly from your Photos Library to your Mac desktop, or any other folder on your Mac. Doing so exports the image as it is in its current (edited) state. Alternatively, you can choose to export the unmodified original photograph, meaning the picture as it was originally taken without any edits you have made in Photos. Select File, Export, Export Unmodified Original and choose your filenaming options as you did in Steps 5 and 6 of the preceding task.