
Chapter 1. Creating a WatchKit Project
Apple frequently refers to Watch apps as standalone entities: miniature equivalents of iOS apps that can exist independently of your iPhone, iPad, or iPod touch. Although Watch apps are becoming more independent, creating a watchOS app means creating a new iOS project and giving it a few extras.
Lifelong Companions
The first generation of third-party WatchKit apps required that you have an extension to an iOS app running on an iOS device. The extension acted as the brains of the app while the user interface ran on the watch. In watchOS 2 the split nature still exists, but the extension and the interface now both run on the watch. Therefore, to create your Watch app you’ll need to create a new iOS project in Xcode and add a companion watchOS target to it.
 Note
Note
The next chapter explains the split nature of watchOS apps more fully so you can understand the implications of using it. For now, we focus on getting a watchOS app up and running as soon as possible, and we skip over some of the finer details here and there.
1. Open Xcode, and create a new iOS project by selecting File > New > Project from the main menu.
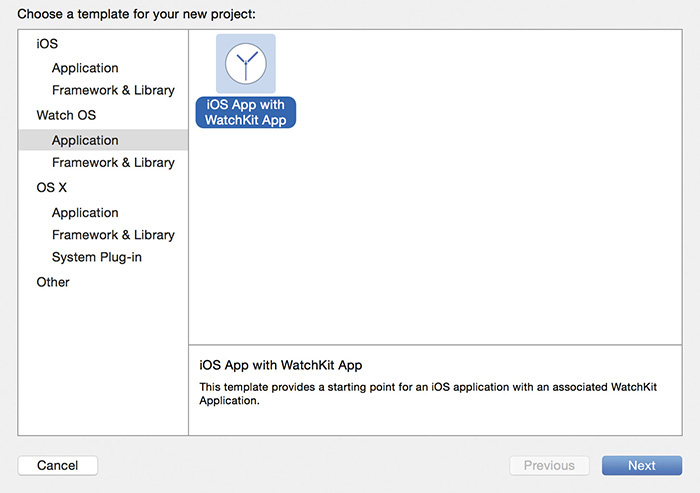
2. In the project template chooser (Figure 1.1), navigate to the watchOS Application category, select the iOS App with WatchKit App template, and click Next.
3. Give your project a name (we use HelloWrist), choose Swift from the Language menu, and choose Universal as the Devices type (Figure 1.2).
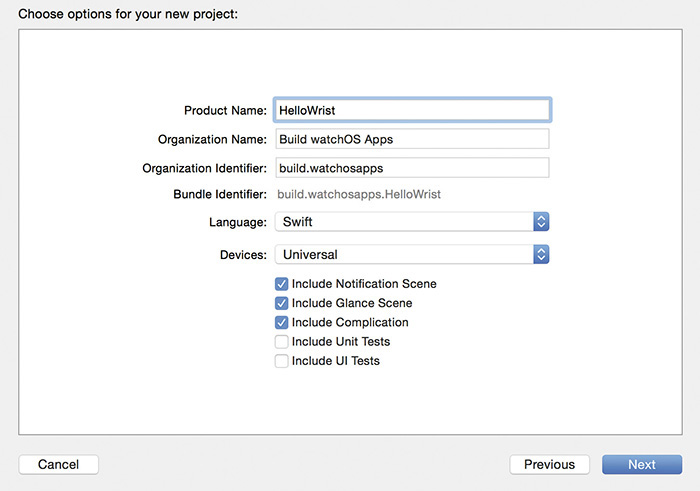
4. Ensure that the Include Notification Scene, Include Glance Scene, and Include Complication options are selected, and click Next.
5. Choose a location to save your project, and click Create to finish creating the project.
When the project has been created, you’ll have what looks like a standard iOS project but with a number of extra items in the File Navigator, the list of targets, and the list of schemes in your project. Chapter 2 explains the significance of these new items in detail.
Adding Code to Your WatchKit App
You now have a working app that you could easily try running at this point; jump ahead to the section “Trying Out HelloWrist!” if you feel so inclined. However, you may be a bit underwhelmed if you do because there isn’t much to the default templates. Instead let’s add some extra code to some of the template files created by Xcode to demonstrate a little more of the watch functionality.
Updating the Watch Interface
The main interface to the WatchKit app is defined as a scene in a storyboard file. WatchKit has its own selection of UI components designed to work on the restricted interface, so let’s see what we can do with them.
1. In the Xcode File Navigator, expand the HelloWrist WatchKit App folder, and click the Interface.storyboard file to load the WatchKit App user interface in the Storyboard editor of Interface Builder.
When the storyboard file loads, it displays four scenes (Figure 1.3).
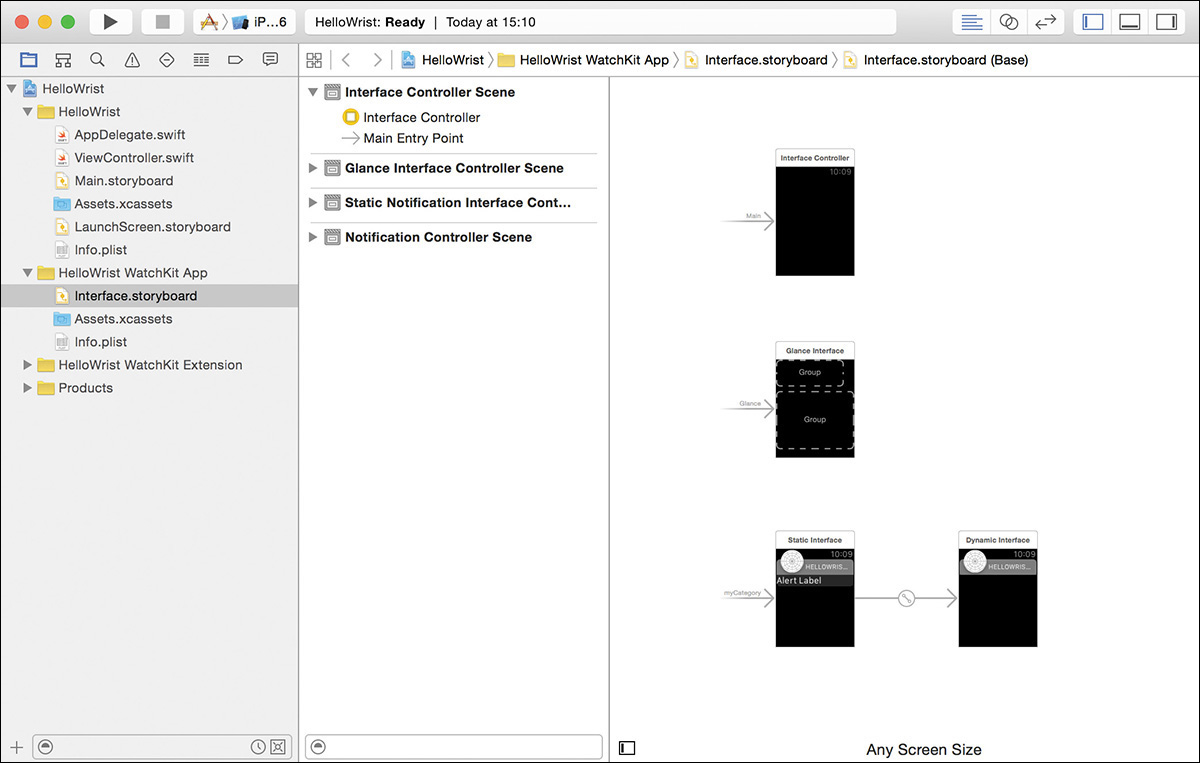
2. Select the Interface Controller Scene option.
3. In the Object Library, search for the user interface element named Label (or WKInterfaceLabel) (Figure 1.4).
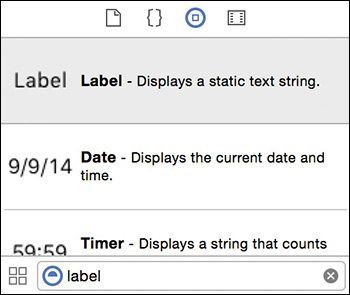
This is the equivalent of a UILabel in a full iOS app, but as you’ll see later, it comes with some limitations compared to its more fully featured counterpart.
Note
The Label element uses the underlying WKInterfaceLabel class. If you need more information about any element, you can click it in the Object Library to show a popover with more information, including the class name.
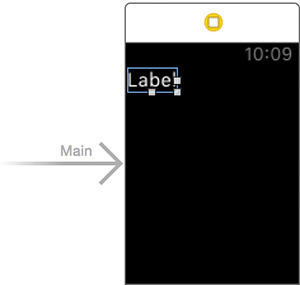
4. Drag the Label element from the Object Library onto the interface controller scene (Figure 1.5).
5. Use the Attribute inspector to style the element as you please.
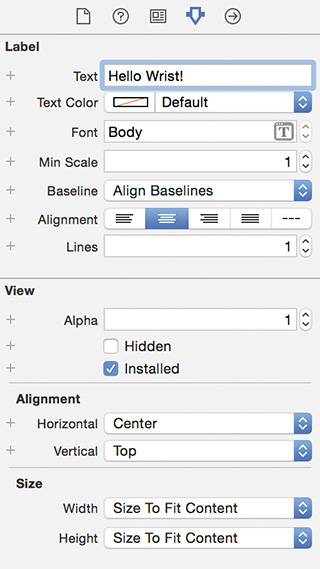
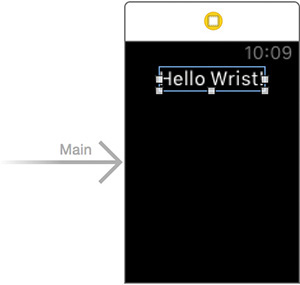
Figure 1.6 shows the full range of customization options available to you for a WatchKit Label element. We have chosen to center the label horizontally (Figure 1.7).
Note
Unlike in a regular iOS storyboard, you cannot place the label anywhere you choose. WatchKit uses a flow-layout system in which elements are placed in the order they should appear. Chapter 5 covers this in more detail.
Writing Code for the Watch App
What you have created so far is pretty much a vanilla “Hello World!” introduction. Again, if you want to run it right now, you can skip ahead to the “Trying Out HelloWrist!” section, but let’s add some more interactivity before running it.
As with UIKit apps, WatchKit relies on a button user interface element to provide a lot of its interactive capabilities.
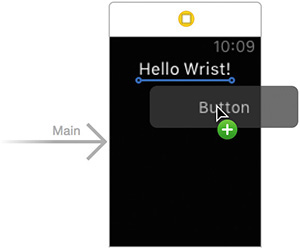
1. In the Object Library, search for a Button (or WKInterfaceButton) element (Figure 1.8), and drag it onto the interface controller scene.

Figure 1.9 highlights that, due to the flow-layout system, the Button element cannot be absolutely positioned on the interface, but can be placed relative only to the existing Label element. The button can be styled using the Attribute inspector; we’ll set the Button title to Say Hello.
To make the button do something useful, you need to hook it up to an action method; this process is identical to that which would be carried out with a regular iOS storyboard. The easiest way to create the action is to enable the assistant editor, which should cause the InterfaceController.swift file from the HelloWrist WatchKit Extension folder to be displayed.
2. Control-click your new button, and drag it into the assistant editor. When Xcode displays an insertion line and the text “Insert Outlet or Action” (Figure 1.10), release the drag operation.
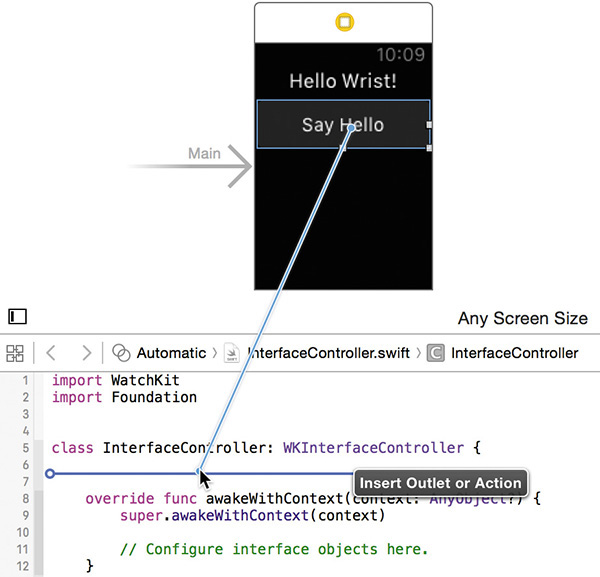
3. In the popover that appears, select Action as the Connection type, and name it saySomething.
Our intention is to have the Label element start blank and be populated by pressing the button.
4. Select the label in the storyboard, and change the Text attribute to be empty in the Attribute inspector.
To be able to change the label text programmatically, the label must have an outlet that you can access from the InterfaceController class.
5. Control-click the label, and drag it into the assistant editor, releasing when Xcode shows the insertion line.
6. This time select Outlet as the Connection type, and name the outlet messageLabel. Update the saySomething method to match the following code:
@IBAction func saySomething() {
messageLabel.setText("Hello Wrist!")
}
Now that you can change the label text, let’s make the message change between “Hello Wrist!” and “Bye Wrist!” on tapping the button.
7. Add an outlet named button so you can programmatically change the button text.
An easy way to toggle the label text on tapping the button would be to inspect the current text value and change it accordingly.
8. Replace the saySomething method with the following code:
@IBAction func saySomething() {
if messageLabel.text == "Hello Wrist!" {
messageLabel.setText("Bye Wrist!")
} else {
messageLabel.setText("Hello Wrist!")
}
}
Unfortunately this highlights a fundamental difference between regular UIKit elements and those from WatchKit. A UILabel has a property named text that you can use to set and inspect the label text, whereas WatchKit has only one method: setText. If you want to track the state of elements in a WatchKit app, it’s up to you to handle it yourself in the extension.
9. Create a Boolean property in the extension:
private var sayingHello = true
The saySomething method now needs to track the state of the Boolean instead of trying to inspect the label text.
10. Use the button outlet to update the button text while you are updating this method:
@IBAction func saySomething() {
if sayingHello {
button.setTitle("Say Goodbye")
messageLabel.setText("Hello Wrist!")
sayingHello = false
} else {
button.setTitle("Say Hello")
messageLabel.setText("Bye Wrist!")
sayingHello = true
}
}
If you have been exercising patience so far and have not skipped ahead to run the app already, then it is time for your patience to be rewarded.
“I’m Sorry, But I Don’t Have a Watch”
As it has done in the past with other iOS devices, Apple has provided the ability to develop apps for the Apple Watch without access to the physical hardware. Although testing against a simulator is never going to be as foolproof as using the real device, it can often be a timesaver in terms of workflow and invaluable when limited access to the physical devices would otherwise slow down development.
The Apple Watch line is quite possibly the most diverse product range that Apple has ever produced. At the time of launch, there were 38 different models available across the Apple Watch, Sport, and Edition product options. The prices range from (relatively) cheap at $349 for the Sport variant up to an eye-wateringly expensive $17,000 for the Edition watches. So how do you safely test all the variations your app could be run on without breaking the bank? Thankfully, although the products may be cosmetically different, the entire range has only two real differences: the 38mm watch and the 42mm watch.
What Do You Want to Test?
The first step to running your watch code is to decide what your entry point is going to be. When your app is installed on a physical device, it can be invoked in four ways:
![]() By launching the app directly from the home screen of the watch
By launching the app directly from the home screen of the watch
![]() By displaying a complication on the watch face
By displaying a complication on the watch face
![]() By viewing a notification
By viewing a notification
![]() By viewing a glance
By viewing a glance
The Watch simulator provided with Xcode 7 is capable of testing all these interactions, but it is not always immediately apparent how you might do so. While running your app you can choose Hardware > Home (or press Control-Command-H) to simulate pressing the digital crown, which returns the simulator to a watch face. At this point it is possible to drag down to display the Notification Center, or drag up to display glances, but unfortunately your notifications and glances will not be displayed. Given this, how are you supposed to test your code in the same ways your users will be able to?
Choosing Your (Hopefully Not So Evil) Scheme
Fortunately, the iOS App with WatchKit App project template has you covered. While creating the project files, Xcode also created a number of extra schemes that allow you to run your app in a variety of ways. To inspect them, choose Product > Scheme > Manage Schemes from the main menu, and note the four extra schemes that Xcode created (Figure 1.11).
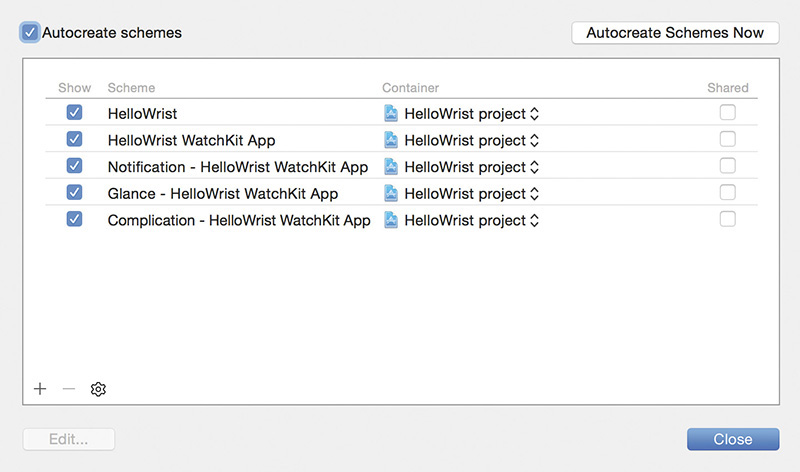
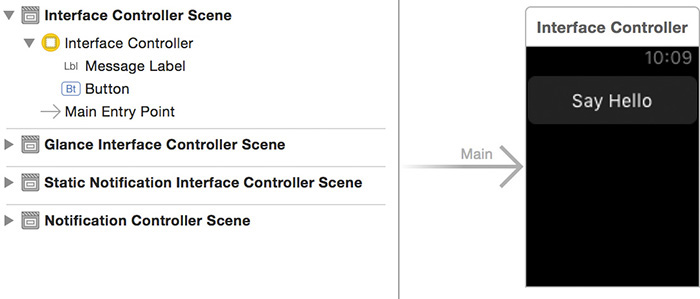
The standard iOS app scheme (HelloWrist) is present, as you would expect, but there is also a scheme named HelloWrist WatchKit App, which is created for all WatchKit apps. This is the scheme you need to build and run to execute the app as though it had been launched from the home screen of the watch. This corresponds to the interface controller scene in the Interface.storyboard file (Figure 1.12).
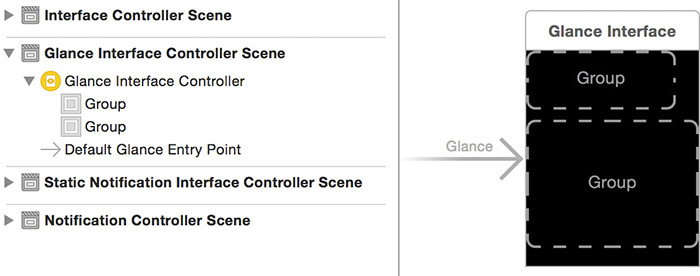
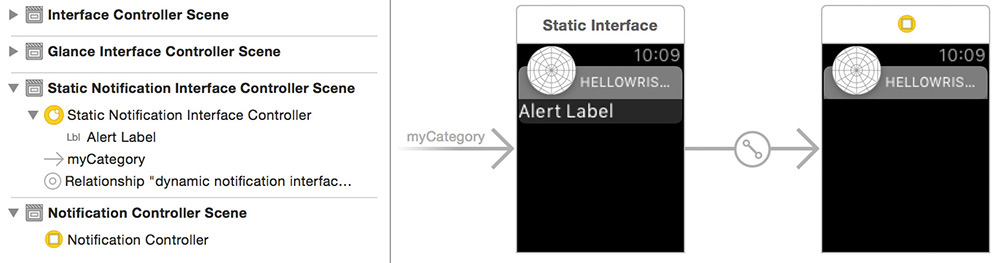
Of the three remaining schemes, the first two—Notification - HelloWrist WatchKit App and Glance - HelloWrist WatchKit App—were created because you selected the options Include Notification Scene and Include Glance Scene when you were creating the WatchKit App target (Figure 1.2). These schemes allow you to run the app as though the watch had received a glance or a notification. You can customize the appearance of these views using the Glance Interface Controller Scene (Figure 1.13), the Static Notification Interface Controller Scene, and the Notification Controller Scene (Figure 1.14).
Note
Chapters 8 and 9 delve into the details of how to work with glances and notifications, respectively.
The final scheme—Complication - HelloWrist WatchKit App—was created in response to enabling the Include Complication option when choosing the project options (Figure 1.2). This scheme allows you to run the simulator to test your complication. This is a simpler proposition than it may sound—it simply launches the simulator directly to a watch face on which you can configure your complication to be displayed. Creating and testing your complications is examined in detail in Chapter 7.
Accessing the Watch Simulators
Choosing a simulator for running your iOS app requires that you open the scheme selection menu and choose a simulator from the list of options currently available to you. It stands to reason that the Watch simulators can be found in the same place:
1. Click the device portion (the right side) of the scheme selection button to view the list of simulators (Figure 1.15).

Unfortunately, although there are plenty of iPhone and iPad simulation options presented, there are no Watch simulation options. That is because we currently have the HelloWrist App scheme selected, and the target for that scheme is an iOS app. To see the Watch simulators we need to select a different target.
2. Click the scheme portion (the left side) of the scheme selection button to display the list of available schemes.
3. Select one of the four HelloWrist WatchKit App schemes to switch to a scheme with a WatchKit app target.
The device portion of the scheme selection button will change to indicate that running the selected scheme will launch both iPhone and Watch simulators. It’s not possible to launch a Watch simulator in isolation, so the selection will include iPhone and Watch simulator combinations (Figure 1.16).
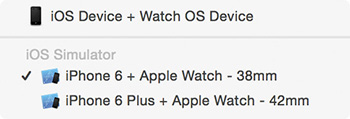
4. Select the simulator combination that you want to launch.
The default configuration includes iPhone 6 and 6 Plus, as well as 38mm and 42mm Apple Watch options. These should be enough to satisfy most test requirements, but if you really need to, you can create more combinations in the Devices section of Xcode.
The Watch simulator shares some of the limitations of the iOS simulator. You cannot run the same app in both an iPad and iPhone simulator at the same time, and you cannot display both the 38mm simulator and the 42mm watchOS simulators at the same time. Also, you cannot run the watchOS simulator along with the iPad simulator—the Apple Watch has an intimate relationship with iPhones but cannot be used with iPads. Not even simulated ones.
Trying Out HelloWrist!
You’ve shown a commendable amount of patience, and now it’s time to actually run your app.
1. Select the HelloWrist WatchKit App scheme from the scheme portion of the scheme selector button.
2. Click the Run button to launch the Watch app.
3. This will spawn the iOS app in a process called Simulator, and the watchOS app in a process called Simulator (Watch). The iOS simulator won’t run an active app, but it is available for the Watch simulator to communicate with.
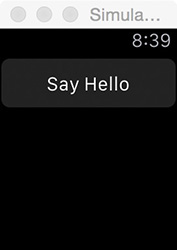
Your app should be prompting you to “Say Hello” (Figure 1.17). Tap the button, and say hello to your future in watchOS development.
Wrapping Up
You’ve come to the end of your initial tour of WatchKit. In many ways it’s remarkably similar to regular old iOS development, but it has just enough caveats and new ways of doing things to justify buying a book on the subject. Lucky you!
In the next chapter, we’ll take a look at the layout of a WatchKit App project template. We’ll also discuss how you can go about adding a watchOS companion app to your existing iOS projects.