17. Sharing Your Photos and Videos
In this chapter, you discover how to share photos and videos shot with your GoPro camera with other people via the Internet. Topics include the following:
![]() Sharing photos via email
Sharing photos via email
![]() Uploading and sharing content using a cloud-based photo or file sharing service
Uploading and sharing content using a cloud-based photo or file sharing service
![]() Sharing photos and video on Facebook, Instagram, and Twitter
Sharing photos and video on Facebook, Instagram, and Twitter
![]() Publishing videos on YouTube
Publishing videos on YouTube
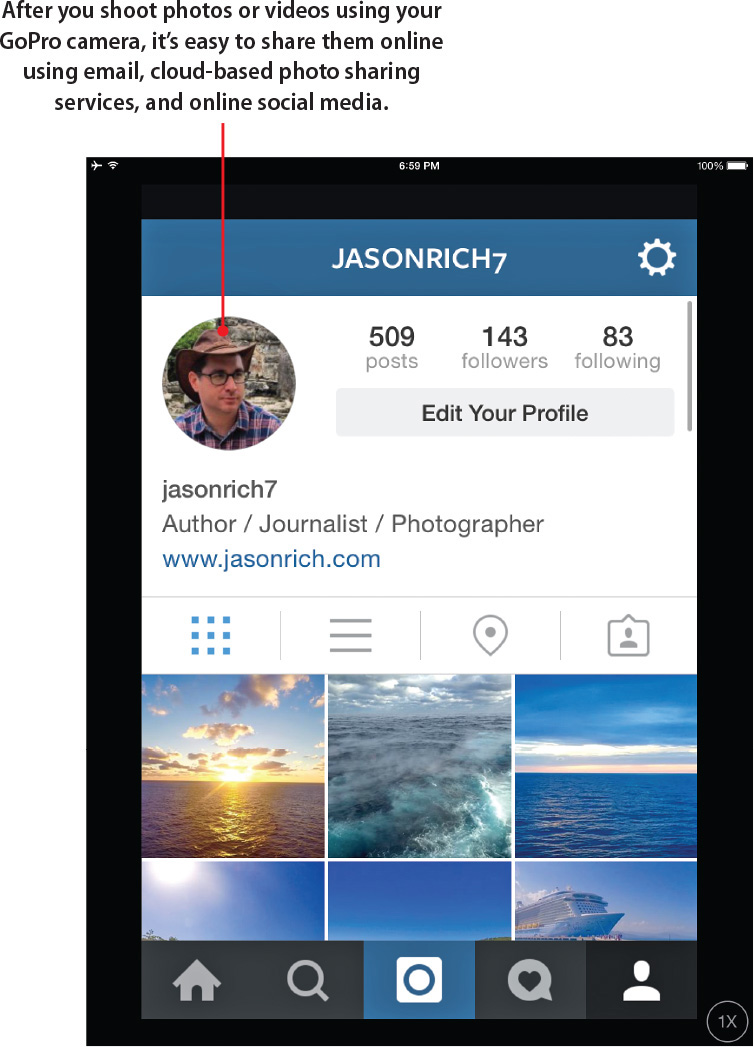
After you shoot photos and video using your GoPro camera and then transfer that content to your mobile device or computer to be edited, you can also share your images and video productions with specific people, or the general public, using a variety of free online-based tools and services.
The online services discussed in this chapter are continuously evolving. So, before you start uploading your content to any of these services, you need to understand how to adjust that service’s privacy settings and determine exactly who can view and potentially share your content.
Some people enjoy sharing their photos and videos with the general public via social media, whereas others prefer to share their personal content only with close friends and family members. What you decide to share and how you opt to share it is entirely up to you.
This chapter introduces you to some of the ways you can share photos and videos online, and points out the pros and cons related to each option. Because the actual process for uploading and sharing photos and videos via these services changes often, this chapter focuses more on what’s possible. Each service offers its own online Help features, as well as tutorials, that walk you through the step-by-step process of sharing your content online using the service you opt to use.
It’s Not All Good: Tag Someone in a Photo or Video

Sharing Photos via Email
When you store photos within your computer or mobile device, you can share them with other individuals or small groups using email. Sending video, however, is another story. HD video files tend to be large and often exceed the file size limit imposed by most email service providers. Thus, using email, you’re typically limited to sending short video clips instead of longer length videos.
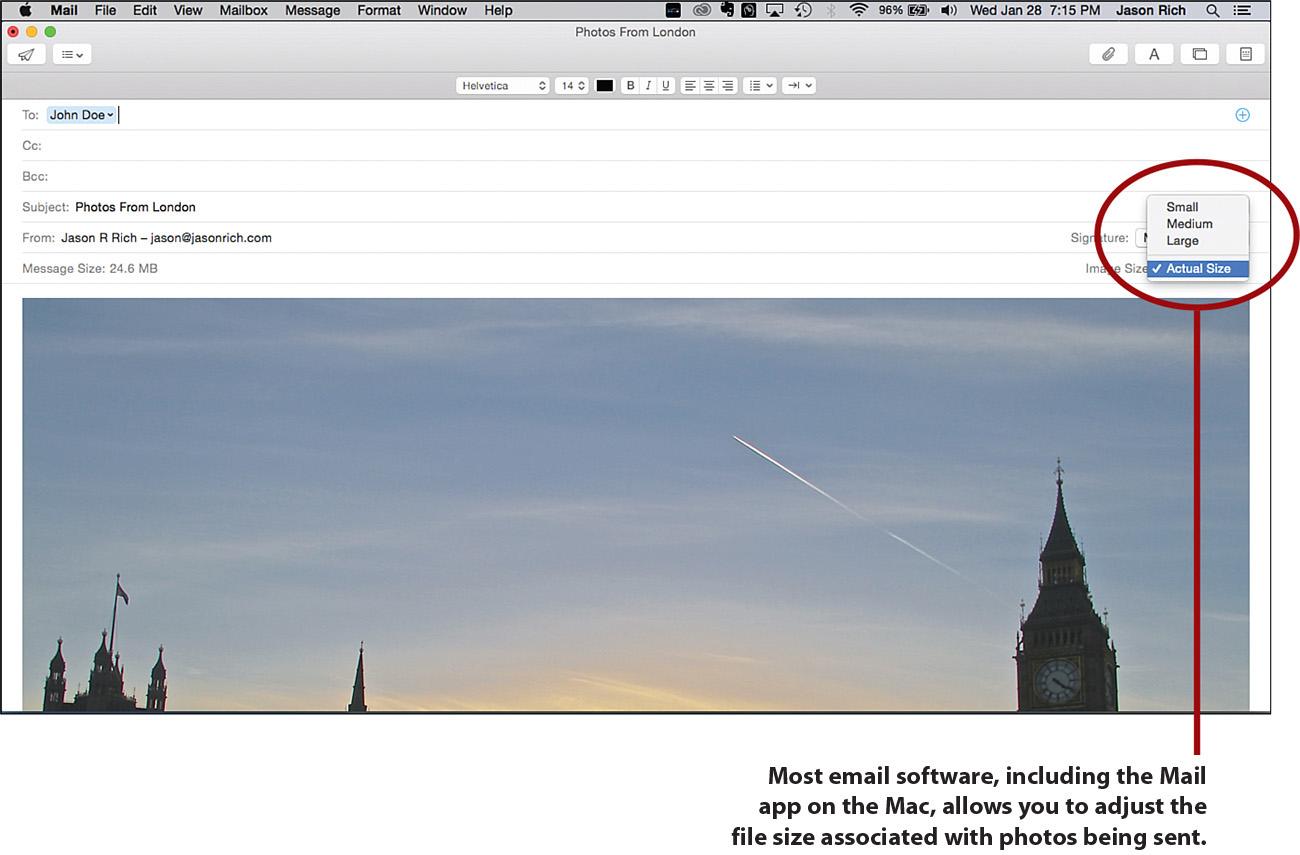
Depending on what you want the email’s recipients to do with the content you send, the email software or app you use to compose and send the email messages can reduce the file sizes associated with photos. However, by reducing the file size of your content, you’re also reducing the quality.
If you just want to send a few high-resolution images within an email message, you can typically leave their file size and image quality intact. To send more than a few images, however, or to send longer length videos, you need to use an alternative sharing method.
As you compose an email message using your email management software or app (for example, the Mail app on a Mac, iPhone, or iPad), use the Attach File command to select and then attach your content’s files to the outgoing message as it’s being composed. This icon typically looks like a paperclip.
Easy Sharing
Many photo editing mobile apps and software packages have a built-in Share feature that enables you to compose and send email messages from within the app or software that include photos or video clips you select.
Sharing Photos Using a Cloud-Based Service
A variety of online, cloud-based file sharing services enable you to upload and store a vast amount of content online within individual folders, directories, or albums. You can then choose to share access to specific content with specific people while keeping the rest of your content private.
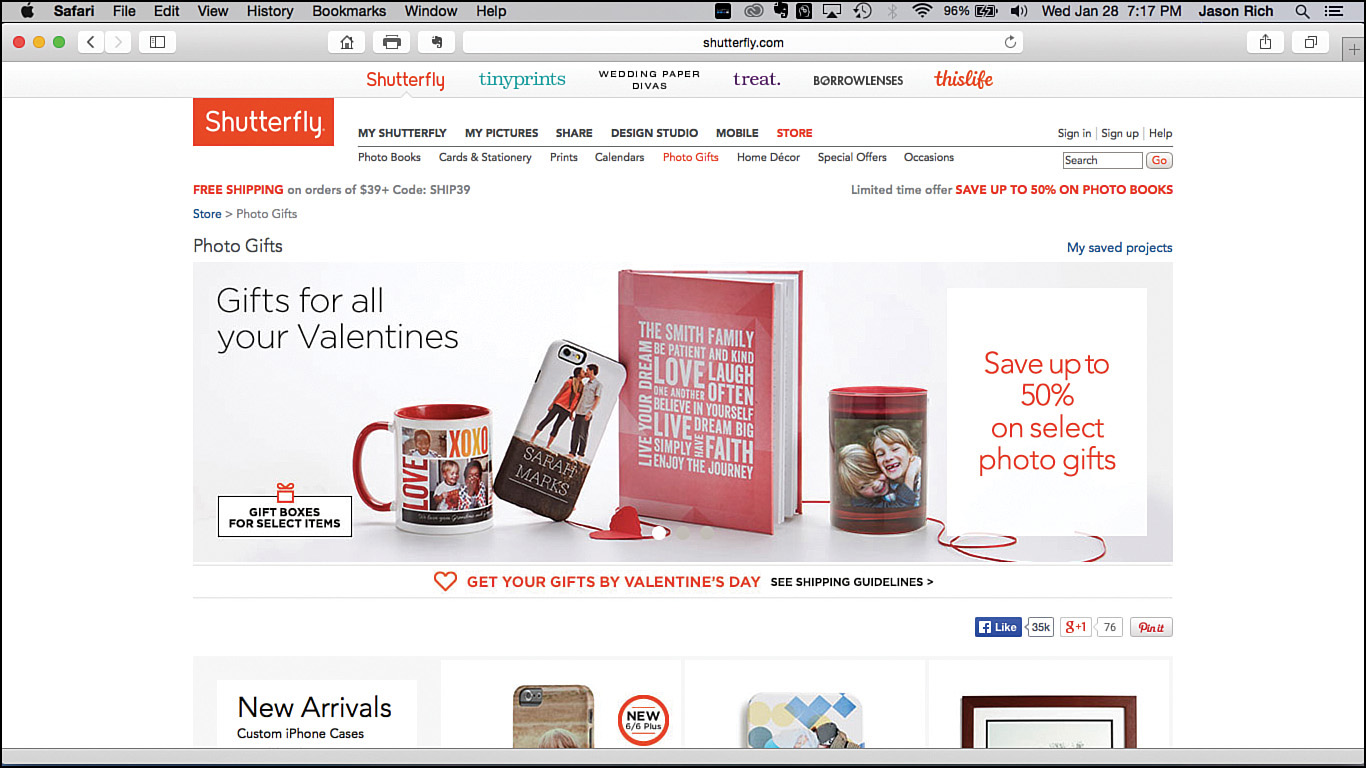
Apple users can use the company’s iCloud Photo Library feature to share photos, videos, or Albums, whereas Windows-based PC users can use Microsoft’s OneDrive service. In addition, online-based services are dedicated specifically to photo and video sharing, including Shutterfly.com, Smugmug.com, Snapfish.com, and Flickr.com. Dropbox enables you to archive and share all types of files, including photo and video files.
Some of these cloud-based photo and video sharing services are free to sign up for and use. However, most enable you to set up a free account and then provide a predetermined amount of free online storage space. When you go beyond that online storage space allocation, you pay a monthly or annual fee for additional online storage space.
In many cases, you can use these services to create an online archive of your entire digital photo library or video project collection. When the content is online, it can be accessed by any of your Internet-enabled computers or mobile devices.
In addition, some of these services have professional photo labs linked to them. So, if you want to have traditional prints, enlargements, or photo products (gifts) created and sent, this can be done online, often for less money than using a 1-hour photo lab.
Sharing Photos and Videos Using Social Media
Literally billions of people from all over the world and from all walks of life are active users of online social media services, such as Facebook, Twitter, and Instagram. One of the most popular features of services such as Facebook is that you can easily share individual photos or groups of photos (within online Albums) with your online friends and family members. People can then “like” or comment on your photos and potentially share them with their own online friends and acquaintances.
Setting up a free account so that you can use a social media service takes just minutes. Then you can upload photos and videos, plus share other types of content, interact with other people, and communicate in a variety of public or private ways.
Some of these services are set up to allow for private communication and the sharing of information between two people or small groups of people. Other services, however, are designed to be public forums. Thus, after you publish something online, it becomes accessible by virtually anyone.
Before becoming active on any of these services, for sharing photos or video, be sure you understand how the specific service works, and invest a few minutes to access and customize the Privacy settings associated with your account. Also, based on your personal comfort level, decide how much information you want to share within your public profile, for example, any information about yourself that’s included within your profile becomes public and searchable.
Sharing with Facebook
To share photos and videos, Facebook enables users to upload and post one or more images or video clips at a time to their Facebook Wall as a Status Update or Check-In Update, or just as easily create online Albums that can contain groups of images or video clips. (Check-In updates can only be done from a mobile device.)
Each photo or video that is uploaded to Facebook can include a text-based caption, location information, tags, as well as when the content was created. This makes it easy for people to share their experiences, in almost real time, from almost anywhere, using their smartphone or tablet.
Be Sure to Adjust Your Facebook Privacy Settings
When you have an active Facebook account, be sure to adjust your Privacy settings. There are many individual settings to adjust, but it’s a good idea to invest the time necessary to do this. From any computer web browser, visit www.facebook.com/settings?tab=privacy.
From the Facebook iPhone/iPad app, tap the More icon at the bottom of the screen, scroll down within the menu, and tap the Privacy Shortcuts option. Then tap on each option separately from the Privacy Shortcuts menu to adjust individual settings.
There are several ways you can upload one or more photos (or video clips) to your Facebook account, and then share them with one or more fellow Facebook users. This can be done from the Facebook mobile app on your smartphone or tablet, from within the photo editing software or mobile app you’re running on your computer or mobile device, or from your computer’s web browser, for example.
In addition to various ways to upload photos (and video clips), you must also decide if the photo(s) will be part of a Facebook Status Update, a Facebook Check-In (which also shows your location), and/or a Facebook Photo Album.
Upload A Photo To Facebook
To update your Facebook Status using the web browser on your computer, and include one or more photos within that Status Update, follow these steps:
1. Launch your web browser and visit www.facebook.com. Log in, if you’re not logged in already, so that you can see your Facebook timeline. (Not shown.)
2. Click the Update Status tab near the top-center of the browser window.
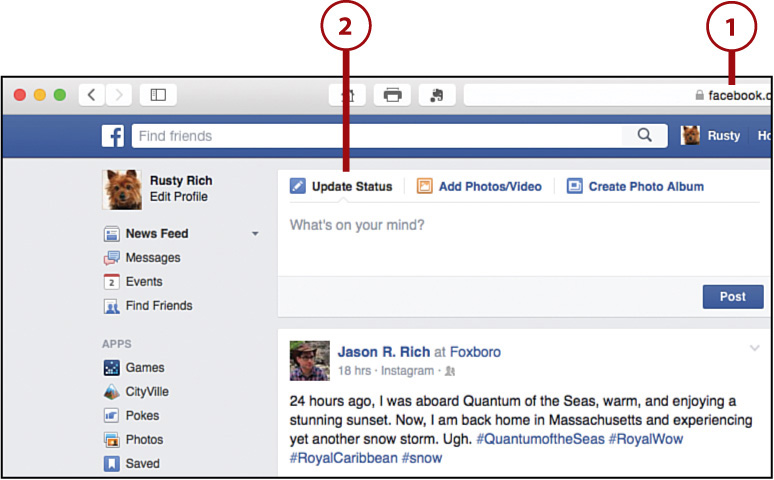
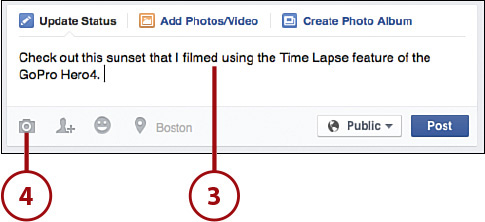
3. Within the What’s On Your Mind? field, type any text you want to accompany your photos.
4. Click the camera-shaped Attachment icon located near the bottom-left corner of the Update Status window.
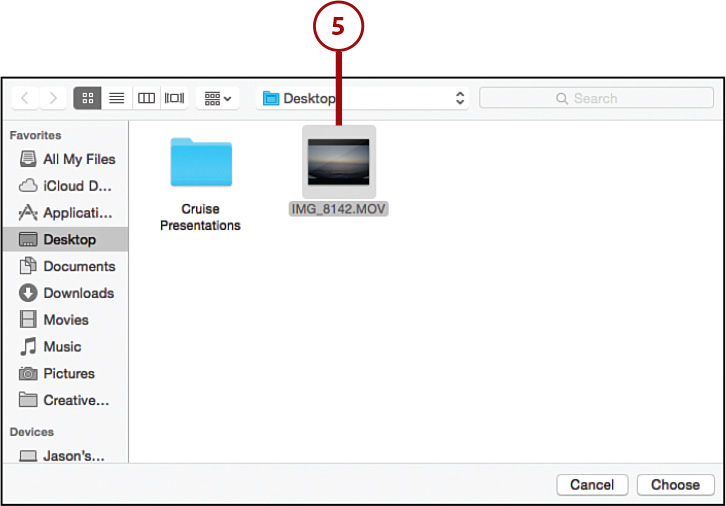
5. Locate and select one or more digital images or video clips that are stored within your computer and that you want to share on Facebook as part of your Status Update. The selected photo(s) or video clip(s) are displayed as thumbnails within the Update Status window.
Adding Details
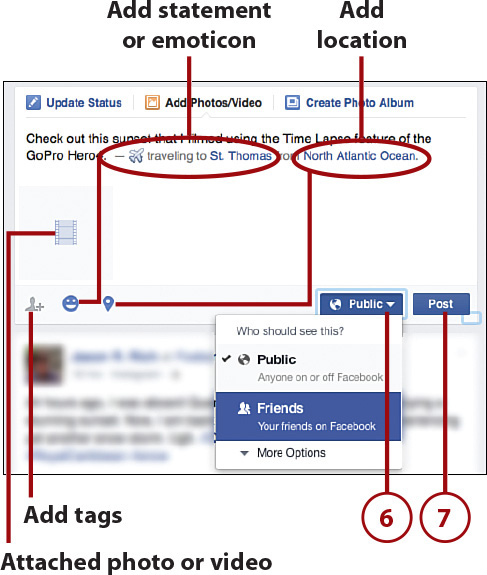
You can use the tags, emoticon, or location icons to add further context to your post, such as who you’re with, what you’re doing, or where you are.
6. Click the Public button to alter the message’s privacy settings. When set to Public (default), any Facebook user who views your profile or Facebook page can view your photos. If you select the Friends option, only your Facebook friends can see the posting that contains your photos. Click More Options to view and potentially select other privacy setting options that will apply only to this posting that you’re currently composing.
7. Click the Post button to publish your Status Update and the photos or video clips attached to it on your Facebook Wall.
8. Within a few seconds, your Status Update is displayed on your Facebook Wall. It includes the attached photo(s) or video clip(s), for your online audience to see.

Sharing with Twitter and Instagram
Twitter (www.twitter.com) and Instagram (www.instagram.com) are like scaled-down versions of Facebook; you can use them to share small amounts of information with online friends or the general public in a forum that’s referred to as your timeline or feed.
One reason why Twitter and Instagram have become so popular is that they’re designed to be accessed from a smartphone or tablet from virtually anywhere. Thus, it’s easy to publish a photo or short video clip from wherever you are or communicate with online friends while you’re out-and-about, sitting at your desk, or relaxing on your couch at home.
After setting up a free Twitter account, you can post individual messages (called tweets) that can contain up to 140 characters. You can also attach a single photo or video clip to each message, as well as your location information.
Twitter is useful for sending individual photos or short video clips with a short text-based message. Each time you publish a tweet, it’s added to your timeline, which displays your tweets in chronological order, with the most recent tweet displayed first. The tweet also appears within the feeds of your followers as soon as it’s published online.
Instagram works much like Twitter, but instead of focusing on text messages that can include a photo or video clip, Instagram showcases the photo or video clip but enables you to add a text-based caption (as well as other details about the photo, including tags).
After you set up a free Instagram account, you can publish one photo or video clip at a time, which can then be viewed by your online followers as well as the general public. By default, everything published on Instagram is public and searchable, again using hashtag keywords or searchable tags.
Tweet Photos from the Twitter App
To use the official Twitter app (on an iPhone, for example) to compose a tweet and attach a photo to it, find a photo you want to share and follow these steps:
1. Launch the Twitter app from your mobile device’s Home screen.
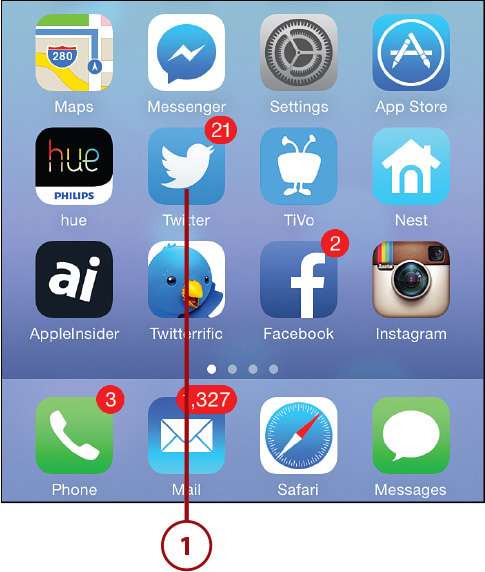
2. Tap the Compose icon near the top-right corner of the screen.

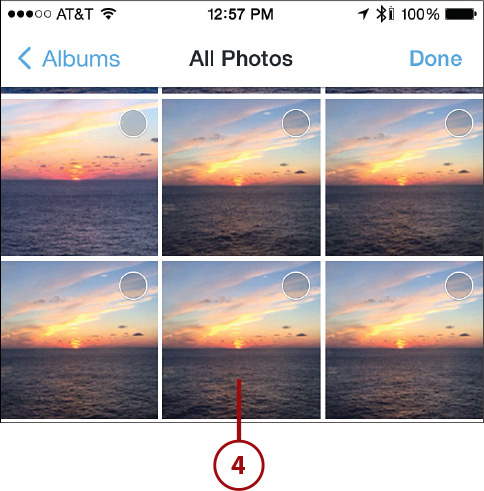
3. Tap the Photo icon to attach a photo to your outgoing tweet. By default, the All Photos album is displayed.

Attach the Photo First
When composing a tweet, you typically have up to 140 characters for your message. When you attach a photo, however, this reduces your character count, so attach your photo first.
4. Locate and tap the image you want to include within your tweet. The image is attached to your outgoing tweet.
Optional Features
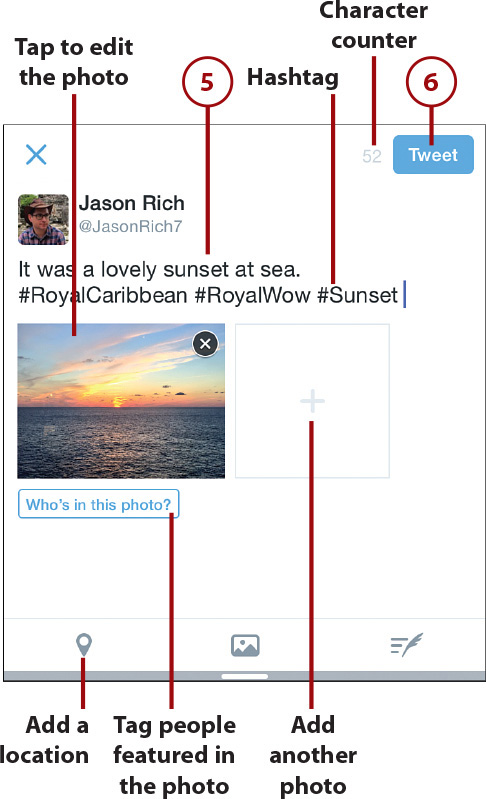
To add another photo, tap the “+” icon next to the image thumbnail within the Compose window. There are also buttons for tagging people featured in the photo, adding a location, and for making basic edits to the image.
5. Enter a short message in the What’s Happening? field. Located next to the Tweet button (in the top-right corner of the screen) is a character counter. This tells you how many characters you have remaining within your outgoing message.
Using Hashtags
Within the text-based portion of your message (or at the end of it), include hashtags that contain relevant keywords, so people searching for tweets under that hashtag can more easily find your photo. Each hashtag is always preceded by the “#” symbol.
6. Tap the Tweet button to publish your tweet. (Be sure to proof it first!) The tweet will become part of your Twitter timeline within seconds.
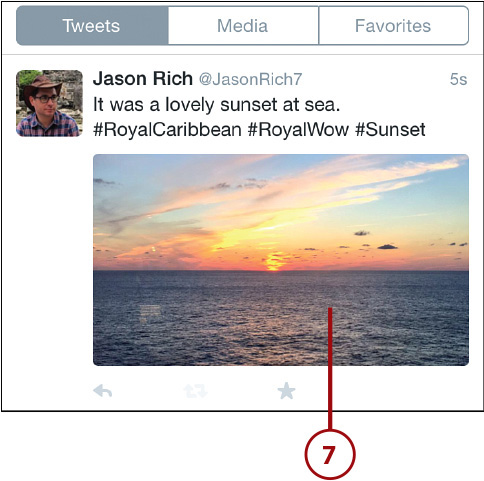
7. This is what your tweet will look like when your followers view it using the official Twitter app on their iPhone, for example.
Tweet Photos from the Photos App
To compose and send a tweet from within the Photos app, using the Photos app on an iPhone or iPad, locate the photo within the app and follow these steps:
1. Tap the Select option in the top-right corner of the screen.
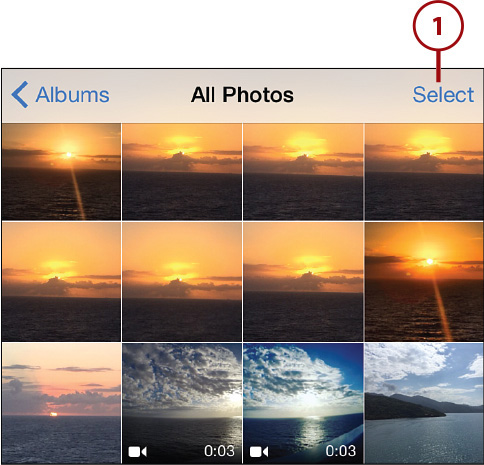
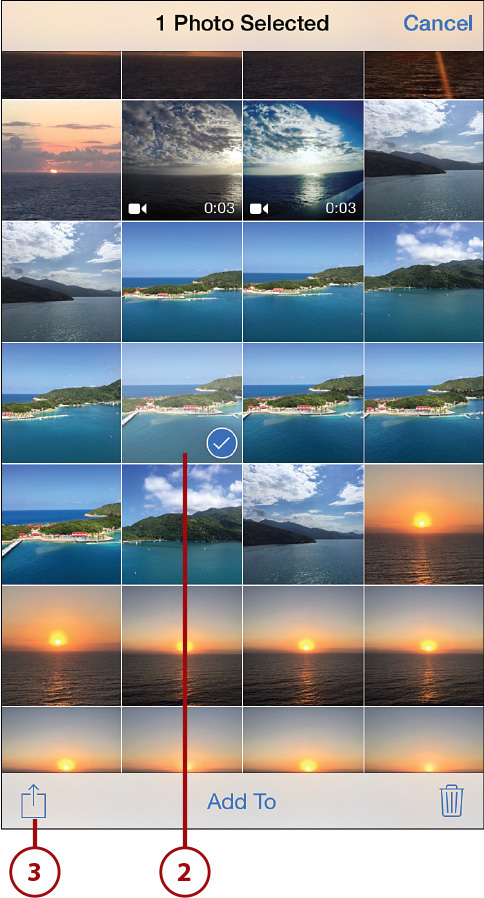
2. Tap the image thumbnail you want to send via Twitter to select it. A blue and white checkmark icon appears within that thumbnail.
3. Tap the Share icon near the bottom-left corner of the screen.
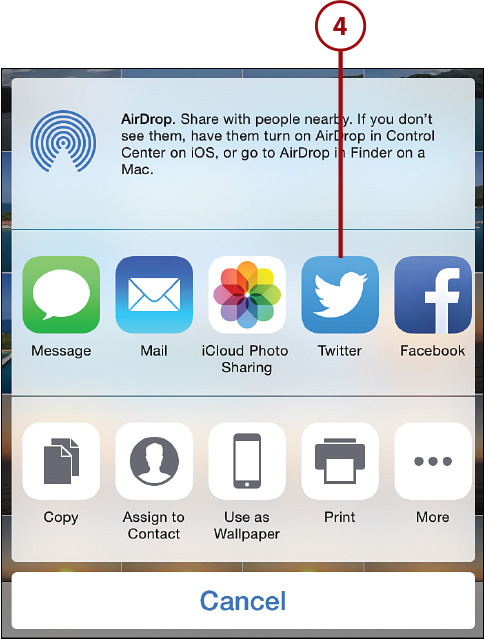
4. Tap the Twitter icon. Within the Compose Tweet window, your selected photo is automatically attached to the outgoing message (tweet).
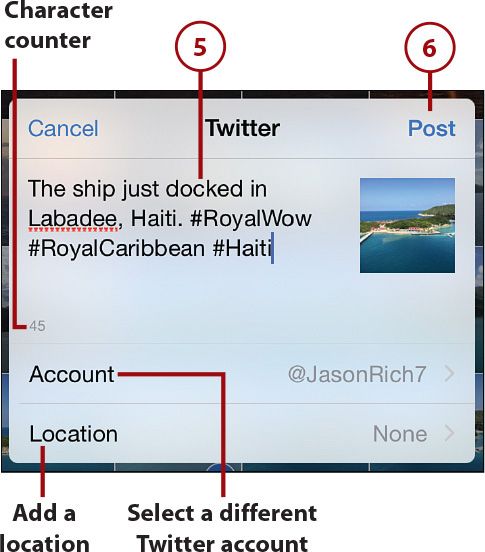
5. Type your text-based message (caption). If you choose, add hashtags to your message. The character counter is located in the bottom-left corner of the message composition field.
Other Options
Tap the Location option if you want to share your location within the outgoing tweet. If you manage multiple Twitter accounts from your mobile device, tap the Account option to select which account you want to send the outgoing tweet from.
6. Tap Post to publish your tweet online.
Publish A Photo On Instagram From Your iPhone/iPad
To publish an image on Instagram, open the app on your device (iPhone version is shown here) and follow these steps:
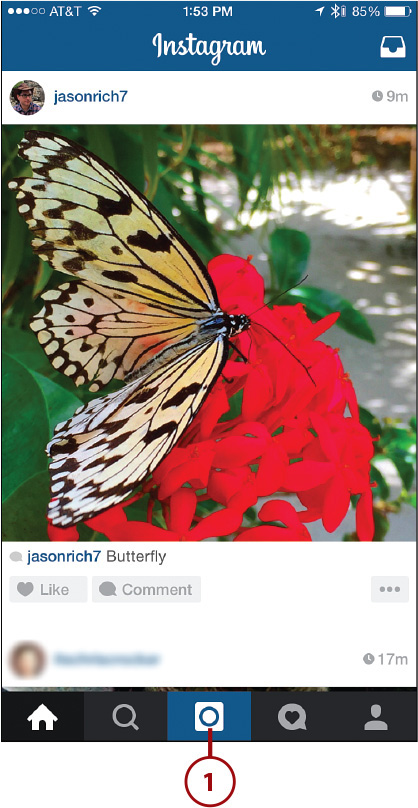
1. Tap the Photo icon at the bottom-center of the screen.
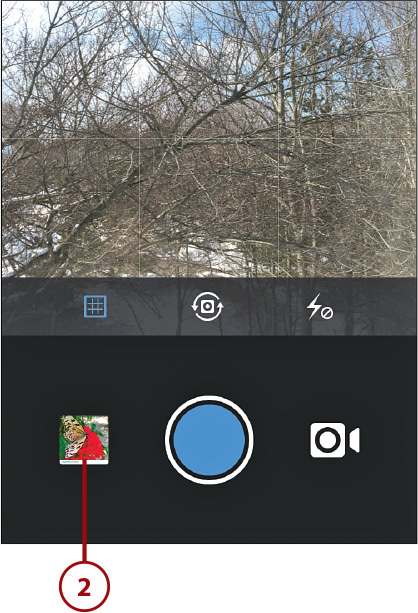
2. When the Viewfinder screen appears, tap the Image Thumbnail in the bottom-left corner of the screen.
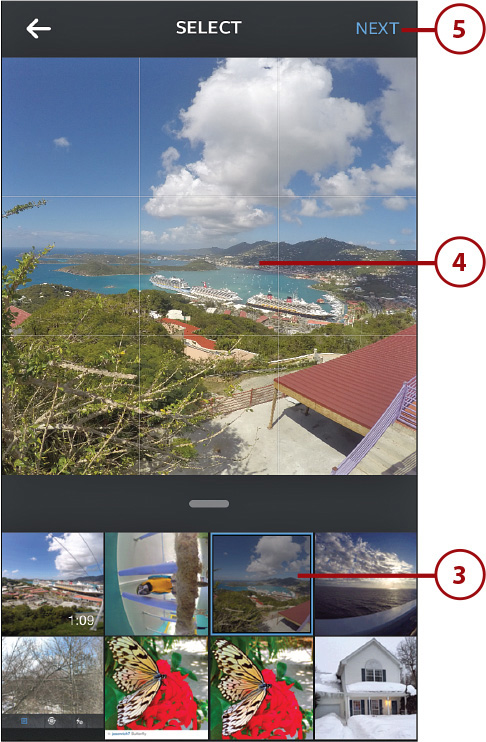
3. From the Select screen, scroll through your images/video clips and tap the one you want to publish on Instagram to select it. That image will be displayed in a larger format, within the top portion of the screen.
4. Use a pinch finger gesture to zoom in/out, or place your finger within the image frame and drag it around to re-frame your image. Keep in mind that when you publish an image on Instagram, it uses a square-shaped image format.
5. Tap the Next option that’s located in the top-right corner of the screen to continue.
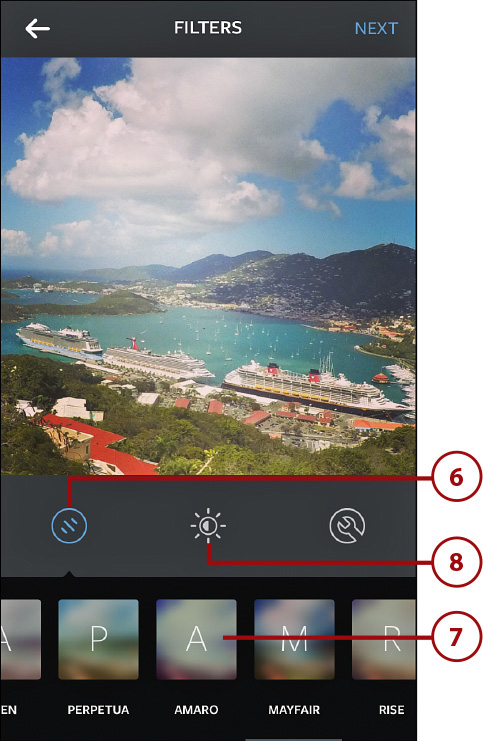
6. Tap the Filters icon to see a list of available filters you can apply.
7. Tap an (optional) image filter to select (you can swipe up to see more). Each filter dramatically alters the image’s appearance.
8. Tap the Brightness/Contrast icon to manually adjust the image’s brightness and contrast using a slider. As you do this, your image is altered in real-time, so you can see the impact of the edit. Tap the checkmark icon to save your changes, or tap the “X” icon to abort your edits and return to the previous screen. (Not shown.)
9. Tap the Edit Tools icon (the right-most icon) to display Instagram’s Photo Editing toolbox. Each of these tools has a different adjustable slider, so you can utilize it within your image. You use one or more tools to alter your image.
10. To use one of these tools, tap its icon.
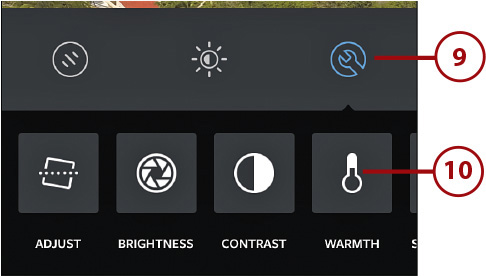
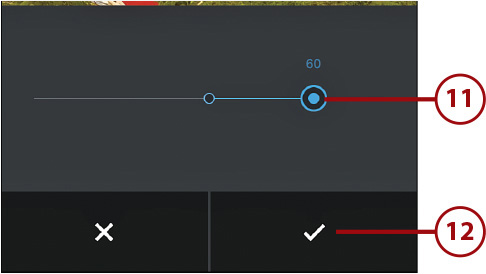
11. To use the Saturation tool icon, for example, slide the dot on the Saturation slider to the right to intensify the colors within your image. Drag it to the left to soften the colors.
12. When you’re done, tap the checkmark icon to save your changes and return to the previous menu, or tap the “X” icon to discard your changes (without saving them) and return to the previous menu.
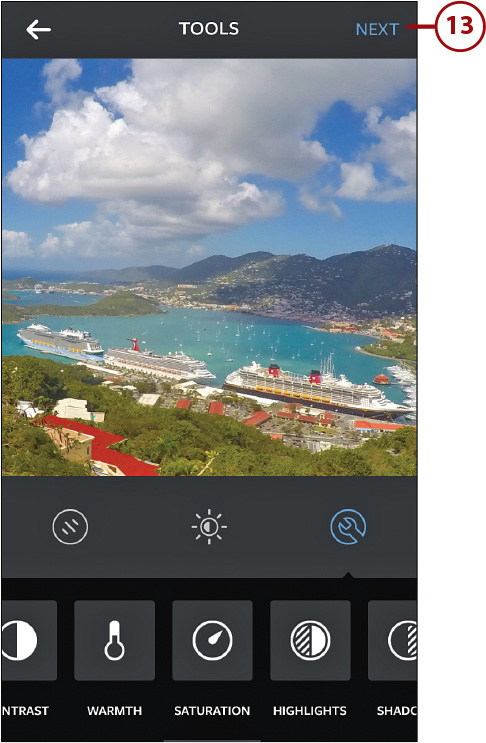
13. After you have edited your image using one or more of the image editing and enhancement tools available, tap the Next option in the top-right corner of the screen.
14. If you want to publish this photo so everyone on Instagram can potentially see it, tap the Followers tab (the default) near the top-center of the screen. Tap the Direct tab to send the image to just the Instagram users you select.
15. Enter a message within the Write A Caption field. This can include relevant hashtags. Tap the OK option to continue.
Other Options
As with Twitter and Facebook, you can add location information to your post or tag people featured in your post. To add a location, you first must turn on the Add to Photo Map switch. Your smartphone or tablet determines your location and allows you to select it.
16. If you have linked your Instagram account with other compatible social media services, like Facebook, Twitter, Tumblr, or Flickr, tap those icons if you want to simultaneously publish your Instagram posting on the services you select.
17. Tap the Share button at the bottom of the screen to publish your image on Instagram.

Publishing Videos on YouTube
Many GoPro users enjoy creating visually stunning HD videos of themselves engaged in all sorts of exciting adventures and then opt to share their videos with friends, family, and the general public.
YouTube (www.youtube.com) continues to be the world’s most popular video sharing service and it’s ideal for GoPro users for a variety of reasons. First and foremost, YouTube supports a wide range of video resolutions and formats, so you can use this service to showcase your video projects exactly as they were intended to be viewed.
YouTube integration is also built in to many video editing apps, including GoPro Studio, so as soon as you finish editing your project, you can upload the video to your personal YouTube Channel and begin sharing it online.
If you plan to create content to be shared on YouTube, you need to create a free YouTube Channel. This is your own virtual space on YouTube where you can store and showcase your video projects. After you create a YouTube Channel, you can adjust a wide range of privacy options, so you can make your entire channel accessible by the general public or lock it down so only certain people (who you invite) can access it.
You can also adjust privacy settings for individual videos. This makes it an ideal (and free) online backup and archival service because you can upload a video and make it private, so only someone signed in using your personal account can access and view it.

YouTube, however, is designed to be a public forum. Thus, when you upload a video, you’re asked to provide a title, description, keywords, location information, and other information that all becomes searchable and makes it easy for people who don’t already subscribe to your YouTube Channel to find and view your content.
YouTube Is Owned and Operated by Google
Because Google owns YouTube, within moments after you publish video content on YouTube, it becomes searchable via both YouTube and Google. While Google is the world’s most popular Internet search engine, YouTube is ranked the second most popular.
When someone subscribes to your YouTube Channel, they’re notified each time you upload and publish a new video. Anyone who views your videos can “like” or “dislike” the video with a single click or write a text-based comment about the video. These comments can be made viewable by the general public or by just the YouTube channel operators.
YouTube is an advertiser-supported service. Thus, when people view your videos, they may see different types of ads within or around the video window. In some cases, a short TV commercial-like video will play before the selected video, or a banner ad will be superimposed over the lower portion of your video for a few seconds as it starts playing. The good news is that as a content producer, if you start getting a lot of views for your videos, YouTube will share this advertising revenue with you.
For the average GoPro videographer, however, YouTube offers a simple and free way to share HD video with friends and family, or the general public, through this extremely popular and ever-growing online community.
There are many ways to publish a video on YouTube. This can be done directly from some video editing applications running on your computer, from the web browser on your mobile device, from the official YouTube app that’s running on your mobile device, or from your computer using your favorite web browser.
Upload and Publish a Video on YouTube
To upload a YouTube video from your computer using a web browser, follow these steps. You must already have a YouTube Channel created in order to do this.
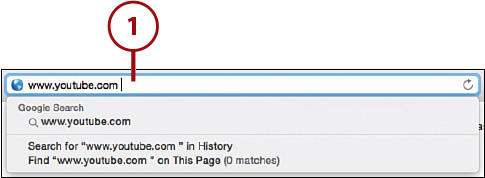
1. Launch your computer’s web browser and access the YouTube website at www.youtube.com.
If you have not already done so, click the Sign in button in the top-right corner of the browser window. When prompted, enter your YouTube username and password, or select the saved account details from the displayed menu. (Not shown.)
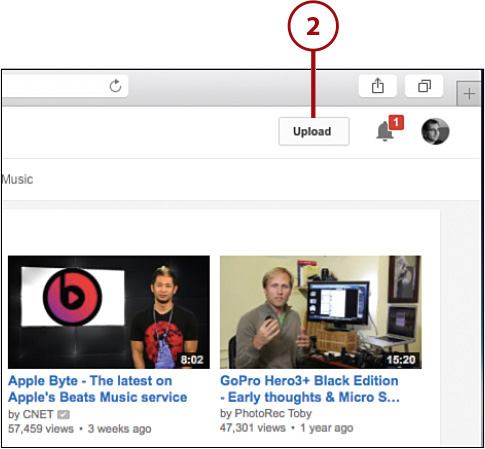
2. Click the Upload button in the top-right corner of the screen.
3. Click the large Select Files to Upload icon near the center of the browser window.

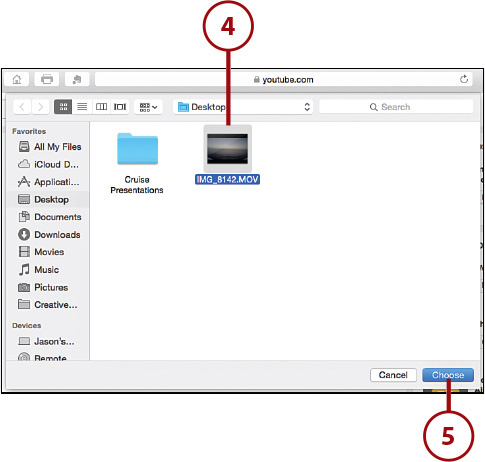
4. Select the video file you want to upload that’s stored within your computer.
5. Select Choose (this button’s label will vary depending on your web browser).
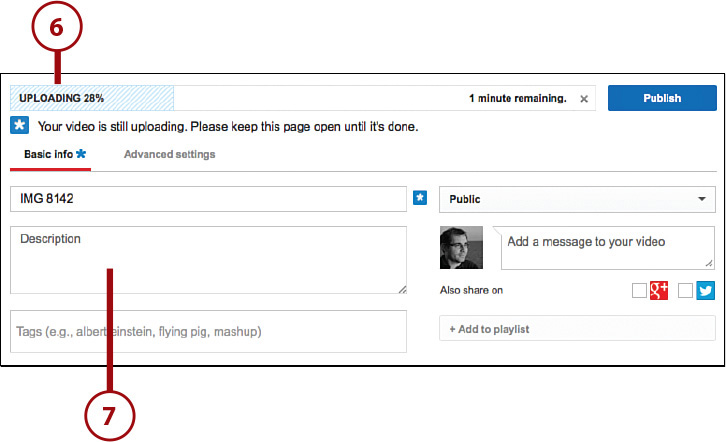
6. Wait while the video uploads. Depending on the length, resolution, and file size of your video, as well as the speed of your Internet connection, the upload process can take a while.
7. Fill in the various fields displayed within the Upload Progress screen, adding a title, description, and any keyword tags you want to associate with your video.
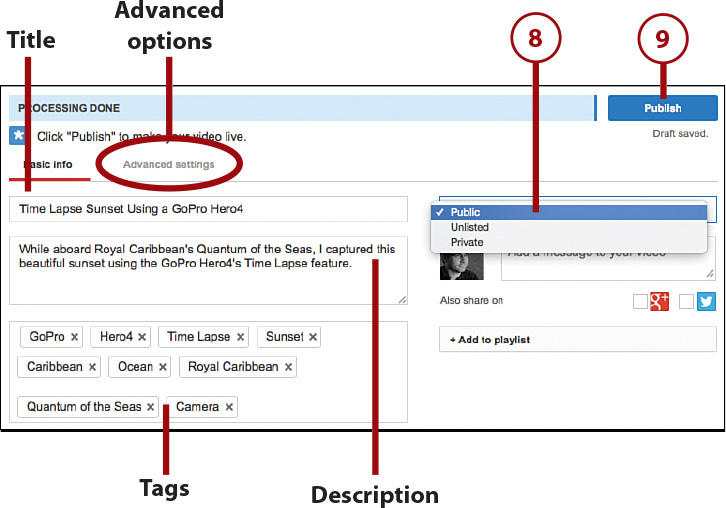
8. Adjust your video’s Privacy settings by clicking the Privacy option. Public is the default option, but you can also choose to make your video Private and accessible only by invite; Unlisted isn’t searchable and requires viewers to navigate directly to its web address.
9. Click the Publish button when you’re ready to publish your video. If the video was set to be Public, it will become accessible to others almost immediately after it’s published online.
Keep it Searchable
Everything you type within these fields is searchable on YouTube, Google, and other search engines, so use keywords and descriptive phrases directly related to your video’s content. When entering tags, separate each word or phrase with a comma.
Advanced Options
The options available under the Advanced Settings tab allow you to adjust additional options related specifically to the video you’re uploading. These options include controls for comment moderation, video category, and more. You can learn more about uploading to YouTube at the YouTube Support web page at https://support.google.com/youtube/.
At any time in the future, you can access your YouTube Channel Video Manager page by clicking the menu icon near the top-left corner of the screen (or by visiting www.youtube.com/my_videos) in order to adjust your video’s settings and accessibility.
Sharing Photos and Videos via the GoPro Channel
GoPro, Inc. started by developing, manufacturing, and selling its ultra-small digital camera. However, GoPro camera users have become so dedicated to the cameras, and the GoPro brand, that a large and ever-growing community has emerged.
This is because most GoPro users are not professional photographers or videographers. Instead, they’re everyday people who enjoy adventure, activity, and capturing the world around them in vibrant digital photos or using HD video.
Some GoPro users excel in a particular sport or activity, and use their GoPro camera to share what they do with the world from a unique first-person video perspective.
To help these people, as well as everyday GoPro camera users share their video projects and photos with the GoPro community, the company has created the GoPro Channel. Accessible from the GoPro website (www.gopro.com), as well as via the GoPro App on any smartphone or tablet, this free service works something like YouTube and enables people to publish and share their GoPro photos and videos with the public.
Every hour of everyday, new content is added to the GoPro Channel by people just like you, as well as professional adventurers and athletes that GoPro works with. So, anytime you access the GoPro Channel, you have the opportunity to experience other people’s adventures from a point of view that GoPro cameras can capture brilliantly.
Access the GoPro Channel
To access the GoPro Channel, follow these steps:
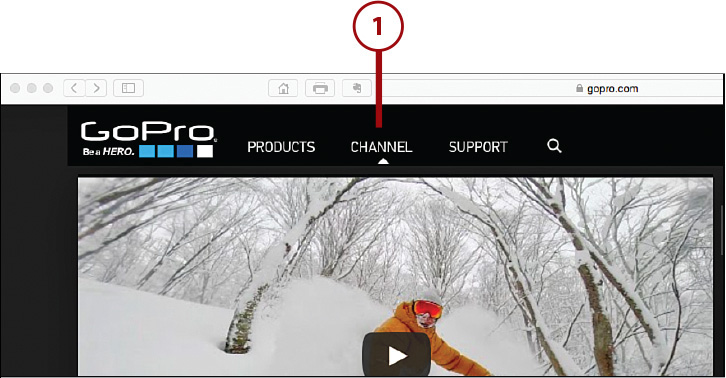
1. From any Internet-enabled computer, visit www.gopro.com and click the Channel option near the top center of the screen.
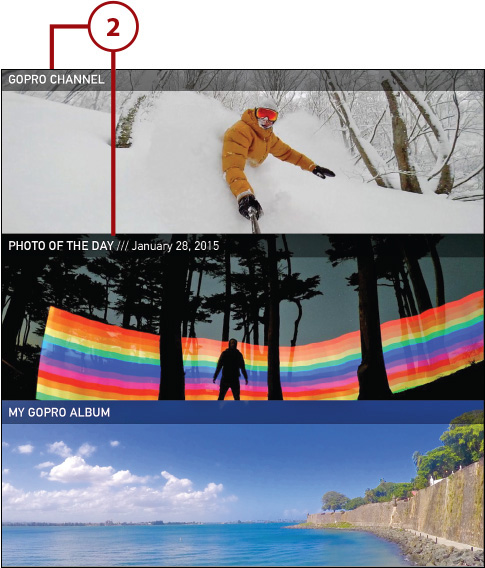
2. From the GoPro mobile app, tap either the GoPro Channel option to watch video or the Photo of the Day option to view other people’s digital images taken using a GoPro camera.
Sharing to the GoPro Channel
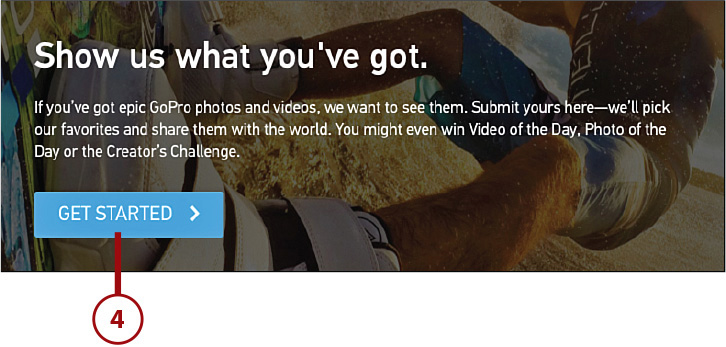
As a GoPro user, you are welcome to share your content via the GoPro Channel, providing the content meets the community’s guidelines. To do this, access the GoPro Channel web page, and click the Submit Your Photos or Videos button. Then from the Show Us What You’ve Got screen, click the Get Started option. You need to create a free GoPro Channel account, which includes creating a public profile.
Not all photos or videos uploaded to the GoPro Channel actually are featured. The GoPro Channel’s operators curate the channel and select only the best of the best to showcase.
To reward participants, prizes are given out to content providers on a regular basis. Details for the GoPro’s photo and video contests can be found on the GoPro website.
Upload to the GoPro Channel
You can upload videos or photos you’ve shot using your GoPro camera so that they might be published as part of the GoPro Channel’s ever-changing content. One way to do this is from your Internet-enabled computer, using your web browser. Follow these steps:
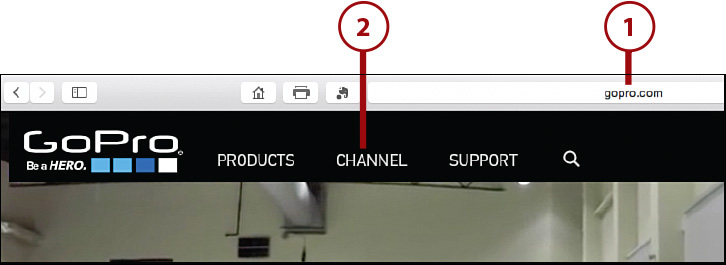
1. Launch your computer’s web browser and visit www.gopro.com. (Not shown.)
2. Click the Channel option near the top-center of the browser window.
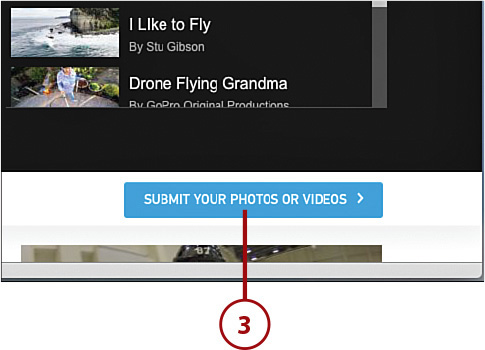
3. Click the Submit Your Photos or Videos button below the Video of the Day menu.
4. From the Show Us What You’ve Got screen, click the Get Started button.
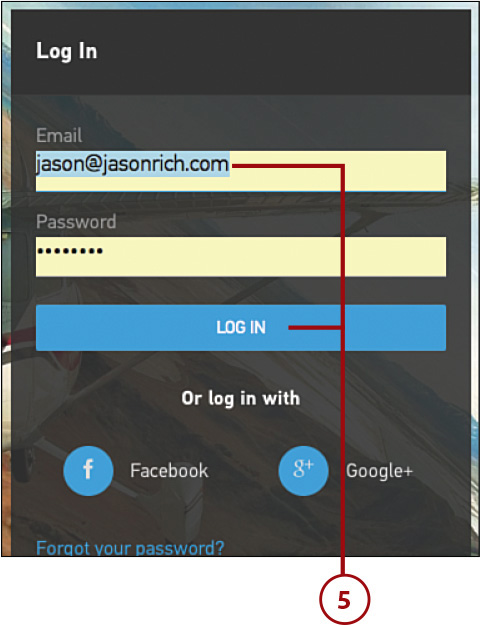
5. Log in to your GoPro Channel Email Address and Password. (If you don’t have an account set up, you need to create one.)
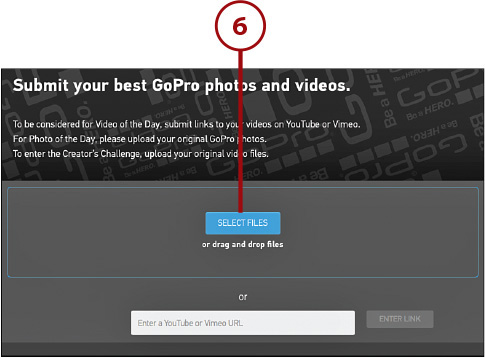
6. From the Submit Your Best GoPro Photos and Videos screen, click the Select Files button to locate the content you want to share online and select it.
7. Select the video or photo file you want to upload from your computer.
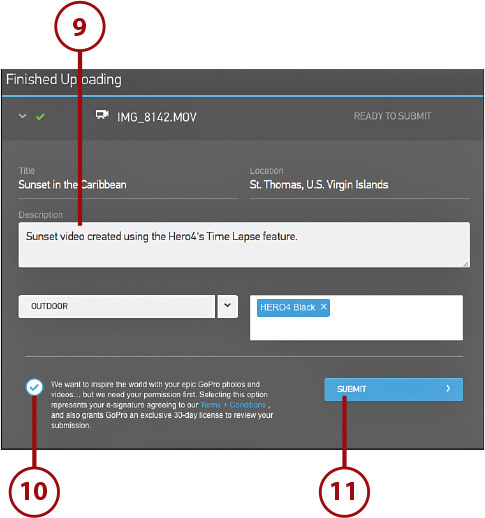
8. Click the Choose button (the label may vary based on your web browser). Your content will start uploading to the GoPro Channel. During this upload process (which could take a while, based on the file size of your content), a Status Meter is displayed near the top of the browser window. When the upload process is done, the Finished Uploading message appears.

9. Fill in the Title, Location, Description, Activity, and Products Used fields with information that’s relevant to your video.
10. Click the Accept Terms & Conditions button to confirm your video adheres to the GoPro Channel’s guidelines.
11. Click the Submit button. At this point, it will be up to the people who curate the GoPro Channel to determine if your content is suitable and worthy of being published as part of the GoPro Channel. Uploading your content to the GoPro Channel does not guarantee it will be published online for all to see. If you want to guarantee your video will be viewable by the public, publish it on YouTube.
Other Ways to Showcase Your Photos and Videos
After you shoot photos or video using your GoPro camera, you can showcase or share that content in literally hundreds of other ways. Here’s just a sampling of what’s possible after you transfer and edit content to your mobile device or computer.
Ways to Showcase Photos
Following are some of the ways you can share and showcase digital photos shot using your GoPro camera:
• Create traditional prints, which can be framed or displayed within a photo album, scrapbook, or within a picture frame. Do this using a home photo printer, 1-hour photo lab, or photo service (such as Shutterfly.com).
• Display your favorite images as your computer screensaver or as the wallpaper on your smartphone or tablet. This is set up from the computer’s operating system Control Panel. On a Mac, open System Preferences, and then click the Desktop & Screen Saver option. Using an iPhone or iPad, launch Settings, tap the Wallpaper option, tap the Choose a New Wallpaper option, and then follow the onscreen prompts.
• Create a professionally bound photo book that showcases your photos in a hardcover or softcover book that you create. Many photo book publishing companies offer free photo book design software and then handle the printing and binding. Blurb.com is one example.
• Display the photos on your HD television screen either directly from your camera or via your computer or mobile device. Do this using a special cable that connects between the micro-HDMI port within your camera and the HDMI port on your HD television set or wirelessly via your mobile device (as long as your TV has compatible equipment to handle this feature).
• Instead of creating traditional enlargements, have your images printed on canvas, wood, plastic, or other material that can display on any wall without using a traditional frame. Most 1-hour photo labs, as well as online photo services (such as Shutterfly.com, fotoflot.com, or EasyCanvasPrints.com) offer this service.
• Send photos via a text message to others via your smartphone.
Ways to Showcase Video
Following are some of the ways you can share and showcase HD video taken using your GoPro camera:
• Create and distribute DVDs that can be played on any DVD player. Most video editing software offers this option, providing you have a writable DVD drive connected to your computer.
• Copy your HD video files to a flash memory card (thumb drive) and distribute them to friends and family.
• Upload your video to a video sharing service, such as YouTube.
• Watch your edited videos on your computer or mobile device.
That’s a Wrap!
Now that you understand how to operate your GoPro camera, and you’ve learned a handful of useful photography and videography strategies for creating professional-quality content, the rest is up to you.
Your GoPro camera is extremely powerful and enables you to capture photos or video in ways that have never before been possible. Use this technology to your advantage, and begin capturing moments and activities in your life that you want to remember and share with others.
Never before has taking high-resolution photos or shooting HD video been so accessible to so many people, at a relatively low cost. It’s now up to you to use this ultra-compact and durable technology in creative and fun ways. As you’ve seen throughout this book, and as you can see on YouTube or the GoPro Channel, the possibilities are truly limitless.
Welcome to the GoPro community!