Section 7: Up, Up, and Away!
Shooting Air-to-Air

Stinson Reliant SR-9F over the Golden Gate Bridge | Shutter Speed: 1/100 sec
The email chimed, signaling that the latest batch had reached my Inbox. I started to glance at them when one caught my immediate attention. The subject: the 1937 Stinson Reliant SR-9F. The sender was unknown to me, but he included two photos of this spectacular aircraft, which instantly had me hooked. This rare bird is simply one you don’t see every day, and the romance connected to it made it an easy sell to any magazine. The end of the email said, “Your photos are beautiful. We want to share the story of our special aircraft, as well as our saga in getting the old girl back in the air. I would love to talk to you about the possibilities.”
Scott had seen my images and had asked around. Like I said in the previous section, it’s a small world, and it so happened that some of Scott’s friends were people I had worked with and who were now also friends of mine. So, it didn’t take long until we had set a date to get together and do an air-to-air with his gorgeous aircraft. Sharon and I were excited on many levels. First was the huge compliment being paid to us by being asked to be the first to photograph this newly restored Stinson air-to-air. And then, to be asked to be the one to tell its story in a magazine article—wow! Being a visual storyteller is what it’s all about. So we were on cloud nine as we drove over to the Bay Area for the shoot.
It Only Works This Way in Dreams
It was a warm August, and that normally creates overcast-to-foggy mornings in San Francisco Bay. I had only “met” Scott via email up to this point. I hadn’t even been in touch with, nor ever heard of, the photo platform pilot, Steve, and that always makes me very cautious. When I was told he was retired Navy, an F-4 driver in Vietnam, any agnst about him flying me evaporated. We got in late that night, and made the call that we were in place and ready to meet them before sunrise the next morning (yes, I seem to always be shooting before the sun rises).
When we walked to the truck the next morning, the fog was so thick we couldn’t see the front of the hood from the cab. We drove over to the airport in the pea soup, which I figured would cancel the flight. In the dark, damp, and depressing fog, we sat and sat. Our photo mission was pretty simplistic: fly down to the Golden Gate, fly a couple of orbits around it, fly back along the coast to Point Reyes, and then turn back inland to recover. But, we weren’t going anywhere with this fog. The coffee and both pilots arrived at the hangar to talk things over. We briefed the flight, in case the fog was to lift instantly, then we sat and chatted. An hour went by, and the magical morning light I wanted evaporated, but not the fog. Then, another hour ticked away, and we were getting close to scrubbing. Scrubbing an air-to-air because of weather (WX) is nothing new to me. Twenty minutes later, Steve checked again and said that the fog was breaking and we should launch. After a few moments of triple checking, we were loading into the aircraft and launching.

Stinson Reliant SR-9F
In those few moments, the fog at the airport vanished and the hard, August morning light blared everywhere along with bald skies! I couldn’t imagine worse light on such a sexy subject or background for an air-to-air, but there we were winging our way toward the Golden Gate. Below, we could see all these helicopters hovering and flying about. Then, we realized the Grand Prix was that day and those were all camera ships working the race flying about. This was another complication to our photo mission. As we made the slight turn in our flight path, we could see the Golden Gate was partially wrapped in fog. Steve got on the mic and started to talk to ATC (air traffic control), getting permission to do orbits around the Golden Gate. I asked him if they would grant it with the fog and all the helicopters. He said, “I know that gal; she’s always nice to me.” A moment later, ATC came back and said, “Clearing the air space, deviate around Alcatraz, and then you have permission for two orbits.”

Stinson Reliant SR-9F
Holy cow, we got it! Time to settle down and get to work. Steve is a marvelous pilot, who really made the whole thing happen. During the brief before we launched, I had explained the shots I wanted at the Golden Gate, so he knew the exact flight path to fly. I really had two subjects in mind for the photograph—the Stinson and the bridge—and really needed that fog to bring the romance to life. Steve worked the flight path to make the most of all three of those elements. We had just enough fog for the photograph, the romance, and to soften the light. On the first orbit, I wasn’t thrilled with the photos because, while they would do in a pinch, they were like, well, what anyone could take. So, on the second orbit, I made a couple of small adjustments.
On the second orbit, we were further from the bridge and, rather than doing an orbit, we went to a racetrack so the Stinson would be in level flight when I wanted to make my clicks. We lined up on our flight path and everything was looking good. Once I saw all the elements line up in the viewfinder, I let the D5 rip: I just held down the shutter release, shooting 14fps for about a minute. Steve said, “I’ve not heard that sound since Vietnam!” A few minutes later, we made our turn north up the coast with some of my favorite images in the can. Scott and I have become great friends since then, coming up with new ways to get in trouble with planes and cameras. A year later, when the article came out, his text to me simply said it all: “Great story, I knew it would be.”
Air-to-Air Is Not Cut-and-Dried
What you’re going to read in this section is how I’ve gotten to the style of air-to-air I use today, and the success I enjoy. There has been an evolution in my air-to-air since the beginning, which continues to this day. That evolution comes from the constant learning process, learning not so much about the photographic process, but about aviation, aircraft, pilots, and the art of telling their story visually in the air.

A6M2 Zero
The point here is that what you’re reading is how I’ve come to this point in my aviation photography, and you have to understand that it’s still growing. At the same time, my goal is to help you get started and pointed in the right direction in your aviation photography. It’s all about your photography, not mine! There are so many ways to approach air-to-air photography successfully, and if you look at all the successful photographers out there doing this, you’ll quickly understand what you’re reading is not the only way. Your job is to take all this information in, and then make it work for your storytelling. I want you to experience the excitement, thrill, and joy of air-to-air, and I want you to make your images your way. So, consider this a guide and advice from a good friend.

FG-1D Corsair and A6M2 Zero
It Comes with a Warning
Air-to-air photography is literally and figuratively one of the greatest highs in photography I’ve ever experienced! Forget just aviation photography, I’m talking all photography when I say it’s a huge high. Seriously, you’re hanging out there, with just your camera, watching the world whizzing by 5,000 feet below, with this gorgeous aircraft basically parked right next to you begging to have its photo taken. As you’ll soon read, I was hooked within the first minute of my first air-to-air and haven’t stopped since, with more than 100 photo missions since in the logbook in nine years. That means I’m still a rookie! But, there is simply nothing like it in the world of photography.
This section comes with a big warning: air-to-air photography, while the most exciting photography you will ever experience, is also the most dangerous! Understand, many have lost their lives doing air-to-air photography—civilian and military alike. This is a place where f-stop and shutter speed knowledge won’t bring you home safe. While I have learned from the best and still work with the best, I’m more than happy to share what I’ve learned thus far, but there is still a lot left for me to learn still. You take this advice and take on this photographic pursuit at your own risk. As Rosie likes to say, and as I repeat on every air-to-air photo mission, “The mission is to land safe and have a beer!”
How I Got Hooked
We’d been cruising in large orbits for 20 minutes when the photographers on the loading ramp slid down to the interior floor of the C-130. We’d taken off from Reno-Stead Airport in the Alaska Air National Guard 144th Airlift Squadron’s C-130 at 18:10 with a huge crowd watching. I was about to participate in something never done before or since.
It had begun in March 2010. “We have an opportunity, a once-in-a-lifetime one, to have a gathering of five P-38s at Reno in September” was how the phone call began. A plane my father, a bombardier/navigator in B-29s in WWII, was involved with in the factory. I grew up on stories of these fabled aircraft, with models and photos about the house. So, when the call came, and I was asked to help find sponsors for the effort to bring the P-38s to the Reno National Championship Air Races in September, I jumped in. As it is with aircraft that are 70 years old, things happen. And, running these warbirds takes money—just the gas bill alone makes me gulp. So, at the start of race week, we only had one P-38 at the races—the very famous Glacier Girl, and that was it. What had been planned for months had fallen by the wayside. I made plans, but like so many previous times in my career, the best laid plans...well, you know the rest.
It was the second day of the races, and the ramp rumor (what I call them) was that the P-38 23 Skidoo from Planes of Fame was flying up. Then, the plan was hatched: how about an air-to-air photo mission with the two P-38s and the two F7F Tigercats at the races? It had never been done before, and in all likelihood, the chances that it would ever happen again was slim to none. So, the shoot was on. The next day, it was off. The next day, it was on again. The goal was to do an air-to-air, photographing a flight of four planes from the rear of a C-130. Talk about grandiose! The next day, the flight was off again, and then on the last possible day we could do it, it was on, then off, and then on, if they could get the tire on the C-130 changed soon enough. Seriously, this is how it unfolded.

P-38F Lightning Glacier Girl, and F7F Tigercats Here Kitty, Kitty! and Big Bossman
Then, came the call: we were on for 17:30. Then, it was changed to 16:30, and then it was 17:00, and finally, the flight briefing would be at 17:30 for a flight at 18:00. Holy cow! There were to be eight photographers on this historic flight, and I was incredibly, incredibly, incredibly fortunate to be asked to be one of them. My emotions went up and down from my throat to my toes so many times I felt like I had already taken the flight. As we walked over to where we were going to have the briefing, details kept changing—the time of the briefing, the location. Up until the very last moment the briefing began, things were in flux. While I had brought and thought through the camera gear I was going to use, with each change in the plans, I would fret through what gear to take. This was a once-in-a-lifetime opportunity. There would be no reshoots!
We all gathered right next to where Glacier Girl was parked all week. She had been pulled out onto the ramp and parked next to 23 Skidoo and the two F7F Tigercats, Here Kitty, Kitty! and Big Bossman. And there I was, the “rookie,” with aviation photography veterans Paul Bowen, Scott Slocum, Kevin Graham, “Bucky” Dawson, Richard VanderMeulen, Dave, and Jimmy, listening to four legendary pilots brief us on the flight. I pinched myself twice. This flight was a first for everyone, from the pilots to the planes to the photographers. And, the stakes were very high. There was zero room for any mistakes. As the rookie, I was wide-eyed, nervous, sweating, excited, taking it all in, while counting every blessing. Keep in mind that I’d only been doing aviation photography for three years at this point and I’d had my first air-to-air just a few months prior. Yet, here I was, incredibly blessed to be included in what would be my second air-to-air photo mission. (Later, when I asked why I was included in this shoot, I was told, “Your reputation and a big thanks for what you do.”)
Quick Brief
Backgrounds are everything in air-to-air. Get in the habit of looking forward to see where you’re going because you can never go back to repeat a great background.
With the briefing over, I ran back to get my gear, got in the van, and was driven over and loaded up in the C-130. From the briefing to the C-130, I was rethinking over and over the lenses I would use. At this point, I didn’t have a set gear list for air-to-air missions. It was then that it occurred to me that Bill Pekala from NPS (Nikon Professional Services) was there, shooting with the new Nikkor 28–300mm VR. Changing lenses during the air-to-air mission wasn’t an option for lots of reasons, time and safety the top two. We would be shooting in groups of four photographers at a time on the ramp, with each group getting, at most, 20 minutes to shoot. I needed to have the lens on the body from the get-go. I walked up to Bill, told him the situation, and asked point blank, “Would you trust this lens to such an event?” I trust Bill 100%, so when he said, “Without hesitation,” I then asked if I could borrow his 28–300mm. I walked out of the Media Room with the 28–300mm VR on the D3x and the 24–70mm AF-S on the D3s.
We would be shooting from the ramp at the rear of the C-130. It would be partially up, or partially opened, however you want to think about it. We would be right in the suck zone, where anything can and will be sucked up and out (this includes photographers, as well as camera gear not secured) of the C-130. Each photographer would be wearing a C-130 load deck harness, secured to the floor of the C-130. I was in group two, the second group to shoot, so we each picked a shooter from group one to partner up with. We went through putting on and taking off the C-130 harnesses. We would be doing this exchange while in the air and there was no room for mistakes. Any mistake—a person or object falling out the back of the C-130—would not just mean the loss of that life or object, but also could adversely affect the planes behind us. If an item struck the planes behind us, while they were doing 200+ knots, it would bring them down. This is very serious stuff! With all of this covered and rehearsed under the watchful eye of the C-130 loadmaster, we all sat down, put on our seat belts, and the C-130 taxied out.
The eight of us, in the very back of the plane, were giddy as kids and, of course, being photographers, we were all taking photos of each other. The excitement nearly took my breath away because, before I knew it, we were airborne. I could then feel us in a steep bank to the left. Dave tapped me on my shoulder and pointed out the window on the side of the C-130, where we could see the ground and the runway. We were flying the Reno Air Races course! We gave all those on the ramp watching quite a show. After one lap, it was off to our appointment over Pyramid Lake with four amazing aircraft.
Once in the air, communication was only by yelling in the ear of someone next to you (we all were wearing ear protection). The sign came up and we were down to only three aircraft—a Tigercat was having issues and returning to Reno-Stead Airport. A slight disappointment was just setting in when we got the sign that we were back to four aircraft. That’s how it can go, that fast. We were given the sign for the first four shooters to get into their harnesses, and then the top half of the ramp door folded up and open. We all strained to see the flight behind us in the bright light, but we could see nothing from our seats or standing up. The first four photographers scooted up the ramp and took up their assigned positions kneeling on the edge of the ramp. We could tell from their body language that they were shooting and loving every moment of it. Their 20 minutes of shooting seemed to last all day. Without a word, when their time was up, they skidded down the ramp, took off their harnesses and, just as we practiced, we put them on and moved up the ramp to shoot. What I had been thinking about for months was about to be in my viewfinder.
The four of us went up the ramp together. We crawled up the last little section, and as we neared the edge of the suck zone, I was pulled up by the air the last few feet. On the way up the ramp, I couldn’t see anything out the back of the C-130. I wondered if the four planes had left formation and would be joining up with us shortly. When I got up to the very edge of the ramp, my knees literally on the edge of the ramp—one more inch and I would’ve been flying—I looked out to see Glacier Girl parked right behind the C-130! OMG! I was not prepared to be nose-to-nose with history. Dave and I just looked at Glacier Girl, then at each other, not really believing what we saw. It literally took my breath away! Then we came out of the dream—SHOOT!

P-38s Glacier Girl and 23 Skidoo, and F7F Tigercats Here Kitty, Kitty! and Big Bossman
The first shots were taken at 1/250 to ensure at least some tack sharp images. Like I said, this had never been done before (and more than likely will never happen again), so I had to have some tack sharp images. With those recorded on both bodies, I went to work with the D3x and 28–300mm, shooting at 1/90. Why that shutter speed? That’s what gives you the beautiful blur to the props, and when the planes are flying right into the sun, it’s magical! We were connected to the C-130 by a 15-foot tether, with our knees on the edge of a metal ramp covered with non-skid material. It was great! Using proper hand-holding, leaning out on the tether and pulling against it using my thighs, I steadied myself and shot.

P-38F Lightning Glacier Girl, and F7F Tigercat Here Kitty, Kitty!
We made a constant clockwise racetrack over Pyramid Lake, so the background and light changed constantly. The four planes were given directions to create different formations, so we could constantly shoot something a little bit different. The pilots of the four aircraft have amazing skills, creating the new formations by using very romantic and dramatic moves. The whole time we were in the air, we were fighting the clock. The sun was setting and fuel is expensive. With every turn, the background changed, the light changed, and the formation changed. I would fill up the buffer on the D3x, and I’d switch to the D3s, and once the D3x was ready, I switched back. In our 20 minutes of shooting, I had more than 800 images. If two were tack sharp, I’d feel really good. Oh yeah, the doubts and fears raced through my mind the entire flight. It was the opportunity of a lifetime, using a new lens for the first time, shooting at 1/90 in rough conditions where 1/1000 was required. There was plenty of room for total failure!

P-38F Lightning Glacier Girl, and F7F Tigercats Here Kitty, Kitty! and Big Bossman
Time was up, and I slipped back down the ramp, got out of the harness, and strapped back down in my seat. I looked at the LCD and found one sharp image. Phew! Then, it was time for giant smiles, high fives, and the satisfaction of success. We landed, hugged, and celebrated the moment with the killer C-130 crew, shook hands one more time, and walked over to the Media Ops party. We were greeted like heroes, with folks wanting to hear the story you just read and see the images. I handed my two bodies to Brent and Jake, and from their faces, I could see I had succeeded in capturing the magic of the experience in the images. But, it’s a flight that will never leave my heart!
Where the Basics Count the Most!
It’s only human nature to want to jump right into this incredibly adrenaline-pumping photography. Warning: again, this is a very dangerous passion! Photographers have lost their lives doing air-to-air photography! I’m going to encourage you to do your homework first, and then proceed. Keep in mind that this can also be a very expensive type of photography—if you’re footing the bill for the entire flight, it can easily start at $5,000 for an hour of photography. That’s just for the aircraft and gas! No matter who is paying the bill, the objectives must be kept in sight if you want to do more and more air-to-air photo missions. You want to come back with only the best images—for all the reasons we’ve already talked about and more to come. This all starts where you can perfect your skills the easiest—on the ground.
Like I’ve hammered on this entire book, you start on the ground perfecting the basics. When your knees are digging in on that C-130 ramp in rough air with those four aircraft in the viewfinder, is that the time to be perfecting your basic skills? NO! All the techniques, tools, and background knowledge you need in the air needs to be as perfected, as much as is humanly possible, on the ground a prior to your first flight. One of the most important techniques is simple hand-holding of your camera. To go over the basics once again, turn you left hand palm up so the lens rests in the palm of your hand. Grasp the body with your right hand and pull it into your face. Use an eyecup to act like a shock absorber (essential in the air). Bring your elbows into your sides and roll your finger on the shutter release to fire the camera. This has to be second nature! You need to be able to do this without thinking about it, because when you’re in the air, your mind is most definitely elsewhere.
There is a twist you need to incorporate into your hand-holding, and it has to do with securing your gear to you. When you’re shooting air-to-air, nothing can leave the photo platform (the aircraft you’re shooting from). The camera body, lens, etc., must be secured and there are many ways of doing it. The first and most common is by wrapping the camera strap around your wrist. Yes, this is very simplistic, but effective. And, just as basic hand-holding must be second nature, so must wrapping that strap around your wrist.
Many use a carabiner (coupling link) to attach their camera strap to their harness, so they don’t have to have it wrapped around their wrist. Some do a combo of both. There are straps (like the A2 from Vulture Equipment Works, which I use) that are made specifically with air-to-air in mind. The Vulture A2 is a beast of a strap that will keep your gear inside and attached to you or your harness or both! It’s constructed from military-grade material, fully adjustable, and simply badass. I highly recommend it.
The one thing we don’t do when shooting air-to-air is panning. We have two moving aircraft that are flying in formation at the same air speed, so they are in sync. This means that the subject platform is, for all intents and purposes as far as the camera is concerned, not moving. This eliminates the need for panning to freeze movement like we do in ground-to-air shooting. That’s not to say you don’t move the camera to keep the subject in the frame, but these are fine adjustments and not panning. You still need that rock-solid hand-holding, though. It’s the base for everything.
Quick Brief
Many photographers don’t use a filter, as it can come unscrewed and fly out (we never use shades [lens hoods] either). But, with all the oil in the air, I must use a filter, so I gaffer tape it in place so it can’t come unscrewed.
First Thoughts on Gear
Lens selection, in my book, is a very important component of the air-to-air photograph. Aircraft all have a distinct design, which is what makes them unique. You can change that “look” by distorting, the classic being by making the wings look longer and narrower. This is not necessarily a bad thing, just something you need to be aware of. Another thing you must take into consideration is the physical distance between the two aircraft. To get the same image size, you have to have the aircraft closer to you with the wider lens and can be further away with the longer lens. The greater the distance is between the two aircraft, the more safety there is built into the formation. Then, there is your style of photography. So, the lens you select is kinda important.
With that said, probably the easiest part of this whole gig is the camera gear. You really don’t need much. In fact, I know many who shoot their air-to-air with just one body and one lens, and have been doing it that way for years. I’m one of those. The primary lens I use in air-to-air is the 70–200 f/4 AF-S. This one lens provides, along with good coverage and flexibility, a maximum of f/32 when closed down, and has just enough bulk to it, which can help when the air is a little rough. The one thing you don’t need is a fast 70–200mm, which can save you some money.
Another lens option, which I used for many years, is the 80–400mm/100–400mm. This is a great option because it permits your subject aircraft to have that extra distance from the photo platform. These lenses also have bigger bulk, making them a little steadier in rough air. Why did I stop using the 80–400? It’s not that I stopped using it, it’s just no longer my primary air-to-air lens. It’s because I’m often photographing multiple aircraft, a formation, all at a time where longer doesn’t work. I’ve also been working more and more in open cockpit and, as you’ll read shortly, the less that’s sticking out in the airstream, the better.
When it comes to a camera body, what you’ve already got is a great place to start. I want to give you some food for thought on this topic, though: knowing that flying the aircraft you’re photographing is expensive, anything you can do to minimize costs is a good thing. When you have a camera body that has only a five-frame buffer, you will find yourself using a lot of gas waiting to shoot again. There are many options for solving what I see as a big problem. Keep in mind that without those aircraft, their owners, and pilots, there is no air-to-air photography. When you do everything in your power to make it safe, easy, fun, and rewarding for them, you’ll have more and more shoots. From the ground, thinking that camera buffer equates to gas is a bit of a stretch until you’ve done an air-to-air with a full buffer.
Solving the buffer problem can be done in at least three ways: The first, which many do, is to buy a camera body that has a bigger buffer. I know that’s one reason I bought and use the D5 as my primary body for air-to-air. Shooting with two Lexar 128GB XQD cards (both inserted into the camera), I have a buffer and card permitting basically continual bursts without ever really filling the buffer. With that freedom, there are times I’ll lay on the hammer hard during an air-to-air shoot. Buying a camera with a big buffer might not be in the budget, so the next option that comes into play is a second body. The second body helps because, when the first body’s buffer is full, you pick up the second body and continue shooting, doing that same thing through the entire shoot. Keep in mind that a second body means a second lens.

F2G-2 Super Corsair
You don’t wanna be changing lenses during an air-to-air photo mission. This is for two reasons: The first is the amount of dust buzzing around is unbelievable and, with the force of the air, it seems to instantly find its way onto your sensor. We have enough dust issues without making them worse by changing lenses. The other is because we cannot risk anything going out the plane and hitting the plane we are photographing. You can’t change media, filters, lenses—anything—because the risk is just too great.
Even with the D5 being my primary body, many times I have a second body with me during air-to-airs. The second body is not only an additional buffer option, it’s an additional lens option. My second body will either be a second D5 or the D500. That second body I use depends on the requirements of the shoot—big files, video, whatever the particulars might be. What if buying a second body isn’t an option no matter the price? If that’s the case, you need to really ask yourself if it’s the right time for you to be venturing into the skies to began with. As an editor used to always remind me, “You’re only as good as your last photo.”
Quick Brief
My favorite lens right now for air-to-air photography? The Nikon 70–200 f/4 AF-S. It’s small, compact, has some bulk, fast AF, and is spooky sharp. At the same time, it’s got a great focal length range and closes way down to f/32.
Quick Brief
Is VR/IS essential for air-to-air? This technology doesn’t do much for you when you are on stable ground. Such is not the case when you’re in an airplane. In air-to-air, VR/IS can make a difference, so with the Nikon system, switch to Active, and you’ll get your money’s worth!
The last option to consider solving this problem is renting. There are many great rental houses, which are a good option for renting that body with a big buffer or second body with a smaller buffer for that air-to-air. The problem you need to solve is any down time from shooting because of gear, which wastes gas.
I mentioned a second lens on that second body. What might you go with? The most common is a lens in the 24–70mm or 24–120mm range. The thought process is pretty straightforward: the longer lens is to zoom in on the pilot and aircraft details; the wider one is for the whole plane and “plane portrait” shot. But, just like any segment of photography, you can really use any lens you own. Here’s the basic thought process: Normally, to get the image size you desire, you either use focal length or you move in relationship to the subject. When you’re shooting air-to-air, moving the subject aircraft around can, at times, take time and, therefore, fuel. At the same time, there is a safety margin that, if you don’t fly, you won’t understand. In a nutshell, the farther the subject platform is from the photo platform, the safer the photo mission. We will get into this in greater depth shortly.
The last lens you might want to consider is the 16mm fisheye. This is for the traditional “glory shot”—your self-portrait taken on the flight back to the field. This might seem silly until you do it and look back on the memory. Now, there are pluses and minuses to this, which we will also talk about shortly, but for many of us, the 16mm fisheye is a piece of basic camera gear when it comes to doing an air-to-air.
The Photo Platform
It’s probably obvious that in an air-to-air shoot, you’ve gotta be in an aircraft in order to photograph another flying aircraft. This brings up some terms you should have a basic understanding of, so you can communicate effectively with pilots. Some basic jargon: aerial photography = photographing the earth; air-to-air = photographing a flying object from a flying object; subject platform = subject aircraft; photo platform = plane you’re in; photo mission = the photography. The photo platform is the must-have gear we need to talk about.

Cessna 182RG photo platform to photograph a Cessna Citation
There are actually many different aircraft that work as a photo platform. Each has its pluses and minuses, as well as price tag. The most basic is the Cessna 172. This aircraft has a window that can be opened (with the removal of a screw) and held up by the airstream, permitting you to shoot out an open window. There are some obstacles, though, that you must overcome with this platform. Typically, pilots fly from what is called the “left seat,” because they are literally flying from the left seat. This means that, in the 172, you’re shooting from the right seat. Being a high-wing aircraft, you have a wing strut outside your window. So, you must twist in the seat and try to shoot over and behind your right shoulder and around this strut. You have very little room to move and, worse, your subject platform has little sky to make movements to make an interesting photograph.
In the photograph here, you see a Cessna 182, similar to the 172. The difference in the 182 from your typical 172 is first, the landing gear in this 182 is retractable (so, it’s a 182RG). The second is this 182 is set up for skydiving, which means that whole door comes off. Lastly, the right seat has been removed and a simple backrest made and inserted in the seat track. So, rather than having to face forward and turning around to shoot, you face backward when you shoot. When it comes to comfort, ease of shooting, shot possibilities, and price, this is my favorite platform.
If the pilot or PIC (pilot-in-command) is a CFI (certified flight instructor), then they are trained and able to fly the Cessna 172 from the right seat. This means you can shoot from the left seat. This is a huge plus for you! If you want to get an idea of how important this can be, sit in your vehicle’s right seat with the seatbelt/harness belt on, twist in the seat, and shoot something behind your vehicle by its bumper. Then, do the same thing from the left seat. Then, try doing this for 30 minutes or longer! This can make all the difference, and is one of the small nuisances of air-to-air you might not think about until you’re in that situation. Just keep in mind that if a pilot offers that to you, and you don’t know their abilities, safety must come first. So, don’t feel bad about saying no thanks, you’ll shoot from the right seat!

Spitfire Mk. IXc
The AT-6 Texan (simply called a T-6) is a WWII warbird and trainer, and another common air-to-air photo platform. Being a trainer, it has what’s called tandem seats, which is a second seat behind the pilot’s. Depending on the PIC, you might sit in the front seat rather than the rear seat (though, rear seat is the most common). The beauty of the T-6 is not only its agility and speed, but photographically, the canopy slides out of the way, providing you clear shooting to the left, right, and above. Some T-6 (or SNJ or Harvard—they’re all the same basic aircraft) have a rear seat that swivels, so you face backward. This is often called a gunner’s seat. These are a great photo platform when you can find them.
The T-6, like any platform, has its pluses and minuses. Its speed, agility, and cost of operation are definitely pluses. If the T-6 has a gunner’s seat, that’s a huge plus for your photography. If it doesn’t, then it can be like shooting out the right seat of the Cessna 172, as you have to twist and shoot over your right shoulder. This is challenging because, with the open canopy, you have to concern yourself with the airstream screaming just past it. If your lens gets close to this invisible line, it will start getting buffeted. That causes out-of-focus images, no matter how good your hand-holding might be. This can really limit your mobility and framing options with your subject aircraft. It can be done, but by the end of the shoot, your body will feel it! If you’re using a T-6 without the gunner seat, in the brief (which we’ll talk about shortly), try to get right-hand orbits or racetracks (circles or ovals) with the subject aircraft on the left side of the photo platform. That way, you can shoot over your left shoulder rather than your right shoulder.
The more air-to-air photo missions you do, the more likely you’ll get into a photo platform permitting you to shoot from inside the cabin. This is a benefit in many ways: it’s easy to use multiple camera bodies, it’s more comfortable, you have greater flexibility with your subject, and much more. The most common platform is the A36 Bonanza. With these aircraft, the back two doors are removed, permitting you to shoot out the right side of the aircraft while you’re in the cabin. You have a huge opening, providing a lot of options for shooting without the worry of the airstream.
Another platform that I’ve been using the last couple of years, while a bit pricey, is great—the TBM Avenger. This WWII warbird has a door on the right side that is easily removed. Because of the design of the fuselage, you can shoot from straight down to straight up, and about every other direction you want. At the same time, there is a rear window in the ass of the TBM, permitting the subject aircraft to pull up right behind for that dramatic head-on shot. As of the writing of this book, I only know of two TBMs that are working as a photo platform, so to say they are not common is an understatement. But, they are a magnificent platform when you can get them.

B-25J God and Country
What many feel is the Cadillac of photo platforms is the B-25 bomber. This WWII warbird has the speed and agility to work even with jets. It has a large port on the right side that you can shoot out of, but that’s not the main vantage point. The main shooting locale is in the rear of the aircraft. The rear gunner emplacement is removed, and you’re inserted in its place for a totally different type of shooting! You crawl through the tail and shoot right back at your subject platform. You have every view of the subject aircraft you could ever want, giving you the complete creative and storytelling control you might desire. While they are considered the best, they are the least used because they are more expensive, and there are only a few in the country that function as a photo platform. Photographers working with a commercial client, on a Hollywood production, or flying for some really good friends, use the B-25 most often because of its operational cost.
There are other photo platforms out there; these are not your only options. I’ve shot out of Cherokees, Cubs, Wacos, a Beech Model 18, C-47, P-51D Mustang, Stearman, and many more. In fact, anything that flies can be made into a photo platform. I already mentioned shooting from the C-130, a photo platform not in most of our budgets. There is the Short Skyvan, an aircraft most thought of for skydiving. It has a rear ramp that can be raised for shooting out of like a C-130. The photo platform starts at about $1k an hour and can go to $4k really fast, depending on the platform. And, that price does not include the subject platform. But, as mentioned many times prior to this section of the book, you work to not have to pay this bill, but you need to be aware of it and appreciate the cost. When you compare it to the price of some big prints, the big prints are really nothing!
When thinking about photo platforms, you need to think through these and other considerations. The photo platform’s cruising speed might be too slow or too fast for your subject. That’s a safety, as well as a photographic, factor to consider. Some photographers aren’t physically flexible, which can be an issue in some photo platforms. Some, like myself, have knees that don’t like being bent for long periods, making some photo platforms impractical. Then, there is the price. And, there are more, as you’ll see, but these are some you need to familiarize yourself with as you get into air-to-air.
Being a Pilot Doesn’t Automatically Make Them an Air-to-Air Pilot
You are putting more than your photography in the pilot’s hands—you are entrusting him with your life! You cannot take this lightly, not for one second. I have been incredibly fortunate to fly with only the best in my short aviation photography career, but that’s not by accident. I’ve talked about my mentor Bob, and he drummed this into my head early on: you simply can’t trust someone because they have their pilot’s license. The pilots I work with understand the risks involved, but it requires more than just that understanding. You need to know that and take it to heart!
How, if you are just starting out, do you know a good pilot from a bad pilot? There is no one question or test you can give to determine this. Pilots can get a FAST card (Formation and Safety Team; or equivalent), which means they have attended and passed a formation class. We are technically flying in formation when we do an air-to-air and formation flying simply isn’t in every pilot’s bag of skills. Flying that close to another aircraft is an art unto itself. Flying in particular formations to get particular angles for a photo is even more of an art for both the subject and photo platforms. So, working with pilots with a FAST card is one way you can check a pilot’s abilities prior to taking to the skies. With that said, I did a multi-aircraft formation air-to-air with all pilots having FAST cards once. They had all participated in air-to-air photo missions before doing this one with me. And, within five minutes of launching, I called a “knock-off” and we landed. One of the pilots scared the crap out of me, and I thought he was risking all our lives, so I called off the photo mission. It’s just a photograph, and it’s not worth that risk in any way!
Quick Brief
Air-to-air is hard on the body. Have ibuprofen in the car for when you land!
You can simply talk to a pilot and get some sense of their abilities. This, in part, means you learn more of the jargon, skill, and craft of aviation. You can ask a pilot how many hours they have flying, perhaps what aircraft they are type rated in, even how many air-to-air missions they have done. Don’t let age fool you! Some of my favorite air-to-airs were with pilots as young as 23 or as aged as 86. And, some of the best pilots are the ones who know their limits and say from the get-go that they need to stand down and not do the photo mission or a particular formation you’re requesting during your photo mission. Pilots that understand their limits know safety. That’s a good thing and those are the ones to work with!
While I have had my one scary moment now, I have heard plenty of scary stories from other photographers and pilots. Some of the nation’s more famous airplane crashes were during an air-to-air shoot, like with the legendary XB-70 Valkyrie in June 1966. I want you to have only fun and the experience of a lifetime in the air, so start off by making sure you understand that you are putting your life, literally, in the hands of these pilots.
The Most Important Piece of Gear
I need to emphasize again that what you’re after, just a photograph, you can capture safely, but it’s not worth risking your life for by throwing caution to the wind. You can basically go up with one body and one lens on a strap, and the gear will be okay when it comes to air-to-air. But, it’s just gear in the grander scheme of things. Based on just your photo platform, your first thought needs to be to your own personal safety and not your gear. You must keep your butt firmly in place in that plane from the moment the prop turns until it stops. The first additional piece of gear you have to add, and it’s really not an option, is the safety harness.

B-17G Sentimental Journey, P-51D Mustangs, and Spitfire replica

P-40K Aleutian Tiger, FG-1D Corsair, Spitfire Mk. IXc, P-51D Dakota Kid II, and B-25J Betty’s Dream
If your photo platform is the AT-6 (and some others), you’ll be using the safety harness built into that aircraft and don’t need anything additional. With almost any other photo platform, even if you’re in an A-36, SkyVan, C-130, or B-25, you’ll need to provide your own harness—this is mandatory, not optional! If you watch an air-to-air video, you can’t help but notice that there is nothing between you and the ground. There is no door or window (in most air-to-air situations) preventing you from falling out if, for example, you run into midair turbulence. Without the proper restraint, you will be ejected from the aircraft, and that won’t be a happy ending.
What’s essential in a safety harness? That it can hold your weight and then some, like perhaps, 3,000 lbs. If you head to the web, you will find lots of safety harnesses. They are not all built the same. Things to look for (and price isn’t one of them): leg loops, a chest belt, comfort, and the least number of snag points. The harness needs to hold you in case of the worst-case scenario. There can be no way for you to “wiggle” out of the harness. Those straps around your legs, through your crotch, and around your chest are a must! And, they have to be tight. I am not the expert on sizing, so don’t take this lightly: find the right expert and harness for your own safety.
At the same time, the harness must be workable. What does that mean? You have to be able to function while wearing it. You need to be able, if necessary, to attach your camera (perhaps via its strap and carabiners) to the strap. And, you need to be able to access other items you might have on your person. That harness is an important piece of gear! At the same time, the metal connectors that keep you safe can do one heck of a lot of damage to your camera gear. Brassing of metal parts is the least of the possible damage. Next, when actually shooting, harness parts can snag gear, causing you to, at the least, lose a shot. You need to think about all of this and more.
Lastly, your harness has to connect to a hard point in the plane. Commonly called a pigtail, it connects to a giant D-ring on the back of your harness, and then to some hard point in the aircraft. That hard point in the aircraft needs to support your weight in a worst-case scenario. You might have to get the POH (pilot operating handbook) out and find out where those points are if the pilot doesn’t know. Once connected, you need to lean forward, and pull freakin’ tight to make sure you aren’t going any further and your pigtail limit keeps you in the aircraft. This isn’t a game; this can be life or death!
Quick Brief
Some hard points in an aircraft are too small to get the D-ring/carabiner from your pigtail to connect to. Or, the ergonomics don’t permit it to be twisted in. One solution comes from your neighborhood climbing store. FreeWire Quickdraws are an excellent solution to this problem. You should always have a couple in your flight bag, just in case.
Not a Fashion Statement
This has to be making you scratch your head, but it is a consideration. Most photographers simply go up in their street clothes and think nothing of it. I’m suggesting that, for many reasons, you might not want to go this route. If you watch pilots, they tend to wear their street clothes to the briefing, but as soon as their minds turns to flying, they grab and put on their flight suits. The main reason is pretty straightforward: pockets and protection.
Flight suits (I got mine at BDU.com) have pockets designed for easy access during flight. In an environment where you want everything contained and not loose, a flight suit suits photography perfectly. I got a Nomex flight suit, just in case—that extra protection for a few seconds, in case of fire, might make a difference. At the same time, I got a black flight suit, which we’ll talk about shortly. Lastly, when you don your flight suit, you look professional, and I can’t emphasize what a positive impact that can have.
One thing you wouldn’t know about until it’s too late is that there are lots of sharp, snaggy edges inside planes. You’re not stepping into a commercial flight cabin. Often, warbird interiors are the same as they were when produced back in the ’40s. Not only will your normal street clothes snag and rip, but because of their nature, they make it easier for this to happen. The flight suit is designed to get you in and out of the aircraft without this obstacle. They have big pockets, especially on the thigh and calf, and again, make you look professional. They just make good sense.
Communication Is Everything!
It goes without saying, this is simply vital! Being able to talk quickly and clearly often means getting the shot or not. Communication is everything. Unlike what you see in the movies, you can’t talk in a normal voice, or even by screaming at the top of your lungs, when you’re in a plane doing an air-to-air and be heard. In the B-25, you can’t even hear the camera firing when it’s plastered to your face! There is simply too much noise. Surely you understand that you can’t scream across to the subject platform to communicate. So, being able to communicate everything from the simplest to the most complex commands must be able to be done quickly, clearly, and as concisely as possible. That’s why you need a headset.

P-51D Mustang Cripes A’Mighty

Hawker Sea Fury FB. 11

Starduster Too
Now, some planes/owners will supply you with a headset, but you can’t count on that. And, while they mean well, those that are lent to us are typically “last year’s model” or the hand-me-down used sets that don’t always work the best. If you’re going to get into air-to-air, another investment you need to make is in a headset. David Clark (DC) is pretty much the industry standard and a great place to start. You don’t need to buy the best headset if you don’t use them that often, but you want to get a good one.
A feature you might want to consider when looking at headsets is the ability to connect to a hand-held radio. There are times when there is no direct connection for your headset, so you can directly communicate with the photo platform and subject platform. Some older aircraft simply don’t have that many jacks. One solution is to own a hand-held radio. Icom is what I use and, for the most part, is the industry standard. I bring this up because if you go this route, you might want to make sure the headset you buy can easily connect to a hand-held and has the ability to attach a push-to-talk accessory. I realize this is a lot to throw at you if you’re new to all of this. But, it’s best to know about this up front, before you make the investment in a headset only to find you purchased one that can’t be accessorized later.
Warbirds are notorious for having bad radios. I’ve been in warbirds that just had their radios replaced literally right before a flight only to go out during the flight. Even if you have a headset on, you need to be able to communicate with the subject aircraft with hand signals. Hand signals are really old school, but they work. There are photo missions that, even with working radios, you won’t be talking directly to the subject aircraft. Your directions are being relayed by the photo platform pilot. In this case, you might prefer hand signals to communicate with the subject aircraft. This is why I wear bright red gloves, so my hand signals can be seen. You need to brief hand signals prior to the flight, and then remember that when you do the hand signals, they are slow and very deliberate, so they are seen.
Quick Brief
Get a flight bag for your air-to-air gear. A small duffel where you keep your flight suit, harness, headset, radio, Quickdraw, gaffer’s tape, and business cards, and that you can easily grab and go with is just smart. You can’t forget anything if you keep it all in one place, and it’s another thing that looks professional.
Don’t Chance Anything to Memory!
We can learn a lot from the pilots we work with that will improve our photography. The one thing you’ll see pilots do is constantly check lists. They have lots of lists for all they have to do before, during, and after a flight. No matter how many times they’ve flown, they check their lists. It’s simply smart! We should adapt the same work habit: have lists and always check them. For example, I have a camera gear list I check before I go out the door for an air-to-air photo mission:
Gear List:
» Camera Body – D5 and D500
» Video – Keymission 360/170
» Lenses – 70–200mm f/4 AF-S and 24–70mm f/2.8 VR
» Strap – Vulture
» Safety Harness
» Flight Suit
» Headset
And, this is not the only list. I have an extensive To Do List:
Camera:
» sensor cleaned
» card wiped
» battery charged
» protection tape/wrap
» camera strap
Settings:
» shutter priority
» Exp Comp
» ISO
» CH (Continuous High)
» VR - Active
» Auto-area AF
Photog List:
» Shot List (we’ll soon discuss)
» Business Cards
» Paper
» Pen
These lists are on my iPhone/iPad mini, and I go over them before I leave my home, after I arrive at the airport, before the brief, and before the flight. Knock on wood, I’ve never forgotten one thing in all my photo missions, which I attribute to my lists. They are repetitive in nature, and that’s intentional. They are meant to assure a safe, fun, and successful air-to-air mission. It’s hard to imagine how much is going through your mind before a flight and how much goes flying out of your memory with that huge adrenaline rush. Lists are for our survival, as well as success!

Douglas C-53 Skytrooper

Hamilton Metalplane H-47
Shooting Open or No Canopy
The best-case scenario is there is nothing between your lens and the subject. This would be shooting out the back seat of a T-6, the cabin of an A-36, or the rear of a B-25. With these photo platforms, you’re not shooting through any windows, just the sky. This makes some aspects of the photography much simpler, but it does bring into play something potentially very dangerous.
Just outside the fuselage is the wind stream. It’s nothing like the wind you feel outside your car window as you drive down the road. Just barely sticking your hand out in the wind stream can whip it back and break a wrist, elbow, or arm (if not tear it off). Sadly, it has happened. The wind is going at a minimum of 100 mph and its power must be respected. It’s a wicked force you must be constantly aware of and know that it will grab anything it can touch and suck it out of the plane!

B-25J Betty’s Dream, TBM-3E Avenger, FG-1D Corsair, P-51D Dakota Kid II, P-40K Aleutian Tiger, and A6M2 Zero
Literally, during my first air-to-air, I learned this lesson and, luckily, it caused no damage. I was in the back of the T-6 of someone who, while we had just met, would end up being a dear friend. Well, it was my first air-to-air and I didn’t have anyone giving me tips, and had nothing to read, so I didn’t know about bringing my own headset or what I’m about to tell you. I was wearing the owner’s extra headset, and we were flying along doing just fine. The subject aircraft was another T-6, which I was shooting with a D3s and 70–200mm. I was working the subject, and started to scoot up in my seat to get the angle to shoot down on the subject platform, when the top of my head just barely hit the wind stream flowing along the top of the canopy.
Voomph! The wind stream grabbed the top pad of the headset and sent the whole headset flying out of the cabin! I didn’t panic. Since the camera was on a strap, I instantly dropped it in my lap and, with both hands, grabbed the cable connecting the headset to the T-6 and started to reel it in. I kept my hand high enough to prevent the headset from slapping into the fuselage, but low enough not to break my wrist. I got it back in and back on my head and just hoped the wind stream hadn’t stretched the cable and ruined the headset. The thought just went through my mind when I heard in the headset, “Ready to continue now? Chuckle, chuckle, chuckle.”
Learn from my mistake: respect that wind. Keep everything out of it, and that includes the end of your lens. It will whip it right into the edge of a canopy or doorframe and cause damage to both your gear and, more importantly, the aircraft. This is one reason to keep everything contained and try to avoid having to do things like changing lenses or compact flash cards. And, when shooting, never lose sight of where the front of your lens is in relationship to the wind stream.
Quick Brief
Two common accessories might be an issue: the protective lens filter and shade. Again, there have been instances where these were unscrewed by the wind stream, fell off, and headed toward the subject platform. This is a bad thing! You have two options: don’t use the filter/shade, or use gaffer’s tape to tape them to the lens barrel.
Shooting Through the Glass
There are going to be times you will have to shoot through a window. You might be in the back of an Apache for a media flight, inside a C-53, or if you’re really lucky, at the rear window of a KC-135 during refueling. You might be in the back seat of a P-51D Mustang or L-39 jet. In these instances, and many more, you might have to shoot through a window to get the shot. The good news here is that you don’t have to worry about the wind stream (and if you do, you have bigger issues). The bad news is that there is the real possibility that your image quality won’t be the best, so maximizing what you’ve got is essential.
You need to have your lens as close to the window as possible. This is to avoid the reflections created by you or other elements in the interior with you. Here’s the place where that black flight suit can really be helpful. What you usually see is yourself in the window and the light/bright clothes you’re wearing. By going dark or, better yet, black, you minimize the reflections you might be creating. Some photographers create special black rubber “shades” that mold around the curve of the window (I forgot to mention that the windows aren’t flat). The rubber molds around the curve shape of the window, blocking the reflections. Some use a cut-off sleeve of a sweatshirt to do the same thing. I just cup my hand around the front of the lens in an attempt to minimize the reflection. In doing this, there is a huge warning I must pass along:
Windows scratch really bloody easily! The windows are not glass, but Plexiglas, and the serrations on our filter rings can easily mar them to pieces. The worst is when you have that lens against the window and you hit turbulence. That sends a scratch up or down the window that will always be there from that time forward. How do I know about them? I’ve had to shoot around those left from photographers before me, who didn’t have the consideration or professionalism to avoid creating scratches. Sure, some scratches, like in the canopy of a P-51D Mustang, came with the canopy from the factory, but others were most definitely added by a careless act. Be a class act and don’t add to the problem.

Porterfield 65s
This means, though, that when you’re shooting through windows, you’ve gotta attempt to not shoot through the scratches. If reflections aren’t a concern, shooting through scratches will get ya every time. While I’ve not had the problem, I have heard of some photographers who were totally skunked because they couldn’t get a clean shot through the scratched window. Now, most pilots, when you talk to them, will do their best to clean the Plexiglas prior to a flight, but they don’t have a way of removing scratches. The good news is that scratches appear the worst when you have a backlit subject and we tend to shoot less, or not at all, in those instances. Putting a simple ring of gaffer’s tape on the edge of your filter will prevent you from adding to those scratches.

P-51D Mustang Boomer
The last thing to keep in mind is that Plexiglas tends to have a color cast and other optical imperfections. There is nothing you can do about that at the point of capture. There is something, though, you can do to remove the color cast, reflections, and optical imperfections in post. This is important to not only recognize in your photos, but also to know how to deal with in post.
An example is a flight I recently had: Sharon and I were in North Dakota for July 4th as guests of the Texas Flying Legends Museum. We were invited to fly in their C-53 Skytrooper, as they went to Rolla for their celebration and air show. The TFLM flew down with their A6M2 Zero, as well. It was a gorgeous day with big, beautiful puffy clouds, and on the flight down, we looked out the window and there was the Zero! Well, naturally, I shot an informal air-to-air. And then, on the way back, we had an opportunity with the P-51D Mustang Boomer, TBM-3E Avenger, and FG-1D Corsair. None of it was planned, but you don’t pass up such opportunities. Looking through the tinted, scratched windows of the 70-year-old aircraft, I might not have shot, unless I knew how to make the most of the moment, and what was required in post to make it all work out. It can be done.

Cessna 170
Don’t Forget the Memories!
It’s totally not required and, while it can add another layer of complexity to the whole thing, don’t forget to record the memories! What I affectionately call the “Moose Cam,” a video camera placed in the hot shoe, adds a whole other level of fun to the adventure. You can make it as simple or as complex as you’d like. I’m going to encourage the simple. My current system (I’ve gone through a whole bunch) starts with the Manfrotto 492LCD Micro Ball Head. I’ve used this particular ballhead for this purpose for a number of years now because it’s the best one I’ve found. What makes it unique is that it slips into the hot shoe of your camera. For the video, I use the Nikon KeyMission 360 and 170, which attaches to the ballhead.
As soon as the engine cranks, the video is turned on (so there is a Lexar 128-GB micro SD inserted). It’s sighted in before we get in the photo platform and the ballhead is locked in place, so it’s recording the same basic scene as the camera. It just runs, recording the same action in video that we’re trying to capture with stills. At the very least, it brings back memories of the flight that seem to pass all too quickly when you’re shooting stills. Just wanted to make sure you were aware of this because it is an essential tool in our aviation air-to-air photography.

B-17G Thunderbird and P-47D Tarheel Hall

P-51Ds Boo-Man Choo, Charlotte’s Chariot II, Little Horse, and Dakota Kid II
Time to Get in the Air!
These are really just the basics of the gear, techniques, and tools you need to get started. Seriously, every air-to-air brings to light some new piece of gear, technique, or tool that will make the next photo mission just that much better. We’ve covered the basics, so it’s time to get in the air and start making some images—let’s go!
The Flight/Safety Brief
One of the very first things you will learn about is the flight/safety brief before you leave the ground on a photo mission. If you don’t have one, DO NOT fly! Seriously, it tells you a lot about the pilots, so if you don’t have a brief before you fly, don’t fly! I’m very serious. There are a couple of pilots I always fly with, and have at least 20 photo missions with them, some being back-to-back within minutes of each other. We still brief each and every flight, no exception! We’re talking life and death stuff here, where the professionals, the ones you want to fly with, go over the flight plan for your photo mission. If you don’t know the pilots, have never worked with them before, and they don’t want to brief, then don’t climb in the plane!
There is one thing this book is not full of and that’s all the lingo that goes with flying. You’ll hear it in the brief for sure, so you will find out very quickly what you need to learn. The key here is to not be shy about asking questions. Pilots are really good at answering them, and they like it when you’re engaged with the whole process. And, that’s what the brief is all about. You talk photography, then flying, and then safety.
“What do you want your photo to look like?” This could very well be one of the first questions the pilots might ask you. Communication is key, so if you don’t talk flying with your hands, you might find photos others have taken to demonstrate your answer about what you’re looking for. Both the subject and photo platform pilots need to be present during the brief to hear your desires and answers. They are counting on you for direction—literal direction—about what is to occur in the flight, step by step, to get the photos you have in your mind. This means you have done your homework prior to arriving at the airport and have a list of what you want as far as content goes. That’s right, another list, and one we call the Shot List.
Quick Brief
Distance is a big safety factor. The more room aircraft have to maneuver around in the sky, the more time they have to respond to a problem (this includes altitude [AGL—Above Ground Level]).
Well, if you’ve never done this before, how do you come up with a list, let alone the terms to communicate what’s on your list? Start by looking at lots air-to-air images that you like and making note of what you see. It’s really best to buy magazines and tear out the pages with the images you like and use them as a reference. This is not only a great way to communicate, but you see what’s being published, so you can work toward that goal with your images. Then, I recommend heading to the web and teaching yourself about formations. A formation is when two or more aircraft are flying in sync together and, in our case, the subject and photo platforms are the two aircraft flying in sync, creating a formation. Formation flying started with the military and was designed to give them advantages, be it transiting or in combat. These formations have names for simple communication. The Formation and Safety Team (FAST) Formation Maneuvers Guide (http://kel.by/formationguide) is a great resource to learn formations and their names. It’s a PDF that you should have loaded on your iPad for quick and easy reference. It’s from this information that you put together your Shot List.
The pilots using your Shot List will figure out the best sequence for the flight based on maneuvers and safety. Don’t take it personally if one of your shots is said to be not doable. Ask why, learn from it, and realize it could be that you’ve asked for the moon or perhaps something beyond the skill range of your pilots. It’s okay, it happens. This and a whole lot more is what you will be discussing during the brief. All pilots involved in the flight must be present, hear what’s happening, and add their input. They will also talk over other basics, such as who will talk to the tower, what frequencies, their airspeed, and other important flying stuff, making it a safe flight. Remember the goal: to come back safely and have a beer!

Luscombe T8F Observer
Quick Brief
I have a knee board in my air-to-air kit where I write down the Shot List. There’s so much to remember that remembering the order of the photographs can be overload. Having them written down makes it really clean and simple.
Your Very First Shot—Period!
When you brief, the very first shot on your Shot List that you need to brief is the broadside. The broadside is when the subject aircraft pulls up even with the photo platform, so you’re shooting a simple, clean broadside of the subject aircraft. So, put that on your Shot List, every time, every photo mission, without exception. Why?
What’s with the broadside that makes it so important? What is the one thing we must deliver to the pilot after the photo mission? A print. A big, gorgeous, thank you print! You gotta do this, no exception, and that’s a lot of pressure. So, the broadside is your ace-in-the-hole photograph. With the subject aircraft broadside, you can use a fast shutter speed, like 1/125 or faster, and it won’t have any affect on the prop blur—it will look fine. You can get that one, tack sharp image guaranteed for that print right from the start. So, take that photo, check you LCD to confirm it’s sharp, and then go on with the rest of your photo mission. This is your insurance that you have that one photo, so in case nothing else works the rest of the flight, you have this one very important obligation covered. In case you’re wondering, I’ve never had to fall back on this photo, but I still make it the first shot in every one of my air-to-air photo missions.

B-25J Betty’s Dream

Cessna Citation
A Must-Have Shot for the Shot List
It’s actually a very fun and challenging shot to get, and that’s a pilot portrait. Pilots are like everyone else and love photographs of themselves doing what they do best—flying. If you recognize this, and make that photo, you won’t be forgotten. So, sometime during that photo mission, when the light is great on the pilot, either zoom in closer or have the subject aircraft get closer to make the shot.
Now this is something you want to brief for two reasons: First, you want the pilot to know you recognize how important they are to the photo shoot. You do this by saying you want to take this portrait. The next thing you need to brief is the smile. Yeah, it sounds silly, but you will more than likely have to brief that, at some point, you will communicate that the subject aircraft pilot will need to smile. I let them know I will make that request over the radio, and more than likely, with a hand signal. It all sounds silly, but I’m here to tell you, the dividends for getting this shot will pay you back for years to come!

FM-2P Wildcat

Monocoupe 110 Special

L-39 Albatros
Do I Have a Typical Shot List?
That really is a good question and the answer is, no. I do have a very distinct methodology to my photo missions, though, that I would like to share with you. You probably won’t be surprised to learn my photo missions are based on the story I want to tell, and that’s going to be greatly influenced by the background. So, my Shot List is based on that story and the background. I work with the pilots to accomplish this by asking where the type of background I’m looking for—desert, water, mountains, clouds, whatever—can be found. They normally know, so that’s the direction we’ll head.
But, here’s my secret to doing so many air-to-air missions and being asked back to do more: I don’t spend much time in the air! Remember, it’s expensive and dangerous, so if you can get the job done in as short a time as possible, all the better. My routine is simple: First, I plan the flight around the best time for the light! Then, once in the air, I get the broadside and other basic aircraft ID photos I desire shot on the way to where that great background might be for the main shots. We then orbit or racetrack around that background until I get that shot. Then, we knock out the rest of the Shot List on the flight back to base. This simple routine I developed means you’re in the air for around 30 minutes and get full coverage. The results, along with this very simplistic yet efficient approach, are really popular and continue to get me asked back.

Waco QCF
You might be wondering why I don’t have a sample of a typical air-to-air Shot List here for you. That’s because there is no typical Shot List. No two air-to-air photo missions I’ve done were alike in those regards. There are so many variables—aircraft, pilots, weather, and background, just to mention a few—that the only commonality is that you’re flying. I remember one air-to-air photo mission that was sprung on me lasted no more than five minutes. They wanted just one photo: a vertical with a blue sky background. We launched, made one orbit getting the photo, and recovered. The brief took longer than the flight!
You are like a movie director during an air-to-air, moving the actors around to get the shot you want to tell the story. Your first few flights, all of this will not even be part of your thinking because you’re so high on the excitement. Then, you will settle down, and from what you’ve learned here and from your first flights, you’ll easily come up with your Shot List, and that’s how it’s meant to be!
Again, Communication Is Everything!
I cannot stress this enough! And, it is one of the hardest aspects of the whole adventure. Communication between you and the pilot, and you and the subject platform, is what makes or breaks a good photo mission. Yes, you have briefed the flight, but there is more to getting the photograph than just simply running the list. It’s these small nuisances where the communication comes into play.
The first thing you must remember is: what you see in the viewfinder is fleeting. You will never, ever be able to repeat it exactly ever again! The position of an aircraft, the light, the background—you get only one chance at it, and that’s it. You cannot ever go back and do it over and have it be the same, which puts the pressure on, if you let it. Once you realize this and get over that fact, your photography will grow quickly because, with this knowledge, you learn to use the eyes in the back of your head once you leave the ground. That’s another way of saying that you’ll look ahead and plan out shots before you fly over them.

A6M2 Zero
You have to look at the light, you have to look at the background, and you have to look at the subject platform and make a decision—fast—just exactly where you want that subject in the photograph. You must rely on everything you’ve learned shooting statics and ground-to-air and use what you like from those photos in your air-to-air. Never lose sight of the fact that this is all about photography! You must communicate simple movements to the subject aircraft to make the photograph happen.
What might you say? First, I should let you know that I’m really active when it comes to this. I’m constantly moving the subject aircraft around. And, I’m always complimented for that. What does it mean to move the aircraft around? I might say “up five” or “out 10” or “back 20.” These are all small adjustments I’m making in the subject aircraft to fine-tune where they are in relationship to the background, as well as the altitude and angle of the aircraft. I do this constantly during a flight by either talking through the mic or with hand signals. The photo platform you’re in isn’t the one moving for these small adjustments, it’s the subject aircraft.
Your primary method of making these adjustments in the subject aircraft is simply talking through your headset. If the photo platform doesn’t have a way for you to plug into its system, you have to use a hand-held radio and push-to-talk button to talk with the subject platform. And, if you have neither of these, before you ever leave the ground, you need to work out those hand signals to communicate to the subject platform what you want. Keep in mind that if you have to use hand signals, the pilot has to be able to see them. If you’re wearing a black flight suit, and black gloves in the shadows of the cabin of the photo platform, your hands will never be seen. For this reason, again, I have a pair of bright red gloves.
There’s another type of communication we should talk about: body language. It can tell the subject aircraft pilot a whole lot. When flying in formation, the subject aircraft pilot is staring at the photo platform very intently. He is, as the phrase goes, flying off your wing. Because of this, he sees you the whole time and is watching you. That’s why hand signals work so well. The good pilots also know when you’re shooting horizontal or vertical images (landscape/portrait) and might make small adjustments to their flight path to enhance that format. They also see when you’re shooting and not shooting. Remember that flying is expensive and if they see you just sitting there and not shooting, you’ll be on the ground before you can say boo! I bring this up because I’ve seen it happen many times with shooters and I feel sorry for the pilots. The photographers who says afterward, “I’ve got that shot” won’t fly with those pilots again!

F2G-1D Super Corsair Race 57
Shoot, Shoot, Shoot!
The hardest thing to remember during your photo mission is proper hand-holding. Then, it’s to get that first, broadside shot. Next, will be watching your shutter speed. Then, you need to watch the subject placement in the frame, think about prop blur, and where the light is, communicate to the pilots, watch your buffer, and smile! Yeah, there is simply a shitload of stuff going on all at once, and you have to master it all to make that photo come to life for the viewer of your photo. And, do that all in the short period of your flight. It simply is senses overload!
All the information in previous sections of this book, from underexposure to prop blur to backgrounds, still applies once you get in the air. That’s why it is so important to learn all you can from your static and ground-to-air photography. And why air shows are such a great learning ground to prepare you for this moment in the air. Like I said, my general rule of thumb is that for the very first images, I use a high shutter speed (1/125 or higher) to make sure I have tack sharp images from the flight, and once they are in the can, I get down to business. This part also settles your nerves, so you can think through all that you have to do to be a great visual storyteller.
Some crank their shutter speed down to the basement to get the full 360° disk blur and leave it there the entire flight, just so they don’t have to think about shutter speed. There’s nothing wrong with this, but as you learned at the air shows, if the aircraft is flying into the sun, you’ll see that prop blur. If the aircraft isn’t flying into the sun, you won’t see that prop blur. Since you’re flying in either orbits or racetracks, you know that only a couple of times during that circuit will the aircraft be flying into the sun. For that reason, I am constantly changing the shutter speed.

P-51D Mustang Crazy Horse
Quick Brief
To see that disk blur, you’ve gotta fly into the sun. Flying into the sun means the pilots are staring right into the sun. That’s hard on the pilot’s eyes! Don’t do it constantly. Give them a break when flying, and you’ll have happier pilots who will stay in the air longer.
Now, if you have something very specific in mind (a killer background or some other important reason), go right to the desired shutter speed and kill them pixels. I found that having a routine like this helps when you have so much else going on during the shoot. When you have a limited buffer, it also helps to slow down and think, and make the most of the opportunity.
The natural tendency is to shoot horizontal, especially since the aircraft are horizontal subjects. But, don’t forget vertical. Now, just turning the camera vertical and cramming the subject in because you want a vertical isn’t really my style. You can look at the photo and know that it’s a horizontal crammed into a vertical. It doesn’t work on the ground; it doesn’t work in the sky. This means that if you want that sweet vertical, you’ve gotta figure out the shot and add it to your Shot List. Then go over it in the briefing, so everyone is on the same page, and make it happen in the sky.

Monocoupe 110 Special
The Horizon Line
Then, there is the horizon line—that thing out there that divides the heavens from the earth. It’s the one visual in our photos that provides us a sense of place and orientation. Does it have to be level in your photos? This is a serious thing with many, and it is something you should consider. Cutting to the chase, I don’t think bringing it level in your photo is a make or break proposition. In level flight, aircraft have their nose pointed up. The aircraft itself is not level, so then if you level the horizon in the viewfinder, the aircraft will look like it is not in level flight. Which is right? You gotta make the call.
Here’s my two cents worth: When I can, and it works in the viewfinder, I level the horizon. If the gesture of the aircraft overpowers the skewed horizon, then who cares? But, if this is not the case, then it is an issue. The biggest offenses are in those forced verticals, when the camera is yanked over to make a vertical out of a horizontal and the earth looks like it just had a major tilt. That visually just doesn’t fly (pun intended). Are there fixes? The main fix would be simply not to take the shot. Next, you can shoot below an aircraft, so the horizon is not even in the frame. With the fast changing nature of air-to-air photography, you can always just wait a second, and you’ll more than likely have a whole new photo and the problem solves itself. The horizon line is the background, so it is something you need to ponder.
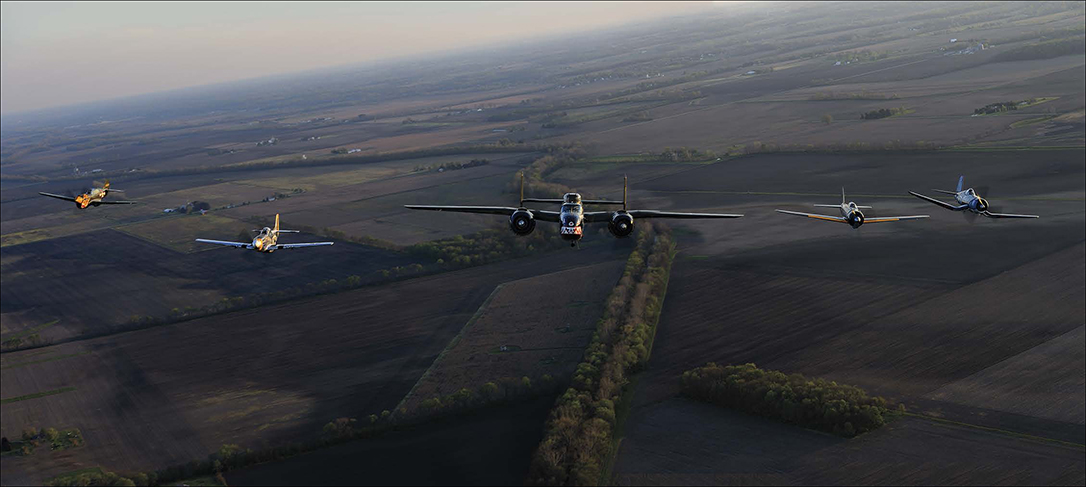
P-40K Aleutian Tiger, P-51D Mustang Dakota Kid II, B-25J Betty’s Dream, A6M2 Zero, and FG-1D Corsair. This is a two-image pano stitched together in post

Beechcraft King Air B200
All Too Soon, Your Feet Are Back on the Ground
I think the phrase “time flies” originated with the first air-to-air photographer. That’s because you no sooner take off, then you’re back on the ground again. If you didn’t have photographs to prove it, you might think you never left the ground. Again, it is an adrenaline-packed adventure that will get you hooked like no other form of photography—guaranteed! But, your job is not done once you’re back on the ground.
The first thing you do is thank the pilots! I don’t care what you think you need to get done, you make the time to walk up with the biggest smile you’ve got, stretch out your hand, shake theirs, and say thanks. Next, you give them a business card and tell them that prints are theirs, no strings attached, and you follow through with that promise! Then, you see what you can do to help get the aircraft secured, parked, wiped down—anything to show you’re not just there for yourself. This is serious stuff that pays huge dividends in the long run.
You want to have a debriefing after all is settled. The debriefing is where the entire flight is talked over, both the good and bad. You will learn a ton from the debriefing, so listen carefully. Have the ability to take notes because you will not remember a thing afterward (because, typically, as soon as the debriefing is over, it’s time for food and beer).

Ford Trimotor
Pilots Shouldn’t Be the Only Ones with Logs
One of the most useful tips I ever received came from a good friend and pilot, who said I should get a logbook. Pilots log their flights—it’s more trivia than just where they went and what time. This same information for the photographer is just as useful. You can head to someplace like Sporty’s Pilot Shop, get your basic hardcopy logbook, and it will do a great job.
I’ve gone with the more “modern” method, which many pilots are now adopting. There is an iPad app, LogTen Pro X, that I use and really like. It lets you keep track of the basics, like hours flown, airport in and out of, PIC (a term you’ll need to learn), photo mission name, and other good trivia, like costs. The best part, I think, is you can include images from the flight, which is such a great reference, because over time, you will do lots of air-to-air photo missions, and they will start to become a blur. This is a great way to keep track and use your own notes to help propel your photography forward.
The log is something I use for other flights, as well. There are many opportunities to fly that aren’t air-to-air photo missions, but simply just a flight for the fun of flying. I’ve done this a lot with many of the pilots who have become dear friends and I log them, as well. Yes, there is a camera along, usually just the one body with the 16mm fisheye for the hero shot, but there are also other possible opportunities. Keeping track of all of this is part of aviation photography.
Share, Damn It!
I cannot say it often enough, or loud enough: share your images with the pilots! Yeah, send them a couple via email right after the flight with a thank you note, but put prints in their hands. Again, I’m not talking about a $2 print from the local drugstore. I’m talking big, beautiful prints you did yourself. I tell this to photographers and the response sometimes is: “I don’t have a printer; they are expensive!” Like the plane you just flew in, and the gas to keep it up in the air, isn’t?
Knowing the cost of keeping planes flying, let alone the price of one air-to-air, do you think I could do so many if I were paying those bills to shoot? Hell no! All the opportunities I have had presented to me come as gifts. As far as I’m concerned, I’m an honored guest with a camera. And, to say thank you and be invited back again, I send prints. Lots of prints. A freakin’ lot of prints! Next time you’re in a hangar, look at the walls. They are not only huge, they are often covered with prints. That should be this giant message to you, “Send freaking large prints!” And, if you do, you will never be wanting for flights again.
And the Next Flight?
That’s usually my first question when I get back down on the ground. Seriously, it is the biggest rush, and the most complicated, most rewarding photography you can imagine. What I’ve presented here is meant to help you make the most of your first flight because, after that, you must write your own flight path. Like all photography, the basics are what you must master, but what makes the great images is what you bring to those basics. Work with the best pilots, the best gear, and push yourself for the best images, and you will come out on top. Share those images and infect others, and complete the circle. With all you’ve learned here, combined with your passion, there is no doubt your aviation photography will take off!

Jet-powered Schweizer SGS 1-26 Glider

Piper PA-18

PT-17 Stearman

Piper PA-18 Super Cub

Howard 500

F2G-2 Super Corsair