
The apps that dominate the brains of users are networked apps. Those people fiddling with their phones instead of talking to each other at dinner? They are maniacally checking their newsfeeds, responding to text messages, or playing networked games.
To get started with networking in Android, you are going to create a new app called PhotoGallery. PhotoGallery is a client for the photo-sharing site Flickr. It will fetch and display the most recent public photos uploaded to Flickr. Figure 25.1 gives you an idea of what the app will look like.

(We have added a filter to our PhotoGallery implementation to show only photos listed on Flickr as having no known copyright restrictions. Visit www.flickr.com/commons/usage/ to learn more about unrestricted images. All other photos on Flickr are the property of the person who posted them and are subject to usage restrictions depending on the license specified by the owner. To read more about permissions for using third-party content that you retrieve from Flickr, visit www.flickr.com/creativecommons/.)
You will spend six chapters with PhotoGallery. It will take two chapters for you to get the basics of downloading and parsing JSON and displaying images up and running. Once that is done, in subsequent chapters you will add features that explore search, services, notifications, broadcast receivers, and web views.
In this chapter, you will learn how to use Android’s high-level HTTP networking. Almost all day-to-day programming of web services these days is based on the HTTP networking protocol. By the end of the chapter, you will be fetching, parsing, and displaying photo captions from Flickr (Figure 25.2). (Retrieving and displaying photos will happen in Chapter 26.)

Create a new Android application project. Configure the app as shown in Figure 25.3.
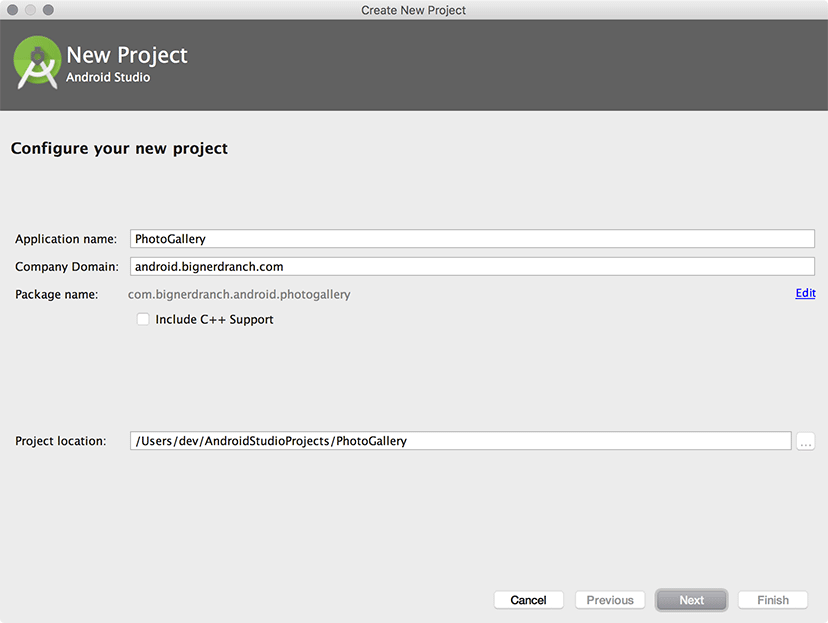
Click Next. When prompted, check Phone and Tablet as the target form factor and choose API 19: Android 4.4 (KitKat) from the Minimum SDK dropdown.
Then have the wizard create an empty activity named PhotoGalleryActivity.
PhotoGallery will follow the same architecture you have been using so far. PhotoGalleryActivity will be a SingleFragmentActivity subclass and its view will be the container view defined in activity_fragment.xml. This activity will host a fragment – in particular, an instance of PhotoGalleryFragment, which you will create shortly.
Copy SingleFragmentActivity.java and activity_fragment.xml into your project from a previous project.
In PhotoGalleryActivity.java, set up PhotoGalleryActivity as a SingleFragmentActivity by deleting the code that the template generated and replacing it with an implementation of createFragment(). Have createFragment() return an instance of PhotoGalleryFragment. (Bear with the error that this code will cause for the moment. It will go away after you create the PhotoGalleryFragment class.)
Listing 25.1 Activity setup (PhotoGalleryActivity.java)
public class PhotoGalleryActivity extendsActivitySingleFragmentActivity { @Override protected Fragment createFragment() { return PhotoGalleryFragment.newInstance(); }@Overrideprotected void onCreate(Bundle savedInstanceState) {/* Auto-generated template code... */}}
PhotoGallery will display its results in a RecyclerView, using the built-in GridLayoutManager to arrange the items in a grid.
First, add the RecyclerView library as a dependency, as you did in Chapter 8. Open the project structure window and select the app module on the left. Select the Dependencies tab and click the + button. Select Library dependency from the drop-down menu that appears. Find and select the recyclerview-v7 library and click OK.
Rename layout/activity_photo_gallery.xml to layout/fragment_photo_gallery.xml to create a layout for the fragment. Then replace its contents with the RecyclerView shown in Figure 25.4.
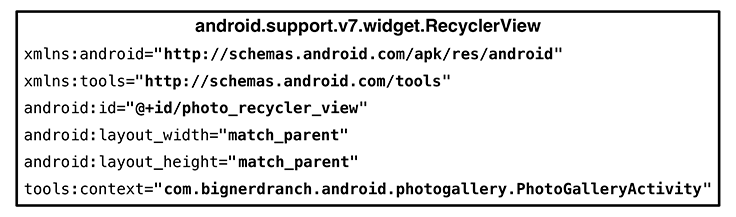
Finally, create the PhotoGalleryFragment class. Retain the fragment, inflate the layout you just created, and initialize a member variable referencing the RecyclerView.
Listing 25.2 Some skeleton code (PhotoGalleryFragment.java)
public class PhotoGalleryFragment extends Fragment {

    private RecyclerView mPhotoRecyclerView;

    public static PhotoGalleryFragment newInstance() {
        return new PhotoGalleryFragment();
    }

    @Override
    public void onCreate(Bundle savedInstanceState) {
        super.onCreate(savedInstanceState);
        setRetainInstance(true);
    }

    @Override
    public View onCreateView(LayoutInflater inflater, ViewGroup container,
            Bundle savedInstanceState) {
        View v = inflater.inflate(R.layout.fragment_photo_gallery, container, false);

        mPhotoRecyclerView = (RecyclerView) v.findViewById(R.id.photo_recycler_view);
        mPhotoRecyclerView.setLayoutManager(new GridLayoutManager(getActivity(), 3));

        return v;
    }
}
(Wondering why you are retaining the fragment? Hold that thought – we will explain later in the chapter, in the section called Cleaning Up AsyncTasks.)
Fire up PhotoGallery to make sure everything is wired up correctly before moving on. If all is well, you will be the proud owner of a blank screen.