To run an Android application, you need a device – either a hardware device or a virtual device. Virtual devices are powered by the Android emulator, which ships with the developer tools.
To create an Android virtual device (AVD), choose Tools → Android → AVD Manager. When the AVD Manager appears, click the +Create Virtual Device... button in the lower-left corner of the window.
In the dialog that appears, you are offered many options for configuring a virtual device. For your first AVD, choose to emulate a Nexus 5X, as shown in Figure 1.15. Click Next.
On the next screen, choose a system image that your emulator is based on. For this emulator, select an x86 Nougat emulator and select Next (Figure 1.16). (You may need to follow the steps to download the emulator’s components before you can click Next.)
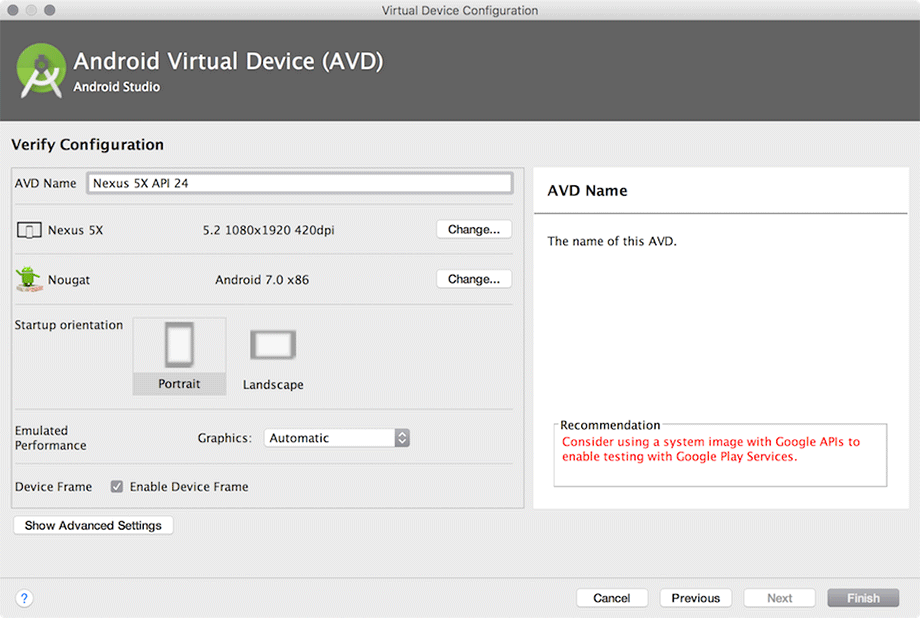
Finally, you can review and tweak properties of the emulator. You can also edit the properties of an existing emulator later. For now, name your emulator something that will help you to identify it later and click Finish (Figure 1.17).
Once you have an AVD, you can run GeoQuiz on it. From the Android Studio toolbar, click the run button (it looks like a green “play” symbol) or press Control+R. Android Studio will find the virtual device you created, start it, install the application package on it, and run the app.
Starting up the emulator can take a while, but eventually your GeoQuiz app will launch on the AVD that you created. Press buttons and admire your toasts.
If GeoQuiz crashes when launching or when you press a button, useful information will appear in the Logcat view in the Android DDMS tool window. (If Logcat did not open automatically when you ran GeoQuiz, you can open it by clicking the Android Monitor button at the bottom of the Android Studio window.) Look for exceptions in the log; they will be an eye-catching red color, as shown in Figure 1.18.
Compare your code with the code in the book to try to find the cause of the problem. Then try running again. (You will learn more about Logcat and debugging in the next two chapters.)
Keep the emulator running – you do not want to wait for it to launch on every run.
You can stop the app by pressing the Back button on the emulator. The Back button is shaped like a left-pointing triangle (on older versions of Android, it looks like an arrow that is making a U-turn). Then re-run the app from Android Studio to test changes.
The emulator is useful, but testing on a real device gives more accurate results. In Chapter 2, you will run GeoQuiz on a hardware device. You will also give GeoQuiz more geography questions with which to test the user.


