
10
Events in React
So far, most of our examples did their work only upon page load. As you probably guessed, that isn’t normal. In most apps, especially the kind of UI-heavy ones you’ll be building, the app will do a ton of things only as a reaction to something. Those somethings could be triggered by a mouse click, a key press, a window resize, or a whole bunch of other gestures and interactions. Events are the glue that makes all of this possible.
Now, you probably know all about events from your experience using them in the DOM world. (If you don’t, then I suggest getting a quick refresher first: https://www.kirupa.com/html5/javascript_events.htm.) The way React deals with events is a bit different, and these differences can surprise you if you aren’t paying close attention. Don’t worry, that’s why you have this book! We start off with a few simple examples and then gradually look at increasingly more bizarre, complex, and (yes!) boring things.
Listening and Reacting to Events
The easiest way to learn about events in React is to actually use them, and that’s exactly what you’re going to do here. To help with this, we have a simple example made up of a counter that increments each time you click a button. Initially, our example will look like Figure 10.1.
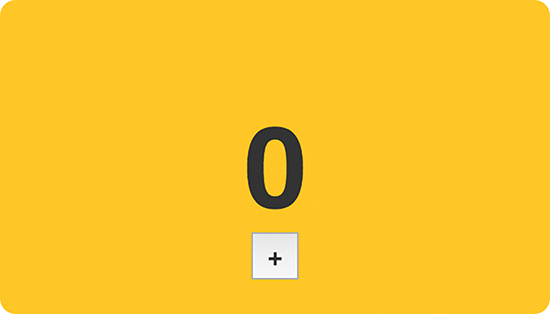
Figure 10.1 Our example.
Each time you click the plus button, the counter value will increase by 1. After you click the plus button a bunch of times, it will look sort of like Figure 10.2.
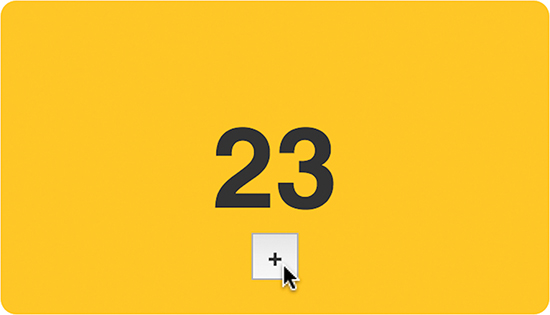
Figure 10.2 After clicking the plus button a bunch of times (23).
Under the covers, this example is pretty simple. Each time you click on the button, an event gets fired. We listen for this event and do all sorts of React-ey things to get the counter to update when this event gets overheard.
Starting Point
To save all of us some time, we aren’t going to be creating everything in our example from scratch. By now, you probably have a good idea of how to work with components, styles, state, and so on. Instead, we’re going to start off with a partially implemented example that contains everything except the event-related functionality that you’re here to learn.
First, create a new HTML document and ensure that your starting point looks as follows:
<html>
<head>
<meta charset="utf-8">
<title>Events</title>
<script src="https://unpkg.com/react@16/umd/react.development.js"></script>
<script src="https://unpkg.com/react-dom@16/umd/react-dom.development.js"></script>
<script src="https://unpkg.com/[email protected]/babel.min.js"></script>
<style>
#container {
padding: 50px;
background-color: #FFF;
}
</style>
</head>
<body>
<div id="container"></div>
<script type="text/babel">
</script>
</body>
</html>
When your new HTML document looks like what you see, it’s time to add our partially implemented counter example. Inside our script tag below the container div, add the following:
render() {
var textStyle = {
fontSize: 72,
fontFamily: "sans-serif",
color: "#333",
fontWeight: "bold"
};
return (
<div style={textStyle}>
{this.props.display}
</div>
);
}
}
class CounterParent extends React.Component {
constructor(props) {
super(props);
this.state = {
count: 0
};
}
render() {
var backgroundStyle = {
padding: 50,
backgroundColor: "#FFC53A",
width: 250,
height: 100,
borderRadius: 10,
textAlign: "center"
};
var buttonStyle = {
fontSize: "1em",
width: 30,
height: 30,
fontFamily: "sans-serif",
color: "#333",
fontWeight: "bold",
lineHeight: "3px"
};
return (
<div style={backgroundStyle}>
<Counter display={this.state.count} />
<button style={buttonStyle}>+</button>
</div>
);
}
}
ReactDOM.render(
<div>
<CounterParent />
</div>,
document.querySelector("#container")
);
Now preview everything in your browser to make sure it works. You should see the beginning of our counter. Take a few moments to look at what all of this code does. You shouldn’t see anything that looks strange. The only odd thing is that clicking the plus button won’t do anything. We’ll fix that in the next section.
Making the Button Click Do Something
Each time we click the plus button, we want the value of our counter to increase by 1. What we need to do roughly looks like this:
1. Listen for the click event on the button.
2. Implement the event handler so that we react to the click and increase the value of our this.state.count property that our counter relies on.
We’ll just go straight down the list, starting with listening for the click event. In React, you listen to an event by specifying everything inline in your JSX itself. More specifically, you specify inside your markup both the event you’re listening for and the event handler that will get called. To do this, find the return function inside our CounterParent component and make the following highlighted change:
.
.
return (
<div style={backgroundStyle}>
<Counter display={this.state.count}/>
<button onClick={this.increase} style={buttonStyle}>+</button>
</div>
);
We’ve told React to call the increase function when the onClick event is overheard. Next, let’s go ahead and implement the increase function (a.k.a. our event handler). Inside our CounterParent component, add the following highlighted lines:
constructor(props) {
super(props);
this.state = {
count: 0
};
this.setState({
count: this.state.count + 1
});
}
render() {
var backgroundStyle = {
padding: 50,
backgroundColor: "#FFC53A",
width: 250,
height: 100,
borderRadius: 10,
textAlign: "center"
};
var buttonStyle = {
fontSize: "1em",
width: 30,
height: 30,
fontFamily: "sans-serif",
color: "#333",
fontWeight: "bold",
lineHeight: "3px"
};
return (
<div style={backgroundStyle}>
<Counter display={this.state.count} />
<button onClick={this.increase} style={buttonStyle}>+</button>
</div>
);
}
}
All we’re doing with these lines is making sure that each call to the increase function increments the value of our this.state.count property by 1. Because we’re dealing with events, our increase function (as the designated event handler) will get access to any event arguments. We’ve set these arguments to be accessed by e, and you can see that by looking at our increase function’s signature (that is, what its declaration looks like). We’ll talk about the various events and their properties in a little bit when we take a detailed look at Events. Lastly, in the constructor, we bind the value of this to the increase function.
Now, go ahead and preview what you have in your browser. Once everything has loaded, click the plus button to see our newly added code in action. The counter value should increase with each click. Isn’t that pretty awesome?
Event Properties
As you know, events pass what are known as event arguments to our event handlers. These event arguments contain a bunch of properties that are specific to the type of event you’re dealing with. In the regular DOM world, each event has its own type. For example, if you’re dealing with a mouse event, your event and its event arguments object are of type MouseEvent. This MouseEvent object allows you to access mouse-specific information, such as which button was pressed or the screen position of the mouse click. Event arguments for a keyboard-related event are of type KeyboardEvent. Your KeyboardEvent object contains properties that (among many other things) allow you to figure out which key was actually pressed. I could go on forever for every other event type, but you get the point. Each event type contains its own set of properties that you can access via the event handler for that event.
Why am I boring you with things you already know? Well….
Meet Synthetic Events
In React, when you specify an event in JSX as we did with onClick, you’re not directly dealing with regular DOM events. Instead, you’re dealing with a React-specific event type known as a SyntheticEvent. Your event handlers don’t get native event arguments of type MouseEvent, KeyboardEvent, and so on. They always get event arguments of type SyntheticEvent that wrap your browser’s native event instead. What’s the fallout of this in our code? Surprisingly not a whole lot.
Each SyntheticEvent contains the following properties:
boolean cancelable
DOMEventTarget currentTarget
boolean defaultPrevented
number eventPhase
boolean isTrusted
DOMEvent nativeEvent
void preventDefault()
boolean isDefaultPrevented()
void stopPropagation()
boolean isPropagationStopped()
DOMEventTarget target
number timeStamp
string type
These properties should seem pretty straightforward…and generic! The nongeneric stuff depends on what type of native event our SyntheticEvent is wrapping. This means that a SyntheticEvent that wraps a MouseEvent will have access to mouse-specific properties such as the following:
number button
number buttons
number clientX
number clientY
boolean ctrlKey
boolean getModifierState(key)
boolean metaKey
number pageX
number pageY
DOMEventTarget relatedTarget
number screenX
number screenY
boolean shiftKey
Similarly, a SyntheticEvent that wraps a KeyboardEvent will have access to these additional keyboard-related properties:
number charCode
boolean ctrlKey
boolean getModifierState(key)
string key
number keyCode
string locale
number location
boolean metaKey
boolean repeat
boolean shiftKey
number which
In the end, all of this means that you still get the same functionality in the SyntheticEvent world that you had in the vanilla DOM world.
Now, here’s something I learned the hard way: Don’t refer to traditional DOM event documentation when using SyntheticEvents and their properties. Because the SyntheticEvent wraps your native DOM event, events and their properties might not map one-to-one. Some DOM events don’t even exist in React. To avoid running into any issues, if you want to know the name of a SyntheticEvent or any of its properties, refer to the React Event System document (https://facebook.github.io/react/docs/events.html) instead.
Doing Stuff with Event Properties
By now, you’ve seen more about the DOM and SyntheticEvents than you’d probably like. To wash away the taste of all that text, let’s write some code and put your newfound knowledge to good use. Right now, our counter example increments by 1 each time you click the plus button. We want to increment our counter by 10 when the Shift key on the keyboard is pressed while clicking the plus button with our mouse.
We can do that by using the shiftKey property that exists on the SyntheticEvent when using the mouse:
number button
number buttons
number clientX
number clientY
boolean ctrlKey
boolean getModifierState(key)
boolean metaKey
number pageX
number pageY
DOMEventTarget relatedTarget
number screenX
number screenY
The way this property works is simple. If the Shift key is pressed when this mouse event fires, then the shiftKey property value is true. Otherwise, the shiftKey property value is false. To increment our counter by 10 when the Shift key is pressed, go back to our increase function and make the following highlighted changes:
currentCount += 10;
} else {
currentCount += 1;
}
this.setState({
}
When you’ve made the changes, preview the example in the browser. Each time you click the plus button, your counter will increment by 1 just like always. If you click on the plus button with your Shift key pressed, notice that the counter increments by 10 instead.
All of this works because we change our incrementing behavior depending on whether the Shift key is pressed. That’s primarily handled by the following lines:
currentCount += 10;
} else {
currentCount += 1;
}
If the shiftKey property on our SyntheticEvent event argument is true, we increment our counter by 10. If the shiftKey value is false, we just increment by 1.
More Eventing Shenanigans
We’re not done yet! Up to this point, we’ve looked at how to work with events in React in a very simplistic way. In the real world, things rarely will be as direct as what you’ve seen. Your real apps will be more complex, and because React insists on doing things differently, you’ll need to learn (or relearn) some new event-related tricks and techniques to make your apps work. That’s where this section comes in. We’re going to look at some common situations you’ll run into and how to deal with them.
You Can’t Directly Listen to Events on Components
Let’s say your component is nothing more than a button or another type of UI element that users will be interacting with. You can’t get away with doing something like what we see in the following highlighted line:
constructor(props) {
super(props);
this.state = {
count: 0
};
this.increase = this.increase.bind(this);
}
increase(e) {
this.setState({
count: this.state.count + 1
});
}
render() {
return (
<div>
<Counter display={this.state.count} />
);
}
}
On the surface, this line of JSX looks totally valid. When somebody clicks our PlusButton component, the increase function gets called. In case you’re curious, this is what our PlusButton component looks like:
render() {
return (
<button>
+
</button>
);
}
}
Our PlusButton component doesn’t do anything crazy; it only returns a single HTML element.
No matter how you slice and dice this, none of it matters. It doesn’t matter how simple or obvious the HTML we’re returning via a component looks. You simply can’t listen for events on them directly. This is because components are wrappers for DOM elements. What does it even mean to listen for an event on a component? When your component gets unwrapped into DOM elements, does the outer HTML element act as the thing you’re listening for the event on? Is it some other element? How do you distinguish between listening for an event and declaring a prop you’re listening for?
There’s no clear answer to any of those questions. It’s too harsh to say that the solution is to simply not listen to events on components, either. Fortunately, there’s a workaround: We can treat the event handler as a prop and pass it on to the component. Inside the component, we can then assign the event to a DOM element and set the event handler to the value of the prop we just passed in. I realize that probably makes no sense, so let’s walk through an example.
Take a look at the following highlighted line:
.
.
.
render() {
return (
<div>
<Counter display={this.state.count} />
);
}
}
In this example, we create a property called clickHandler whose value is the increase event handler. Inside our PlusButton component, we can then do something like this:
render() {
return (
</button>
);
}
}
On our button element, we specify the onClick event and set its value to the clickHandler prop. At runtime, this prop gets evaluated as our increase function, and clicking the plus button ensures that the increase function gets called. This solves our problem while still allowing our component to participate in all this eventing goodness.
Listening to Regular DOM Events
If you thought the previous section was a doozy, wait until you see what we have here. Not all DOM events have SyntheticEvent equivalents. It might seem like you can just add the on prefix and capitalize the event you’re listening for when specifying it inline in your JSX:
.
.
.
handleMyEvent(e) {
// do something
}
render() {
return (
}
}
It doesn’t work that way! For events that React doesn’t officially recognize, you have to follow the traditional approach that uses addEventListener with a few extra hoops to jump through.
Take a look at the following section of code:
.
.
.
handleMyEvent(e) {
// do something
}
window.addEventListener("someEvent", this.handleMyEvent);
}
window.removeEventListener("someEvent", this.handleMyEvent);
}
render() {
return (
<div>Hello!</div>
);
}
}
We have our Something component that listens for an event called someEvent. We start listening for this event under the componentDidMount method, which is automatically called when our component gets rendered. We listen for our event by using addEventListener and specifying both the event and the event handler to call.
That should be pretty straightforward. The only other point you need to keep in mind is that you need to remove the event listener when the component is about to be destroyed. To do that, you can use the opposite of the componentDidMount method, the componentWillUnmount method. Put your removeEventListener call inside that method to ensure that no trace of our event listening exists after our component goes away.
The Meaning of this Inside the Event Handler
When dealing with events in React, the value of this inside your event handler is different than what you normally see in the non-React DOM world. In the non-React world, the value of this inside an event handler refers to the element that fired the event:
console.log(this); // button element
}
var foo = document.querySelector("button");
foo.addEventListener("click", doSomething, false);
In the React world, the value of this does not refer to the element that fired the event. The value is the very unhelpful (yet correct) undefined. That’s why we need to explicitly specify what this binds to using the bind method, as you’ve seen a few times:
constructor(props) {
super(props);
this.state = {
count: 0
};
increase(e) {
console.log(this);
this.setState({
count: this.state.count + 1
});
}
render() {
return (
<div>
<Counter display={this.state.count} />
<button onClick={this.increase}>+</button>
</div>
);
}
}
In this example, the value of this inside the increase event handler refers to the CounterParent component. It doesn’t refer to the element that triggered the event. You can attribute this behavior to us binding the value of this to our component from inside our constructor.
React…Why? Why?
Before we call it a day, let’s use this time to talk about why React decided to deviate from how we’ve worked with events in the past. There are two reasons:
1. Browser compatibility
2. Improved performance
Let’s elaborate on these reasons a bit.
Browser Compatibility
Event handling is one of those things that works consistently in modern browsers, but once you go back to older browser versions, things get really bad really quickly. By wrapping all the native events as an object of type SyntheticEvent, React frees you from dealing with event-handling quirks.
Improved Performance
In complex UIs, the more event handlers you have, the more memory your app takes up. Manually dealing with that isn’t difficult, but it is a bit tedious as you try to group events under a common parent. Sometimes that just isn’t possible. Sometimes the hassle doesn’t outweigh the benefits. What React does is pretty clever.
React never directly attaches event handlers to the DOM elements. It uses one event handler at the root of your document that is responsible for listening to all events and calling the appropriate event handler as necessary (see Figure 10.3).

Figure 10.3 React uses one event handler at the root of your document.
This frees you from having to deal with optimizing your event handler–related code yourself. If you’ve manually had to do that in the past, you can relax, knowing that React takes care of that tedious task for you. If you’ve never had to optimize event handler–related code yourself, consider yourself lucky.
Conclusion
You’ll spend a good amount of time dealing with events, and this chapter threw a lot of things at you. We started by exploring the basics of how to listen to events and specify the event handler. Toward the end, we got fully invested and looked at eventing corner cases that you’ll bump into if you aren’t careful enough. You don’t want to bump into corners. That’s never fun.
Note: If you run into any issues, ask!
If you have any questions or your code isn’t running like you expect, don’t hesitate to ask! Post on the forums at https://forum.kirupa.com and get help from some of the friendliest and most knowledgeable people the Internet has ever brought together!