
In the android:icon attribute, the value @android:drawable/ic_menu_add references a system icon.
A system icon is one that is found on the device rather than in your project’s resources.
In a prototype, referencing a system icon works fine. However, in an app that will be released, it is better to be sure of what your user will see instead of leaving it up to each device. System icons can change drastically across devices and OS versions, and some devices might have system icons that do not fit with the rest of your app’s design.
One alternative is to create your own icons from scratch. You will need to prepare versions for each screen density and possibly for other device configurations. For more information, visit Android’s Icon Design Guidelines at developer.android.com/design/style/iconography.html.
A second alternative is to find system icons that meet your app’s needs and copy them directly into your project’s drawable resources.
System icons can be found in your Android SDK directory.
On a Mac, this is typically /Users/user/Library/Android/sdk.
On Windows, the default location is Usersusersdk.
You can also verify your SDK location by opening the project structure window (File → Project Structure) and checking the Android SDK location shown.
In your SDK directory, you will find Android’s resources, including ic_menu_add.
These resources are found in /platforms/android-XX/data/res, where XX represents the API level of the Android version.
For example, for API level 28, Android’s resources are found in platforms/android-28/data/res.
The third and easiest alternative is to use the Android Asset Studio, which is included in Android Studio. The Asset Studio allows you to create and customize an image to use in the app bar.
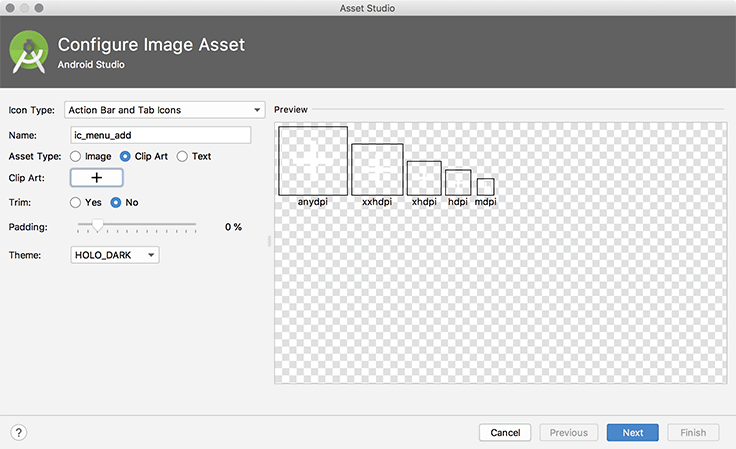
Right-click on your drawable directory in the project tool window and select New → Image Asset to bring up the Asset Studio (Figure 14.10).
Here, you can generate a few types of icons. Try it out by making a new icon for the New Crime action item. In the Icon Type field, choose Action Bar and Tab Icons. Next, name your asset ic_menu_add and set the Asset Type option to Clip Art.
Update the Theme to use HOLO_DARK. Since your app bar uses a dark theme, your image should appear as a light color. These changes are shown in Figure 14.10; note that while we are also showing the clip art you are about to select, your screen will feature the adorable Android logo.
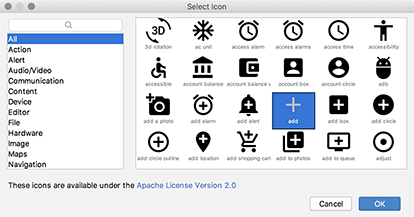
Select the Clip Art button to pick your clip art. In the clip art window, choose the image that looks like a plus sign (Figure 14.11). (You can enter “add” in the search box at the top left to save yourself some hunting.)
Back on the main screen, click Next to move to the last step of the wizard. The Asset Studio will show you a preview of the work that it will do (Figure 14.12). Notice that an hdpi, mdpi, xhdpi, xxhdpi, and anydpi icon will be created for you. Jim-dandy.
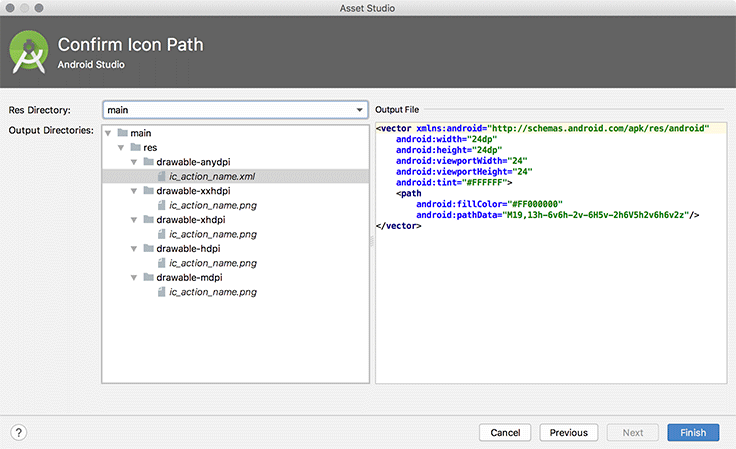
Select Finish to generate the images. Then, in your layout file, modify your icon attribute to reference the new resource in your project.
Listing 14.7 Referencing a local resource (res/menu/fragment_crime_list.xml)
<item
    android:id="@+id/new_crime"
    android:icon="@android:drawable/ic_menu_add"
    android:icon="@drawable/ic_menu_add"
    android:title="@string/new_crime"
    app:showAsAction="ifRoom|withText"/>
Run your app and relish your newly updated icon, which will now look the same no matter which version of Android your user has installed (Figure 14.13).