Hour 3. Models, Materials, and Textures
What You’ll Learn in This Hour:
► The fundamentals of models
► How to import custom and premade models
► How to work with materials and shaders
In this hour, you’ll learn all about models and how they are used in Unity. You’ll start by looking at the fundamental principles of meshes and 3D objects. From there, you’ll learn how to import your own models or use ones acquired from the Asset Store. You’ll finish this hour by examining Unity’s material and shader functionality.
The Basics of Models
Video games wouldn’t be very video without the graphical components. In 2D games, the graphics consist of flat images called sprites. In 2D games, all you need to do is change the x and y positions of sprites and flip several of them in sequence, and the viewer’s eye is fooled into believing that it sees true motion and animation. In 3D games, however, things aren’t so simple. In worlds with a third axis, objects need to have volume to fool the eye. Games use a large number of objects; therefore, they need to process things quickly. Meshes make that possible. A mesh, at its most simple, is a series of interconnected triangles. These triangles build off each other in strips to form basic to very complex objects. These strips provide the 3D definitions of a model and can be processed very quickly. Don’t worry, though: Unity handles all this for you so that you don’t have to manage it yourself. Later in this hour, you’ll see just how triangles can make up various shapes in the Unity Scene view.
Built-in 3D Objects
Unity comes with a few basic built-in meshes (or primitives) for you to work with. They tend to be simple shapes that serve simple utilities or can be combined to make more complex objects. Figure 3.1 shows the available built-in meshes. (You worked with the cube and sphere in the previous hours.)
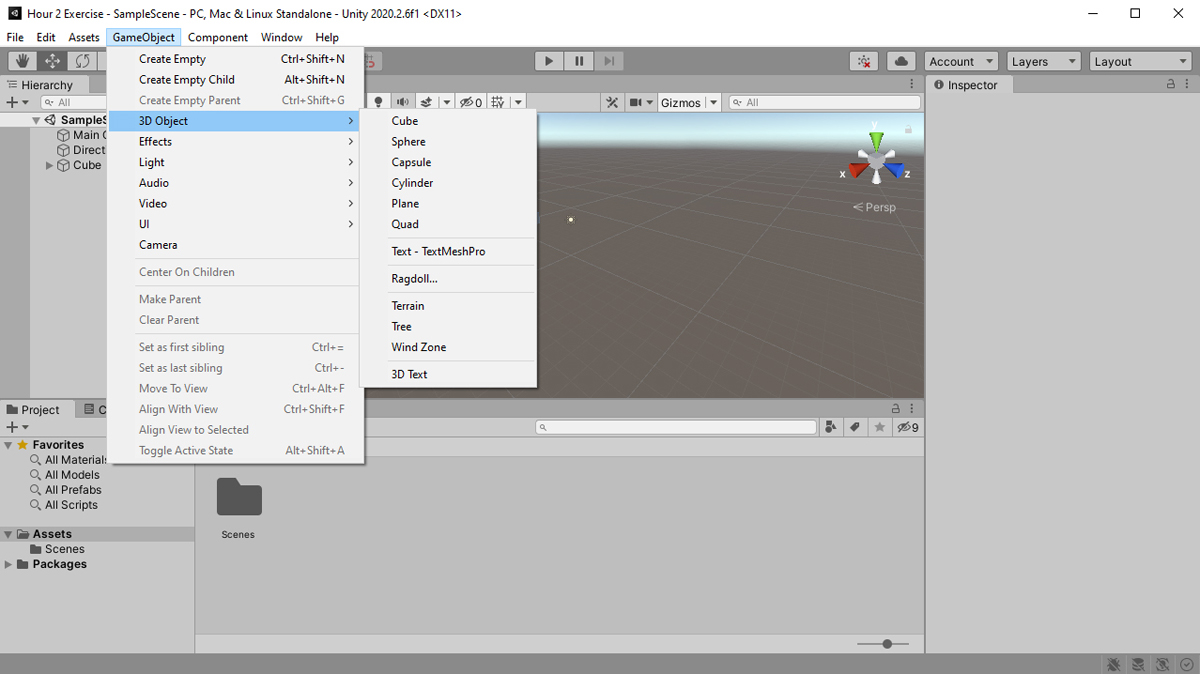
FIGURE 3.1
The built-in meshes in Unity.
Importing Models
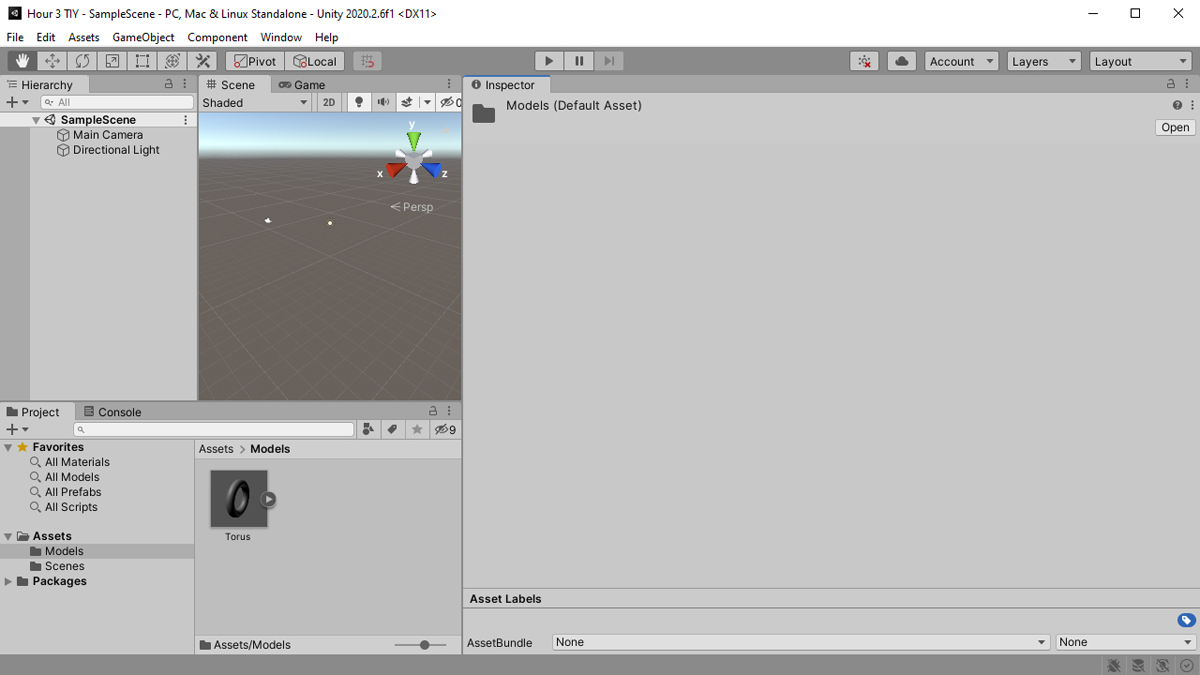
Having built-in models is nice, but most of the time your games will require art assets that are a little more complex. Thankfully, Unity makes it rather easy to bring your own 3D models into your projects. Just placing a file containing a 3D model in your Assets folder is enough to bring it into the project. From there, you can drag it into the scene or hierarchy to build a game object around it. Natively, Unity supports .fbx, .dae, .3ds, .dxf, and .obj files. This enables you to work with just about any 3D modeling tool.
Models and the Asset Store
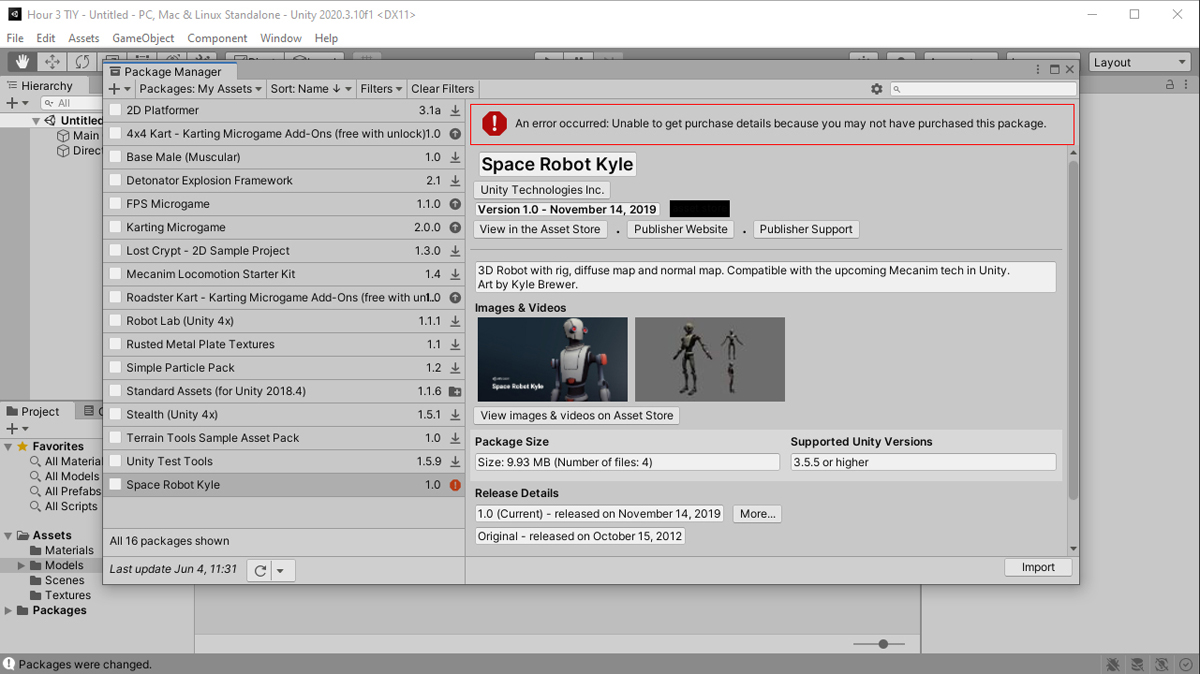
You don’t have to be an expert modeler to make games with Unity. The Asset Store provides a simple and effective way to find premade models and import them into your projects. Generally speaking, models in the Asset Store are either free or paid and come alone or in a collection of similar models. Some of the models come with their own textures, and some of them are simply the mesh data.
Textures, Shaders, and Materials
Applying graphical assets to 3D models can be daunting for beginners who are not familiar with the process. Unity uses a simple and specific workflow that gives you a lot of power in determining exactly how you want things to look. Graphical assets are broken down into textures, shaders, and materials. Each of these is covered individually in its own section, and Figure 3.5 shows how they fit together. Notice that textures are not applied directly to models. Instead, textures and shaders are applied to materials. Those materials are in turn applied to the models. This way, the look of a model can be swapped or modified quickly and cleanly without a lot of work.
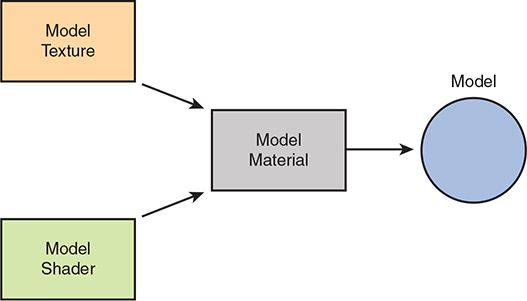
FIGURE 3.5
The model asset workflow.
Textures
Textures are flat images that get applied to 3D objects. They are responsible for models being colorful and interesting instead of blank and boring. It can be strange to think that a 2D image can be applied to a 3D model, but it is a fairly straightforward process once you are familiar with it. Think about a soup can for a moment. If you were to take the label off the can, you would see that it is a flat piece of paper. That label is like a texture. After a label is printed, it is wrapped around a 3D can to provide a more pleasing look.
Just as with all other assets, adding textures to a Unity project is easy. Start by creating a folder for your textures; a good name would be Textures. Then drag any textures you want in your project into the Textures folder you just created. That’s it!
Shaders
Whereas the texture of a model determines what is drawn on its surface, the shader determines how it is drawn. Here’s another way to look at this: A material is the interface between you and a shader. The material tells you what the shader needs to render an object, and you provide those items to make it look the way you want. This might seem nonsensical right now, but later, when you create materials, you will begin to understand how they work. Much of the information about shaders is covered later this hour because you cannot use a shader without a material. In fact, much of the information to be learned about materials is actually about materials’ shaders.
Materials
As mentioned earlier, materials are not much more than containers for shaders and textures that can be applied to models. Most of the customization of materials depends on which shader is chosen for it, although all shaders have some common functionality.
To create a new material, start by making a Materials folder. Then right-click the folder and select Create > Material. Give your material some descriptive name, and you are done. Figure 3.6 shows two materials with different shader settings. Notice how they both use the same Standard shader. Each has a base albedo color of white (more about albedo later), but they have different Smoothness settings. The Flat material has a low Smoothness, so the lighting looks very flat because the light bounces in a lot of directions. The Shiny material has a higher Smoothness, which creates a more focused light bounce. For both materials, there is also a preview of the material, so you can see what it will look like once it is on a model.
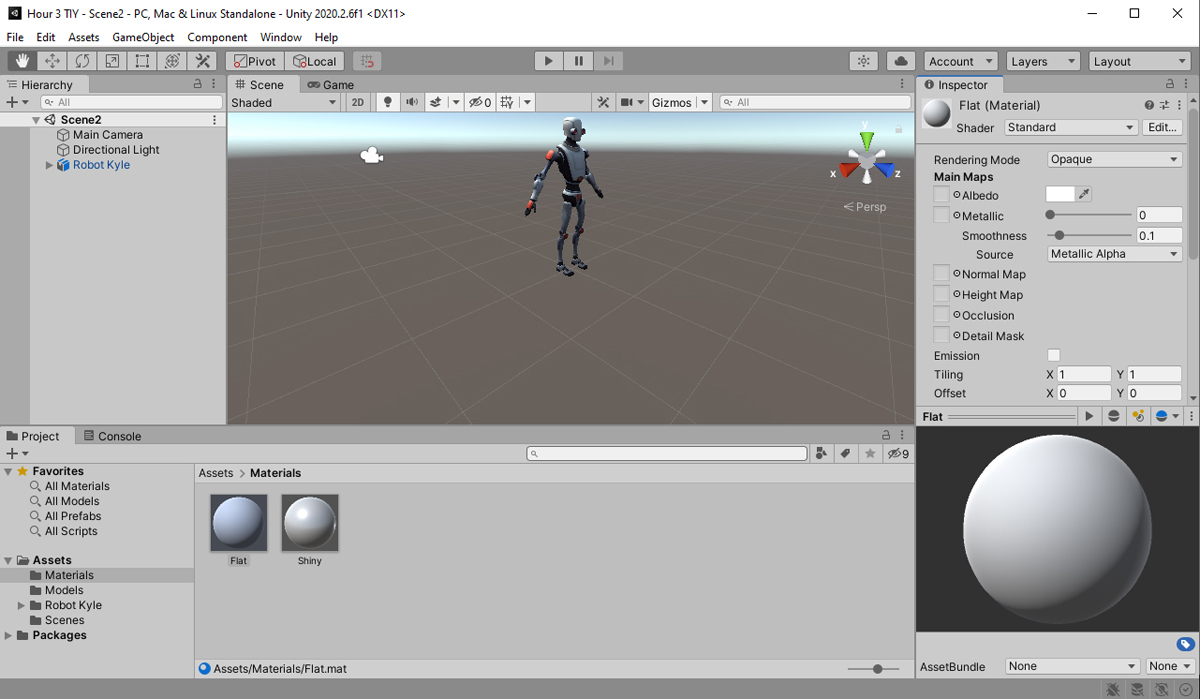
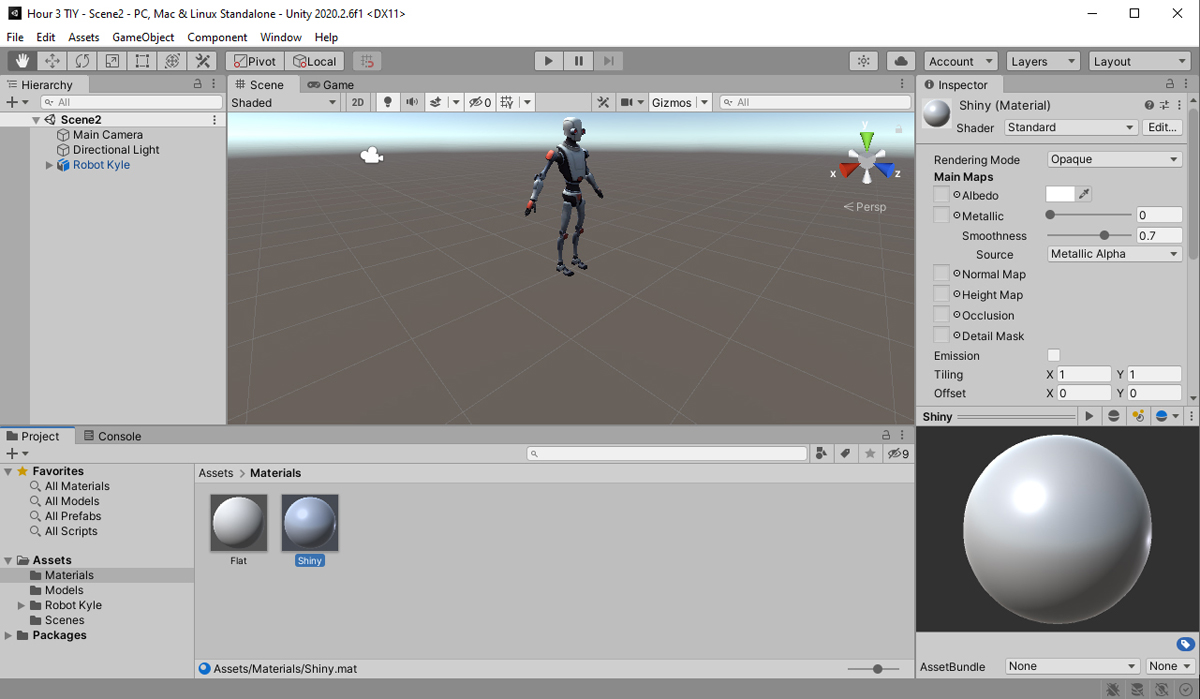
FIGURE 3.6
Two materials with different shader settings.
Shaders Revisited
Now that you have been introduced to textures, models, and shaders, it is time to look at how it all comes together. Unity has a very powerful Standard shader, which this book focuses on. Table 3.1 describes the common shader properties. In addition to the settings listing in Table 3.1, there are many other settings of the Standard shader; however, this book focuses on mastering the ones listed in the table.
TABLE 3.1 Common Shader Properties
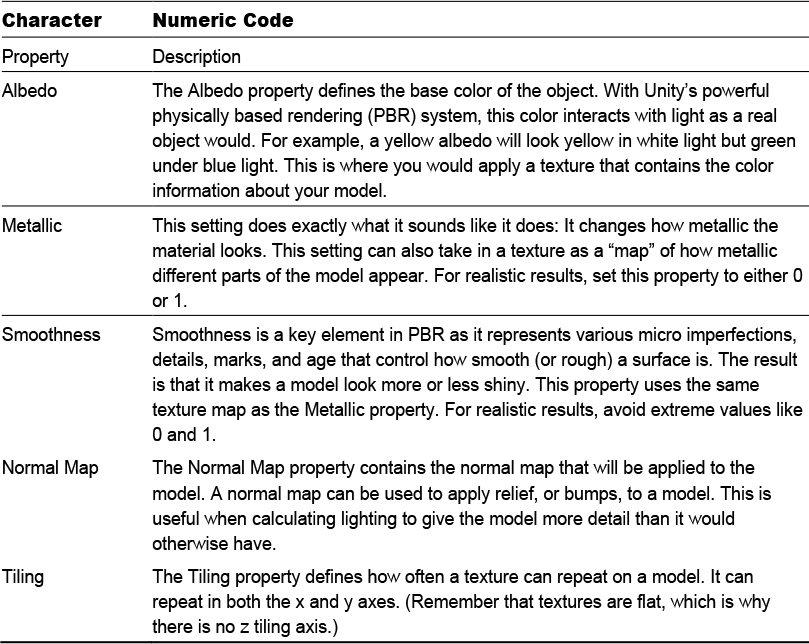
This might seem like a lot of information to take in, but once you become more familiar with the few basics of textures, shaders, and materials, you’ll find that the Smoothness value of your understanding goes to 1 (classic comedy).
Unity also has several other shaders that this book doesn’t cover. The Standard shader is very flexible and should work for most of your basic needs.
Summary
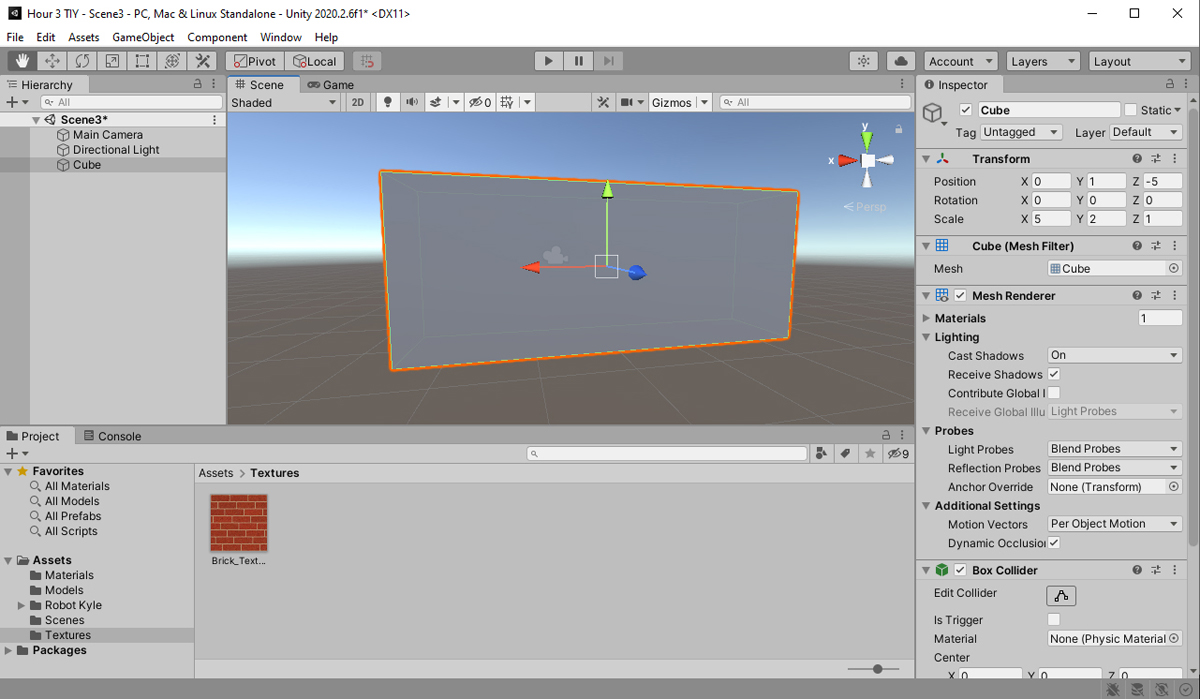
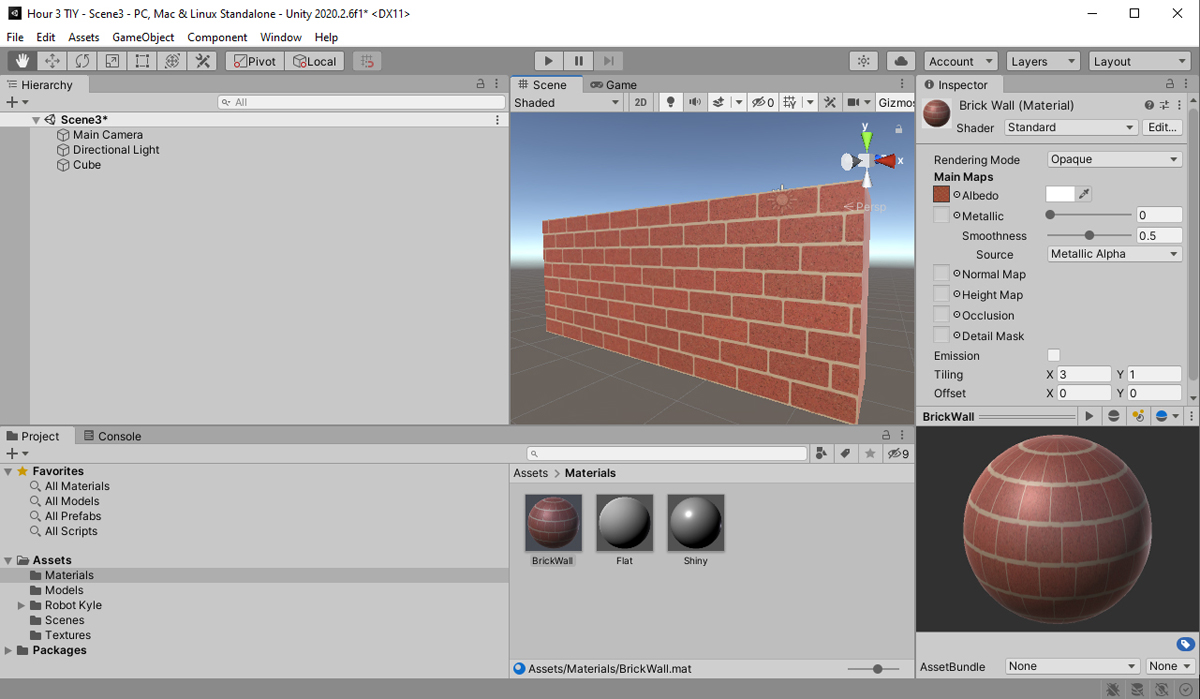
In this hour, you have learned all about models in Unity. You started by learning about how models are built with collections of vertices called meshes. Then you discovered how to use the built-in models, import your own models, and download models from the Asset Store. You then learned about the model art workflow in Unity. You experimented with textures, shaders, and materials. You finished by creating a textured brick wall.
Q&A
Q. Will I still be able to make games if I’m not an artist?
A. Absolutely. Using free online resources and the Unity Asset Store, you can find various art assets to put in your games.
Q. Do I need to know how to use all the built-in shaders?
A. Not necessarily. Many shaders are very situational. Start with the Standard shader covered in this lesson and learn more if a game project requires it.
Q. If there are paid art assets in the Unity Asset Store, does that mean I can sell my own art assets?
A. Yes, it does. In fact, the Asset Store is not limited to only art assets. If you can create high-quality assets, you can certainly sell them in the store.
Workshop
Take some time to work through the questions here to ensure that you have a firm grasp of the material.
Quiz
1. True or False: Because of their simple nature, squares make up meshes in models.
2. What file formats does Unity support for 3D models?
3. True or False: Only paid models can be downloaded from the Unity Asset Store.
4. Explain the relationship between textures, shaders, and materials.
Answers
1. False. Meshes are made up of triangles.
2. .fbx, .dae, .3ds, .dxf, and .obj files
3. False. There are many free models.
4. Materials contain textures and shaders. Shaders dictate the properties that can be set by a material and how the material gets rendered.
Exercise
In this exercise, you’ll experiment with the effects shaders have on the way models look. You will use the same mesh and texture for each model; only the shaders will be different. The project created in this exercise is named Hour 3_Exercise and is available in the Hour 3 book files.
1. Create a new scene or project.
2. Add a Materials folder and a Textures folder to your project. Locate the files Brick_Normal.png and Brick_Texture.png in the Hour 3 book files and drag them into the Textures folder.
3. In the Project view, select Brick_Texture. In the Inspector view, change the aniso level to 3 to increase the texture quality for curves. Click Apply.
4. In the Project view, select Brick_Normal. In the Inspector view, change the texture type to Normal Map. Click Apply.
5. Select Directional Light in the Hierarchy view and give it the position (0, 10, -10) and the rotation (30, -180, 0).
6. Add four spheres to your project. Scale them each to (2, 2, 2). Spread them out by giving them the positions (1, 2, -5), (-1, 0, -5), (1, 0, -5), and (-1, 2, -5).
7. Create four new materials in the Materials folder. Name them DiffuseBrick, SpecularBrick, BumpedBrick, and BumpedSpecularBrick. Figure 3.9 shows all the properties of the four materials. Go ahead and set them as shown.
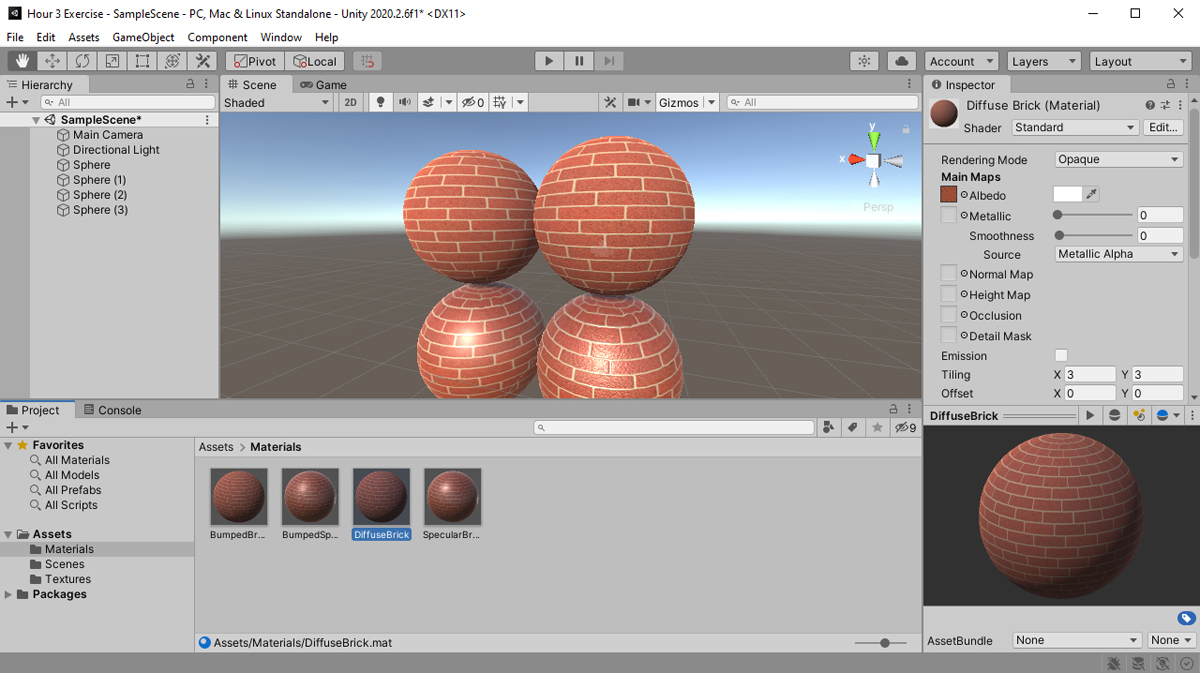

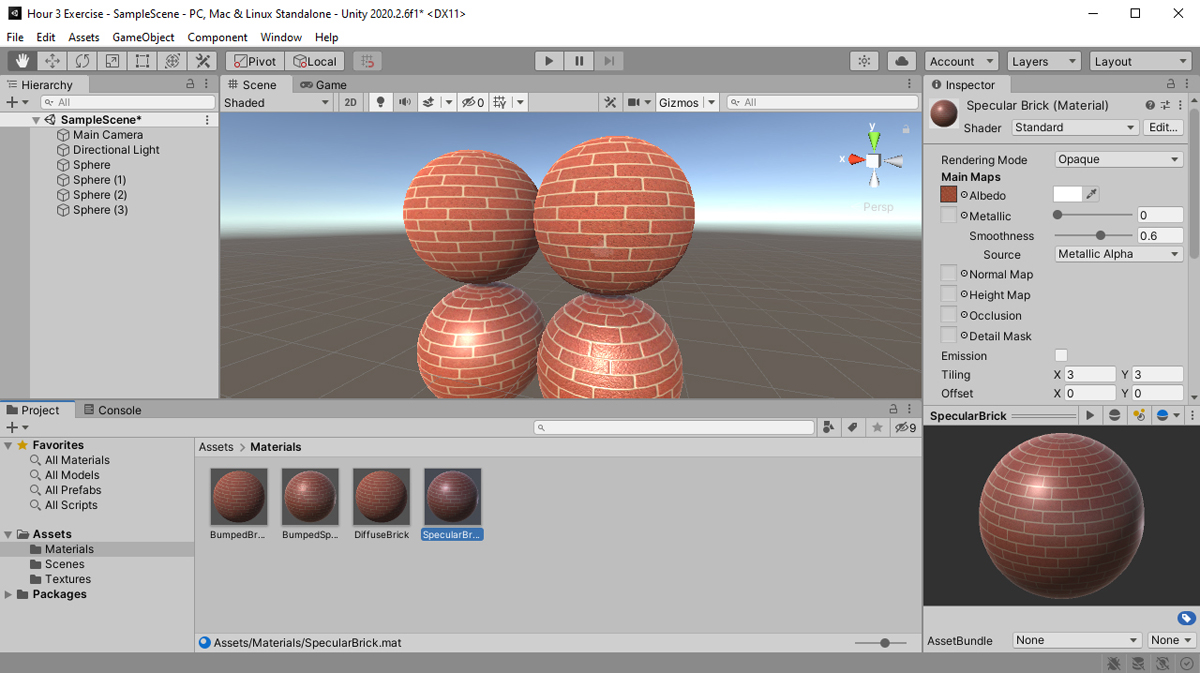

FIGURE 3.9
Material properties.
8. Click and drag each of the materials onto one of the four spheres. Notice how the light and the curvature of the spheres interact with the different shaders. Remember that you can move about the Scene view to see the spheres from different angles.
