4
Downloading Raw Files
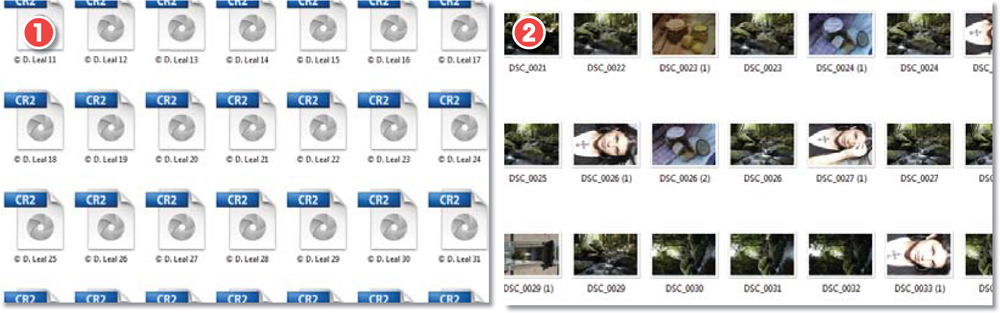
There are two main ways to transfer your files from camera to computer – (1) via a card reader or (2) directly.
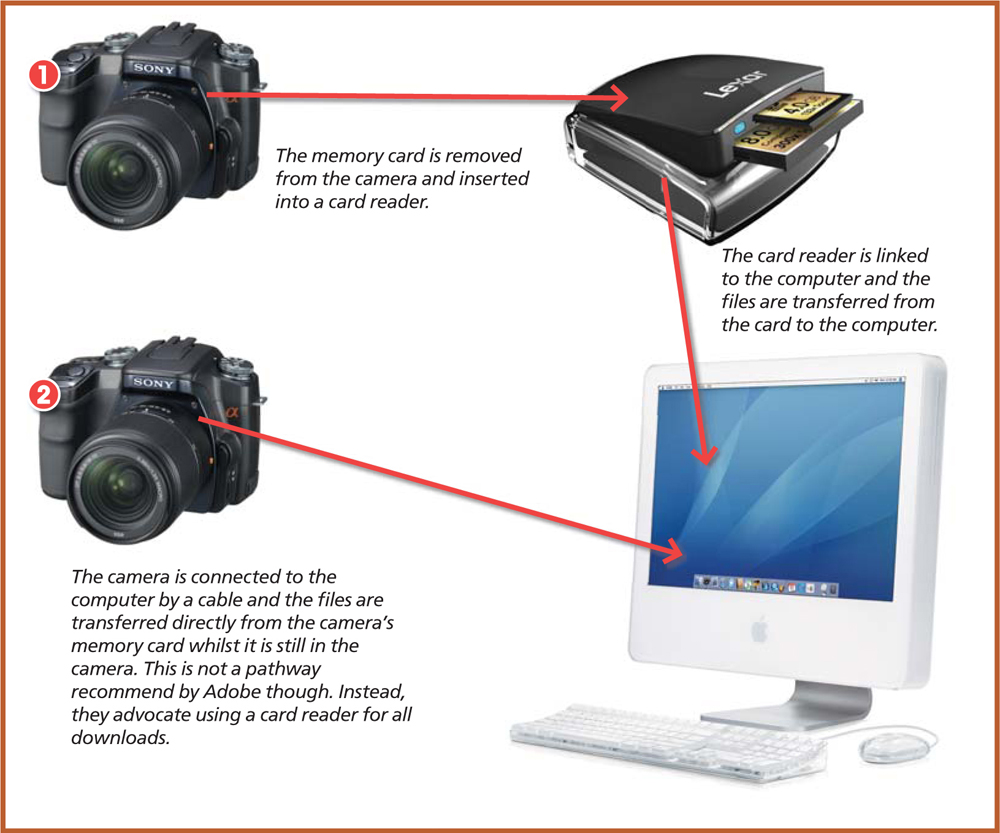
After enabling the camera and then spending your time creating a bunch of masterpieces, saved in the raw format of course, the next step is to download these photos to your computer. As with most things raw, we have several different download options. Some photographers love to connect their cameras directly to the computer, others who use multiple memory cards make use of a dedicated card reader to transfer their images. And a third group of image makers who shoot tethered are able to capture and download in one action.
In this chapter we will outline the various ways you can port your photos to the computer and take particular notice of some of the automated download options that are now provided by the image editing and raw conversion programs.
Camera to computer
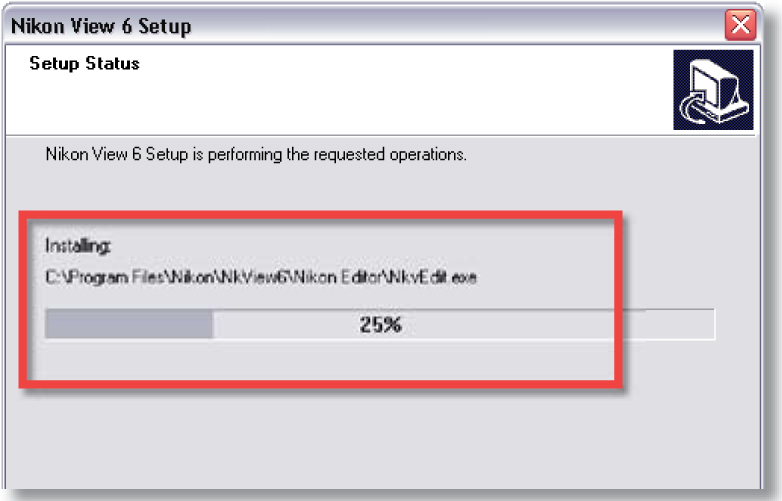
As we saw in the ‘Shooting tethered’ section in the last chapter, when connecting your camera to the computer it is important to ensure that the drivers for the devices are installed before plugging in the cables.
The drivers are generally installed at the same time that you load the utility software that accompanied the camera. If you haven’t yet installed any of these applications then you may need to do this first before the computer will recognize and be able to communicate with the camera. During the installation process follow any on-screen instructions and, if necessary, reboot the computer to initialize the new drivers.
To download images directly from the camera the computer needs to communicate with the connected camera as it would a hard drive or temporary removable drive. For this to occur you may need to change the basic communications setup on the camera before connecting the unit. The need to alter the default setup for the camera is largely based on the operating system (and version) that you are using. Typically you will have a choice between connecting your camera as a mass storage device (the most common option) or via PTP (Picture Transfer Protocol). Check with your camera documentation which works best for your setup and then use the mode options in the camera’s setup menu to switch to the transfer system that you need.
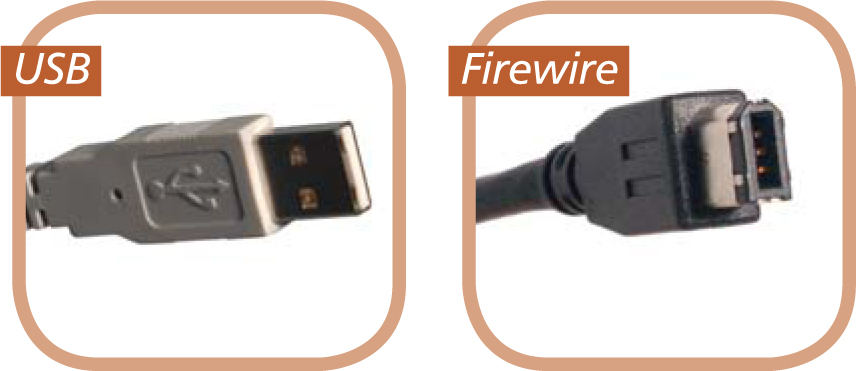
The next step is to connect the camera to the computer via the USB/Firewire cable. Make sure that your camera is switched off, and the computer on, when plugging in the cables. For the best connection and the least chance of trouble it is also a good idea to connect the camera directly to a computer USB/Firewire port rather than an intermediary hub.

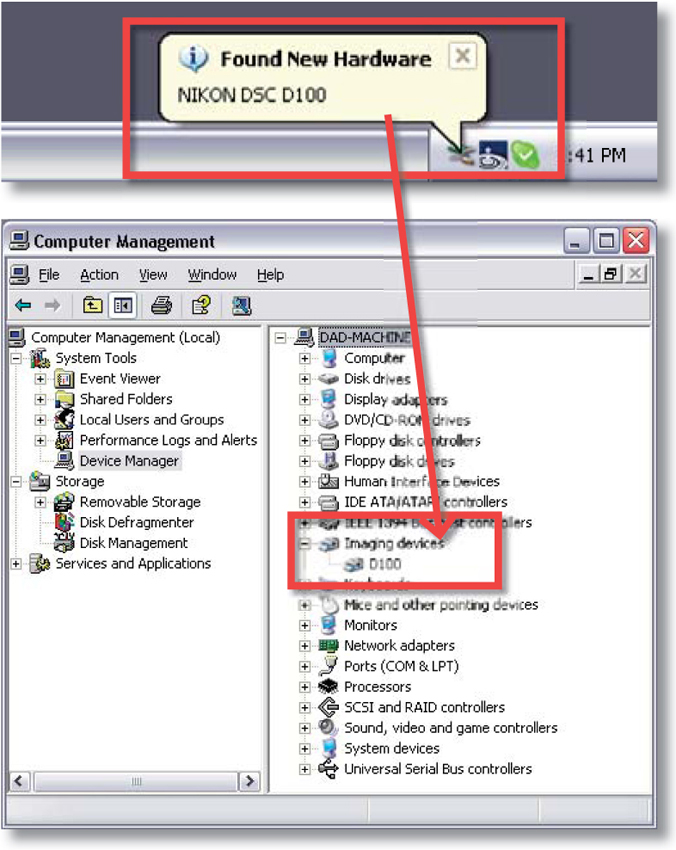
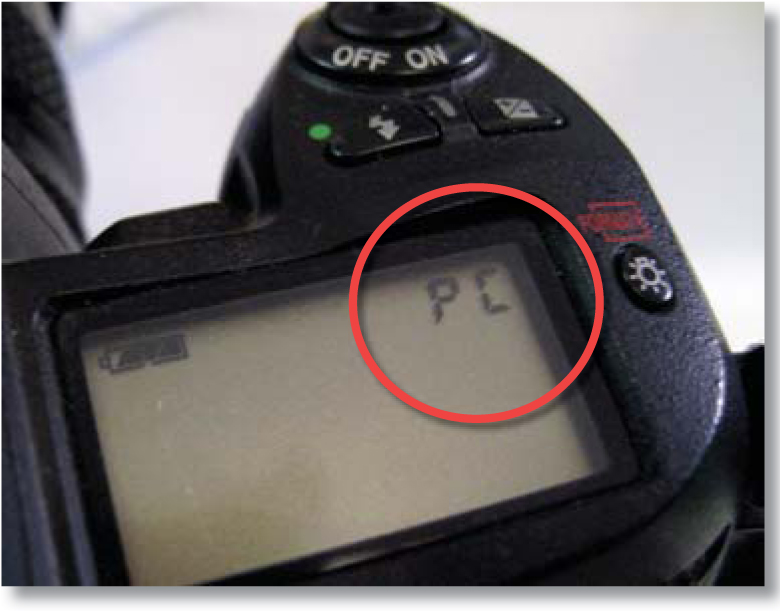
Now switch the camera on. Some models have a special PC or connect-to-computer mode – if yours is one of these then change the camera settings to the PC connection mode. Most cameras no longer require this change, but check with your camera manual just in case. If the drivers are installed correctly the computer should report that the camera has been found and the connection is now active and a connection symbol (such as PC) will be displayed on the camera. If the computer can’t find the camera try resinstalling the drivers and, if all else fails, consult the troubleshooting section in the manual. To ensure a continuous connection use newly recharged batteries or an AC adaptor.
Card reader to computer
Like attaching a camera to your computer, some card readers need to be installed before being used. This process involves copying a set of drivers to your machine that will allow the computer to communicate with the card reader. Some readers do not require extra drivers to function and simply plugging these devices into a free USB or Firewire port is all that is needed for them to be ready to use.
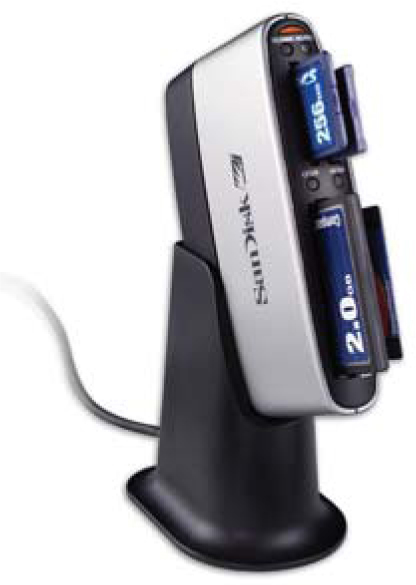
Many modern card readers can be used with multiple card types, making them a good solution if you have several cameras in the household or office.
After installing the reader, inserting a memory card into the device registers the card as a new removable disk or volume. Depending on the imaging software that you have installed on your computer, this action may also start a download manager or utility designed to aid with the task of moving your raw files from the card to hard drive. In the ‘Photoshop Elements’, Photoshop CS3 (via Bridge 2.0), Lightroom and ‘Camera-specific download’ sections later in this chapter you will see examples of these utilities in action.
Note
Before turning off the camera, disconnecting the cable to camera/card reader, or removing a memory card from the reader make sure that any transfer of information or images is complete. Mac users should then drag the camera/card volume from the desktop to the trash icon or select the volume icon and press the eject button. Windows users should click the Safely Remove Hardware icon in the system tray (found at the bottom right of the screen) and select Safely Remove Mass Storage Device from the pop-up menu that appears.

Both the Photoshop and Photoshop Elements versions of the Adobe Photo Downloader software provide auto-start options that allow the user to select the feature from a pop-up window when a memory card (in reader) or camera is attached to the computer or when an archive CD/DVD disk is inserted. Notice the Photoshop Lightroom option in the dialog on the right. It too has its own transfer utility.

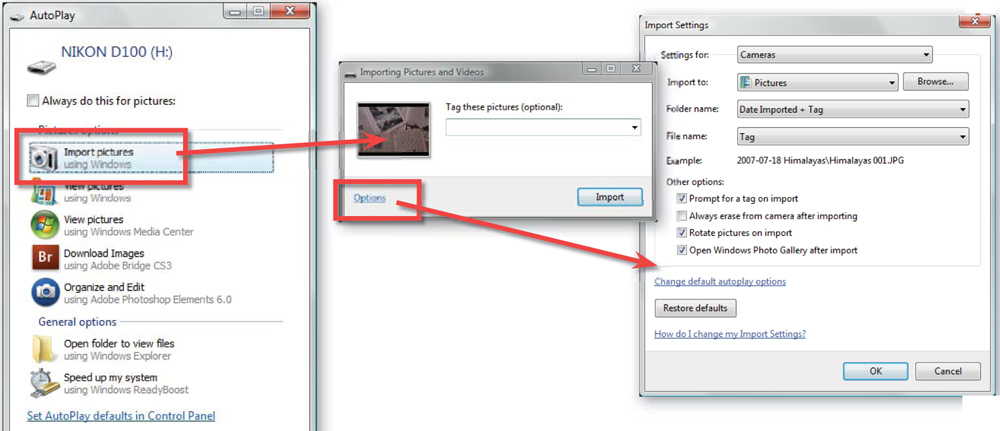
Failing this, Windows users will be presented with a Removable Disk pop-up or AutoPlay window containing a range of choices for further action. One of the options in Vista is Import Pictures. Choosing this entry will display the new Import Pictures and Videos dialog. Clicking the Import button will transfer the files to your computer using the default settings for the utility. To change settings used for transferring click on the Options text button in the bottom left of the dialog.
Vista users have a new system-based transfer option available from the AutoPlay pop-up window. Selecting Import Pictures activates the new feature. Default transfer settings can be altered via the Options button.
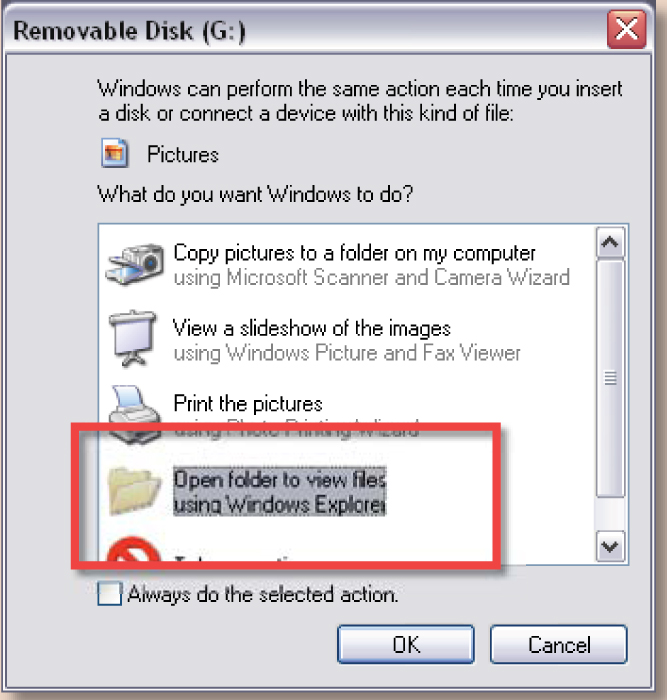
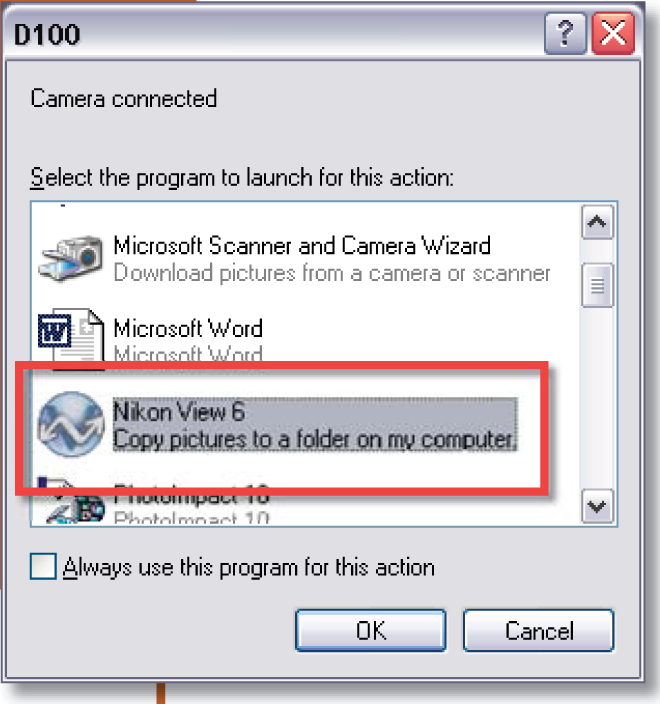
Windows XP users need to use the ‘Open folder to view files’ option to copy their raw files to the computer as these picture types are not recognized with the current version of the Microsoft Scanner and Camera Wizard.
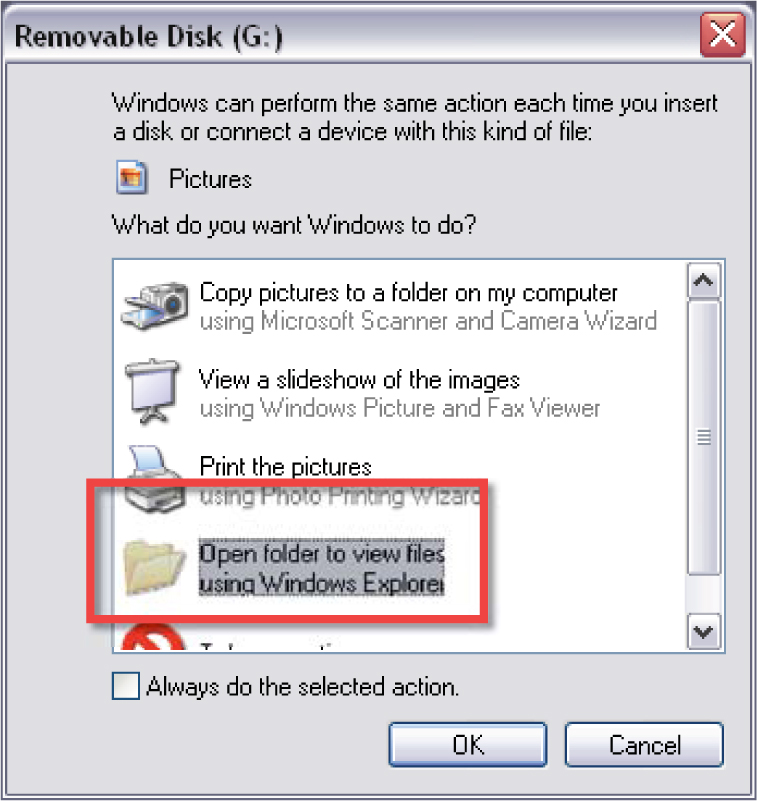
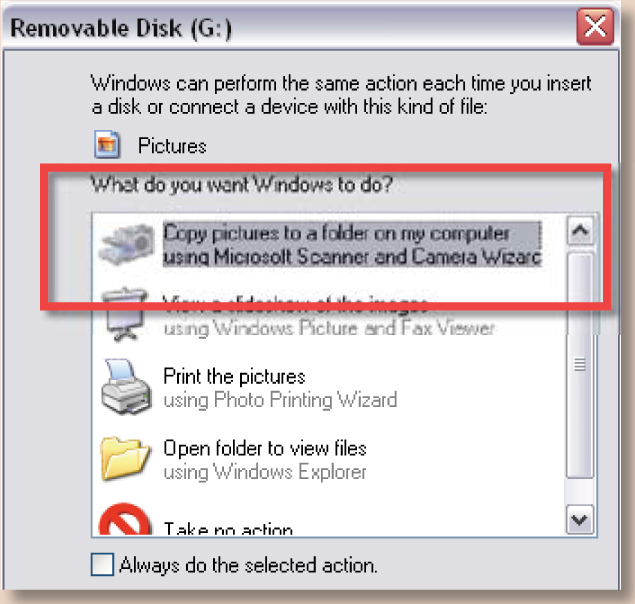
XP users will see a similar option titled ‘Copy pictures to a folder on my computer’ in the AutoPlay window. Choosing this entry will open the Microsoft Scanner and Camera Wizard which acts as a default download manager for transferring non-raw-based picture files. If your card contains raw files then the current version of the wizard will report that there are no photos present on the card. This situation will change as the Windows software becomes more raw aware, but for the moment the solution is to select the ‘Open folder to view files’ option and manually copy the pictures into a new folder on your hard drive.
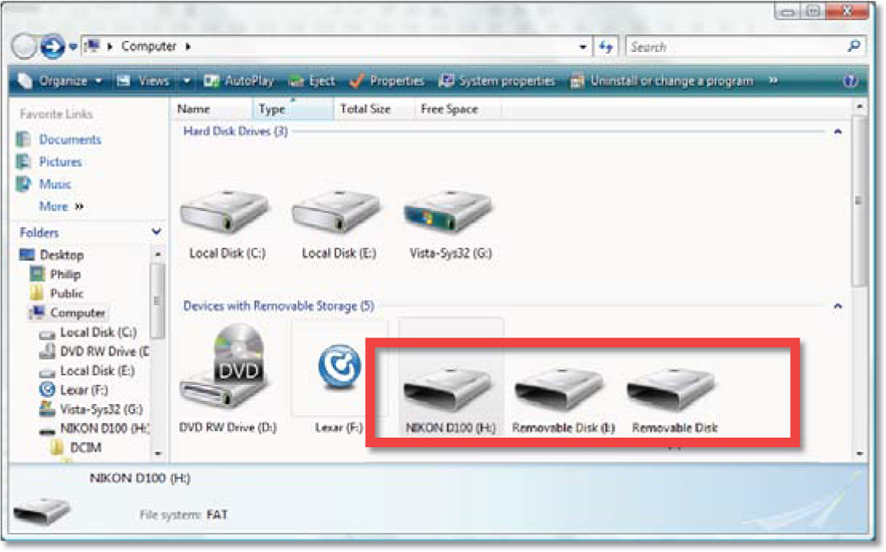
After a multi-card reader has been installed on a Windows computer the various card slots are displayed in the My Computer window as separate removable drives.
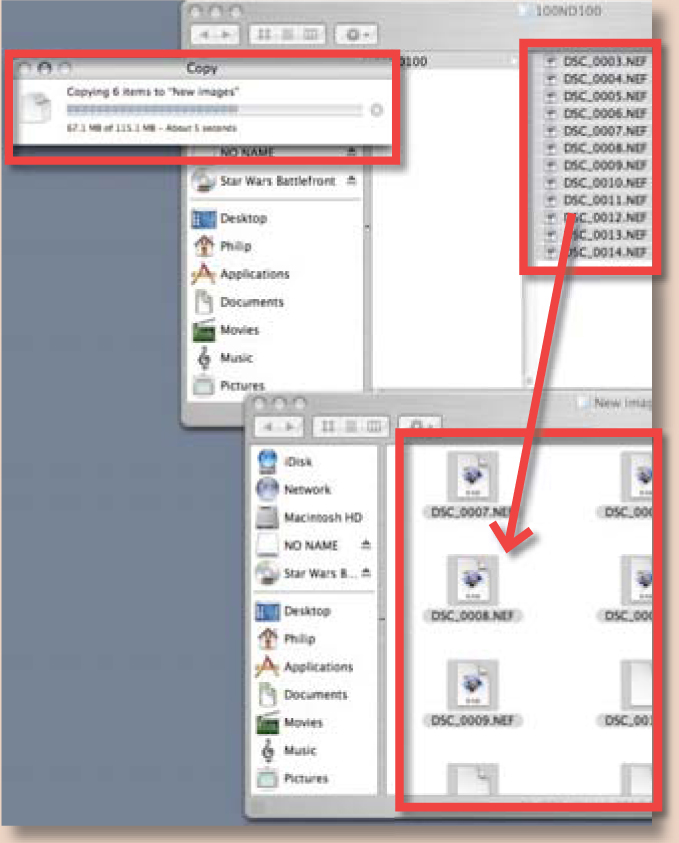
Cards inserted into a Macintosh connected reader will appear as a new volume on the computer’s desktop. Users can then copy or move the picture files from this volume to a new folder on their hard drive. Alternatively the Image Capture utility can be used to automate this process.
The important last step on both Macintosh and Windows platforms is to ensure that the card is correctly disconnected from the system. Macintosh users will need to drag the volume to the Wastebasket or Eject icon, whereas Windows users can use the Safely Remove Mass Storage Device feature accessed via a button in the Taskbar (bottom right of the screen).
Memory cards will appear as a new volume on the Macintosh desktop.

Complete step-by-step instructions for Windows and Macintosh transfer processes can be found in the ‘Operating system-based downloads’ section in the next part of this chapter.
Connections: Camera and card reader connections
The connection that links the camera/card reader and computer is used to transfer the picture data between the two machines. Because digital photographs are made up of vast amounts of information this connection needs to be very fast. Over the years several different connection types have developed, each with their own merits. It is important to check that your computer has the same connection as the camera/card reader before finalizing any purchase.
| CONNECTION TYPE: | MERITS: | SPEED RATING: |
| USB 1.0 |
• No need to turn computer off to connect (hot swappable) • Can link many devices • Standard on most computers • Can be added to older machines using an additional card | Fast (1.5 Mbytes per sec) |
| USB 2.0 |
• Hot swappable • Can link many devices • Standard on most models • Can be added to older machines using an additional card • Backwards compatible to USB 1.0 | Extremely fast (60 Mbytes per sec) |
| Firewire |
• Hot swappable • Can link many devices • Becoming a standard on Windows machines. • In real world tests Firewire can be faster than USB 2.0. • Can be added using an additional card • Standard on Macintosh machines | Extremely fast (50 Mbytes per sec) |
| Firewire 800 |
• Hot swappable • Can link many devices • Can be added using an additional card • Not yet standard but some new machines feature the connection | Fastest connection available (100 Mbytes per sec) |
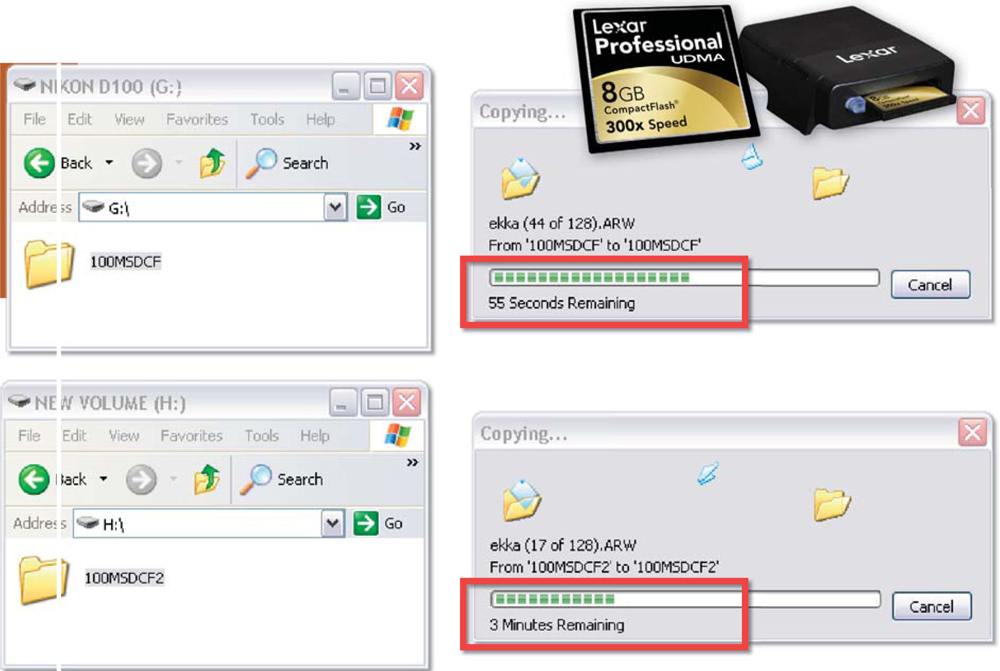
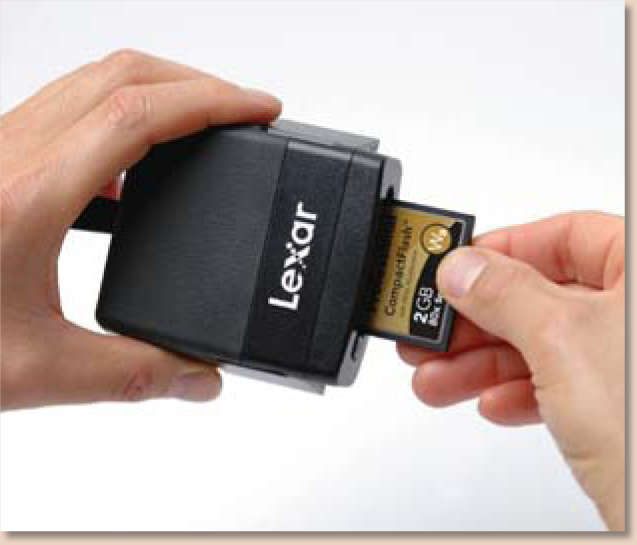
Flash memory companies, such as Lexar, are always producing new products that make the process of downloading files faster than what was possible with the previous generation of cards. Lexar’s latest offering boasts 300× speed which dramatically decreases the time taken to download large numbers of files. In the demonstration, above, the same folder of photos (1Gb in size) was downloaded from both a 133× (lower) and the new 300× card (upper). The UDMA card was noticeably faster, completing the task minutes ahead of the older style flash card and reader.
Fast cards means fast downloads
The latest incarnation of fast memory cards require equally fast card readers in order to take advantage of the increased speed. In the case of the UDMA cards from Lexar that are capable of 300× download speeds, the fast transfer performance is only possible when using the matched card reader and a Firewire 800 connection. Firewire 800 is the fastest of all the plugable connections and is necessary if the upper limit of the card/reader combination download speed is to be reached and, more importantly, sustained.
For Macintosh users working on a recently released model, the Firewire 800 connection is not a problem as these computer models include at least one port of the faster interface as standard. Windows users on the other hand will have a more difficult task tracking down an off the shelf computer that features Firewire 800. Instead most users will need to add the functionality to an existing system via an upgrade card. Be warned though, most Firewire 800 interface cards use the 64bit version of the PCI interface which can only be found on advanced motherboards or those employed by server computers.
Memory cards are used to store your camera’s pictures. Various capacity sizes and speeds are available in the four main formats shown here. (1) Compact flash. (2) Multimedia. (3) MemoryStick. (4) Smart media.

| MEMORY CARD TYPE: | MERITS: | CAMERA MAKES: |
| Compact flash | The choice for professional cameras Matchbook size | Most Canon, Nikon, Sony DSLR, Hewlett-Packard, Casio, Minolta and pre-2002 Kodak |
| Compact Flash (Microdrive) | Same format and connection as standard Compact Flash but contain a small hard drive and so therefore contain moving parts | Same camera categories as above but check the fitting as microdrives are a Type II Compact Flash footprint |
| Smart media | Credit card thickness Usually colored black Matchbook size | Olympus and Fuji digital cameras, Sharp camcorders with digital still mode, and some MP3 players |
| Multimedia (MMC) or Secure Digital (SD) | Most popular card Postage stamp size Credit card thickness SD are second generation MMC cards | Most Panasonic camcorders with digital still mode, some MP3 players, and the Kyocera Finecam S3, KB Gear JamCam, Minolta DiMAGE X and most Kodak digital cameras produced after 2001 |
| xD Picture Card | Smallest of all cards About the size and thickness of a thumbnail | Fuji and Olympus cameras |
| MemoryStick and MemoryStick Pro | Smaller than a stick of chewing gum Longer than other card types | Used almost exclusively in Sony digital cameras, camcorders, handhelds, portable music players and notebook computers |
Operating system-based downloads
For non-automated download of raw files you will need to perform a basic copy or move process to transfer your pictures from the card/camera to a folder/directory on your computer. The steps taken to facilitate the transfer vary slightly between Macintosh- and Windows-based machines – two different step-by-step summaries are provided below.
Step by step: Windows XP
1. Ensure that the card reader is correctly installed and then insert the camera’s memory card into the appropriate slot. Windows will display a generic Removable Disk dialog and ask you to select an option to determine how you want to proceed. For standard picture files (non-raw) you would generally select ‘Copy pictures to a folder on my computer’ but raw shooters need to work in a slightly different fashion as the operating system doesn’t natively recognize raw files as photos.
2. So instead select the ‘Open folder to view files using Windows Explorer’. This will simply display the contents of the card as if it were a standard hard drive or CD-ROM. If you want to bypass this dialog in the future tick the ‘Always do the selected action’ option. Windows will then remember your selection and perform this action every time you insert a camera card.
3. A new Windows Explorer dialog will open displaying the default folder created by your camera when saving the pictures to the card. There may be nested folders that you have to work your way through before reaching the actual picture files.
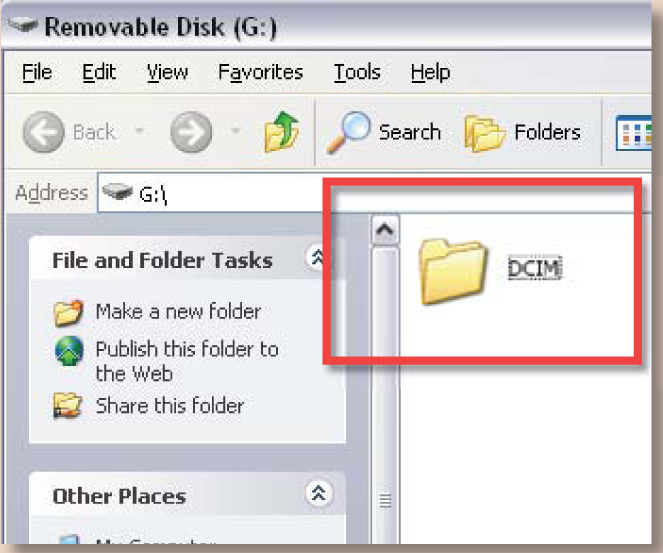
Pro’s tip: The default file and folder structure used for saving your photos to memory card is determined by options in the setup menu of your camera.
4. As the raw files are not recognized as photos in the current version of Windows you will not be able to preview the contents of the files as thumbnails. So switch the View mode to Details (View > Details), which will present the files in list form.
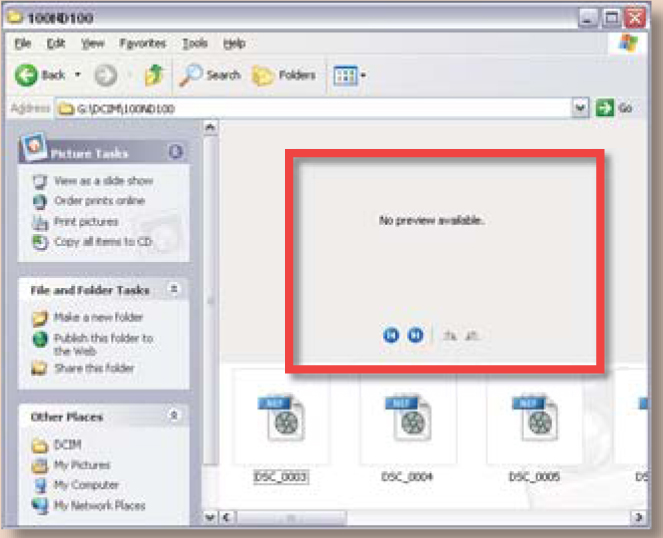
Note: Recently Microsoft released a free raw thumbnailer and viewer utility for XP that allows the contents of raw files to be viewed in standard Windows file browsing dialogs. See ‘The Microsoft Raw Image Thumbnailer and Viewer for Windows XP’ section on the next page for more details of this utility.
5. Next open a second window by pressing the My Computer icon. Navigate your way to the My Pictures folder (or the directory you wish to move the raw photos to) and create a new folder to house the transferred files.
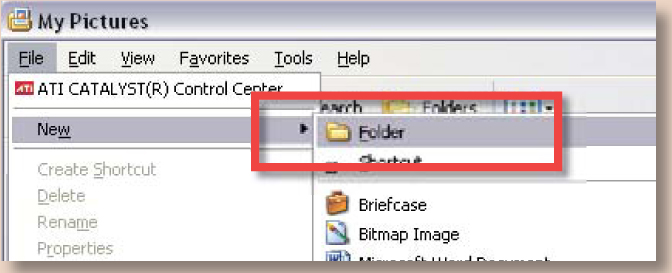
6. With both Explorer windows sitting side by side select all the files in the memory card folder and then hold down the Ctrl key and drag the files across to the new folder. This will copy the files to the new position.

Note: Holding down the Shift key whilst dragging will move the files from the card to the new folder, removing the need to delete the files after the transfer is complete.
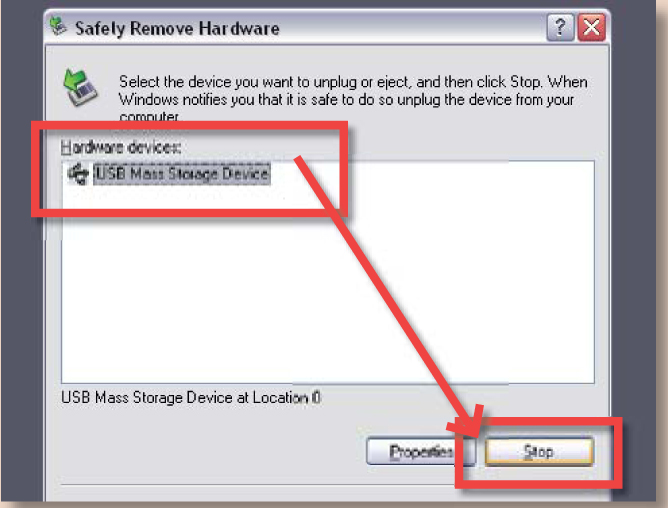
7. After the files have been copied or moved and whilst they are still selected in the card window, choose File > Delete to erase the raw pictures from the card. Before removing the card from the reader, right-click the Safely Remove Hardware icon in the System tray. At the next screen select the Stop button to allow you to unplug the memory card (USB Mass Storage Device).
The Microsoft Raw Image Thumbnailer and Viewer for Windows XP
In response to the growing number of Windows users who are also raw shooters, Microsoft released a utility that can be installed on XP-driven machines to provide previews of raw files within the file browsing windows of the operating system. Available as a free download from www.microsoft.com, the utility or Power Toy provides thumbnails, previews, printing and metadata display for raw images from supported Canon and Nikon digital cameras in Windows XP. The sad news for Vista users is that despite initial expectations that raw files would be supported straight out of the box, the new Windows operating system still needs a little tweaking if it is going to work efficiently with your images. Instructions for setting up Vista are listed later in this chapter.
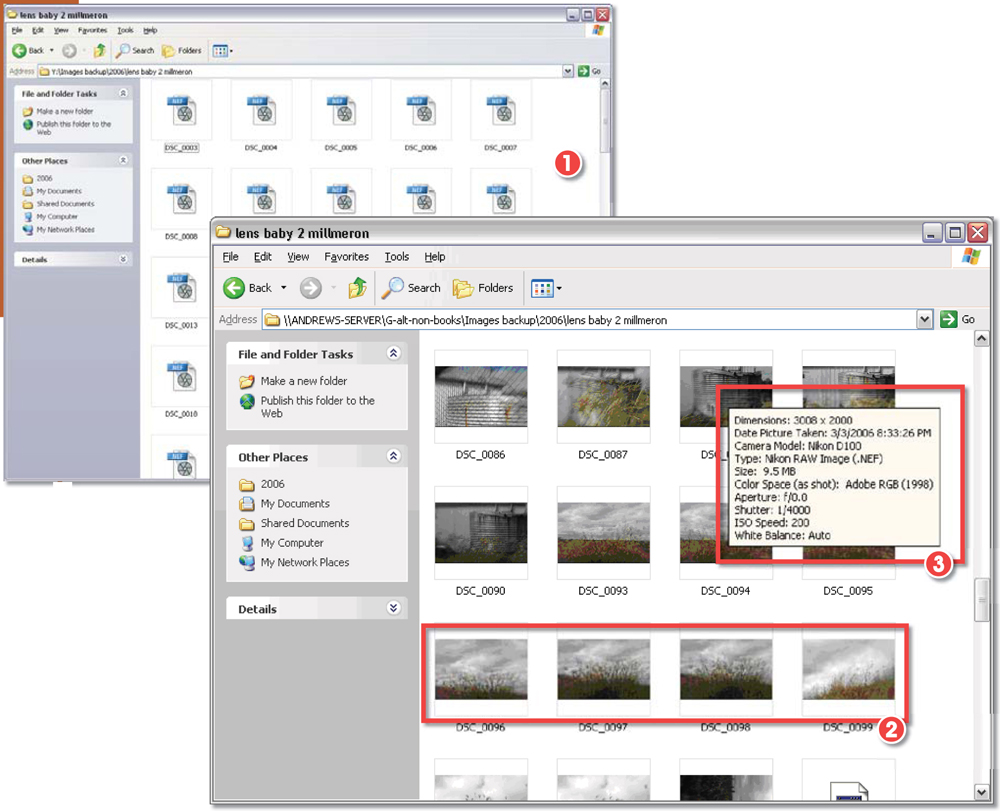
Without the Microsoft Raw Image Thumbnailer and Viewer for Windows XP installed a folder full of raw files cannot be previewed in Thumbnail mode (1). Once the utility is installed the same folder will display thumbnails of the raw photos (2) and metadata for each picture when hovering the mouse over the thumbnail (3).
Photoshop and Raw Image Thumbnailer and Viewer working together
Despite the obvious advantage of installing this utility for file management and organizational purposes it is worth noting that the Viewer and Thumbnailer only displays the pixels from the original captured file. Any processing applied via software such as Adobe Camera Raw will not be reflected in the previews, slideshows or prints. Also, setting the Raw Image Viewer as the default way to view your raw files takes your image editing or raw conversion software out of this position in your raw workflow.
Some photographers who want to thumbnail their raw photos in Windows XP but still retain a specific program such as Photoshop as their default raw conversion/editing program alter the settings in the File Types tab of the Raw Image Viewer Options.
The XP raw utility in action
When Windows users who don’t have the utility installed point their file browsers at a folder full of raw photos, the dialog can display the files in tile, icons, list and details views but not the thumbnails option. At the most basic level installing the utility enables this thumbnailing option to function in all file browser windows but there is more to this utility than just the preview options.
The Viewer and Thumbnailer is not intended to replace the raw conversion utilities provided by the camera manufacturer or those found in your imaging software, rather it is designed to make the management tasks regularly performed via operating system (OS) dialogs as simple as they are with other picture formats.
The utility has two main components:
1. A Windows XP ‘Shell Extension’ which provides the thumbnail rendering, printing and metadata display for raw files (of supported cameras), and
2. A raw image view application that provides previews, printing and slideshow options for raw files. This application looks and works like the Windows Picture and Fax Viewer but with added features designed specifically for raw shooters.
Digital photographers will benefit from installing this utility in several ways. Obviously being able to preview your raw files directly in the OS dialogs will aid in locating and organizing your photos. Add to this the fact that software makes use of the camera manufacturers’ own coding libraries to generate the high quality and color correct (yes it is ICC profile aware) previews and you have the ability not only to manage but to accurately preview your raw files natively. Cool!
Top features
Previewing – After installing the utility you can preview raw files by either right-clicking the file and selecting Preview from the menu that pops up or double-clicking the file. Both options will launch the Microsoft Raw Image Viewer for those raw file types (.nef, .crw) selected during the utility installation process.
Metadata viewing – Hovering the mouse over a raw image in Windows Explorer will display the metadata for the file in a pop-up window. Alternatively clicking the yellow properties button at the bottom of the Raw Image Viewer will display the same information in a floating window.
Custom properties columns – New levels of information can be displayed in the Details view of Windows Explorer. This information is based on the metadata associated with the raw file and it can be shown in a new column by right-clicking the column header bar and then selecting the new data type from those listed.
Slideshows – You can include raw images in an impromptu slideshow by clicking the Slideshow button at the bottom of the Raw Image Viewer. The duration that each slide stays on screen is governed by the Slideshow setting in the General tab of the viewer’s Options.
Printing – Raw files can be printed directly from the Raw Image Viewer using the button at the bottom of the dialog and the photos are set up for output via the Photo Printing Wizard.
Limitations
Whilst the Raw Image Thumbnail and Viewer does extend raw functionality to many OS areas it doesn’t enable all the digital photography features that XP users may be familiar with. In particular the Windows Filmstrip view doesn’t show raw files, the Picture Task options in the Windows Task Pane are not supported, but print and slideshow features are supported in the Raw Viewer application itself, and the Windows Camera and Scanner Wizard and Picture and Fax Viewer do not support raw files.
Raw-enabling Windows Vista
In creating a more ‘raw aware’ operating system, Microsoft has made use of a structure where the various camera manufacturers supply their own CODECs (Compression Decompression drivers) to be used with their particular type of raw files inside Vista. In this approach, though a little troublesome to start with, the user has to install the CODEC for the camera that he or she uses. This will hopefully future proof the operating system’s support for raw files. It is a simple matter in the future to support the latest camera, or raw file type, by installing the latest CODEC from the manufacturer.
Use the following steps as a guide for raw enabling your own Windows Vista machine.
Step by step: Installing a new raw CODEC
1. Start by searching the internet, or your camera manufacturer’s support site, for the specific Vista CODEC that supports your raw files. Once located, download, and in some cases, extract, or decompress, the files to your desktop ready for installation.
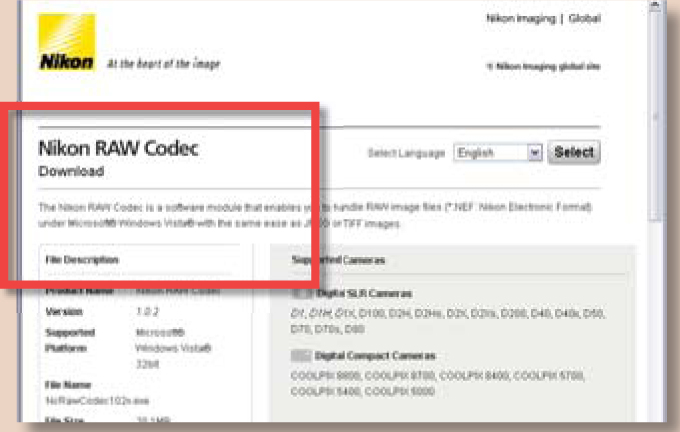
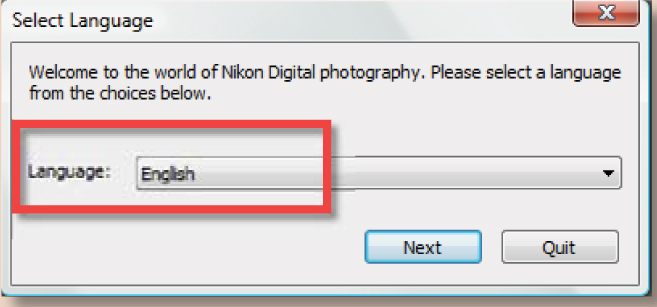
2. Next follow the install instructions. Here I am installing the Nikon Raw CODEC for Vista. As part of the process, the user is required to input location and language selections.
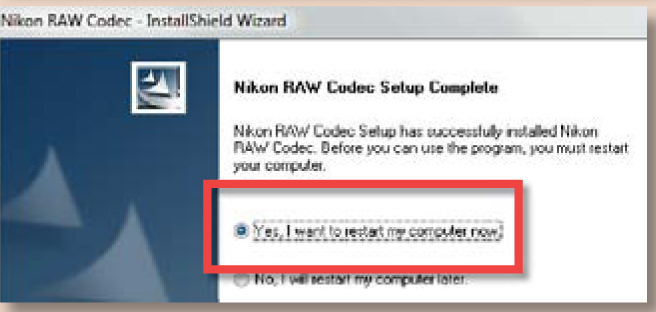
3. As the CODEC forms part of the file processing functions of the operating system it may be necessary to reboot (turn off and turn back on again) your computer after installing the software.
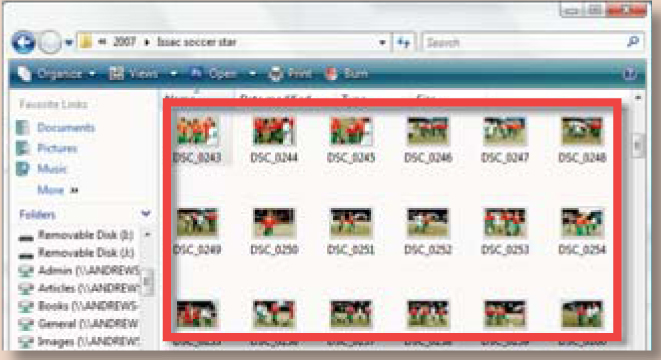
4. After rebooting check to see that the CODEC is functioning correctly by either displaying an Icon View of an image folder that you know contains raw files. You should see a series of thumbnails representing your image files.
Step by step: Transferring files with Vista
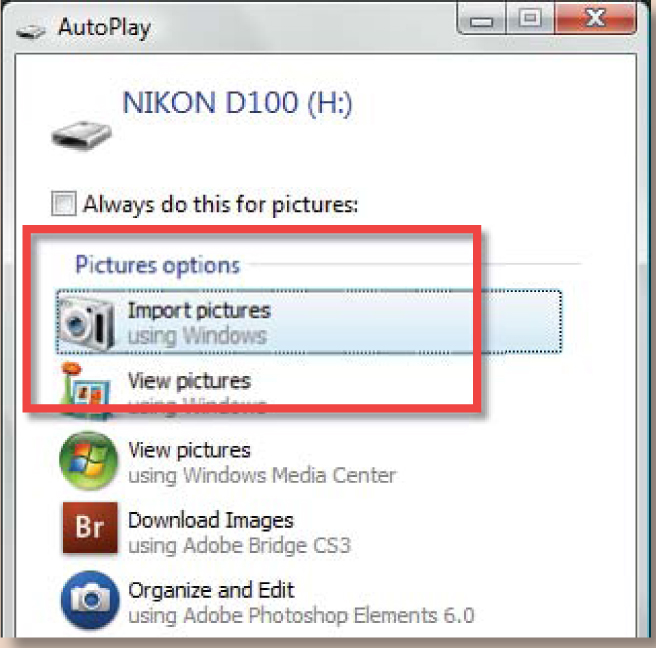
1. After inserting a card into your card reader or connecting a camera to the computer the AutoPlay dialog will be displayed, providing you with a range of transfer options. To use Vista, select the Import Pictures entry. An Import Photos dialog for Bridge, Photoshop Elements and/or Lightroom may also appear. Cancel out of this window to stop the download process using any of these utilities.
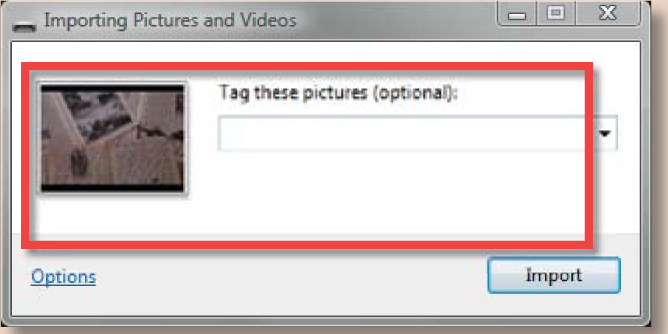
2. Selecting the Import Photos entry will display the Importing Pictures and Videos window. A small preview of the first photo to be transferred will be shown and a text box for ‘on the fly’ tagging of the files is also included. To start the transfer process using the current defaults, click the Import button. To customize the download click on the Options text (bottom left).
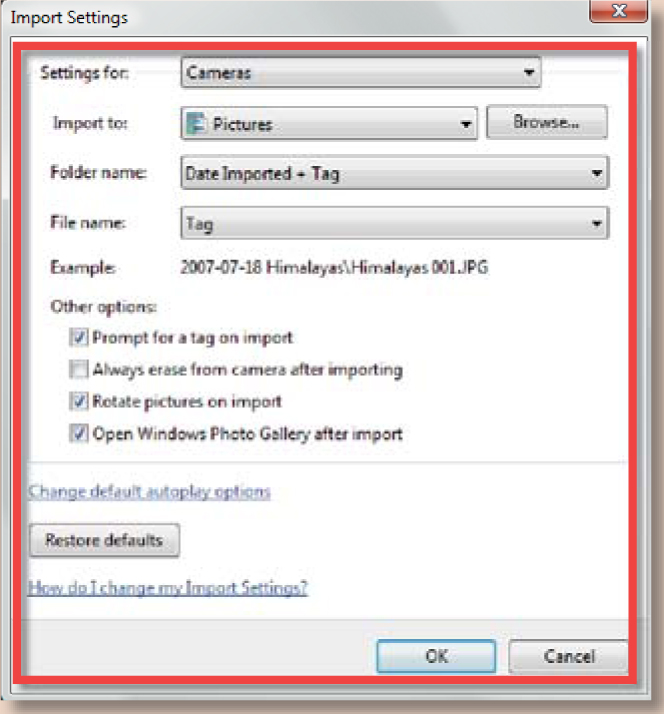
3. The Import settings dialog contains all the download controls. Here you can select where the files will be saved to, how the download folder, and the files themselves, will be named, if tags are applied during import, whether the files are erased from the card or camera after downloading, auto rotate options and if the Windows Photo Gallery is opened when the transfer is finished.
Raw support in Macintosh
From the Tiger version (10.4) of Macintosh’s operating system the Apple platform has supported the display and opening of a variety of raw file formats. This includes Nikon and Canon formats along with Adobe’s DNG or digital negative file type.
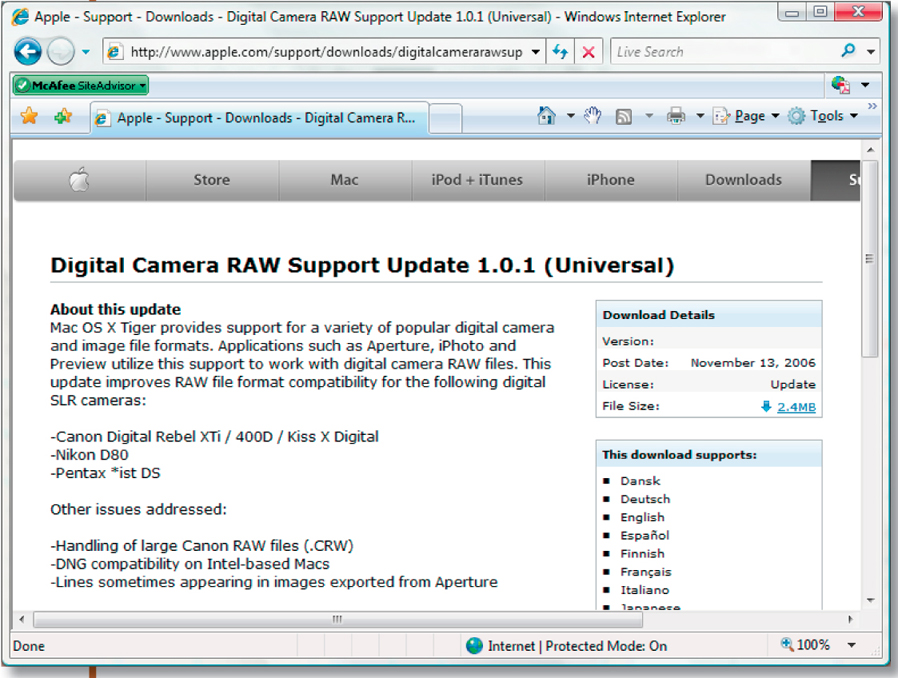
As camera companies continue to release new models and, in doing so, they often release slight variations to their proprietary raw formats to account for new or improved technologies, Apple occasionally releases updates to its Operating System, including in these changes support for newer camera models and file formats. Check the support web page for Apple Preview (at www.apple.com) for the latest updates.
These updates also provide the basis for raw support for other Macintosh programs such as Preview, iPhoto and Aperture.
Step by step: Macintosh step by step
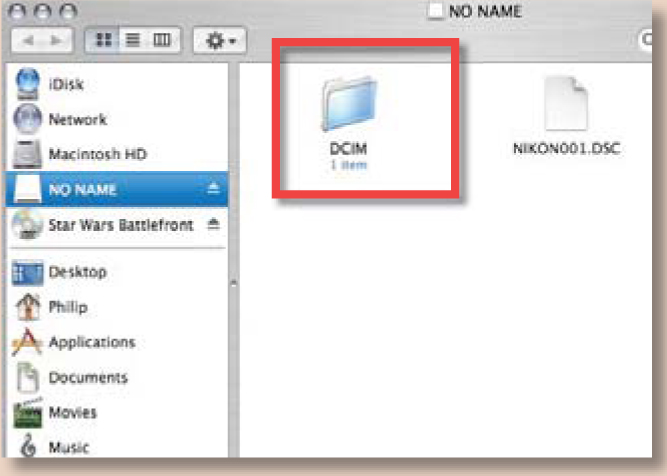
1. Macintosh users can follow a similar route when manually downloading their files from a card reader or camera. After connecting the reader, insert the memory card. The card will be displayed as a new drive icon on the desktop.

2. With the way that most cameras save their captured photos the next step will be for you to navigate your way through a series of folders until you reach the primary folder that contains the raw files. Now open another Finder window and create a new folder on your hard drive in which to save your transferred photos.
3. Select all of the raw files and then drag them to the new folder. This will move the files from the card to the folder. If you wish to copy rather than move the photos, hold down the Opt key as you drag the selected files.
4. Once the pictures are safely in the new folder on your computer you can delete the files from the memory card. Select the photos and drag them to the Trash Can. This step won’t be necessary if you moved instead of copied the files in the previous step. Now eject the card from the system by click-dragging the drive from the desktop to the Eject/Trash Can icon in the dock. When the drive icon is no longer on the desktop you can safely remove the card.
Camera-specific download
Most digital cameras now ship with a host of utilities designed to make the life of the photographer much easier. As part of this software pack the camera manufacturers generally include an automated download utility designed to aid the transfer of files from camera or card reader to computer. These camera-specific download managers are clever enough to know when a camera or card reader is connected to the computer and will generally display a connection dialog when the camera is first attached or a memory card inserted into the reader.
Generally camera-based transfer utilities either start automatically when a camera is connected to the computer, or a card inserted into a reader. Alternatively the utility can also be selected from the AutoPlay menu.
As we will see in the next section of this chapter some software programs such as Photoshop/Bridge and Photoshop Elements load their own download manager when they are first installed. For this reason it is not unusual for a couple of utility windows to appear whenever you insert a memory card into a reader. The particular software you select to handle the file transfer will depend largely on your own preferred workflow. Some photographers download using the camera software and then convert/edit using their imaging program, others prefer to keep to one system from beginning to end using a single program such as Photoshop Elements for both tasks.
Once you have made a decision about which route to use then look for a disable option in the preferences of the manager software that you want to bypass. Failing that, you can always nominate your preferred method of handling downloads via the Windows Removable Disk or Camera dialog. Simply select the download utility from those selected and then tick the ‘Always do the selected action’ option at the bottom of the dialog. The next time you insert a card into the reader Windows will automatically open the download manager of your choice.
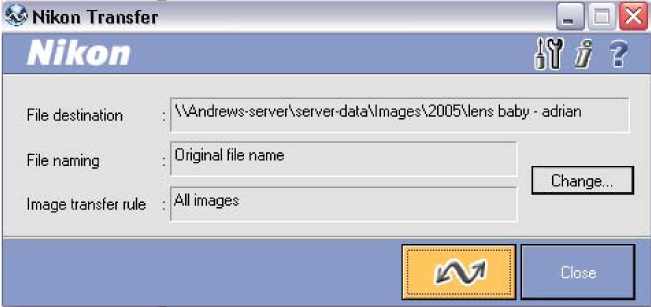
Nikon’s download manager
Nikon owners have the option to use the Nikon Transfer manager, a small pop-up utility that automates the moving of files from card/camera to hard drive. The manager is installed along with camera drivers, photo browser and basic raw conversion software when you load the software on the disk that accompanies your camera. Generally this type of software provides settings for choosing destination directories, renaming files on the fly, adding in copyright information and determining if the files are deleted from the camera or card after transfer.
Most hardware companies supply a suite of software products with their cameras. Many include automated download utilities like this one from Nikon.
Software-specific download
Many photographers will choose not to rely on the download options available with their camera-based software or the manual copy route provided by the operating system. Instead they manage the download component of their workflow with the main imaging software package. This may be an editing program, such as Photoshop or Photoshop Elements, or the raw conversion or workflow software, like Lightroom, that they employ. Either way, making this approach generally provides time savings as the raw files are transferred from camera, or card reader, and during the same action they are imported into the editing, workflow or conversion program.
To give you an idea of the options available with this style of download the following few pages contain step-by-step examples for key software titles.
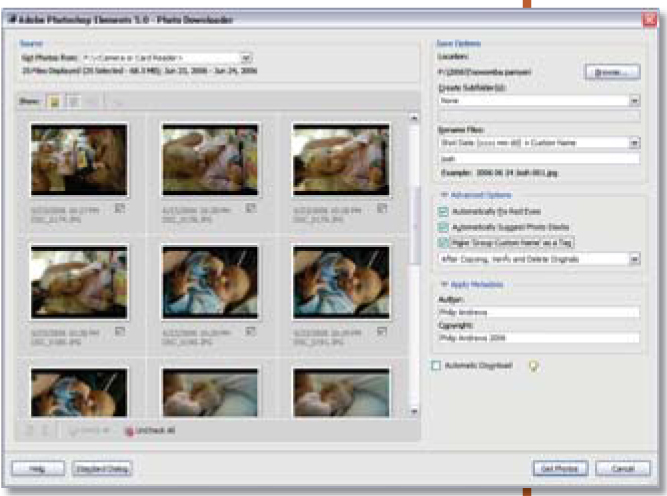
The Adobe Photo Downloader (APD)
Over the history of the development of Photoshop Elements one of the most significant additions to the program has been the Photo Browser or Organizer workspace. This feature provides a visual index of your pictures and can be customized to display the images in browser mode, date mode or sorted by keyword tags or collection. The Adobe Photo Downloader utility has been coupled with the Organizer workspace for the last few versions of Photoshop Elements and it is this utility that provides the primary method for users to import photos from camera, cards and folders to the program.
Adobe’s own transfer utility now ships with both Photoshop and Photoshop Elements after initially starting its life as an Elements-only product. Like other transfer options the Adobe Photo Downloader can rename, erase images from memory cards, add metadata and, in the Photoshop version, convert to DNG, all during the transfer process.
Photoshop and Bridge get APD….finally!
New for Bridge 2.0 (and Photoshop CS3) and borrowed from Photoshop’s little brother, Photoshop Elements, is the Adobe Photo Downloader or APD utility. Just as is the case with Photoshop Elements the downloader manages the transfer of files from camera, card reader or archive CD/DVD to your computer. In the process, the Bridge version of the utility can also change file names, convert to DNG on the fly, apply pre-saved metadata templates and even save copies of the files to a backup drive. The backup feature alone saves loads of time and effort for the working photographer, over performing this task manually.
Despite the core functionality being the same, there are slight differences between APD as it appears in Photoshop/Bridge and Photoshop Elements. This table summarizes both the similarities and differences between the versions.
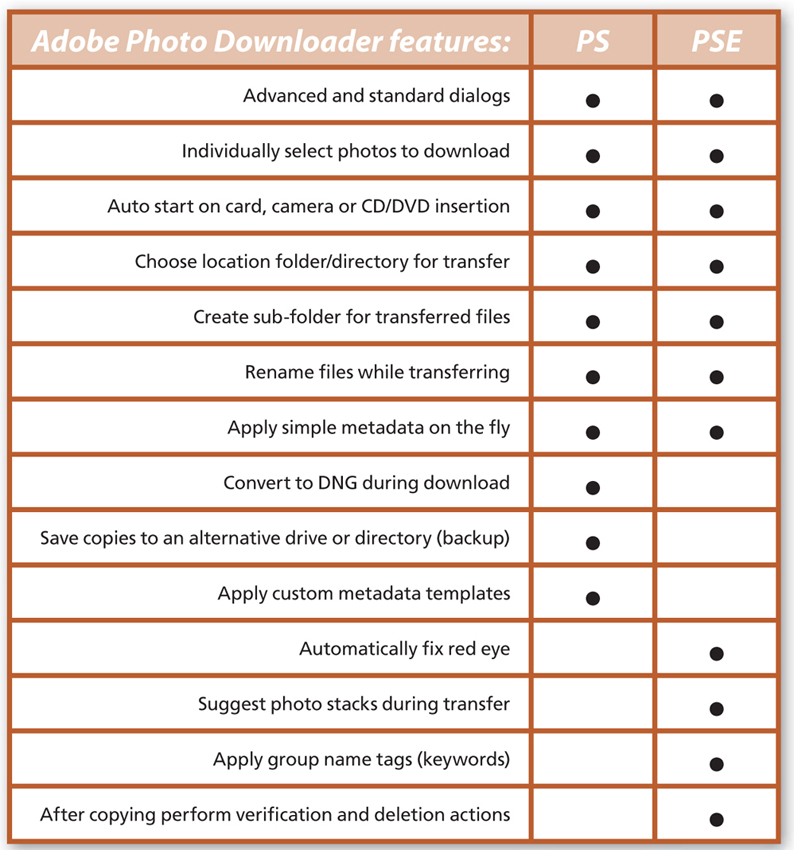
Adobe Photo Downloader is common to both versions of Photoshop (Photoshop CS3 and Photoshop CS3 Extended) and is also included in Photoshop Elements. Although the core of the controls are the same, there are a few minor differences between the Elements and Photoshop versions. Because of these differences we will look at each version and its associated workflow in turn.
Transfers with APD and Photoshop Elements
Unlike the standard file browsers, the Organizer workspace in Photoshop Elements creates the thumbnail during the process of adding your photographs to a collection. A similar process is used when moving files from card, camera or folders on your computer (if you have already transferred the pictures using an alternative process).
To commence downloading your raw files and, in the process, create your first collection, simply select the View and Organize option from the Welcome screen and then proceed to the Organizer: File > Get Photos menu option. Select one of the listed sources of pictures (camera or folders) provided and move through the steps and prompts in the dialogs that follow.
Step by step: Option 1: Getting your raw files from camera or card reader
1. To demonstrate the process let’s start by downloading some photographs from a memory card or camera. This will probably be the most frequently used route for your raw images to enter the Elements program. Connect the camera, being sure that you have first installed the drivers for the unit. Alternatively you may wish to eject the memory card from the camera and insert it into a card reader that is already attached to the computer. Next select the From Camera or Card Reader option from the File > Get Photos menu.
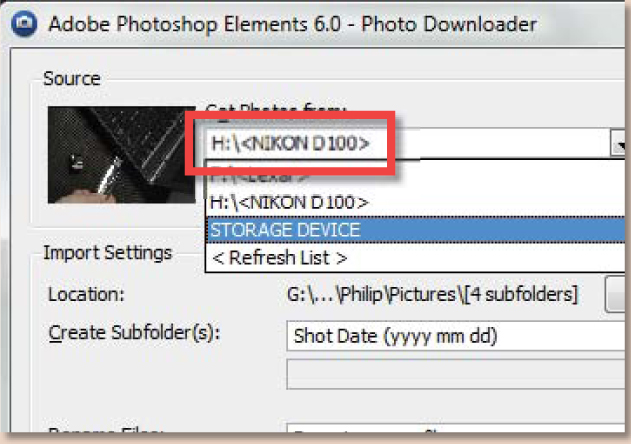
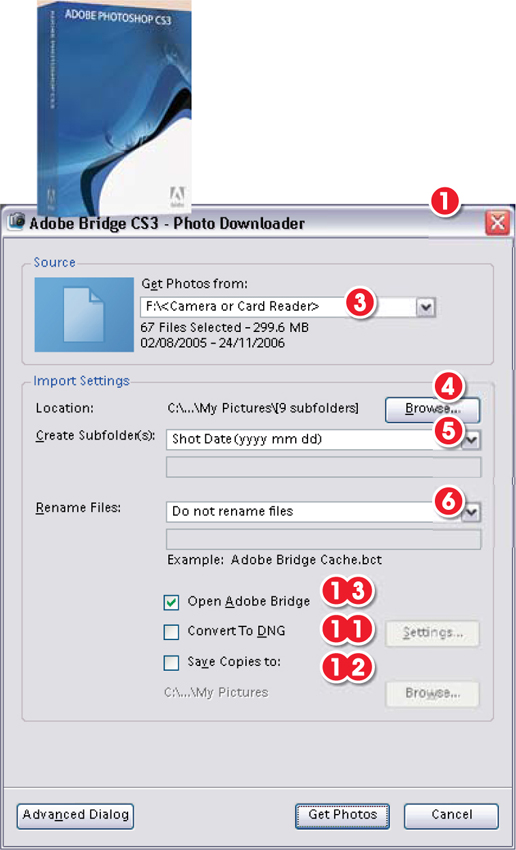
2. After attaching the camera, or inserting a memory card into the reader, you will see the Adobe Photo Downloader dialog. As we have seen already this is a utility and dialog designed specifically for managing the download process. The first step is to locate and then select the source of the pictures (the card reader or memory card in the camera) from the drop-down menu in the top right of the dialog.
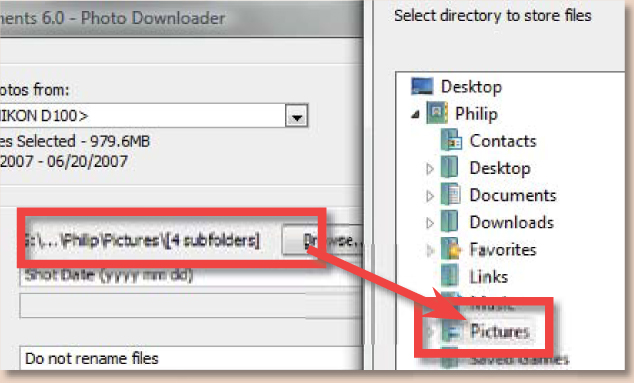
3. By default, when using the Standard Dialog, all pictures on the card will be selected ready for downloading and cataloging. Next set the Import Settings. Browse for the folder where you want the photographs to be stored and if you want to use a subfolder, select the way that this folder will be named from the Create Subfolder drop-down menu.
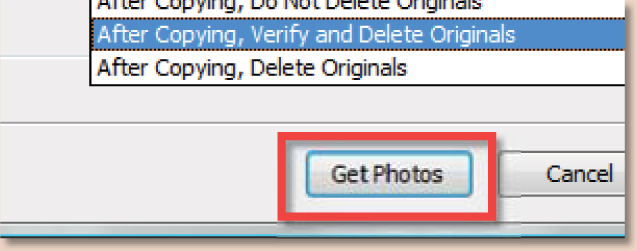
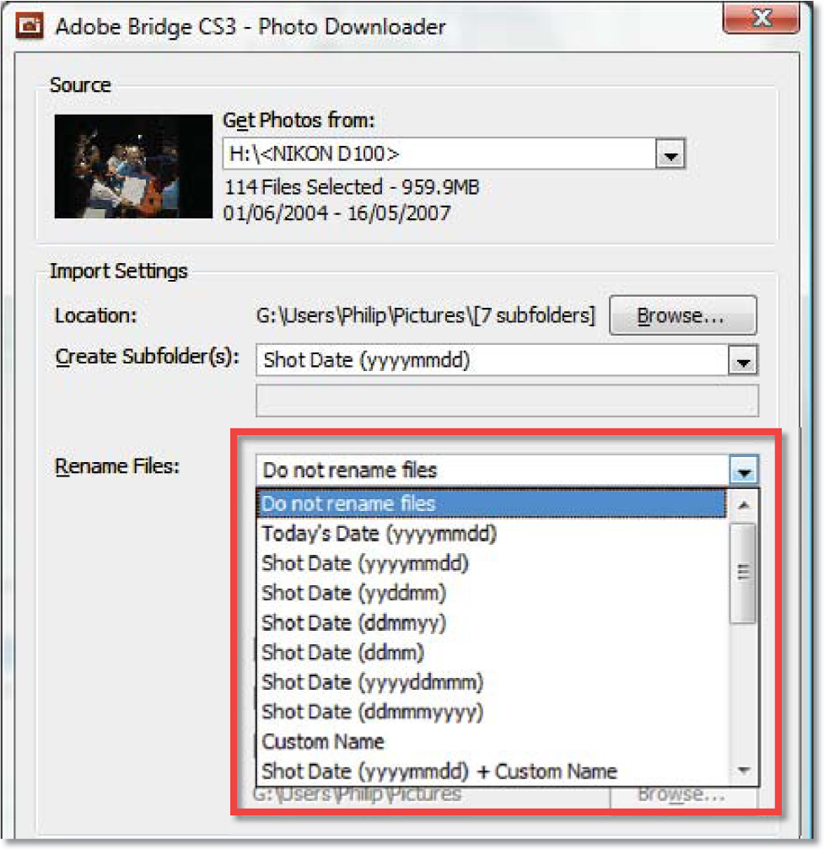
4. To help with finding your pictures later it may be helpful to add a meaningful name, not the labels that are attached by the camera, to the beginning of each of the images. You can do this by selecting an option from the Rename File drop-down menu and adding any custom text if needed. It is at this point that you can choose what action Elements will take after downloading the files via the Delete Options menu.

5. It is a good idea to choose the Verify and Delete option as this makes sure that your valuable pictures have been downloaded successfully before they are removed from the card.

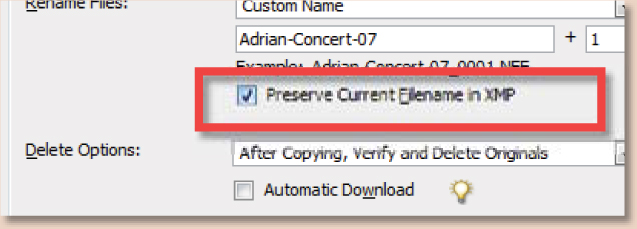
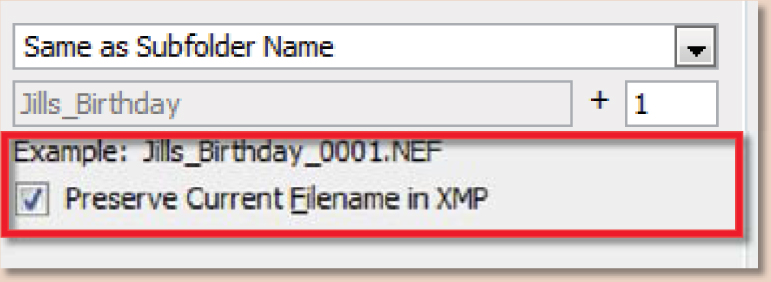
6. If you have elected to rename the files as they are downloaded then choosing to Preserve the Current File Name in XMP will mean that it is always possible to search for the specific file using the original name at a later date.
7. Clicking Get Photos will transfer your pictures to your hard drive – you can then catalog the pictures in the Organizer workspace. For more choices during the download process you will need to switch to the Advanced mode.
Advanced Dialog Options
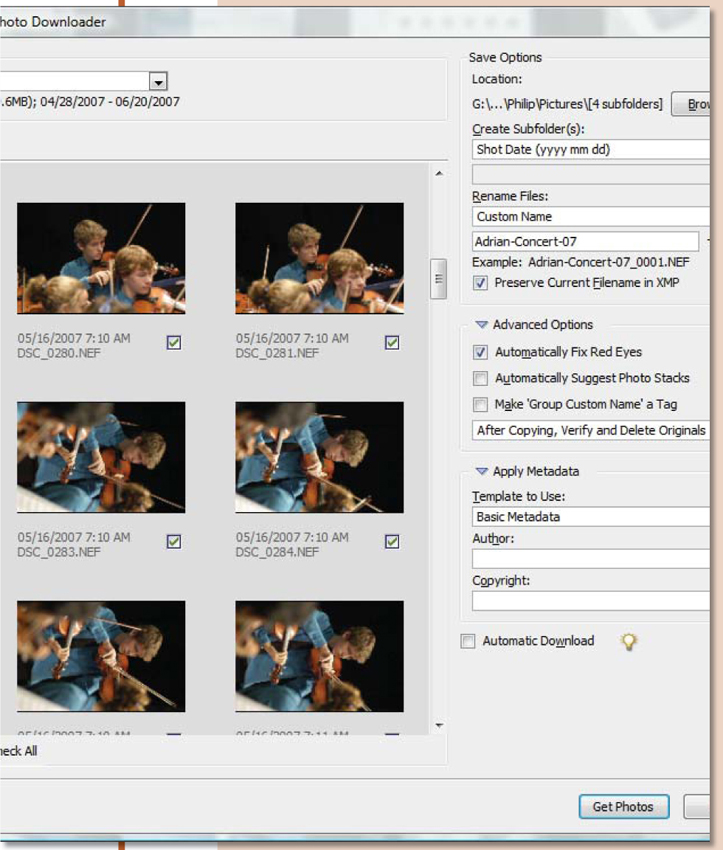
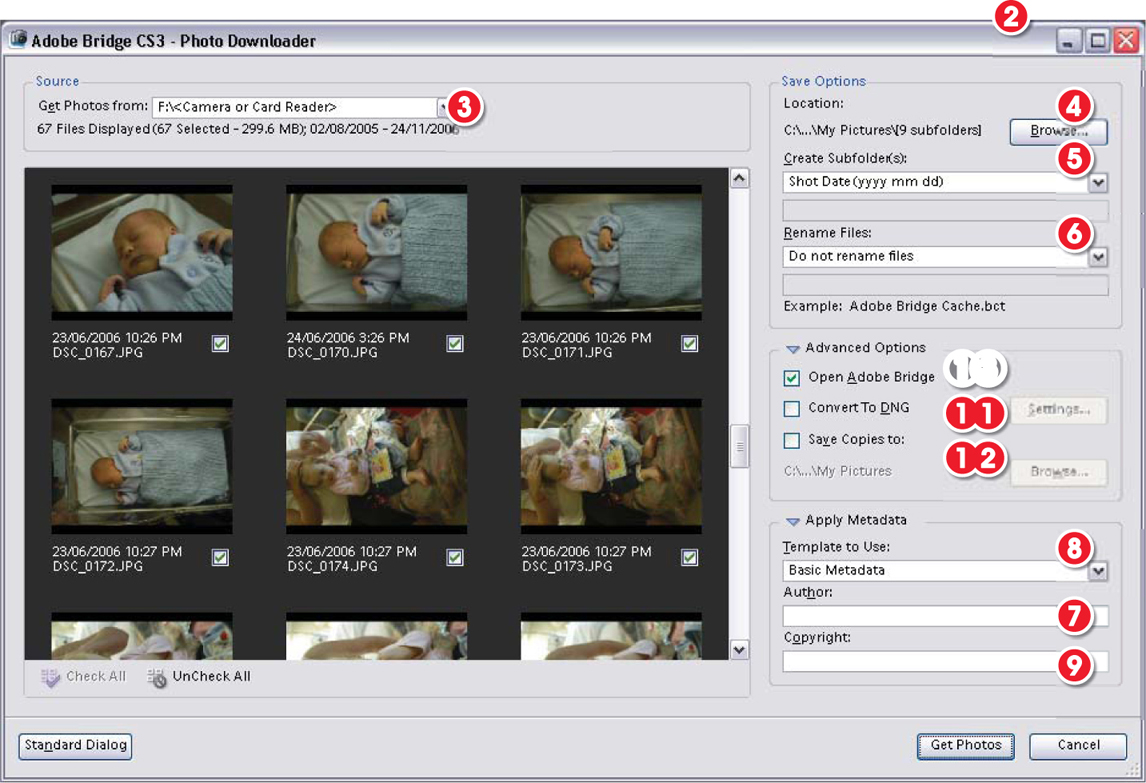
Selecting the Advanced Dialog button at the bottom left of the Standard mode window will display a larger Photo Downloader dialog with more options and a preview area showing a complete set of preview thumbnails of the photos stored on the camera or memory card. If for some reason you do not want to download all the images, then you will need to deselect the files to remain, by unchecking the tick box at the bottom right of the thumbnail.
Only files that are selected in Adobe Photo Downloader can be deleted from the camera. This means they have to be downloaded and added to the catalog (even if they’re already there from a previous download) before they are deleted.
The Advanced mode of the Photo Downloader contains the same Location for saving transferred files, Rename and Delete after importing options that are in the Standard dialog.
After downloading your pictures from the memory card, or the camera itself, you are given the option to delete the original files. This frees up the memory space on the card, readying it for further use.

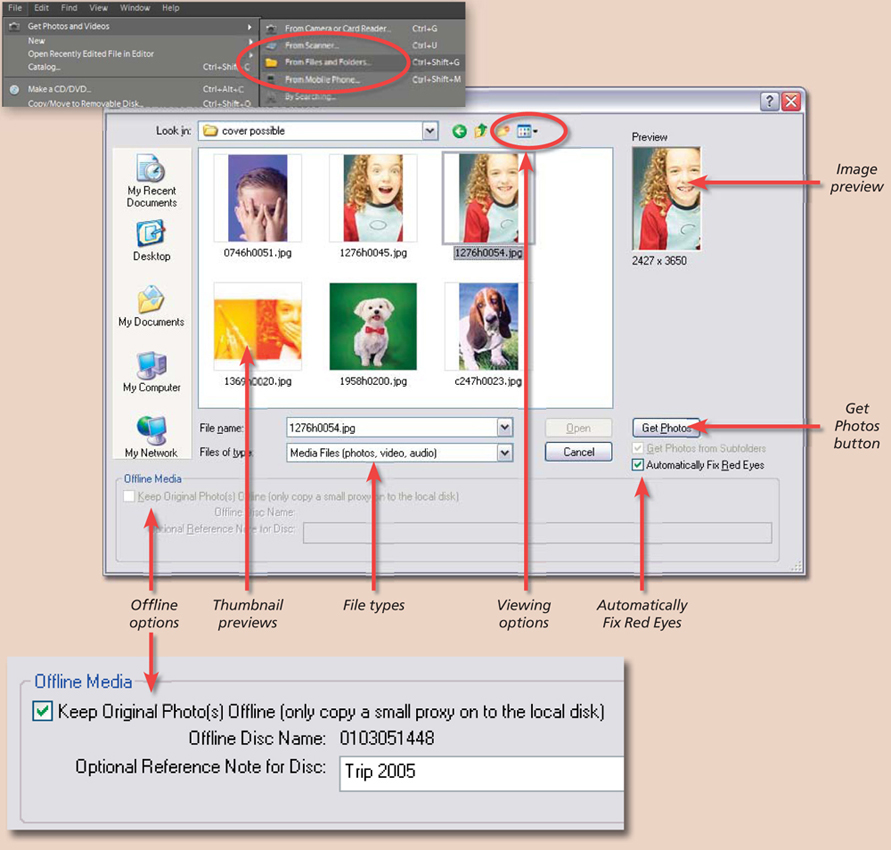
The From Files and Folders option allows you to preview thumbnail versions of existing images from the directories or folders on your computer.
The Offline Media options allow you to import small thumbnail versions of the pictures that you have stored on CD-ROMs, DVDs or other media that can be disconnected from your computer. Elements catalogs these pictures and allows you to search and organize the thumbnails just like any other picture.
Option 2: Loading raw files from an existing archive, disk or drive
Acting much like the File > Open option common to most programs, the Get Photos > From Files and Folders selection provides you with the familiar operating system browse window that allows you to search for and open pictures that you have already saved to your computer.
Though slightly different on Windows and Macintosh machines, you generally have the option to view your files in a variety of ways. Windows users can choose between Thumbnails, Tiles, Icons, List and Detail views using the drop-down menu from the top of the window.
When importing raw files that have been previously transferred to your computer you will only be able to view the images in thumbnail mode if the correct, or most up to date, CODEC has been installed. When this isn’t the case operating system file windows will display a collection of file icons (1) rather than a thumbnail preview of the photo (2).
The thumbnail option provides a simplified file browser view of the pictures on your disk and it is this way of working that will prove to be most useful for digital photographers, but keep in mind that some versions of operating systems will not be able to preview raw files as thumbnails unless the CODEC or special raw viewing software has been installed. After selecting the image, or images, you wish to import into the Photo Browser or Organizer, select the Get Photos button.
How to multi-select the files to import
To select several images or files at once hold down the Ctrl key whilst clicking onto the pictures of your choice.
To select a complete list of files without having to pick each file in turn click on the first picture and then whilst holding down the Shift key click on the last file in the group.
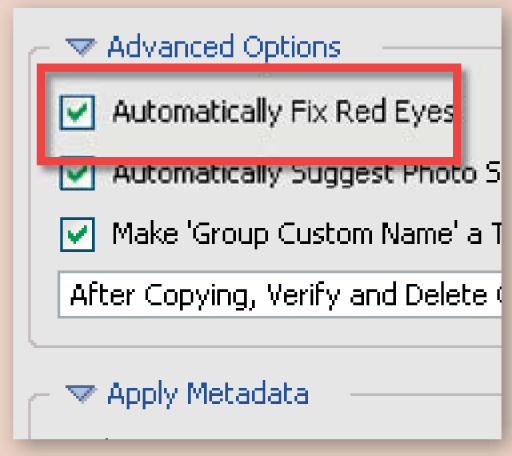
Automatically Fix Red Eyes – First introduced in Elements 4.0, this feature searches for and corrects any red eye effects in photos taken with flash. Photoshop Elements looks through the metadata of each image for the ‘flash-fired’ entry before locating and correcting the red eye problem.
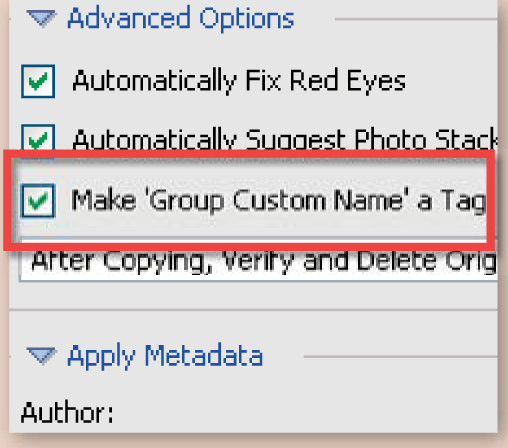
Make ‘Group Custom Name’ a Tag – To aid with finding your pictures once they become part of the larger collection of images in your Elements’ catalog, you can ‘group tag’ the photos as you download them. Adding tags is the Elements equivalent of including searchable keywords with your pictures. This task is normally handled once the photos are in the Organizer workspace but version 5.0 introduces a new automated way to add the same tag to all the photos downloaded in a single session. The tag name used is the same as the title added in the Rename section of the Photo Downloader utility.
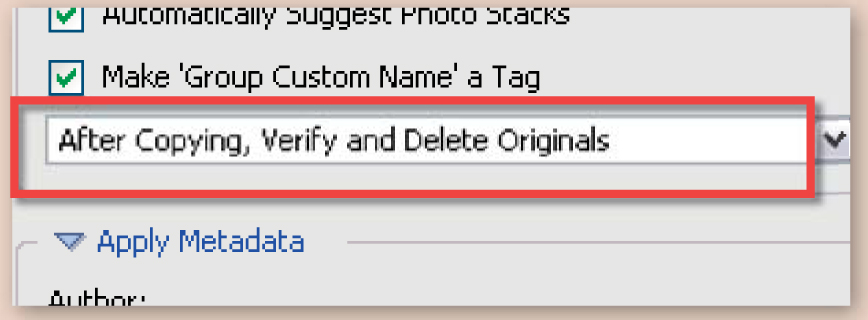
Delete/Verify options – Adobe Photo Downloader also provides a range of options for the action that is taken after the pictures have transferred from camera to the computer. It is possible to Copy and Delete, Copy, Verify and Delete or just Copy the files. In most scenarios the best option to choose is Copy, Verify and Delete. This ensures that after the files are transferred they are true replicas of the originals stored on the card, before deleting these documents to free up the memory ready for the next lot of photos.
Speed up your Elements workflow with these APD special options
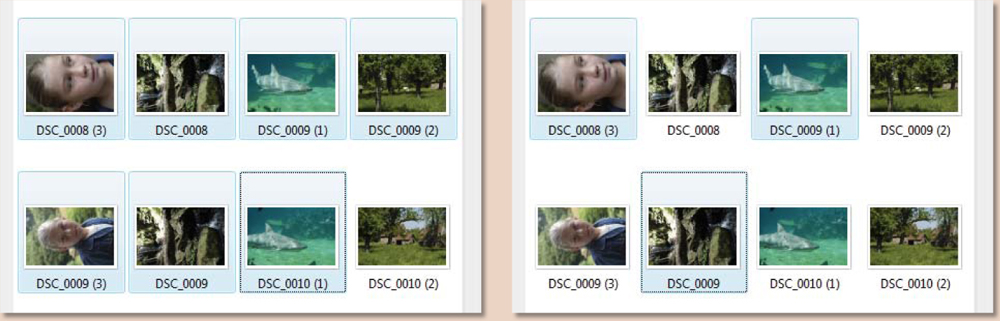
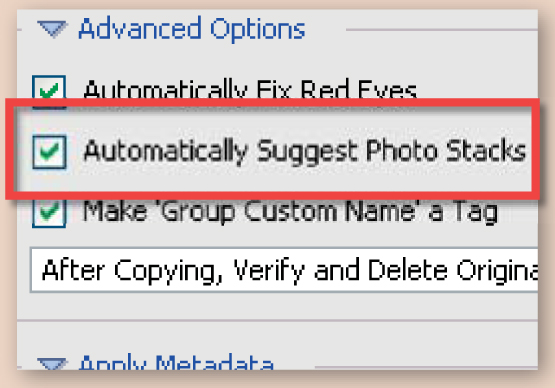
Automatically Suggest Photo Stacks – Select this option to get the downloader utility to display groups of photos that are similar in either content or time taken.
The user can then opt to convert these groups into image stacks or keep them as individual thumbnails in the Organizer.
Apply Metadata (Author and Copyright) – With this option you can add both author name and copyright details to the metadata that is stored with the photo. Metadata, or EXIF data as it is sometimes called, is saved as part of the file and can be displayed at any time with the File Info (Editor) or Properties (Organizer) options in Elements or with a similar feature in other imaging programs.

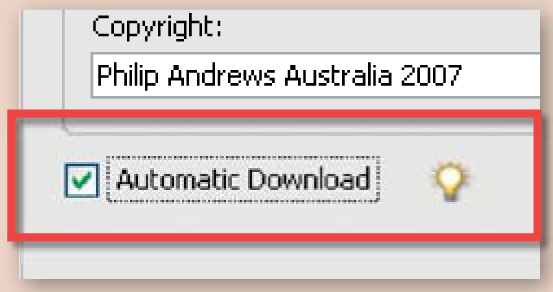
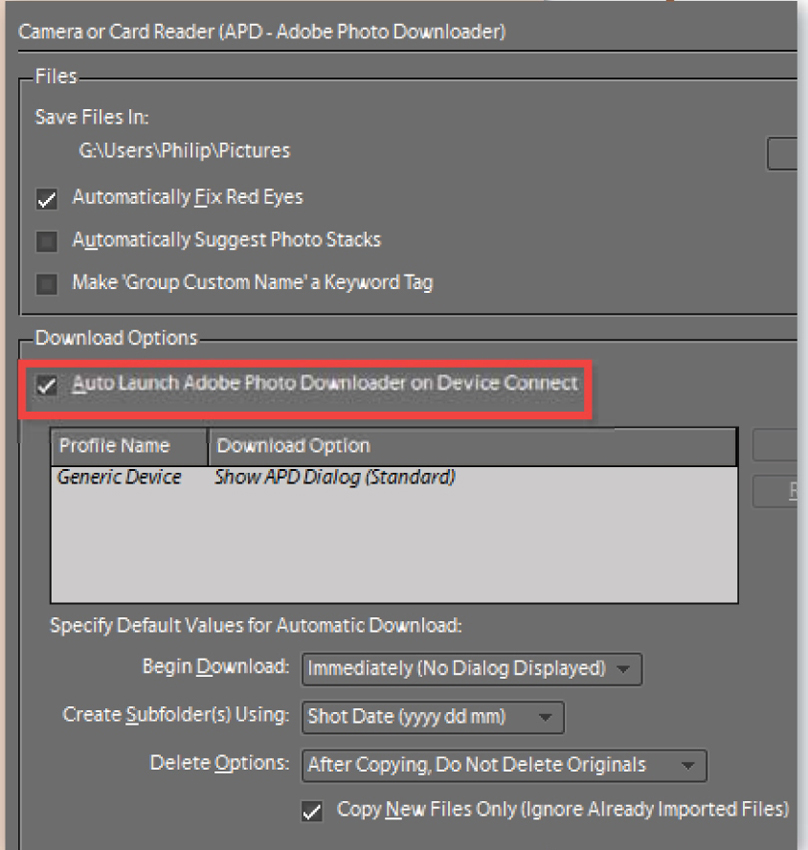
Automatic Download – Both the Standard and Advanced dialogs contain the option to use automatic downloading the next time a camera or card reader is attached to the computer. The settings used for the auto download, as well as default values for features in the advanced mode of the Photo Downloader, can be adjusted in the Organizer: Edit > Preferences > Camera or Card Reader dialog.
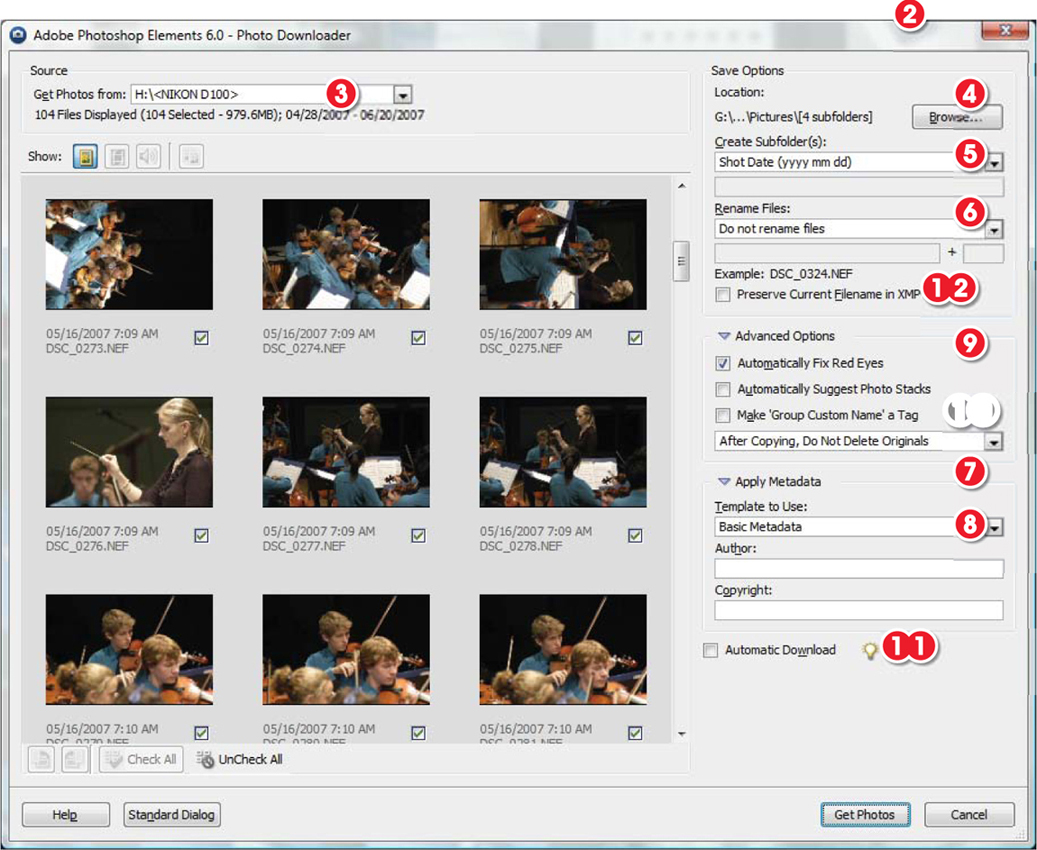
A closer look at Adobe Photo Downloader for Photoshop Elements
Adobe Photo Downloader features and settings:
1. Standard Dialog
2. Advanced Dialog
3. Source folder, drive or card reader location
4. Save or transfer location
5. Create subfolders option
6. File renaming settings
7. Apply simple metadata details such as author and copyright statements
8. Apply pre-saved metadata templates
9. Fix red eyes, suggest Photo Stacks and add group tags
10. After transfer verify and delete options
11. Auto Download setting
12. Preserve current filename in XMP

A closer look at Adobe Photo Downloader for Bridge 2.0 (Photoshop CS3)
Adobe Photo Downloader features and settings:
1. Standard Dialog
2. Advanced Dialog
3. Source folder, drive or card reader location
4. Save or transfer location
5. Create subfolders option
6. File renaming settings
7. Apply simple metadata details such as author and copyright statements
8. Apply pre-saved metadata templates
9. Apply copyright statement
10. After transfer verify and delete options
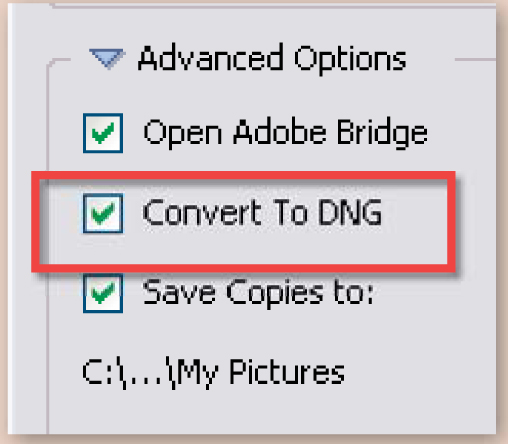
11. Convert to DNG
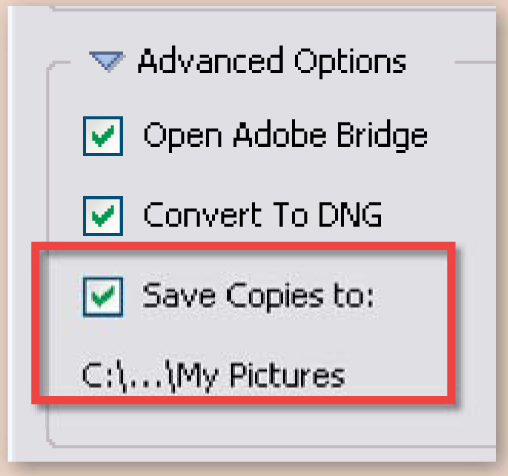
12. Save extra copies to selected drive/folder (back up during transfer)
13. Display transferred files in Bridge
Transfers with APD and Bridge (Photoshop CS3)
The Adobe Photo Downloader is included with Photoshop CS3 and Bridge. Like the version found in Photoshop Elements APD is primarily responsible for transferring newly captured camera files from memory card or camera to computer. There are slight differences between the two versions of APD (see the previous page for a comparison), but both utilities contain a Standard or Basic dialog for simple and quick transfers and a more sophisticated version called the Advanced Dialog.
Step by step: Bridge and the Adobe Photo Downloader
1. Select the Get Photos from Camera option from the File menu inside Bridge 2.0. Next you will see the new Adobe Photo Downloader dialog. The utility contains the option of either Standard or Advanced modes. The Advanced option not only provides thumbnail previews of the images stored on the camera or card, but the dialog also contains several new features for sorting and managing files as they are downloaded. But let’s start simply, with the options in the Standard dialog.

2. Standard mode: To start you need to select the source of the pictures (the location of the card reader or camera). In the Standard mode all pictures on the card will be selected ready for downloading. Next set the Import Settings. Browse for the folder where you want the photographs to be stored and if you want to use a subfolder, select the way that this folder will be named from the Create Subfolder drop-down menu. To help with finding your pictures later it may be helpful to add a meaningful name, not the labels that are attached by the camera, to the beginning of each of the images. You can do this by selecting an option from the Rename File drop-down menu and adding any custom text needed. There are also options to open Bridge after the transfer is complete and convert to DNG or save copies of the photos on the fly (great for backing up images). Clicking the Get Photos button will transfer your pictures to your hard drive – you can then organize the pictures in the Bridge workspace. For more choices during the download process you will need to switch to the Advanced mode.

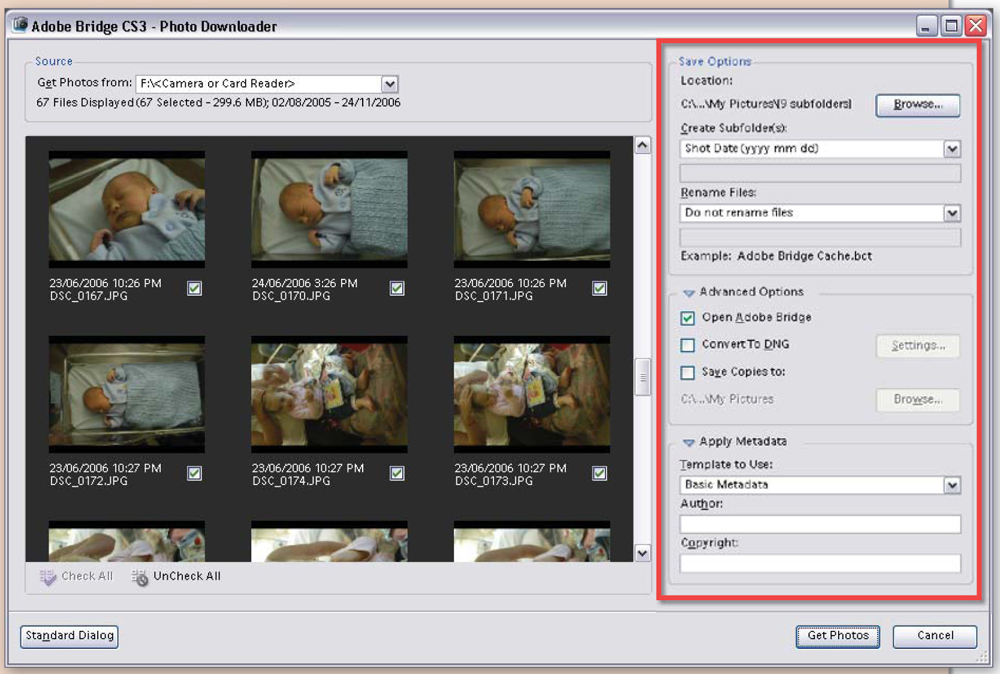
3. Advanced mode: Selecting the Advanced Dialog button at the bottom left of the Standard mode window will display a larger Photo Downloader dialog with more options and a preview area showing a complete set of thumbnails of the photos stored on the camera or memory card. If for some reason you do not want to download all the images, then you will need to deselect the files to remain, by unchecking the tick box at the bottom right of the thumbnail. This version of the Photo Downloader has the same location for saving transferred files, rename, convert to DNG and copy files options that are in the Standard dialog. In addition, this mode also contains the ability to add metadata to the photos during the downloading process. You can select a predefined metadata template from the drop-down menu or manually add in Author and Copyright details. Pressing the Get Photos button will start the download process.
Customizing transfers in Bridge 2.0
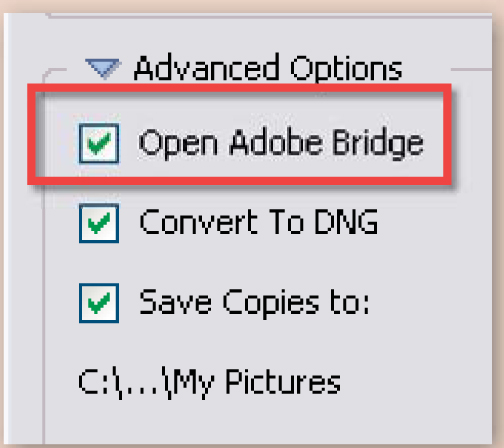
Open Adobe Bridge – When using the Adobe Photo Downloader from inside Bridge you have the option of opening Bridge and displaying the transferred files in a new window.
Convert to DNG – Adobe’s Digital Negative format or DNG is an open source raw file format designed to be used as the primary file type for archiving. To help reduce the steps involved in managing the thousands of photos that are transferred each year, the Adobe team has included an automatic conversion option in APD. When selected, the picture files are converted from their native raw format (i.e. .NEF, .CRW) to the DNG automatically. From this point onwards they can still be processed as standard raw files.
Automated backup – The ‘Save Copies to’ option provides the ability to automatically store a separate copy of each downloaded file as a primary backup. This saves having to manually back up photos at a later date or transfer the files twice from the camera or memory card – once to the drive used for processing and a second time to the backup device. It is important to note that even when the Convert to DNG setting is selected the file type of the photos copied is the original capture format and not the converted DNG documents.
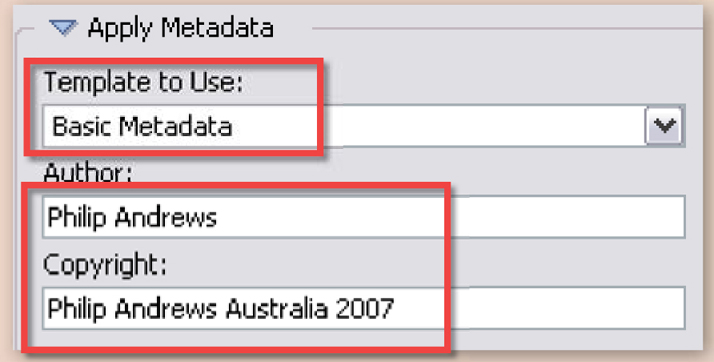
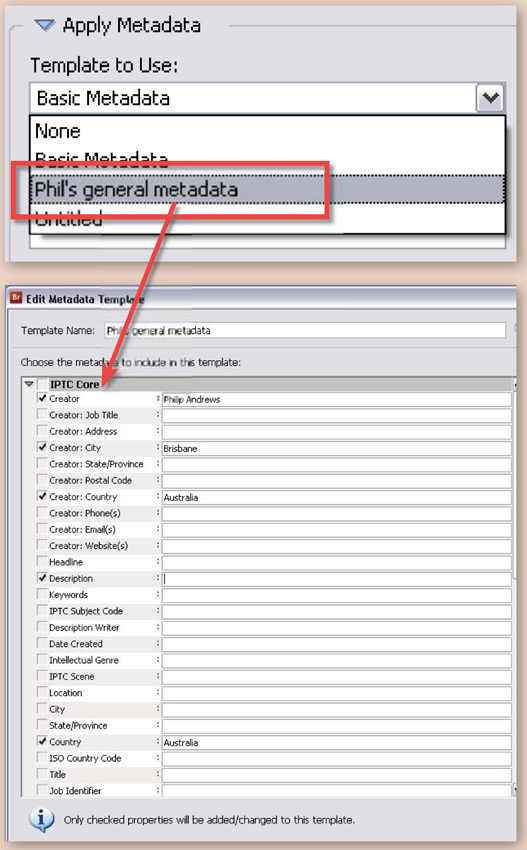
Apply Basic Metadata – Like the Photoshop Elements version of APD, the Apply Metadata section contains an option for inserting Author and Copyright information quickly and easily. To display these input fields you will need to select the Basic Metadata option in the Template to Use drop-down menu. Also listed on this menu are any other metadata templates you have created and saved, either in Bridge (via the Metadata panel) or in Photoshop (with the File Info dialog).
Earlier versions of Photoshop and Bridge
Photoshop CS2 users (and earlier) don’t have the option of transferring their images with the Adobe Photo Downloader. Instead they will need to use an alternative method of importing the pictures from card or camera. Bridge 1.0 (which ships with Photoshop CS2) is essentially a browser program and unlike Lightroom it does not contain a built-in download or import feature. Bridge’s job is to provide preview and management options for files that have already been transferred to the computer, so Photoshop CS2 users will have to employ either:
• a manual method of transferring files using the computer’s operating system
• or a camera-specific download manager such as Nikon Transfer.
Once the files have been downloaded they can be managed and sorted using the features in Bridge 1.0.
How to: Disable the Adobe Photo Downloader In Photoshop Elements
1. Select Organizer: Edit > Preferences > Camera or Card Reader.
2. Elements 6.0/5.0 users should deselect ‘Auto Launch Adobe Photo Downloader on Device Connect’ option. Elements 4.0 users should deselect ‘Use Adobe Photo Downloader to get photos from Camera or Reader’.
Enable the Adobe Photo Downloader In Photoshop Elements
1. Select Organizer: Edit > Preferences > Camera or Card Reader.
2. Select either the Auto Launch Adobe Photo Downloader on Device Connect’ or ‘Use Adobe Photo Downloader to get photos from Camera or Reader’ options.
Both the Photoshop Elements and Photoshop/Bridge versions of Adobe Photo Downloader contain sophisticated renaming options that can be applied to photos as they are being transferred from card to computer.
Renaming options in APD
One of the best ways to ensure that you can find your files again after downloading is to take the time to name them with a descriptive title. Thankfully tools such as Adobe Photo Downloader and the Import options in Photoshop Lightroom contain a wide range or renaming options which can be put to great effect when transferring your raw files.
As we have already seen, slightly different versions of the transfer utility are available in Photoshop and Photoshop Elements. Both versions have a Standard and an Advanced dialog (switch between using the button in the bottom left) which contain a drop-down Rename Files menu. The renaming options revolve around three key pieces of data – the current date, the shot date, a custom name and a subfolder name. Each menu entry uses a different combination or sequence of these details. The Photoshop/Bridge version of APD contains 21 different naming formats. Elements users have a smaller number of choices, 14, but these should still provide enough options for most users. Unfortunately APD doesn’t include the option to create your own customized naming schema, or Template, as is available in Photoshop Lightroom’s own transfer utility.
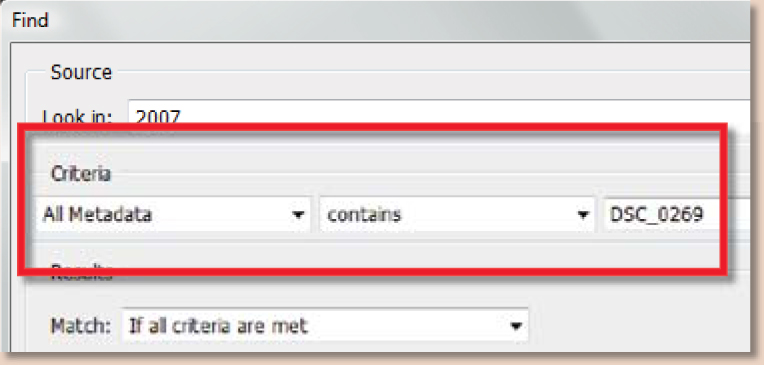
It is good to see that when dates are part of the renaming process Adobe has thought to include both US- and UK-based date formats. It is also very handy to have the option to include the original filename stored in the XMP data associated with the photo (Photoshop/Bridge only). XMP data is searchable via the Find option in Bridge’s Edit menu.
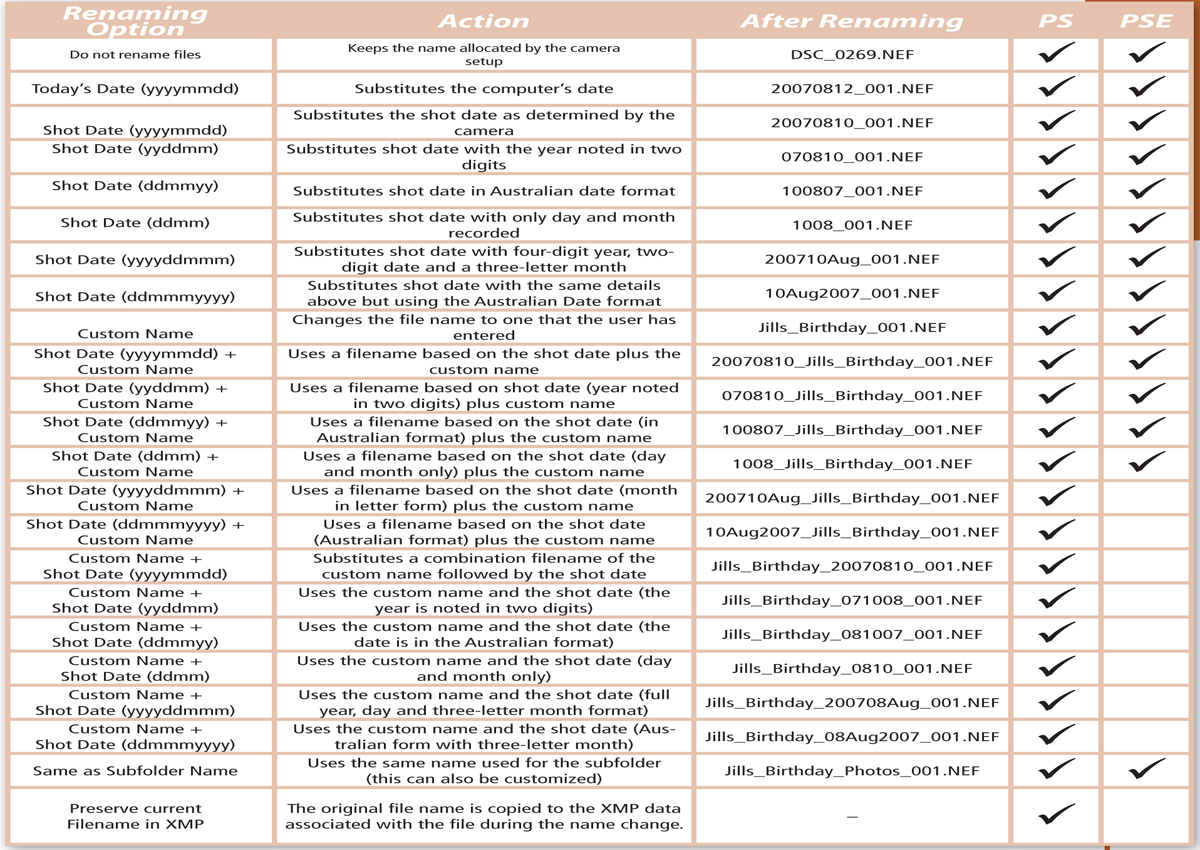
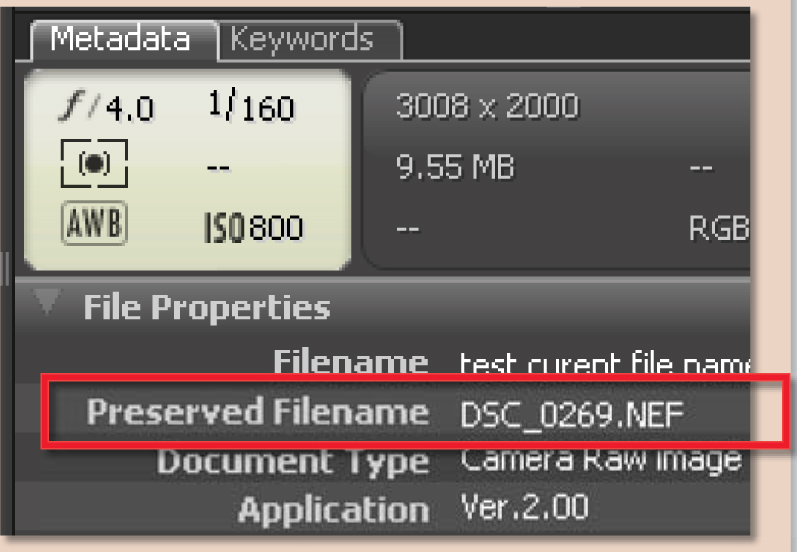
Renaming conditions for the example above – Original filename: DSC_0269.NEF.
User applied custom name: Jills_Birthday.
User applied subfolder name: Jills_Birthday_Photos
Number sequencing (001, 002, 003 etc.): Automatically applied by the download utility
Step by step: Using a Subfolder name
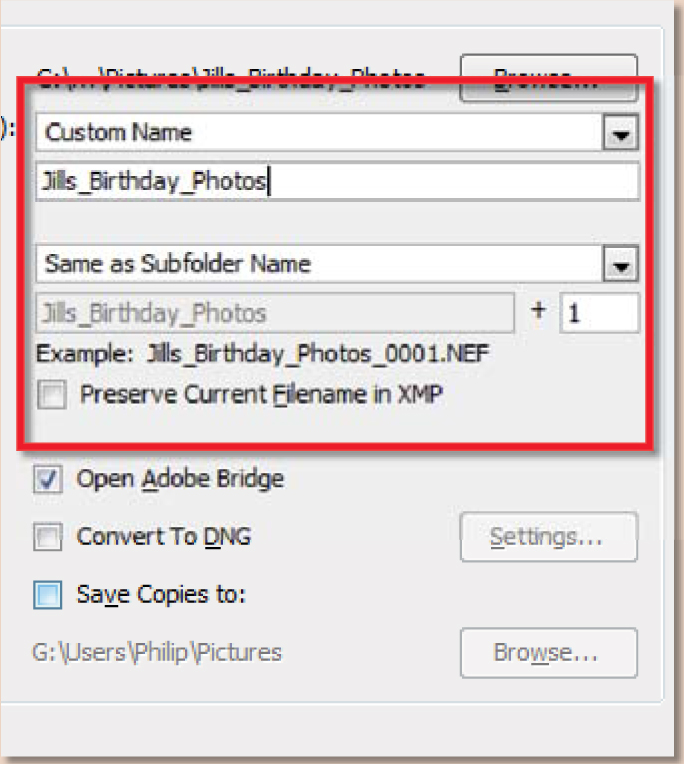
1. To create some consistency across your naming scheme some photographers will use the same title for both the download folder and the images contained within it. To do this start by selecting the Custom Name option in the Create Subfolder drop-down menu.
2. Next input the title you wish to use in the text box directly below the Custom Name entry. This action sets the name of the folder that will be created on your hard drive and used to store the transferred photos.
3. Now select the Same as Subfolder Name entry from the options in the Rename Files drop-down menu. APD will automatically insert the Subfolder custom name in the Rename Files text box. You still have the option to choose a different starting value for the sequential number by inputting this number in the box to the right of the text.
4. Finally, double check that the naming scheme provides the results that you expect by looking at the Example entry at the bottom of the Rename Files area. This text should display the subfolder custom name, the sequential number and the file extension.
Step by step: Using a Custom name
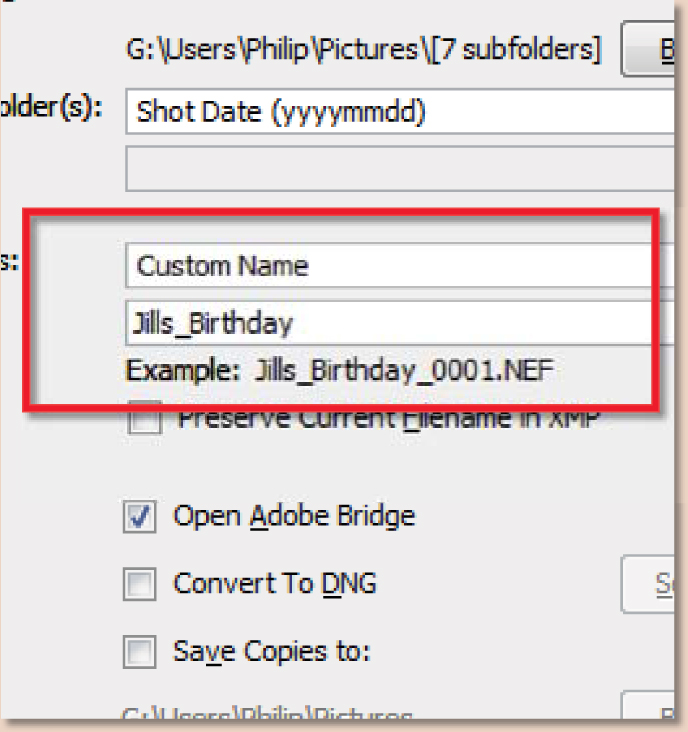
1. To substitute a custom name for the one allocated by the camera choose the Custom Name option from the Rename Files drop-down menu.
2. Next input the title you wish to use in the text box directly below the Custom Name entry. At this point you can also add a starting number for the numbering sequence that will be used if more than one image is to be renamed. Here the value is set to 1.
3. Double check that the naming scheme provides the results that you expect by looking at the Example entry at the bottom of the Rename Files area. This text should display the custom name, the sequential number and the file extension.
Step by step: Embedding the original filename in the XMP data (Photoshop/Bridge)
1. In some circumstances it may be necessary to retain the original filename but not use it as the photo’s title. For these times select the Preserve Current File Name in XMP option at the bottom of the Rename Files section of the dialog.
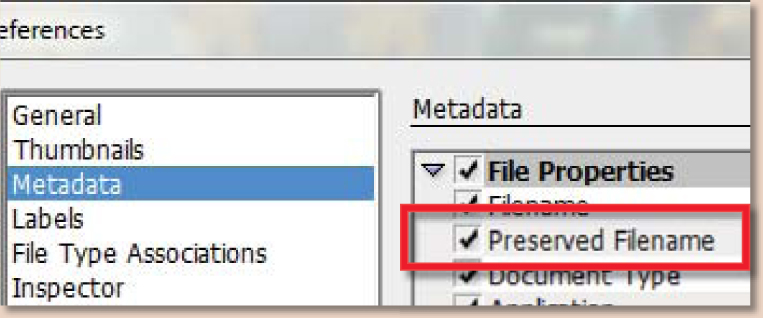
2. With this option selected the original filename is stored in the metadata of the picture file. To view the original name start by choosing Edit > Preferences. In the Metadata section of the Preferences dialog locate and select the File Properties group of data. Next, make sure that the Preserved Filename property is also selected. Click OK to apply the changes.
3. Now display the Metadata panel inside Bridge by selecting Window > Metadata panel. Scroll through the metadata headings until you locate File Properties. Directly under the Filename entry should be the Preserved or original filename.
4. To locate images based on their original filename (now embedded in the XMP data for the photo) navigate to the images folder that contains the file. Next choose Edit > Find to display the Find dialog. Browse for the correct folder for searching if it is not already listed in the ‘Look in’ text box. Choose the All Metadata entry from the leftmost dropdown menu in the Criteria section of the dialog. Leave the Contains entry in the middle box and then type in the filename to search for in the last box.
5. Next choose the Match criteria, whether to include all the subfolders and nominate if you want to search through non-indexed files. The last step requires you to click either the Find button, to display the results in a new Bridge Content window, or choose the Save As Collection option which produces the results as a defined search or Collection.
Adobe Photoshop Lightroom
Being a complete raw workflow product you would expect that Lightroom would cater for the card/camera to computer part of the process and you would be right. In fact, of all the import or download options we have looked at here Lightroom provides some of the most sophisticated features and functions that are well suited for the job.
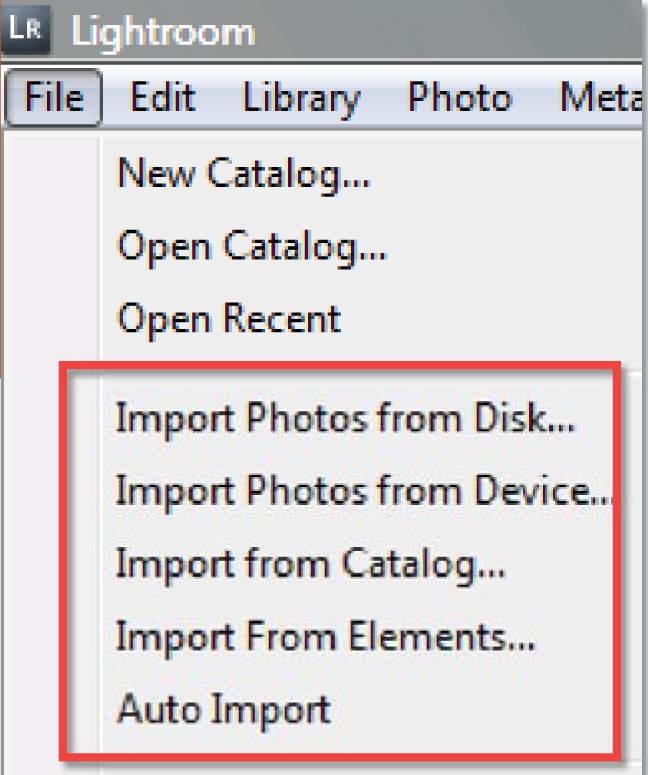
Photoshop Lightroom contains many of the download features we have already looked at with APD but in a slightly different format. Lightroom contains a range of options in the File menu that can be used to start the Import process.
One key area that the both Adobe engineers and countless public beta testers have worked on is the Lightroom Library module. Designed to make managing your many raw files a breeze, this module also contains no less than five different import features. Getting this part of the workflow so that it suits the working photographer was a key concern for the development team and many of the ideas first seen here have found their way into other transfer utilities.
Rather than simply providing a means to transfer files from camera/memory card to hard drive, the File > Import entries contain options for renaming and adding customized metadata as well.
Several different options are available when it comes to downloading files into Lightroom. You can opt for the traditional route of transferring the photos from the memory card or camera to a Lightroom library, source images from existing folders on your computer, import pictures from a Lightroom Catalog that you made earlier, convert a Photoshop Elements Catalog to the Lightroom format, or set up Auto Import options which transfer files in a designated way to a specific area when a card is inserted or camera connected.
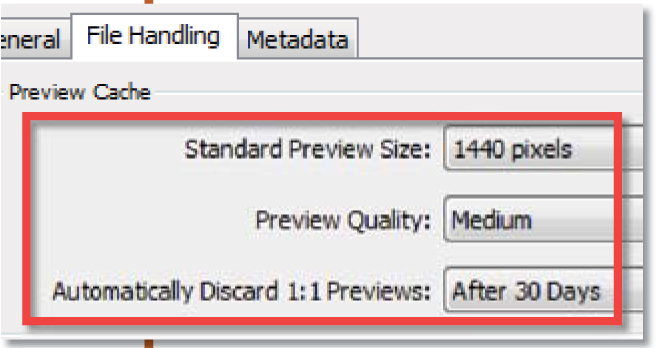
The size and quality of the standard previews in Lightroom can be adjusted using the settings in the File Handling section of the File > Catalog Settings.
In some ways the import process in Photoshop Lightroom is similar to that involved with Photoshop Elements. As well as transferring the files from card/camera to computer, the images are also registered as part of a database that each program uses for management purposes. With Elements the database underpins all the activities in the Organizer workspace, whereas in Lightroom the database is the foundation of the functions in the Library module of the program.
During the transfer and database creation process, Lightroom imports all the metadata associated with the image and also creates three different levels of preview thumbnail. The first is low resolution and is usually drawn from the camera preview. Next is an intermediate preview, the size and quality of which is determined by the settings selected in the Preview Cache section of the File Handling part of the File > Catalog Settings. Lastly a full 1:1 preview can be generated on demand when needed.
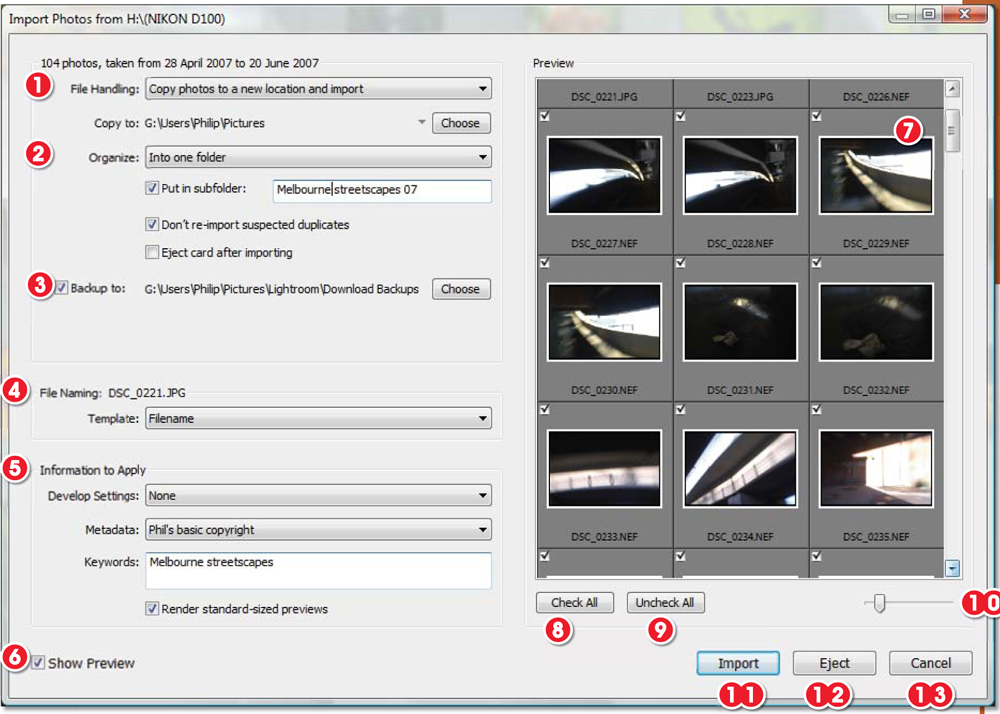
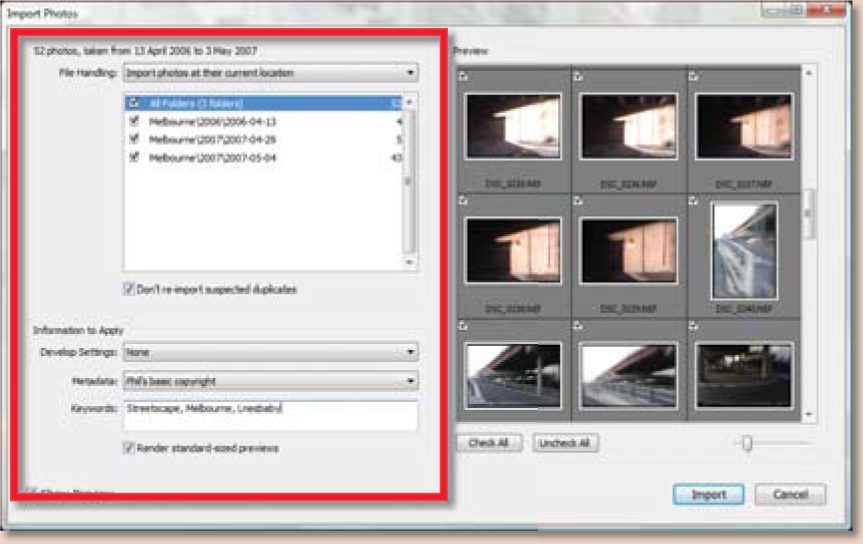
The Lightroom transfer options center around the Import dialog which contains the following features and controls:
1. File handling and location
2. Transfer organization
3. Backup options
4. File naming options
5. Metadata application
6. Display previews
7. Photo previews
8. Check All images
9. Uncheck All images
10. Preview size
11. Import selected thumbnails
12. Eject camera or camera card
13. Cancel
A slightly different dialog is used for importing files that have already been transferred to your computer. The dialog provides a subset of the features found in the more sophisticated window that is associated with photo downloading.

Step by step: Lightroom – Import Photos from Device
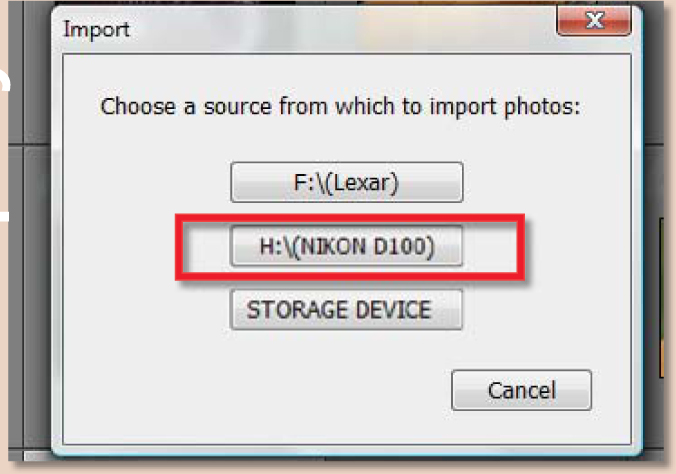
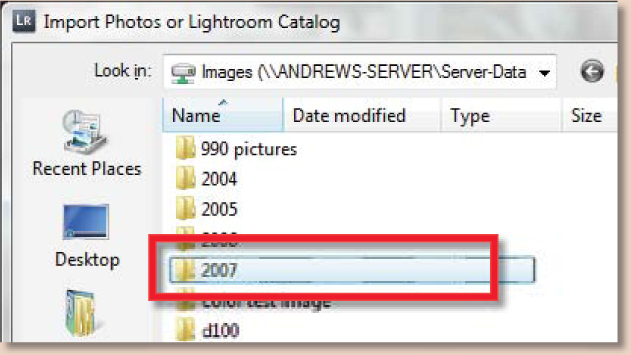
1. After selecting the File > Import Photos from Device option, Lightroom displays an Import dialog listing the various device sources currently available on you computer. This part of the process may be bypassed if you select the Lightroom option from the AutoPlay dialog which is displayed when first inserting a card into a reader or attaching a camera.
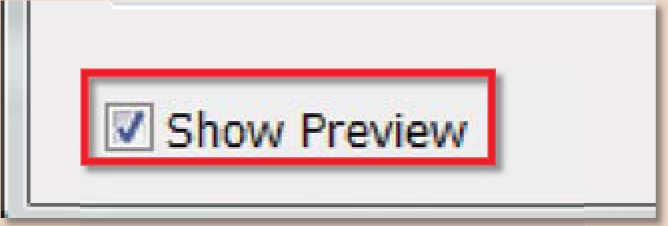
2. Once the source has been selected Lightroom displays the Import Photos dialog. To display thumbnails of the images contained on the card make sure that the Show Preview option is selected. Next, using the scroll bar on the right of the previews review the images, deselecting those that you don’t want to import.
3. Now working from the top left of the window start to adjust the settings that will be used for the download. Start by choosing between straight copy to a new location or copy and convert to DNG during the Import. Also choose the folder where the images will be copied to and the way that the imported files will be organized (by shot dates or grouped in one folder).

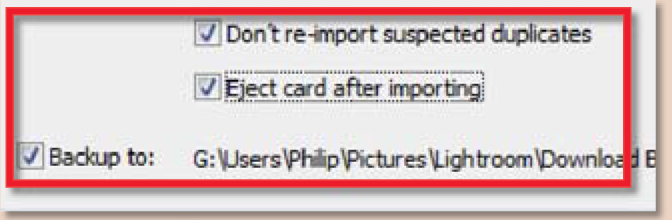
4. In the next group of settings choose what action to take if you are trying to inadvertently import images that already exist in the Catalog, whether to eject the memory card after the transfer is complete and where to back up duplicate copies of the transferred files.
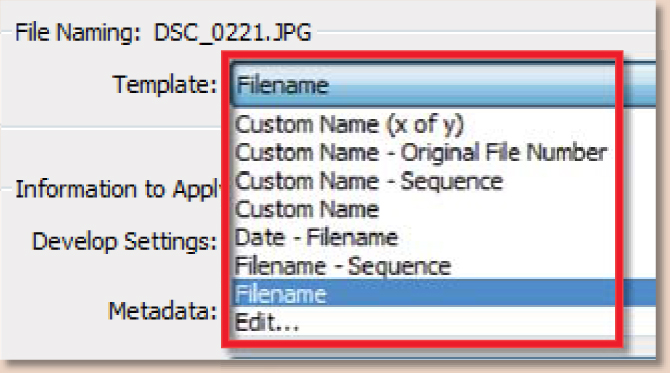
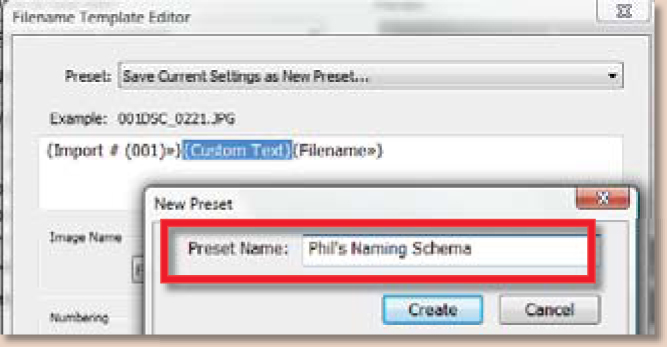
5. As we have already seen in the discussion surrounding naming options in APD, selecting a suitable naming strategy in the transfer process can really help when managing photo files at a later date. The File Naming section of the Import dialog provides many of the naming options available in APD with the added inclusion of a custom edit feature. Selecting Edit from the dropdown menu options opens the Filename Template Editor window, where you can mix and match naming ‘tokens’ to create your own naming schema. The results can then be saved as a new name preset and selected from the Filename menu.
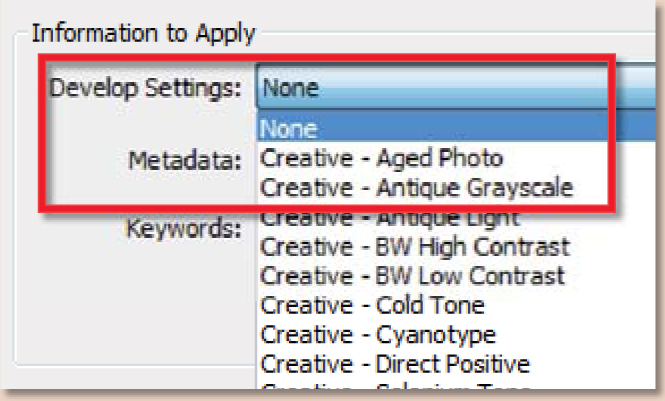
6. The next part of the dialog contains options that can be applied to the images as they are being transferred. The Develop Settings are a list of raw processing presets (some supplied with Lightroom, others saved by the user in the Develop module) that can be applied to the photos on the fly. Use this option if you have a saved preset that suits the group of photos that are being imported.
7. Metadata too can be applied to the downloading pictures. Like the Develop Settings, pre-saved metadata, created with the New and Edit Presets options, can be automatically added to transferred images.

8. Finally the Keywords section provides the opportunity to apply specific keywords associated with a particular shoot or group of photos. Use commas to separate individual keyword headings. Hierachies of keywords can also be added using the ‘>’ as separator such as Places > America. Strategies for keyword selection are detailed in Chapter 13 of the book.

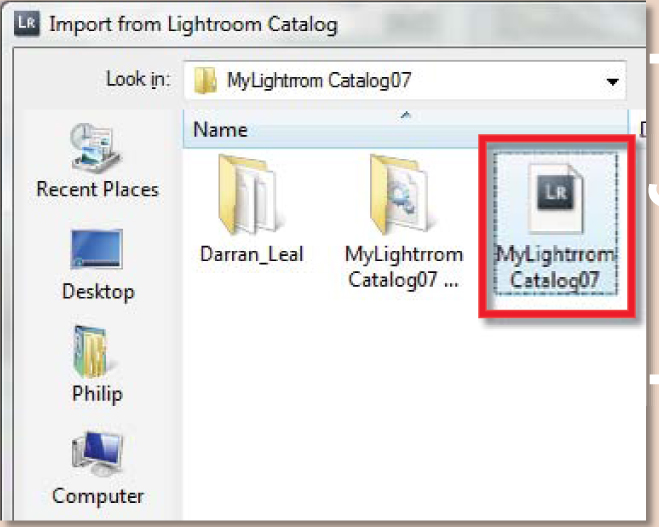
Step by step: Lightroom – Import Photos from Catalog
1. The File > Import Photos from Catalog option allows for the importation of existing Lightroom catalogs into the program. After selecting the option the standard Import Photos window is displayed. If any of the photos attempted to be downloaded are already in the current catalog then the dialog displays a menu of possible actions to take, including replace settings, metadata and the raw files or do nothing.
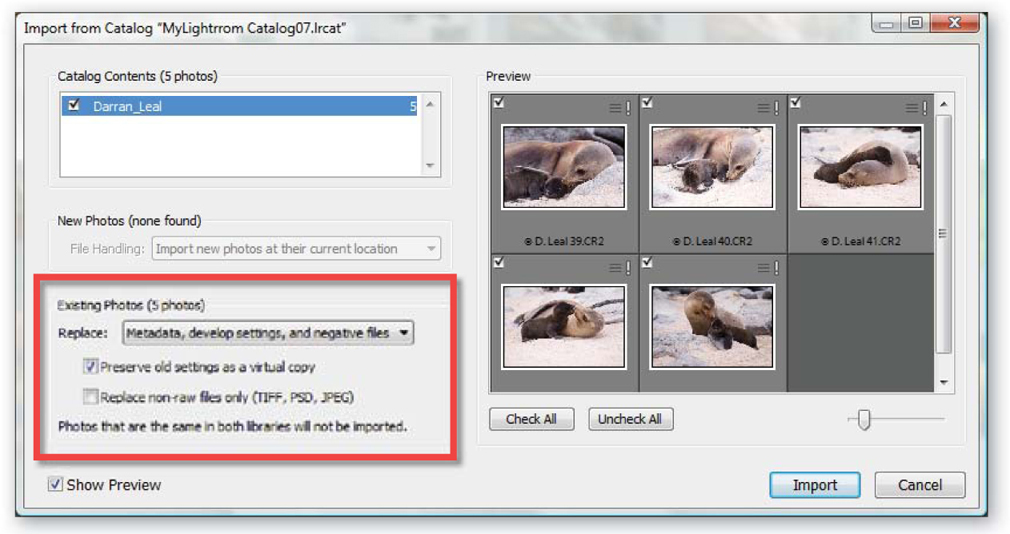
When duplicate photos exist in a Lightroom Catalog that you are importing, the program displays a range of Existing Photos options to help deal with the situation. You can choose to do nothing, replace the existing photos and their Develop and Metadata settings with the downloaded photos or just append the Metadata and Develop settings.
Step by step: Lightroom – Import Photos from Elements
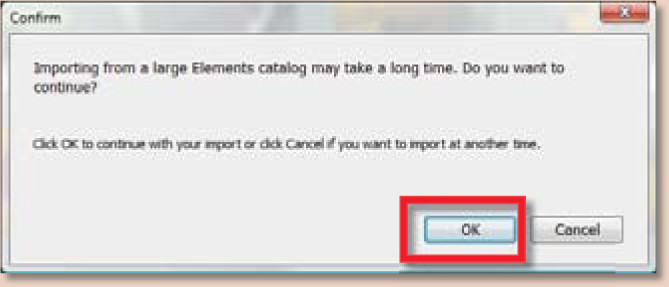
1. Like Lightroom, Photoshop Elements creates a catalog of its photos when they are imported into the program. When migrating from Elements Lightroom users can import the Elements catalog directly. After selecting the File > Import Photos from Elements option, Lightroom displays a warning that the process can be lengthy.
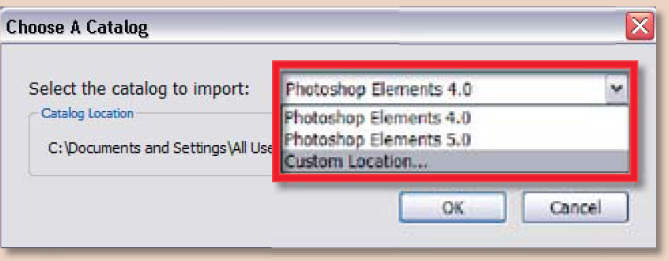
2. After clicking OK to the warning the Choose a Catalog dialog prompts you for a catalog to import. Either select from those listed or search via the Custom Location option.
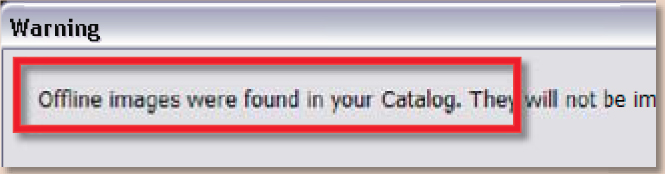
3. Before starting the import Lightroom checks the Elements Catalog. The user is notified if errors are located in the catalog file or if offline images (those referenced in the Elements catalog but stored on removable media) are found. Click OK to continue.

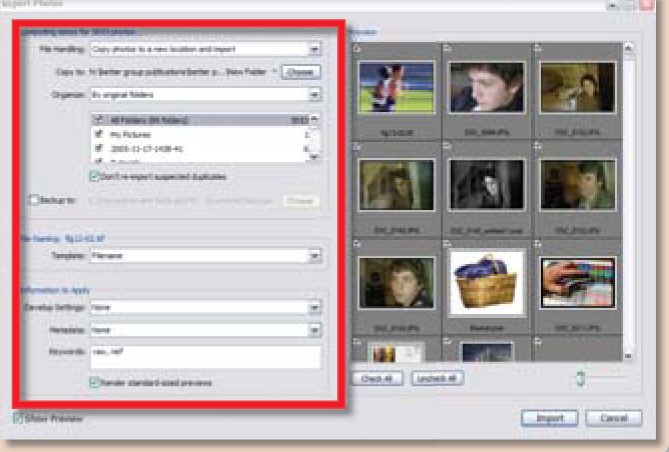
4. With the preliminaries out of the way Lightroom then displays the standard Import Photos dialog, allowing the user to determine the settings used for the catalog conversion.
5. After clicking Import, Lightroom starts the conversion process. This certainly can take some time depending on the size of the Elements catalog and the processing speed of the computer.
Step by step: Lightroom – Import Photos from Disk
1. If your preferred workflow makes use of another download utility then select the File > Import Photos from Disk option to include the images in your Lightroom catalog.
2. Choose the folder of images that you want to import from the file dialog that is displayed. Remember that you will only see previews of your raw files in these OS windows if you have correctly installed the CODEC for the file. After selection click the Choose Selected option to import.
3. Lightroom then displays the Import Photos dialog, where you can adjust the settings to be used to include the pictures in the catalog.
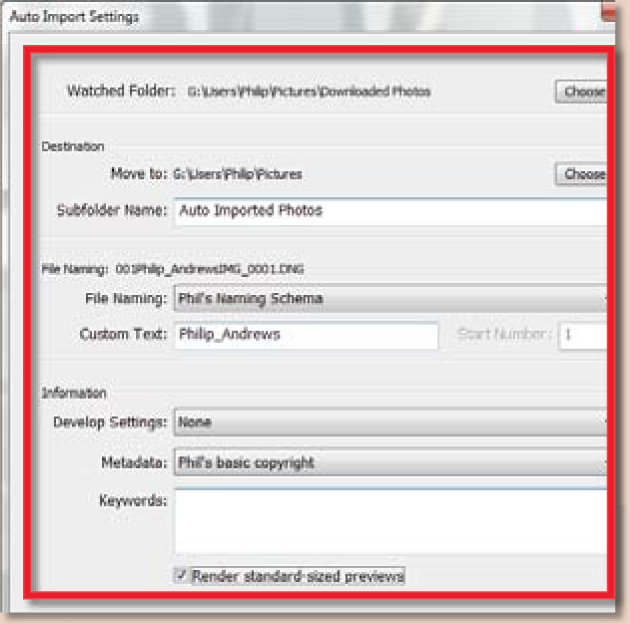
Step by step: Lightroom – Auto Import
1. The last way to get you photos into Lightroom is the File > Auto Import option. The feature works by automatically importing files that are saved to a specific directory called the ‘watched folder’. Using this option is a two-step process. Firstly, the import options must be set up by selecting File > Auto Import > Import Settings and then adjusting the options in the dialog box. Here you can choose the folder to be watched, the destination of the import, file naming strategies, auto applied development settings, and metadata and keywords that are attached to the files as they are transferred.
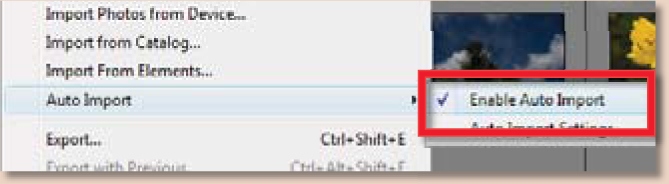
2. Next the feature is activated by selecting File > Auto Import > Enable Auto Import menu entry. Now any files saved to the watched folder will automatically be imported into Lightroom.

3. To deactivate the feature select File > Auto Import > Enable Auto Import for a second time.
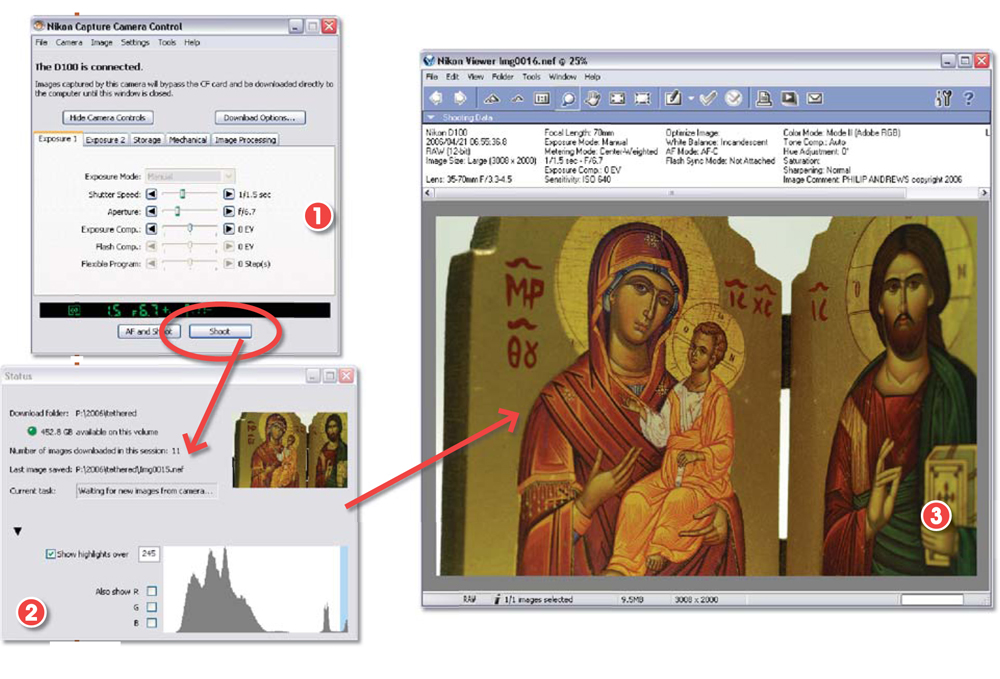
Shooting tethered – capture and download in one step
For those photographers who are shooting with their camera attached to the computer, or tethered as it is usually known, the download process takes a different form. Rather than being a completely separate activity that occurs after capture, most tethered systems bypass the camera’s memory card and save the photos directly to the computer’s hard drive. This means that there is generally a small time lag between the moment when the photo is captured and when it first appears on screen. Systems such as Nikon Capture use three separate windows/utilities for:
1. adjusting camera settings and tripping the shutter,
1. tracking the download or transfer progress from camera to hard drive, and
1. previewing the resultant photo on screen.
Because the capture and download occurs in one action it is important to nominate the folder used for transferring newly photographed images before the shooting session commences. Depending on the software used for tethered shooting it may also be possible to add in date, time, copyright and even customized shoot information as part of the download process.
Nikon’s Capture software provides remote capture capabilities together with built-in download and full image preview functions.