5
Camera-based Converters
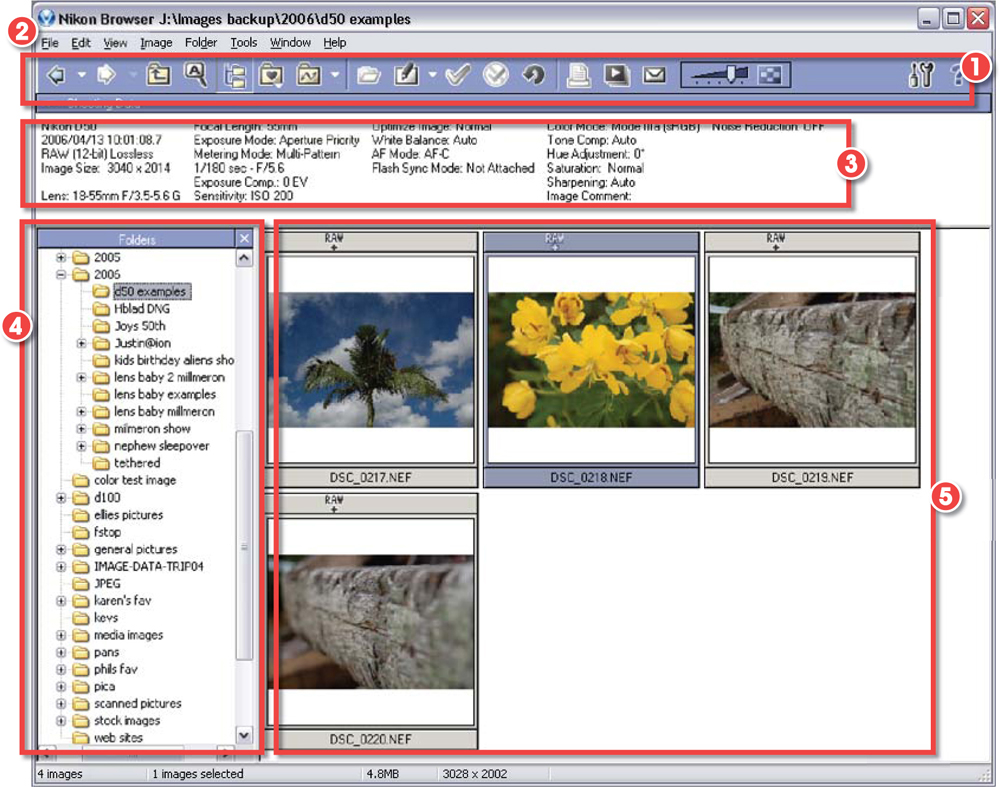
All camera companies that manufacture models with raw capture capabilities also supply picture management and raw processing software. In most cases, the applications include a dedicated image browser, a workspace where photos can be enhanced and edited, some raw conversion utilities, management and sorting options, and a means for outputting to print and screen or passing the converted file to an editing program like Photoshop.
The sophistication, features list and abilities of these programs vary from company to company and camera model to model. In addition there are often several different levels of conversion and management functions depending on if you are using the free package that came with the camera or the upgraded pro version that is purchased and shipped separately. In the Nikon system, for instance, basic browsing, management, conversion and output options are all available with the software that accompanies the camera drivers on the freely supplied install disk. However, professionals can opt to purchase an upgrade to this software which provides more functionality for the end user. The upgrade provides more options for raw processing plus the ability to control the camera remotely for tethered shooting scenarios.
In this chapter we will look at how these camera-based converters work and how they compare with other raw workflow solution options.
Camera-based converters software
| Camera make | Software |
| Nikon | Nikon Capture NX Capture Editor Capture Camera Control |
| Canon | Digital Photo Professional |
| Sigma | Photo Pro |
| Leica | SilverFast DC |
| Samsung | Photofun Studio |
| Kodak | EasyShare |
| Olympus | Olympus Studio |
| Pentax | Photo Laboratory |
| Sony | Image Data Converter |
| Fuji | Hyper-Utility |
| Samsung | Digimax Master |
Advantages and disadvantages of a camera-based system
As a digital photography author one of the questions we are asked constantly is ‘Which is better, converting and editing my raw files with software created by my camera manufacturer, or with utilities produced by the maker of my editing software?’ This is not an easy question to answer as there are advantages and disadvantages with each approach.
Camera-based converters are arguably better able to handle the conversion of raw files than their generic counterparts. After all, the guys that are deciding how the image details will be encoded in the raw file are the same guys who are producing the raw conversion software for the camera. If anyone should understand how to get the best from the camera files it should be these folks. ‘So I should go with my camera-based software?’ ‘Well, maybe?’
Which is better -the raw conversion software that came with your camera or the one that is included in your favorite editing program?

Keep in mind that the accumulated image processing knowledge that a company like Adobe has developed over the last decade or so provides a substantial foundation for the creation of their own conversion programs. Add to this the fact that a product like Adobe Camera Raw fits so snugly in the Bridge/Photoshop workflow that using any other utility seems like too much hard work to be seriously contemplated and you start to see how compelling the argument is for adopting an all-Adobe workflow.
Does it sound like I am hedging my bets? Well, yes I am! At the moment there is no definitive answer to this question. The best advice is to try each approach and see which is the best fit for you and the way you work. When testing don’t forget to compare the quality of the converted files, the ease of working, and the size and range of the feature and tool set.
Most software producers supply free trials of their products. So don’t be backward, download several candidate programs and spend some time comparing the way they work.
Different levels of support – the Nikon system
The Nikon system for handling raw provides a good example of how a camera-based conversion system can function in conjunction with your normal image editing workflow.
Basic features
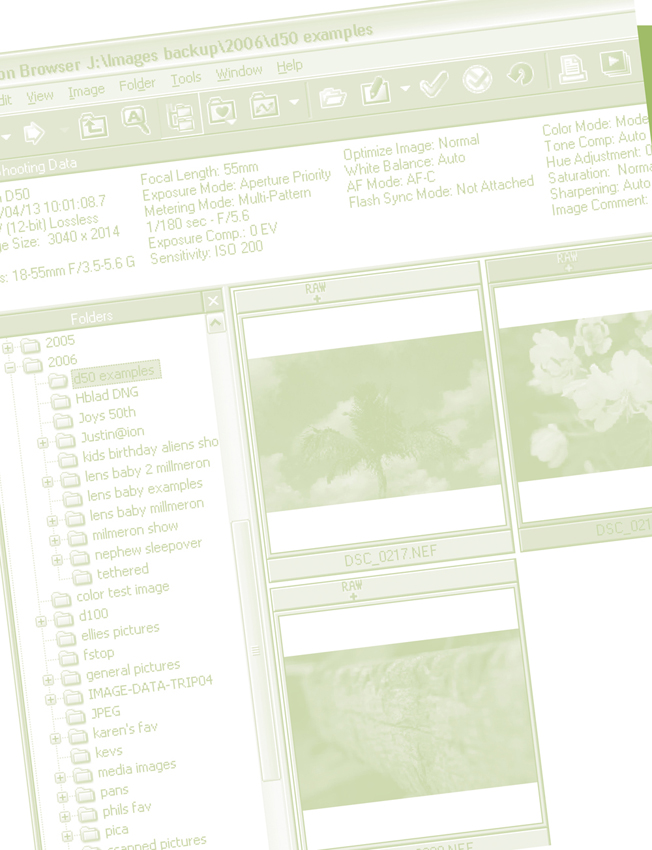
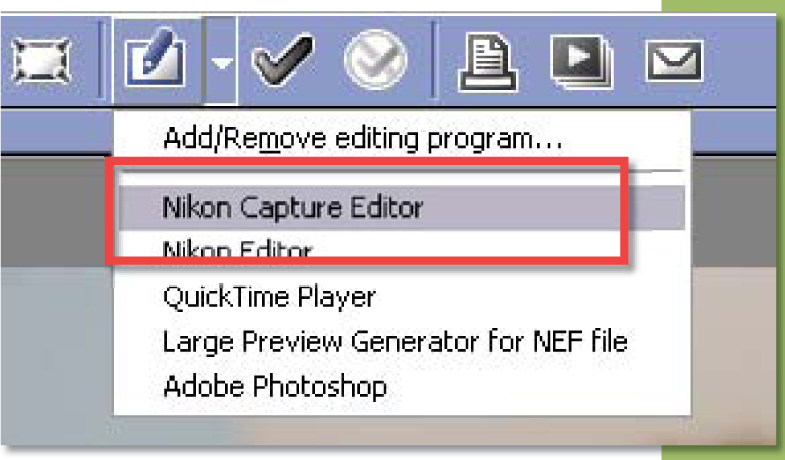
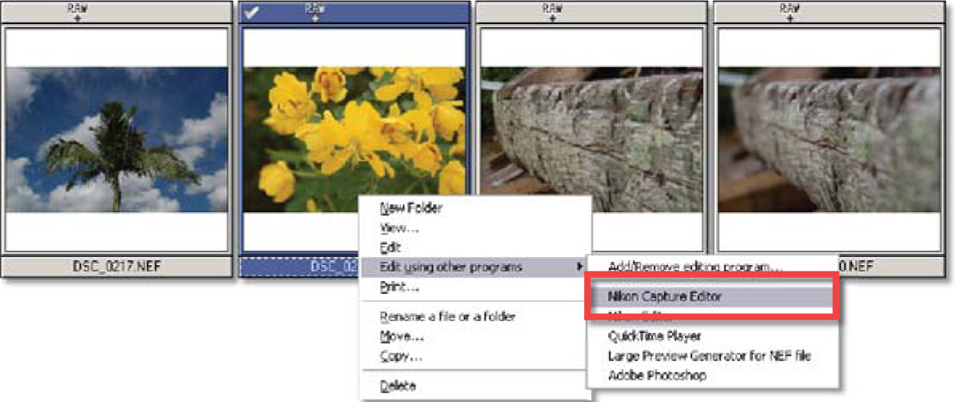
A basic level of raw support is installed onto your system when you first load the utilities that come with your camera. During this process, not only are camera drivers installed on your computer but Nikon also loads a browsing application called Nikon View. The program is used to view the photos that are downloaded onto your computer. The interface contains thumbnail previews of the pictures, including those captured in the Nikon raw format (.NEF), a display area where shooting data is listed along with a modest range of tools in a simple toolbar. The features grouped here are designed for tagging (rating), searching, printing, emailing and creating slideshows. No editing tools are available in the browser application or even the enlarged preview window which is displayed when a thumbnail is double-clicked. Instead these options are made via linked helper programs. Nikon’s own Capture Editor is listed by default as is the standard Editor and the Large Preview Generator for the NEF utility. Other programs can be added to the list and it is here that photographers who want to browse in Nikon View but convert with Adobe Camera Raw add a Photoshop option. Images to be edited in Photoshop are simply highlighted in the browser workspace and then the Photoshop option is selected from the pop-up menu accessed via the Edit button.
The Nikon View browser interface – (1) Toolbar. (2) Menu and title bars. (3) Shooting or metadata area. (4) File/folder navigation area. (5) Thumbnail previews.
The Edit button in the Browser and Preview windows of Nikon View provides a quick way to transfer the selected photo to your favorite editing application.
Note: Though listed, the Capture Editor is only available as a trial with the basic install and needs to be purchased separately if it is to be used past the trial period. As this program provides the most comprehensive raw conversion options serious raw shooters will need to pay the extra cash or alternatively shift the bulk of their processing requirements to another conversion program.
The NEF Photoshop plug-in
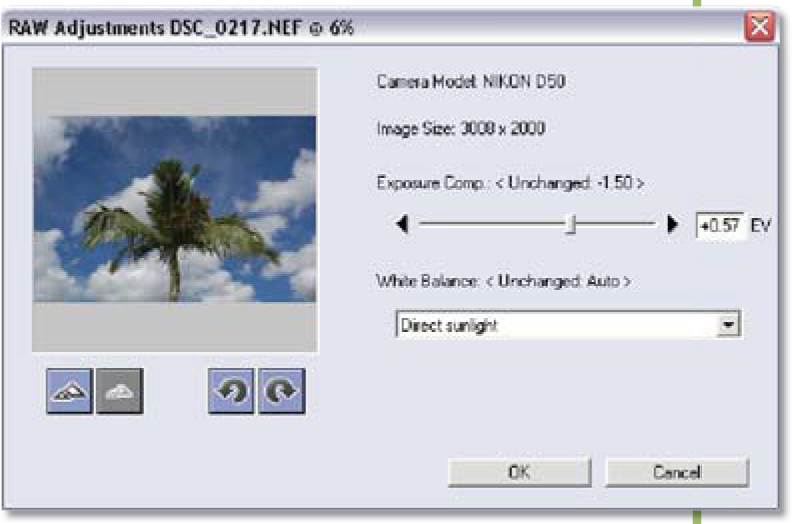
The basic install assumes that photographers will be using a package such as Photoshop for most of their pixel-by-pixel editing changes so as well as loading the browser a small NEF plug-in is also placed in the plug-ins folder of Photoshop. It is designed to provide basic (white balance and exposure only) conversion settings when an NEF file is opened from inside Photoshop. Interestingly, when this plug-in is installed Adobe’s own raw utility ACR ceases to function.
The NEF plug-in is designed as a simple way to convert raw files when opening them into Photoshop. It provides exposure and white balance controls.
Pro’s tip: After installing the drivers for a new camera you may find that you no longer have access to ACR and that instead the Nikon plug-in keeps appearing when you are attempting to open raw files. If this occurs and you want to restore ACR as the default raw utility then you will need to remove the NEF plug-in from the plug-insAdobe Photoshop OnlyFile Formats folder in Photoshop.
The NEF is installed into the Plug-ins folder to help provide Nikon file support but sometimes this action stops ACR from working.

More sophisticated control
If you want a little more control over your raw conversions than white balance and exposure controls provided by the NEF plug-in then Nikon also produces a dedicated software program called Nikon Capture Editor. Unlike the simple Editor that comes free with Nikon View, Capture Editor is a fullblown raw converter. The package is one part of a two-program upgrade that can be purchased separately from Nikon dealers. The second software component is the Nikon Capture Control which provides remote camera operation for studio use.
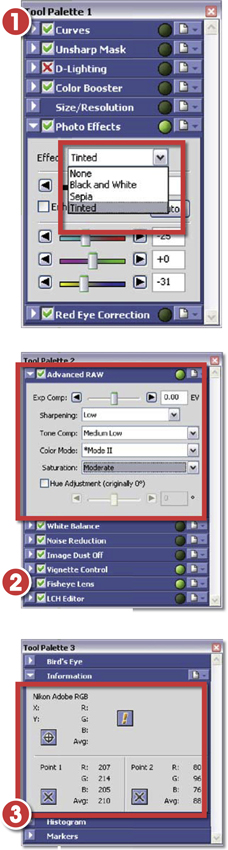
The adjustment options in Capture Editor are grouped in three separate tool palettes. Palette one (1) contains a Curves control, the Unsharp Mask filter, a Red Eye Correction tool and a Size/Resolution control. Also in this palette is the D-Lighting feature that opens shadow detail and boosts picture color, and Photo Effects control with options for creating black and white and toned monochromes.
The second palette (2) houses more advanced adjustments, some of which are only available for raw file processing. Here you can alter white balance, exposure, tone compensation (contrast), change color modes and adjust the saturation of the photo. In addition, a Noise Reduction option and Vignette Control are both included alongside a specialist LCH (Lightness, Chroma, Hue) curves control.
The Image Dust Off and Fisheye Lens features are great examples of what is possible when the hardware manufacturer is involved in creating their own image processing software.
The Image Dust Off option lets you eradicate the dust marks that can appear in photos as a result of having a dirty camera sensor. The feature is used via a two-step process. To start, you create a reference photo by switching to the Dust Off Ref Photo selection of the camera’s setup menu and then shooting a flat white featureless subject from a distance of 10 cm. This file is then referenced in the Image Dust Off palette where the program uses the reference file to locate and eliminate the dust in the photo.
The Nikon Capture Editor palettes.
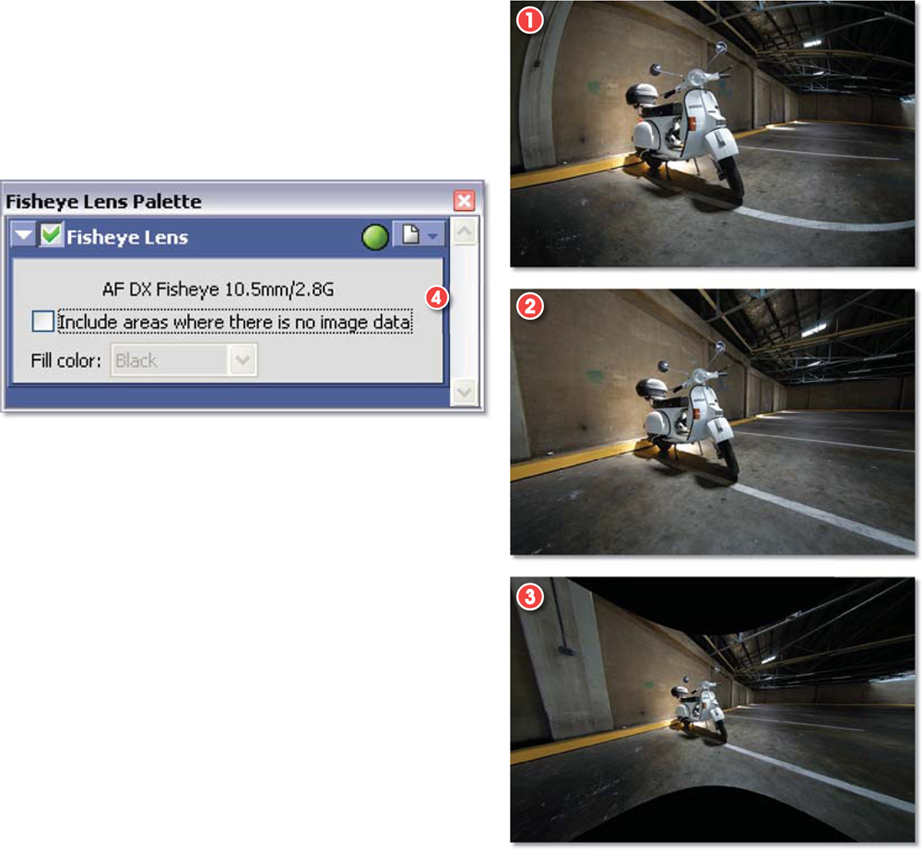
The Fisheye Lens control automatically dewarps the bulging images that are captured with extreme wide-angle lenses. The feature uses the lens information contained in the metadata of a picture file to correctly identify the lens used at the time of capture. The pixels in the photo are then remapped to a rectilinear format.
This level of lens correction is only possible if the characteristics of the lens are fully known. It’s true that other editing programs, such as Photoshop, have sophisticated lens correction features but generally these apply generic adjustments rather than ones designed specifically for the lens in question.
You can choose from a range of editing options from inside the Nikon View browser. Simply right-click the photo to be edited, select the ‘Edit using other programs’ option and then choose the application from the list provided. To add another editing program to the list select the ‘Add/Remove editing program’ option and locate the program to be added to the list.
The third palette (3) contains a Navigator-like control Nikon calls Bird’s Eye as well as a histogram display, the Nikon equivalent of the History palette called Markers and an Information palette. The last feature is designed to allow the user to sample the RGB values of various pixels in the image and track these values during tonal and color changes.
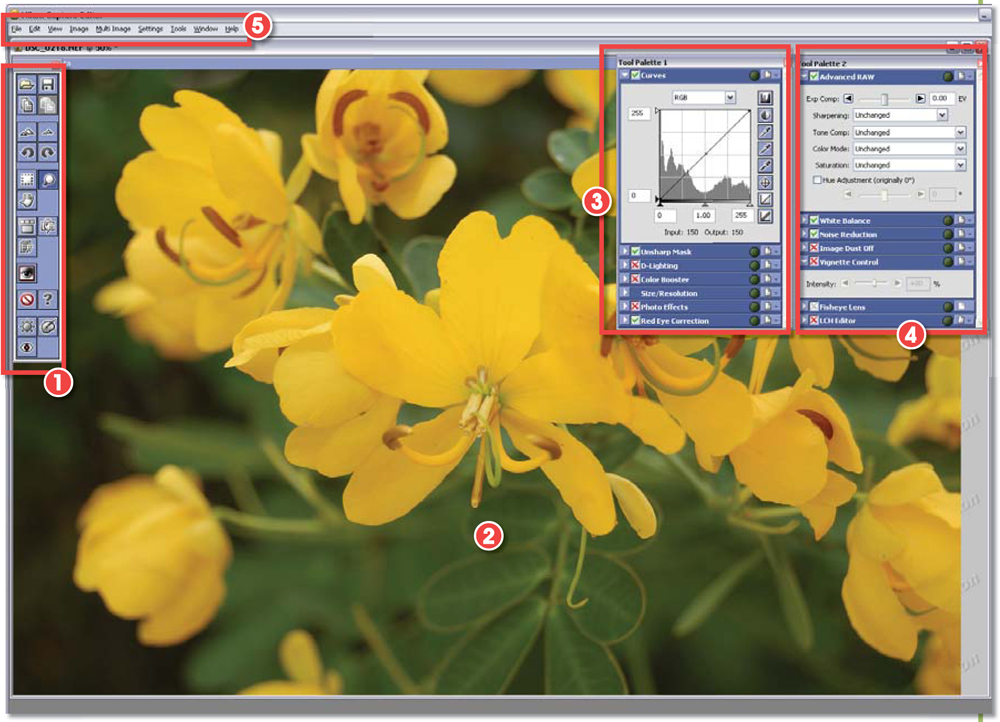
The Nikon Capture Editor interface – (1) Toolbar. (2) Preview area. (3) Tool Palette 1. (4) Tool Palette 2 – Advanced Raw options. (5) Program menu bar.
A hybrid approach
Because of the camera- and lens-specific corrections such as ‘dust off’ and ‘fisheye lens fix’ many photographers prefer to stick with the raw software offerings provided by their camera manufacturer. Though it is not possible to apply and save these corrections to the raw file and then complete the conversion in another program such as Adobe Camera Raw, the corrected file can be passed directly to Photoshop. This hybrid approach to editing means that all raw correction and conversion settings are applied in the camera-based software, after which the file is sent to Photoshop, where the pixel-based editing is completed.
The Fisheye Lens control provides lens-specific dewarping adjustments to images photographed with ultra-wide-angle lenses.
The feature interrogates the metadata of the file to retrieve details about the lens type and settings.
It is in this circumstance that using a piece of software designed by your camera/lens manufacturer really comes into its own.
The software understands how the lens records the very wide scene and via the Fisheye Lens feature it is possible to remap the bulging photo back to a more normal perspective.
1. Non-corrected photo taken with a 10.5 mm Nikon fisheye lens.
2. The same image after remapping with the Fisheye Lens feature in Capture Editor.
3. After remapping with the Include areas where there is no image data option selected.
4. The Fisheye Lens correction palette.