
12
Creative Raw
After all is said and done, raw processing is a tool that we use to help us in the pursuit of creating great imagery. So rather than spend the whole text on the underlying technology and its related techniques, let’s
some time to look at some of the workflow concepts and ideas that we have examined in practice. The following projects make the most of the latest image editing tools we have available to use. They will, I’m sure, provide you with a greater sense of how to apply raw workflow to your daily workflow.
Lith printing
There is no doubt that a well-crafted lith print is, to borrow an oft-used phrase from my father-in-law (and before that, John Keats), ‘a thing of beauty that is (therefore) a joy forever’. The trick, for experienced and occasional darkroom users alike, is the production of such a print. Even with frequent reference to publications penned by lith guru Tim Rudman, I have always had difficulty getting consistency with the production of my prints. Despite this frustration, my love affair with the process still continues. There is something quite magical about the quality of images created using this technique and it is this magic that I hanker after. They are distinctly textured and richly colored and their origins are unmistakable.
The process, full of quirky variables like age and strength of developer and the amount of overexposure received by the paper, is unpredictable and almost always unrepeatable. In this regard at least, most printers, myself included, find the whole lith printing process both fascinating and infuriating. This said, it’s well over a decade since lith printing started to become more commonplace and there is no sign of people’s interest declining. ‘Long live lith!’ I hear you say, ‘but I shoot digital’. Well, good news: the digital worker with basic skills, a copy of Photoshop and a reasonable color printer can reproduce the characteristics of lith printing without the smelly hands, or the dank darkroom. What’s more, arm that digital worker with quality raw files, and a copy of Photoshop CS3, and the technique can be completed totally non-destructively with the capture images still intact. Cool!
Step by step: Lith – Step by step
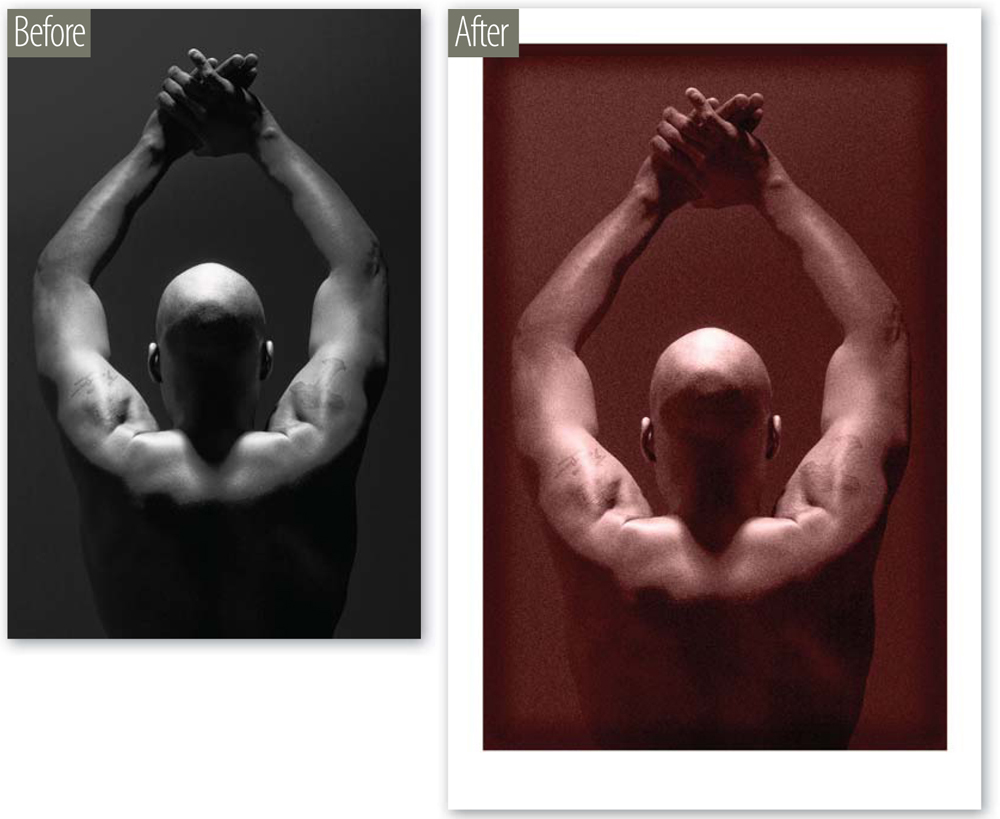
1. If you ask most photographers what makes a lith print special the majority will tell you it’s the amazing grain and the rich colors. Most prints have strong, distinctive and quite atmospheric grain that is a direct result of the way in which the image is processed. This is coupled with colors that are seldom seen in a black and white print. They range from deep chocolate, through warm browns, to oranges and sometimes even pink tones. If our digital version is to be convincing, then the final print will need to contain all of these elements. Make sure that the subject matter is conducive to making a lith-type print. The composition should be strong and the image should contain a full range of tones, especially in the highlights and shadows. Delicate details may be lost during the manipulation process, so select an image that still works when the fine details are obscured by coarse grain. Good contrast will also help make a more striking print.
A digitally produced lith print can exhibit similar color and grain characteristics to those typically found in chemically produced originals. In Photoshop CS3 it is possible to produce a digital lith image non-destructively from a raw file using Smart Objects and Smart Filters.
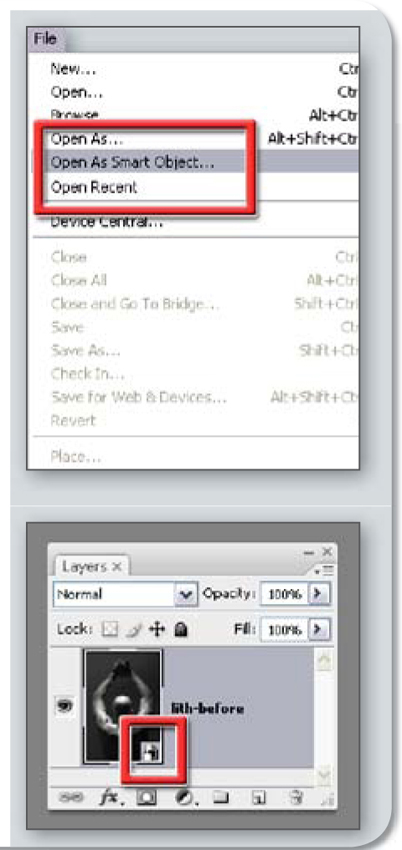
The next step after selecting a suitable image is to open the raw capture file in Photoshop as a Smart Object (File > Open as Smart Object). Basing your adjustments around a Smart Object will ensure that they can be tweaked at any time later and the original pixels are always maintained. Immediately save the picture as a .PSD file (this helps with the Smart Object editing steps later on).
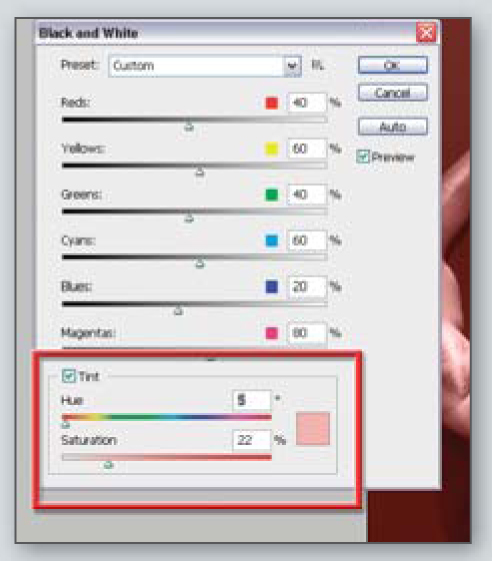
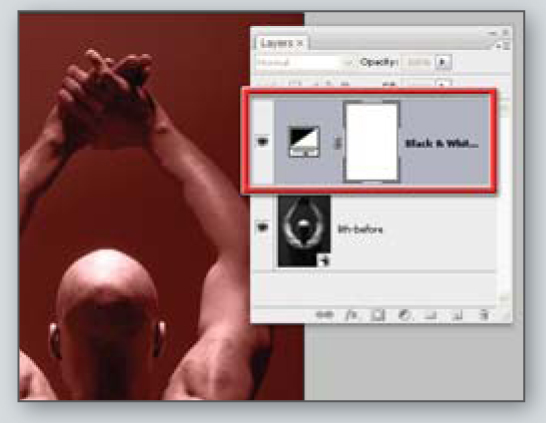
2. Now, let’s add some color. Photoshop provides a couple of options for adding the distinctive lith colors. The simplest approach uses the Tint options in the new Black and White control. Previously we would have used Hue/Saturation but this new feature has the added bonus of providing the chance to manipulate the monochrome conversion (convert to gray) before adding the tint hues. As we are using an embedded raw-based workflow, the Black and White feature is applied via an Adjustment Layer (Layer > New Adjustment Layer > Black and White). If your original is in color, start by adjusting the color sliders in the upper section of the dialog. These allow you to control the way that specific colors are converted to gray. Next move to the bottom of the feature and check the Tint option. Use the Hue slider to select the color for the tint and the Saturation slider to adjust the vividness of the effect.
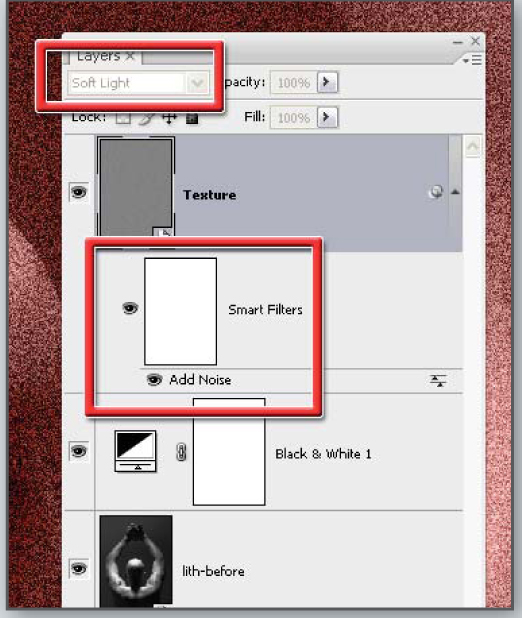
3. To simulate the texture of the lith print we will add a Noise filter to the photo but rather than applying it directly, more control is possible if the texture is applied to a separate layer first, and then blended with the image. Start by creating a new layer (Layer > New > Layer) and filling it with 50% gray (Edit > Fill then choose 50% Gray from the contents menu). Name this layer Texture.
To ensure that we can adjust the settings used for the filtering effect later on, convert the Texture layer to a Smart Object (Layer > Smart Objects > Convert to Smart Object) and change the mode of the new Smart Object layer to Overlay or Soft Light. Next, Smart Filter the layer using either the Grain (Filter > Texture > Grain) or Noise (Filter > Noise > Add Noise) filter.
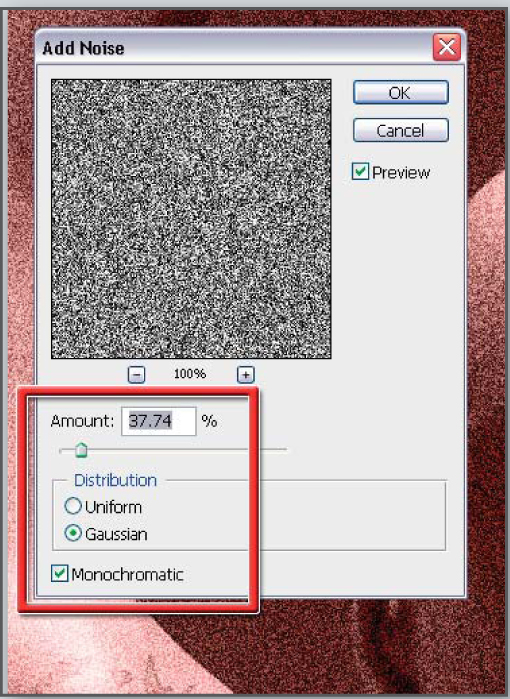
Most of these types of filters have slider controls that adjust the size of the grain, its strength and how it is applied to various parts of the image. The settings you use will depend on the resolution of your picture, as well as the amount of detail it contains. The stronger the filter effects, the more details will be obscured by the resultant texture. Be sure to preview the filter settings with the image magnification set at 100%, so that you can more accurately predict the results. Here I have the used the ‘Noise’ filter with both the Gaussian and Monochrome options set.
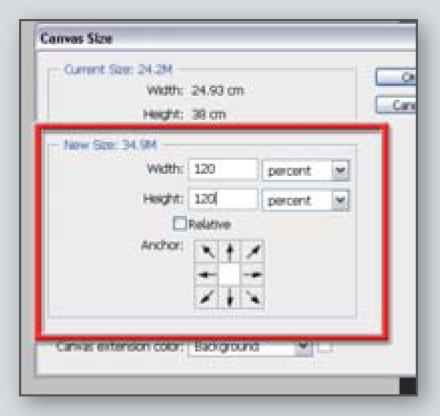
4. At this point in the project the lith-print effect is finished but to show the power of working with Smart Objects, let’s take the process a little further by adding some extra canvas space and a blurred border to the otherwise completed photo. Start by selecting the base image’s Smart Object layer. Next choose Layer > Smart Objects > Edit Contents. This will open the original photo as a separate Photoshop document with no color or texture effects applied. Change the background layer to a standard image layer by double-clicking on its entry in the Layers palette. Now add a new layer and convert this layer to a background layer by selecting Layer > New > Background from Layer. Make sure that the default Foreground/Background colors are selected before this step. To extend the white background, choose Image > Canvas Size, and add 120% for both Width and Height settings.
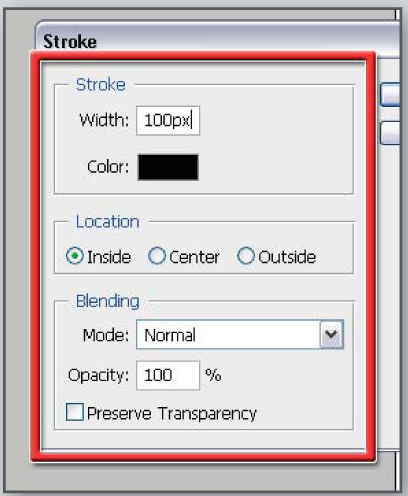
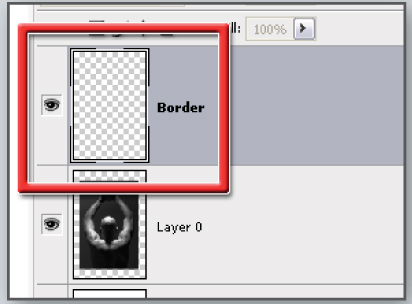
5. To add a blurred border the size of the image, create a new layer above the photo. Label this layer Border. Hold down the Ctrl/Cmd key and click on the picture in the thumbnail of the image layer. This creates a selection based on the size and shape of the picture content of this layer. Now choose the Border layer and then select Edit > Stroke. Adjust the settings so the stroke is 100 pixels wide (this may change for your image), black, and is located on the inside of the selection. Click OK to draw the stroke.
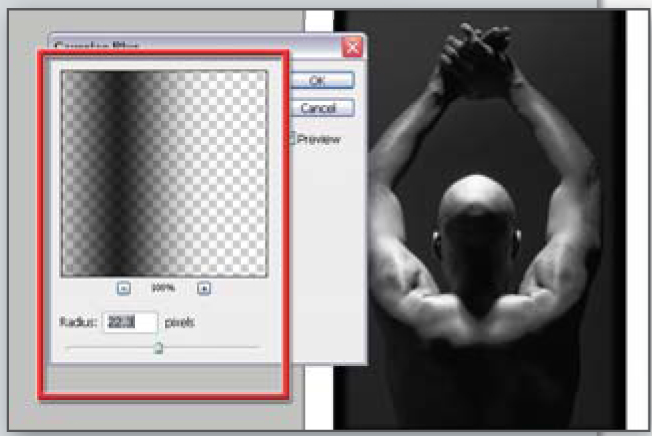
6. We will use the Gaussian Blur filter to blur this border but before applying the filter, change the Border layer to a Smart Object. This way it will be possible to alter the settings used for the border later, if needed. Select the border layer and choose Layer > Smart Objects > Convert to Smart Object. Next, with the selection that you used to create the border in the first place still active, apply the Gaussian Blur filter to blur the inner edge of the stroked border. If you have lost the selection, recreate it by holding down the Ctrl/Cmd key and clicking on the image layer’s thumbnail.
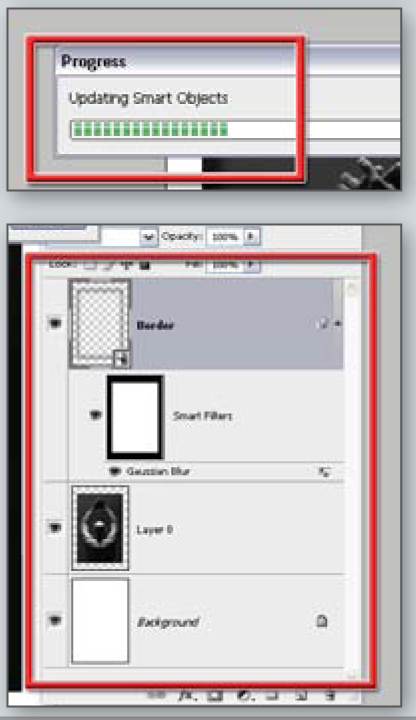
7. With the border now created, it is time to apply the settings back to the original lith print. Save the file (File > Save) and then close the document. Photoshop will automatically update the picture Smart Object layer that sits inside the lith document with the changes. Select Image > Reveal All to show the extended canvas area. Using Smart Objects in this technique provides endless opportunity to adjust the settings for the color and texture of the final result. Even the blur of the border can be manipulated at a later date, as applying the filter via a selection automatically creates a mask that will restrain the blur effect to the inside of the image.
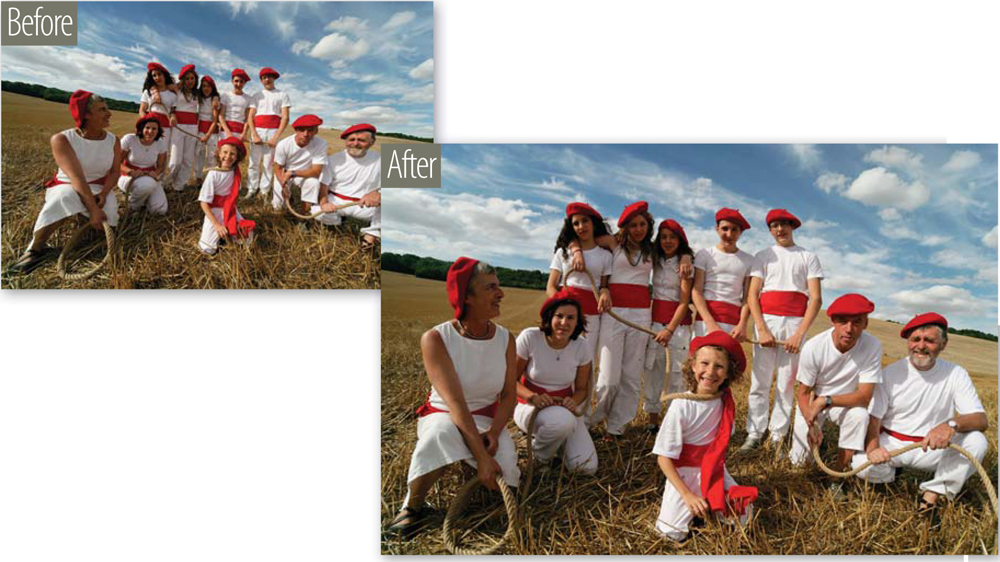
The enhancement features in Adobe Camera Raw can be used good effect with both TIFF and JPEG files in the latest Photoshop version of the product. Here the highlight recovery and Smart Object workflow usually reserved for raw pictures is employed to help rescue this family portrait.
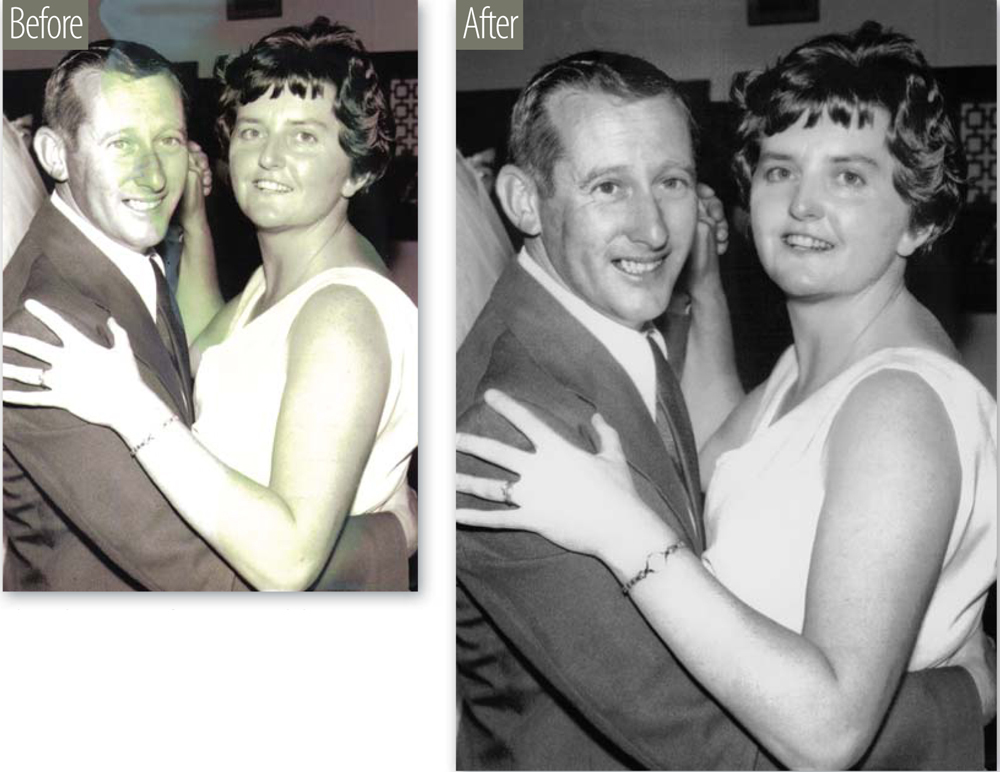
Image restoration
As a digital imaging author, I am often asked about techniques for repairing old photos. I’m sure that this is not unusual as most photographers will attempt to restore an old picture at least once during their lifetime. After all, many of the memories of important family events and history are associated with images of the time and, even with the right care and attention, lots of these photos end up a little worse for wear.
Until now the tools and techniques used by raw shooters couldn’t be used with most restoration projects as the digital files requiring correction work are generally sourced from scanners rather than cameras. Although some scanners use a proprietary form of raw capture when creating a digital file, most models output their digital images in TIFF or JPEG.
I say until now, because both TIFF and JPEG files can be opened and enhanced in the latest version of Adobe Camera Raw. So here I thought I would present a couple of techniques that use raw-based workflow techniques to restore, or repair, those images most precious to you.
Step by step: Removing stains – Step by step
In this example, the repair work centered around the removal of a yellowish stain running through the middle of the photo. There was also the need to try and restore some details in the highlights sections of the photo.
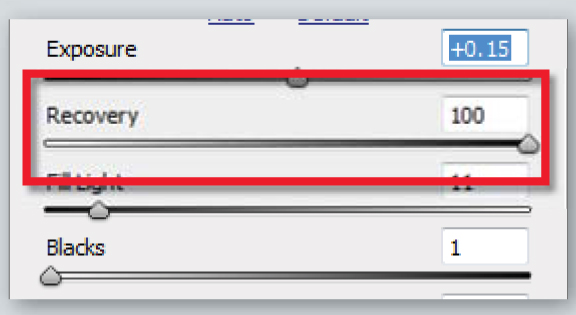
1. Some of the highlight areas in the example file are clipped. The Recovery slider in Adobe Camera Raw 4.0 is able to reconstruct details in some blown highlights by referencing the details in the other channels. So the first step is to rebuild as much lost detail as possible using this control. NB: ACR 4.0 also works with TIFF and JPEG files as well as most raw formats.
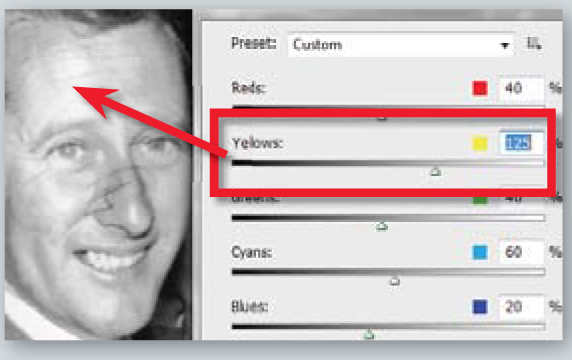
2. Next the file is opened as a Smart Object in Photoshop from ACR. To remove the yellow stain a Black and White adjustment layer is added above the image layer. This feature allows you to control how specific colors are mapped to gray. By adjusting the Yellow slider it is possible to hide the stain in the grayscale conversion process.
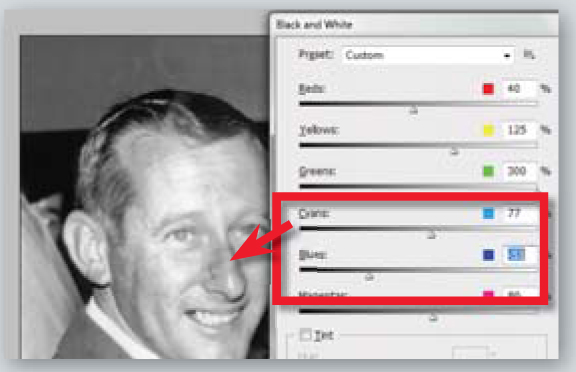
3. To minimize the blue pen scribble on the subject’s nose, adjust the Blue and Cyan sliders. Variation in density of the stain, or scribble, may cause some, or only part of the stain to disappear. This is the case here so we will have to resort to another process for the final touchup of these problems.
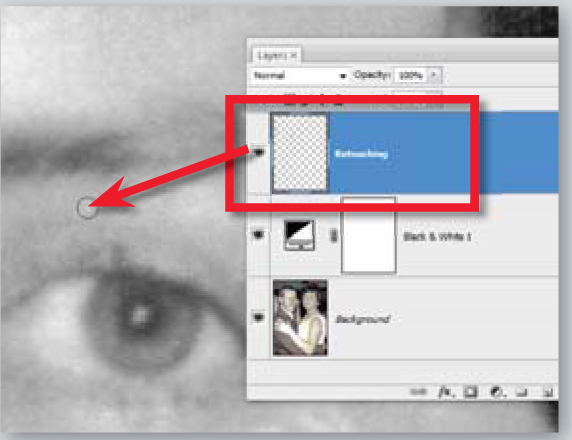
4. To retouch residual stains and other marks, create a new layer above both the background image layer and the Black and White adjustment layer. Select the new layer and then choose the Spot Healing Brush. Change the brush settings to Sample All Layers in the options bar and proceed to retouch problem areas.
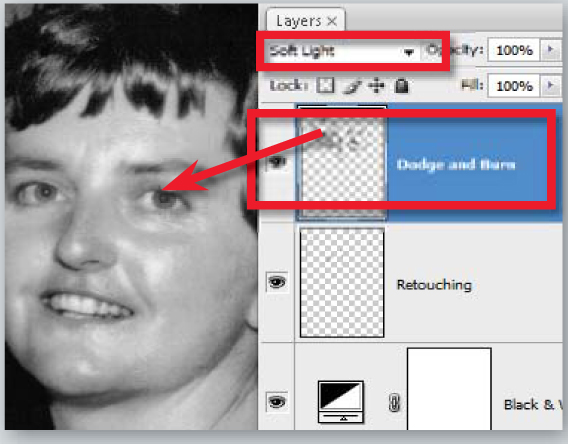
5. After removing dust marks and scratches, add another blank layer at the top of the layers stack. Change the Blend Mode of the layer to Soft Light and choose a black soft-edged brush. This setup works like the Burn tool but the changes are made non-destructively. Carefully add some depth to the areas of the image that appear flat because of the harsh, direct, flash lighting.
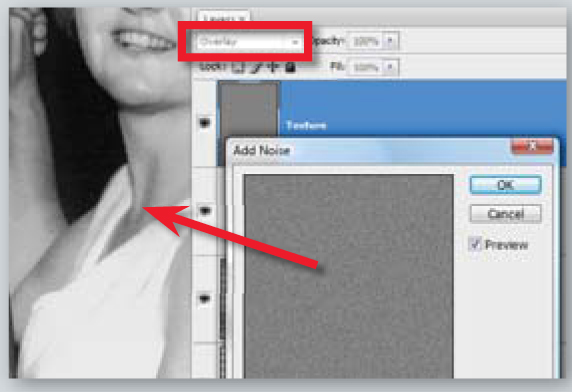
6. The last part of the restoration process is to add a very small amount of texture to the photo to provide detail in the blown out areas. Add a new blank layer and change the mode to Overlay. Next fill the layer with 50% gray and filter the layer with the Add Noise filter. Make sure that you view the photo at 100% in order to properly gauge the appearance of the texture.
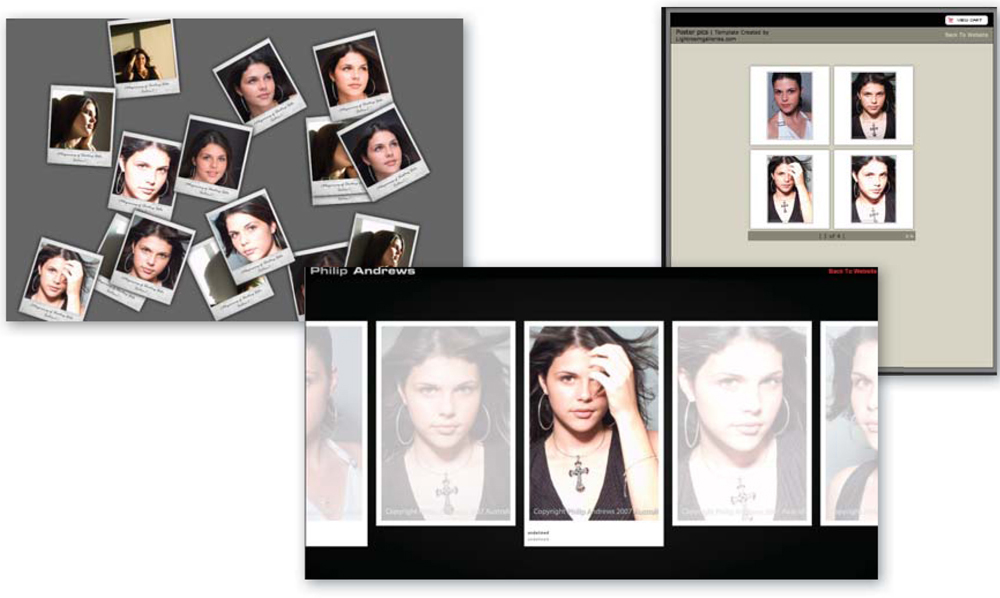
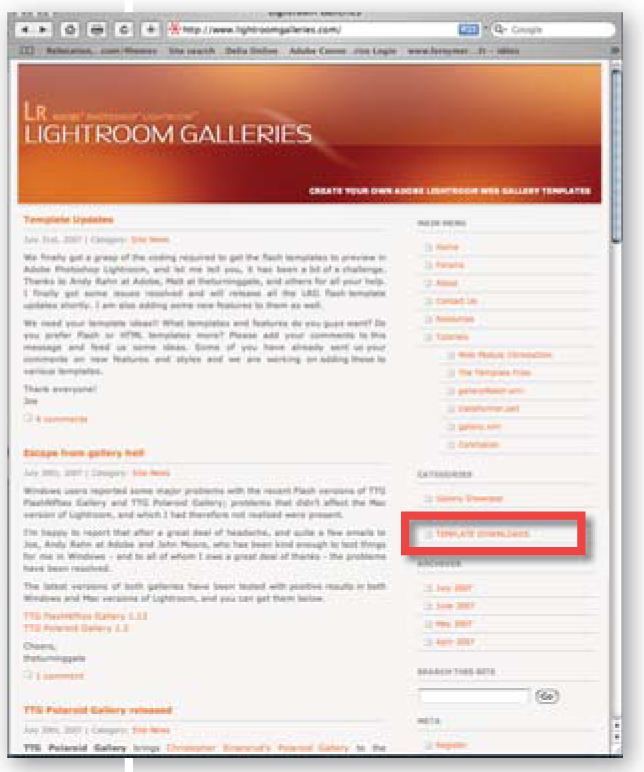
The variety of gallery types produced by the Lightroom Web module can be expanded by adding in extra templates created by third-party Lightroom enthusiasts. The examples detailed here are available from www.lightroomgalleries.com.
Web template heaven
One of the really valuable features of Lightroom is the ability to output your raw files directly to slideshow, print or web galleries from inside the program. That said, the web templates supplied with Lightroom can seem a little formulaic and, for some photographers, downright limiting. Thankfully there are clever individuals out there, like the guys from www.lightroomgalleries.com, who are able to create third-party gallery components that fit neatly into Lightroom.
It is important to realize up front that many of these web templates are not officially sanctioned by Adobe although they are referenced in many Adobe blogs around the world. They are generally created by Lightroom aficionados who, despite liking the overall package, want a little more pizazz or more custom options in the web gallery.
Here I look at how to install one of the great galleries that can be found on the www.lightroomgalleries.com website.
Using third-party web galleries – Step by step
1. Start by navigating to the Template Downloads section of the Lightroom Galleries website. Download the gallery of your choice and then proceed to save the new template folder to the Web Galleries directory on your computer. Use the following locations:

Mac: Users/YourUserDirectory/Library/Application Support/Adobe/Lightroom/Web Galleries
Windows Vista: C:UsersYourUserNameAppDataRoamingAdobeLightroomWeb Galleries
Windows XP: C:documents and SettingsYourUserNameApplication DataAdobeLightroomWeb Galleries
Make sure that the folder name you use has no spaces.
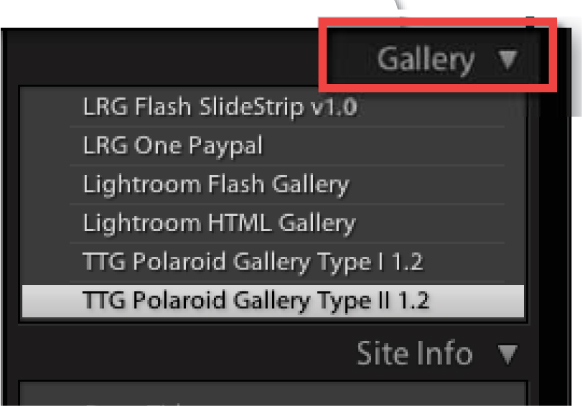
2. Next restart Lightroom. The new gallery templates will be loaded into the Web module and will appear in the drop-down Gallery menu at the top right of the dialog (and not in the Template presets on the left).
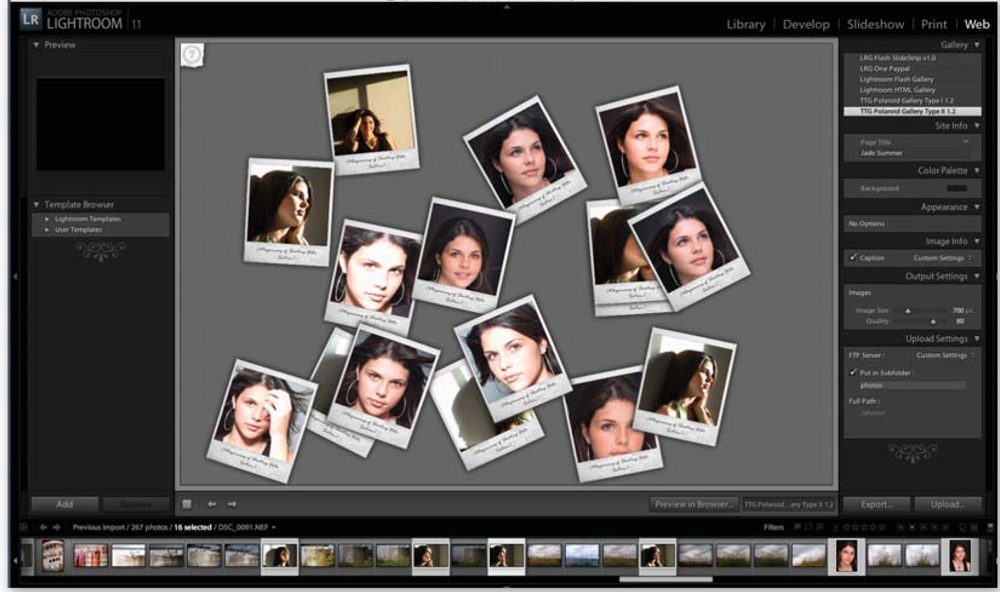
3. To use the new gallery template, multi-select the pictures to include in the gallery and then navigate to the Web module. Select the new layout option from the gallery list and then proceed to adjust the settings in the rest of the sections in the right-hand side of the Lightroom dialog.
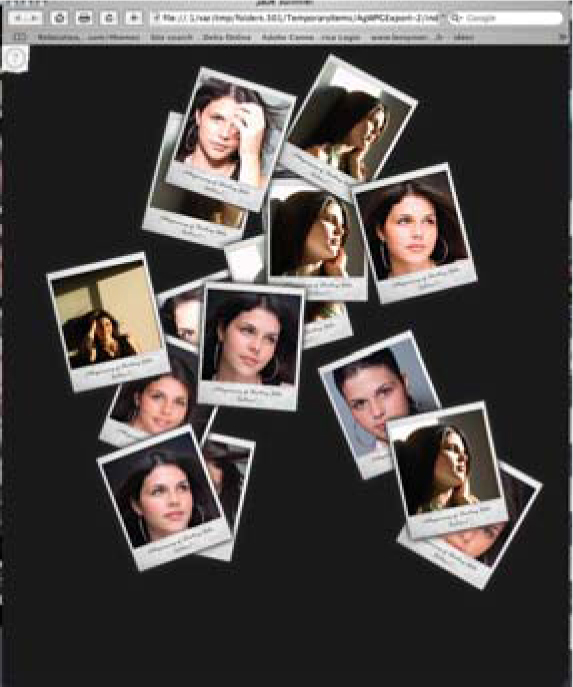
4. With all the settings complete you can select the Export, Upload or Preview in Browser options just as you would for any other web gallery.
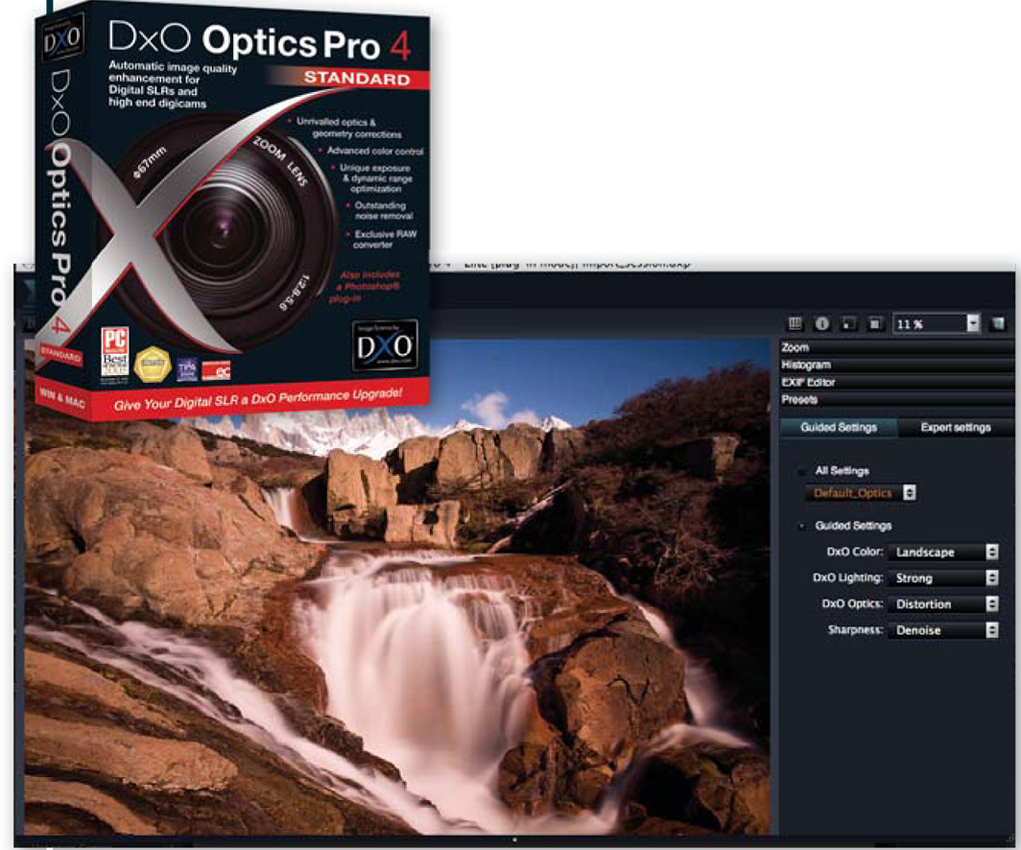
The impressive lens correction abiltities found in the DxO Optics Pro software are now available to Lightroom users when nominating the plug-in version of the program as an External Editor.

Extending Lightroom’s power
Over the last few years DxO Optics Pro has gained an enviable reputation as one of the best ways to adjust the optical problems that exist with all digital cameras and lenses. Unlike other solutions, including the Lens Corrections features available in both Lightroom and Adobe Camera Raw, DxO Optics provides the ability to automatically correct and enhance images based on extensive measurement and calibration of supported cameras and lenses.
DxO Optics Pro is particularly good at automatically correcting a set of images, taken with different lenses at different focal lengths, that exhibit different distortion problems. In addition, the program can also correct lens softness, chromatic aberration, vignetting, volume anamorphosis and keystoning, either automatically or with comparatively little user intervention.
Lightroom users will be impressed with the accuracy of the optical-based corrections available via DxO Optics Pro. The quality of the corrections is a reflection of the fact that all changes are based on objective testing of specific camera and lens combinations.
In the most recent release of DxO Optics Pro, the company has provided a plug-in version of the correcting software that works with Lightroom. Essentially the user nominates the plug-in as one of the External Editors for Lightroom, which, in turn, provides the ability to transfer the photo to DxO Optics Pro, make the necessary changes and then ‘round trip’ the corrected image back to Lightroom.
The Lightroom and DxO Optics workflow
This approach provides Lightroom users with the ability to take advantage of the incredible optical correction options for supported camera/lens combinations that the program provides. Sound too good to be true? Well, there are some issues to be aware of when employing a combined workflow featuring Lightroom and DxO.
First of all, DxO has its own raw conversion engine. This means that when you pass raw files to the plug-in they return to Lightroom corrected, but in a TIFF or JPEG format. Generally this is not a problem as the lens-correcting abilities of the DxO Optics plug-in outweigh the downsides of early raw conversions. However, if you are purposely employing a full raw, or non-destructive, workflow then this does have an impact on the nature of the resultant image. In this situation, it may be better to use the full DxO Optics program to batch process all your raw files first and save the corrected images in the DNG format before then importing them into Lightroom.
Secondly, DxO recommends making corrections in the DxO Optics plug-in first, before applying any enhancement changes in Lightroom itself. This is because the Lightroom alterations are not recognized (for raw files), or only recognized in part (for JPEG images), by the DxO program. This is the case irrespective of if you select the Edit a Copy with Lightroom Adjustments option when sending the file to the plug-in. DxO Optics actually performs its corrections on the full raw file before returning a copy to the Lightroom library. When the Lightroom SDK is finally released to developers, greater integration with 3rd party products should occur
So to make sure that you get to use the best features of both programs, open your files into Lightroom, make corrections in DxO next and then apply any global enhancements in Lightroom. A trial version of DxO Optics Pro plug-in is available for download and use with a limited number of photos during a specific period from www.dxo.com.
Using DxO and Lightroom – Step by step
1. After installing the DxO Optics program you will need to set up the connection between Lightroom and the plug-in version of the program. Do this by going to the Preferences part of Lightroom (Edit > Preferences for Windows users) and selecting the External Editing tab in the dialog. Leaving Photoshop as the Main External Editor, add the DxO Optics Pro plug-in as the Additional External Editor.
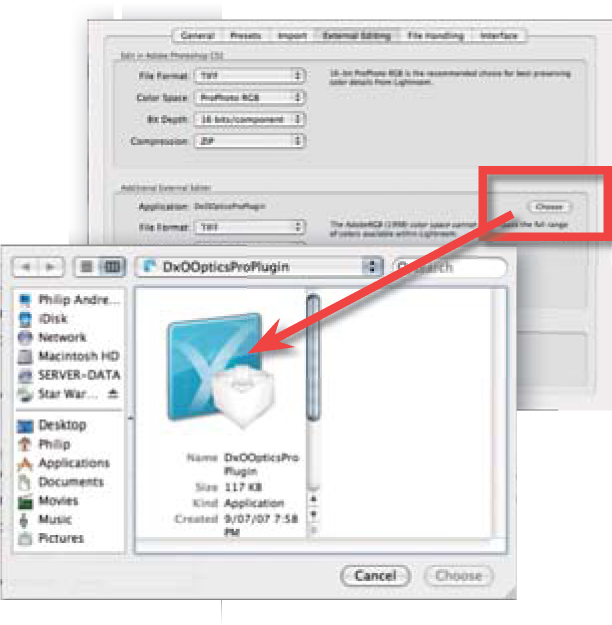
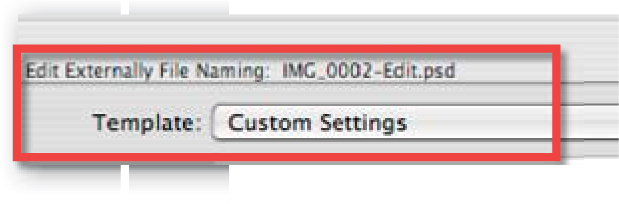
2. Ensure that the Additional External Editor fields in the dialog are set to the following: File Format – Tiff, Color Space – AdobeRGB, Bit Depth – 16 Bits/component and Compression – None. In addition, ensure that you don’t modify the default renaming scheme at the bottom of the dialog, as this helps link the corrected file back to the Lightroom Library. It should read IMG_0002-Edit.PSD.
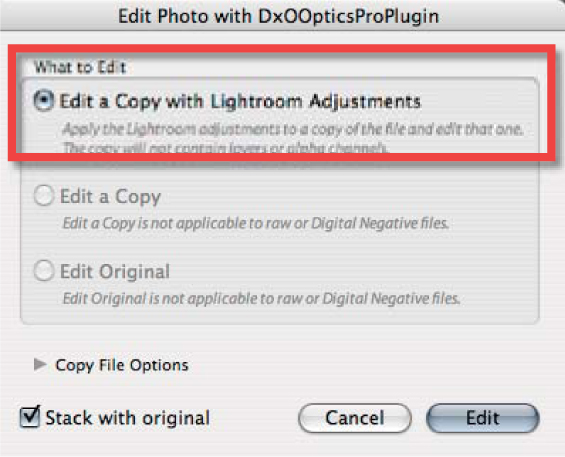
3. To open images into the plug-in select the file in the Grid View of the Library and select the Edit with DxOOpticsProPlugin option from the right-click menu (Ctrl-click for Macintosh users). Next the Lightroom Edit Photo dialog will be displayed. Select the Edit a Copy with Lightroom Adjustments option but remember that DxO ignores any enhancement changes made in Lightroom so these won’t, in fact, be applied to the copy before opening the photo into the plug-in. Choose the ‘Stack with original’ entry at the bottom of the Edit Photo dialog to group the edited copies and the original together in the Lightroom Library as an Image Stack. Click the Edit button to continue.
4. The photo will then be transferred to the DxO Optics plug-in. Here you can make changes to the photo using the full range of features available in the plug-in. So as not to confuse myself by making tone and color corrections in both Lightroom and DxO, I tend to stick to using the plug-in to make the camera/lens-based optical corrections in the photo, before returning to Lightroom for the more general enhancements.
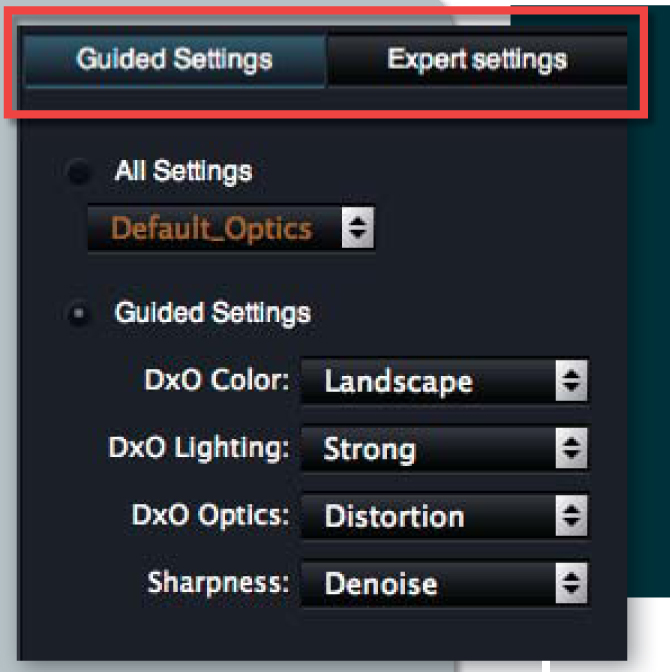
Adjustments can be made using two different sets of controls -Guided Settings or Expert controls. The Guided Settings group the main changes around several drop-down menus, providing quick correction of key areas based on presets, whereas the Expert settings list manual controls for all DxO correction features. The key lens-based corrections are grouped under the DxO Optics heading and include controls for geometric distortion, chromatic aberration, purple fringing and vignetting. Adjustments here are based on the characteristics of the lenses used for image capture and so the features are only available when the correct lens module is installed for the image currently being enhanced. The Volume Anamorphosis Correction and Keystoning/Horizon features in the Geometry section of the Expert settings will also prove useful, but are manually controlled, on an image-by-image basis.
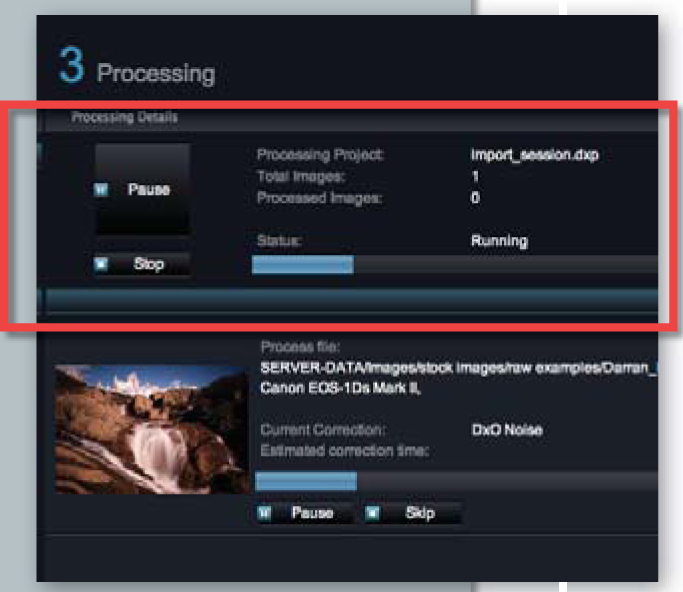
5. Once the adjustments have been set, in either of the two settings modes, the process tab at the top right of the dialog is selected to switch from the Enhance view to the processing view. To process the file, or apply the settings, click the Process button. The Output location and Format options are automatically set to ensure capability with Lightroom, so there is no need for user intervention with these settings. Remember that raw files sent to the DxO Optics plug-in are returned to Lightroom in the TIFF format.
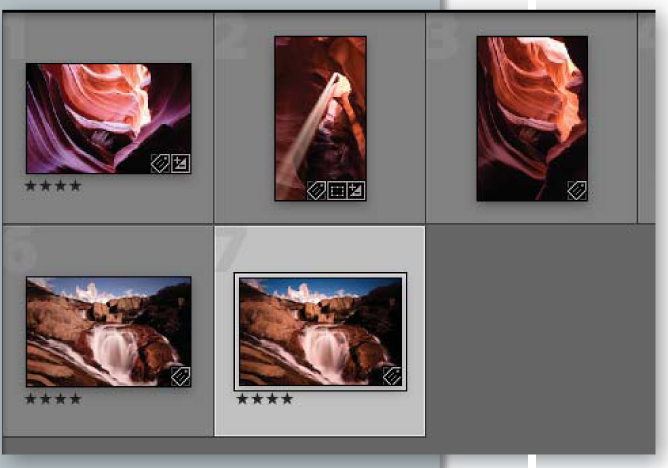
6. The corrected images are displayed in the Lightroom Library as separate files to the raw original.
Advanced noise reduction
As part of the new analysis features inside Photoshop CS3 Extended, you can now compare the contents of several layers and use the differences and/or similarities in this content as the basis for creating a new image.
The technology makes use of Smart Objects, Auto-Align and Stack Mode features. Although not specifically designed to remove noise, these features, along with shooting multiple versions of the original scene, provide one of the most successful techniques available for the task.
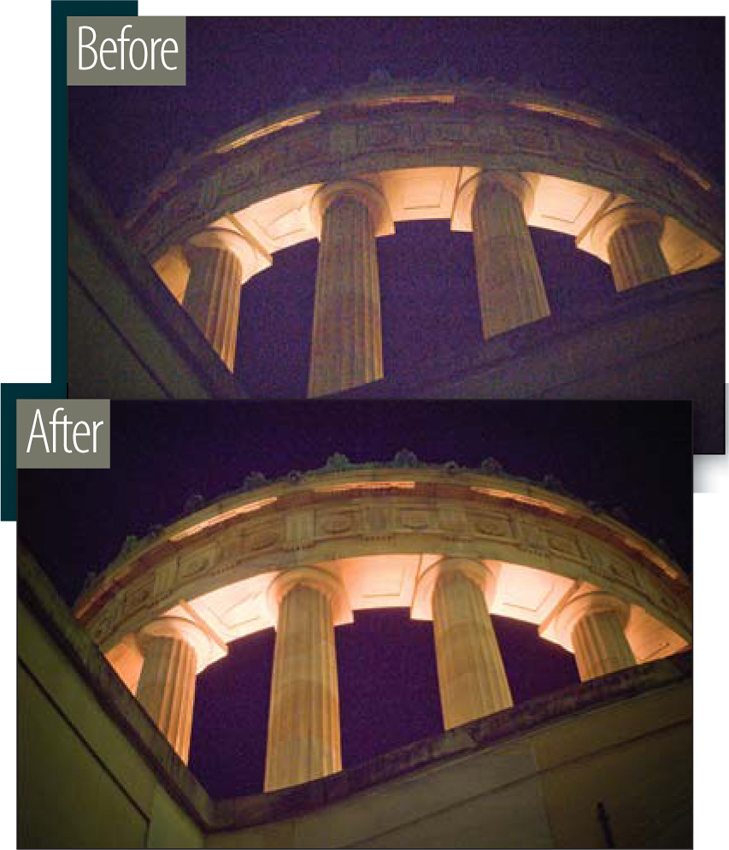
The noisy image (top) was captured using an ISO 6400 setting. The same file was then processed using the Image Stack noise reduction technique detailed here (bottom).
Unlike other noise removal techniques, this approach requires some forethought at time of capture. If you are using a high ISO value or long shutter speed (and a stationary object), snap at least three source photos of the same scene, ready for noise removal at the desktop.
Unfortunately the Image Stack technology in CS3 doesn’t support using embedded raw files as the stack layers, so yes, you will need to convert your photos to PSD via ACR before using this technique.
Step by step
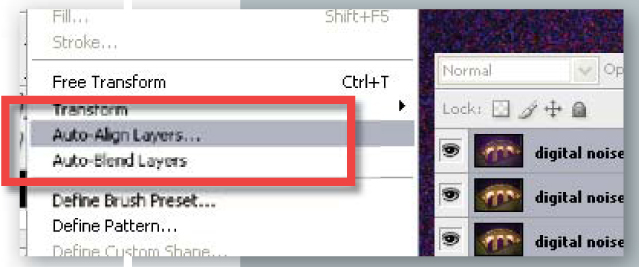
1. To start the process it is necessary to layer the source images in a single document. With the Move tool selected, click and drag the various separate files onto a single document. Holding down the Shift key during this action will center each file. Next multi-select all layers in the new document and choose the Edit > Auto-Align option to ensure registration of common picture details.
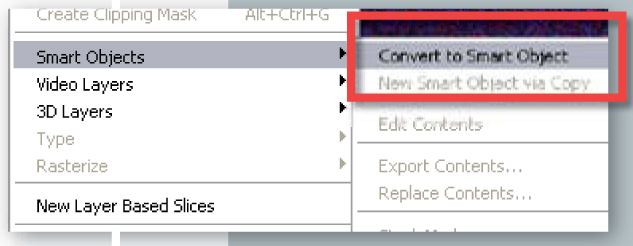
1. Next the layers are multi-selected in the layer stack and converted to a Smart Object (Layer > Smart Object > Convert to Smart Object).
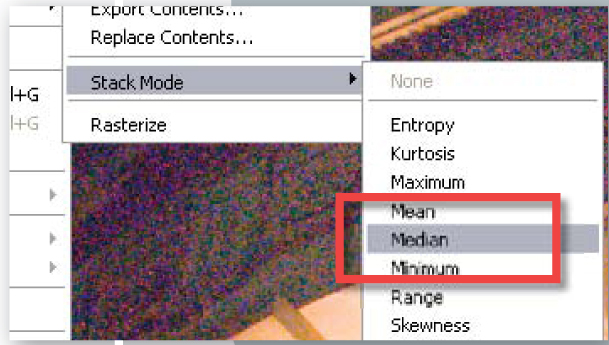
1. With the new Smart Object selected, the Median option is chosen from the list of Rendering entries in the Layer > Smart Object >Stack Mode menu.
Pro’s tip: To simplify the first three steps in this technique Photoshop CS3 Extended ships with a special script which loads files into a stack (File > Scripts > Load Files into Stack). The script displays a Load Layers dialog which contains options to Auto-Align and Convert to Smart Object as part of the stacking process.