In this chapter, we take a side trip away from application security and delve into the server end of things. If you don’t administer your own server, this information will be useful to you while shopping for a Web host. You’ll know what to ask to find out how secure the host’s servers really are. If you do administer your own server, well … “With great power comes great responsibility” and “Knowledge is power.” Here’s the knowledge you need to defend your server against attack.
It’s a pretty broad statement to claim that all programming languages, all Web servers, and all operating systems are inherently insecure—and before anyone has a chance to scream about the latest and greatest security update to his or her favorite OS, Web server, or language, allow us to clarify. You must assume that our statement is true. (And for the record, hackers the world over have proven it to be true for just about every version of every Web server, language, and operating system available.)
We’re not trying to be fatalistic here. Having to assume that your environment is insecure doesn’t mean you shouldn’t bother to secure it as much as possible or that there’s no point in securing your own application. Just the opposite is true. If you administer your own Web server, you’re in a great position to be vigilant. If you’re working with shared hosting, you can still take an active role in the security of the entire server in a few ways:
• Shop for a secure Web host. Insist on knowing what Web server software (and which version of it) the host is running and which version of each programming language it has installed. If the host is running software that’s a full version out of date, keep looking.
• Keep up with security alerts that affect the applications running on your Web host.
• Encourage your Web host’s system administrators to apply security patches and updates promptly.
Some Web hosts grumble at clients who take an active interest in the security of the server. If your shared host seems less than thrilled when you forward security alerts that affect its systems, you may want to start shopping around for a new Web host. Good hosting companies will either let you know that they’ve already seen the alert and are working on applying a patch to the affected system or will thank you for alerting them to the potential problem before a hacker does.
If you administer your own server, there are two primary tasks you should perform to keep your system as secure as possible:
• Upgrade your Web server, operating system, and programming languages to the latest stable versions.
• Keep up with the latest security alerts that affect your systems.
We’re not going to sugarcoat things. Securing a Web application takes time and effort. It’s not something you can do in an hour. So after putting in the work to secure your application, it is really discouraging to find out you’ve been the target of an attack made possible by security holes on the server. Avoiding that situation is what the next three chapters are all about.
This section doesn’t tell you everything you need to know about securing UNIX, Linux, or Mac OS X. We don’t have the space to do that here, so what you’ll find in this section are a couple of basic things to check while you’re thinking about securing the environment in which your application runs. This chapter is very UNIX/Linux/Mac OS X–centric, but don’t worry if your server runs Microsoft Windows. We’ll talk about securing servers running on the Windows platform in Chapter 12, “Securing IIS and SQL Server.”
Follow these steps if your server runs UNIX, Linux, or Mac OS. Since all three operating systems are based on a similar architecture, the process is very similar. Consult your operating system documentation for specific instructions if the following commands don’t produce the results you expect. If you’re running Apache on a Windows server, follow the steps in Chapter 12, “Securing IIS and SQL Server.”
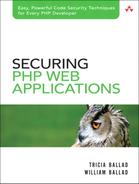
The first step in updating your operating system is to check the kernel version. From a shell prompt, type the following command:
$ uname -a
You will see a string like the one shown in Figure 11.1.
Depending on the graphical tools you have installed and the specific operating system brand you are running, it may be simpler to check the operating system’s release number. This is especially true if you’re running Mac OS X, which is a very graphically oriented OS. Either way, you want to find out what version of the operating system you are running so you can cross-reference that with the latest stable release from your vendor.
To check the latest version of Mac OS X, follow these steps:
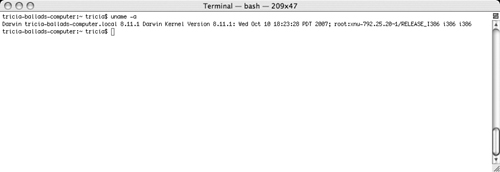
1. Click on the Apple icon at the top-left corner of the screen, then click “About This Mac.” This will bring up an information box with the operating system version number, as shown in Figure 11.2.
2. Next, go to the Mac OS X support section of the Apple support Web site at www.apple.com/support/. You want to make sure that the first two sections of the version number (10.5 as of this writing) match the first two sections of your version number. The third digit in the version number isn’t as critical. It simply denotes a minor update.
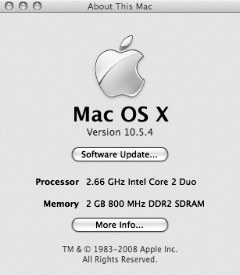
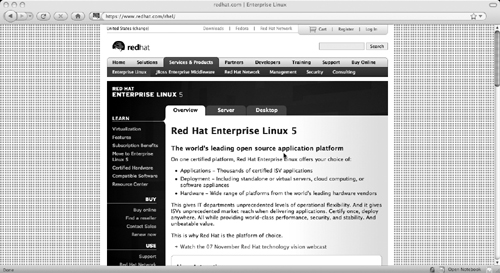
If you’re running Red Hat Linux, you can find the latest version information on the Red Hat Linux Web site as shown in Figure 11.3.
We’ll start by securing the Apache Web Server software, since it’s still the most widely used Web server application on the Internet, according to the July 2008 Netcraft survey at http://news.netcraft.com.
The single most important thing you can do to ensure that your application is running in a secure environment is to run the latest stable version of the Web server software. Most operating systems, programming languages, and Web server platforms release security updates periodically. Check the vendor’s Web site to be sure that you’re running the latest stable version, and see if there’s a newsletter or e-mail alert you can subscribe to so you know when a new version is released.
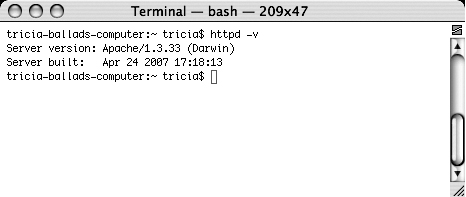
How do you find out which version of Apache you’re currently running? From a shell prompt, type the following command:
$ httpd -v
You will see two lines of output, as shown in Figure 11.4.
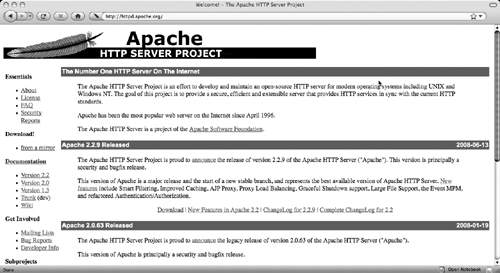
Verify that you are running the latest version of Apache by checking the Apache Web site at http://httpd.apache.org/download.cgi. Scroll down until you see the most recent release announcement, as shown in Figure 11.5.
If you’re not running the latest stable version, you should upgrade Apache before continuing to secure the rest of the server. Follow these steps:
1. Download the most recent version from http://httpd.apache.org/download.cgi. Save the file to the appropriate directory on your server. Where you install Apache depends on your server configuration, but it’s safe to install the new version in the same directory as the old one. Don’t worry about overwriting. The new version will install into a subdirectory named after the version number.
2. Unzip the file using the following commands (replace NN in the code below with the version number you downloaded):
$ gzip -d httpd-NN.tar.gz
$ tar xvf httpd-NN.tar
$ cd httpd-NN
3. Next, run the configure script using the following command (replace PREFIX with the path to your Apache installation):
$ ./configure -prefix=PREFIX
4. Once you’ve run the configure script, you’ll need to compile and install Apache, using the following commands:
$ make
$ make install
5. Finally, you’ll need to adjust the settings in the Apache configuration file. There are dozens of configuration directives, so we won’t cover them all here, although we discuss the most important security-related ones in the following sections. Once your configuration file is customized for your server, test it using the following command:
$ PREFIX/bin/apachectl configtest
Once you’re satisfied that everything is running as it should, you can replace the old Apache version with the new one. First, stop the old Apache server using the following command (replace OLD_PREFIX with the full path to the old Apache server):
$ OLD_PREFIX/bin/apachectl stop
Next, start the new Apache server and verify that it’s running correctly using the following command (replace PREFIX with the full path to the new Apache server):
$ PREFIX/bin/apachectl start
Assuming the new server starts without any errors, you can go ahead and delete the old Apache directory and rename the new Apache directory. If you think you may need to revert to the old Apache version for some reason, copy the httpd.conf (and any other environment-specific configuration files you use) to a safe place before deleting the directory. It’s not a good idea to keep old server versions around, even if they aren’t running. First, they take up space. Second, there’s always the possibility that you or someone else will mistakenly start the wrong server. Third, you’re replacing the older version for a reason—it’s less secure than the newer version, and more prone to attack. If you delete it from your server, it’s gone. We have yet to meet a hacker who can exploit something that no longer exists.
By default, Apache runs as the nobody user. Unfortunately, so can other server applications, cron jobs, and other system applications. This means that if someone successfully hijacks the nobody account, he or she has access to any application running as that user. In order to limit the damage that can be done by this type of attack, it’s a good idea to create a new unprivileged user for each application, including Apache.
To run Apache as its own user, follow these steps:
1. Create a new user and group, both called www (or apache, or webserver, or Bob—it doesn’t really matter what you call it). Give the user and group the bare-minimum privileges Apache needs to run.
2. Update the httpd.conf file to reflect the new user and group name, as shown in Figure 11.6.
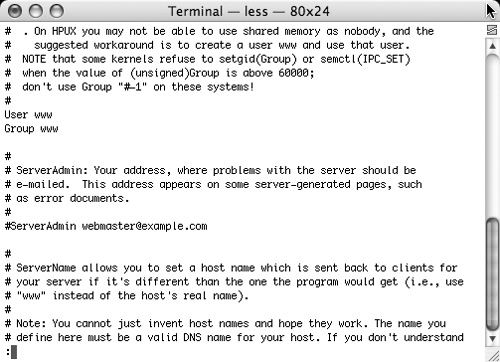
3. Save the configuration file.
4. Transfer ownership of the Web server files to the new user and group, using the chown command:
$ chown -R NEW_APACHE_USER PATH_TO_APACHE
$ chgrp -R NEW_APACHE_GROUP PATH_TO_APACHE
Replace NEW_APACHE_USER and NEW_APACHE_GROUP with the username and group under which you chose to run the Web server. Replace PATH_TO_APACHE with the full path to your Apache installation.
5. Finally, test and start (or restart) the server, using the following commands:
$ PATH_TO_APACHE/bin/apachectl configtest
$ PATH_TO_APACHE/bin/apachectl start
This is a good foundation, but there are a few more things to do before we can really call Apache secure.
By default, Apache includes some important information about itself in its error messages. That’s useful if you’re trying to debug an error, but it’s also useful information if your goal is to break into the Web server. After all, if you want to break into Apache, it will save you a lot of time to know what version the server is running. If you know that, you know what vulnerabilities to look for.
To obscure this information, you’ll need to set a couple of directives in the httpd.conf file:
• Set ServerSignature to Off.
• Set ServerTokens to Prod.
Setting ServerSignature to Off tells Apache not to display its own version number, the modules it’s running, or any information about the operating system on 404 pages. The ServerTokens directive tells Apache to include only the minimum amount of information in the HTTP header. The default value for the ServerTokens directive is Full, which displays quite a bit of information in the HTTP header:
Server: Apache/2.0.41 (Unix) PHP/4.2.2 MyMod/1.2
A hacker with this information knows exactly what version of Apache you’re running, as well as the operating system, the version of PHP, and any modules you’re running. That’s a lot of information to exploit! If you set this directive to Off, Apache will return only the fact that it is running:
Server: Apache
Now that we’ve told Apache not to tell the whole world about our server setup, we need to restrict it to its own area of the server.
There’s really no good reason for Apache to be allowed to serve files outside of its document root, so we’ll restrict it to that directory structure. Any request for files outside the document root is highly suspect. To restrict Apache’s capability to serve files outside the document root, set the following directives in the httpd.conf file:
<Directory />
Order Deny, Allow
Deny from all
Options none
AllowOverride none
</Directory>
<Directory www>
Order Allow, Deny
Allow from all
Options -Indexes
</Directory>
Replace the www directory name with whatever you’ve called your Web server’s document root. Notice the Options line in the <Directory www> section:
Options -Indexes
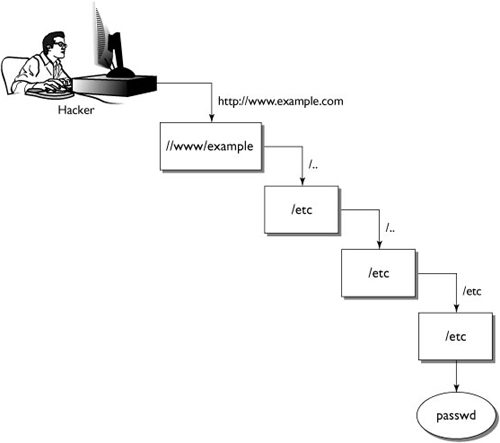
This disables directory browsing, securing the server from directory traversal attacks. In a directory traversal attack, the hacker uses the "." and ".." notation to travel through the server’s directory structure. For example, say our document root is set as /www and each Web site we serve has its own directory under /www. A hacker hitting the Example.com Web site (physically located at /www/example on our server) could type the following URL into the address bar of the browser: http://www.example.com/../../etc/passwd.
Let’s break this down to demonstrate:
1. http://www.example.com points the browser at our server and finds the document root for this particular Web site. This Web site’s document root is physically located at /www/example.
2. ../ takes us up one directory, to /www.
3. ../ takes us up one more directory, to /.
4. etc/ takes us into the /etc directory.
5. passwd requests the file named passwd.
Figure 11.7 is a visual representation of this process.
Just as we’ve disabled directory traversals, we need to disable anything else we don’t explicitly need.
The httpd.conf file has dozens of options, directives, and modules that make Apache a very powerful Web server. Unfortunately, the more features you include in your Apache installation, the more possibilities there are for security vulnerabilities. While you’re installing or upgrading Apache, take the time to look through the httpd.conf file and make absolutely certain that anything that’s enabled is essential to running your server and its Web sites. Don’t enable a feature just because you think you might use it at some point. It’s a lot less work to make a configuration change to Apache—even one that requires recompiling!—than it is to clean up after a security breach. Trust us on this one …
Here are a few common features that many servers have enabled, regardless of whether they are actually used:
• Symlinks, which allow the server to follow symbolic links, possibly outside of the document root
• SSI, or Server Side Includes
• CGI
• mod_perl (if none of your Web applications are built in Perl, you don’t need mod_perl)
This isn’t a comprehensive list by any means. It’s simply meant to get you started. We highly recommend you take a look at the documentation for Apache directives and modules. The most up-to-date information is available on the Apache Web Server Web site at the following URLs:
If you’re not absolutely certain what a given module or directive does, or whether you need it enabled, the Apache Web Server Web site is the place to find out. When in doubt, disable the module or directive. You’ll find out pretty quickly if it was something important. The one exception to this rule is ModSecurity, which you should keep (if you’ve inherited a server with it preinstalled), even if you don’t yet know exactly what it does. The next section covers ModSecurity.
ModSecurity is a robust packet-filtering tool from Breach Security that examines every packet coming into your Web server. It compares each packet to its internal rules and decides whether to stop the packet or allow it to continue to the Web server. Think of ModSecurity as a bouncer for your Web server. Instead of checking IDs at the door to a club (enforcing the rule that anyone who enters must be above a certain age), it checks that packets coming into the Web server meet specific criteria for trustworthiness.
Breach Security doesn’t charge for the ModSecurity application; the company makes its money through consulting, support, and training. This method works out very well for independent Web application programmers and server administrators. We get the benefits of an enterprise-class product that’s constantly updated and maintained, without the price tag usually associated with this type of application. ModSecurity can be pretty complex if you get into customizing its rules, but as long as you keep your packaged rule set up to date you should be fine.
Unfortunately, ModSecurity doesn’t come with Apache. You’ll have to download and install it separately, so we’ll walk you through that process.
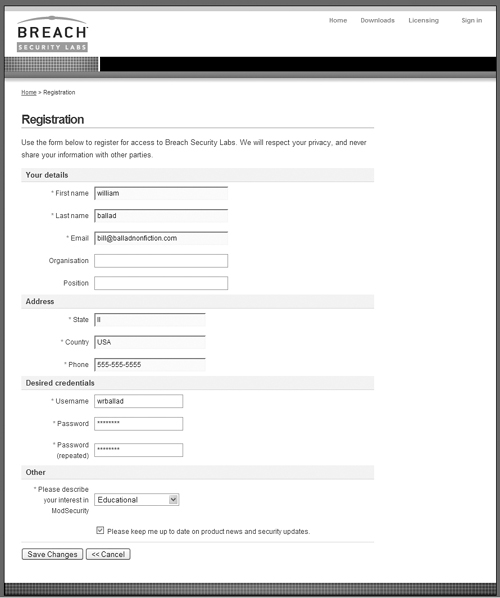
The first step is to download the latest version from www.modsecurity.org/download/. You’ll need to register for a free account on the Breach Security Labs community site in order to download ModSecurity and rule sets and to view documentation. Fill out the brief registration form, as shown in Figure 11.8.
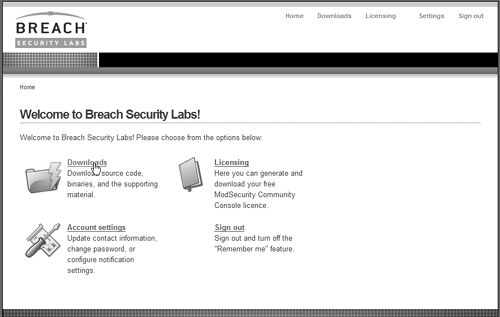
Once you’ve registered, you’ll get access to the Breach Security Labs site, where you can click on the Downloads link, as shown in Figure 11.9.
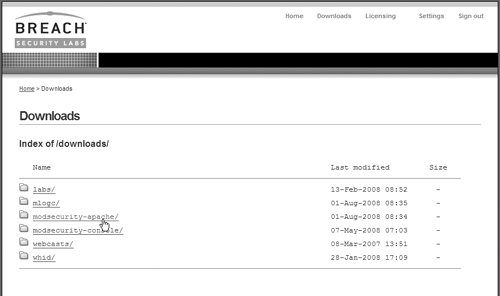
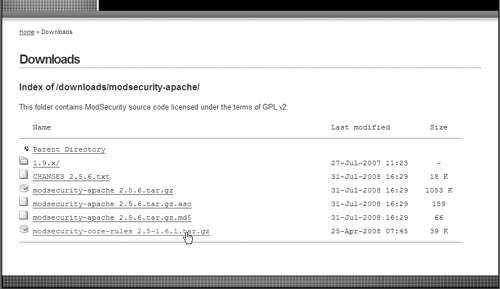
You’ll see a simple directory listing. Click on modsecurity-apache/, as shown in Figure 11.10.
Click on modsecurity-apache_2.5.6.tar.gz, as shown in Figure 11.11, to download ModSecurity. The version number may not be exactly the same as we’ve shown here, but this area will always give you the latest version.
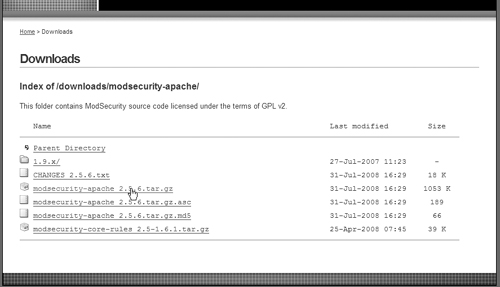
When that file is finished downloading, click on modsecurity-core-rules_2.5-1.6.1.tar.gz, as shown in Figure 11.12. Again, don’t worry about the version numbers.
Store both files wherever you have installed other Apache modules.
The next task is to prepare Apache to work with ModSecurity:
1. Verify that mod_unique_id is enabled in httpd.conf. mod_unique_id comes with Apache, so you shouldn’t have to install it.
2. Verify that your server has the latest version of the libxml2 library installed. You can check version numbers and download the newest version at http://xmlsoft.org/downloads.html.
3. Stop Apache httpd, using the following command:
$ PREFIX/bin/apachectl stop
Replace PREFIX with the full path to your Apache installation.
4. Unpack the ModSecurity archive using the following commands:
$ gzip -d modsecurity-apache_2.5.6.tar.gz
$ tar xvf modsecurity-apache_2.5.6.tar
$ gzip -d modsecurity-core-rules_2.5-1.6.1.tar.gz
$ tar xvf modsecurity-core-rules_2.5-1.6.1.tar
5. Run the configure script, using the following command:
$ ./configure
6. Compile and test ModSecurity:
$ make
$ make test
7. Install ModSecurity using the following command:
$ make install
Modify httpd.conf to enable ModSecurity. Add the following directives to httpd.conf:
LoadFile /usr/lib/libxml2.so
LoadModule security2_module modules/mod_security2.so
8. Restart Apache using the following command:
$ PREFIX/bin/apachectl start
At this point, you have installed ModSecurity. You should look at the configuration directives documentation located at www.modsecurity.org/documentation/modsecurity-apache/2.5.6/html-multipage/configuration-directives.html, but just having ModSecurity running with the core rule set is a good start toward a well-secured Apache Web Server. Of course Apache is only part of a secure Web server system. You also need to secure your database server, which we’ll discuss in the next section.
Behind every great Web application there’s a database. For the purpose of demonstration, we talk about MySQL, but the concepts can be applied to PostgreSQL or any other relational database running on a UNIX, Linux, or Mac platform. We’ll discuss Microsoft SQL Server in Chapter 12, “Securing IIS and SQL Server.”
We know you’re probably getting tired of hearing this by now, but the very first thing you should do when securing your database server (or any other server application for that matter) is to make sure you’re running the latest stable version. If you do absolutely nothing else, that will give you some measure of security.
First, determine what version of MySQL you’re running. From a command prompt, run the following command:
$ mysql
This will give you a welcome message, including the version of MySQL you’re running. Look for a line that gives you server information, similar to this:
Server version: 5.0.27-standard MySQL Community Edition - Standard (GPL)
Then check the MySQL Web site at http://dev.mysql.com/downloads/. Scroll down until you see the “Current Release” announcement. As with Apache and ModSecurity, as long as the first two digits in the release number are current, you don’t have to worry about the third digit as it’s just a minor release.
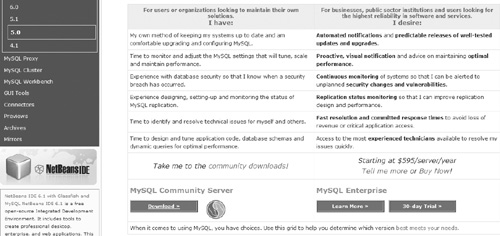
To download the latest Generally Available Release (MySQL jargon for the latest stable release), go to http://dev.mysql.com/downloads/mysql/5.0.html and click the Download button, as shown in Figure 11.13.
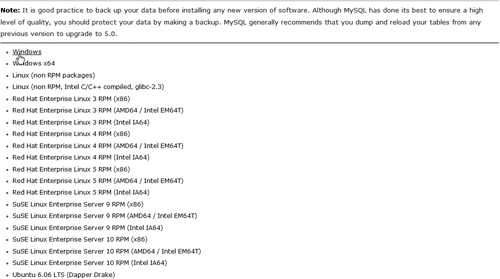
Click the link that best describes your operating system, as shown in Figure 11.14.
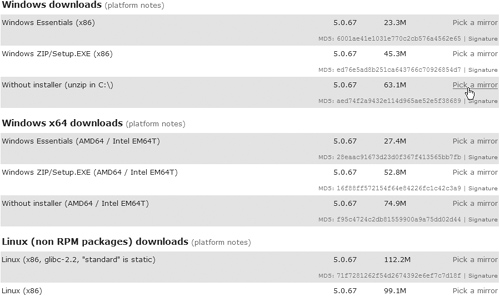
Choose the option that best describes your system, and click Pick a mirror as shown in Figure 11.15.
If you will be the person responsible for keeping MySQL up to date, it’s a good idea to register for a free account, but for now we’ll skip registration and go straight to the download. Click the No thanks … link, as shown in Figure 11.16.

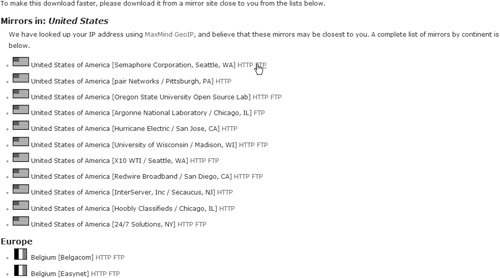
Choose the mirror that’s closest to your location, and choose either FTP or HTTP download, as shown in Figure 11.17.
Save the file, then upload it to your server. Before you go any further, you should take a few minutes to check the following to ensure that your upgrade goes as smoothly as possible:
1. Back up your databases. Just to be safe, pull a copy of your database backup down to your local machine.
2. Read the upgrade notes located at http://dev.mysql.com/doc/refman/5.0/en/upgrading-from-4-1.html.
3. Resolve any library incompatibilities before you install the new version of MySQL.
At this point, you can install the new version of MySQL. There are slightly different instructions for every operating system (and every version of each OS) for which MySQL is available, so rather than showing you the entire process of installing MySQL on our server (which may very well be different from yours), we’ll simply point you to the list of OS-specific installation guides on the MySQL Web site at http://dev.mysql.com/doc/refman/5.0/en/installing-cs.html.
The rest of this chapter will focus on simple configuration changes you can make to MySQL to make it more secure.
If your Web server and database server are both running on the same physical machine—as is often the case—there is no reason to allow remote access to MySQL. As a general rule, you should disable any feature that you don’t explicitly need. Remote access is generally used only to perform backups and for remote server administration. As a rule, you should not enable remote server administration unless you absolutely need it. Is getting up and walking across the building enough of an inconvenience to warrant a possible security breach? On the other hand, if you live and work in Chicago, and your server is in New York, you have a valid case for using remote administration.
By default, the administrative password on a MySQL installation is empty. This allows anyone to log in to the database as the administrative user and create new users, change or grant privileges, add or drop tables, and so on. Clearly, this is not something just anyone should be allowed to do, but you’d be surprised how many MySQL installations floating around on the Internet have the defaults left alone. Why change the username as well as the password? It’s common knowledge that the MySQL administrative user is named root. If you change only the password, hackers attempting to break into your application already have half of the information they need. Change both the username and the password, and you’ve made it twice as difficult to break into your server.
To change the admin username, use the following commands from within the MySQL command-line utility. In the examples below, mysql> is the command prompt used by the command-line utility.
mysql> update user set user="mydbadmin" where user="root";
mysql> flush privileges;
We used "mydbadmin" as the new administrative username, but you can choose any name that makes sense to you.
Next, we’ll set the default password. Of course, any password is better than no password, but we may as well set it to something secure. There are two ways to go about this:
• If you plan to store the administrative password in a database administration tool so you won’t need to remember it, a randomly generated password is often more secure than one you create manually. A random password is also much more difficult to memorize, because it has no inherent meaning to you.
• If you will be using the MySQL command-line utility or a database administration tool that requires you to log in each time you need to administer the database, follow the guidelines set out in Chapter 7, “Authentication.”
If you decide to use a randomly generated password, Gibson Research Corporation, or GRC, has a solid password generator on its Web site at https://www.grc.com/passwords.htm. Every time the page is refreshed, it generates three new passwords: a 64-character hexadecimal string, 63 random printable ASCII characters, and a 63-character string composed of alphanumeric characters. One of the libraries MySQL uses for authentication has a limit of 8 characters on passwords, so although MySQL itself has no limits on password length, there is a functional restriction of 8 characters. Copy a random series of 8 characters from one of the random strings generated by the GRC password generator, and use that for a random MySQL password.
Once you’ve decided on an administrative password, log in to the database as the administrative user, using the following command:
$ mysql -u mydbadmin
mysql> SET PASSWORD FOR mydbadmin@localhost=PASSWORD('new_password'),
Replace 'new_password' with whatever you’ve chosen as the new administrative password.
Several default database user accounts are generated when you install MySQL. You need the administrative account (although you should rename it and set a password for it, as discussed in the previous section), but depending on your server setup and your intentions for the database, you may not need any of the other default user accounts. If they aren’t crucial to the operation of your application, delete them. Extra user accounts are just one more opportunity for a hacker to break into your database.
To delete unnecessary user accounts, run the MySQL command-line utility, as shown in this example, and enter the commands at the mysql> prompt:
$ mysql -u mydbadmin
mysql> DELETE FROM user WHERE NOT (host="localhost" and user="mydbadmin");
mysql> FLUSH PRIVILEGES;
This will delete all default users except the administrative account. From here you can create the user accounts you need. We recommend creating a separate user account for each application that will use MySQL. That way if one account is compromised, the other applications on the server aren’t affected. To add new user accounts, open the command-line utility and enter the following commands:
$ mysql -u mydbadmin
mysql> CREATE USER dbapp IDENTIFIED BY 'new_dbapp_password';
Replace dbapp with the name of the user you are creating. Replace 'new_dbapp_password' with a password for that user account.
The default MySQL installation also comes with some sample databases. These are useful for testing purposes, but once you are satisfied that your installation of MySQL is running properly, you should delete them. Once again, this follows the general rule of deleting or disabling anything that you don’t explicitly need to run your application.
To delete the sample databases, open the command-line utility and enter the following commands:
$ mysql -u mydbadmin
mysql> drop database test;
At this point, you have a reasonably secure installation of MySQL upon which to build your application.
In this chapter, we covered a lot of ground! We discussed how to secure an Apache Web Server and a MySQL database server. Keep in mind that if you administer your own server this chapter shouldn’t take the place of a complete tutorial on server security. Our goals are simply to help you avoid the most obvious security blunders and to encourage you to look deeper if you need more information. We’ve included a few good reference books on UNIX, Linux, and Mac OS X server security in the Appendix.