If you’re like most PHP programmers, you may control your development environment, but you probably don’t own or control the production Web server your application will run on. So why are we devoting several chapters to server-side PHP security? First, this chapter will give an overview and a starting point for further research if you do control either your development or production Web server. The most secure application can still be compromised if the server itself is insecure. Second, even if you are using shared hosting for both your development and production environments, knowing something about server-side PHP security will allow you to choose a shared host that is responsible about security on its servers.
If only it were so easy to hop over to www.php.net and download the most recent version! Since PHP is released under the Creative Commons license, there are a couple of PHP “brands,” if you will. The two major types of PHP are
• PHP
• Zend
PHP is the language itself as distributed by the PHP Group. If you’re reading this book, you already know what core PHP is. Enough said. So what about Zend? You have probably heard of it; you may already use it. But for the reader who hasn’t had time to really research Zend, we’ll take a brief detour. After all, the core idea behind application security is that applications are hardened through a series of decisions that all somehow revolve around keeping code secure. Decisions made on the basis of facts generally turn out better (at least when it comes to application security!) than those made on the basis of convenience and speed. So before you start downloading PHP, take the time to decide which PHP you’ll use.
Zend is a framework built on top of core PHP. It’s essentially a toolbox of libraries that extend PHP and make it easier and quicker to develop Web applications. Take authentication, for example. You can write your own authentication code. In fact, that’s what we’ve done in Chapter 7, “Authentication.” You should write your own authentication system at least once. It’s kind of like visiting Niagara Falls—something you should do at least once in your life, but after you’ve seen it, you can cross it off the list of things to do before you die. Unless you’re really into waterfalls, you probably don’t need to visit Niagara Falls every year. Writing an authentication system from scratch will teach you more about the pitfalls and necessary components of that type of system than any article or textbook ever could. Once you know that, you’ll be much better able to use an off-the-shelf authentication system sanely, extending it to meet your needs without breaking something crucial and opening up your entire application to the first hacker who wanders by your server. So why use the framework, if you already know how to write an authentication system yourself? It’s quicker, for one thing. You just have to plug in a few prebuilt functions and voilà—you have an authentication system. It can also be more secure, because the folks involved with the Zend Framework project have the ability to focus strictly on that one piece of the application puzzle. You’ve got to look at the whole project, so it’s easy to miss the crucial details.
So why don’t we use the Zend Framework for the examples in this book? Well, to start with, this book isn’t called Securing Zend Framework PHP Web Applications. Our goal isn’t to teach you how to use Zend. Our goal is to show you how to write secure PHP applications for the Web, regardless of the environment or libraries or other tools you decide to use.
The Zend Framework gives you a lot of those core building blocks that you’re likely to need if you’re developing Web applications. If you’re whipping out quick system administration scripts, you probably don’t need Zend. There is a learning curve to using any framework, and if you use PHP only to automate quick little tasks, it’s probably not worth the time to learn. But if you use PHP to write full Web applications, Zend can make your life a whole lot easier.
If you decide to use Zend, you’ll need to install the Zend Core package and the Zend Framework. We’ll walk you through the process in this section. Zend Core includes the most up-to-date version of PHP, as well as several other applications and libraries in one bundle:
• Most of the more commonly used PHP extensions.
• Zend Optimizer: The runtime application that allows PHP to interpret applications encoded by Zend Guard. Zend Guard allows companies and developers to distribute their applications without exposing the underlying source code.
• Zend Debugger: A fully featured PHP debugger. Since the PHP language doesn’t come with a debugger, this feature alone is worth the trouble of installing Zend.
• Zend Enabler: Zend’s version of FastCGI, which optimizes the interaction between PHP and either Apache or IIS.
• Zend Updater: The configuration and update mechanism for Zend.
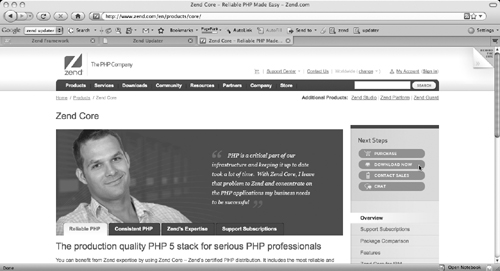
During installation, you can also get Zend Framework and the most recent versions of the Apache Web Server and MySQL or DB2 Express-C relational databases. To get started, point your browser at the Zend Core Web site at www.zend.com/en/products/core/ and click the Download Now button, as shown in Figure 13.1.
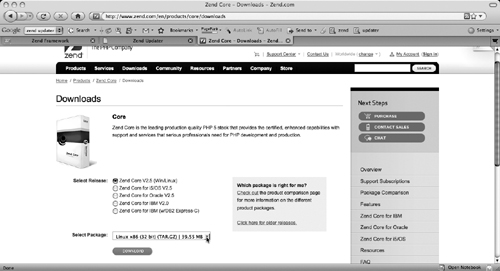
Select the radio button next to “Zend Core V2.5” (Win/Linux), unless you are certain that you need another version. Then select either the 32-bit Linux, 64-bit Linux, or Windows package from the Package menu, as shown in Figure 13.2.
If you are working on a Mac, choose one of the Linux versions, then click the Download button.
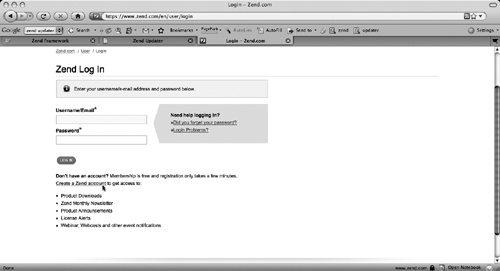
You’ll be asked to create a free Zend Network account if you don’t already have one. Click the link to Create a Zend account, as shown in Figure 13.3.
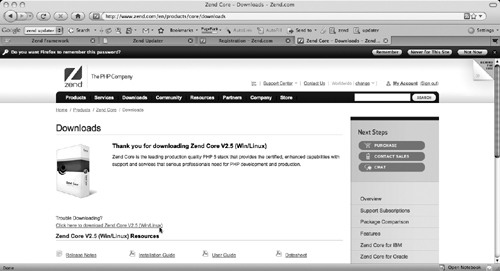
Once you’ve created your account, log in to your Zend account and you will be taken to the Zend Core download page, as shown in Figure 13.4.
Unpack the archive, then follow the steps described in the Zend Core Installation Guide located in the archive. During the installation process, you’ll be given the opportunity to install the Zend Framework, Apache Web Server, and either MySQL or DB2 Express-C.
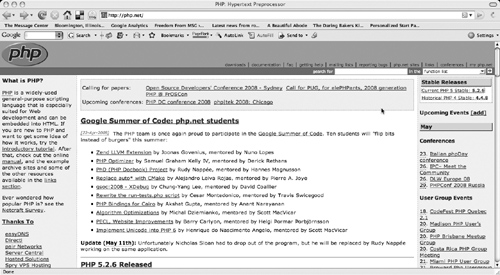
The first thing you should look for when evaluating how secure PHP is on your server is what version of PHP is running. As of this writing, the latest stable version of PHP is 5.2.6. If your server is running 5.2.4, you probably don’t need to be too concerned, but if you’re running 5.0.3, for example, it’s time for an upgrade. You can find out the latest stable version of PHP by visiting the official PHP Web site at www.php.net. The latest stable version is shown in the upper right corner, as shown in Figure 13.5.
It’s almost always a good idea to run the latest stable version of PHP. We won’t say there’s never a good reason to run an older version, but for the vast majority of uses, you want the most recent stable release. Notice that so far we’ve discussed only stable releases. The PHP Group also releases development versions on a regular basis. Do not use a development version of PHP on your production server. Development releases aren’t supported and may produce unexpected results. Their main purpose is to allow programmers to experiment with new features that may or may not ever make it into a stable PHP release. If the development version of PHP includes a feature you’d like to use in your application, by all means install it on your development box and experiment with it. Just don’t put it into your production environment, and don’t write code in your application that relies on experimental features.
It’s also worth mentioning here that doing a major upgrade isn’t always as straightforward as you’d like. Depending on how out of date your version of PHP is, you may have to do an intermediate upgrade or jump through other hoops. Always read the release notes before doing any major upgrade.
Finally, you can install the Suhosin patch and extension to PHP. The goal behind Suhosin is to be a safety net that protects servers from insecure PHP coding practices like the ones we discuss throughout this book. The Suhosin patch fixes a few key vulnerabilities in the core PHP language. The Suhosin extension adds several encryption schemes and protects against various remote file inclusion attacks, session attacks, and a long list of other vulnerabilities. It also includes a toolbox of ready-made data filters and some advanced logging capabilities. As with any other set of libraries, you can implement these protections yourself, but once you understand the inner workings of writing secure code, there’s nothing wrong with taking a trusted shortcut every now and then.
You can obtain the Suhosin patch and extension from the Hardened-PHP Project Web site at www.hardened-php.net/suhosin/index.html. The installation and configuration documentation available on the Web site is fairly complete and easy to follow, so we won’t repeat what’s already been written there. Suhosin is designed to work for most configurations right out of the box.
Once you’ve installed the latest stable version of PHP, there are two other features you should consider using to further secure your server and your application. PHP includes a setting called safe_mode that restricts which files PHP can access, and Apache can be configured with SuEXEC to run PHP scripts as a specified user.
safe_mode is one of the key settings in the php.ini file (we’ll discuss how to enable safe_mode in the section on tuning php.ini later in this chapter). When safe_mode is turned on, PHP will only open files that are owned by the same user as the application. This allows PHP to open your files, but not files owned by any other user on the server.
safe_mode is one of the things that is being removed from PHP when PHP 6 is released, but since a significant percentage of PHP Web applications are still running PHP 4, it makes sense to discuss safe_mode.
This is a good way to limit the damage that can be done by a single insecure application running on a shared server. If that application is compromised, the owning user’s files will be affected, but at least the rest of the users on the server should be protected from attack.
Unfortunately, there are a few caveats to using safe_mode. First, using safe_mode requires that your application store all of its data in a database, which is a good idea anyway. The alternative is storing data in flat files, which are easier to compromise. safe_mode won’t allow your PHP application to create or access new files because when a Web-based application creates files, the Apache user owns them. Because safe_mode allows PHP applications to access only those files owned by the same user who owns the original application, any files created by the application would become unavailable to it. If your application design is based on storing data in flat files, this is a great time to revisit that decision and consider moving the data to a database. Not only is the data itself more secure, but by making your application compatible with safe_mode, you’re contributing to the security of everyone else on a shared server as well.
The second thing to watch out for with safe_mode is that it’s not 100 percent enforced. PHP itself enforces safe_mode restrictions, but third-party libraries and extensions that are written in another language (usually C or C++) can easily ignore safe_mode. The PHP Group examines extensions that are included in official PHP releases to be sure they respect safe_mode, but there are plenty of other extensions that aren’t vetted by the PHP Group. This isn’t to say third-party extensions are automatically unsafe, but you do have to be careful.
Finally, safe_mode is slated to be dropped from PHP 6 when it is released, partially because so many applications ignore it, and because it is unenforceable with third-party extensions to PHP. However, since PHP 6 is not yet scheduled for release as of this writing, safe_mode is a good thing to look for when you’re shopping for a shared hosting provider. Having a Web host that requires applications to run in safe_mode doesn’t automatically make the applications secure, but it helps.
SuEXEC is Apache’s answer to securing applications in a shared hosting environment. Normally, Apache runs all Web applications as the Apache user. Under SuEXEC, each application runs as the user who owns the application. What’s the difference? The Apache user generally has a much looser set of privileges than the average user. This means that if hackers can carry out a code injection attack on an application running as the Apache user, they will have all the privileges of that user and will be able to do much more widespread damage to the server. If the same attack is carried out on an application running in a SuEXEC environment, the attacker is constrained to the privileges allowed to a normal user. The attacker can damage that user’s application and data but can’t harm the applications and data owned by other users on the server.
SuEXEC isn’t the perfect solution to securing shared hosting. Its big downside is that it requires applications to be run as CGI rather than under the mod_php Apache module. PHP as CGI runs significantly slower—between 30 and 40 times slower, depending on the benchmarks you use—than PHP under mod_php. CGI also does not support HTTP authentication. It all comes down to the balance among performance, features, and security. If your application doesn’t require significant server resources (so the time factor won’t be too significant) and doesn’t rely on HTTP authentication, choosing a shared hosting provider that implements SuEXEC is a good choice. If either of those two factors would significantly impact how your application performs, you’ll have to forgo the added security boost of running in a SuEXEC environment.
ModSecurity takes the idea of running applications in a secure server environment one step further. ModSecurity is an all-in-one intrusion detection system and Web application firewall. It’s purposes are to
• Block bad requests, such as known automated attacks
• Filter out all incoming data that does not meet validation requirements
• Monitor data coming into the application and data going out to the user, to alert administrators and developers to potential security breaches
Running ModSecurity is a lot like posting an armed guard outside a building. It will stop a lot of attacks that would otherwise get through, but it won’t stop everything, so don’t make the mistake of thinking that running ModSecurity (or any firewall/intrusion detection system) excuses you as a programmer from hardening your application. After all, even if there were an armed guard posted at the entrance to your neighborhood, you would still lock the doors to your house when you leave.
ModSecurity also has some peculiarities when it’s combined with PHP. The ModSecurity blog at www.blog/modsecurity.org has the latest information on securing PHP applications with ModSecurity, but the most important points are the following:
• Whitespace, dots, and opening square brackets ([) in parameter names are converted to underscores when ModSecurity filters input. This is problematic because a hacker can attack a variable named my_var by including a variable named my.var, my[var, or even my var in the parameter list.
• When register_globals is turned on in php.ini, ModSecurity automatically converts request parameters into variables. This allows an attacker to actually create new variables within your application.
ModSecurity requires a significant amount of overhead, especially as the list of rules describing what data can and cannot be allowed through gets longer. This overhead can cause your application (and anything else running on the server) to run noticeably slower if you use ModSecurity as a replacement for variable sanitation or any of the other application security techniques we’ve discussed. Using ModSecurity as a replacement for secure programming practices isn’t actually significantly easier anyhow. ModSecurity comes with a core rules package that covers the basics, but using ModSecurity instead of writing secure code would involve creating a lot of custom rules. Configuring and creating custom rules for ModSecurity is beyond the scope of this book, but you can get a good introduction to the process in the ModSecurity documentation at www.modsecurity.org/documentation/modsecurity-apache/2.5.4/html-multipage/.
The most basic thing you can do to secure PHP on the server is to be sure the options in the php.ini file are set optimally. If you are working in a shared hosting environment, you may not have the ability to change the settings in php.ini, but by knowing which settings have an effect on overall server security, you will be able to choose a Web host that has taken the time to secure PHP.
There are dozens of parameters in php.ini, but only a few of them are important from a security standpoint. Many of these parameters aren’t set securely by default, so anytime you have a new PHP installation (or are working in a new environment that you haven’t already secured), take a few minutes to check the settings in php.ini against the following list and change the settings as needed.
• safe_mode = On
As we discussed earlier in this chapter, safe_mode is a good thing to turn on unless you have a compelling reason not to use it.
Combined with safe_mode = On, turning off safe_mode_gid requires that a file be owned by the same user and group ID in order to be accessed by a PHP application.
• open_basedir = <directory>
This allows you to set the top-level directory that PHP applications can access. For example, if you set open_basedir = /home/my_application/, an attacker would not be able to traverse the filesystem to /home/some_other_user/.
• safe_mode_exec_dir = <directory>
Combined with safe_mode = On, functions that execute system programs such as exec() and system() would not have access to them unless they are placed in the specified directory. This means that only system functions you specifically place in the specified directory would be available to your application, preventing a hacker from executing anything else.
• expose_php = Off
This prevents PHP from including information about itself (such as the version of PHP running on the server) in HTTP headers. This information is very helpful to hackers because it narrows down which vulnerabilities they may be able to exploit. If hackers discover that you are running PHP 4, they will know that there is a good likelihood that they will be able to exploit typical PHP 4 vulnerabilities.
• register_globals = Off
Unless register_globals is turned off, any parameter sent to a PHP script is automatically converted to a global variable. This allows a hacker to create new variables within your application. register_globals is turned off by default in every version of PHP starting with 4.2.0, but it doesn’t hurt to check the setting just to be sure it hasn’t been turned on at some point.
• session.cookie_lifetime
session.cookie_lifetime specifies how long a session cookie remains viable before it times out. The default value is 0 or no time-out. It’s a good idea to set this value to something that makes sense for your application. For instance, if you’re writing an online banking application, you may want to set it for only a few minutes. For our guestbook, a couple of hours is probably sufficient. This allows the user to walk away and come back, but will prevent some session hijacking attempts.
• display_errors = Off
display_errors is a very useful debugging tool, because it displays detailed error messages anytime a PHP application encounters a problem. Like most debugging tools, it should be turned off in a production environment—unless, of course, you want to share path names, SQL statements, and other sensitive information with the world.
These are the most important parameters to look at when securing PHP. If you’re setting up PHP for the first time, you’ll want to familiarize yourself with the entire php.ini file, and be sure you understand what each parameter does before you change the default setting. However, at least where security is concerned, the default values aren’t always the best setting. If you do nothing else with php.ini, at least make sure the parameters listed here are set correctly.
If you’re like most PHP programmers, your application runs on a shared Web server that you don’t personally control. This doesn’t mean you can ignore server-side PHP security. It simply means that you should be aware of the various ways that PHP can be secured on the server so that you will know what to look for and what questions to ask any Web hosting company before you sign up for an account. A half-hour chat with someone on the Web host’s technical staff could save you hours of work and a lot of headaches by allowing you to get a clear idea of how secure the company’s server is. The more secure the Web server, the less likely you are to be the victim of a hacking incident. It’s not a guarantee—any server can be hacked, given enough time and resources—but a secured server does make your application less of a target.