At this point, you’ve examined your application from several security angles—and we hope you’ve closed a few holes in the process. You’ve written some automated tests to make sure your code works and will continue to work. This chapter is a bit like the pop quiz at the end of the week. Now we find out how effective your input validation and variable sanitation really are by emulating hacker activity, in a controlled environment.
Whenever you attempt to harden an application, there are really only two ways to know how effective your work is:
• Wait and see if your application or server is attacked, and whether the attack is successful or not.
• Emulate a hacker and try to find weaknesses in your own application or server.
This chapter is all about the second option. We’ll show you some tools that will emulate various hacker activities in a controlled environment, then produce reports that pinpoint where the weaknesses in your defenses are.
There are two main goals of exploit testing:
• Testing the effectiveness of filters and input validation functions
• Penetration testing
We focus primarily on testing filters and input validation functions, since creating those functions has been the bulk of the work we’ve done throughout the book. Penetration testing is really outside the scope of this book, which is to give you, the PHP Web application programmer, enough understanding of security concepts and tools to defend your applications against attack, so you can spend more of your time creating and less time cleaning up the mess after a security incident. To really carry out effective penetration testing, you need someone with a deep understanding of hacking methods and the low-level systems hackers exploit. The tools we discuss in this chapter don’t replace that level of knowledge and experience, but they will give you a fairly good idea of how secure your application is and where the weaknesses are.
It’s important to note before we get started that you have to be very careful when performing exploit testing. This is part of the security field where the line between legitimate work in securing Web sites and applications and hacking is really blurred. You have to go through some of the same processes, and in some cases use the same tools, that hackers use in order to test the secure code you’ve written. As long as you are only testing your own Web sites and applications, you’re solidly on the correct side of that line. Because many of the testing tools are so useful in finding vulnerabilities, hackers use them also. In fact, many of the tools that are used for legitimate exploit testing were originally created by hackers looking for vulnerable Web sites to attack, so you have to be careful about the tools you use and where you get them. Some testing tools are really Trojan horses with hidden virus code that infects your system as soon as you install them. Others are available only from Web sites infected with malicious code.
The tools we demonstrate in this chapter are legitimate and available from safe sources. When you download these tools, make sure you are downloading them from the original sources (which we include in each section) rather than from a third party. The only way you can be sure you are getting the legitimate tool, without any modifications, is by getting it directly from the original vendor.
Now that we’ve got the warnings out of the way, let’s move on to how to test the security of your application.
Fuzz testing is an extremely simple concept that also happens to be very effective at finding obscure weaknesses in applications. The idea behind fuzzing is that by sending strings of random, or pseudo-random, data at the application, you’ll find ways to break it that a human tester wouldn’t think of. When we designed our tests in Chapter 14, “Introduction to Automated Testing,” one of the biggest challenges was trying to think like a hacker whose goal is to break the application. Fuzz testing eliminates the necessity of changing our thought process. The idea is that by throwing large amounts of random data at an application, the fuzz tester will accidentally hit some or all of the boundary conditions inherent in the system.
Fuzz testing isn’t a substitute for carefully designed unit and system tests. It’s useful because it tests your application from a perspective that’s different from that of human-designed tests. The more ways you have of examining and testing your code, the more certain you can be that what you’ve designed is solid and will stand up to attack. Fuzzers are generally very good at finding these types of vulnerabilities:
• Buffer overflows
• Denial of service
• SQL injections
• Cross-site scripting
These all have one thing in common: They tend to cause erratic application behavior and server crashes. Fuzzers aren’t as useful for finding holes related to weak encryption or information disclosure.
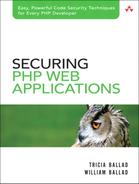
There are a lot of fuzz testing tools available, and some are more useful than others. We’ve had success with one called PowerFuzzer, which we’ll demonstrate in the following sections.
PowerFuzzer is a Python tool, which means it is OS independent. Follow these steps to install and configure PowerFuzzer:
1. Go to http://sourceforge.net/projects/powerfuzzer and click the Download PowerFuzzer link, as shown in Figure 15.1.
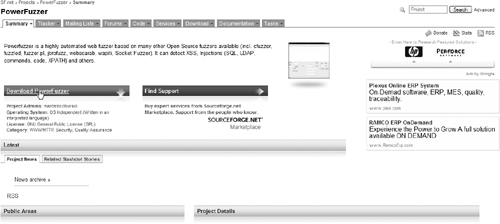
2. This will take you to the PowerFuzzer download page. Click the Download link, as shown in Figure 15.2.
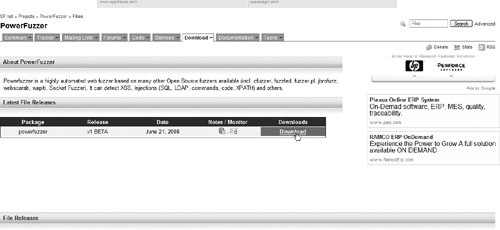
3. Finally, select a mirror (there’s only one, so the choice is pretty easy) and download PowerFuzzer, as shown in Figure 15.3.
4. After the file downloads, go to http://powerfuzzer.sourceforge.net. Scroll down to the section called “Prerequisites and Installation,” as shown in Figure 15.4. You’ll need to install five other packages that PowerFuzzer depends upon. You may already have some or all of these packages:
![]() Python 2.5 or greater
Python 2.5 or greater
![]() wxPython 2.8 or greater
wxPython 2.8 or greater
![]() HTML Tidy library
HTML Tidy library
![]() cytpes
cytpes
![]() TidyLib Python wrapper
TidyLib Python wrapper
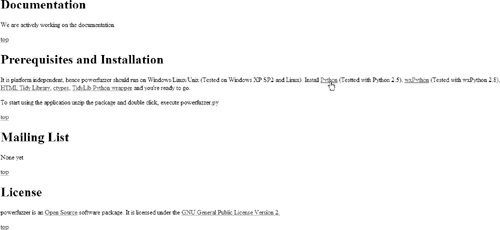
Be careful to install the latest version of each package.
5. Run the powerfuzzer.py script to launch PowerFuzzer. The starting screen for PowerFuzzer is shown in Figure 15.5.
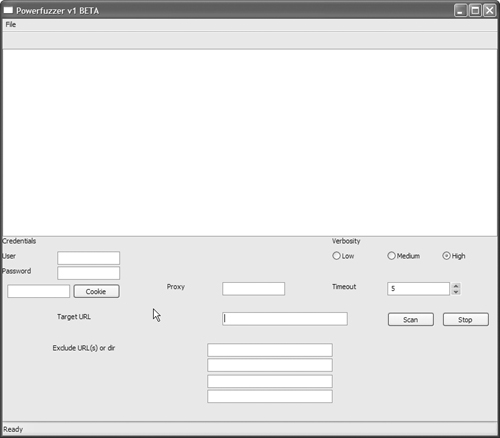
At this point, you’ve successfully installed PowerFuzzer. In the next section, we’ll walk through the process of using PowerFuzzer to test a Web application.
The PowerFuzzer interface is fairly self-explanatory. We’ll walk through a sample test that involves generating a cookie file, since that requires an extra step. For this example, we’re using a test site that we know has vulnerabilities: http://testphp.acunetix.com. If your application uses cookies and you want to include that functionality in your testing, you’ll need to do some minor configuration.
1. From a command prompt, type the following command:
$ python getcookie.py my_test_cookie http://testphp.acunetix.com
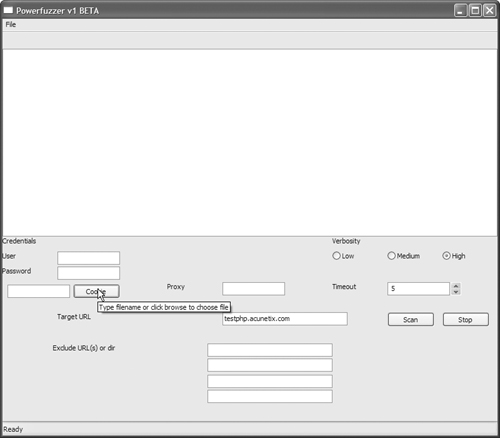
2. Replace my_test_cookie with a filename. This is the file that will hold the cookie you generate. Replace http://testphp.acunetix.com with the fully qualified domain name (FQDN) of the page in your application that generates a cookie. To test the cookie file we just generated, go back to the PowerFuzzer application interface and click the Cookie button, as shown in Figure 15.6.
3. Select the cookie file you generated. Enter your application’s URL into the Target URL box, as shown in Figure 15.7.
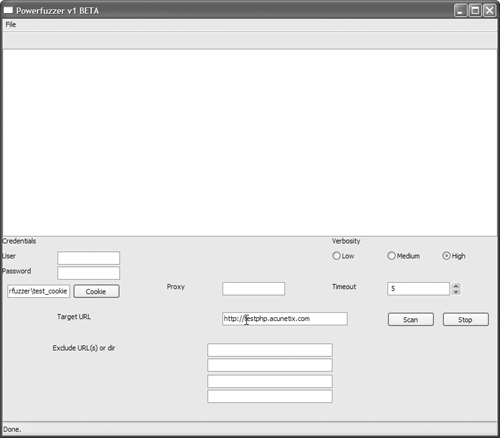
4. Click the Scan button, as shown in Figure 15.8, to launch the test.

5. When the test is complete, PowerFuzzer will display a report of the vulnerabilities it found, as shown in Figure 15.9. The test may take a few minutes to complete, depending on the speed of your Internet connection, your Web server, network latency, and a host of other variables. Be patient.
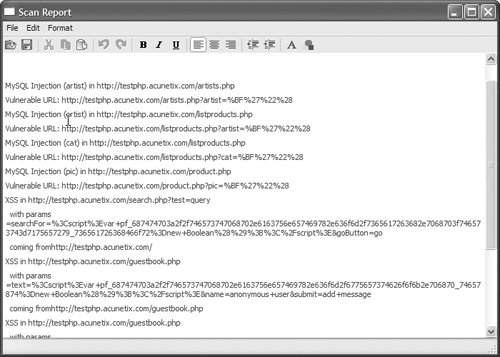
The PowerFuzzer vulnerability report tells you two things:
• The specific page in your application the tester hit
• The data it passed into your application
If a page shows up in the vulnerability report, that’s not a guarantee that the page is exploitable. It simply tells you that when the tester sent a random data string, the application choked on it. Use the findings in the vulnerability report as a guideline for areas of your application that you need to recheck from a security standpoint.
Fuzz testers don’t necessarily search for a specific type of vulnerability. They are designed to throw a lot of random data at the application and see what happens. It’s also useful to test your application against specific types of attacks, especially after you’ve patched your application to close a specific security hole.
The other major type of testing tools are testing toolkits. Testing toolkits don’t actually run the tests for you. Instead, they provide you with a collection of tools that assist you in testing your application manually. There are many good testing toolkits available, and even more that either don’t work or carry a Trojan horse. As we mentioned at the beginning of this chapter, when you search for security testing tools, be cautious about your sources.
We’ll use a general-purpose toolkit called CAL9000 to demonstrate the uses of an exploit testing toolkit. Like most toolkits, it focuses on a specific type of attack. In this case, its primary focus is on cross-site scripting attacks.
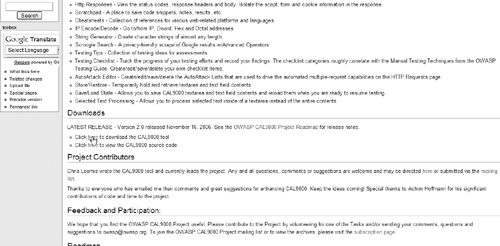
CAL9000 is written in JSP, HTML, and XML so it’s completely platform independent. You can download it from www.owasp.org/index.php/Category:OWASP_CAL9000_Project. Scroll down to the “Downloads” section, as shown in Figure 15.10.
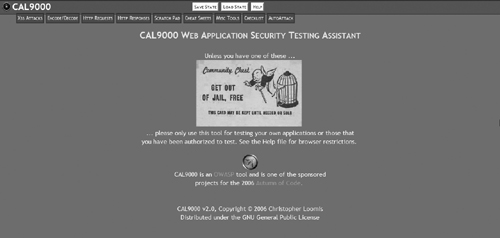
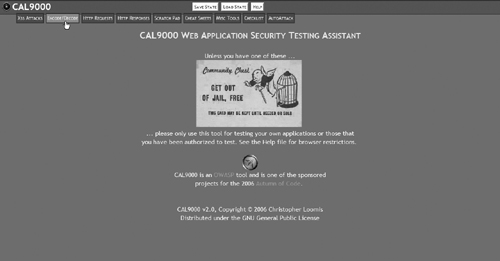
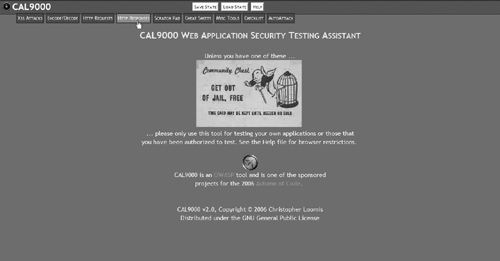
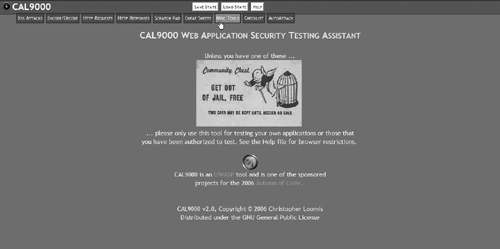
When the download is complete, unzip the archive and open the CAL9000.html file in your Web browser, as shown in Figure 15.11. Firefox (available from www.mozilla.com/firefox/) is the recommended Web browser for use with CAL9000.
At this point, you’ve successfully obtained the CAL9000 testing toolkit. In the next section, we’ll walk through what you can do with CAL9000.
CAL9000 is a collection of nine tools that are used to test Web applications for security vulnerabilities, specifically cross-site scripting. You can use some of these tools to test for other types of vulnerabilities, but the primary focus of this toolkit is on cross-site scripting. In this section, we’ll walk you through the CAL9000 interface and describe each of the nine tools:
• XSS Attacks
• Encode/Decode
• HTTP Requests
• HTTP Responses
• Scratch Pad
• Cheat Sheets
• Misc Tools
• Checklist
• AutoAttack
We’ll start off at the top of the list with the XSS Attacks tab.
On the CAL9000.html page, click the XSS Attacks tab, as shown in Figure 15.12.
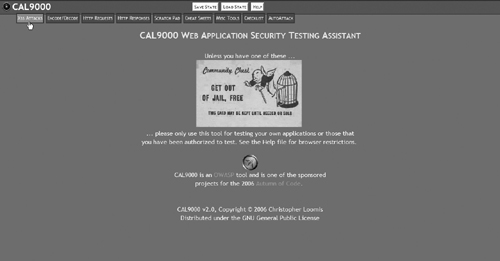
This will bring up the XSS Attacks tool page. This is a dictionary of known XSS attacks. Click on one of the attacks listed in the attacks menu on the left side of the screen, as shown in Figure 15.13.
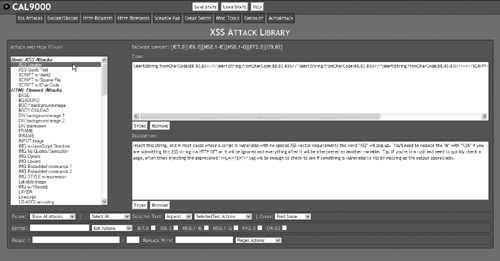
On the right side of the screen, you will see the attack code in the top text box, and a description of what the attack is designed to do in the bottom text box. On this page, there is also an editor that allows you to create your own customized attack code and save it to the dictionary. There is also a regular expression tester at the bottom of the page.
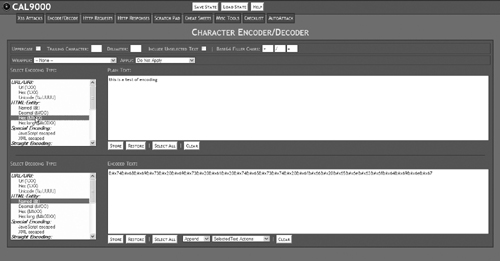
Click on the Encode/Decode tab, as shown in Figure 15.14, to bring up the Encode/Decode screen.
This tool allows you to encode plain text in a variety of ways, as shown in Figure 15.15.
This is most useful for testing that your application successfully filters out alternate encoded data. This page can also decode data in a variety of formats, as shown in Figure 15.16.
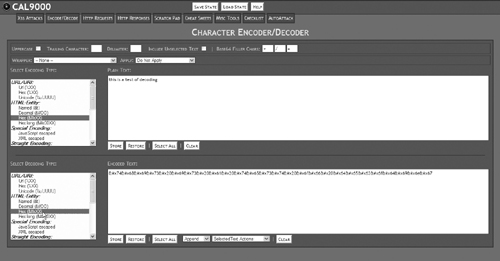
The best time to use this is after your application has been attacked. The decoder allows you to read the data a hacker has used to break into your site. Unless you recognize or know how the string is encoded, you may have to try several decodings before you find the one that successfully produces plain text.
Click on the HTTP Requests tab, as shown in Figure 15.17, to bring up the HTTP Requests screen.

The HTTP Requests tool requires some knowledge of how HTTP works, because it allows you to send a raw HTTP header directly to a Web site or Web application. From this tool, you can also launch an autoattack against your site. This is one of the more advanced tools in the toolkit, so you probably won’t need to use it for basic testing. If you get into more advanced exploit testing, click the Help button at the top of the screen for a more in-depth explanation of what this tool is designed to do and how to use it.
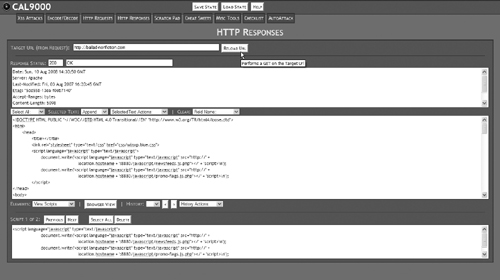
Click on the HTTP Responses tab, as shown in Figure 15.18, to bring up the HTTP Responses screen.
This tool shows you the HTTP headers returned by your Web site and allows you to view any scripts, forms, or cookies available on the page. The benefit of using this tool to examine your Web site is that this is the information hackers are looking for when crafting an attack against an application. If hackers are looking at this information, you need to know what they’re seeing. This is also useful for testing your server security. For example, one of the techniques we used in Chapter 11, “Securing Apache and MySQL,” was to limit the amount of server information Apache reported back to the browser. As you can see in the top window in Figure 15.19, the server signature simply says “Apache” with no version information or information about PHP or other modules we may be running. To use this tool, type in the address of your Web site and click the Reload URL button.
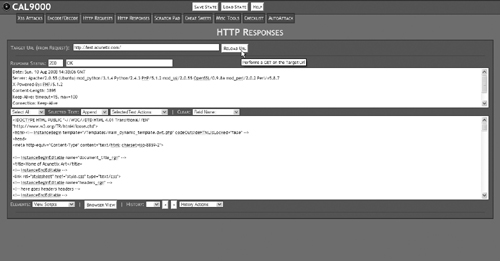
This tells us that the ServerTokens directive we set in the httpd.conf file is working properly. Compare this with the server signature from an unsecured site, as shown in Figure 15.20.
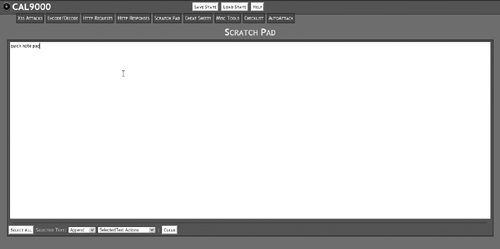
The Scratch Pad tab simply brings you to a blank page where you can take notes on what you find using the tools and write reminders to yourself, as shown in Figure 15.21.
Click on the Cheat Sheets tab, as shown in Figure 15.22.

This brings up a variety of cheat sheets on various languages and tools that you may need as a Web application developer, as shown in Figure 15.23.
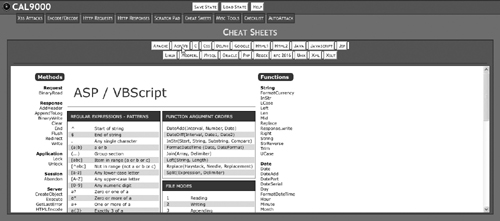
If you need to use one of PHP’s predefined variables but can’t remember the exact name, the cheat sheet for PHP comes to the rescue.
Click on the Misc Tools tab, shown in Figure 15.24.
This brings up a few tools that just don’t fit anywhere else. The IP Encoder and String Generator tools are pretty self-explanatory. The Scroogle Search, shown on the right side of the screen in Figure 15.25, is a front end to the Google search engine.
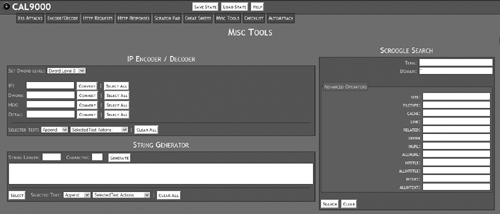
The Scroogle Search tool strips out all the aggregate information that Google tracks before sending your search request on to the search engine.
Click on the Checklist tab, as shown in Figure 15.26, to bring up the Checklist tool.

There are two main sections to the Testing Checklist tool. The top half of the screen gives you a list of important things to test for, with suggestions for ways to test for each item and an example or concrete action to perform in order to test. The bottom half of the screen gives you a notepad area where you can take notes on the results of your tests, as shown in Figure 15.27.
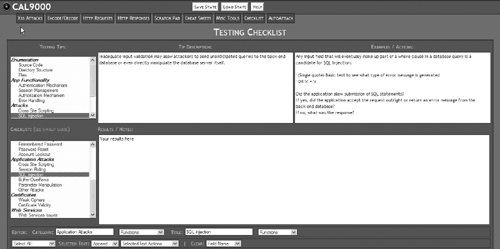
This is one of the most useful areas in CAL9000 because it helps ensure that you don’t overlook any potential vulnerability areas.
The AutoAttack tool is used in conjunction with the HTTP Requests tool to formulate custom attacks against your application. This is an advanced feature that, although useful, isn’t critical for performing basic security testing.
Now that we’ve walked through the main features of an open-source security testing toolkit, we’ll take a look at one of the proprietary ones.
Several proprietary test suites are available for security testing. For most individual programmers, they are prohibitively expensive, but if you are responsible for the security of a small business Web site—especially if that business is part of a regulated industry—or your Web site is particularly attractive to hackers, they can be worth the cost. In this section, we’ll discuss the benefits of using a proprietary test suite instead of an open-source testing toolkit, and we’ll walk through one of the more commonly used test suites available.
There are a few basic benefits to using proprietary test suites:
• It’s convenient to have all your testing tools in one place, under one interface. Proprietary test suites can be lot easier to use than the open-source alternatives.
• The security testing is automated, running in the background 24 hours per day, and the tool notifies you if anything on your Web site or application changes.
• Proprietary tools are constantly updated against industry-standard exploit databases, so you know that the attacks they simulate against your application are based on real-world exploits.
• They comply with government regulations covering security audits and reporting.
These tools are built for small businesses and public-sector and enterprise-level customers. To demonstrate the features common to most proprietary security test suites, we’ll use the Acunetix Web Vulnerability Scanner, available from www.acunetix.com. It is a Windows-based application, so you’ll need Windows 2000, 2003 Server, XP, or Vista to run it.
Most proprietary test suites include the same features. The ones that are going to be most useful to you are
• Automated scanning for a variety of attacks, including SQL injection, cross-site scripting, and buffer overflows
• Advanced reporting capabilities
• Penetration testing tools, including a fuzz tester and a tool to craft custom HTTP headers
In the next, section we’ll demonstrate an automated scan for vulnerabilities.
Automated scanning for vulnerabilities tests your entire Web site or application for a variety of exploitable vulnerabilities. We’re using the Acunetix Web Vulnerability Scanner to demonstrate, but any of the proprietary test suites will have a similar tool.
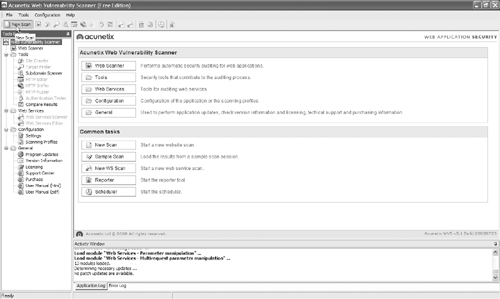
Before you can launch the scan, you’ll have to install the application. You can obtain a demo version of the tool from the Acunetix Web site. The installation is done through a typical Windows install wizard, so we won’t go through it step by step. Once you’ve installed the application, you’ll see the testing interface, as shown in Figure 15.28.

To launch the automated scan, click the New Scan button, as shown in Figure 15.29.
The Scan Wizard will open, giving you the opportunity to choose a scan type, as shown in Figure 15.30.
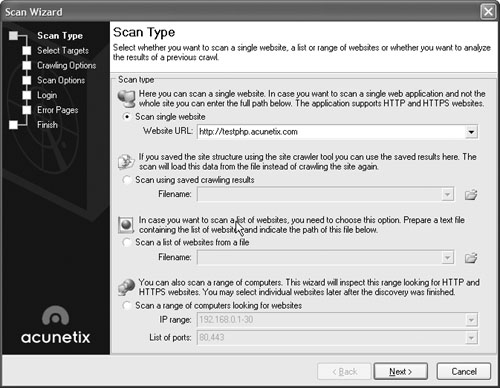
Select the “Scan single website” radio button, enter the URL of your Web site in the text box, then click Next. This will bring up the Select Targets screen, as shown in Figure 15.31.
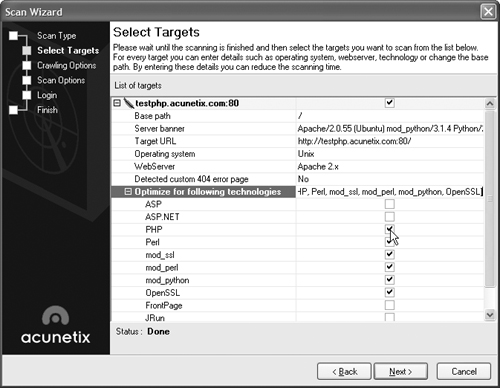
This screen allows you to optimize the scan for your specific environment. Choose your Web server and scripting language, then click Next. This will bring you to the Crawling Options screen, as shown in Figure 15.32.
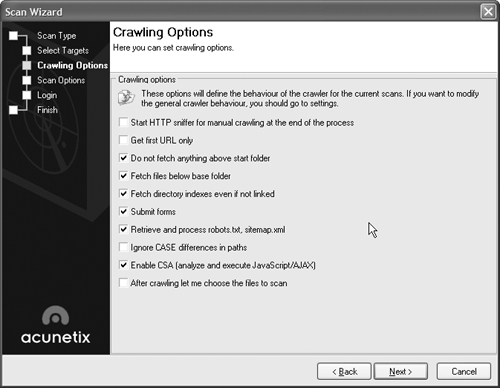
On the Crawling Options screen, you can select a variety of options to control how the scan traverses your Web site. Click the checkboxes next to the options that define how you want the scanner to interact with your Web site, and click Next to bring up the Scan Options screen, as shown in Figure 15.33.

On the Scan Options screen, you can test every directory in your site (which will cause a significant amount of traffic and slow down the test), choose the type of scan you want to perform, and specifically check for cross-site scripting vulnerabilities. Choose the options you want and click Next to bring up the Login screen, as shown in Figure 15.34.
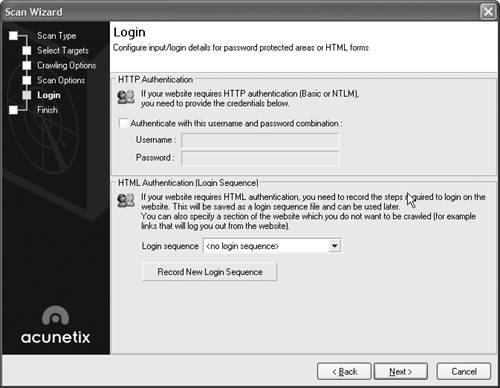
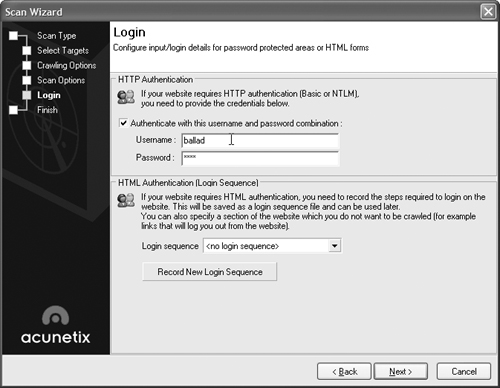
If your application uses authentication, you can put in a username and password to allow the scanner access to privileged areas of the application. This is especially useful for making sure that areas available only to authenticated users—usually the areas of your application that deal with sensitive data and more complex processing—are safe from attack. Remember, a hacker can create an account within your application just as easily as a legitimate user. Select the checkbox next to “Authenticate with this username and password combination,” as shown in Figure 15.35, type in a username and password, and click Next to view a summary of the options you’ve chosen.
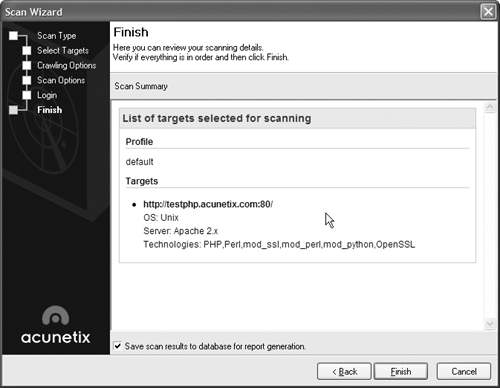
Review the summary screen, as shown in Figure 15.36, and click Finish to launch the scan.
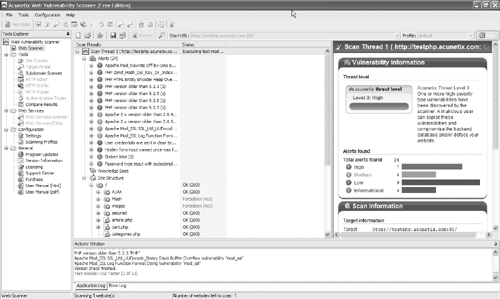
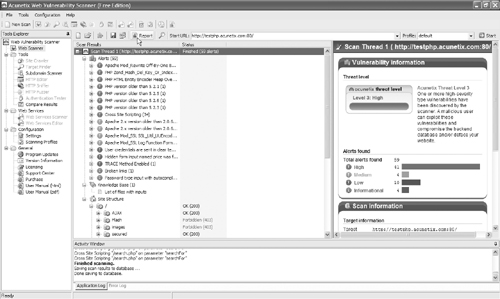
While the scan is running, you can review alerts as they are found, as shown in Figure 15.37.
Once the scan is finished, click the Report button, as shown in Figure 15.38, to generate a report of the results.
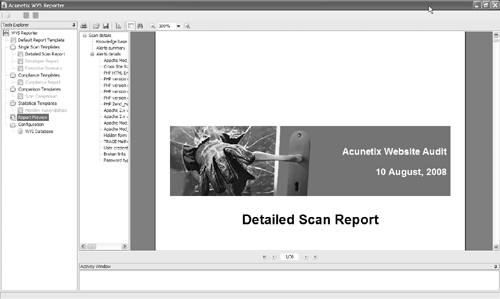
The Web Vulnerability Scanner Reporter will launch, showing you the Detailed Scan Report for your Web site, as shown in Figure 15.39.
If you need a specific reporting style—for example, to comply with government auditing regulations—you can click on one of the templates in the menu on the left side of the screen to generate a customized report.
In this chapter, we’ve covered a few of the tools that are available for testing the security of your application. There are others out there, but you need to be careful about where you get your tools. Exploit testing is one of those gray areas between securing an application and breaking it.