Photoshop is an extremely efficient program, but you’re truly missing out if you don’t learn how to use its automation features. Photoshop has three categories of technology that can streamline your workflow and save you hours of work per week. These powerful commands can take the most repetitive tasks and automate them completely:
Actions record a series of commands for playback on future images. They can be used to generate extremely complex results. You can also use batch processing to run an action on an entire folder of images.
Automate commands perform complex production tasks (like creating panoramic or high dynamic range [HDR] images) with minimal effort.
Scripts can perform tasks that are more complex than actions. Scripts have made a strong impact on complex workflow issues.
In addition to automation commands in Photoshop, a few additional tasks can be easily completed using Adobe Bridge. You can use Bridge as a powerful image browsing and organization tool. It also makes it easy to batch rename files or easily create contact sheets and Web galleries.
Tip: Actions as F-keys
Actions can be assigned to F-keys for easy access. Just double-click to the right of an action’s name in the standard view of the Actions panel and pick an F-key. You can also add modifier keys to extend the number of F-keys.
Photoshop’s actions technology lets you record nearly every command (or better yet, a series of commands), and then play them back on another image. You can use basic actions, such as a resize or file format change, to quickly convert files at a push of a button. These simple actions can be recorded, and then mapped to empty function keys at the top of your keyboard. By using combinations of Shift and Option/Alt as modifiers to the function key, a standard keyboard has 48–60 customizable keys (depending on the size of your keyboard).

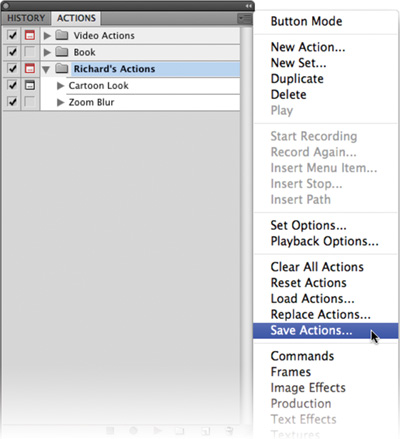
To use actions, let’s take a closer look at the Actions panel. An easy way to set up your computer to work with Photoshop’s automation commands is to switch to the Automation workspace by choosing Window > Workspace > Automation. To toggle the visibility of the Actions panel, press Option/Alt+F9. If the panel does not look like a list, go to the panel’s submenu (in the panel’s upper-right corner) and make sure that the Button mode is not selected.
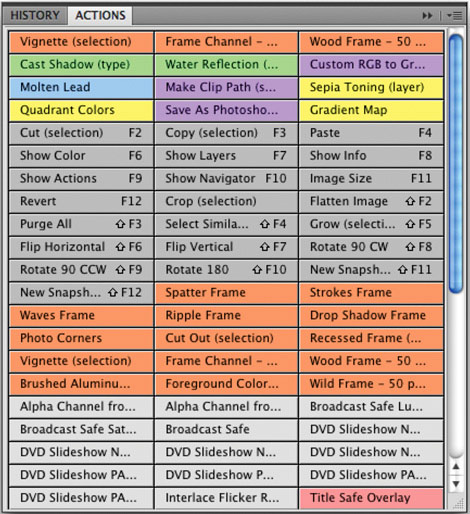
If your Actions panel looks like this, you are using Button mode. This is a useful way to access actions, but you cannot create or modify actions when using Button mode.
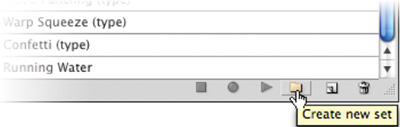
The interface has fairly clear controls. There are Stop, Record, and Play buttons, and they behave as you might expect. The folder icon creates a new set to store actions, and the page icon creates a new (empty) action. Click the trash icon to delete the highlighted items, or you can drag actions or sets into it.

Let’s practice with actions by using some of the built-in actions.
Open the file Ch15_Ocean_Bay_Day.psd from the Chapter 15 folder on the CD.
From the Actions panel submenu, choose Image Effects. This menu item loads a set of actions that will process the image to a different look using a combination of filters and adjustments.
Click the triangle next to the Image Effects set to expose the actions contained within.
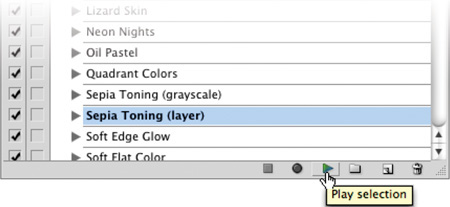
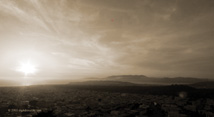
Choose the Action Sepia Toning (layer) and click Play. The action should take very little time to process the image. The end result is a nice sepia tone effect.
Choose File > Revert, and then try other actions from this set to see the diversity of those actions.
You can explore the steps in an action by clicking the triangles in the Actions panel to look at how elaborate some actions are. You may be thinking that these are interesting but they will get stale quickly because they create the same look each time.
This does not have to be the case. It’s very easy to modify an action. The easiest way to do this is by turning on dialog boxes. Normally, an action will play all the way through using the original values assigned to the filters or image adjustments. However, if you click in the column next to each step, you can enable dialog boxes for a filter or adjustment (click a second time to disable dialog boxes). These dialog boxes let you enter variables and influence an action’s outcome. Let’s try this out.
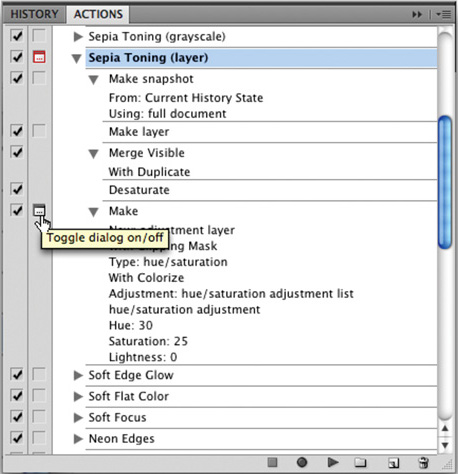
Choose File > Revert, and then go back to the Sepia Toning (layer) action in the Actions panel. Click the triangle next to the action so you can expand it and see all of its steps. You may find it useful to expand individual steps to better see what command they perform.
The final step, Make, creates a new adjustment layer for the tinting. Click next to its name to enable the dialog box.
Run the action again. This time a dialog box opens for the final step so you can customize the tint effect. Click OK to create the adjustment layer. You can now modify the tint effect, and then click OK to finish the action.
This exercise has only scratched the surface of what’s possible with actions. Actions open up all sorts of options, both for creative and technical outcomes.
An innumerable amount of actions are available on the Internet. Adobe Studio Exchange Web site (www.adobe.com/exchange)—mentioned in an earlier chapter—is an excellent starting point. Most actions are available for free; some of the most creative and useful actions are sold by both small and large developers. Let’s try out some third-party actions and learn how to load and use them.
Open the file Ch15_Ocean_Bay_Day.psd from the Chapter 15 folder. If it is still open from before, choose File > Revert.
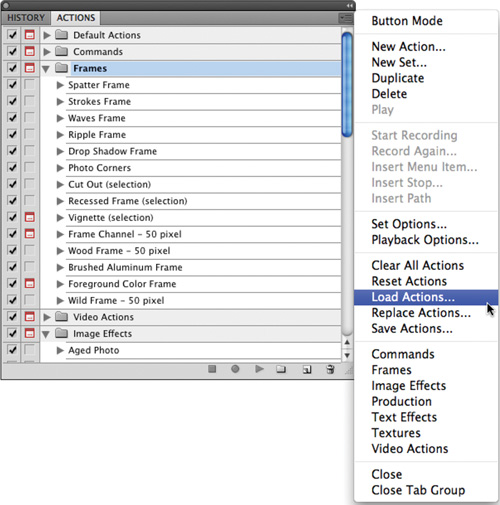
In the Actions panel, click the submenu to choose Load Actions.
Navigate to the Chapter 15 folder where you’ll find a folder called PanosFX Actions. The folder contains four sets of actions from the creative mind of Panos Efstathiadis (www.PANOSFX.com). Load the action Stamp v2 by Panos.atn.
Select the README first! action and click Play to run the action. Follow the onscreen instructions.
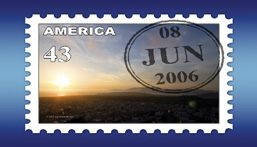
Select the !!! STAMP !!! round stamp action and click Play.
Follow the detailed onscreen instructions. You can substitute the Enter button for clicking the Commit check mark if you want.
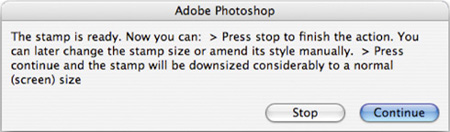
When the action gets to the very end, it asks you to make a choice. You can stop and preserve the high-res version or click Continue to reduce the image to a very small size for screen resolution. I recommend clicking Stop.
All the important layers are in a group already. You can drag this group into a new document or save it to use later.
Three more sets and a total of nearly 20 actions are available to explore. These are some wonderful samples of how powerful and devoted the Photoshop community is.

By now, actions should seem pretty appealing. You’ve explored using built-in actions, as well as loading (and finding) third-party actions. Now it’s time to create your own.
You must first create a set to hold your personal actions. Sets hold actions, and there’s no limit to how many actions can be placed into a set or how many sets you can load. Let’s give it a try.
Close the previous files, and then open the file Ch15_Canyon.tif.
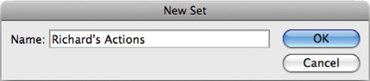
Call up the Actions panel and click the folder icon to create a new set. Name the set using your own name and click OK.
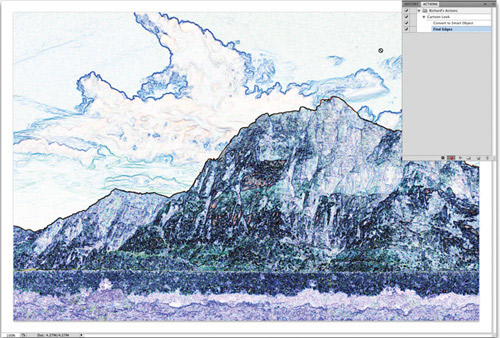
Click the New Action icon. You can give the action a name now or rename it later. In this case, name it Cartoon Look and click the Record button.
Choose Filter > Convert for Smart Filters to make the layer a smart object, and then click OK.
Run the Find Edges Filter by choosing Filter > Stylize > Find Edges. There is no dialog box for this effect.
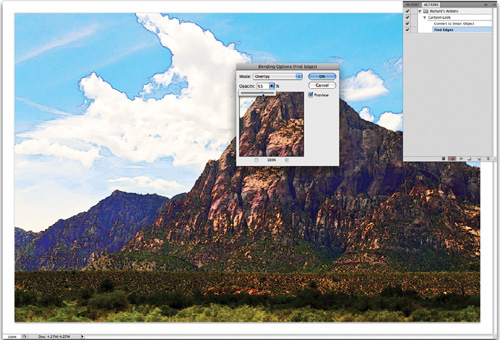
To achieve the look you need to fade the filter, click the Blending Options icon for the Smart Object.
Try the Overlay blending mode and adjust the Opacity slider as desired. Depending on the source image, you may need to try different blending modes. You can always remove steps from a recorded action afterwards by dragging individual steps into the trash can in the Actions panel.
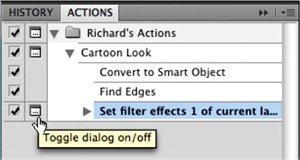
To enable flexibility, turn on the dialog box for the Set Filter Effects step.
In the Actions panel, click Stop.
Congratulations, you’ve created your first action from scratch. The preceding recipe is one of my own, but the technique works with most filter recipes. Let’s try making one more.
Open the file Ch15_Canyon.tif or if it is still open from the last action, choose File > Revert.
Click the New Action icon. You can give the action a name now or rename it later. In this case, name it Zoom Blur and click the Record button. The action is now recording.
Duplicate the background layer by selecting it and pressing Command/Ctrl+J.
Strip the color from the duplicate layer by pressing Command+Shift+U/Ctrl+Shift+U.
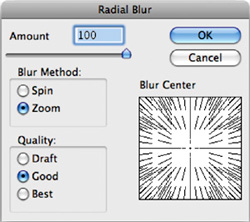
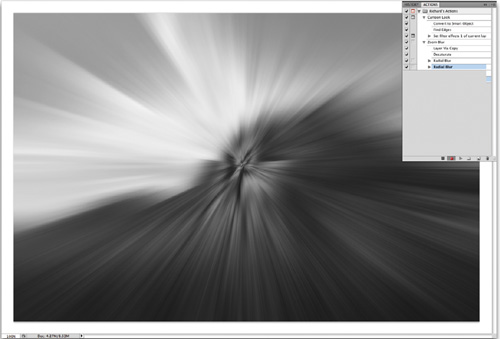
Now you’ll make the image zoom from a center point. Choose Filter > Blur > Radial Blur. Set the Method to Zoom and use an Amount of 100 at Good Quality. Move the center point by dragging within the dialog box, and then click OK.
Repeat the Blur filter by pressing Command/Ctrl+F.
On the topmost layer, make a Levels adjustment by pressing Command/Ctrl+L. Bring the black and white Input sliders toward the center. Move the gray slider until the midtones are brighter.
Change the blend mode of the top layer to Screen mode.
Press Option/Alt+[ to select the previous layer.

Press Command+Option+F/Ctrl+Alt+F to run the Zoom filter again with options.
Set the amount to 30 and click OK.
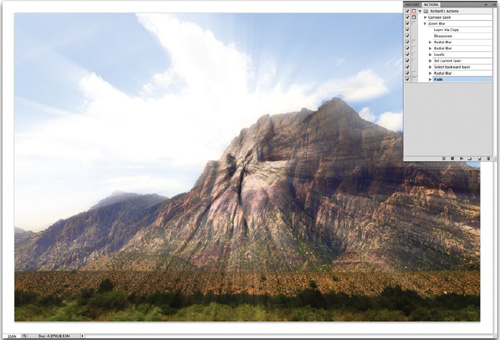
To achieve the look you need to fade the filter, choose Edit > Fade Radial Blur. Lower the Opacity of the effect to 30% and click OK.
In the Actions panel, click Stop.
Experiment and create your own looks. Virtually every menu command or button can be recorded. Actions can be duplicated, modified, and deleted. Be sure to explore all the options in the Actions panel submenu. Be sure to dissect actions made by others to get ideas of what is possible. With a little practice and imagination you’ll be amazed at what you can accomplish.
If you want to check out the actions you just created, compare them to a set I’ve saved in the Chapter 15 folder.
Actions are stored in a temporary cache. If you delete the set, load a replacement, or experience an application crash, your new actions could be overwritten. Therefore, it’s important to save your actions so they can be backed up and reloaded in the future.
Click an action set. You can use the one created in the previous exercise. You must click the whole set, not just an action in that set.
Go to the Actions panel submenu and choose Save Actions.
The Photoshop Actions folder (inside the Presets folder) will be chosen by default. If it isn’t, manually locate it in your Presets folder.
If you add to the set later, just be sure to resave it to the same location with the same name.
Tip: Sharing Actions
If you create useful actions, you can post them to the Adobe Studio Exchange community to share with other users (www.adobe.com/exchange).
Photoshop offers several commands for speeding up professional imaging workflow. You’ll explore each option available as of this writing. If you are working with an older version of Photoshop, you might not have some of these automation tools. Each is a significant time-saver, and you should attempt to integrate them into your workflow as often as is feasible.
If you liked actions, you’ll love the Batch command. The Batch command allows you to apply an action to a group of images. This is a huge time-saver, especially for mundane tasks like resizing. You can also use it to batch process an entire roll of images and run the same Levels adjustment on each image. Let’s give it a try.
Let’s start by making the action “batchable.”
Tip: Batch Jams
A batch process can get stuck on file closings, especially with JPEG or TIFF compression, which asks for user interaction. You’ll want to either batch convert the files ahead of time to another format (like PSD) or record the close-and-save step as part of the action. Be sure to select the Override Action “Save As” Commands option. This will ensure that your files are saved in the folder specified by the Batch command.
Open a TIFF image from the Batch folder.
Choose File > Save As and save a copy to the desktop. This is a temporary copy to prep the action and can be thrown away when you’re done.
Create a new action called Zoom Blur Batch and start to record.
Click the Zoom Blur action and click Play (an action can record the running of another action).
When the action completes, choose File > Save As. Navigate to your desktop and save the file. Select a TIFF file format, deselect the Layers box, and click Save.
Choose a compression option: In this case LZW is very efficient.
Click Stop.
Discard the two temp images from your desktop now (or later).
The action is now ready to be applied to a folder of images.
Choose File > Automate > Batch to invoke the Batch window.
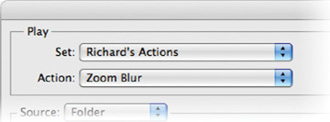
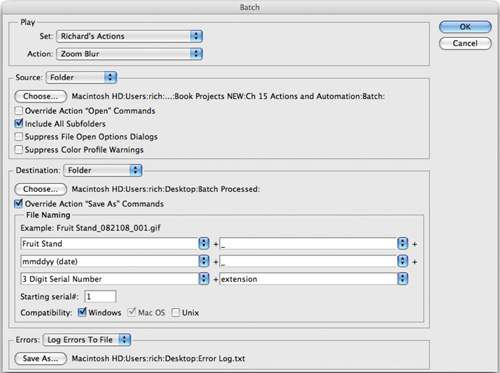
Specify a set and an action from the set that you’d like to use. The action must be currently loaded in the Actions panel in order to appear in this list. In this case, use the Zoom Blur action that you created earlier.
Choose the files that you want to process from the Source pop-up menu:
Folder: This option processes all items in a specified folder. Click Choose to navigate to and select the folder. A folder can include additional subfolders as well. For your images, choose Folder. Click Choose and navigate to the folder called Batch in the Chapter 15 folder.
Import: This option processes images from a digital camera, scanner, or a PDF file. A useful batch and action would be to create an action that sets a documents resolution to 300 pixels per inch without resampling. You could then run this action on all items you import from a digital camera.
Opened Files: This option processes all open files.
Bridge: This option works on all selected items in Adobe Bridge. You would first select several images in Bridge, and then choose Tools > Photoshop > Batch.
Set processing options that guide what is and is not processed as well as how to handle errors or files:
Override Action “Open”. Commands: If your action contains an Open command that refers to specific filenames rather than the batched files, you’ll want to deselect the Override Action “Open” command.
Include All Subfolders: This option applies the action to all files in the subdirectories of the specified folder.
Suppress File Open Options Dialogs: This option hides File Open Options dialog boxes. It’s a good idea to use this when batching actions on camera raw image files. Photoshop will then use the latest settings. For maximum compatibility, select this option.
Suppress Color Profile Warnings: This option ignores color profile warnings, which can cause an action to hang and wait for user interaction. For maximum compatibility, select this option.
Specify a destination for the processed files by choosing one from the Destination menu:
None: This option leaves the files open without saving changes.
Save And Close: This option saves the files in their current location. This is a destructive edit because it will overwrite the original files.
Folder: This method saves the processed files to another location (this is the safest option). Click Choose to specify the destination folder. For this batch, navigate to the desktop and create a new folder called Batch Processed.
If the action you’re using includes a Save As command, choose Override Action “Save As” Commands. Otherwise, the image may write to the wrong folder. For maximum compatibility, select this option.
Tip: Converting File Formats
The Batch command cannot convert file formats. This can easily be done in advance using the Image Processor script that ships with Photoshop. In fact, you can even add an action to the Image Processor script. It is a good idea to convert a JPEG file to TIFF or PSD before running an action. More on the Image Processor later in the chapter.
If you chose Folder as the destination, you’ll need to specify a filenaming convention. Several pop-up fields are available for easy filenaming. These fields make it very easy to rename files from a digital camera or to specify a serial number. Photos from multiple digital cameras often end up with the same name, so this is a very good idea because you can create more accurate and descriptive names for each image. In this case choose the following settings:
Field 1: Fruit Stand (manually type in)
Field 2: _ (manually type in)
Field 3: mmddyy (date) (from pop-up list)
Field 4: _ (manually type in)
Field 5: 3 Digit Serial Number (from pop-up list)
Field 6: extension (from pop-up list)
These settings will result in a name like Fruit Stand_122705_001.tif.
Set an option for error processing from the Errors pop-up menu:
Stop For Errors: This option suspends the process until you confirm the error message. Only choose this option if you will be monitoring the batch process closely.
Log Errors To File: This option records each error into a file without stopping the process. After processing, a message appears indicating if any errors occurred. For this batch, choose Log Errors To File. Save a file called Error Log.txt on the desktop.
Click OK to run the batch. Photoshop will batch process the images. Depending on the speed of your computer, this may take a few minutes. You can abort a batch by pressing Esc at any time.
A droplet is a lot like a permanent batch. The interface is almost the same as the Batch command in that you choose an action and set naming and destination options. The key difference is that you don’t set an input source. Instead, a droplet is created that allows you to drag an image (or folder of images) onto it to run. Be sure you’ve loaded the Image Effects set of actions before proceeding.
Choose File > Automate > Create Droplet. The Droplet interface opens and should appear similar to the Batch window.
Click the Choose button in the Save Droplet In section of the dialog box and navigate to a location in which to save it. In this case, name the droplet Aged Photo and save it to the desktop.
Select the set and action that you want to use. In this example, choose the Image Effects and the Aged Photo action.
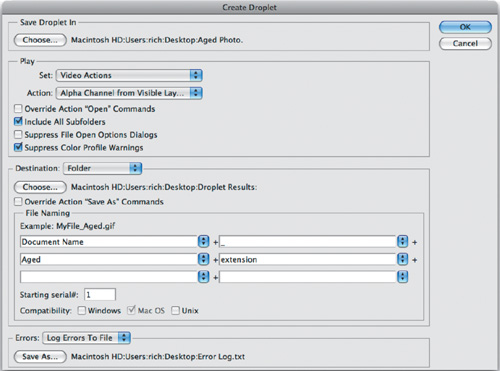
The Override commands in the Play area are identical to the Batch command. In this case, leave the Suppress Color Profile Warnings box selected. It’s also a good idea to select Include All Subfolders Processes files in subdirectories if you have multiple folders of images nested together.
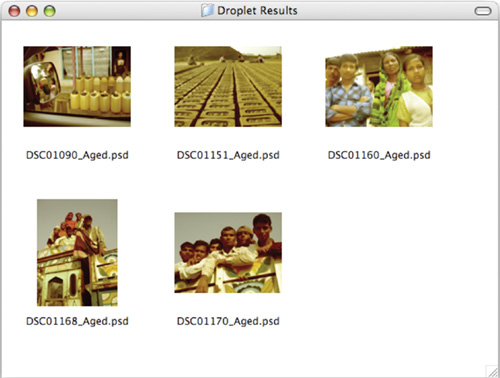
Choose a destination for the processed images. In the Destination menu, choose Folder and create a new folder on the desktop called Droplet Results.
Specify the filenaming convention and select file compatibility options for the new files. Feel free to choose a naming convention that makes sense to you. Be sure to make the files Mac and PC compatible.
Choose to log errors to a file. Set the log to write to the desktop in a file called Error Log. You can read this afterwards to check for any issues with the Batch.
To prevent the batch from stopping to ask about file compatibility, change a File Handling option. Press Command/Ctrl+K to call up Photoshop’s preferences.
Choose File Handling from the pop-up menu.
Deselect Ask Before Saving Layered TIFF files. If you’re running CS2 or later, select the box for Enable Large Document Format (.psb) and set Maximize PSD and PSB File Compatibility to Always. This will preserve additional embedded information to make the file more compatible with older versions of Photoshop.
In the Chapter 15 folder, you’ll find a folder called Droplet. Drag it on top of the new droplet you created (Aged Photo) to run the action on the entire folder.
Sit back and wait. The batch should run without errors. Droplets can be useful as well if you want to set up a time-intensive task and walk away from your computer for awhile. Just be sure to test a few images before leaving.
When scanning images, it’s often possible to fit more than one image on the scanner bed. Scanning multiple images at once can save input time when loading images into Photoshop. Fortunately, the Crop And Straighten Photos command picks up and keeps the efficiency going. Let’s give it a try.
Tip: Crop and Straighten Best Results
For best results, you need to keep 1/8 inch between the images in your scan. If the Crop And Straighten Photos command does not succeed (which is rare), you should process the individual images using the Crop tool.
Open the file Ch15_Crop_and_Straighten.tif from the Chapter 15 folder. If you would rather, just scan in a few images on your own scanner.
If you’re working in a multilayered image, select the layer that contains the images. If you only want some of the images, draw a selection border around one or more images.
Choose File > Automate > Crop And Straighten Photos.
Each image should be cropped, straightened, and moved into its own document window.
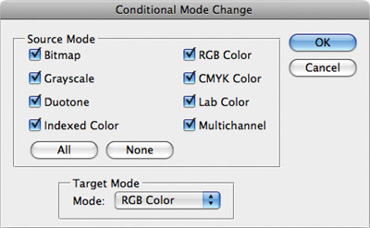
The Conditional Mode Change command is meant to be used within an action. It allows you to specify conditions for a mode change to occur during an action. Recording a mode change into an action can result in an error if the action is run on an image that has a different image mode. For example, if one step of an action were to convert an image from a source mode of RGB to a target mode of CMYK, applying this action to an image in Grayscale mode would result in an error. The command allows you to specify one or more source modes and a mode for the target mode.
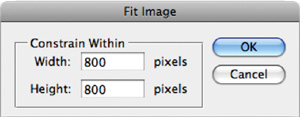
The Fit Image command is also meant to be inserted into an action. It allows you to specify a maximum width and height (in pixels) that the image cannot exceed. This is useful when sizing images for the screen or Internet. If you intend to use it for print resolution, you’ll need to know your resolution setting and multiply by your desired print size to convert inches to a pixel-based measurement.
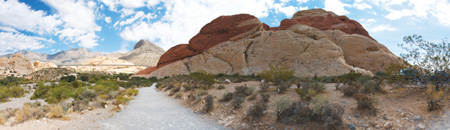
The Photomerge command allows you to merge several (adjacent) photographs into one continuous image. This command is used to make panoramic images. This command was covered in depth back in Chapter 8. If you skipped that hands-on activity, flip back to Chapter 8. If you’d like another set of practice images, you’ll find a folder called Photomerge in the Chapter 15 folder.
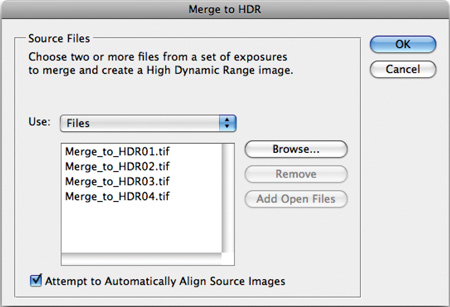
The Merge to HDR command was introduced in Photoshop CS2. It allows you to take multiple exposures of a subject (shot from a locked tripod or camera mount) and merge them into a new image that better displays highlights and shadows. The resulting image is also a 32-bit image that allows great flexibility for adjusting exposure. HDR images were covered in depth in Chapter 10, “Color Correction and Enhancement.” Let’s create an HDR image.
Choose File > Automate > Merge to HDR.
Within the Merge to HDR dialog box, click Browse to navigate to the source images. You’ll find a folder called Merge to HDR in the Chapter 15 folder. In the folder, Shift-click images 1–4 to select them. Click Open.
A second Merge to HDR dialog box opens. You’ll see thumbnails for each of the images used as well as a resulting image.
Leave the Bit Depth set to 32 Bit/Channel.
Adjust the slider below the histogram to set the white point.
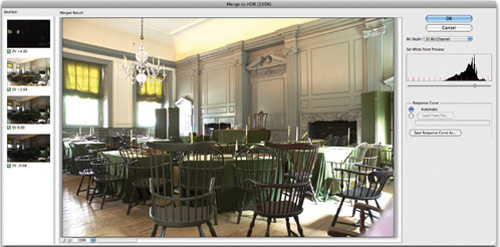
Click OK to create a new HDR image.
Try adjusting the Exposure settings to different values to see the results of the HDR image.
Photoshop scripting offers a more powerful automation technology than actions. Scripts allow for the execution of more elaborate tasks than what actions can do because scripts recognize conditional states like image mode and orientation. Scripting was introduced in Photoshop CS, and powerful built-in scripts automate the processing of multiple layers or layer comps.
Creating original scripts requires you to use a scripting language such as AppleScript, JavaScript, or Visual Basic. Photoshop includes a script editor and debugger for JavaScript. JavaScript is the preferred language because the scripts are cross platform. Scripting is complex; it’s essentially computer programming. Plenty of resources are available for those who want to learn scripting, but be prepared to spend some time. You’ll find a folder called Scripting Guide in the Photoshop application folder. In it you’ll find sample scripts and a PDF with detailed information.
Fortunately, some wonderful examples of scripting are available at the Adobe Studio Exchange Web site (www.adobexchange.com.) Be sure to look for scripts by Photoshop guru Russell Brown. Load new scripts by choosing File > Script > Browse. To permanently add a script to the Script menu, copy it into the Scripts folder inside your Presets folder. For now, let’s explore the built-in scripts.
The Image Processor command can be used to convert and process multiple images. It made its official debut in Photoshop CS2, but you can find it at Adobe Studio Exchange under the name Dr. Brown’s Image Processor. (If you’re still using Photoshop CS, you can download and use this version of this useful script.)
Tip: Apply One Setting to All
If you need to process a group of camera raw files taken under the same lighting conditions, you can open and adjust only the first image to your satisfaction. In the Image Processor dialog box be sure to select the Open first image to apply settings check box. You can then reuse the same settings for the other images.
The Image Processor differs from the Batch command in that you don’t have to first create an action. The Image Processor can be used for any of the following tasks:
To convert a set of files to JPEG, PSD, or TIFF format. You can also convert files simultaneously to all three formats.
To process a set of camera raw files using the same camera raw options.
To resize images to fit within a specified pixel dimension.
To embed a color profile into images or convert files to sRGB and save them as JPEG images for the Web.
To include copyright metadata into the processed images.
The Image Processor works with PSD, TIFF, JPEG, or camera raw files.
In the Actions panel, click the submenu and load the Image Effects actions.
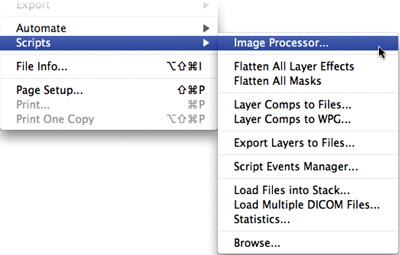
Choose > File > Scripts > Image Processor.
Choose the images you want to process. You can use open images or navigate to a folder to choose images. Click Select Folder and navigate to the folder called Batch in the Chapter 15 folder. Highlight the folder and click Choose.
Select a location in which to save the processed files. You can make and then choose a Script Exports folder on the desktop.
Select the file types and options you want to convert to:
Save as JPEG: Sets the JPEG quality between 0 and 12. You can also resize the image and convert it to the sRGB color profile.
Save as PSD: Sets the PSD options. You can also resize the image and select Maximize Compatibility.
Save as TIFF: Saves images in TIFF format with LZW compression. You can also resize the image.
For this example, choose JPEG and choose to resize to 800 × 600 pixels with a compression of 10.
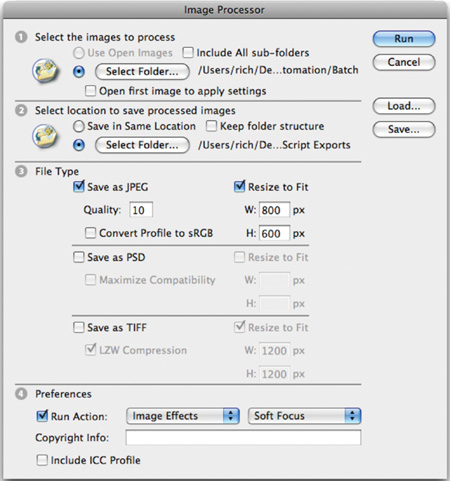
You can choose other processing options as well:
Run Action: If an action is loaded into Photoshop, you can run it on the image during the process.
Copyright Info: This includes any text you enter in the IPTC copyright metadata for the file. Text overwrites the copyright metadata in the original file.
Include ICC Profile: This embeds the color profile with the saved files.
For this example, choose the Soft Focus action from the Image Effects set to run on the processed images.
Click Run. Photoshop processes the images to the specified folder.
The Flatten All Layer Effects and All Masks scripts are fairly self-explanatory. Each analyzes an open document that contains layers, and then performs a destructive action. You can use these scripts to permanently apply layer effects or masks to their respective layers (masks on layer sets are left untouched). These commands can be used to simplify a layered file if you need to use it with other software tools (such as motion graphics, video editing, or multimedia) that do not support all of Photoshop’s layer features. It is a good idea to run these scripts on a copy of your document because the changes are permanent.
You may remember Layer Comps, which were covered in depth in Chapter 8. This useful design tool allows you to save different arrangements of layer visibility, position, and effects. Layer Comps are very useful when experimenting with designs. Photoshop makes it easy to create an individual file for each layer comp.
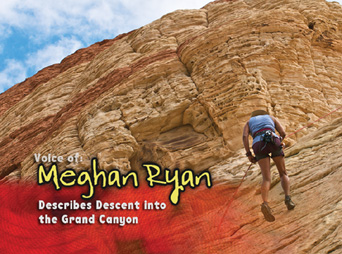
Open an image that uses Layer Comps. You can use your own or the file called Ch15_Script_Sample.psd from the Chapter 15 folder.
A warning dialog about the display of nonsquare pixels appears with pixel aspect ratio preview. This is a graphic intended for use in a digital video project; therefore, it uses a special pixel designed for video technology. Click OK to close the dialog box.
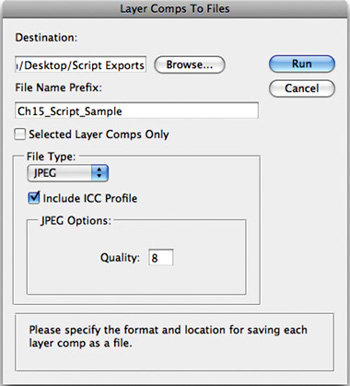
Choose File > Scripts > Layer Comps To Files to export all Layer Comps to individual files, one for each comp. You can choose to create BMP, JPEG, PDF, PSD, Targa, TIFF, PNG-8, or PNG-24 files.
Click Browse to specify a target destination. Select the Script Exports folder you created on your desktop.
Specify PNG-24 files as the File Type output (this will automatically embed the transparency of each layer into the file).
Click Run.
If desired, you can create a PDF file or a Web Gallery using Adobe Bridge to share these files for review. These techniques are discussed later in the chapter.
There are certain production situations where it is useful to export a layered PSD file to separate images. This might be the case if you are trying to bring a layered file into another application that does not read layered files.
Photoshop allows you to convert a layered file into a series of individual files. You can choose to create a PSD, BMP, JPEG, PDF, Targa, or TIFF for each layer. Layers are named automatically as they are created; however, you have some options you can modify for naming. Let’s give it a try.
If it’s not already open from the previous exercise, open the file Ch15_Script_Sample.psd. Click OK to close the warning about pixel aspect ratio preview.
Choose File > Scripts > Export Layers To Files.
In the Export Layers To Files dialog box, choose Destination by clicking Browse. For this example, create a folder on the desktop called Script Export.
Enter a name in the File Name Prefix text box. This will serve as a prefix for the exported files. For this example, enter Canyon Title.
Choose a File Type and set options for the exported file. For this example, choose PSD.
Select the Visible Layers Only option if you only want to export layers that have visibility enabled.
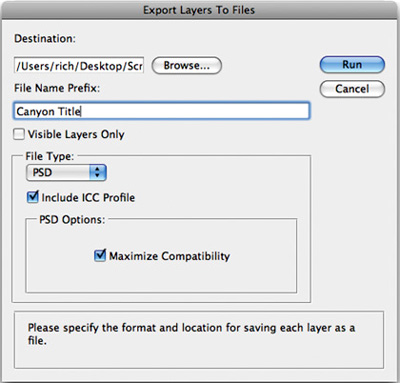
Choose the Include ICC Profile option if you want the working space embedded in the exported files. This is important if you’re working in a color-managed workflow.
Click Run.
The Script Events Manager allows you to have certain events (such as the opening or saving of a file) trigger a JavaScript or a Photoshop action. Several default events are included, or you can add your own by following the guidelines in the Photoshop Scripting Guide.
Let’s create a useful script that resets Photoshop’s interface on launch. This can be particularly useful in a mixed user environment like a computer lab.
Call up the Actions panel.
Select the Default Actions set (if it’s not loaded, choose it from the Actions panel submenu).
Create a new action called Reset.
Choose Window > Workspace > Essentials. Photoshop resets all the panels and tools.
Open the Actions panel and click Stop.
Select the Default Actions set and save it back into your Presets folder (overwriting the previous version).
You can now set up an event and an action to go with that event.
Choose File > Scripts > Scripts Events Manager.
Make sure the Enable Events to Run Scripts/Actions check box is selected.
From the Photoshop Event menu, choose an event that will trigger the script or action. For this example, choose Start Application as the event.
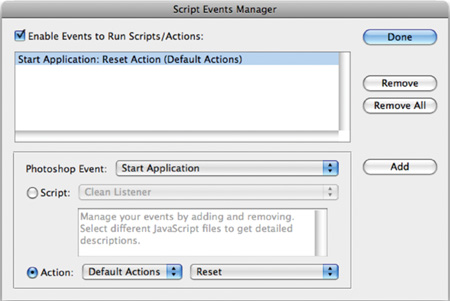
You can choose to add a script or an action. In this example, choose the newly created Reset action from the Default Actions folder.
Click Add. The event and its associated script or action is now listed in the dialog box.
When you’re finished, click Done. The dialog box closes. The Reset script will run each time you launch Photoshop.
Long-time Photoshop users will notice that certain Automation commands have gone missing from Photoshop CS4. You will no longer find the Picture Package command as part of the application, and you will have to perform some tasks in Adobe Bridge. These changes were due in part to some core technology changing within the application and an effort to streamline tasks. Let’s take a look at a few useful commands you’ll find in Adobe Bridge.
One of the key functions of Adobe Bridge is organizing your digital images. As part of that organization, you’ll likely rename files. This is particularly true since most digital cameras progressively number their files, which is great for counting but not organizing. Bridge makes it easy to rename several files or folders at one time; this process is called a batch.
Tip: Bridge from the Start
If you’d like Bridge to launch automatically when you log in to your computer, open Bridge’s preferences and select the Advanced category. Simply select Start Bridge at Login to make Bridge readily available.
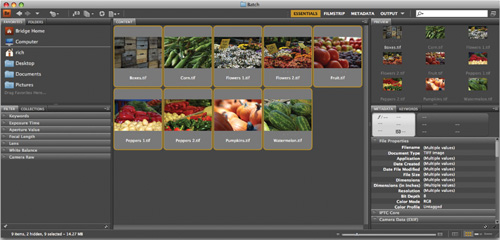
If it’s not running already, launch Adobe Bridge CS4.
Navigate to the folder named Batch in the Chapter 15 folder. Double-click to open the folder and view the nine images contained within it.
Press Command/Ctrl+A to select all the files within the folder.
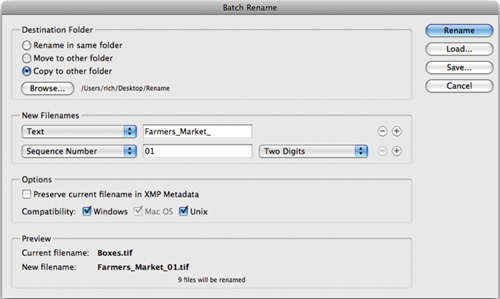
You must specify a destination for the renamed files. You can choose to keep them in their current folder, move them to another folder, or copy them to a another destination. For this example, choose to Copy to other folder and specify a target folder on your desktop (you cannot resave files to the CD drive).
Specify New Filenames using a combination of pop-up menus and a text field. For this example choose Text and enter Farmers_Market_. Then add a sequence number of 01 and specify Two Digits.
Check the Preview of the New filename for accuracy.
Specify that you want the files to be compatible in Mac and Windows.
When ready, click the Rename button to complete the batch rename. The Batch command is a useful way to improve the organization of your files.
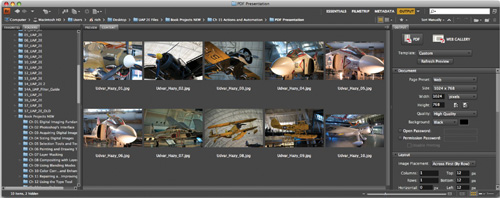
Another useful function of Bridge is its ability to quickly generate PDF files for selected images. Bridge CS4 includes a new workspace called Output, which utilizes the Adobe Output Module script. In just a few clicks, you can generate Adobe PDF contact sheets and presentations.
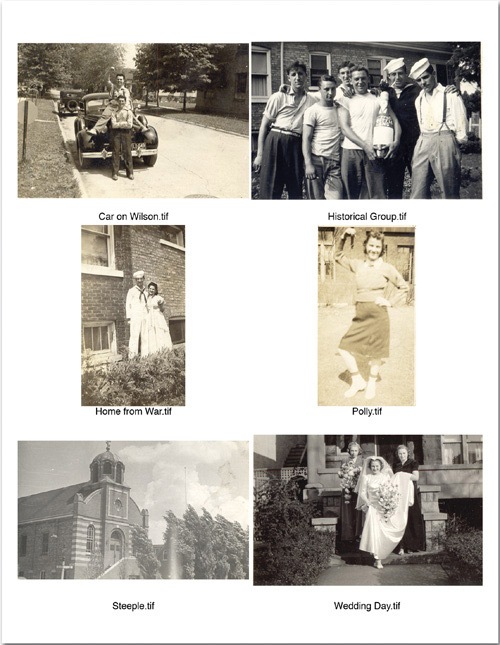
Contact sheet: A contact sheet is a useful catalog of a group of images. You can place multiple, small thumbnail images on a large page along with caption information.
PDF Presentation: The PDF presentation output lets you quickly create a multipage PDF file that you can use to display images as a slide show presentation. The PDF output also offers options for image quality, security settings, and display preferences. You can also add text overlays at the bottom of each image in the PDF presentation.
Let’s go ahead and create a PDF file from a folder of images.
If it’s not running already, launch Adobe Bridge CS4.
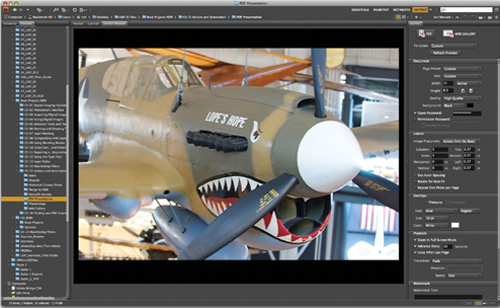
Choose Window > Workspace > Output. The Bridge interface rearranges to show the Output panel at the right side of the screen. The Content panel appears at the bottom of the screen (nested with Preview); this is where you see thumbnails for the images you choose to use. The left column contains a list of folders.
Navigate to the PDF Presentation folder inside the Chapter 15 folder.
Click the PDF button in the Output panel.
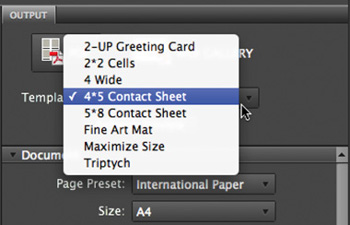
The Output Module offers several contact sheet templates as starting points. These presets can be modified as needed to serve your unique needs.
Select all the images in the Content panel by pressing Command/Ctrl+A.
Click the Template menu and choose a layout option. For this example, choose the 4*5 Contact Sheet option and click the Refresh Preview button. Bridge creates a preview layout of the first page for the PDF file. Let’s customize the appearance a bit more.
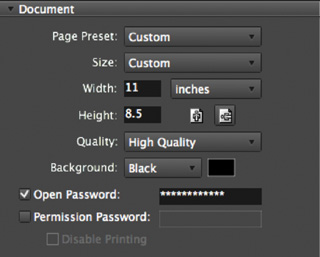
In the Document controls, change the Page Preset to U.S. Paper and set the Background to White.
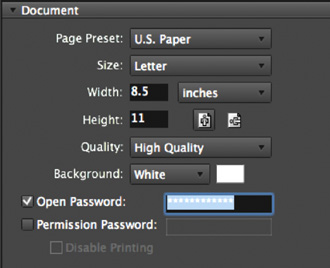
Select the check box next to Open Password and enter “rastervector.” A password provides security to keep a document private for only its intended recipient.
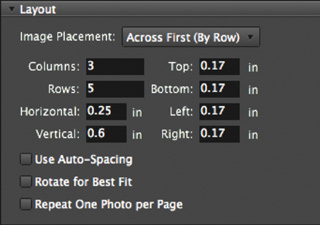
In the Layout controls, change the Columns to 3 to place a larger image on the contact sheet.
In the Overlays controls, increase the Size menu to 12 pt and set the style to Bold.
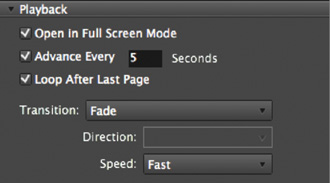
In the Playback Controls, deselect the first three boxes. These controls are generally useful for presentations but less so for contact sheets. You may need to scroll down to see the additional control options.
Click the Refresh Preview button to see how the PDF contact sheet will look.
Click the Save button to create the contact sheet. Name the file and store it on your desktop. When Bridge is done creating the file, it will open by default in your system’s PDF viewer application.
The Output Module also offers presets for generating a PDF slide show. This is a useful way to present several images in one document. The PDF file can be emailed, posted to the Web, or used as part of a live presentation.
Switch back to Bridge and make sure all the images are still selected in the PDF Presentation folder.
In the Template menu, choose Maximize Size.
In the Document controls, change the page orientation to landscape. Also, set the Background color to Black.
In the Layout controls, deselect the Rotate for Best Fit option. Images will then all remain oriented to the screen.
Adjust Playback controls to your liking. You may want to use a longer duration such as Advance Every 10 Seconds. Feel free to modify the Transition and Speed controls.
Click the Refresh Preview button to see how the PDF slide show will look.
Click the Save button to create the PDF slide show. Name the file and store it on your desktop. When Bridge is done creating the file, it will open by default in your system’s PDF viewer application.
When you are finished viewing, press the Esc key to exit the full-screen slide display.
The Web Gallery component of the Adobe Output Module is a very easy way to quickly build a Web site for displaying photos. A Web photo gallery uses a home page with thumbnail images and several gallery pages with full-size images. Power users and amateurs alike have discovered the power and flexibility of creating entire galleries within Bridge.
Without knowing any HTML or Flash, users can quickly create online galleries for their images. Bridge offers several customizable templates, which are well suited for different tasks like client review or online portfolios.
If it’s not running already, launch Adobe Bridge CS4.
Choose Window > Workspace > Output. The Bridge interface rearranges to show the Output panel at the right side of the screen. The Content panel appears at the bottom of the screen (nested with Preview); this is where you see which images you’ve selected to use. The left column contains a list of folders.
Navigate to the Web Gallery folder inside the Chapter 15 folder.
Press Command/Ctrl+A to select all the photos contained within the Web Gallery folder.
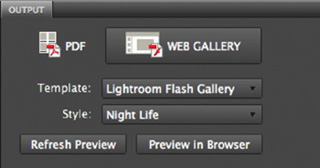
Click the Web Gallery button in the Output panel.
Choose the Lightroom Flash Gallery from the Template list.
Choose Night Life from the Style menu.
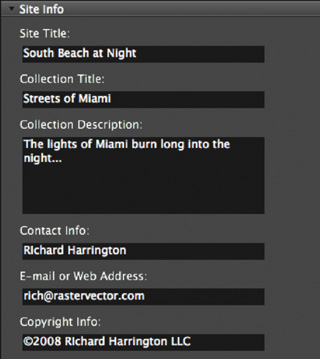
Customize the gallery by entering Site Info. This information helps the site’s visitors understand the photos presented (such as when and where the photos were captured). For this exercise, enter your own information into some of the fields.
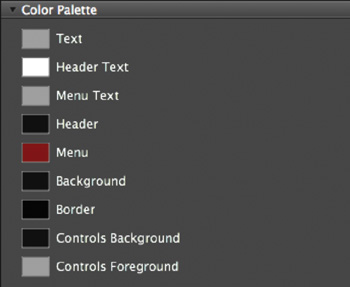
You can change the Color Palette controls to further stylize the site. Try changing the menu color to a dark orange by clicking its swatch and using the color picker.
Customize the design of the page using the Appearance controls. Set the Preview size to Extra Large and the Thumbnail size to Large.
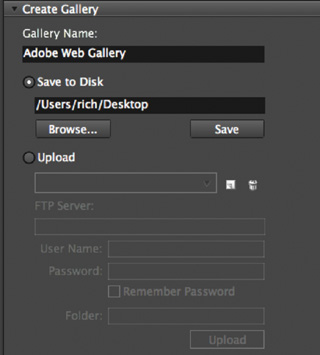
Specify a destination for the generated Web Gallery (the folder will contain several pages and images). If you have a Web site, you can use the built-in Bridge FTP features to upload the Web Gallery to your server. For this exercise, click the Save to Disk button, and then click Browse and specify your desktop.
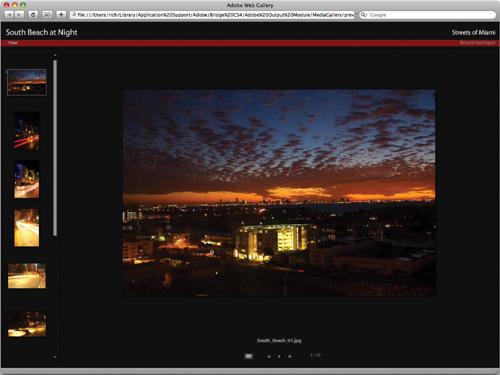
Click the Preview in Browser button to simulate the site (this will only load the first ten images). Browse the Web site and try its many controls. The Web Galleries are truly versatile and elegant.
When satisfied with the preview, close the Web browser and return to Bridge.
Click the Save button in the Create Gallery controls to generate the Web Gallery.