
Thanks to Dreamweaver’s style sheet–based layouts, it’s relatively simple to create a basic Web site with pages that share the same design and navigation buttons. In this chapter, you’ll start by using a basic layout to create a simple home page. In later chapters, you’ll learn to dress it up a bit with images and some special features. Here, however, we’ll focus on the basics: creating, naming, titling, and saving this all-important page.
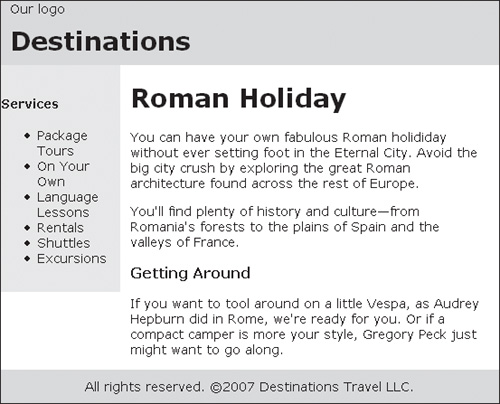
Don’t let this relatively plain example page fool you. Built with Dreamweaver’s predesigned page layouts using Cascading Style Sheets, it offers a solid foundation for an entire Web site. Watch it grow as we move through each chapter.
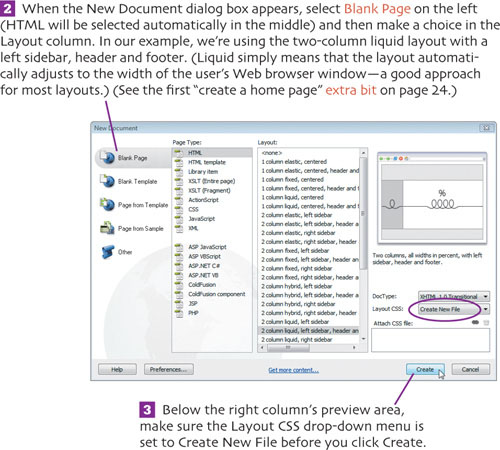
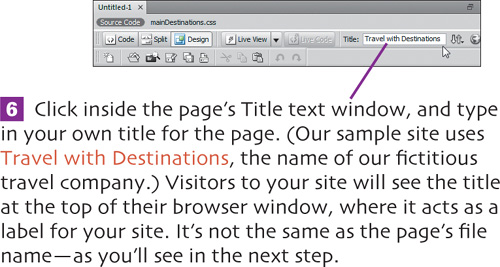
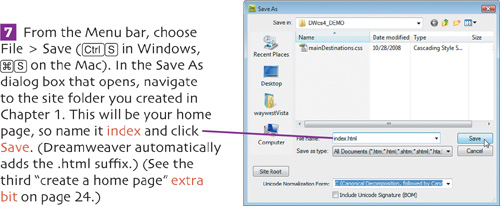
The mechanics of creating a home page for a Web site are pretty simple. The first step is to create a new page, then name the file, give it a title, and save it. While you can give the home page any title you wish (the title will appear at the top of the visitor’s Web browser), use something that helps visitors immediately understand your site’s purpose. If you have not already done so, launch Dreamweaver, and the site you defined in Chapter 1 opens by default.
![]() Use the Menu bar to choose File > New (
Use the Menu bar to choose File > New (![]() in Windows,
in Windows, ![]() on the Mac).
on the Mac).
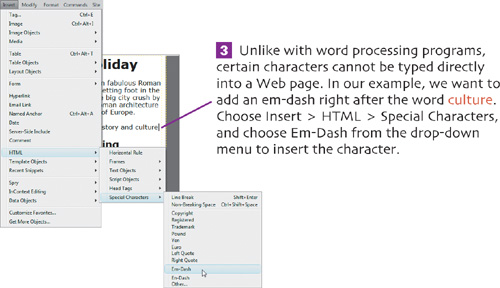
Adding text to a Web page in Dreamweaver is not that different from using a word processing program, with the exception of using certain special characters explained in step 3. (See extra bits on page 24.)
![]() As you enter your text in the main column, press
As you enter your text in the main column, press ![]() (Windows) or
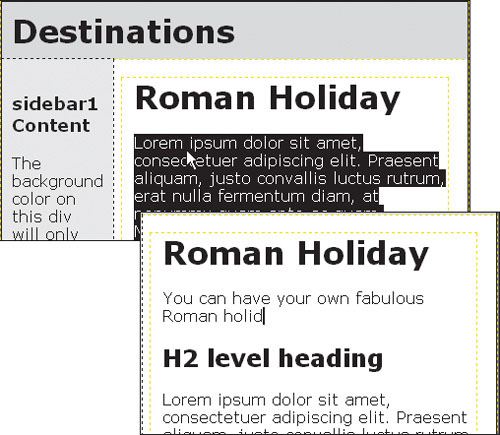
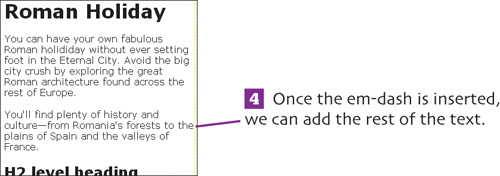
(Windows) or ![]() (Mac) to start a new paragraph, just as you would with a word processing program. Type in the rest of your text, setting off each line as a separate paragraph. In our example, we’ve entered a description of the Roman Holiday travel package.
(Mac) to start a new paragraph, just as you would with a word processing program. Type in the rest of your text, setting off each line as a separate paragraph. In our example, we’ve entered a description of the Roman Holiday travel package.
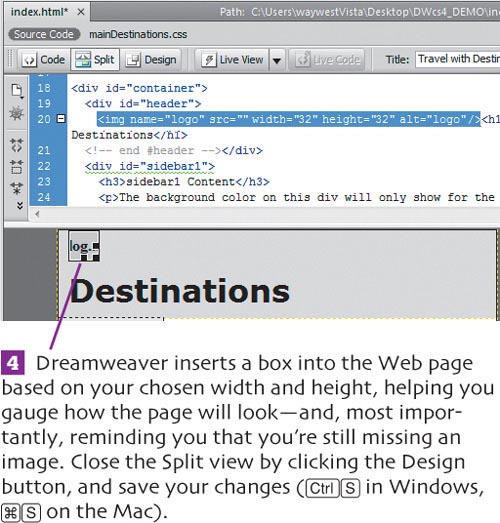
In a perfect world, all your images would be ready to put into your Web pages right when you’re building them. In reality, someone else may be creating the image even though you need to get started building pages. That’s why I explain inserting an image placeholder right in the middle of this text-building chapter. You can add the image later (as explained in Chapter 3), but this trick lets you keep working.
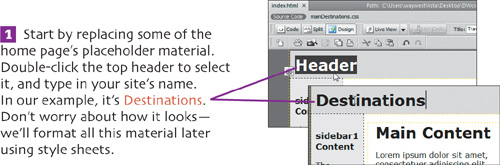
 If you closed your home page previously, reopen it. Click in the header just before its title (Destinations, in our example) and then click the Split view button.
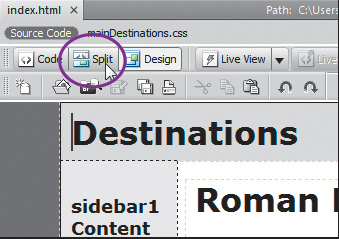
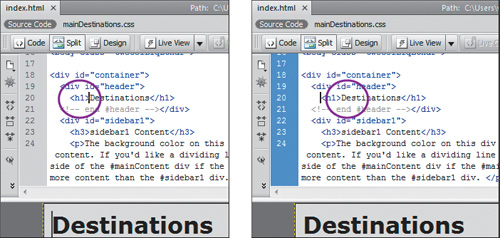
 We want to insert our company logo here but, as the Split view shows, there’s a slight problem. The cursor is sitting after the opening <h1> header tag. Fix the problem by repositioning your cursor just before the <h1> tag.
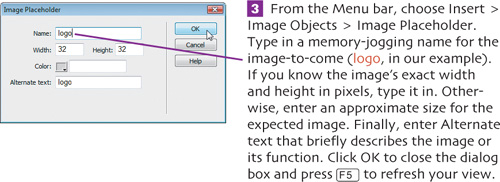
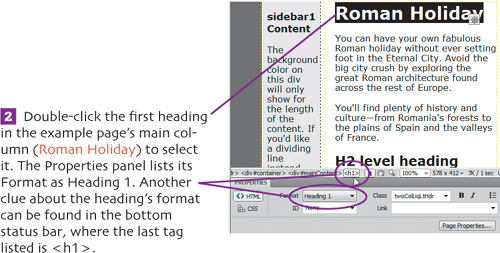
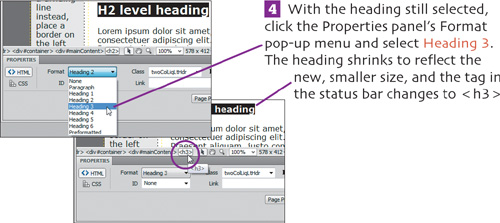
Just like newspaper and magazine headlines, headings on a Web page are larger and more noticeable than regular text. They range from size 1 (the largest) to size 6 (the smallest). Whether you’re building your own page or using our example page, the basics of creating and changing headings remain the same. Just like a newspaper, larger sizes generally are used for more important items and smaller sizes for less important items. (See extra bits on page 24.)
![]() If you closed your home page previously, reopen it. Make sure that you’re working in Design view and that the Properties panel is visible (
If you closed your home page previously, reopen it. Make sure that you’re working in Design view and that the Properties panel is visible (![]() in Windows,
in Windows, ![]() on the Mac).
on the Mac).

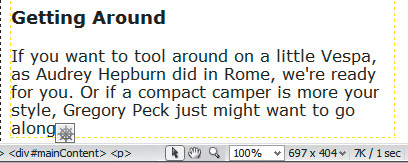
![]() Now replace the heading’s text by typing in your own (Getting Around in our example). We’ll also replace the text below the heading with related text.
Now replace the heading’s text by typing in your own (Getting Around in our example). We’ll also replace the text below the heading with related text.
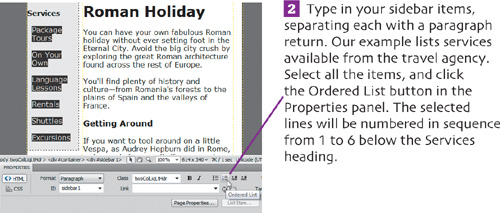
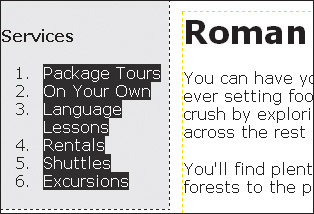
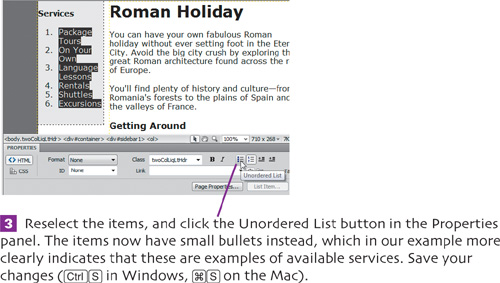
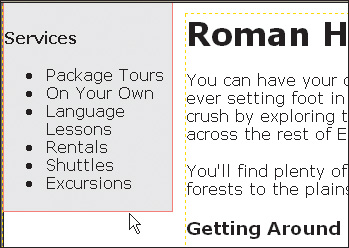
Organizing information into lists, whether numbered or simply marked with bullets, makes it easy to group lots of items in a way that anyone can instantly recognize. Ordered lists are great when you need to highlight a specific sequence of steps or materials. We’ll quickly show you how to do ordered and unordered lists. We’ll cover the rest of the list styling, however, in Chapter 6.
Tucked at the bottom of pages, footers offer a perfect place for displaying essential information that doesn’t need to immediately grab a reader’s attention. Copyright and contact information are good examples. Thanks to our example’s CSS-based layout, the home page already contains a footer. For now, we’ll keep it simple, though later we’ll use CSS to add some fancier formatting and navigation links.

![]() Replace it by typing in your own text. In our example, that includes the formal name of the business, plus copyright information. (You’ll find the © by choosing Insert > HTML > Special Characters.)
Replace it by typing in your own text. In our example, that includes the formal name of the business, plus copyright information. (You’ll find the © by choosing Insert > HTML > Special Characters.)
