
In previous chapters, you saw how Cascading Style Sheets (CSS) save you time in creating and formatting pages. Using those examples, you learned how to change and create style rules. In this chapter, we go a bit deeper, formatting elements based on their use or context.
You’ll learn to create a variety of styles to cover virtually all your needs. Tag-based styles, also known as element-based styles, apply to a specific HTML element, such as every h1 or li tag. Compound styles—also know as context-based styles—enable you to apply a style when a certain combination of tags appears in a specific context, such as the page’s header or sidebar. Finally, class-based styles are not pegged to a particular tag and, so, can be applied to multiple items anywhere in a page. If you want to learn still more about CSS after reading this chapter, check out Peachpit’s Dreamweaver CS4: Visual QuickStart Guide on page xiv.
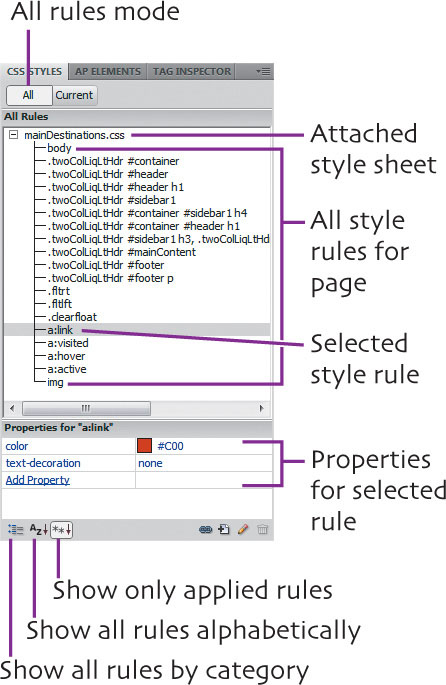
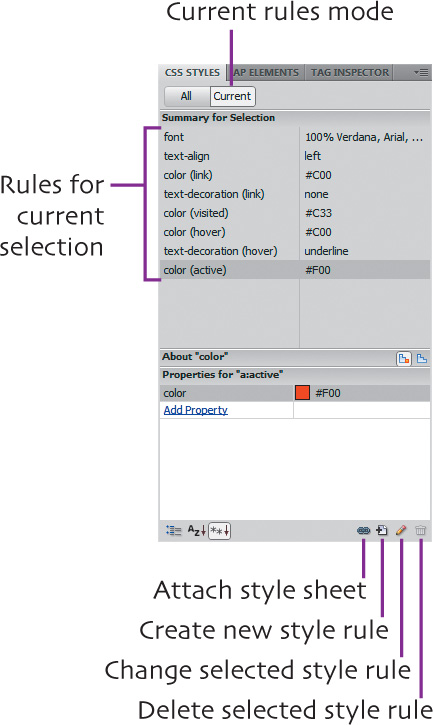
Dreamweaver conveniently puts everything you need for creating and managing style sheets in the CSS Styles tab. Along with the Files tab, it’s something you’ll always want visible. In contrast, you’re unlikely to ever use the AP Elements tab, which is grouped in the same CSS panel. (See the “using the css styles tab” extra bit on page 96.)
To open the CSS panel, choose Window > CSS Styles or press ![]() (Windows) or
(Windows) or ![]() (Mac).
(Mac).
In previous versions of Dreamweaver, using the Properties panel to create CSS often generated a mess of confusing, unnecessary styles. For that reason, we avoided using the Properties panel for any CSS work. The new version of the Properties panel, however, makes it clear when you are generating HTML or CSS code. Unlike previous versions, it also keeps you from accidentally creating a brand-new CSS rule every time you simply want to change an existing CSS rule. So now you have a real choice if you prefer to use the Properties panel instead of the CSS Styles tab.
![]() To open the Properties panel, choose Window > Properties or press
To open the Properties panel, choose Window > Properties or press ![]() (Windows) or
(Windows) or ![]() (Mac).
(Mac).
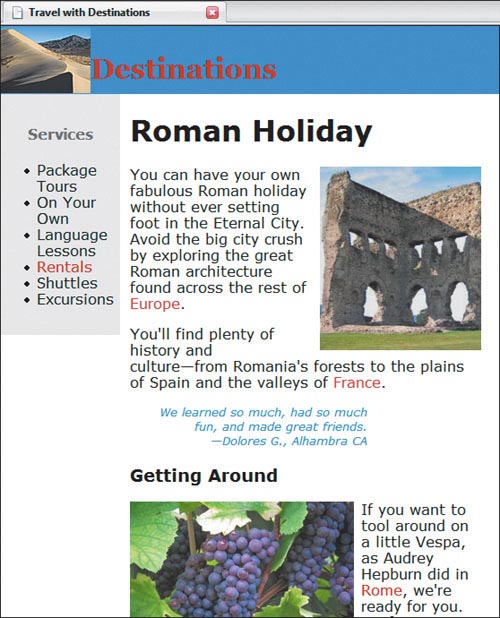
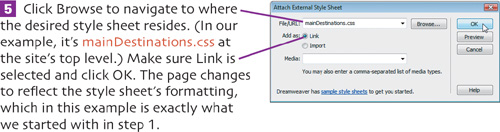
From the beginning of this book, we’ve been using pages already attached to a style sheet (mainDestinations.css in our examples). Let’s detach a style sheet from a page to see how different unattached pages look, and then reattach it.
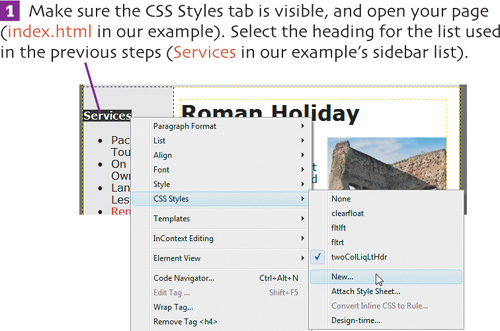
![]() Make sure the CSS Styles tab is visible (Windows > CSS Styles) with the All button selected. Open your page (index.html in our example).
Make sure the CSS Styles tab is visible (Windows > CSS Styles) with the All button selected. Open your page (index.html in our example).


Tag-based styles affect every instance of a selected HTML element. Create a list style, for example, and it’s applied to every list tag in every page attached to that style sheet.
![]() Open your page (index.html in our example). Select the text in any list (not the list’s heading however). Right-click (
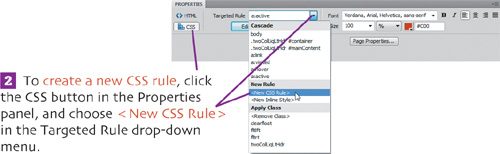
Open your page (index.html in our example). Select the text in any list (not the list’s heading however). Right-click (![]() -click for single-button Macs) and choose CSS Styles > New in the context menu. (Or click the Add CSS Rule button (the plus) at the bottom of the CSS Styles tab. You also can use the Properties panel as explained in step 2 on page 80.)
-click for single-button Macs) and choose CSS Styles > New in the context menu. (Or click the Add CSS Rule button (the plus) at the bottom of the CSS Styles tab. You also can use the Properties panel as explained in step 2 on page 80.)
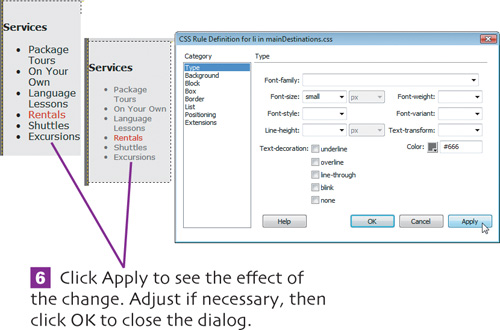
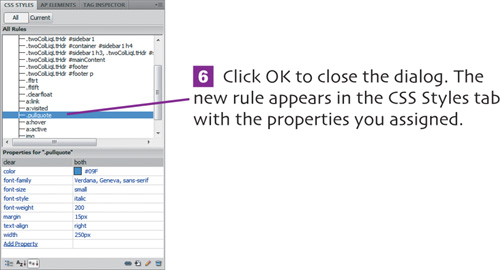
![]() When the CSS Rule Definition dialog opens, the Type category is automatically selected. Set the Font-size and Color. (In our example, small and #666, a gray, are chosen to keep the list from competing visually with the page’s main content.)
When the CSS Rule Definition dialog opens, the Type category is automatically selected. Set the Font-size and Color. (In our example, small and #666, a gray, are chosen to keep the list from competing visually with the page’s main content.)
![]() Choose File > Save All and the new style for lists is applied to every list linked to that external style sheet.
Choose File > Save All and the new style for lists is applied to every list linked to that external style sheet.
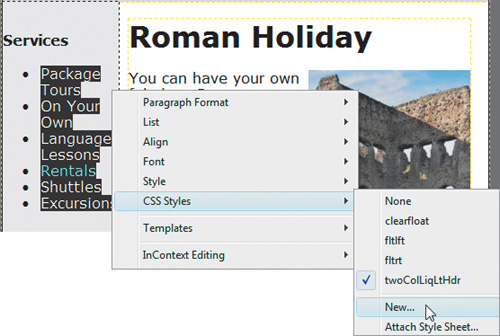
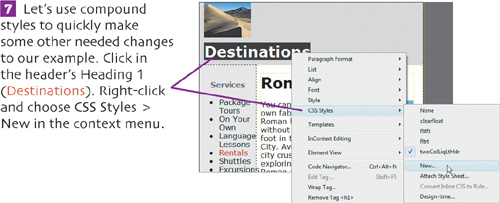
You’re not limited to applying tag-based styles to every instance of an HTML element. You also can define such styles so that they’re applied only when a particular combination of elements appear in a specific part, or division, of a page. These compound (or context-based) styles are particularly powerful when used with Dreamweaver’s predesigned layouts, which use div tags to mark the page’s different divisions.
![]() Right-click (
Right-click (![]() -click for single- button Macs) and choose CSS Styles > New in the context menu. (Or click the Add CSS Rule plus button at the bottom of the CSS Styles tab. You also can use the Properties panel as explained in step 2 on page 80.)
-click for single- button Macs) and choose CSS Styles > New in the context menu. (Or click the Add CSS Rule plus button at the bottom of the CSS Styles tab. You also can use the Properties panel as explained in step 2 on page 80.)
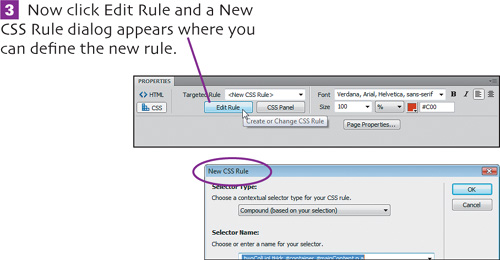
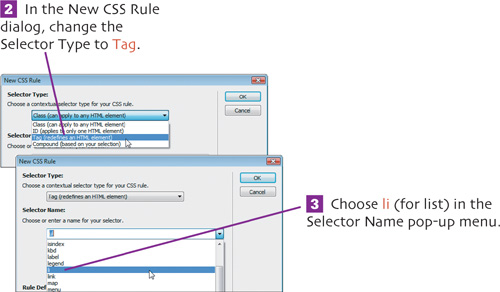
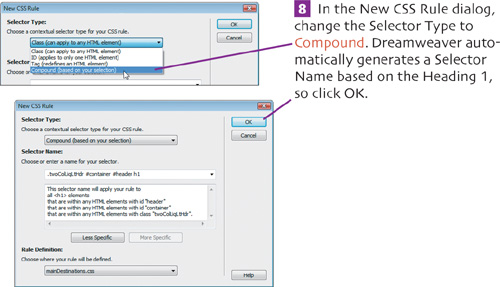
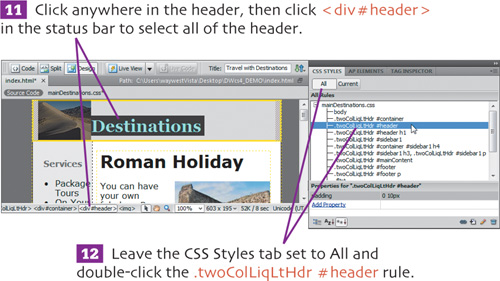
![]() In the New CSS Rule dialog, change the Selector Type to Compound. Let’s look at what’s inside the two Selector Name text windows. In our example, the first window reads: .twoColLiqLtHdr #container #sidebar1 h4. Below it, in the second window, each part of that of code is listed from most to least specific. The first bit of code, (a) .twoColLiqLtHdr, refers to the layout you first chose on page 12, which uses a two- column liquid layout with a header. The # leading off the next two bits of code (b, c) tells you these are page divisions marked with specific ID tags: container and sidebar1. Every CSS layout includes a #container. The #sidebar1 marks the sidebar holding the Services heading, which as the final bit of code (d) tells us is styled as an h4 (Heading 4). (See the first “create a compound style” extra bit on page 96.)
In the New CSS Rule dialog, change the Selector Type to Compound. Let’s look at what’s inside the two Selector Name text windows. In our example, the first window reads: .twoColLiqLtHdr #container #sidebar1 h4. Below it, in the second window, each part of that of code is listed from most to least specific. The first bit of code, (a) .twoColLiqLtHdr, refers to the layout you first chose on page 12, which uses a two- column liquid layout with a header. The # leading off the next two bits of code (b, c) tells you these are page divisions marked with specific ID tags: container and sidebar1. Every CSS layout includes a #container. The #sidebar1 marks the sidebar holding the Services heading, which as the final bit of code (d) tells us is styled as an h4 (Heading 4). (See the first “create a compound style” extra bit on page 96.)
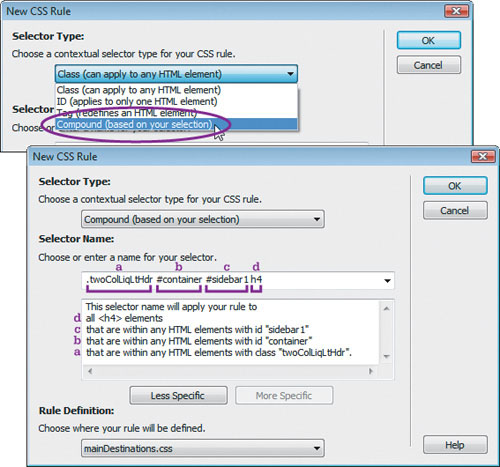
Here’s the cool part about all this: because of what was selected in step 1, Dreamweaver has automatically identified Heading 4’s context. All you have to do is choose Compound as the Selector Type and click OK. (See the second “create a compound-based style” extra bit on page 96.)
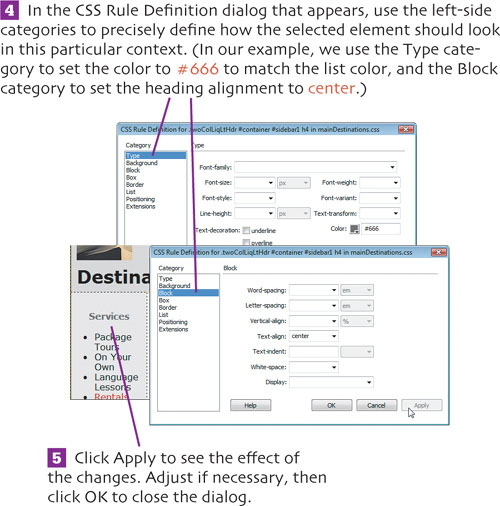

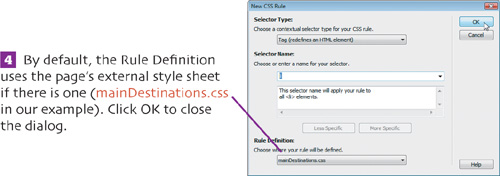
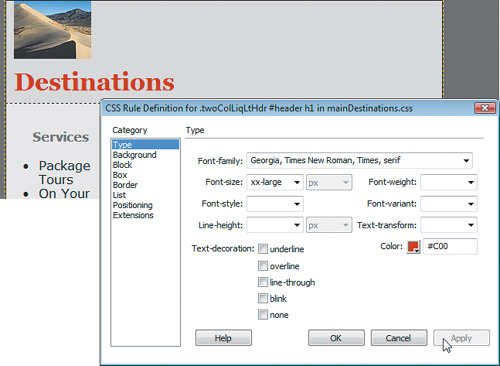
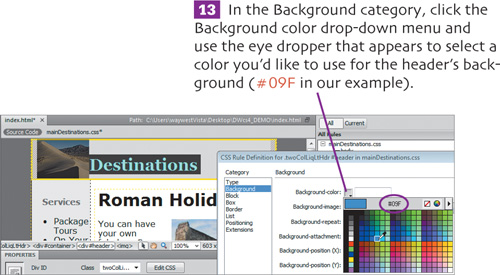
![]() In the Type category, set the Font-family to the Georgia, Times New Roman, Times, serif, the Font-size to xx-large, and the Color to #C00. Click Apply to see the effect of the change, and click OK to close the dialog.
In the Type category, set the Font-family to the Georgia, Times New Roman, Times, serif, the Font-size to xx-large, and the Color to #C00. Click Apply to see the effect of the change, and click OK to close the dialog.
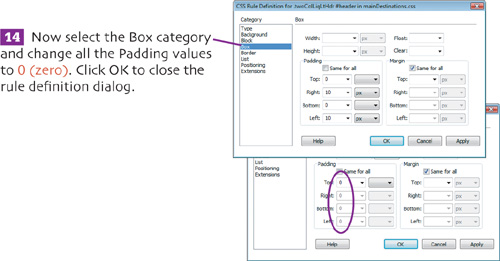
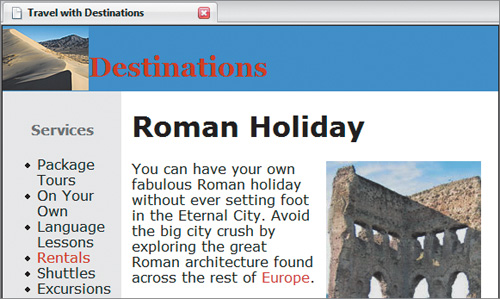
![]() Choose File > Save All to save your changes to the page and the attached style sheet. Click the Globe button in the Document toolbar to preview the changes in your default Web browser.
Choose File > Save All to save your changes to the page and the attached style sheet. Click the Globe button in the Document toolbar to preview the changes in your default Web browser.
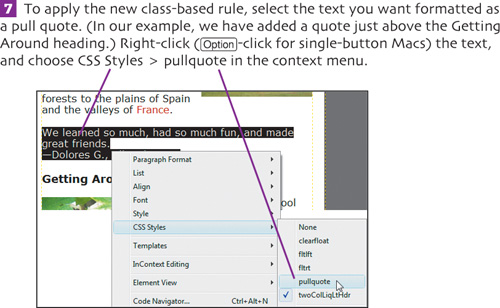
Class-based styles can be applied to multiple items on a page. In our example, we create a style for formatting quotes by customers. But class-based styles are also handy for such things as applying the same color to various elements to give your site a unified look.
![]() Open any page to which you’ve already attached your main css style sheet. (In our example, we’re still using index.html, which is attached to mainDestinations.css.) In the CSS Styles tab, click the Add CSS Rule button at the bottom of the tab. (You also can use the Properties panel as explained in step 2 on page 80.)
Open any page to which you’ve already attached your main css style sheet. (In our example, we’re still using index.html, which is attached to mainDestinations.css.) In the CSS Styles tab, click the Add CSS Rule button at the bottom of the tab. (You also can use the Properties panel as explained in step 2 on page 80.)
![]() Click anywhere in the page to see the effect. Choose File > Save All to save the page and the style sheet.
Click anywhere in the page to see the effect. Choose File > Save All to save the page and the style sheet.