3. Creating and Editing Symbols
This lesson will take about an hour and a half to complete. If needed, delete the previous lesson folder from your hard drive and copy the Lesson03 folder onto it.
![]()
Symbols are reusable assets that are stored in your Library panel. The movie clip, graphic, and button symbols are three types of symbols that you will be creating and using often for special effects, animation, and interactivity.
Getting Started
Start by viewing the final project to see what you’ll be creating as you learn to work with symbols.
1 Double-click the 03End.swf file in the Lesson03/03End folder to view the final project in Flash.
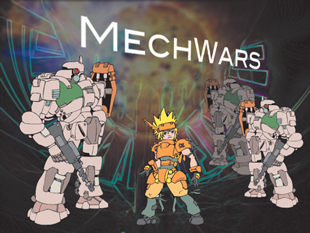
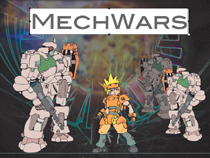
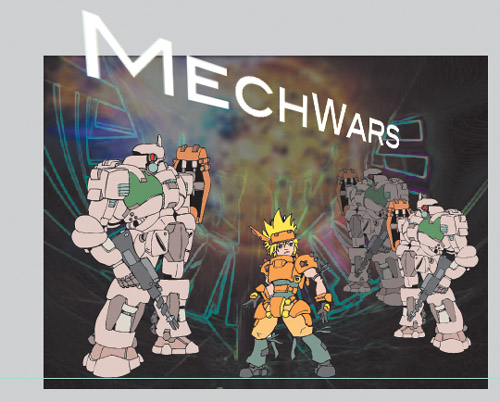
The project is a static illustration of a cartoon frame. In this lesson, you’ll use Illustrator graphic files, imported Photoshop files, and symbols to create an attractive static image with interesting effects. Learning how to work with symbols is an essential step to creating any animation or interactivity.
2 Close the 03End.swf file.
3 Choose File > New. In the New Document dialog box, choose ActionScript 3.0.
4 In the Properties inspector, click the Edit button next to the Size options to change the Stage to 600 pixels wide by 450 pixels high.
5 Choose File > Save. Name the file 03_workingcopy.fla and save it in the 03Start folder.
Importing Illustrator Files
As you learned in Lesson 2, you can draw objects in Flash using the Rectangle, Oval, and other tools. However, for complex drawings, you may prefer to create the artwork in another application. Adobe Flash Professional CS5 supports a variety of graphic formats, including Adobe Illustrator files, so you can create original artwork in that application and then import it into Flash.
When you import an Illustrator file, you can choose which layers in the file to import and how Flash should treat those layers. You’ll import an Illustrator file that contains all the characters for the cartoon frame.
1 Choose File > Import > Import to Stage.
2 Select the characters.ai file in the Lesson03/03Start folder.
3 Click Open.
4 In the Import to Stage dialog box, make sure all layers are selected. A check mark should appear in the check box next to each layer.
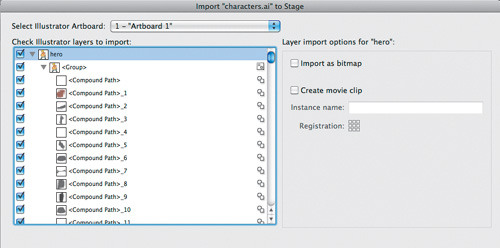
If you only want to import certain layers, you can deselect the layers you want to omit.
5 Choose Flash Layers from the Convert layers to menu, and then select Place objects at original position. Click OK.

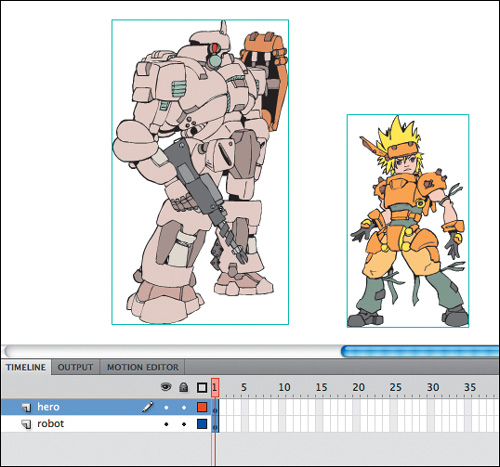
Flash imports the Illustrator graphics, and all the layers from the Illustrator file also appear in the Timeline.

Note
You can select any object displayed in your Illustrator file and choose to import it as a symbol or a bitmap image. In this lesson, you’ll just import the Illustrator graphic and take the extra step of converting it to a symbol so you can see the entire process.
About Symbols
A symbol is a reusable asset that you can use for special effects, animation, or interactivity. There are three kinds of symbols that you can create: the graphic, button, and movie clip. Symbols can reduce the file size and download time for many animations because they can be reused. You can use a symbol countless times in a project, but Flash includes its data only once.
Symbols are stored in the Library panel. When you drag a symbol to the Stage, Flash creates an instance of the symbol, leaving the original in the Library. An instance is a copy of a symbol located on the Stage. You can think of the symbol as an original photographic negative, and the instances on the Stage as prints of the negative. With just a single negative, you can create multiple prints.
It’s also helpful to think of symbols as containers. Symbols are simply containers for your content. A symbol can contain a JPEG image, an imported Illustrator drawing, or a drawing that you created in Flash. At any time, you can go inside your symbol and edit it, which means editing or replacing its contents.
Each of the three kinds of symbols in Flash is used for a specific purpose. You can tell whether a symbol is a graphic (![]() ), button (
), button (![]() ), or movie clip (
), or movie clip (![]() ) by looking at the icon next to it in the Library panel.
) by looking at the icon next to it in the Library panel.
Movie clip symbols
Movie clip symbols are one of the most common, powerful, and flexible of symbols. When you create animation, you will typically use movie clip symbols. You can apply filters, color settings, and blending modes to a movie clip instance to enhance its appearance with special effects.
Also notable is the fact that movie clip symbols contain their own independent Timeline. You can have an animation inside a movie clip symbol just as easily as you can have an animation on the main Timeline. This makes very complex animations possible; for example, a butterfly flying across the Stage can move from left to right as well as have its wings flapping independently of its movement.
Most important, you can control movie clips with ActionScript to make them respond to the user. For instance, a movie clip can have a drag-and-drop behavior.
Button symbols
Button symbols are used for interactivity. They contain four unique keyframes that describe how they appear when the mouse is interacting with them. However, buttons need ActionScript functionality to make them do something.
You can also apply filters, blending modes, and color settings to buttons. You’ll learn more about buttons in Lesson 6 when you create a nonlinear navigation scheme to allow the user to choose what to see.
Graphic symbols
Graphic symbols are the most basic kind of symbol. Although you can use them for animation, you’ll rely more heavily on movie clip symbols.
Graphic symbols are the least flexible symbols, because they don’t support ActionScript and you can’t apply filters or blending modes to a graphic symbol. However, in some cases when you want an animation inside a graphic symbol to be synchronized to the main Timeline, graphic symbols are useful.
Creating Symbols
In the previous lesson, you learned how to create a symbol to be used for the Deco tool. In Flash, there are two ways to create a symbol. The first is to have nothing on the Stage selected, and then choose Insert > New Symbol. Flash will bring you to symbol editing mode where you can begin drawing or importing graphics for your symbol.
The second way is to select existing graphics on the Stage, and then choose Modify > Convert to Symbol (F8). Whatever is selected will automatically be placed inside your new symbol.
Both methods are valid: Which you use depends on your particular workflow preferences. Most designers prefer to use Convert to Symbol (F8) because they can create all their graphics on the Stage and see them together before making the individual components into symbols.
Note
When you use the command Convert to Symbol, you aren’t actually “converting” anything, but rather you are placing whatever you’ve selected inside of a symbol.
For this lesson, you will select the different parts of the imported Illustrator graphic, and then convert the various pieces to symbols.
1 On the Stage, select the cartoon character in the hero layer.

2 Choose Modify > Convert to Symbol (F8).
3 Name the symbol hero and select Movie Clip for the Type.
4 Leave all other settings as they are. The Registration indicates the registration point of your symbol. Leave the registration at the top-left corner.
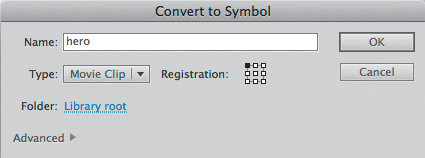
5 Click OK. The hero symbol appears in the Library.
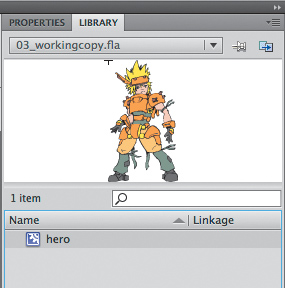
6 Select the other cartoon character in the robot layer and convert it to a movie clip symbol as well. Name it robot.
You now have two movie clip symbols in your Library and an instance of each on the Stage as well.
Importing Photoshop Files
You’ll import a Photoshop file for the background. The Photoshop file contains two layers with a blending effect. A blending effect can create special color mixes between different layers. You’ll see that Flash can import a Photoshop file with all the layers intact and retain all the blending information as well.
1 Select the top layer in your Timeline.
2 From the top menu, choose File > Import > Import to Stage.
3 Select the background.psd file in the Lesson03/03Start folder.
4 Click Open.
5 In the Import to Stage dialog box, make sure all layers are selected. A check mark should appear in the check box next to each layer.
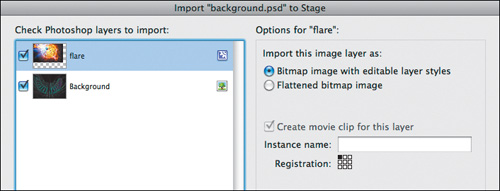
6 Choose the flare layer in the left window.
7 In the options on the right, choose Bitmap image with editable layers styles.
The movie clip symbol icon appears to the right of the Photoshop layer, indicating that the imported layer will be made into a movie clip symbol. The other option, Flatten bitmap image, will not preserve any layer effects such as transparencies or blending.
8 Choose the Background layer in the left window.
9 In the options on the right, choose Bitmap image with editable layers styles.
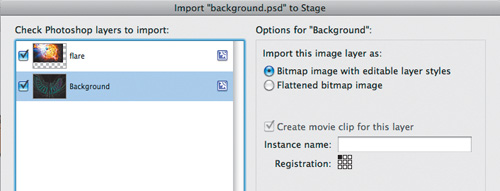
10 At the bottom of the dialog box, set the Convert layers to Flash Layers option, and select Place layers at original position.
You also have the option of changing the Flash Stage size to match the Photoshop canvas. However, the current Stage is already set to the correct dimensions (600 pixels × 450 pixels).

11 Click OK. The two Photoshop layers are imported into Flash and placed on separate layers on the Timeline.
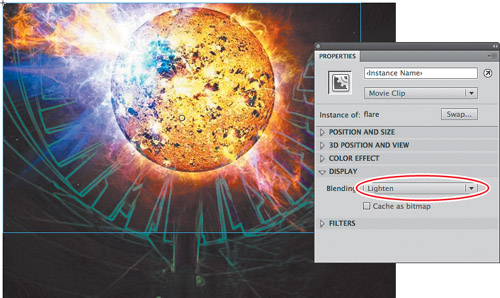
The Photoshop images are automatically converted into movie clip symbols and saved in your Library. All the blending and transparency information is preserved. If you select the image in the flare layer, you’ll see that the Blending option is set to Lighten in the Properties inspector under the Display section.
Note
If you want to edit your Photoshop files, you don’t have to go through the entire import process again. You can edit any image on the Stage or in the Library panel in Adobe Photoshop CS5 or any other image-editing application. Right-click/Ctrl-click an image on the Stage or an image in the Library and choose Edit with Adobe Photoshop CS5 or Edit with to choose your preferred application. Flash launches the application, and once you have saved your changes, your image is immediately updated in Flash.
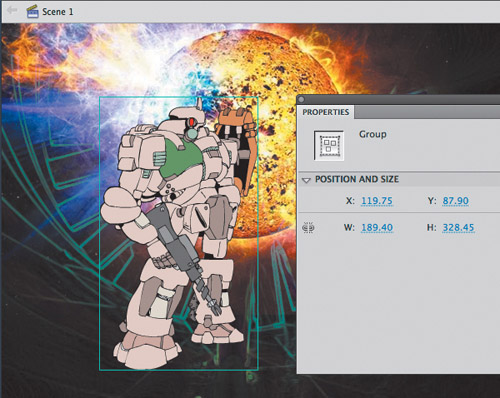
12 Drag the robot and the hero layers to the top of the Timeline so they overlap the background layers.
Editing and Managing Symbols
You now have multiple movie clip symbols in your Library and several instances on the Stage. You can better manage the symbols in your Library by organizing them in folders. You can also edit any symbol at any time. If you decide you want to change the color of one of the robot’s arms, for example, you can easily go into symbol editing mode and make that change.
Adding folders and organizing the Library
1 In the Library panel, right-click/Ctrl-click in an empty space and select New Folder. Alternatively, you can click the New Folder button (![]() ) at the bottom of the Library panel.
) at the bottom of the Library panel.
A new folder is created in your Library.
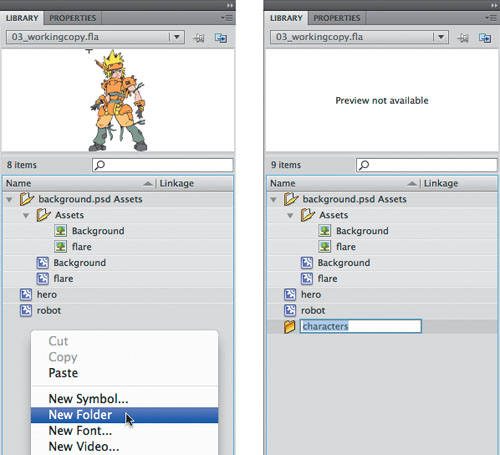
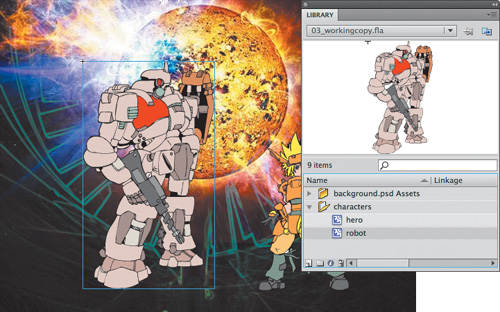
3 Drag the hero and the robot movie clip symbols into the characters folder.
4 You can collapse or expand folders to hide or view their contents and keep your Library organized.
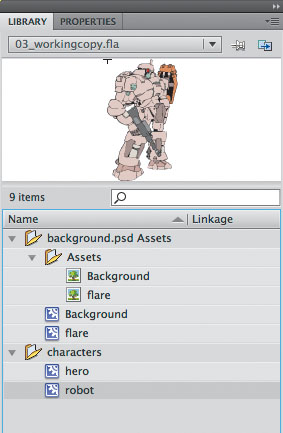
Editing a symbol from the Library
1 Double-click the robot movie clip symbol in the Library.
Flash takes you to symbol editing mode. In this mode, you can see the contents of your symbol, in this case, the robot on the Stage. Notice on the top horizontal bar that you are no longer in Scene 1 but are inside the symbol called robot.
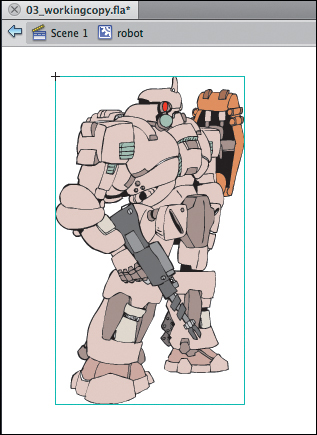
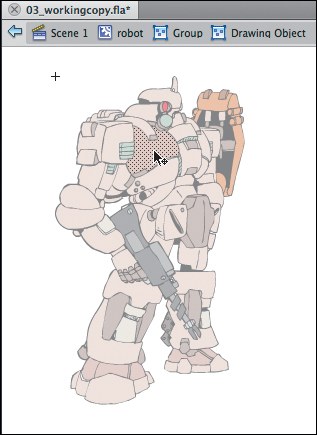
2 Double-click the drawing to edit it. You will need to double-click the drawing groups several times to drill down to the individual shape that you want to edit.
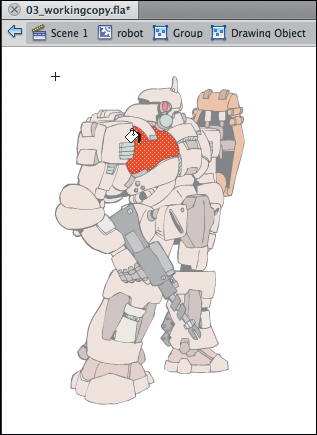
3 Choose the Paint Bucket tool. Select a new fill color and apply it to the shape on the robot drawing.
4 Click on Scene 1 on the top horizontal bar above the Stage to return to the main Timeline.
The movie clip symbol in the Library reflects the changes you made. The instance on the Stage also reflects the changes you made to the symbol. All instances of the symbol on the Stage will change if you edit the symbol.
Note
You can quickly and easily duplicate symbols in the Library. Select the Library symbol, right-click/Ctrl-click, and choose Duplicate. Or, from the top-right Options menu in the Library, choose Duplicate. An exact copy of the selected symbol will be created in your Library.
Editing a symbol in place
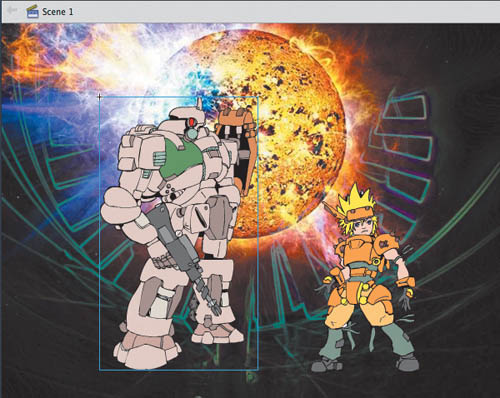
You may want to edit a symbol in context with the other objects on the Stage. You can do so by double-clicking an instance on the Stage. You’ll enter symbol editing mode, but you’ll also be able to see the symbol’s surroundings. This editing mode is called editing in place.
1 Using the Selection tool, double-click the robot movie clip instance on the Stage.
Flash dims all other objects on the Stage and takes you to symbol editing mode. Notice on the top horizontal bar that you are no longer in Scene 1 but are inside the symbol called robot.
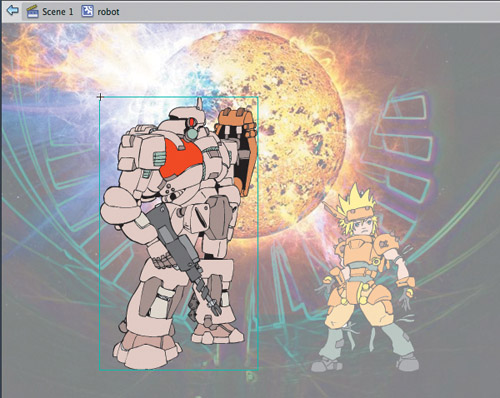
2 Double-click the drawing to edit it. You will need to double-click the drawing groups several times to drill down to the individual shape that you want to edit.
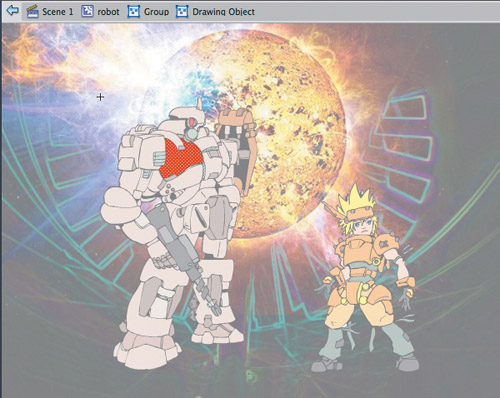
3 Choose the Paint Bucket tool. Select a new fill color and apply it to the shape on the robot drawing.
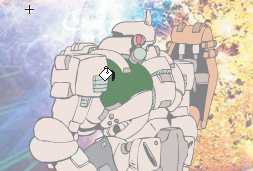
4 Click on Scene 1 on the top horizontal bar above the Stage to return to the main Timeline. You can also just double-click any part of the Stage outside the graphic with the Selection tool to return to the next higher group level.
The movie clip symbol in the Library panel reflects the changes you made. The instance on the Stage also reflects the changes you made to the symbol. All instances of the symbol will change according to the edits you make to the symbol.
Breaking apart a symbol instance
If you no longer want an object on the Stage to be a symbol instance, you can use the Break Apart command to return it to its original form.
1 Select the robot instance on the Stage.
2 Choose Modify > Break Apart.
Flash breaks apart the robot movie clip instance. What’s left on the Stage is a group, which you can break apart further to edit as you please.
Changing the Size and Position of Instances
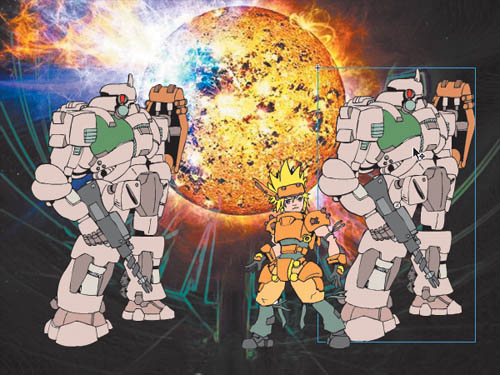
You can have multiple instances of the same symbol on the Stage. Now you’ll add a few more robots to create a small robot army. You’ll learn how to change the size and position (and even rotation) of each instance individually.
1 Select the robot layer in the Timeline.
2 Drag another robot symbol from the Library onto the Stage.
A new instance appears.
3 Choose the Free Transform tool.
Control handles appear around the selected instance.
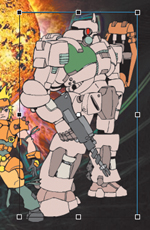
4 Drag the control handles on the sides of the selection to flip the robot so it is facing in the other direction.
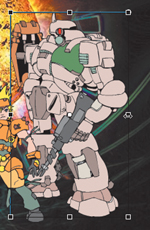
5 Drag the control handles on the corner of the selection while holding down the Shift key to reduce the size of the robot.
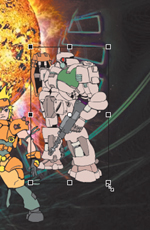
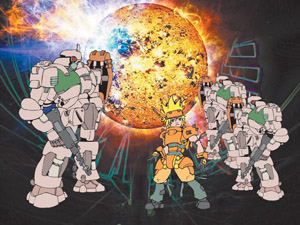
6 Drag a third robot from the Library onto the Stage. With the Free Transform tool, flip the robot, resize it, and make it overlap the second robot.
The robot army is growing!
Using rulers and guides
You may want to be more precise in your placement of your symbol instances. In Lesson 1, you learned how to use the X and Y coordinates in the Properties inspector to position individual objects. In Lesson 2 you learned to use the Align panel to align several objects to each other. Another way to position objects on the Stage is to use rulers and guides. Rulers appear on the top and left edge of the Pasteboard to provide measurement along the horizontal and vertical axes. Guides are vertical or horizontal lines that appear on the Stage but do not appear in the final published movie.
1 Choose View > Rulers (Alt+Shift+R/Option+Shift+Command+ R).
Horizontal and vertical rulers measuring in pixels appear along the top and left edges of the Pasteboard. As you move objects on the Stage, tick marks indicate the bounding box positions on the rulers.
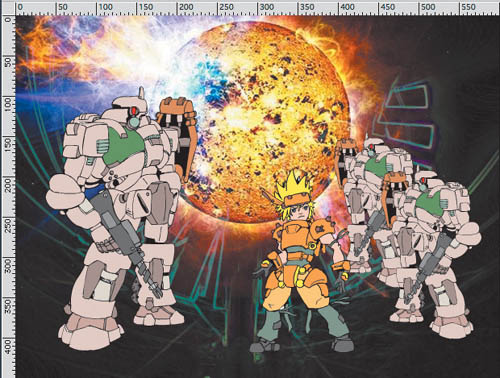
2 Click the top horizontal ruler and drag a guide onto the Stage.
A colored line appears on the Stage that you can use for alignment.

3 Double-click the guide with the Selection tool.
The Move Guide dialog box appears.
4 Enter 435 as the new pixel value of the guide. Click OK.
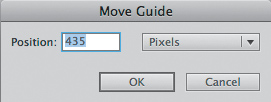
The guide is repositioned 435 pixels from the top edge of the Stage.
5 Choose View > Snapping > Snap to Guides and make sure Snap to Guides is selected.
Objects will now snap to any guides on the Stage.
6 Drag the robot instance and the hero instance so their bottom edges align with the guide.

Note
Lock your guides to prevent you from accidentally moving them by choosing View > Guides > Lock Guides. Clear all guides by choosing View > Guides > Clear Guides. Change the color of the guides and the snapping accuracy by choosing View > Guides > Edit Guides.
Changing the Color Effect of Instances
The Color Effect option in the Properties inspector allows you to change several properties of any instance: These properties include brightness, tint, or alpha.
Brightness controls how dark or light the instance appears, tint controls the overall coloring, and alpha controls the level of opacity. Decreasing the alpha value decreases the opacity and increases the amount of transparency.
Changing the brightness
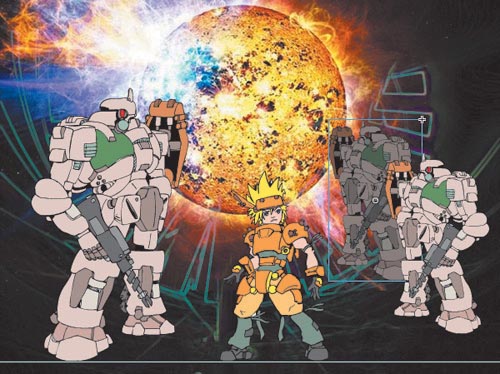
1 Using the Selection tool, click the smallest robot on the Stage.
2 In the Properties inspector, choose Brightness from the Color Effect Style menu.
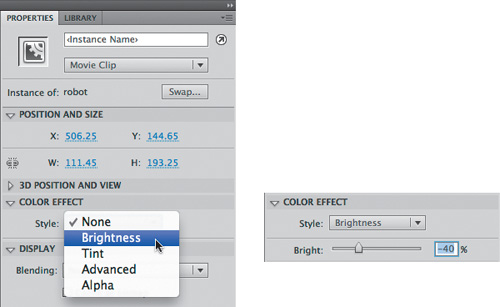
3 Drag the Bright slider to -40%.
The robot instance on the Stage becomes darker and appears to recede into the distance.
Changing the transparency
1 Select the glowing orb in the flare layer.
2 In the Properties inspector, choose Alpha from the Color Effect Style menu.
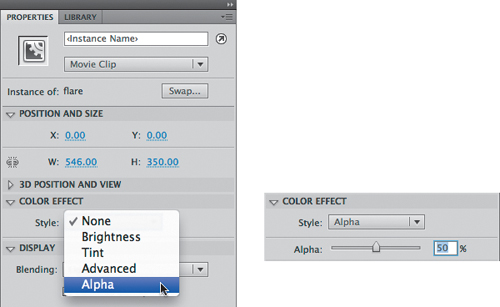
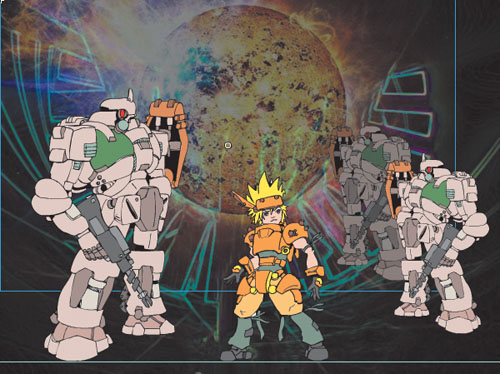
3 Drag the Alpha slider to a value of 50%.
The orb in the flare layer on the Stage becomes more transparent.
Note
To reset the Color Effect of any instance, choose None from the Style menu.
Understanding Blend Effects
Blending refers to how the colors of an instance interact with the colors below it. You saw how the instance in the flare layer had the Lighten option applied to it (carried over from Photoshop), which integrated it more with the instance in the Background layer.
There are many kinds of Blending options. Some have surprising results, depending on the colors in the instance and the colors in the layers below it. Experiment with all the options to understand how they work. The following figure shows some of the Blending options and their effects on the robot instance over a blue-black gradient.

Applying Filters for Special Effects
Filters are special effects that you can apply to movie clip instances. Several filters are available in the Filters section of the Properties inspector. Each filter has different options that can refine the effect.
Applying a blur filter
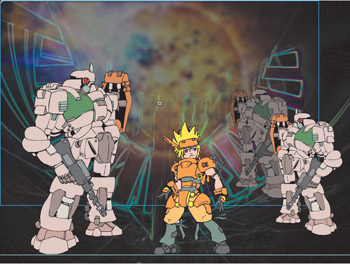
You’ll apply a blur filter to some of the instances to help give the scene a greater sense of depth.
1 Select the glowing orb in the flare layer.
2 In the Properties inspector, expand the Filters section.
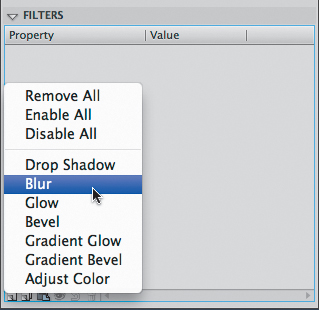
3 Click the Add filter button at the bottom of the Filters section and select Blur.
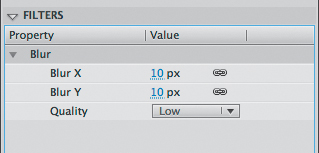
The Blur filter appears in the Filters window with options for Blur X and Blur Y.
4 If they aren’t linked already, click the link icons next to the Blur X and Blur Y options to link the blur effect in both directions.
5 Set the Blur X and Blur Y value to 10 pixels.
The instance on the Stage becomes blurry, helping to give an atmospheric perspective to this scene.
Note
It’s best to keep the Quality setting for filters on Low. Higher settings are processor intensive and can bog down performance, especially if you have multiple filters.
Positioning in 3D Space
You also have the ability to position and animate objects in real three-dimensional space. However, objects need to be either movie clip symbols or TLF Text to move them in 3D. Two tools allow you to position objects in 3D: the 3D Rotation tool and the 3D Translation tool. The Transform panel also provides information for position and rotation.
Understanding the 3D coordinate space is essential for successful 3D placement of objects. Flash divides space using three axes: the x, y, and z axes. The x axis runs horizontally across the Stage with x=0 at the left edge. The y axis runs vertically with y=0 at the top edge. The z axis runs into and out of the plane of the Stage (toward and away from the viewer) with z=0 at the plane of the Stage.
Changing the 3D rotation of an object
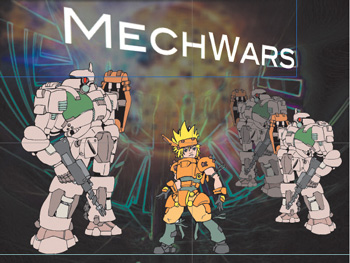
You’ll add some text to your image, but to add a little more interest, you’ll tilt it to put it in perspective. Think about the beginning text introduction to the Star Wars movies, and see if you can achieve a similar effect.
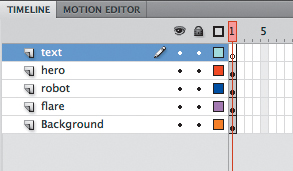
1 Insert a new layer at the top of the layers stack and rename it text.
2 Choose the Text tool from the Tools panel.
3 In the Properties inspector, choose TLF Text, Read Only, and select a large-size font with an interesting color that will add some pizzazz. Your font could appear a little differently than what’s shown in this lesson, depending on the fonts available on your computer.
4 Click on the Stage in your text layer and begin typing your title.
5 To exit the Text tool, select the Selection tool.
6 Choose the 3D Rotation tool (![]() ).
).
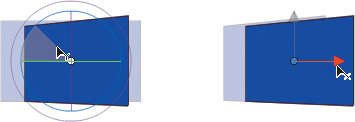
A circular, multicolored target appears on the instance. This is a guide for the 3D rotation. It’s useful to think of the guides as lines on a globe. The red longitudinal line rotates your instance around the x axis. The green line along the equator rotates your instance around the y axis. The circular blue guide rotates your instance around the z axis.

7 Click on one of the guides—red for x, green for y, or blue for z—and drag your mouse in either direction to rotate your instance in 3D space.
You can also click and drag the outer orange circular guide to freely rotate the instance in all three directions.

Changing the 3D position of an object
In addition to changing an object’s rotation in 3D space, you can move it to a specific point in 3D space. Use the 3D Translation tool, which is hidden under the 3D Rotation tool.
1 Choose the 3D Translation tool (![]() ).
).
2 Click on your text.
A guide appears on the instance. This is a guide for the 3D translation. The red guide represents the x axis, the green is the y axis, and the blue is the z axis.

3 Click on one of the guide axes and drag your mouse in either direction to move your instance in 3D space. Notice that your text stays in perspective as you move it around the Stage.

Resetting the rotation and position
If you’ve made a mistake in your 3D transformations and want to reset the position and rotation of your instance, you can use the Transform panel.
1 Choose the Selection tool and select the instance that you want to reset.
2 Open the Transform panel by choosing Window > Transform.
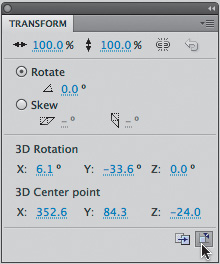
The Transform panel shows all the values for the x, y, and z angles and positions.
3 Click the Remove Transform button in the lower-right corner of the Transform panel.
The selected instance returns to its original settings.
Understanding the vanishing point and the perspective angle
Objects in 3D space represented on a 2D surface (such as the computer screen) are rendered with perspective to make them appear as they do in real life. Correct perspective depends on many factors, including the vanishing point and the perspective angle, both of which can be changed in Flash.
The vanishing point determines where on the horizon parallel lines of a perspective drawing converge. Think of railroad tracks and how the parallel tracks converge to a single point as they recede into the distance. The vanishing point is usually at eye level in the center of your field of view, so the default settings are exactly in the middle of the Stage. You can, however, change the vanishing point setting so it appears above or below eye level, or to the right or left.
The perspective angle determines how quickly parallel lines converge to the vanishing point. The greater the angle the quicker the convergence, and therefore, the more severe and distorted the illustration appears.
1 Select an object on the Stage that has been moved or rotated in 3D space.
2 In the Properties inspector, expand the 3D Position and View section.
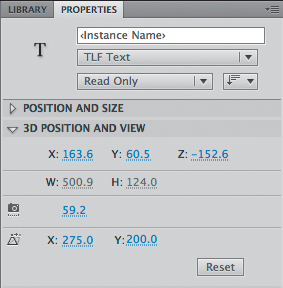
3 Click and drag on the X and Y values of the Vanishing Point to change the vanishing point, which is indicated on the Stage by intersecting gray lines.
4 To reset the Vanishing Point to the default values (to the center of the Stage), click the Reset button.
5 Click and drag on the Perspective Angle value to change the amount of distortion. The greater the angle, the more the distortion.
Review Questions
1 What is a symbol, and how does it differ from an instance?
2 Name two ways you can create a symbol.
3 When you import an Illustrator file, what happens if you choose to import layers as layers? As keyframes?
4 How can you change the transparency of an instance in Flash?
5 What are the two ways to edit symbols?
Review Answers
1 A symbol is a graphic, button, or movie clip that you create once in Flash and can then reuse throughout your document or in other documents. All symbols are stored in your Library panel. An instance is a copy of a symbol located on the Stage.
2 You can create a symbol by choosing Insert > New Symbol, or you can select existing objects on the Stage and choose Modify > Convert to Symbol.
3 When you import layers of an Illustrator file into Flash as layers, Flash recognizes the layers in the Illustrator document and adds them as separate layers in the Timeline. When you import layers as keyframes, Flash adds each Illustrator layer to a separate frame in the Timeline and creates keyframes for them.
4 The transparency of an instance is determined by its alpha value. To change the transparency, select Alpha from the Color Effect menu in the Properties inspector, and then change the alpha percentage.
5 The two ways to edit symbols are to either double-click the symbol in the Library to enter symbol editing mode or to double-click the instance on the Stage to edit in place. Editing a symbol in place lets you see the other objects around the instance.
