
The recent release of ASP.NET 4 AJAX Preview 4 has brought in some exciting additions to the ASP.NET AJAX framework. Preview 4 ushers in native support for working directly with server-side services, command bubbling, change support tracking and identity management, WCF and ASMX web service integration, and much more.
This Wrox Blox is about some of the most compelling features of ASP.NET AJAX Client Templates. The examples herein teach you the basics of Client Templates, demonstrate how to customize the templates, and walk you through getting data from the server using ASP.NET Web Forms, ASP.NET MVC, and through querying ADO.NET Data Services.
For further details on ASP.NET 4 AJAX Preview 4, go to
http://aspnet.codeplex.com/Wiki/View.aspx?title=AJAX.
Please take special care as you work through the examples contained in this Wrox Blox. The code herein works against the Preview 4 release of ASP.NET AJAX and may differ from release versions of the product.
Developers love separation. On the server–side, developers enjoy many advances in techniques used to separate business logic from the database and, to a large extent, business logic from the user interface. When dealing with code on the client, however, this separation is usually compromised.
Often, as pages are constructed programmatically, values from JavaScript data objects are assembled together with HTML markup in order to build a page. Unfortunately, up until now there has been no simple way to completely separate a page's markup from JavaScript code.
The example below demonstrates how people sometimes approach the problem:
<html>
<head>
    <script type="text/javascript">

        window.onload = function()
        {
            var names = [
                   { Name: "John" },
                   { Name: "Paul" }
                ];

            var template = "<table>";

            for (var i = 0; i < names.length; i++)
            {
                template += "<tr><td>" + names[i].Name + "</td></tr>";
            }

            template += "</table>";

            var list = document.getElementById("list");

            list.innerHTML = template;
        }

    </script>
</head>
<body>
    <div id="list"></div>
</body>
</html>
While there are many flaws with the above code, the most relevant weakness is the practice of mingling together the JavaScript code with HTML. This practice is accompanied by the usual drawback in mixing together areas of applications: difficult code to maintain and test.
Developers may choose to use a different approach to DOM manipulation that includes creating DOM nodes in-memory and then applying data to the nodes. This approach is even more complex and still does not achieve the goal of separating client-side business logic from the true user interface.
Client Templates represent a solution to this problem by completely separating HTML markup from JavaScript code. The result is standard markup that includes tokens that act as placeholders for the data. When the template is bound to a data source, the tokens are replaced with the actual data, and true separation is achieved.
Most of the examples in this Wrox Blox are implemented with plain HTML files and require no server-side processing. Near the end of the Wrox Blox, however, you implement examples that call server-side services to provide data to your view pages. The examples include demonstrations using ASP.NET Web Forms, ASP.NET MVC, and calling ADO.NET Data Services. The only project type available that supports all three of these scenarios is an ASP.NET MVC application.
If you do not have ASP.NET MVC installed on your machine or cannot install the project templates, you may create a standard ASP.NET Web Forms project to host the examples in this Wrox Blox and simply skip the section that implements calls to an ASP.NET MVC controller action.
A few of the examples use the jQuery library. If you are using an ASP.NET Web Forms project, you must manually include the library in your project.
If you have the ASP.NET MVC project templates installed on your machine, create a new project now to host the coming exercises.
There are several script references that are required to power the examples highlighted in this book. No matter which type of web project you ended up creating, each exercise relies on the ASP.NET AJAX Preview 4 and jQuery script files to be located in a folder named Scripts off the root of the site.
The following links are the locations where you may download the requisite script files:
ASP.NET AJAX Preview 4 —
http://aspnet.codeplex.com/Release/ProjectReleases.aspx?ReleaseId=24645jQuery —
http://docs.jquery.com/Downloading_jQuery
The DataView is a new client-side control responsible for facilitating data binding in the web browser. When considering Client Templates, the DataView is the "template" used to render data to the user.
To place the DataView in terms that many ASP.NET developers are familiar with, consider the Repeater server control. A Repeater's job is to iterate over a collection of data and render markup for each item according to the ItemTemplate. A distinctive quality of Repeaters is that they do not automatically generate HTML, unlike most other server controls. DataViews behave the same way as a Repeater, with the exception that all the processing is done client side.
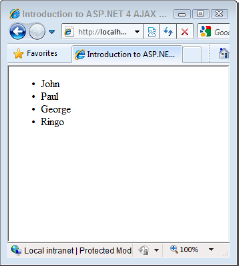
In the following example, you create a page with a list of names to present to the user (see Figure 1):
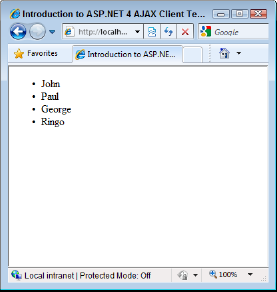
Begin by creating a page named Demo1.htm in the root of your application. Enter the following code as the markup for this very simple DataView:
Even though this Wrox Blox is about ASP.NET AJAX, you use a plain HTML file for most of the exercise to demonstrate that all processing is executed in the browser. While the server is unnecessary for many of the demos, the same techniques may be used in ASPX pages as well.
<html>
<head>
    <style type="text/css">
    .sys-template {display:none;}
    </style>
</head>
<body
    xmlns:sys="javascript:Sys"
    xmlns:dataview="javascript:Sys.UI.DataView"
    sys:activate="*">

    <ul
        class="sys-template"
        sys:attach="dataview"
        dataview:data="{{beatles}}">
        <li>{{Name}}</li>
    </ul>

<script type="text/javascript"
src="scripts/MicrosoftAjax.debug.js"></script>

<script type="text/javascript"
src="scripts/MicrosoftAjaxTemplates.debug.js"></script>
<script type="text/javascript">
var beatles = [
{ Name: "John" },
{ Name: "Paul" },
{ Name: "George" },
{ Name: "Ringo" }
];
</script>
</body>
</html>DataViews are bound to data either using declarative markup or programmatic binding. The code sample above uses declarative data binding, but each approach and all the code are discussed in detail in the next section.
The script blocks in this sample are at the end of the HTML document. This is a good practice to help optimize your web pages for search engines. The execution of the code responsible for binding the template is deferred until after the page is ready in the browser — regardless of where the scripts are located on the page. Therefore, placing the scripts near the bottom makes the content of your page available to search engines as early as possible.
One of the new features available in ASP.NET 4 AJAX is the ability to create objects and bind them to data with a declarative syntax. This section describes the declarative model in detail.
The listing begins with the following code:
<style type="text/css">
.sys-template {display:none;}
</style>
The CSS class sys-template is a convention used by the framework to initially hide templates until they are bound to data. The class must always be defined at a minimum with the style of display:none. Once data binding is complete, the class is removed from the element, effectively displaying the element on the page.
Next, the BODY element includes some extensions:
<body
    xmlns:sys="javascript:Sys"
    xmlns:dataview="javascript:Sys.UI.DataView"
    sys:activate="*">
The BODY element is marked up with attributes using the HTML's schema extensibility features. The Microsoft ASP.NET 4 AJAX namespaces are imported into the document using the xmlns attributes. The root-level Sys library is imported first, then the library that contains the JavaScript class for the DataView is imported into the document. Once the resources are available, then the document may call commands made available through the imported libraries.
The last attribute on the BODY element is sys:activate. This tells the document to scan the entire page for possible instances of a DataView and mark them for data binding.
The * syntax is convenient but is not recommended for large pages. In the event that your page contains many elements, you may pass a comma-delimited list of element IDs that contain
DataViews on the page. This more explicit approach helps increase performance of the page.
Next, the template is defined:
<ul
    class="sys-template"
    sys:attach="dataview"
    dataview:data="{{beatles}}">
    <li>{{Name}}</li>
</ul>
The unordered list uses the sys-template CSS class to initially hide the template from the user. This approach saves the user from first seeing a blank template with odd-looking placeholder text before data is bound to the template. Using the sys-template class ensures that the data view is only shown to the user when data is bound to the control.
The sys:attach element tells the document that the element on the page is a DataView control. Once the element is declared as a DataView, then object-specific properties are available for manipulation. The next element, dataview:data, sets the object's data property equal to an array of objects.
The body of the template contains placeholders that the Client Template Framework replaces with bound data. The placeholder uses double curly braces with the data object's property name to insert data into the control. This approach creates a one-way, one-time binding between the view and the data source.
The last section of the markup imports the updated Microsoft AJAX library and Microsoft AJAX Templates library, and the data used to populate the controls is declared as a JSON object array.
<script type="text/javascript"
src="scripts/MicrosoftAjax.debug.js"></script>

<script type="text/javascript"
src="scripts/MicrosoftAjaxTemplates.debug.js"></script>

<script type="text/javascript">

    var beatles = [
       { Name: "John" },
       { Name: "Paul" },
       { Name: "George" },
       { Name: "Ringo" }
    ];

</script>The declarative model allows you to add functionality to your page without requiring you to write much code, but this convenience comes at a price. When using the declarative features, you lose explicit control over how your page interacts with the libraries making complex interactions difficult. Fortunately, the Client Templates Framework features a programmatic model as well.
The following code listing results in the same list of names for the user, but the markup and script are updated to use a programmatic approach to data binding.
Make a copy of your Demo1.htm, naming it Demo2.htm. Update the code to match the following listing. Note that the changed lines of code are highlighted:
<html>
<head>
    <style type="text/css">
    .sys-template {display:none;}
    </style>
</head>
<body>

    <ul id="dv" class="sys-template">
        <li>{{Name}}</li>
    </ul>

<script type="text/javascript" src="scripts/MicrosoftAjax.debug.js"></script>
<script type="text/javascript" src="scripts/MicrosoftAjaxTemplates.debug.js">
</script>
<script type="text/javascript">

    Sys.Application.add_load(appLoaded);

    function appLoaded()
    {
        $create(Sys.UI.DataView, { data: beatles }, null, null, $get("dv"));
    }

    var beatles = [
       { Name: "John" },
       { Name: "Paul" },
       { Name: "George" },
       { Name: "Ringo" }
    ];

</script>
</body>
</html>
The programmatic approach drastically cleans up the HTML. No longer must you declare extra XML namespaces in the body — nor flag containers for scanning by the framework. The HTML that remains is simple, common markup that makes use of an element ID and CSS class as hooks for the Client Template Framework to pick up.
The updated JavaScript gives you explicit control over when and how the template is bound to its data. Using the add_load function of Sys.Application, an event handler is added to the page to run once the application is loaded into the browser.
The appLoaded function uses the $create shortcut function to create an instance of the Sys.UI.DataView class. The argument list for $create is as follows:
Optional parameters. | |
|---|---|
Type name | The name of the class being instantiated |
Properties* | A JSON object of property and value pairs to set on the object once instantiated |
Events* | A JSON object describing events and associated handlers |
Element ID* | The element the resulting object is attached to on the page |
The
$createfunction is a shortcut to theSys.Component.createfunction. Further details are atwww.asp.net/Ajax/documentation/live/ClientReference/Sys/ComponentClass/ComponentCreateMethod.aspx.
When using the $create function, once the object is created, the data is bound to the template and the final rendered view is displayed to the user.
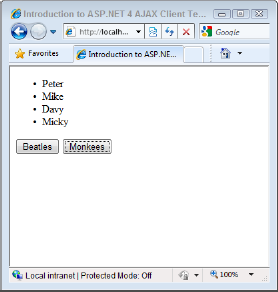
Once you have a DataView bound to a data source, often you may want to update the data being displayed in the template. The DataView class includes a method named set_data, which takes an object list or array as a parameter. Calling the set_data method will bind the DataView to the new data objects.
In this section, you update your code to create a page that allows a user to change the template's data source between two object arrays (see Figure 2).
Begin by making a copy of Demo2.htm and name it Demo3.htm. To add the desired interaction, you will keep the structure of the document but change the JavaScript and HTML.
Return to the script block and update the code to match the following listing:
<script type="text/javascript">

Sys.Application.add_load(appLoaded);

function appLoaded()
{
   $create(Sys.UI.DataView, { data: beatles }, null, null, $get("dv"));
}

function changeTo(data)
{
   $find("dv").set_data(data);
}

var beatles = [
   { Name: "John" },
   { Name: "Paul" },
   { Name: "George" },
   { Name: "Ringo" }
];

var monkees = [
   { Name: "Peter" },
   { Name: "Mike" },
   { Name: "Davy" },
   { Name: "Micky" }
];

</script>
Here you are creating a handler for the ASP.NET AJAX application load event using the add_load method. This gives you a place to reliably execute code once the page is loaded and ready for manipulation.
Once the page is loaded, the appLoaded function is run, and a new data view is created in the same fashion as in the previous exercises.
The changeTo function is run when a user clicks on one of the input buttons to change the template's data source. The data view is instantiated by using the ASP.NET AJAX $find method. Finally, calling the set_data method will re-bind the existing template to the new data source.
The remainder of the script is the initialization of the two object arrays that the page uses as data sources.
The HTML requires very little adjustment. The template stays the same, and you simply need to add the two buttons to the page to facilitate the data source change. The changes to the HTML are highlighted:
<ul id="dv" class="sys-template">
    <li>{{Name}}</li>
</ul>

<input type="button" value="Beatles" onclick="changeTo(beatles);" />
<input type="button" value="Monkees" onclick="changeTo(monkees);" />
Once you complete these changes, run Demo3.htm in the browser to test the page.
The DataView is bound to data using a binding syntax that can be adjusted for different purposes. The data-binding markup will be very familiar to those who have experience in XAML-based environments like WPF or Silverlight. The binding syntax comes in the following modes:
One-way/one-time binding
One-way/live binding
Two-way/live binding
Binding in ASP.NET 4 AJAX is flexible enough to accommodate the view reflecting changes to the data source as well as the UI having direct access to the data values. The following section describes each of these scenarios in detail.
In many cases, developers want to display data to users that is read-only and will not change during the course of the page view. Consider a table of sports scores or statistics on last month's sales revenues; the purpose of these views is to simply present data to the user. When this type of scenario is required, the use of one-way/one-time binding is most appropriate.
Just as you implemented in some of the previous exercises, this type of binding is represented with the following syntax:
{{PropertyName}}The name of the data property inside double curly braces will bind the data in the view as data binding is happening and is not altered even if the underlying data source changes.
The next scenario is when you want a read-only portion of your view to reflect changes to the original data source. The one-way/live binding does not give the user direct access to edit the data but will automatically display any changes made to the data to which it is originally bound.
This type of binding is represented with the following syntax:
{binding PropertyName}The name of the data property inside single curly braces, pre-pended with the keyword binding, will update the element's value when the data changes.
JavaScript is a case-sensitive language; therefore, binding must be in all lowercase, unlike in XAML applications.
The last scenario involves the times when you wish the UI to update when underlying changes occur and allow the user to make direct changes to the data. The best example of this type of use case is a data entry form.
This type of binding is used in conjunction with input elements and is represented with the following syntax:
<input type="text" value="{binding PropertyName}" />Using the same format as the one-way/live binding placed inside an input element gives the user direct access to the data objects.
Consider a page as shown in Figure 3 that allows you to edit the names of a list of people.
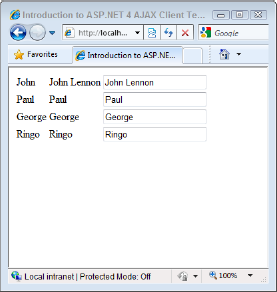
Figure 3. Changes to the data from the input controls are automatically reflected in the markup for elements with live binding.
When the data is changed in the textbox, the original data object is immediately updated. Elements in the view that are bound with a live binding syntax reflect the changes to the data, and the elements bound with {{PropertyName}} reflect the original data.
To begin, make a copy of Demo3.htm, name it Demo4.htm, and change the markup inside the BODY element to match the following code:
<table id="dv" class="sys-template">
    <tr>
        <td>{{Name}}</td>
        <td>{binding Name}</td>
        <td><input type="text" value="{binding Name}" /></td>
    </tr>
</table>
Run the page in the browser and try changing a few values on the page. Note that only the values in the second column change when the data is updated.
The data-binding syntax includes not only the modes discussed in the previous section, but also customizations that aid in manipulating data as it is being bound to the template.
Consider the edit screen shown in Figure 4.
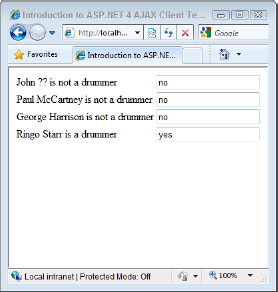
When the data is bound to the template, John's last name is a null value. Rather than rendering a blank space, the binding syntax allows developers the chance to provide a default value. In this case, the default value for the last name is two question marks.
Also, just as is found in XAML applications, the binding has extensibility points for developers to implement value converters. To see how a value converter works, notice how the view changes when the value is changed in one of the textboxes in Figure 5.
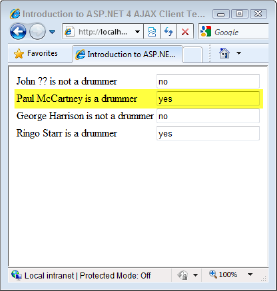
Changing the value in the textbox on Paul's row from "no" to "yes" automatically updates the description. What is most notable about this implementation is that the data object only understands a Boolean value for the IsDrummer property. The value converter function handles the interaction of understanding the text values of "yes" or "no" and rendering the appropriate description when binding to the data view.
This section demonstrates how to implement the example presented above. Create a new HTML file and name it Demo5.htm.
<html>
<head>
    <style type="text/css">
    .sys-template {display:none;}
    </style>
</head>
<body>
    <table id="dv" class="sys-template">
        <tr>
            <td>
                <span>{{ First }}</span>
                <span>{ binding Last, defaultValue=?? }</span>
                <span>{ binding IsDrummer, convert=drummerText }</span>
            </td>
<td><input type="text"
value="{ binding IsDrummer,
convert=convertDrummer,
convertBack=convertDrummerBack }" /></td>
</tr>
</table>
<script type="text/javascript" src="scripts/MicrosoftAjax.debug.js"></script>
<script type="text/javascript" src="scripts/MicrosoftAjaxTemplates.debug.js">
</script>
<script type="text/javascript">
Sys.Application.add_load(appLoaded);
function appLoaded()
{
$create(Sys.UI.DataView, { data: beatles }, null, null, $get("dv"));
}
var beatles = [
{ First: "John", Last:null, IsDrummer: false },
{ First: "Paul", Last: "McCartney", IsDrummer: false },
{ First: "George", Last: "Harrison", IsDrummer: false },
{ First: "Ringo", Last: "Starr", IsDrummer: true }
];
function drummerText(value)
{
   return (value) ? "is a drummer" : "is not a drummer";
}
function convertDrummer(value)
{
return (value) ? "yes" : "no";
}
function convertDrummerBack(value)
{
return value.toLowerCase() == "yes";
}
</script>
</body>
</html>Default Value
Begin by looking at the binding syntax for the last name:
{ binding Last, defaultValue=?? }The last name uses a one-way/live-binding to the view and is given a default value. Default values appear when the data member is null or does not exist in the object. Notice that although the value provided is a string, there are no double or single quotes around the value. The view will render any characters after the equal sign until it reachs a curly brace or a comma. A comma would terminate the syntax for a new parameter; therefore, you may not use a comma inside your default value.
Value Converters
This example uses value converters in two ways. The first use is to render a verbose description to the view based on a value in the data object, and the second is to translate an open text entry into typed values.
The code responsible for displaying the value for the IsDrummer property is defined like this:
{ binding IsDrummer, convert=drummerText }When the data is being bound to the view, instead of simply rendering the value for the property, the rendering is delegated to the function designated by the convert argument. The target function gets the value being bound to the view in its argument array.
function drummerText(value)
{
return (value) ? "is a drummer" : "is not a drummer";
}The drummerText function simply examines the value from the data object and decides what to do based on the value. This function must return a string and in many cases will include HTML as the result is what is injected into the placeholder in the data view.
The code responsible for allowing the data entry is defined like this:
<input type="text"
value="{ binding IsDrummer,
convert=convertDrummer,
convertBack=convertDrummerBack }" />
In this case, the convert function is defined as convertDrummer:
function convertDrummer(value)
{
   return (value) ? "yes" : "no";
}
When the textbox is rendered, the Boolean value for the IsDrummer property is replaced with the corresponding string representation.
After the data is changed in the box, the convertBack function is run in the same manner as the convert function:
function convertDrummerBack(value)
{
   return value.toLowerCase() == "yes";
}The observer pattern is defined as a way of creating a one-to-many relationship among objects in which change notifications are automatically dispatched to listening objects. The common terms used in describing the observer pattern include designating a "publisher" and a "subscriber." As the publisher is updated, each of the subscribing objects has an opportunity to respond to the change.
The following is a quick primer on how the observer pattern is implemented in the ASP.NET 4 AJAX Framework. Consider a page that allows you to update a person's last name, as shown in Figure 6.
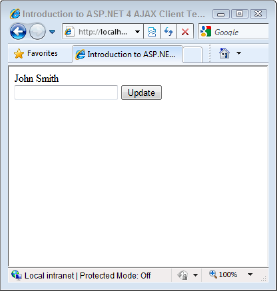
Under normal circumstances you might be inclined to explicitly edit the object's data in a function wired up to the Update button. Once the object's state is modified, the process of displaying the results back to the user is a trivial process. This approach works but tightly couples the button to the click handler to the data object.
Another way to accomplish the same goal is to allow the data object to notify any interested parties that a change is made to its state — delegating the responsibility to respond to this change to some unknown object or function.
The following code demonstrates how to update the above scenario using the observer pattern. Create a new HTML file, name it Demo6.htm, and enter the following:
<html>
<head>
    <title></title>
</head>
<body>
    <div id="personName"></div>
<input type="text" id="lastName" name="lastName" />
<input type="button" value="Update" onclick="update();" />
<script type="text/javascript" src="scripts/MicrosoftAjax.debug.js"></script>
<script type="text/javascript" src="scripts/MicrosoftAjaxTemplates.debug.js">
</script>
<script type="text/javascript" src="scripts/jquery-1.3.2.min.js"></script>
<script type="text/javascript">
var person = { FirstName:"John", LastName:"Smith"}

Sys.Observer.makeObservable(person);
Sys.Observer.addPropertyChanged(person, personPropertyChanged);
Sys.Application.add_load(appLoaded);
function appLoaded()
{
personPropertyChanged(null, null);
}
function update()
{
person.beginUpdate();
person.setValue("LastName",$("#lastName").val());
person.endUpdate();
}
function personPropertyChanged(sender, eventArgs)
{
    $("#personName").html(person.FirstName + " " + person.LastName);
}
</script>
</body>
</html>The markup inside the BODY element acts as a placeholder for the person's name followed by some basic input controls to manipulate the data.
By now, the script blocks that import the Microsoft AJAX, AJAX Templates, and jQuery libraries should be very familiar to you. Following the script imports is the construction of a person object using JSON. This object receives special attention to make changes observable by other objects.
var person = { FirstName:"John", LastName:"Smith"}
Sys.Observer.makeObservable(person);
Sys.Observer.addPropertyChanged(person, personPropertyChanged);The makeObservable function updates the object to include the methods of an observable object. These methods help route changes to the object through the observer pattern framework.
Next, the addPropertyChanged function associates changes in the object instance with a function to run when a change is triggered. In this case, the personPropertyChanged function is called anytime a change is made to the observable object.
function personPropertyChanged(sender, eventArgs)
{
$("#personName").html(person.FirstName + " " + person.LastName);
}When personPropertyChanged is called, the placeholder DIV is updated with the latest name information contained in the person object. The function responsible for triggering the change is the click handler for the Update button:
function update()
{
    person.beginUpdate();
    person.setValue("LastName",$("#lastName").val());
    person.endUpdate();
}
The beginUpdate method marks the object, making it ready to accept change notifications for subscribers.
An important distinction must be made when changing values to an observable object. Under normal circumstances you might approach updating the object's state with a line of code like this one:
person.LastName = $("#lastName").val();Instead of using this traditional approach, observable objects must route changes through the Sys.Observer framework using methods that call the property changed events. Therefore, changes to this object must look like this:
person.setValue("LastName",$("#lastName").val());The setValue takes the object member name as the first argument and the member's new value as the second argument.
If you are updating an object collection, the
addmethod will add the new item to the collection and fire the change events.
Finally, to give the placeholder its value when the page loads, the standard ASP.NET AJAX application load syntax is used to run personPropertyChanged when the page is loaded:
Sys.Application.add_load(appLoaded);

function appLoaded()
{
    personPropertyChanged(null, null);
}
For further details on the observer framework, you may read the official documentation at http://msdn.microsoft.com/en-us/library/dd393710(VS.100).aspx.
Earlier you learned to update an existing data view with a new data source, but what if you want your template to respond to underlying changes to the original data source? This section teaches you to combine ASP.NET 4 AJAX DataViews and the JavaScript observable collections.
The following sample makes the object array an observable collection. When changes are made to the collection, the data view is able to respond to those changes.
To visualize this functionality in action, consider a page on which a few input controls appear to the user when a contact name is clicked (see Figure 7). When the page enters Edit mode, the user has the option to edit the selected item, delete it from the list, or cancel out of the operation.
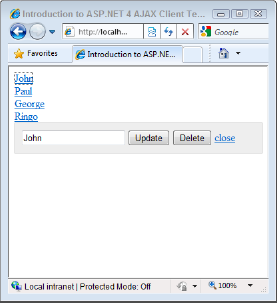
If the user chooses to update the data, the DataView is updated with the changes without having to re-bind the template to the data source.
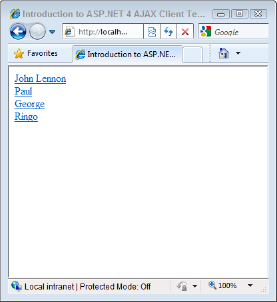
Once the underlying data source is updated (Figure 8), then you may choose whether you grant the user an opportunity for further manipulation of the data or a chance to send the changes back to the server for persistence.
To build the sample seen in the screenshots (Figures 7 and 8), begin by creating a new HTML document and name it Demo7.htm.
Add the following code within the HEAD element on the page:
<style type="text/css">
.sys-template, .hide
{
    display:none;
}

#editor
{
    width:350px;
    padding:10px;
    background-color:#eee;
    border:1px solid #ccc;
}
</style>
The style sheet begins by styling the sys-template class used by convention for templates to initially hide the markup from the user. The next entry styles a DIV on the page used as the editor template for the data item.
Next, add the following markup inside the BODY element:
<div id="dv" class="sys-template">
    <div sys:onclick="{{ 'select(' + $index + '),' }}">
        <a href="javascript:void(0);" onclick="return false;">
            { binding Name }
        </a>
    </div>
</div>
The HTML begins with a simple data view that creates a DIV for each of the names in the list. When the user clicks on the item-level DIV, the select function is run.
In the above code listing, notice the variable named
$indexand the use of thesyssyntax to add element attributes. The$indexvariable is a pseudo-column made available by the Client Template Framework to expose the current item's index value in the array. The keywordsysis required to attach data-bound attributes. Details about pseudo-columns' other data-binding keywords are explained in detail in the section, "Template Manipulation."
The select function uses the item index to populate the textbox with the selected value and then displays the editor to the user.
Note the use of the live binding syntax inside the anchor element. This binding gives the ability to update the element's data automatically when underlying data changes occur.
Next, add the following code:
<div id="editor" class="hide">
    <input type="text" id="name" name="name" />
    <input type="button" value="Update" onclick="update();" />
    <input type="button" value="Delete" onclick="del();" />
    <a href="javascript:void(0);" onclick="closeEditor();">close</a>
</div>
This markup creates the structure for the item editor. A textbox is available to edit the item's value, while the Update and Delete buttons are rendered to the user for the appropriate action. The last element is a link to close the editor. This item is rendered as a link to give less weight to keep the small editing space visually balanced.
Begin by adding references to the ASP.NET AJAX and jQuery libraries just after the closing tag for the BODY element:
<script type="text/javascript" src="scripts/MicrosoftAjax.debug.js"></script>
<script type="text/javascript" src="scripts/MicrosoftAjaxTemplates.debug.js">
</script>
<script type="text/javascript" src="scripts/jquery-1.3.2.min.js"></script>
Next, enter the following code:
<script type="text/javascript">

var beatles = [
   { Name: "John" },
   { Name: "Paul" },
   { Name: "George" },
   { Name: "Ringo" }
];

Sys.Application.add_load(appLoaded);

function appLoaded()
{
    $create(Sys.UI.DataView, { data: beatles }, null, null, $get("dv"));
}
The code here is largely familiar to you from previous examples. The data source is prepared by creating an object array. Then, the ASP.NET AJAX Sys.Application.add_load function is called to create a handler for the application load event. When the application loads, the appLoaded function runs and a DataView is created and bound to the object array.
Next, a variable is created to keep track of the selected item in the array and the function to manage its value:
var _selectedIndex = 0;

function select(index)
{
    _selectedIndex = index;
    $("#editor").removeClass("hide");
    $("#name").val(beatles[_selectedIndex].Name);
}
The select function is called when the user clicks on a name in the list. The index value is then set aside for later use. Then the editor is displayed to the user, and the selected name is copied into the textbox for editing.
Next, the array is marked as observable:
Sys.Observer.makeObservable(beatles);

function update()
{
    beatles.beginUpdate();
    var beatle = beatles[_selectedIndex];
    beatle.Name = $get("name").value;
    beatles.removeAt(_selectedIndex);
    beatles.insert(_selectedIndex, beatle);
    beatles.endUpdate();
    closeEditor();
}

function closeEditor()
{
$("#editor").addClass("hide");
}When the update function runs, the object array is already prepared as an observable collection and has the appropriate methods available to mark the object to track changes. The selected object is pulled from the array, and the Name property is updated from the value found in the textbox.
The approach used in this function to fire the property changed events is to remove the current item in the array and then add the edited copy back into the same location in the array. Using the removeAt method and the insert method allows the manipulation of the array to fire any required property changed events.
In the previous section on the observer pattern, you learned that in order to update an object's member you must use the
setValuemethod. The reason the update method is not callingsetValueon the data object is because the observable object in scope is the array, not the data object. Therefore, theinsertandremoveAtmethods are used to keep changes within messages the observer framework can manage.
Once all changes are complete, the endUpdate method is called to restrict any other changes from being published. The closeEditor function simply hides the item editor from the user.
The last function required to complete the editable list is a function responsible for deleting items from the list:
function del()
{
    beatles.beginUpdate();
    beatles.removeAt(_selectedIndex);
    beatles.endUpdate();
    $("#name").val("");
    closeEditor();
}
When the del function is called, the array is again placed into an edit state tracked by the observer framework. The selected item is removed from the array, and the edit state is closed. To clean up the item editor for future use, the name textbox is cleared out, and then the editor is hidden from the user.
As you begin to work with the DataView control, invariably you will want to customize and manipulate how the view is rendered beyond simply displaying data on the screen.
Manipulating the template is possible by using a mixture of two concepts available in a data view: pseudo-columns and code injection.
Pseudo-columns are variables containing context and metadata about the data view and the current data context. Available pseudo-columns include:
| The array index of the data during data binding |
| The last HTML element opened or closed to which the data is being bound |
| The instance of the current data object |
You can always tell when a pseudo-column is being used by the
$prefix of the variable.
Code injection refers to the practice of placing JavaScript code inside the template for execution during data binding. The following represent ways you may tap into the data-binding action of a template to execute code:
| If the executing code returns |
| Code executed before binding the current data item to the template |
| Code executed after binding the current data item to the template |
To put these concepts in context, the next section demonstrates how to use pseudo-columns and code injection to manipulate a data view.
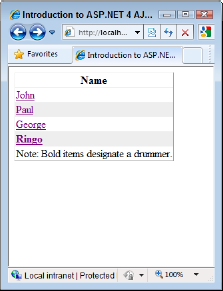
Consider a template (Figure 9) that includes a header, footer, and manipulation of the style sheet based on values found in the data source.
To implement this example, create a new HTML file, naming it Demo8.htm, and enter the following code:
<html>
<head>
    <style type="text/css">
    .sys-template {display:none;}
    .drummer {font-weight:bold;}
    .alt {background-color:#eee;}
    </style>
</head>
<body>
    <table id="dv" class="sys-template"
        border="1" style="border-collapse:collapse;">
        <tr code:if="isFirstItem($index)">
            <th>Name</th>
        </tr>
        <tr>
            <td code:after="formatItem($element, $dataItem, $index)">
                <a href="javascript:void(0);" onclick="{{ 'alert(' + $index + '),
                         return false;' }}">
                    {{Name}}

                </a>
            </td>
        </tr>
        <tfoot code:if="isLastItem($index)">
            <tr>
                <td>Note: Bold items designate a drummer.</td>
            </tr>
        </tfoot>
    </table>

<script type="text/javascript" src="scripts/MicrosoftAjax.debug.js"></script>
<script type="text/javascript" src="scripts/MicrosoftAjaxTemplates.debug.js">
</script>
<script type="text/javascript" src="scripts/jquery-1.3.2.min.js"></script>
<script type="text/javascript">

    Sys.Application.add_load(appLoaded);

    function appLoaded()
    {
        $create(Sys.UI.DataView, { data: beatles }, null, null, $get("dv"));
    }

    var beatles = [
       { Name: "John", IsDrummer:false },
       { Name: "Paul", IsDrummer: false },
       { Name: "George", IsDrummer: false },
       { Name: "Ringo", IsDrummer: true }
    ];
function isFirstItem(index)
{
return index == 0;
}
function isLastItem(index)
{
return index == (beatles.length - 1);
}
function isOddItem(index)
{
return (index % 2) != 0;
}
function formatItem(element, dataItem, index)
{
if (isOddItem(index))
{
$(element).addClass("alt");
}
if (dataItem.IsDrummer)
{
$(element).addClass("drummer");
}
}
</script>
</body>
</html>To learn about the new concepts presented in this code sample, examine the segment of code for the "header" of the template:
<tr code:if="isFirstItem($index)">
    <th>Name</th>
</tr>
The above code calls the following function:
function isFirstItem(index)
{
   return index == 0;
}
The header row is rendered only one time because the isFirstItem function returns a true value only once. The function inspects the value of the $index pseudo-column to see if it is equal to 0, which is the index value for the first record.
Next, the template uses the code:after syntax to inspect the data item after it is bound to the element.
<tr>
    <td code:after="formatItem($element, $dataItem, $index)">
        <a href="javascript:void(0);" onclick="{{ 'alert(' + $index + '),
                 return false;' }}">
            {{Name}}
        </a>
    </td>
</tr>
The above code uses the following functions:
function formatItem(element, dataItem, index)
{
   if (isOddItem(index))
   {
       $(element).addClass("alt");
   }

   if (dataItem.IsDrummer)
   {
       $(element).addClass("drummer");
   }
}

function isOddItem(index)
{
   return (index % 2) != 0;
}
The formatItem function first executes the isOddItem function to determine whether or not the current item has an odd index value. Odd values are detected by applying the JavaScript modulus operator to the item index.
Next, the function accesses the dataItem and interrogates the object to find out if the current record is a drummer. Then the element argument that points to the HTML element that the data is bound to is manipulated using jQuery to update the style sheet.
Finally, the TFOOT element uses the code:if syntax once again to detect the footer of the template.
Up until this point, your work with the templates has simply used object arrays that existed solely on the client. In most cases, real-world scenarios will require that your pages fetch data from the server. The following includes demonstrations and discussions of three common ways developers may choose to provide data to the UI pages:
ASP.NET Web Forms Page Methods
ASP.NET MVC Controller Action
ADO.NET Data Service
While these three examples are featured in this Wrox Blox, there are other options available to you as well. The DataView control also works well with WCF JSON services, ASMX web services, JSONP services, and others.
One of the most common scenarios is the need to work within ASP.NET Web Forms. The following example makes use of ASP.NET AJAX Page Methods to provide data to a data view. Consider a page (Figure 10) much like what you implemented earlier in the Wrox Blox, where an ASPX page displays a list of names.
Begin by creating a new ASPX page and naming it Demo9.aspx.
Enter the following markup into the ASPX file:
<html>
<head runat="server">
    <style type="text/css">
    .sys-template{display:none;}
    </style>
</head>
<body>
    <form runat="server">
    <asp:ScriptManager EnablePageMethods="true" runat="server">
        <Scripts>
            <asp:ScriptReference
                Name="MicrosoftAjax.js" Path="~/scripts/MicrosoftAjax.js" />
            <asp:ScriptReference
                ScriptMode="Inherit" Path="~/scripts/MicrosoftAjaxTemplates.js" />
        </Scripts>
    </asp:ScriptManager>
    </form>
    <ul id="dv" class="sys-template">
<li>{{FirstName}}</li>
</ul>
<script type="text/javascript">
Sys.Application.add_load(appLoaded);
function appLoaded()
{
PageMethods.GetPeople(success, fail);
}
function success(result)
{
$create(Sys.UI.DataView, { data: result }, null, null, $get("dv"));
}
function fail(result)
{
alert(result.get_error());
}
</script>
</body>
</html>This page opens by adding a server form and the ASP.NET AJAX ScriptManager. The ScriptManager is required to enable PageMethods on the page, and the form is a prerequisite for the ScriptManager.
The code of interest for this section is in the JavaScript. Just as you are accustomed to seeing in the HTML pages implemented earlier, the interaction with the page is initiated by adding a function to run once the page is loaded. In this case, instead of binding to the template directly, a PageMethod is called to request data from the server.
When the request completes and the success function runs, then the returned JSON array is used to bind to the template.
The code-behind for this page simply builds up an object array to return to the client:
public partial class PageMethods : System.Web.UI.Page
{
    [System.Web.Services.WebMethod]
    public static Person[] GetPeople()
    {
        Person[] people = {
                          new Person() { FirstName = "John" },
                          new Person() { FirstName = "Paul" },
                          new Person() { FirstName = "George" },
                          new Person() { FirstName = "Ringo"}
                          };

        return people;
    }
}
Now launch your page in the browser to verify it works as expected.
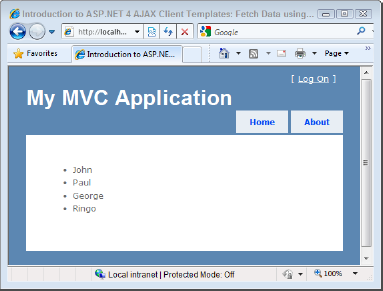
Another common scenario includes using the result of an ASP.NET MVC controller action to provide data to a Client Template. In order to make an equal comparison, this example has the view rendering the same list of names to the user, but this time in a view page, as shown in Figure 11.
To begin, create a new folder inside the Views folder named ControllerAction. In the new view page, enter the following code inside the MainContent content placeholder:
<ul id="dv" class="sys-template">
    <li>{{FirstName}}</li>
</ul>

<script type="text/javascript" src="/scripts/MicrosoftAjax.debug.js"></script>
<script type="text/javascript" src="/scripts/MicrosoftAjaxTemplates.debug.js">
</script>
<script type="text/javascript" src="/scripts/jquery-1.3.2.min.js"></script>
<script type="text/javascript">

    $(document).ready(function()
    {
        $.post("/ControllerAction/GetPeople",
            null,
            function(data)
            {
                $create(Sys.UI.DataView, { data: data }, null, null, $get("dv"));
            },
            "json");
    });
</script>
In this case, instead of using ASP.NET AJAX Page Methods to request data from the server, a jQuery function named post is used to make the call and manage the call back.
In the same fashion as the last example, the initial interaction with the page is set up by using the standard jQuery ready function. This ensures that the needed code will run only once the page is loaded and ready for execution.
The arguments for the post function include:
| The URL of the page or, in this case, the controller action, to load |
| A JSON object representing arguments passed to the URL destination |
| The function to execute once a response is returned from the server |
| The type of data being returned from the URL destination |
Next, create a new class in the Controllers folder named ControllerActionController.cs and add the following code:
public class ControllerActionController : Controller
{
    public ActionResult Index()
    {
        return View();
    }

    public JsonResult GetPeople()
    {
        Person[] people = {
                          new Person() { FirstName = "John" },
                          new Person() { FirstName = "Paul" },
                          new Person() { FirstName = "George" },
                          new Person() { FirstName = "Ringo"}
                          };

        return Json(people);
    }
}
The Index controller action is required to serve the page Index view page to the user. The GetPeople method returns an instance of the JsonResult class as the view page expects an array of JSON objects to bind to the template.
Another avenue available to provide server-side interaction to your pages is to integrate with ADO.NET Data Services. For the uninitiated, ADO.NET Data Services is a series of patterns and libraries that provide REST-based services to an underlying data context.
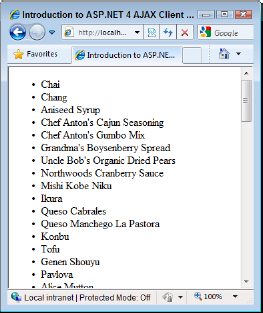
In the following demonstration (see Figure 12), your HTML page will call an ADO.NET Data Service to list product names from the Northwind database.
Before you may implement the code for the Client Template, you must first build a data context and the data service to host interaction with the data.
The following example will expose an Entity Framework entity set using ADO.NET Data Services.
The following example requires the Northwind database. If you need to download the database, please go to
http://tinyurl.com/northwind.
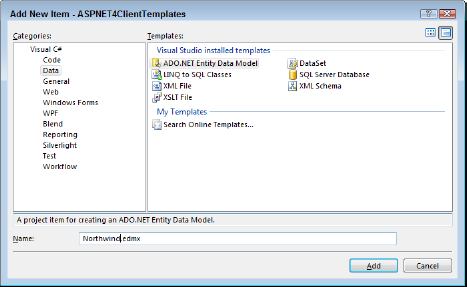
To begin, add a new entity model to the Models folder of your application, naming it Northwind.edmx, as shown in Figure 13.
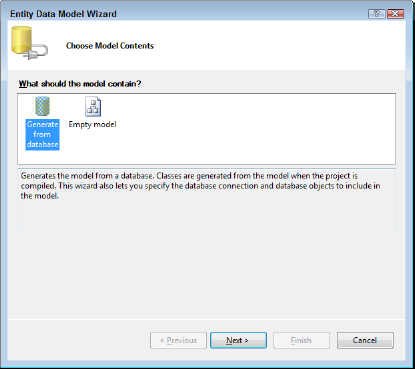
Click on the Add button. Next, the wizard asks you to select the model contents, as shown in Figure 14.
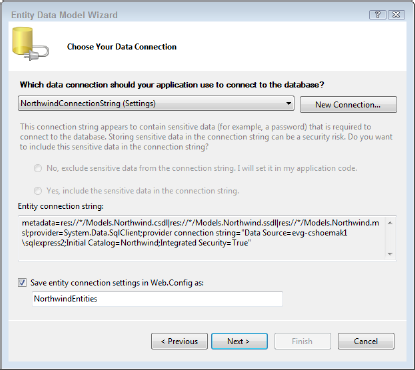
Click on the "Generate from database" icon, and click Next. The resulting dialog gives you an opportunity to create or select the connection to the Northwind database, as shown in Figure 15.
Once you make the connection to the database, click Next. The following dialog will allow you to select what database assets you wish to model. See Figure 16.
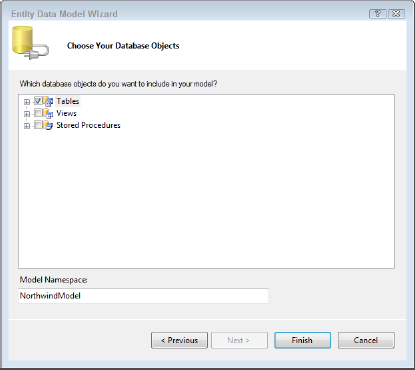
For the purposes of this example, check the box next to the Tables node and click Finish.
If the Entity Designer opens in the Editor window, you may close it.
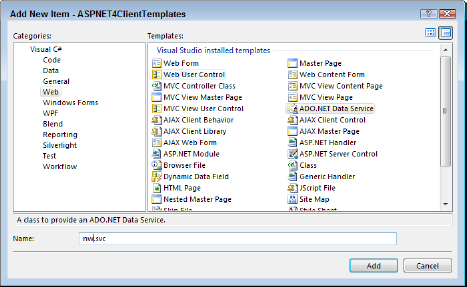
The next step in the process is to create an ADO.NET Data Service that hosts the entity set you just created. Right-click on the project name, and select "Add Items" to add an ADO.NET Data Service to the root of the site named nw.svc, as shown in Figure 17.
Once the code window for the service opens in the Editor, update the code to match the following listing:
public class nw : DataService<NorthwindEntities>
{
    // This method is called only once to initialize service-wide policies.
    public static void InitializeService(IDataServiceConfiguration config)
    {
        config.SetEntitySetAccessRule("*", EntitySetRights.All);
    }
}
Calling the SetEntitySetAccessRule method as shown configures the service to allow complete and unrestricted access to the service.
This practice is used in the context of this example for brevity and is not recommended unless you know exactly what you are doing.
To begin working with the Data Service, the first implementation demonstrates how to use declarative markup to interact with a Data Service. The following example fills the Client Template with the contents of the Product table without requiring you to write a single line of JavaScript.
To begin, create a new HTML file, naming it Demo11.htm, and enter the following code:
You are skipping a file named Demo10 because the ASP.NET MVC example required names by convention. The numbering is preserved here so you may look up code examples by number in the accompanying code download.
<html>
<head>
    <style type="text/css">
    .sys-template { display:none;}
    </style>
</head>
<body xmlns:sys="javascript:Sys"
      xmlns:dataview="javascript:Sys.UI.DataView"
      sys:activate="*">

    <ul class="sys-template"
        sys:attach="dataview"
        dataview:autofetch="true"
        dataview:dataprovider="{{ new Sys.Data.AdoNetServiceProxy('nw.svc') }}"
        dataview:fetchoperation="Products">
        <li>{{ ProductName }}</li>
    </ul>

    <script type="text/javascript" src="scripts/MicrosoftAjax.debug.js"></script>
    <script type="text/javascript" src="scripts/MicrosoftAjaxTemplates.debug.js">
</script>
    <script type="text/javascript" src="scripts/MicrosoftAjaxAdoNet.debug.js">
</script>

</body>
</html>
The material changes to this example from the previous declarative example lie in the extra attributes attached to the data view. The dataprovider attribute points to the URI of the services used to provide data to the template. The fetchoperation tells the request which operation to call to request data from the server.
Another notable change in this example is that you must include the MicrosoftAjaxAdoNet script file in the page to expose the classes necessary to interact with ADO.NET Data Services.
Although the declarative model is simple and effective, developers often need more control over the interaction with the page. The following example demonstrates how to extend interaction with the data and use an imperative approach to declaring and binding a DataView against ADO.NET Data Services.
This exercise updates the view to use live data binding and demonstrates how easy data manipulation is made when integrating with data services. Consider a page on which the user is presented with a textbox to edit a product name, as shown in Figure 18.
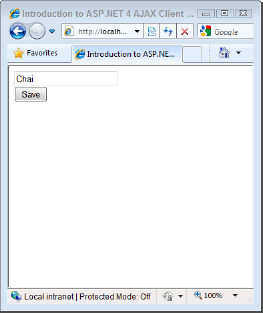
Using data services and live data binding, this page achieves read/write access to the data without having to write the code that you may expect under other circumstances. The only code necessary to make this Edit page work is to live-bind the Client Template to an ADO.NET Data Services data context.
Once changes are made to the data, the button click calls a single method on the data context to persist changes back to the database.
To begin, create a new HTML file, naming it Demo12.htm, and enter the following code:
<html>
<head>
    <style type="text/css">
    .sys-template { display:none;}
    </style>
</head>
<body>

    <div id="dv" class="sys-template">
        <div><input type="text" value="{ binding ProductName }" /></div>
    </div>

    <input type="button" value="Save" onclick="_dataContext.saveChanges();" />

    <script type="text/javascript" src="scripts/MicrosoftAjax.debug.js"></script>
<script type="text/javascript" src="scripts/MicrosoftAjaxTemplates.debug.js">
</script>
<script type="text/javascript" src="scripts/MicrosoftAjaxAdoNet.debug.js">
</script>
<script type="text/javascript">
Sys.Application.add_load(appLoaded);
var _dataContext;
var _dv;
function appLoaded()
{
_dataContext = $create(Sys.Data.AdoNetDataContext,
{
serviceUri: "nw.svc"
});
_dv = $create(Sys.UI.DataView,
{
autoFetch: true,
dataProvider: _dataContext,
fetchOperation: "Products(1)"
},
null, null, $get("dv"));
}
</script>
</body>
</html>Once again, the HTML markup is significantly simplified by removing the declarative syntax. The template uses the two-way live-binding syntax so the underlying data source will recognize changes to the data.
The scripts included on the page include the MicrosoftAjax, MicrosoftAjaxTemplates, and MicrosoftAjaxAdoNet libraries.
The code in the block after the imported scripts begins with the requisite addition of a load handler. When appLoaded is run, a data context is created. This context holds the URI used when making the call to the server for data.
Now, with an instance of the data context, the data view is instantiated using the $create method. The arguments passed to the create method resemble the attributes defined in the previous declarative example.
In this page, instead of listing the entire contents of the Products table, the URI is updated to request only the Product where the primary key value is equal to 1. This is possible by defining:
fetchOperation: "Products(1)".
Finally, turn your attention back up to the HTML and review the code for the input button:
<input type="button" value="Save" onclick="_dataContext.saveChanges();" />
The button calls the saveChanges method of the instance of the data context.
Launch this page in the browser and try to edit the product name, and then refresh the page to ensure that your changes are persisted.
The Preview 4 release includes many advances that make working inside the browser a much more streamlined experience for the developer. These advancements include:
Simple ways for templates to interface with server-side services of many types
Markup extensions and the implementation of the observer pattern in JavaScript enable a development experience in JavaScript that closely resembles the practices of XAML-based environments like WPF and Silverlight.
True separation of HTML markup and JavaScript code
Live binding to data sources
A rich
DataViewcontrol and accompanyingDataContextcomponent
As always with working with preview code, please be sure to check the ASP.NET CodePlex site (http://aspnet.codeplex.com/Wiki/View.aspx?title=AJAX) regularly for updates to the framework.