
Catalyst projects
The Catalyst interface
Getting help
Since its creation, Adobe Flex has provided a powerful means for developers to create Rich Internet Applications. Unfortunately, many developers do not have design skills, and Flex developers had to hire an outside designer to create the visual interface for their application.
However, the developer still faced a problem once the design was complete: He would be given a visual comp (composition) of the interface, often created in a program such as Adobe Illustrator or Adobe Photoshop. Such a design format was not directly usable to the developer, as he would still need to completely render the design in the Flex framework.
Adobe designed Flash Catalyst to bridge this gap between the designer and the developer. By integrating Catalyst into their workflow, designers no longer have to pass off a mere visual representation of their design to the developer, with both parties hoping that the design could be effectively re-created in Flex.
Now, designers can do much more of the work. By importing their Illustrator or Photoshop comps into Catalyst, they can create the beginnings of the Flex project themselves, converting that design into a real, functional Flex project. This allows a design-challenged developer to focus on the back-end and scripting aspects of the application.
Of course, this stereotype of the design-challenged developer and the development-challenged designer is not always the case. In fact, many people are as comfortable with visual design as they are with code. Catalyst can help them as well by providing a better workflow for implementing their designs.
Catalyst is fairly unique in the software world in that it is designed to be a sort of middleman. Most projects will neither begin nor end in Catalyst. Instead, you or your designer will start out by designing a comp of the project in Photoshop or Illustrator and then importing that comp into Catalyst. Once your design work in Catalyst is complete, your project will most likely require further development in Flash Builder.
Note
That last point is an important one. When you work in Catalyst, you are not building a stand-alone file as you would in Photoshop or Microsoft Work. You are really building a starting point for a larger, more complex application to be built in Flex, so it's important that you understand a bit about Flex.
The Flex framework is designed around a project-based model. Rather than working on a single file as you would in other applications, this project-based model means that your application is going to be made up of many files. Flex projects contain multiple files. Simple projects may only contain a dozen or so files, while complex applications can potentially contain many hundreds or even thousands of files. Some of these files are the core MXML files that provide the basic code base for the application. Other files that often make up the bulk of the project are ActionScript files that provide the application with its processing logic.
The simplest way to look at these Flex-project files is this:
MXML describes the visual components of the application (telling the application how it is supposed to look).
ActionScript tells the application what it is supposed to do.
Remaining Flex-project files are external assets, such as images and XML data files.
Tip
Web designers who are used to working in HTML can see several parallels here. MXML is similar in both form and function to HTML. Both languages primarily exist to define the structure and presentation layer of an application. In fact, MXML is tag based and looks very much like HTML, although MXML is actually based on XML. ActionScript is used in a Flex project somewhat like JavaScript is used in an HTML project, providing the application logic and processing code. In both cases, the application is rounded out with external asset files, such as images.
When you work in Catalyst, keep in mind that you are not really creating a Catalyst project per se; rather, you are creating the foundation for a Flex project. Ultimately, Catalyst is nothing more than a new tool to create MXML, the visual layer of the Flex application.
This is why you will see references to Catalyst projects throughout the program and this book, not files. Catalyst does create a project as a single file with an FXG extension, but this file is a package that hides much more complexity behind the scenes. Once you import the project into Flash Builder, you will begin to see the underlying complexity and how Catalyst really does create projects, not files.
Note
See Part 4 for information on importing Catalyst projects into Flash Builder.
Adobe developed Flash Catalyst on top of the Eclipse engine. Eclipse is the same powerful development environment used by Flash Builder (the primary tool for developing Flex applications), and by thousands of other developers using languages such as Java.
Eclipse is open-source, which gives those who want to use it almost complete freedom to do with it what they will. However, unlike its cousin Flash Builder, Catalyst was built with designers in mind. As such, its interface much more closely resembles other Adobe tools such as Photoshop than it does a traditional Eclipse workspace.
When you first launch Catalyst you will be presented with the Start screen (see Figure 2.1). This provides a useful starting point to launch a new project, import a project from another design application, or open a recent project.
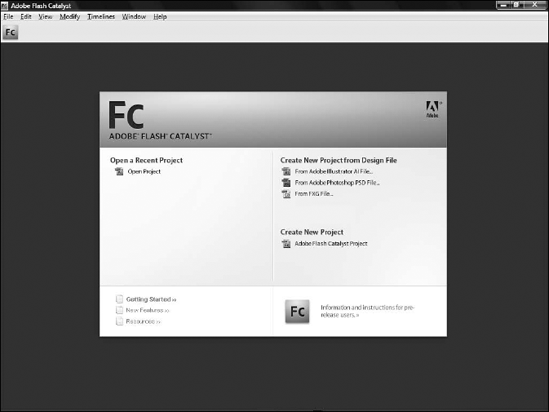
If this is your first time using Catalyst, it might be easiest to select Adobe Flash Catalyst Project under the Create New Project heading. This opens a new project and allows you to jump right in to wireframing an application. A wire-frame is a rough design of a project, generally with simple shapes to illustrate where the project's elements will be. Wire-frames will generally lack final design elements.
Note
For more information on wireframing in Catalyst, see Chapter 4.
Most of the time, however, you will be using one of the other options on the Start screen, like this:
Choose one of the import options on the right side of the Start screen in the Create New Project from Design File section:
From Adobe Illustrator AI File
From Adobe Photoshop PSD File
From FXG File
To continue work on an existing project, you can do either of the following:
Click the file name directly in the Open a Recent Project section.
Click Open Project to browse to the project file.
Note
For more details on creating comps in Photoshop and Illustrator, see Chapters 8 and 9; for more information on exporting a project to Flash Builder, see Part IV.
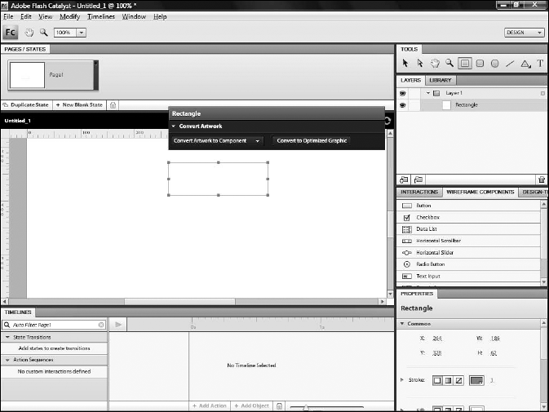
After you open a project, whether new or from an existing design, you are presented with the main workspace in Catalyst (see Figure 2.2). As with other Adobe design programs, Catalyst relies on a series of panels to organize the workspace.
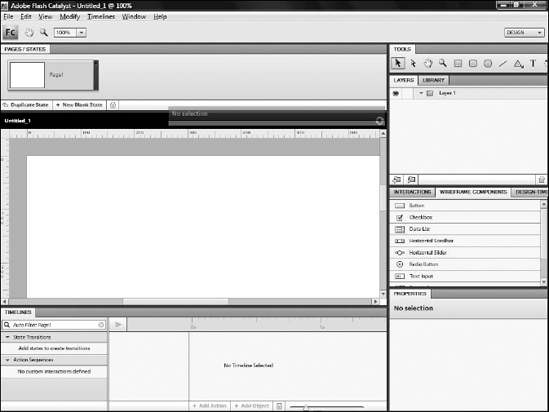
Figure 2.2. The Catalyst Design workspace. This view shows the workspace when opened for creating a new project.
Menus at the top of the screen provide access to commonly used commands within the program. The menus provide many of the same options available in other similar design programs; I discuss their specific commands as they become relevant within the course of the book.
Catalyst provides two primary workspaces:
All of your actual work in the program will be done in Design. The Design workspace provides a set of panels that allow you to modify your project and its assets, as well as design a canvas to see what the project will look like when it's complete.
All Flex projects are ultimately code based. Catalyst merely provides a visual means by which designers can create this code; everything you do in Catalyst has a code equivalent. The Code workspace allows you to view the code that has been generated by the program, but you should note that it is read-only. You cannot edit code directly within Catalyst.
You can freely switch between Design and Code by choosing Window
Tip
The shortcut key is in the upper-left corner on most standard keyboards, immediately to the left of the number 1.
Most of your work in Catalyst will be done via the panels in the Design workspace. If you are familiar with other Adobe applications such as Photoshop or Illustrator, the functionality of these panels should also be familiar:
The Pages/States panel (see Figure 2.3), stretching along the top of the screen, provides a work area for adding and navigating to the pages in your application.
A Tools panel in the top-right corner of the screen allows you to select Catalyst's basic drawing tools.
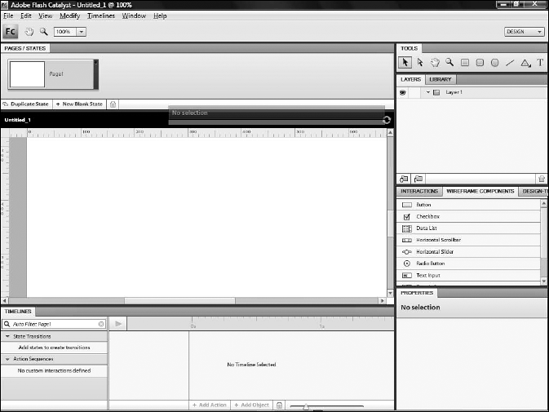
The Layers panel immediately below the Tools panel displays the layers that make up your project (see Figure 2.4). Designers will already be using layers to organize the initial design comps in Photoshop and Illustrator, and those layers are imported and preserved in Catalyst.
The Library is grouped with the Layers and contains external assets such as images that will be used in the project.
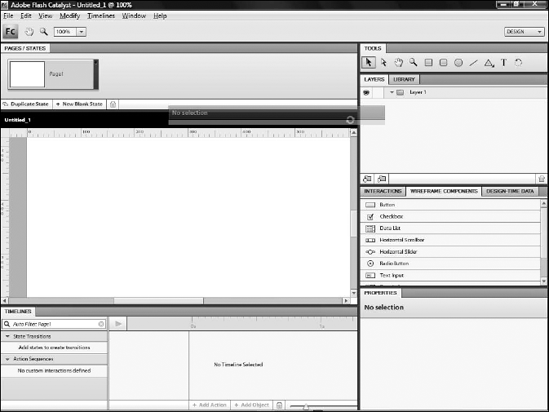
The next set of panels also shares a group:
The Interactions panel is where you go to control the actions of the components in your project. For example, you can add instructions as to what happens when a user clicks a button.
The Wireframe Components panel contains a set of common Web tools such as buttons and sliders to use in wireframe comps in Catalyst.
Design-Time Data allows you to enter information to be used in repeating elements while you create the design.
The Properties panel, the final panel on the right-hand column, allows you to modify an element that you have selected on the screen.
The Timelines panel (see Figure 2.5), which stretches along the bottom of the screen, is your workspace for setting up animation.

The Code workspace provides two panels:
Project Navigator
Problems
The Project Navigator panel (see Figure 2.6) allows you to see the various files being created by Catalyst as you work. These are the files that make up your project and are used by the Flex developer to finalize the project in Flash Builder 4.
Note
See Part IV for details on using Flash Builder 4 to finalize the project.
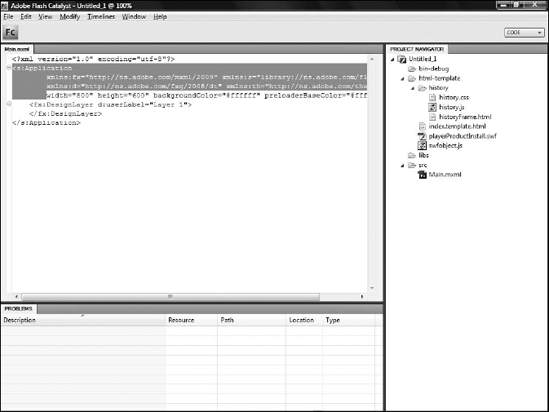
The Problems panel displays any errors that may be generated when you attempt to run the project. Errors may occur if you forget to complete a set of tasks (for example, creating a scrollbar but not specifying each of its required components).
The Heads-up display (HUD) floats on the screen whenever you are in the Design workspace. The primary purpose of the HUD is to convert selected artwork into a component such as a button or scrollbar.
You can freely move the HUD around on the screen to a location where it's easily accessible while still being out of your way. You cannot dock it on any edge of the screen — it will always be floating (see Figure 2.7).
The functionality of the HUD is duplicated. For example, you can right-click (
Unlike most other Adobe design tools, Catalyst provides very little ability to customize the workspace. The panels are all set in predetermined locations and cannot be closed, moved, or rearranged.
You can, however, resize the panel groups by following these steps:
Position your mouse over the edge of the panel set. A double-sided arrow appears.
Drag the arrow to resize the group.
You have the following resizing options:
Tip
Take caution when resizing the panels on the right. The panels can shrink to the point that some panels such as Design-Time Data disappear off the side of the screen. This can cause potential confusion when you need that panel and have forgotten that you merely resized it off the screen.
Collapse or expand any panel by double-clicking the tab that displays the panel's name. This allows the panel to collapse so that only its tab is visible.
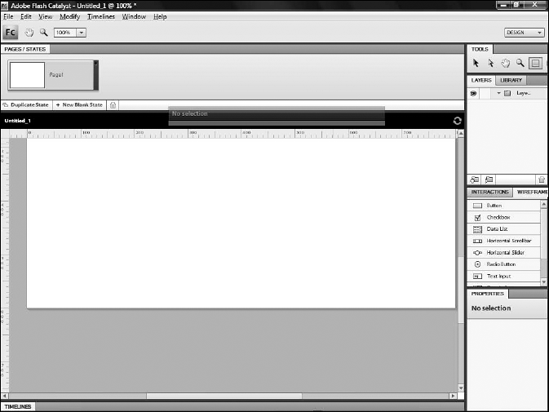
If you are on a smaller screen and will not be using the Timelines panel, you can double-click on the word TIMELINES and the panel drops down to just its tab (see Figure 2.8). You can expand the panel again by double-clicking the tab.
Help is provided within Catalyst using the Adobe Community Help system. When you click Help
The Community Help application displays help not only from the Adobe help files but also from community resources such as blogs. Users can also comment on help files, noting those items which might be confusing so that Adobe or other members of the community can clarify them.
Flash Catalyst has been designed to look and feel like other Adobe design products. While it provides some menu-based controls, most of the work is done through panels and the HUD. This chapter introduced the idea of creating projects (the main type of file used in Catalyst), provided an overview of that layout, and showed you how to use the application's help system.