
Flash Catalyst CS5 is designed to provide an easy way to create the front-end or user interface for Rich Internet Applications (RIAs). It is not designed as a solution for creating complete applications, however. Most applications require a significant amount of programming to add advanced interactions and connect to server-side resources. The task of finishing the project will need to be handled with programming in the Flex Framework, most often via Flash Builder 4.
Flex is an open-source framework for creating RIAs that will run in Flash Player or on the desktop via the Adobe Integrated Runtime (AIR). Flex applications are created using a combination of two languages:
MXML is an XML-based markup language. Flex applications use it primarily to define the visual aspects of the project. Most of the coding created by Catalyst is MXML.
As an XML-based language, MXML follows XML's very specific syntax rules:
All tags must be closed. You must always have a matching closing tag for every opening tag. Tags that do not contain content can either have an explicit closing tag or must contain a slash before the closing angle bracket.
Everything is case sensitive. Element names, attribute names, and attribute values must all use the correct case. Most element names in MXML begin with capital letters. Attributes and most attribute values use the camel casing method. Elements named using camel case begin with a lowercase letter. The first letter of any subsequent words in the name is capitalized (for example, camelCase).
Elements must be properly nested. You must close tags in the opposite order from which you opened them.
Documents must have a single root element. The first element on the page must contain all other elements in the document.
All attribute values must be enclosed in quotation marks. You can use either double or single quotation marks.
If you have prior experience using XML, these rules will be familiar to you. If you are a Web designer who has been using XHTML, MXML rules will seem familiar because XHTML, like MXML, is an XML language.
All Flex applications are written in ActionScript 3.0. MXML is, in fact, nothing more than a simplified way of writing ActionScript. When you compile and run the application, the Flex compiler first rewrites all of your MXML into ActionScript. Therefore, it is possible to write a Flex project in nothing but ActionScript. There is an ActionScript equivalent to every MXML element, although the reverse is not true; there are many things that can only be done in ActionScript and not MXML.
ActionScript was originally developed as a rather simplistic scripting language for Flash. Originally, it did little more than allow designers to enable buttons in their Flash movies. Alternatively, ActionScript 3.0 is an object-oriented programming language. While many designers still use it to perform simple gotoAndPlay actions on buttons in Flash, today it can be used to create complete applications.
Members of the Flash design community are still somewhat split on which ActionScript version they prefer, with some designers continuing to rely on ActionScript 2.0 and its simpler syntax. This is because of Flash Professional's continued support for the older version of the language. No such division exists within the Flex community, however, as Flex projects can only be written using ActionScript 3.0.
Note
As ActionScript 3.0 is the only version usable in Flex, the remainder of this book will simply refer to it as ActionScript, omitting the version number.
To many nonprogrammers, the thought of learning object-oriented programming (OOP) is as daunting as learning advanced calculus. However, most people actually find that once they learn a few key terms and concepts, OOP is not that difficult.
OOP relies on the idea of modeling real-world objects in code. For example, grocery stores rely on customers placing products in shopping carts; e-commerce applications follow these conventions by allowing users to place products in shopping carts as well. While the grocery store products and carts are real, physical things, the e-commerce application models products and carts using programmatic objects.
The first part of this modeling is a class, which is a definition of an object. You cannot use a class in your application; it simply serves as the descriptor for the object. It can help to think of OOP development in terms of building a housing community. A class is then analogous to the blueprints used for the homes: You cannot live in a blueprint; instead, you use it as the basis from which you will build the home.
An object is an instance of a class. While you cannot use a class, you can use objects. In the housing community example, the class is the blueprint, whereas the actual houses are the objects. An e-commerce application would define a shopping cart as a class. Subsequently, as each customer begins shopping, an instance of the class is created as an object. This allows customers to place products in their carts.
Properties define characteristics of objects. Think of properties as the nouns of the object. A house is defined by its square footage, the number of bedrooms and baths it contains, its address, the color of its paint; all of these are properties of the house. Likewise, a virtual shopping cart contains properties. The most important properties are likely the list of products it contains. Visual objects, such as a text field, have properties that define its location on the screen and its width and height.
Objects often contain properties that are shared by all instances of the class, as well as other properties that are unique to each instance. For example, a check box shares certain characteristics with other check boxes, such as the shape of the box and appearance of the check mark. The check box also has unique properties, including its location on the screen and whether it is checked or unchecked.
Tip
Properties are nothing more than variables defined within a class. All properties in predefined classes in ActionScript use camel casing, where multiple word names are combined into a single word, with the first letter of each word except the first capitalized. The first letter is always lowercase. As you create your own variables and properties, you should follow this naming convention to maintain consistency.
If properties are the nouns of the object, methods are its verbs. Methods define the things the object does. A house would have methods such as enter, exit, sleep, eat dinner, and watch TV. Virtual shopping carts would, at a minimum, have methods to add products to the cart, delete products from the cart, and initiate the checkout process.
Tip
Methods are defined in classes as functions. As with properties, all methods in ActionScript use camel casing. Functions, whether defined as a method in a class or simply defined within a file, are called by using the function name followed by a set of parentheses, such as addEventListener().
ActionScript classes are nothing more than text files with the necessary ActionScript code to define the class. Class files are stored in folders on your computer, just as any other file would be. A group of related classes should be stored together in a folder. You can then group folders further into organizational units by placing them in higher-level folders. In OOP terminology, the folders in which classes are saved are known as packages.
OOP uses a technique known as dot notation to denote relationships between packages and classes and between objects, properties, and methods. You can refer to classes by their fully qualified name, which denotes the class and the packages in which it resides from some known starting point. Thus, the ActionScript Alert class' fully qualified name is mx.controls.Alert, meaning that the Alert.as file is in a folder called controls, which is in turn in an mx folder.
Properties and methods of the class are likewise referenced via dot notation. For example, the Alert class contains a show method, which is thus referenced as Alert.show().
You can develop Flex projects entirely for free because the Flex framework is open source. However, Adobe has created Flash Builder 4 as an integrated development environment (IDE) for Flex projects. While it is a commercial product that must be purchased from Adobe, the time saved in developing projects using Flash Builder versus other tools generally makes the cost worthwhile.
Flash Builder, like Catalyst, is built on Eclipse, an open-source editor used primarily by Java developers. Unlike Catalyst, Flash Builder can be installed using one of two methods:
Install Flash Builder as a stand-alone application.
Install Flash Builder as a plug-in to an existing copy of Eclipse that you already use.
Both installations cost the same; the one you use depends entirely on whether you already use Eclipse for other development.
Note
All of the screenshots used in this book are from the stand-alone version of Flash Builder.
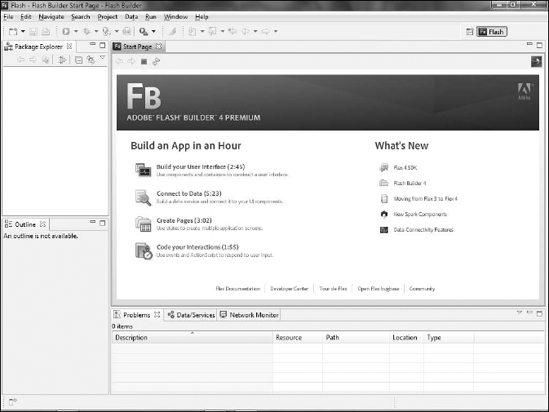
While the Flash Builder interface (see Figure 14.1) is similar in many ways to the interface used in other Adobe tools, its terminology is different; the names of elements in the interface are adopted from Eclipse.
The primary Flash Builder interface is called a workbench. A workbench is a combination of views and editors. Views are the panels around the side of the screen, while each open document is an editor.
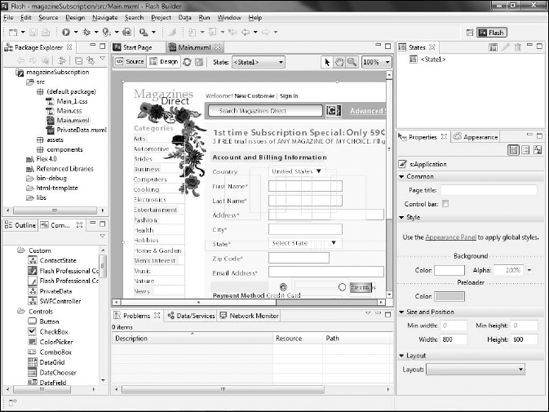
Flash Builder contains both a Design and a Source mode. The Design mode (see Figure 14.2) provides a what-you-see-is-what-you-get (WYSIWYG) visual environment. The WYSIWYG environment allows you to design elements in your application by dragging and dropping components from the Components view and then setting parameters with the Properties view.
You can switch between Design and Source modes at any time by clicking the button in the top-left corner of the editor.
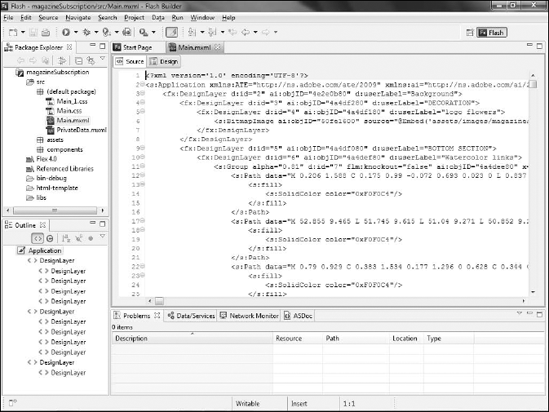
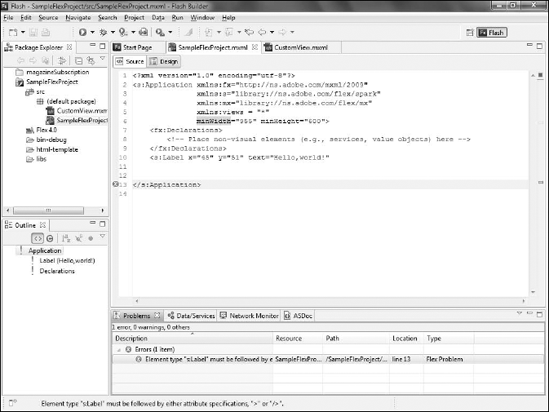
Source mode provides a code editor. The majority of your work in developing your project will be in Source mode (see Figure 14.3).
In order to create a Flex application, you need to first create a project.
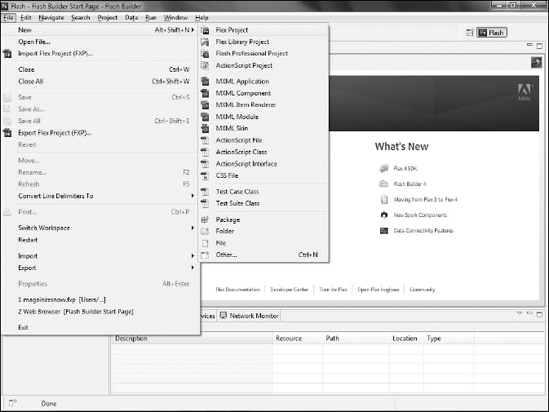
Flex projects are made up of a series of files organized into folders. In order to create a new Flex project, follow these steps:
Choose File

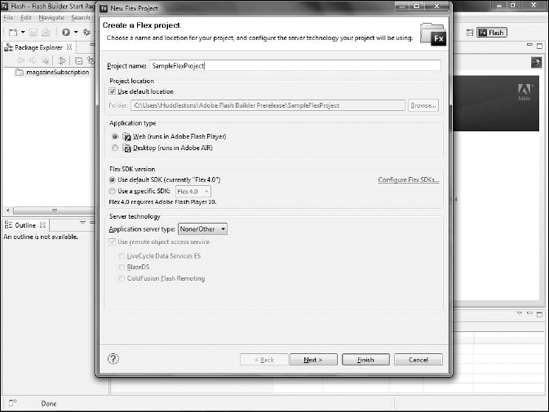
Type a name for the project (see Figure 14.5). This name can be anything, but it should be descriptive of the project's purpose.
Save the project in Flash Builder's default location within your user profile. Alternatively, you can deselect the Use default location check mark and specify a different location on your computer to store the project's files.
Choose whether you want to create an application for the Web or AIR. The default is a Web application.
Note
See Chapter 18 for details on working with AIR
Select which version of Flex you want to use. The default is Flex 4.
Note
If you plan to write the project yourself from scratch, you can use either Flex 3 or 4; however, Catalyst only supports Flex 4.
If you will be using a server-side technology — for example, to get data from a database — select the appropriate option from the drop-down menu. The default is none.
Click Next.
Select the output folder for your project. The default,
bin-debug, is used by most developers (see Figure 14.6).Click Next.
Enter a source folder, into which all of your project files will be saved. Most developers use the default,
src.Enter the name of the main application file (see Figure 14.7).
Click Finish.
Once created, your project will be displayed in the Package Explorer view in the top-left corner of the screen (see Figure 14.8).
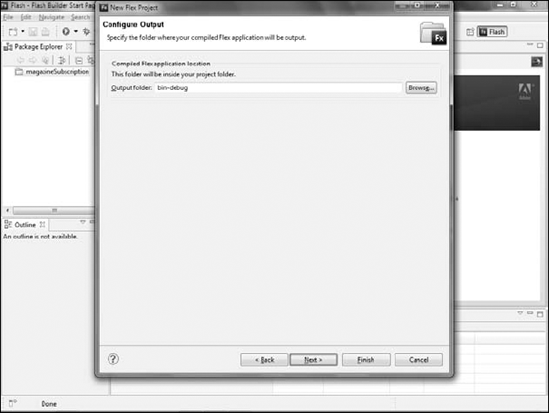
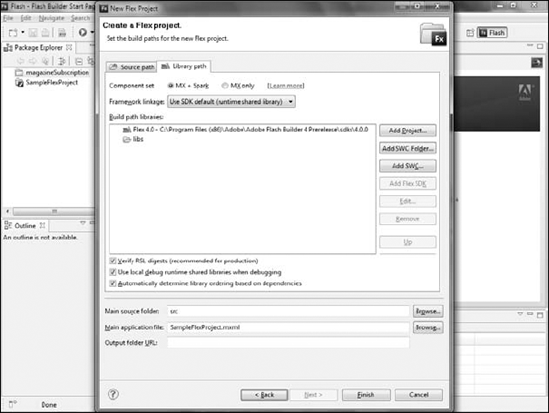
Figure 14.7. Finalizing the new project setup by setting the source folder and naming the main application file
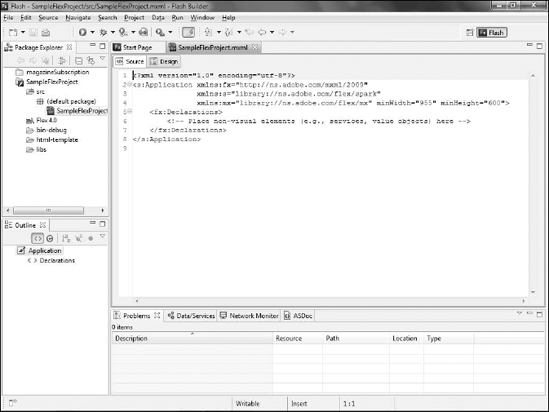
A project created by Flash Builder automatically adds several folders to the project. The src folder contains all of your project's files. Most developers place the main application file in the src folder directly and then create subfolders for other files and components. This structure is not required. The only thing that matters is that the project's structure makes sense to you or other developers who might work on it.
The bin-debug folder is the folder into which the project will be compiled and run while you develop and test the project. The project's SWF file, the HTML page that will contain the SWF, and several helper files will be in this folder.
The html-template folder contains the HTML file that will hold the project's SWF. By default, this page is essentially blank; it only contains the code necessary to display the SWF. However, it is possible to modify this file to add additional HTML elements if you choose.
Note
David Gassner's excellent Flex 4 Bible contains a detailed description of how to edit the HTML template for your project.
The libs folder, which will initially be empty, can contain libraries of SWC files. SWCs are precompiled components that can be used across multiple Flex projects.
Note
A detailed explanation of SWCs and component libraries is beyond the scope of this book. See the Flex 4 Bible for more details.
Flex 4 represents a significant upgrade to the Flex framework. Even experienced Flex developers are going to discover that they have much to learn about the new methodologies presented in Flex 4.
According to Adobe's open source wiki, less than half of all Flex-based applications are drastically skinned. Put simply, this means that most Flex applications look like most other Flex applications. Companies would obviously prefer that their applications carry the corporate branding. While this was certainly possible in Flex 3, many developers failed to do it. Catalyst was ultimately introduced to solve this problem, but addressing the issue forced Adobe to rethink many other aspects of the framework.
Note
This chapter is intended to provide a high-level overview of the new features of Flex 4. It is not intended to be a complete tutorial or reference to the framework. For more information, see the Flex 4 Bible.
All Flex projects must have a main application file. This file contains the primary code base for the application. It also instantiates the main components that make up the application. When you create a new project in Flex, a main application file is created for you.
The application file must have an Application tag as its root. Each Flex application can only contain one file that uses the Application root tag; all other MXML files must be components that use some other element as their root.
Flex 4 is based around a component architecture known as Spark; Flex 3 used the Halo architecture. Spark represents a significant shift in the way in which you build Flex applications. Spark was created to make the process of working on the visual aspects of the project more intuitive, primarily by separating the visual portions of the project such as the appearance of elements from their programming logic; in many ways, Spark was created to enable designers to use a tool like Catalyst to define that appearance without having to deal with the programmatic side of the application,
An important concept in XML is that of namespaces.
There is no predetermined set of tags in XML. Instead, each developer invents the tags he wants to use in the document. It's possible, and in fact likely, that two developers working independently on similar projects might use the same element names for tags, albeit for slightly different purposes. Should these developers later come together and attempt to combine their document structures, conflicts would occur in those cases where the same name was used with a different meaning.
Namespaces exist to solve this problem. By defining one set of elements as being from one namespace and the other from a different namespace, conflicts will not occur. The program responsible for parsing the XML will know to differentiate between them.
Namespaces are defined with an xmlns attribute, most often in the root tag of the document. The attribute includes a prefix, which will be added to the beginning of each element used from the namespace. The attribute's value is set to the location of the document that defines the elements from the namespace.
The model used in Flex 3 defined a single namespace for MXML in the root element of each document. Thus, the root of the main application looked like this:
<mx:Application xmlns:mx="http://www.adobe.com/2006/mxml" />
Early in the development of Flex 4, Adobe realized that it needed to greatly expand the capabilities of MXML, particularly in its ability to define and draw graphics. This realization was driven in large part by the needs of Catalyst to take complex vector graphics from Illustrator and render them in MXML.
A wholesale rewriting of MXML, however, would have created compatibility problems, and Adobe did not want Flex 4 projects to be incompatible with existing Flex 3 components. Thus, Adobe simply leveraged the power of XML namespaces. Flex 4 applications rely on four namespaces:
MXML 2006. The legacy MXML namespace, used by Flex 3 components, but fully compatible with Flex 4. It uses the default
mxnamespace prefix, and its definition is stillhttp://www.adobe.com/2006/mxmlto ensure backwards compatibility.MXML 2009. Unlike MXML 2006, this new Flex 4 namespace is used purely for built-in language elements and does not include components. It uses the
fxprefix to avoid conflicts with MXML 2006 and points tohttp://ns.adobe.com/mxml/2009for its definition.Spark. The Spark namespace is used for all of the new Spark components in conjunction with the MXML 2009 namespace. By default, it uses the
sprefix and is defined athttp://ns.adobe.com/flex/spark.MX. You can use this namespace for using Halo components when using those components with MXML 2009. It uses
mxfor its prefix and is defined athttp://ns.adobe.com/flex/halo.
Therefore, a Flex 4 project's main application page would begin with the following Application tag, in which the three new namespaces are declared:
<s:Application xmlns:fx="http://ns.adobe.com/mxml/2009"
   xmlns:s="library://ns.adobe.com/flex/spark" xmlns:mx="library://
   ns.adobe.com/flex/halo">
Note that the Application tag itself is from the s namespace. Components such as a Label or TextInput are still from the mx namespace, but use the new definitions provided by Halo.
Catalyst bases much of its design paradigm around the idea of components. Almost every graphic in a Catalyst project ends up being either a component by itself or a part of a component.
Note
See Chapter 9 for more details on Catalyst components
Flex projects are also based around the idea of creating and working with components. The framework includes a large set of components to enable developers to quickly build an application. These include user interface components such as text input fields and labels, buttons, and layout components such as canvases and panels. These interface components control the placement and navigation of other components such as button bars and tab bars. Flex developers can also create their own components. In Catalyst, you should take any set of objects that needs to function together as a unit and define it as a component. Flex works the same way. For example, if you have a long form that you want your user to fill out, you would likely define the form as a separate component rather than placing its code in the application file.
Tip
Components are in fact nothing more than classes defined via MXML. As with every class in the framework, all built-in Flex components have names that begin with a capital letter. To maintain consistency, any component that you create whether in Flex or Catalyst should follow this naming convention.
Components can be created in Flash Builder by choosing File
Unlike in Flex 3, where custom components were defined as being based on practically any element in MXML, most Flex 4 custom components are based instead on a single element, Group. This follows the general idea behind much of what it being done in Flex 4 to separate the design of the application from its implementation. Many Flex 3 components would rely on a root element that did not necessarily make sense for the component simply because it needed a root, which tended to add unnecessary overhead to the component.
Group adds no additional overhead; it is simply an element that, as its name implies, groups other elements. The component will contain, as the group's children, those elements necessary to implement the purpose of the component, along with new tags to define the layout and graphical skinning or appearance of those child elements.
Components are instantiated in MXML by first declaring a new namespace. As with the default namespaces, you use the xmlns attribute in the document's root tag with a namespace prefix. The prefix is arbitrary and can be anything you prefer. The value of the attribute will be the path to the component being instantiated, relative to the root of the project. You can use an asterisk (*) to have the namespace make available all of the components within a directory.

Components are often grouped in a folder within the project, and most developers will use the folder name for the namespace prefix. For example, a project might contain a login form component (Login.MXML) stored in a folder called forms. If you want to instantiate the component in the main application, you can add a new namespace declaration to the Application:
<s:Application xmlns:fx="http://ns.adobe.com/mxml/2009"
   xmlns:s="library://ns.adobe.com/flex/spark" xmlns:mx="library://
   ns.adobe.com/flex/halo"
Xmlns:forms="forms.*">
The component can then be called as a tag with the component's filename as the element name, using the namespace prefix:
<forms:Login />
Flash Builder provides context-sensitive code hinting to assist in this process. Once a namespace is declared, components available within that namespace appear in the code hinting (see Figure 14.10).

Throughout the development process, you will want to run your Flex project to ensure that you do not have any errors and ensure that it looks and functions as you planned.
You can run an application by clicking the Run button in the Flash Builder toolbar, clicking Run (projectname) in the Run menu, or by pressing Ctrl+(
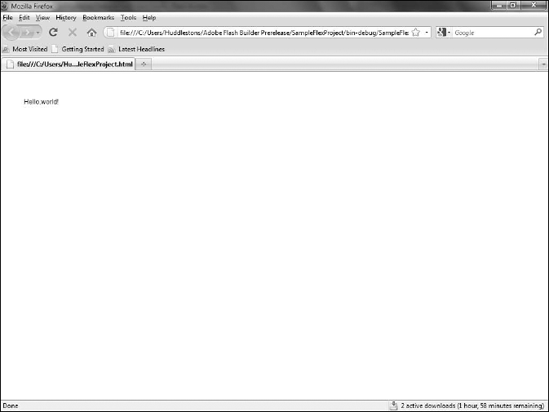
If you have unsaved changes in any files within the project, Flash Builder prompts you to save those changes. It then runs the Flex compiler to compile your application, assemble the HTML container, launch a Web browser, and display the resulting page (see Figure 14.11).
Tip
By default, the project always opens in whichever Web browser you defined as the default for your operating system. If you would like Flash Builder to use a different browser, you can change this setting by choosing Window
Debugging is an unfortunate but necessary part of any programming process. Fortunately, Flash Builder provides a very powerful set of debugging tools so that when an error occurs, you should be able to track it down quickly.
In any program, there are three general types of errors you are likely to encounter:
Syntax error. A syntax error occurs when you have incorrect code. A common source of syntax errors in Flex is capitalization. As all component names, attributes, and attribute values are case sensitive, you should be careful to always use the correct case.
Logical error. Logical errors occur when your syntax is correct but the application fails to run the way you expect. For instance, you might have a conditional statement that executes one block of code if a variable is equal to a certain value and another if it is no equal. You may think that the variable has the value to make the statement true, but something in your code is causing it to have a different value. Therefore, even though your code is syntactically correct, your application will not run the way you expect.
Runtime error. Runtime errors are those that occur when the application is running in real-world scenarios. Most often, runtime errors are caused by a user who performs unanticipated actions. These types of errors are common in traditional HTML-based Web applications when a programmer expects that a page will always be accessed from a certain other page and forgets to account for a user who manually enters an address or follows a bookmark, thus circumventing the expected navigation.
A similar situation can occur in a Flex application if a user jumps directly to a state without having followed the path through the application that you expect. Runtime errors can also be caused by temporary factors such as a network outage that prevents the application from accessing back-end components such as databases.
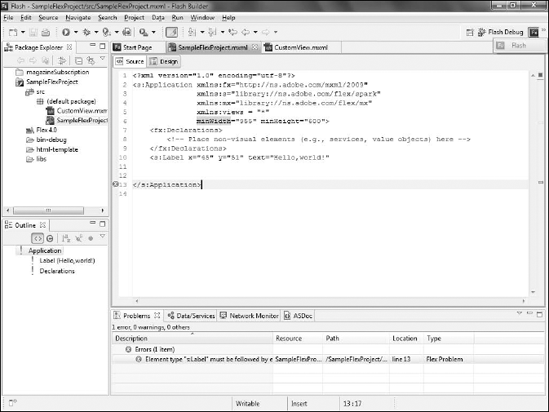
Of the three, syntax errors are far and away the easiest to fix. Syntax errors are almost always caught by the compiler when you attempt to run the project, and a dialog box appears informing you that errors were encountered. Details of the error appear in the Problems view at the bottom of the screen (see Figure 14.12).
Warning
The nature of a Flex project is that you will have multiple files working together to create your application. However, you can only run the application file itself — individual components cannot be run directly. Do not assume that the error message you see in the Problems view is a reference to code in the application. Instead, be sure to look at the Resource column in the Problems view, which indicates the file in which the error exists.
Logical errors are much more difficult to track down. Often, a logical error will occur when a variable is set to a value other than what you expect it to be. This can cause other elements of the code to behave in unexpected ways. You can tell that a logical error is occurring because your application doesn't work correctly as you test it as there is nothing syntactically wrong with your code; neither Flash Builder nor Flash Player will display any error messages.
Flash Builder's Debugging Perspective is a useful tool for tracking down logical errors. You can force the application to stop at a given point in its processing and then examine the value of any variables created at that point. From there, you can often determine which values are incorrect and then track back through the application to figure out when and why the incorrect value appeared.
Setting a breakpoint allows you to stop the applications flow. Breakpoints can be set by simply double-clicking in the margin next to the line number at the point at which you want the breakpoint. Code up to that line will execute; however, as soon as Flash Player encounters the line with the breakpoint it stops processing and sends the application back to Flash Builder.
Warning
You can only set breakpoints on lines of code that contain ActionScript. Lines that are purely MXML cannot contain breakpoints.
Warning
You must have the debug version of Flash Player in order to work with debugging in Flash Builder. The debug version is automatically installed on your system when you install Flash Builder. Be aware that if you later upgrade to a newer release of Flash Player you will lose the debug version and will need to manually reinstall it from www.adobe.com/support/flashplayer/downloads.html.
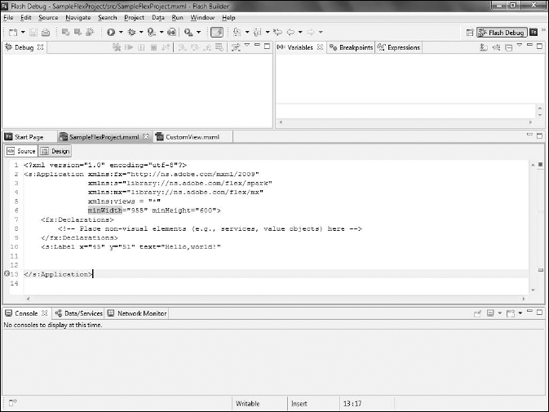
The Debugging Perspective (see Figure 14.13) displays a set of views that provide you with information while you debug. Perhaps the most useful of these is the Variables in the top-right corner, which displays the values of any variables created up to the breakpoint.
Warning
You can only have one debugging session open at a time. Once you are finished debugging, be sure to click the Terminate button — the red square in the Debug view — to end the session.
You can switch between the development and debugging perspectives in Flash Builder using the buttons in the top-right corner of the screen (see Figure 14.14).
The Flex framework is the basis for projects you create in Catalyst. Flash Builder provides a powerful development environment in which you can work with Flex. In this chapter, you:
Gained a basic understanding of the Flex framework and object-oriented programming
Learned the basics of Flash Builder
Learned how to create a new Flex project, run it in a browser, and debug it