
PowerPoint lets you create multiple custom shows in a single document. This feature comes in handy if, for example, you want to have both long and abbreviated versions of the same show, or if you want to tailor some material you’ve used before to a different audience.
Suppose you’re going to address two different groups on the topic of deer. You have lots of engaging slides on the topic. But there’s a good chance the Bambi Fan Club won’t sit through the show you’ve got planned for Hunters Anonymous. You can solve this moral dilemma by creating a customized show for each group, each of whose slides are a subset of the complete deer presentation.
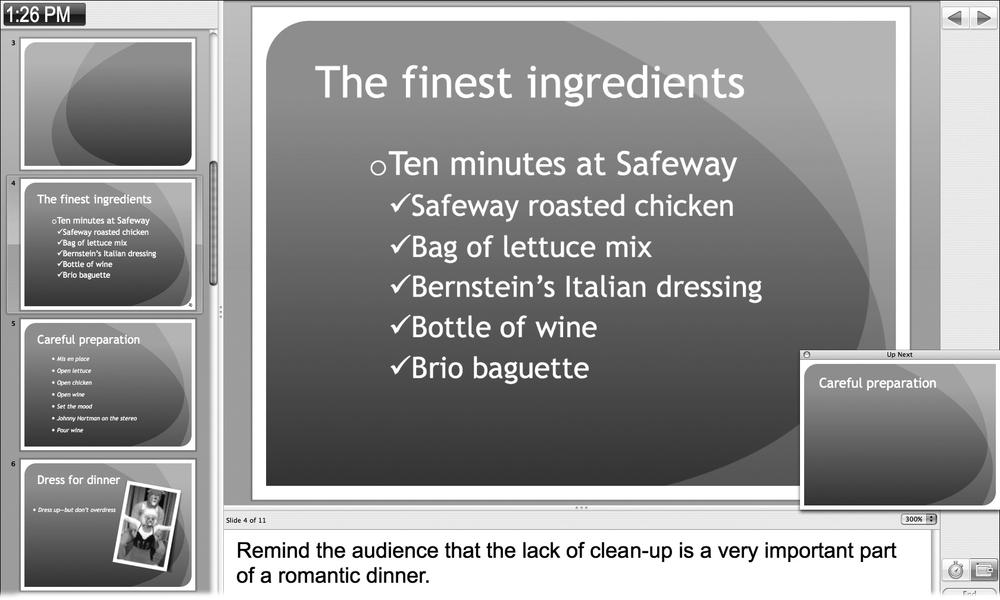
Figure 17-7. Presenter Tools divides the screen into three panes, much like Normal view. The largest, at the top, shows you exactly what the audience sees, in real time. The pane on the left shows thumbnails of the entire presentation; to go to any slide, click it. The notes pane at the bottom shows your slide notes; the pop-up menu directly above it lets you increase the font size for readability. The Up Next window shows the next animation on the current slide or the next slide in the presentation. In the lower-right corner, you’ll find buttons to switch the clock from a clock to a timer, to hide or show the Up Next window, to end the slideshow, or to open the Presenter Tools Help screen with a list of keyboard shortcuts.
To build such a custom show, choose Slide Show → Custom Shows. The resulting dialog box gives you four choices: New, Edit, Remove, and Copy (Figure 17-8). When you click New, a dialog box pops up that lets you choose the slides you want to include in the custom show. You can also reorder the slides in your custom show and give your custom show a name.
Then, when it’s time to give the actual presentation, choose Slide Shows → Custom Shows to bring up a window that lists the custom shows you’ve built. Click the one you want to present and then click Show; your custom show begins.
PowerPoint 2008 retains previous versions’ ability to save presentations as QuickTime movies. This is a nifty idea since anyone with QuickTime installed—Mac or Windows fans—can play these movies even if they don’t have PowerPoint. This is a great way for your associates and underlings to give the same kinds of pitches you give without having to spring for a copy of Office—but proceed with caution.
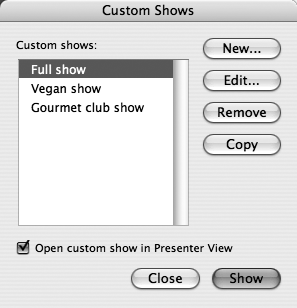
Figure 17-8. Using the Custom Shows dialog box, you can choose a subset of slides from the current slideshow and reorder those slides any way you want to create a customized presentation. If you turn on the checkbox at the bottom, the show opens in Presenter Tools.
Remember that not every bell and whistle of a PowerPoint slideshow survives the conversion into a QuickTime movie. As noted here and there throughout this chapter, things like action buttons on master slides, many PowerPoint transitions, and certain actions (mouseovers, certain kinds of links, sound, and so on) won’t work at all.
To turn an open PowerPoint presentation into a QuickTime movie, choose File → “Save as Movie”. This brings up a Save dialog box, which you can use to name your movie file and choose a folder location for it.
Before you save your movie, PowerPoint gives you a chance to fine-tune some of its settings. To begin, click the Movie Options button. PowerPoint responds by opening the Movie Options dialog box shown in Figure 17-9.
The most important settings worth examining here are Movie Dimensions and the Optimization pop-up menu. The latter lets you specify which you value more: compact file size, smooth playback of animations, or picture quality. Depending on the complexity of your file and the screen size you’ve specified, these virtues may be mutually exclusive. If you want the highest quality animations, for example, the file won’t be very small on your hard drive, and the quality of animated photos may suffer.
Tip
After you’ve saved your slideshow as a QuickTime movie, you may notice your transitions acting flaky. Because the PowerPoint Movie format doesn’t actually support PowerPoint transitions, they get translated to a QuickTime equivalent that may be very different from what you intended. For the best results, use simple transitions like Fade Smoothly, or don’t use any transitions at all.
The movie Options dialog box also lets you import a sound file to use as a soundtrack. Depending on your presentation, if chosen tastefully, music or some other nondistracting background sound (rainfall or ocean waves, perhaps) can make your movie a more well-rounded presentation. Tread carefully, though, to avoid crossing that fine line between “nondistracting” and “sleep-inducing.” These background sound files can be in any number of formats, including AIFF, QuickTime audio, WAV, and MP3.
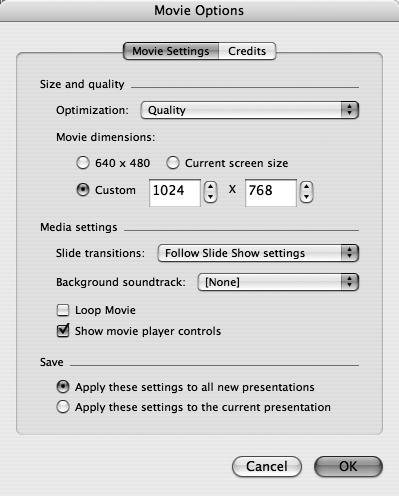
Figure 17-9. This dialog box lets you specify the size of the QuickTime movie; 640 x 480 creates a tiny window on today’s larger screens—1,024 x 768 is a good minimum size. Using the “Background soundtrack” pop-up menu, you can choose an MP3 file or another file to play during the whole slideshow—a handy option in self-running, kiosk situations. Notice the radio buttons in the Save area that let you select whether PowerPoint should use your new settings for just this presentation or use them for future presentations you save as QuickTime movies, as well.
To add a background soundtrack, choose Select Soundtrack in the Background soundtrack pop-up menu. PowerPoint asks you to locate the sound file that you want to use, which it then attaches to your presentation when you click OK. PowerPoint will mix the soundtrack sound with any embedded sounds, including voice narration.
PowerPoint lets you create presentation files that are formatted, coded, and ready to be posted on the Internet. With just a few mouse clicks, you can save your slideshow as a Web page, complete with some nifty JavaScript programming that gives viewers a high level of control over how they watch your show. Just don’t set your production-value hopes too high. You’ll lose transitions and animations; photos might look terrible; and gradients will suffer from extreme banding. However, if you plan ahead, use simple graphics, Web colors, no transitions or animations, and no gradients, you can get your information up on the Web quickly.
Before you move your presentation onto the Web, you’ll first want to see how it looks after the conversion. To preview your presentation as a Web page, choose File → Web Page Preview. PowerPoint generates all the necessary graphics, HTML, and JavaScript coding, and then transfers the whole enchilada into your browser. You can then use your browser to click your way through the presentation, which actually looks very much as it would if you were viewing it in PowerPoint’s Normal (three-pane) view.
To save your presentation as a Web page (or rather, a set of them), choose File → Save as Web Page. PowerPoint asks where you’d like to save your show. Clicking Web Options opens a dialog box that lets you tell the program such things as what colors to use, where to place navigation buttons, and how to encode images. Once you’re satisfied with the options you’ve chosen, click OK. To actually save the presentation, click Save. PowerPoint automatically renders your presentation as HTML files complete with embedded JavaScript and accompanying Web-ready graphics files. You wind up with a home page and a folder full of HTML files, graphics files, and sound files (see Figure 17-10). You can upload these files to your Web server as you would any other Web page files (see Posting Your Web Site Online).
Among its many other gifts, PowerPoint lets you save individual slides—text and all—as graphics files. This can be a handy little feature whenever you want to make sharp-looking, high-resolution images of your presentation to pass along to your friends, your students, or your mom. When PowerPoint saves slides as graphics, you’ll end up with an individual file for each slide. (As you undoubtedly surmise, transitions, animations, and sounds are all lost in translation.)
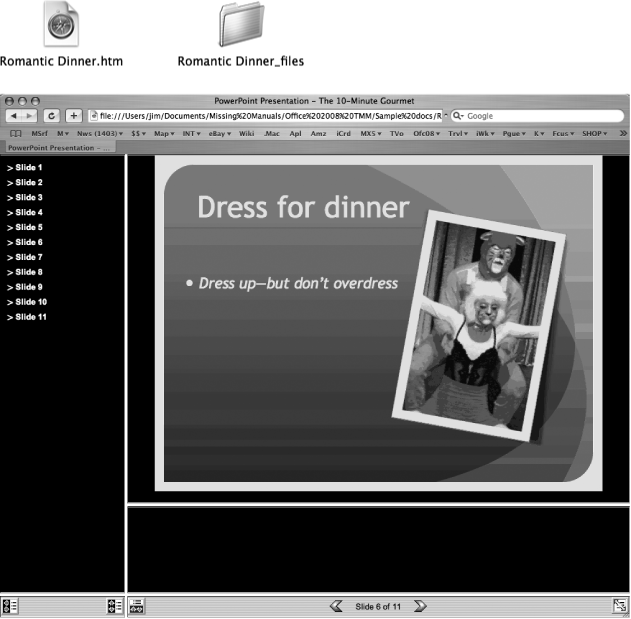
Figure 17-10. Top: After you’ve saved your presentation as a Web page, you can find it in the Finder as a single, “home page” file and a folder containing secondary pages and supporting media files. In this example, the presentation is named Romantic Dinner.htm. PowerPoint applies a similar name to the folder. Bottom: In Safari, buttons at the bottom let you hide (or show) the Outline and Notes panes, switch slides, or see the show at full-screen size. The look of a Web presentation on any individual computer depends on many factors: operating system, fonts installed, screen resolution, browser preferences set by the user, and so on. But you can be sure of one thing: it won’t look as nice as it does in PowerPoint.
The easiest way to save your slides as high-quality graphics is to send them to iPhoto. Once in iPhoto, you can use them in an iPhoto slideshow that you could put on a DVD, add them to an iWeb page, or import them to iMovie. Best of all, if you have a video iPod you can load the slides on it and always have your presentation with you (see the box on Page Setup).
Choose PowerPoint → Preferences → Save, click the “Dots per inch” button, and set the pop-up menu to 300 dpi for high-quality (6 megapixel) images.
Use a higher setting if you’re going to be making gigantic prints, or lower settings if you don’t care so much about picture quality.
Select the slides you want to export to iPhoto.
You can select one or more slides if you want to send just a portion of your slideshow to iPhoto. PowerPoint doesn’t care what slides you select if you’re going to send the entire slideshow.
Choose File → Send To → iPhoto.
The “Send to iPhoto” dialog box appears; iPhoto is about to create a new album for your slides. Give the folder a different name if you don’t want it to have the same name as your PowerPoint file.
Click the Format pop-up menu to choose either JPEG or PNG format—your only choices.
Both can create visually identical, high-quality images—but JPEG is a more universal format and probably the better choice. This menu controls the format but not the quality—which is why you set that first, back in Step 1.
Choose to send all of the slides or just the selected group.
Click All to send the entire slideshow, no matter what slide or slides you’ve selected.
Click “Send to iPhoto”.
PowerPoint launches iPhoto, which then creates a new album and imports the slides. When it’s done, iPhoto pops to the foreground to show off its newly created album.
Tip
Enable Disk mode on your iPod (in your iPod’s Summary tab in iTunes) to make your iPod function like an external hard drive. Then drag your actual PowerPoint file to your iPod to copy it. Now you can plug your iPod into a Mac or Windows PC, launch PowerPoint, choose File → Open, and locate the file on your iPod. This way you can run the full PowerPoint slideshow with all its bells, whistles, animations, transitions, and so on—but without lugging around your own computer. (You can do the same thing, of course, with a USB flash drive. And, the usual considerations with XML file format still apply)
If you don’t go the iPhoto route, PowerPoint is willing to save its slides in a wider variety of file types. To do so, first select the slide you want to convert, and then follow these few steps:
Choose File → Save as Pictures (or File → Save As—which leads to the same dialog box).
A dialog box appears, offering several options.
From the Format pop-up menu, select a graphics file format.
JPEG or TIFF are excellent choices for photos. Use GIF or PNG (see the box on Photos) for smaller files, especially if you intend to use the resulting still images on a Web page.
Click Options.
At the bottom of the resulting Preferences window, you can choose whether you want PowerPoint to save all the slides in the show as graphics or just this one. In addition, you can set up the file resolution or dimensions. (Choose one or the other—they both adjust the file’s pixel dimensions.) If you want high quality graphics for printing or viewing large on screen, try 180 dpi or 1800 x 1350 pixels—either results in exactly the same size file. Finally, you can specify whether to compress the file (if you need to make it smaller for emailing, for example). The Image Quality pop-up menu’s choices run from Least (high compression, small file size, and low quality) to Best (no compression, large file size, and high quality).
Change the settings as desired, click OK; then name the still image and click Save.
If you opted to save all of the slides, PowerPoint automatically creates a folder bearing your file’s name. Inside the folder are the individual graphics files, with names like Slide1.jpg, Slide2.jpg, and so on.