
Chapter 7. Effects
Introduction
Out of the box, jQuery comes with a number of preset effects and the robust low-level animation method for creating your own custom effects.
The preset effects include the following:
Hiding and showing elements in a toggle fashion
Scaling and simultaneously fading elements in and out of view
Sliding up and down and toggling
Fading in and out and to a specific opacity
All of the preset effects support speeds and callback functions to trigger upon completion.
In addition to these predefined effects, there are also a number of utilities that can help you take more control over your animations:
:animatedselector to assess whether an element is in the process of being animatedThe ability to turn off and on all effects across the board
The ability to add to the animation queue with your own bespoke functions
Function to change the entire queue of animations
Warning
It’s worth noting that the canned animation methods, hide (with a duration) and slideUp, reduce the margin and padding on the element as they approach zero height. This may
affect how you want to mark up the page and CSS for your effect. Also
note that jQuery doesn’t officially support
effects in documents using QuirksMode.
Animate Method
Using the animate
method gives you complete control over the animation to roll your own
bespoke effect. Using the animate
method, you can do the following:
Control CSS properties (limited to numerical properties only)
Control
scrollTopandscrollLeftDOM properties (if the element has overflow)Use any CSS unit of measure, e.g., pixels, ems, inches, or percentages for the end point values
Specify the end point of the effect as a fixed value or a relative value from the element’s current state
Use
toggleas a value to flip between states, e.g.,opacity: toggleSpecify an easing method to run the animation over
Set callbacks at all points of the animation: on each step of the animation and when it finishes
Specify whether the animation should queue or run immediately allowing for simultaneous animations
Warning
When specifying properties to animate, they must be written
using camel case, e.g. marginLeft
rather than margin-left. If you
don’t do it this way, nothing will animate!
Animation Speeds
The speed parameter
can be specified using either milliseconds or a few predefined
strings:
slowhas a value of 600 milliseconds.fasthas a value of 200 milliseconds.
If a speed isn’t explicitly passed in to the animation functions, the animation will run at a default speed of 400 milliseconds.
Note
If you explicitly pass in a speed of zero, then the animation
will run like the .css()
function, but as of jQuery 1.3, the method call will run
synchronously rather than
asynchronously like all other animations would
do.
Effects Template
Unless otherwise stated in the recipe, we will use the following template for all the examples, applying a different jQuery snippet for each solution:
<!DOCTYPE html PUBLIC "-//W3C//DTD XHTML 1.0 Transitional//EN"
  "http://www.w3.org/TR/xhtml1/DTD/xhtml1-transitional.dtd">
<html>
<head>
  <title>Chapter 6</title>
  <link rel="stylesheet" href="chapter6.css" type="text/css" />
  <script src="jquery-latest.js" type="text/javascript"></script>
</head>
<body id="single">
  <input type="button" id="animate" value="animate" />
  <div class="box">
  <p>Lorem ipsum dolor sit amet, consectetur adipisicing elit, sed do
    eiusmod tempor incididunt ut labore et dolore magna aliqua.</p>
  </div>
</body>
</html>
All the individual examples are available online at http://jquery-cookbook.com/examples/06/, including a complete amalgamated version of the recipes.
7.1. Sliding and Fading Elements in and out of View
Problem
We want to reveal or toggle a block of content into view. This can be triggered by the user clicking some element or can be fired by some other event.
Rather than just showing and hiding, which could be jarring visually, we want to create a gradual effect to reveal the content into view.
For these solutions, I’ve assumed we want to allow the user to toggle the effect.
Solution
For reference, if we were just to show the element, our code would be as follows:
$(document).ready(function () {
  $('#animate').click(function () {
    $('.box').show();
  });
);
If we were to toggle the box but just
toggle from visible and hidden, we would use the following instead of
.show():
$('.box').toggle();However, our solution wants to be a little more visually engaging than just toggling the display property. So, let’s look at using the slide and fade methods:
Slide
$(document).ready(function () {
  $('#animate').click(function () {
    $('.box').slideToggle('slow'),
  });
});
Fade
Because there’s no opacity toggle function, either we can use
a combination of fadeIn and
fadeOut:
$(document).ready(function () {
  $('#animate').click(function () {
    var $box = $('.box'),
    if ($box.is(':visible')) {
      $box.fadeOut('slow'),
    } else {
      $box.fadeIn('slow'),
    }
  });
});
or we can create our own fade toggle animation, using the
fadeTo method:
$(document).ready(function () {
  $('#animate').click(function () {
    $('.box').fadeTo('slow', 'toggle'),
  });
});
However, I’m of the opinion that it reads better for future
maintenance if we use the animate
method:
$(document).ready(function () {
  $('#animate').click(function () {
    $('.box').animate({ opacity : 'toggle' }, 'slow'),
  });
});
Both
If we want to toggle the height and opacity together, we can reuse the previous solution and add the height to toggle at the same time. This would cause the box to fade out and slide up at the same time:
$(document).ready(function () {
  $('#animate').click(function () {
    $('.box').animate({
      opacity : 'toggle',
      height: 'toggle'
    }, 'slow'),
  });
});
Discussion
As we can see from the previous solutions, the slide and fade methods are the next step up from the straight show (and hide) and toggle methods. The slide methods come in the following flavors:
slideUpslideDownslideToggle
The fade methods don’t have an explicit toggle feature, but it can be achieved. Fading has the following methods:
fadeInfadeOutfadeTo
With the exception of fadeTo, all these methods take speed as the first parameter and a
callback function as the second—both of which are
optional. The callback function is executed once the animation is
complete, and the context is set to the element the animation ran
against; i.e., the this variable is
the current element.
The reason I would choose to use animate over fadeTo to toggle opacity is that the
fadeTo parameters read the wrong
way around. If a new developer were coming to the code, using the
animate function almost reads as plain English, therefore making it
easier to skim and understand what is happening in the code.
It’s worth also adding that if you use the show (or hide) method using a speed, it will animate the height,
width, opacity, margin, and padding all in one animation, as shown in
Figure 7-1.
7.2. Making Elements Visible by Sliding Them Up
Problem
You want to slide the content block into view, but the UI design
dictates that the content must slide upward when
being revealed. The slideUp method would hide the element, reducing the height from
the top position.
To slide upward, we need to use CSS to position the element and then consider the content that we are revealing.
Solution
HTML
We need to absolutely position the element we are animating to get it to stick to the bottom position so it can animate upward when revealing.
To achieve this, we need to wrap the animating element in
another <div> (or the
element that suits your design) and give it a position: relative style. (This may also
be position:
absolute. We just need a defined position to trigger the
position: absolute on #revealUp to position relatively to;
however, since we want the document to flow
normally, we’ve used position: relative.)
<div class="box">
  <div id="revealUp">
    <p>Lorem ipsum dolor sit amet, consectetur adipisicing elit, sed do
    eiusmod tempor incididunt ut labore et dolore magna aliqua.</p>
  </div>
</div>
CSS
Now we need to give the box
element a relative position so that we can absolutely position
#revealUp relative to it:
.box {
  position: relative;
}

#revealUp {
  position: absolute;
  overflow: hidden;
  display: none;
  bottom: 0;
  background-color: #c00;
  height: 0;
}
jQuery
We can toggle the #revealUp
based on the element’s height. We’re going to longer lengths to
animate the height upward (by checking the current height) rather
than just using slideToggle()—but
we’ll look at why in the discussion:
$(document).ready(function () {
  $('#animate').click(function () {
    var $box = $('#revealUp'),

    if ($box.height() > 0) {
      $box.animate({ height : 0 });
    } else {
      $box.animate({ height : '100%' });
    }
  });
});
Discussion
This solution requires that we check the height of the box to then determine how we proceed.
Notice how we don’t use slideToggle, which behind the scenes is very similar, if not the
same as, using .animate({ height: 'toggle'
}).
The reason we’re not using the toggle is that for the toggle to
work correctly, it needs to capture the real
height from somewhere. As the element starts with a height of zero,
jQuery has no way to work out what the full height is. If we used
slideToggle, the #revealUp element appears briefly as a
1-pixel slither and then disappears again. This is because there’s no
real height to animate to.
Instead, we determine whether the height is great than zero and
then animate the height
accordingly. Since the element is nested within another
element with position:
relative, we can give it a height of 100 percent, and it
will grow to fill the space.
Warning
In the recipe, I have used overflow:
hidden. However, if the font size is increased by the
user, my example hides some of the content. In your real solutions,
make sure you test that the content is still available when the font
size is increased, and consider either ensuring that the
revealing box is large enough for the content or using overflow: auto on the #revealUp element.
7.3. Creating a Horizontal Accordion
Problem
The jQuery UI library supports vertical accordions out of the box, and in fact there are a few simple code snippets that can be used to create a rudimentary accordion effect. However, making the accordion run horizontally requires specific CSS and a slightly different take on the jQuery code.
For this solution we won’t be using the template, because the markup is different for the horizontal accordion.
Solution
HTML
<div id="accordionWrapper">
  <h3 class="red"><a href="#red">Red</a></h3>
  <div id="red" class="box"><p>Lorem ipsum dolor sit amet, consectetur
adipisicing.</p></div>

  <h3 class="green"><a href="#green">Green</a></h3>
  <div id="green" class="box"><p>Lorem ipsum dolor sit amet, consectetur
adipisicing.</p></div>

  <h3 class="blue"><a href="#blue">Blue</a></h3>
  <div id="blue" class="box"><p>Lorem ipsum dolor sit amet, consectetur
adipisicing.</p></div>
</div>
CSS
#accordionWrapper {
  margin: 10px;
}

#accordionWrapper h3 a {
  text-indent: -9999px;
  height: 150px;
  width: 50px;
  float: left;
}

#accordionWrapper .red {
  background: #c00 url(images/red.png) no-repeat;
}

#accordionWrapper .green {
  background: #0c0 url(images/green.png) no-repeat;
}

#accordionWrapper .blue {
  background: #00c url(images/blue.png) no-repeat;
}

#accordionWrapper div.box {
  float: left;
  height: 150px;
  width: 150px;
  border: 0;
  margin: 0;

  /* to cancel the image from .red, etc */
  background-image: none;
}
jQuery
$.fn.horizontalAccordion = function (speed) {
  return this.each(function () {
    var $accordionHeaders = $(this).find('h3'),
      $open = $accordionHeaders.next().filter(':first'),
      width = $open.outerWidth();

    // initialize the display
    $accordionHeaders.next().filter(':not(:first)').css({ display : 'none', width : 0
});

    $accordionHeaders.click(function () {
      if ($open.prev().get(0) == this) {
        return;
      }
      $open.animate({ width: 0 }, { duration : speed });
      $open = $(this).next().animate({ width : width }, { duration : speed });
    });
  });
};

$(document).ready(function () {
  $('#accordionWrapper').horizontalAccordion(200);
});
Discussion
The HTML and CSS lay the accordion out so that the elements within it are all floated to the left. If you used this on a web page, you would probably expect to have to add a clearing element directly after the accordion to allow the following content to flow properly.
By floating the elements to the left, our accordion is set up
with the h3 > a as the title to
the content panel.
If CSS and JavaScript are disabled, then the content flows correctly and is readable by, for instance, Google’s search engine.
If CSS is turned on but JavaScript isn’t, the default view is to see all the content panels.
Using jQuery, we initialize the display by hiding all the panels except the first, and we hook click handlers to the headers to slide the content in and out of view.
The horizontal accordion has been written as a jQuery plugin, in particular to show that we don’t need to hard-code any variables within the accordion effect. We only pass the duration speed variable in to the plugin, which determines the duration of the effect. We could easily upgrade this plugin to also take an easing or callback.
It’s important to note that throughout this code, all the click
handling and navigation of the DOM happens around the <h3> element, not
the <a> element. This still
works, keeping the code relatively simple (instead of having to
navigate up and down from the <a> element to get the parent <h3> then the adjacent <div> element), but more importantly,
offers keyboard accessibility because the <a> elements can be tabbed on to and
triggered via the keyboard. We don’t have to bind the click handler to
the <a> element, because when
the <a> element has the click
event triggered (via clicking or the keyboard), it
bubbles up through the DOM and is caught by our
click handler on the <h3>
element.
The plugin first collects the necessary parts of the accordion: the header, which will be clickable; the first visible panel, and the width of the panels (note that this version of the plugin works only for equal sized panels):
var $accordionHeaders = $(this).find('h3'),this is the current accordion
wrapper element, typically a <div>.
From the accordion wrapper, our code collects all the <h3> elements. Note that we will make
use of next() and prev() to change our DOM collection from the
<h3> to the next nodes in the
DOM tree, in particular the accordion content panels:
$open = $accordionHeaders.next().filter(':first'),$open is a temporary variable
that will point to the current visible panel. We can’t use .is(':visible') because we’re actually
reducing the width and the panel still has a CSS property of display: block. So, we will keep track of
the current panel through this $open variable:
width = $open.outerWidth();
Finally in the initialization, we capture the width of the open panel so that we can animate the width of the panels correctly.
Two tasks are left:
Initialize the view of panels, showing only the first panel
Bind the click handles to show and hide the panels
To initialize the view, we must hide all the panels except the first. We must also set the width to zero to allow for the animate function to increase the width, rather than making it pop out when it is shown.
To achieve this, we use an inverse filter from the $open variable, in particular :not(:first):
$accordionHeaders.next().filter(':not(:first)').css({ display : 'none', width : 0 });Once we have our selection of panels that are not the first, we change the CSS properties to initialize them.
Finally, we attach the click handler.
Remembering that the $accordionHeaders variable contains the
h3 elements, the first thing we do
is say this: if the <h3>
clicked is the same as the currently open panel, then don’t do
anything.
Since the $open variable is
the panel, we use .prev() to
navigate to the previous <h3>
element and test whether it matches the current context of the clicked
element.
If the clicked element is not the current open panel, we animate
the $open panel width to zero, and
the current clicked panel to the captured width.
Notice the very last line of the click handler:
$open = $(this).next().animate({ width : width }, { duration : speed });Because jQuery usually returns jQuery (except when getting a
value) and we’re animating the panel that will now be open, we can
capture this at the same time in the $open variable, thus overwriting it with the
latest panel.
7.4. Simultaneously Sliding and Fading Elements
When some part of the web page is hidden and is shown to the user only on a specific action, sometimes a simple show/hide isn’t enough. We want to create more pleasing effects for our visitors.
Depending on the layout of the page, an instant show/hide effect may not make it entirely clear to the visitor what content was revealed. This is another advantage of sliding an element into view because it gives a visual cue to the visitor where the page layout is changing.
We could use jQuery’s built-in show method with a duration because this almost does the job, but not quite because it also animates the width of the element, as shown earlier in Figure 7-1. As you also noted earlier, the show method will animate any padding and margin around the element, so to solve the problem we will use the animate function to create a custom effect.
Solution
Use the animation function to toggle both the height and the opacity at the same time:
$(document).ready(function () {
  $('#animate').click(function () {
    $('.box').animate({ opacity: 'toggle', height: 'toggle' });
    return false;
  });
});
Discussion
Using the animate method
allows us to specify exactly which CSS properties we
want to animate for the effect.
We are also using toggle as
the end point value. This way, the animate method takes the current height in
the initial state and toggles it to either zero or 100 percent of the
initial state.
In our example, the initial state of the box is visible. If we
want it to slide and fade into view, then we only
need to set the display property to none in the stylesheet.
Warning: there is no need to set the height to zero in the
style; in fact, doing so will mean the animate won’t expand to the
correct height because it will toggle back and forth between zero
height (from the CSS) and zero height and display none (the final
point of slideUp).
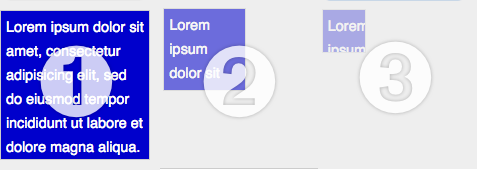
7.5. Applying Sequential Effects
Problem
You want an effect to occur on one set of elements after another effect occurs on a different set of elements. This is simple to solve if you just have one other effect to execute, but if you want to apply the effect one-by-one to any number of elements, the code could become difficult to maintain.
Solution
This solution uses the standard template outlined at the
beginning of this chapter, except that we have multiple copies of the
div.box element on the page. This
solution is designed as such that we can be dealing with any number of
div.box elements, from just one
single element to many, because the automatic sequence solution can
handle them all.
Manual callback
The basic approach to applying sequential effects would be to use the callback. This would also be used if the next effect is different from the first:
$(document).ready(function () {
  var $boxes = $('.box').hide();

  $('#animate').click(function () {
    $boxes.eq(0).fadeIn('slow', function () {
      $boxes.eq(1).slideDown('slow'),
    });
  });
});
Automatic sequence
This alternative method, based on Dave Methvin’s solution, will repeat in sequence the effect on any number of elements:
$(document).ready(function () {
  var $boxes = $('.box').hide(),
    div = 0;

  $('#animate').click(function () {
    $($boxes[div++] || []).fadeIn('slow', arguments.callee);
  });
});
Discussion
The simple solution uses the callback feature to then step in to
the next animation in the sequence. The selector we use targets the
first div.box; however, this
doesn’t scale because it is expecting there to be two and only two
animated elements. Any less and the code breaks. Any more, and some
elements will be missed.
If we have many more, or even an unknown number of elements we need to animate in sequence, then Dave Methvin’s solution is perfect.
There are two tricks to the code. The first is the failover to an empty array:
$($boxes[div++] || [])
This code increments the index counter, and if the element doesn’t exist, it passes an empty array to jQuery.
When the jQuery result set is empty, running an animation doesn’t do anything. Since the result is empty, jQuery doesn’t pass any DOM elements to the chained call, and therefore any callbacks given to the chained method won’t be called either.
For example, if we ran the following code, the alert box would never appear—which is a key ingredient to making this recipe work:
$('made-up-element').show(function () {
  alert('will never appear'),
});
The second trick to this recipe is the callback argument:
arguments.callee
arguments is a keyword in JavaScript referring to a local
variable that all functions have access to. The arguments object is similar to any array but
does not have any of the array methods (such as slice) or properties except length.
arguments also contains a
reference to the currently executing function in the arguments.callee
property. This is useful for recursive function calls, which is
exactly how we are using the property in this solution.
This solution says to keep incrementing through the $boxes jQuery collection and, on completion
of the animation, recursively execute the function. This continues
until the <div> index goes
beyond the length of the $boxes
jQuery collection ($boxes.length),
at which point an empty array is used as the jQuery collection, and
thus the callback is not executed, causing the code to finish
running.
7.6. Determining Whether Elements Are Currently Being Animated
Problem
When an animation is in progress, we may want to prevent the user from triggering the animation to run again until the initial animation has finished.
An example of this may be if the user clicks a button to trigger some animation. This could be to reveal some piece of information. For our particular contrived example, when the user clicks the button, we will shake the box back and forth.
If the user keeps clicking the button, we won’t want to keep queuing animations, so we need to test whether the animation is already running and, if it is, ignore the request to animate.
Solution
For this solution, I want to include some debugging information,
so I’ve included a <div>
element with the ID of debug, and
we’ll append log messages to this to help us see what’s
happening.
We will use the :animated
custom jQuery selector to test whether the animation is
running:
$(document).ready(function () {
  var speed = 100;

  $('#animate').click(function () {
    $('.box')
      .filter(':not(:animated)')
      .animate({ marginLeft: −10 }, speed, function () {
        $('#debug').append('<p>Starting animation.<p>'),
      })
      .animate({ marginLeft: 10 }, speed)
      .animate({ marginLeft: −10}, speed)
      .animate({ marginLeft: 10 }, speed)
      .animate({ marginLeft: −10}, speed)
      .animate({ marginLeft: 10 }, speed)
      .animate({ marginLeft: 0}, speed, function () {
        $('#debug').append('<p>Finished animation.</p>'),
      }); // end of our long chain
  });
});
Discussion
In this contrived example, we use multiple calls to the animate method to make the box shake back and forth (though if this
were required in reality, it might be better to use a bouncing easing
instead!).
This animation is triggered when the user clicks the animate button.
I have included two callback functions to show when the
animation starts and finishes. Note that even though there are several
lines, because of the way chaining works, this is in fact one single
line of JavaScript starting from $('.box') and ending on }); // end of our long chain.
The following line of jQuery filters out any div.box element that is currently being
animated from our collection and only running the subsequent
animations on the remaining elements:
.filter(':not(:animated)')Since we have a single div.box element in our example, the
animation will run only if the element isn’t animating already.
7.7. Stopping and Resetting Animations
Problem
If an animation is running, we may be required to stop it in midflow. A common problem is seen when using a mouseover and a mouseout to trigger an animation to show and hide a particular block of content.
If the mouse is run in and out of the trigger area, the animation continuously triggers; for example, the content block would keep sliding up and down until it completed the number of times it was triggered.
One approach could be to use the :animated selector to filter out the element for animation. However, you
may want to fade an element back out of view when the user moves the
mouse away from the trigger rather than letting it complete. This can
be solved with the stop()
method.
Solution
We have added a CSS style to the div.box element to set the opacity to
zero.
Instead of having the user click the button
to trigger the effect, we’re running the animation when the mouse
hovers over the button. This is just to show that
without the stop() calls, the
animation would run out of control:
$(document).ready(function () {
  $('#animate').hover(function () {
    $('.box').stop().fadeTo(200, 1);
  }, function () {
    $('.box').stop().fadeTo(200, 0);
  });
});
Discussion
Typically this problem would be solved using a combination of
fadeIn() and fadeOut(). However, if this were used, firstly without stop(), then the effect keeps repeating each
time the mouse hovers over the button.
To prevent this, we insert the stop() command before queuing on the next
animation. The big advantage of this is that it stops the animation
midflow. This means if the opacity of the element is at 0.5 (or 50 in
IE), it will proceed with the next animation with the starting point
of 0.5.
Since we are now stopping in the middle of the opacity
animation, it also means we can’t properly use fadeIn() and fadeOut(). We have to explicitly state where
we want to fade to. So, now we are using fadeTo(), passing in the duration and then the target
opacity.
Now when the user moves their mouse back and forth over the button, the animation doesn’t repeat but fades in and out in a single smooth transition.
7.8. Using Custom Easing Methods for Effects
Problem
jQuery comes with only two built-in easing functions:
swing and linear. The default is swing. If we want to make our animations a
little more interesting, then we might want to use a different easing
function—this could give us a bounce animation, or elastic, or perhaps
just an animation that slows down as it’s coming to its end.
We can manually add easing functions, but we can also include a
predefined collection using the jquery.easing plugin, which can be
downloaded from http://jquery-cookbook.com/go/easing/.
Solution
By first including jquery.easing.1.3.js after we include the
jQuery library, we can now make use of any one of the 31 new easing
functions:
$(document).ready(function () {
  $('#animate').click(function () {
    $('.box').animate({ scrollTop: '+=100' },
      { duration: 400, easing: 'easeOutElastic' });
  });
});
Discussion
By including the easing library, we can specify a large range of
values in the easing property in
the options parameter. The animate method also supports passing
easing as the third parameter, so
the preceding solution could be written as follows:
$('.box').animate({ scrollTop: '+=100' }, 400, 'easeOutElastic'),To create your own custom easing function, you can extend the
easing object using this:
jQuery.extend(jQuery.easing, {
  customEasing: function(x, t, b, c, d) {
    return c*(t/=d)*t + b;
  },
});
The preceding example is the equation for the easeInQuad easing. All easing functions take
five parameters:
fractionThe current position of the animation, as measured in time between 0 (the beginning of the animation) and 1 (the end of the animation)
elapsedThe number of milliseconds that have passed since the beginning of the animation (seldom used)
attrStartThe beginning value of the CSS attribute that is being animated
attrDeltaThe difference between the start and end values of the CSS attribute that is being animated
durationThe total number of milliseconds that will pass during the animation (seldom used)
7.9. Disabling All Effects
Problem
Your user or web application may require that all animations are disabled, but the effect of revealing information or scrolling (or whichever animation type) may still be required.
This may be a personal preference, the user may be using a low-resolution device, or it may be because the user finds the animations problematic in their browsing.
jQuery has a way to disable all animations from one access point
but still supports the animate
method and its final value.
Solution
$.fx.off = true;

$(document).ready(function () {
  $('#animate').click(function () {
    $('.box').animate({ width: '+=100', height: '+=100' });
  });
});
Discussion
By setting fx to off using the following line, all animation
calls have the same effect as calling css() directly:
$.fx.off = true;
This can be set at any point and it will disable the animations,
which means it can be offered as a user preference. To enable
animations again, you simply set the flag to false:
$.fx.off = false;
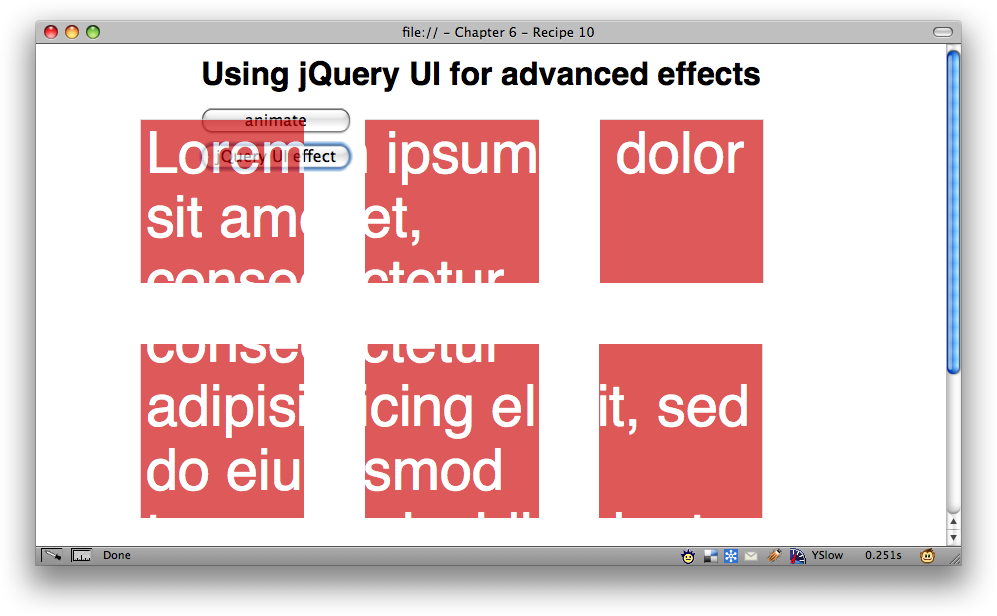
7.10. Using jQuery UI for Advanced Effects
Problem
If you want to create more complicated effects, it is
certainly possible using the animate method. This might be for a web
application that needs to animate a whole range of CSS properties on
an element, or perhaps there is a special way a dialog box must
disappear when closed—say, for instance, explode away on the screen
(see Figure 7-2).
Solution
Download the jQuery UI library from http://jquery-cookbook.com/go/jqueryui-download. The library can now be included after jQuery is included and the new effects plugin is available.
For this solution, I have added an extra button to show two effects and added a new class to our CSS.
Discussion
The jQuery UI effects library also modifies the way addClass, removeClass, and toggleClass work; in particular, you can supply a duration as the
second parameter, and it will animate a transition from the current
state to the new class, working through all new class
properties.
So, the first example adds the class big and sets the animation to run for two
seconds. All the CSS properties from the big class are animated onto the div.box element. Because the toggleClass method has also been modified by
jQuery UI, we are able to toggle back and forth to the original
state.
Second, we are using the effect() method, which is bespoke to the jQuery UI library. This method
offers a collection of show and hide functions.
Note
The effect() method
requires the option object passed in as the second variable; this
can be null or it can be an empty object, but it must be provided to
be able to pass in the duration.
Using the string explode, the
div.box will split into nine pieces
and fade off the page as shown earlier in Figure 7-2.
Warning
At the time of this writing, one or two effect types have slight side effects in Safari 4. They do work in all other A-grade browsers as outlined by Yahoo! at http://developer.yahoo.com/yui/articles/gbs/.
To see all the different available effects, you can visit http://jquery-cookbook.com/go/jqueryui-effects and play with all the interactive demos.