
Chapter 3. Beyond the Basics
Introduction
jQuery is a very lightweight library that is capable of helping you do the simple selections of DOM elements on your page. You saw these simple uses in Chapter 1. In this chapter, we’ll explore how jQuery can be used to manipulate, traverse, and extend jQuery to infinite possibilities. As lightweight as jQuery is, it was built to be robust and expandable.
3.1. Looping Through a Set of Selected Results
Problem
You need to create a list from your selected set of DOM elements, but performing any action on the selected set is done on the set as a whole. To be able to create a list with each individual element, you’ll need to perform a separate action on each element of the selected set.
Solution
Let’s say you wanted to make a list of every link within a
certain DOM element (perhaps it’s a site with a lot of user-provided
content, and you wanted to quickly glance at the submitted links being
provided by users). We would first create our jQuery selection,
$("div#post a[href]"), which will
select all links with an href
attribute within the <div>
with the id of post. Then we want to loop through each
matched element and append it to an array. See the following code
example:
var urls = [];
 $("div#post a[href]").each(function(i) {
    urls[i] = $(this).attr('href'),
});

alert(urls.join(","));
We were able to make an array because we iterated through each
element in the jQuery object by using the $().each(); method. We are able to access
the individual elements and execute jQuery methods against those
elements because we wrapped the this variable in a jQuery wrapper, $(), thus making it a jQuery object.
Discussion
jQuery provides a core method that you can use to loop through
your set of selected DOM elements. $().each() is jQuery’s for
loop, which will loop through and provide a separate function scope
for each element in the set. $().each(); will iterate exclusively through
jQuery objects.
Warning
$().each(); is not the same
as the jQuery utility method jQuery.each(object, callback);. The
jQuery.each method is a more
generalized iterator method that will iterate through both objects
and arrays. See jQuery’s online documentation for more information
on jQuery.each() at http://docs.jquery.com/Utilities/jQuery.each.
In each iteration, we are getting the href attribute of the current element from
the main selection. We are able to get the current DOM element by
using the this keyword. We then
wrap it in the jQuery object, $(this), so that we can perform jQuery
methods/actions against it—in our case, pulling the href attribute from the DOM element. The
last action is to assign the href
attribute to a global array, urls.
Just so we can see what we have, the array URL is joined
together with a , and displayed to
the user in an alert box. We could also have added the list to an
unordered list DOM element for display to the user. More practically,
we might want to format the list of URLs into JSON format and send it
to the server for processing into a database.
Let’s look at another example using $().each();. This example is probably the
most obvious use of $().each();.
Let’s say we have an unordered list of names, and we want each name to
stand out. One way to accomplish this is to set an alternate
background color for every other list item:
<!DOCTYPE html
     PUBLIC "-//W3C//DTD XHTML 1.0 Transitional//EN"
     "http://www.w3.org/TR/xhtml1/DTD/xhtml1-transitional.dtd">
<html xmlns="http://www.w3.org/1999/xhtml">
<head>
    <meta http-equiv="Content-Type" content="text/html;charset=UTF-8" />
    <title>Chapter 3 - Recipe 1 - Looping through a set of selected results</title>
    <style type="text/css">
        .even { background-color: #ffffff; }
        .odd  { background-color: #cccccc; }
    </style>
    <script src="http://ajax.googleapis.com/ajax/libs/jquery/1.3.2/jquery.min.js"
type="text/javascript"></script>
    <script type="text/javascript">
        (function($){
            $(document).ready(function() {
                $("ul > li").each(function(i) {
                    if (i % 2 == 1)
                    {
                        $(this).addClass("odd");
                    }
                    else
                    {
                        $(this).addClass("even");
                    }
                });
            });
        })(jQuery);
    </script>
</head>
<body>
    <h2>Family Members</h2>
    <ul>
        <li>Ralph</li>
        <li>Hope</li>
        <li>Brandon</li>
        <li>Jordan</li>
        <li>Ralphie</li>
    </ul>
</body>
</html>
Figure 3-1 shows the code output.
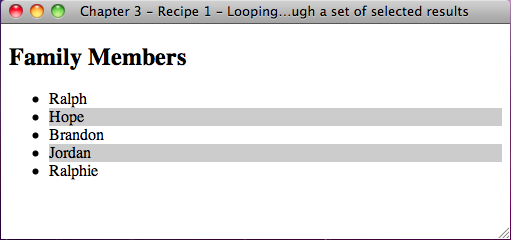
As we iterate through each <li> element, we are testing whether
the current index, which is passed in as a single argument to the
function when executed, modded by 2 is equal to 1. Based on that
condition, we either set one CSS class (.odd) or another CSS class (.even).
Note
Even though this may be the most obvious way to use $().each(), it isn’t the most efficient
way to handle making alternating background colors. We could have
accomplished this with one line:
$("ul > li:odd").addClass("odd");All we needed to do was set all the <li> elements to the class .even in the CSS so that we could override
the odd <li> elements with
the .odd class with
jQuery.
The basic function of $.each(); is to take the matched set and
iterate through each element via reference of the index, perform some
action, and iterate to the next element in the matched set until there
are no more elements left.
3.2. Reducing the Selection Set to a Specified Item
Problem
A jQuery selector is broad and selects all elements on the page based on your query. The need may rise when you need to select a single item, based on its position, but there isn’t an easy way to select that item without editing the code.
Solution
After you make your selection with jQuery, you can chain the
.eq() method and pass in the index of the selection you want to work
with.
Note
The selection index is zero-based, so the first item in the
selection would be $().eq(0);
where 0 represents the first item in the selection. $().eq(4); represents the fifth
item.
Let’s use the end of the season standings for the National Hockey League (NHL) conferences as an example of how we can show which teams made the playoffs and which didn’t. What we need to do is list all the teams in each conference in the order they finished the season in. Since the top eight teams in each conference make it to the playoff round, we just need to figure out the eighth entry in each list and draw a line:
<!DOCTYPE html
     PUBLIC "-//W3C//DTD XHTML 1.0 Transitional//EN"
     "http://www.w3.org/TR/xhtml1/DTD/xhtml1-transitional.dtd">
<html xmlns="http://www.w3.org/1999/xhtml">
<head>
    <meta http-equiv="Content-Type" content="text/html;charset=UTF-8" />
    <title>Chapter 3 - Recipe 2 - Reducing the selection set to specified item</title>
    <script type="text/javascript"
src="http://ajax.googleapis.com/ajax/libs/jquery/1.3.2/jquery.min.js"></script>
    <script type="text/javascript">
        (function($){
            $(document).ready(function(){
                $("ol#east > li").eq(7).css("border-bottom", "1px solid #000000");
                $("ol#west > li").eq(7).css("border-bottom", "1px solid #000000");
            });
        })(jQuery);
    </script>
</head>
<body>
    <h2>Eastern Conference</h2>
    <ol id="east">
        <li>Boston Bruins</li>
        <li>Washington Capitals</li>
        <li>New Jersey Devils</li>
        <li>Pittsburgh Penguins</li>
        <li>Philadelphia Flyers</li>
        <li>Carolina Hurricanes</li>
        <li>New York Rangers</li>
        <li>Montreal Canadians</li>
        <li>Florida Panthers</li>
        <li>Buffalo Sabres</li>
        <li>Ottawa Senators</li>
        <li>Toronto Maple Leafs</li>
        <li>Atlanta Thrashers</li>
        <li>Tampa Bay Lightning</li>
        <li>New York Islanders</li>
    </ol>

    <h2>Western Conference</h2>
    <ol id="west">
        <li>San Jose Sharks</li>
        <li>Detroit Red Wings</li>
        <li>Vancouver Canucks</li>
        <li>Chicago Blackhawks</li>
        <li>Calgary Flames</li>
        <li>St. Louis Blues</li>
        <li>Columbus Blue Jackets</li>
        <li>Anaheim Ducks</li>
        <li>Minnesota Wild</li>
        <li>Nashville Predators</li>
        <li>Edmonton Oilers</li>
        <li>Dallas Stars</li>
        <li>Phoenix Coyotes</li>
        <li>Los Angeles Kings</li>
        <li>Colorado Avalanche</li>
    </ol>
</body>
</html>
Figure 3-2 shows the code output.
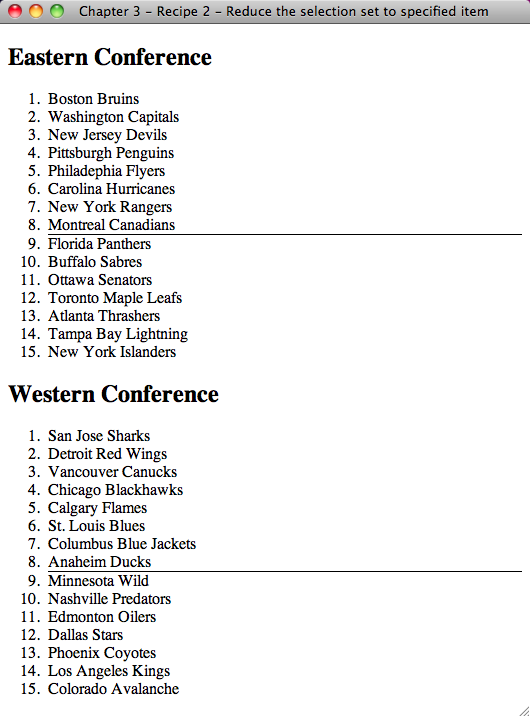
As you can see, we just use an ordered list to list the teams in
the order they placed, then we use jQuery to add a bottom border to
the eighth item in each list. We need to add an ID to each ordered
list so that we can specify each list in a separate query. If we were
to do $("li").eq(7);, it would
select only from the first list because the query would have counted
all the <li> elements on the
page together.
Discussion
The .eq() method is used to
take a selection set and reduce it to a single item from that set. The
argument is the index that you want to reduce your selection to. The
index starts at 0 and goes to length −1. If the argument is an invalid
index, the method will return an empty set of elements instead of
null.
The .eq() method is similar
to using the $(":eq()"); right in
your selection, but the .eq()
method allows you to chain to the selection and fine-tune further. For
example:
$("li").css("background-color","#CCCCCC").eq(0).css("background-color","#ff0000");This will change the background color of all <li> elements and then select the
first one and give it a different color to signify that it is perhaps
a header item.
3.3. Convert a Selected jQuery Object into a Raw DOM Object
Problem
Selecting elements on a page with jQuery returns a set as a jQuery object and not as a raw DOM object. Because it’s a jQuery object, you can only run jQuery methods against the selected set. To be able to run DOM methods and properties against the selected set, the set needs to be converted to a raw DOM object.
Solution
jQuery provides a core method get(), which will convert all matched jQuery objects back
into an array of DOM objects. Additionally, you can pass an index
value in as an argument of get(),
which will return the element at the index of the matched set as a DOM
object, $.get(1);. Now, even though
you can get at a single element’s DOM object via $.get(index), it is there for historical
reasons; the “best practices” way is to use the [] notation, $("div")[1];.
Warning
We are discussing the core .get() method, which transforms a jQuery
object to a DOM array. We are not discussing the Ajax get method, which will load a remote page
using an HTTP GET request.
Because get() returns an
array, you can traverse the array to get at each DOM element. Once
it’s a DOM element, you can then call traditional DOM properties and
methods against it. Let’s explore a simple example of pulling the
innerHTML of an element:
<!DOCTYPE html
     PUBLIC "-//W3C//DTD XHTML 1.0 Transitional//EN"
     "http://www.w3.org/TR/xhtml1/DTD/xhtml1-transitional.dtd">
<html xmlns="http://www.w3.org/1999/xhtml">
<head>
    <meta http-equiv="Content-Type" content="text/html;charset=UTF-8" />
    <title>Chapter 3 - Recipe 3 - Converting a selected jQuery object into a
raw DOM object</title>
    <script type="text/javascript"
src="http://ajax.googleapis.com/ajax/libs/jquery/1.3.2/jquery.min.js"></script>
    <script type="text/javascript">
        (function($){
            $(document).ready(function(){
                var inner = $("div")[0].innerHTML;
                alert(inner);
            });
        })(jQuery);
    </script>
</head>
<body>
    <div>
        <p>
            jQuery, the write less, do more JavaScript library.  Saving the day
for web developers since 2006.
        </p>
    </div>
</body>
</html>
Figure 3-3 shows the output.
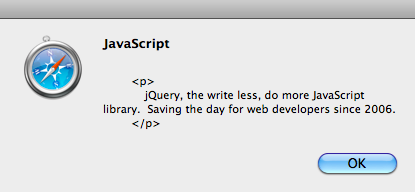
We start by selecting all the <div> elements on the page and calling
[0]. We pass in the index of the
selection we want to work with; since there is only one <div> on the page, we can pass in
index 0. Finally, we call a
property, in this case innerHTML,
to retrieve the raw DOM element.
Discussion
The core get() method can be
very useful, as there are some non-JavaScript methods that we can
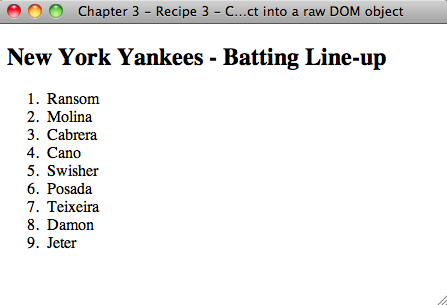
utilize for our advantage. Let’s say we have a list and we need to
show that list in reverse order. Since get() returns an array, we can use native
array methods to reverse sort the list and then redisplay the
list:
<!DOCTYPE html
     PUBLIC "-//W3C//DTD XHTML 1.0 Transitional//EN"
     "http://www.w3.org/TR/xhtml1/DTD/xhtml1-transitional.dtd">
<html xmlns="http://www.w3.org/1999/xhtml">
<head>
    <meta http-equiv="Content-Type" content="text/html;charset=UTF-8" />
    <title>Chapter 3 - Recipe 3 - Converting a selected jQuery object into a raw DOM
object</title>
    <script type="text/javascript"
src="http://ajax.googleapis.com/ajax/libs/jquery/1.3.2/jquery.min.js"></script>
    <script type="text/javascript">
    <!--
        (function($){
            $(document).ready(function(){
                var lis = $("ol li").get().reverse();
                $("ol").empty();
                $.each(lis, function(i){
                   $("ol").append("<li>" + lis[i].innerHTML + "</li>");
                });
            });
        })(jQuery);
    //-->
    </script>
</head>
<body>
    <h2>New York Yankees - Batting Line-up</h2>
    <ol>
        <li>Jeter</li>
        <li>Damon</li>
        <li>Teixeira</li>
        <li>Posada</li>
        <li>Swisher</li>
        <li>Cano</li>
        <li>Cabrera</li>
        <li>Molina</li>
        <li>Ransom</li>
    </ol>
</body>
</html>
Figure 3-4 shows the output.
3.4. Getting the Index of an Item in a Selection
Problem
When binding an event for a wide range of selected elements on a page, you need to know exactly which item was clicked from the selected set to “personalize” the action of the bound event.
Solution
When we click an item, we can use the core method index() to search through a selection to see what index the item is
at:
<!DOCTYPE html
     PUBLIC "-//W3C//DTD XHTML 1.0 Transitional//EN"
     "http://www.w3.org/TR/xhtml1/DTD/xhtml1-transitional.dtd">
<html xmlns="http://www.w3.org/1999/xhtml">
<head>
    <meta http-equiv="Content-Type" content="text/html;charset=UTF-8" />
    <title>Chapter 3 - Recipe 4 - Getting the index of an item in a selection</title>
    <script type="text/javascript"
src="http://ajax.googleapis.com/ajax/libs/jquery/1.3.2/jquery.min.js"></script>
    <script type="text/javascript">
    <!--
        (function($){
            $(document).ready(function(){
                $("div").click(function() {
                    alert("You clicked on div with an index of " +
$("div").index(this));
                });
            });
        })(jQuery);
    //-->
    </script>
</head>
<body>
    <div>click me</div>
    <div class="test">test</div>
    <div>click me</div>
</body>
</html>
Figure 3-5 shows the output.

We start by binding all <div> elements to a click event. Then
when a <div> is clicked, we
can figure out which <div>
was clicked by searching for the item in the same selection: $("div").index(this);, where this is the <div> that was clicked.
Discussion
The core method index() allows you to get the index of the DOM element you are
looking for from a jQuery set. As of jQuery 1.2.6, you can also pass
in the index of a jQuery collection to search for. The method will
return the index of the first occurrence it finds:
var test = $("div.test");

$("div").each(function(i){
    if ($(this).index(test) >= 0)
    {
        //do something
    }
    else
    {
        //do something else
    }
});
We’ll see whether the <div> in the loop matches the
collection we saved in the variable test, and if so, it will perform a custom
action on the matched collection.
Note
If the index method cannot find the subject that was passed in, it will return −1.
3.5. Making a Unique Array of Values from an Existing Array
Problem
You have an ordered list on your page. You select all
the <li> elements of that
list using jQuery; now you need to transform that list into another
list.
Solution
Let’s say we have a list of people in an ordered list. We would like to display the first three people from that ordered list as a sentence:
<!DOCTYPE html
     PUBLIC "-//W3C//DTD XHTML 1.0 Transitional//EN"
     "http://www.w3.org/TR/xhtml1/DTD/xhtml1-transitional.dtd">
<html xmlns="http://www.w3.org/1999/xhtml">
<head>
    <meta http-equiv="Content-Type" content="text/html;charset=UTF-8" />
    <title>Chapter 3 - Recipe 5 - Making a unique array of values from an existing
array</title>
    <script type="text/javascript"
src="http://ajax.googleapis.com/ajax/libs/jquery/1.3.2/jquery.min.js"></script>
    <script type="text/javascript">
    <!--
        (function($){
            $(document).ready(function(){
                var arr = $.map($("LI"), function(item, index){
                    while (index < 3)
                    {
                        return $(item).html();
                    }
                    return null;
                });

                $(document.body).append("<span>The first three authors are: " +
arr.join(", ") + "</span>");
            });
        })(jQuery);
    //-->
    </script>
</head>
<body>
    <h1>jQuery Cookbook Authors</h1>
    <ol>
        <li>John Resig</li>
        <li>Cody Lindley</li>
        <li>James Padolsey</li>
        <li>Ralph Whitbeck</li>
        <li>Jonathan Sharp</li>
        <li>Michael Geary</li>
        <li>Scott González</li>
        <li>Rebecca Murphey</li>
        <li>Remy Sharp</li>
        <li>Ariel Flesler</li>
        <li>Brian Cherne</li>
        <li>Jörn Zaefferer</li>
        <li>Mike Hostetler</li>
        <li>Nathan Smith</li>
        <li>Richard D. Worth</li>
        <li>Maggie Wachs</li>
        <li>Scott Jehl</li>
        <li>Todd Parker</li>
        <li>Patty Toland</li>
        <li>Rob Burns</li>
    </ol>
</body>
</html>
Figure 3-6 shows the output.
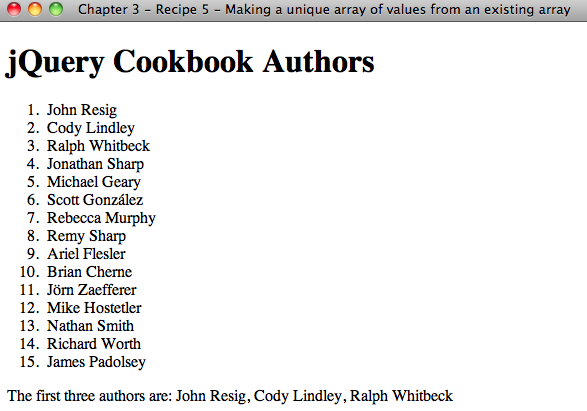
We start by making an array of the <li> elements from the ordered list.
We will select all <li>
elements on the page by using a jQuery selector and pass that in as an
argument of the jQuery utility method $.map(), which will take an existing array and “map” it into
another array. The second argument is the function that will iterate
through the array, perform translations, and return a new value to be
stored into a new array.
In the preceding example, we iterate through the array we made,
return only the html() values of
the first three list elements, and map these values into a new array.
We then take that array and use the join method to make a single
string out of the array and inject it into the end of the
document.
Discussion
In the solution, we are using the jQuery utility method $.map(), which will transform an existing
array into another array of items. $.map() takes two arguments, an array and a
callback function:
$.map([1,2,3], function(n,i) { return n+i;});

//Output: [1,3,5]
$.map() will iterate through
each item of the original array and pass in the item to be translated
and the index of the current location within the array. The method is
expecting a value to be returned. The returned value will be inserted
into the new array.
Note
If the null value is returned, no value will be saved into the new array. Returning null basically removes the item from the new array.
3.6. Performing an Action on a Subset of the Selected Set
Problem
You need to perform an action on a set of tags, but there is no way to isolate these tags from all the other tags on the page in a jQuery selection set.
Solution
We can use the slice() method
to filter the selection set to a subset. We pass it a
starting index value and an ending index value, then we can chain our
action at the end:
<!DOCTYPE html
     PUBLIC "-//W3C//DTD XHTML 1.0 Transitional//EN"
     "http://www.w3.org/TR/xhtml1/DTD/xhtml1-transitional.dtd">
<html xmlns="http://www.w3.org/1999/xhtml">
<head>
    <meta http-equiv="Content-Type" content="text/html;charset=UTF-8" />
    <title>Chapter 3 - Recipe 6 - Performing an action on a subset of the selected
set</title>
    <script type="text/javascript"
src="http://ajax.googleapis.com/ajax/libs/jquery/1.3.2/jquery.min.js"></script>
    <script type="text/javascript">
    <!--
        (function($){
            $(document).ready(function(){

  $("p").slice(1,3).wrap("<i></i>");
            });
        })(jQuery);
    //-->
   </script>
</head>
<body>
    <p>
        Lorem ipsum dolor sit amet, consectetur adipiscing elit. Proin eget nibh ut
tortor egestas pharetra. Nullam a hendrerit urna. Aenean augue arcu, vestibulum eget
faucibus nec, auctor vel velit. Fusce eget velit non nunc auctor rutrum id et ante.
Donec nec malesuada arcu. Suspendisse eu nibh nulla, congue aliquet metus. Integer
porta dignissim magna, eu facilisis magna luctus ac. Aliquam convallis condimentum
purus, at lacinia nisi semper volutpat. Nulla non risus justo. In ac elit vitae elit
posuere adipiscing.
    </p>
    <p>
        Aliquam gravida metus sit amet orci facilisis eu ultricies risus iaculis. Nunc
tempus tristique magna, molestie adipiscing nibh bibendum vel. Donec sed nisi luctus
sapien scelerisque pretium id eu augue. Mauris ipsum arcu, feugiat non tempor
tincidunt, tincidunt sit amet turpis. Vestibulum scelerisque rutrum luctus. Curabitur
eu ornare nisl. Cras in sem ut eros consequat fringilla nec vitae felis. Nulla
facilisi. Mauris suscipit feugiat odio, a condimentum felis luctus in. Nulla interdum
dictum risus, accumsan dignissim tortor ultricies in. Duis justo mauris, posuere vel
convallis ut, auctor non libero. Ut a diam magna, ut egestas dolor. Nulla convallis,
orci in sodales blandit, lorem augue feugiat nulla, vitae dapibus mi ligula quis
ligula. Aenean mattis pulvinar est quis bibendum.
    </p>
    <p>
        Donec posuere pulvinar ligula, nec sagittis lacus pharetra ac. Cras nec
tortor mi. Pellentesque et magna vel erat consequat commodo a id nunc. Donec velit
elit, vulputate nec tristique vitae, scelerisque ac sem. Proin blandit quam ut magna
ultrices porttitor. Fusce rhoncus faucibus tincidunt. Cras ac erat lacus, dictum
elementum urna. Nulla facilisi. Praesent ac neque nulla, in rutrum ipsum. Aenean
imperdiet, turpis sit amet porttitor hendrerit, ante dui eleifend purus, eu fermentum
dolor enim et elit.
    </p>
    <p>
        Suspendisse facilisis molestie hendrerit. Aenean congue congue sapien, ac
luctus nulla rutrum vel. Fusce vitae dui urna. Fusce iaculis mattis justo sit amet
varius. Duis velit massa, varius in congue ut, tristique sit amet lorem. Curabitur
porta, mauris non pretium ultrices, justo elit tristique enim, et elementum tellus
enim sit amet felis. Sed sollicitudin rutrum libero sit amet malesuada. Duis vitae
gravida purus. Proin in nunc at ligula bibendum pharetra sit amet sit amet felis.
Integer ut justo at massa ullamcorper sagittis. Mauris blandit tortor lacus,
convallis iaculis libero. Etiam non pellentesque dolor. Fusce ac facilisis ipsum.
Suspendisse eget ornare ligula. Aliquam erat volutpat. Aliquam in porttitor purus.
    </p>
    <p>
        Suspendisse facilisis euismod purus in dictum. Vivamus ac neque ut sapien
fermentum placerat. Sed malesuada pellentesque tempor. Aenean cursus, metus a
lacinia scelerisque, nulla mi malesuada nisi, eget laoreet massa risus eu felis.
Vivamus imperdiet rutrum convallis. Proin porta, nunc a interdum facilisis, nunc dui
aliquet sapien, non consectetur ipsum nisi et felis. Nullam quis ligula nisi, sed
scelerisque arcu. Nam lorem arcu, mollis ac sodales eget, aliquet ac eros. Duis
hendrerit mi vitae odio convallis eget lobortis nibh sodales. Nunc ut nunc vitae
nibh scelerisque tempor at malesuada sapien. Nullam elementum rutrum odio nec aliquet.
    </p>
</body>
</html>
Figure 3-7 shows the output.
The preceding example selects the subset starting at index 1 and ending before index 3 and wraps an italics tag around the subselection.
Discussion
The jQuery method slice()
takes a couple of options; the first is the starting index position,
and the second argument, which is optional, is the ending index
position. So, say you wanted all <P> tags except the first one; you
could do $("p").slice(1), and it
would start the selection at the second item and select the rest that
is in the jQuery selection.
slice() also takes a negative
number. If a negative number is given, it’ll count in from the
selection’s end. So, $("p").slice(−1); will select the last item
in the selection. Additionally, $("p").slice(1, −2); will start the
selection at the second item and select to the second-to-last
item.
3.7. Configuring jQuery Not to Conflict with Other Libraries
Problem
If jQuery is loaded on the same page as another
JavaScript library, both libraries may have implemented the $ variable, which results in only one of those methods working
correctly.
Solution
Let’s say you inherit a web page that you need to update, and the previous programmer used another JavaScript library like Prototype, but you still want to use jQuery. This will cause a conflict, and one of the two libraries will not work based on which library is listed last in the page head.
If we just declare both jQuery and Prototype on the same page like so:
<script type="text/javascript"
src="http://ajax.googleapis.com/ajax/libs/prototype/1.6.0.3/prototype.js"></script>
<script type="text/javascript"
src="http://ajax.googleapis.com/ajax/libs/jquery/1.3.2/jquery.min.js"></script>
this will cause a JavaScript error:
element.dispatchEvent is not a function in
prototype.js.
Thankfully, jQuery provides a workaround with the jQuery.noConflict() method:
<!DOCTYPE html
     PUBLIC "-//W3C//DTD XHTML 1.0 Transitional//EN"
     "http://www.w3.org/TR/xhtml1/DTD/xhtml1-transitional.dtd">
<html xmlns="http://www.w3.org/1999/xhtml">
<head>
    <meta http-equiv="Content-Type" content="text/html;charset=UTF-8" />
    <title>Chapter 3 - Recipe 7 - Configuring jQuery to free up a conflict with
another library</title>

    <script type="text/javascript"
src="http://ajax.googleapis.com/ajax/libs/prototype/1.6.0.3/prototype.js"></script>
    <script type="text/javascript"
src="http://ajax.googleapis.com/ajax/libs/jquery/1.3.2/jquery.min.js"></script>
    <script type="text/javascript">
    <!--
        jQuery.noConflict();

        // Use jQuery via jQuery(...)
        jQuery(document).ready(function(){
          jQuery("div#jQuery").css("font-weight","bold");
        });

        // Use Prototype with $(...), etc.
        document.observe("dom:loaded", function() {
            $('prototype').setStyle({
               fontSize: '10px'
            });
        });
    //-->
   </script>

</head>
<body>
    <div id="jQuery">Hello, I am a jQuery div</div>
    <div id="prototype">Hello, I am a Prototype div</div>
</body>
</html>
Figure 3-8 shows the output.
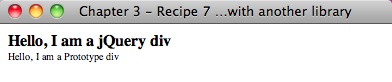
When you call jQuery.noConflict(), it gives control of the
$ variable back to whomever
implemented it first. Once you free up the $ variable, you only will be able to access
jQuery with the jQuery variable.
For example, when you used to use $("div
p"), you would now use jQuery("div
p").
Discussion
The jQuery library and virtually all of its plugins are
constrained by the jQuery namespace. You shouldn’t get a conflict with the jQuery variable
and any other library (i.e., Prototype, YUI, etc.). jQuery does
however use $ as a shortcut for the jQuery object. This shortcut
definition is what conflicts with other libraries that also use the
$ variable. As we’ve seen in the
solution, we can free jQuery of the $ shortcut and revert to using the jQuery
object.
There is another option. If you want to make sure jQuery won’t
conflict with another library but still have the benefit of a short
name, you can call jQuery.noConflict() and assign it to a
variable:
     var j = jQuery.noConflict();

     j(document).ready(function(){
       j("div#jQuery").css("font-weight","bold");
     });
You can define your own short name by choosing the variable name
you assign, jQuery.noConflict().
Finally, another option is to encapsulate your jQuery code inside a closure:
    jQuery.noConflict();

    (function($){
        $("div#jQuery").css("font-weight","bold");
    })(jQuery);
By using a closure, you temporarily make the $ variable available to the jQuery object
while being run inside the function. Once the function ends, the
$ variable will revert to the
library that had initial control.
Warning
If you use this technique, you will not be able to use other
libraries’ methods within the encapsulated function that expect the
$.
3.8. Adding Functionality with Plugins
Problem
The jQuery library is a small, slick, powerful JavaScript library, but it doesn’t come preloaded with every piece of functionality that you may need.
Solution
jQuery was built with extensibility in mind. If the core jQuery library can’t do what you want, chances are a jQuery plugin author has written a plugin that will handle your need, probably in as little as one line of code.
To include a plugin on your page, all you need to do is download the plugin .js file, include the jQuery library on the page, then immediately after, include your plugin on the page. Then, in either another .js file or in a script block on the page, you’ll typically need to call the plugin and provide any options that may be required.
Here is an example using the jQuery cycle plugin developed by Mike Alsup:
<!DOCTYPE html
     PUBLIC "-//W3C//DTD XHTML 1.0 Transitional//EN"
     "http://www.w3.org/TR/xhtml1/DTD/xhtml1-transitional.dtd">
<html xmlns="http://www.w3.org/1999/xhtml">
<head>
    <meta http-equiv="Content-Type" content="text/html;charset=UTF-8" />
    <title>Chapter 3 - Recipe 8 - Adding Functionality with Plugins</title>
    <style type="text/css">
        .pics {
            height:  232px;
            width:   232px;
            padding: 0;
            margin:  0;
        }

        .pics img {
            padding: 15px;
            border:  1px solid #ccc;
            background-color: #eee;
            width:  200px;
            height: 200px;
            top:  0;
            left: 0
        }
    </style>
    <script type="text/javascript"
src="http://ajax.googleapis.com/ajax/libs/jquery/1.3.2/jquery.min.js"></script>
    <!--Now include your plugin declarations after you've declared jQuery on the page-->
    <script type="text/javascript" src="scripts/2.8/jquery.cycle.all.min.js?
v2.60"></script>
    <script type="text/javascript">
    <!--
        (function($){
            $(document).ready(function(){
                $('.pics').cycle('fade'),
            });
        })(jQuery);
    //-->
    </script>

</head>
<body>
    <div class="pics">
        <img src="images/2.8/beach1.jpg" width="200" height="200" alt="Beach 1" />
        <img src="images/2.8/beach2.jpg" width="200" height="200" alt="Beach 2" />
        <img src="images/2.8/beach3.jpg" width="200" height="200" alt="Beach 3" />
    </div>
</body>
</html>
Figure 3-9 shows the output.

With one line of code, we are able to make a slideshow effect that will show one image at a time and then fade to the next image automatically. The cycle plugin is also extensible because it was written so developers can provide different options to have different transition effects and layouts.
Discussion
jQuery has one of the largest communities of developers of any of the JavaScript libraries. This large community contributes to a large base of plugins and tutorials that are available on the Web. jQuery hosts a repository of plugins that have been written and submitted to http://plugins.jquery.com by the authors. There are currently more than 1,600 plugins listed in the repository, and you can find plugins in many different categories. Plugin authors are invited to submit their plugins and to give a description, a link to the plugin, and a link to the plugin’s documentation. The repository makes it easy for developers to search for the specific functionality they want.
Chances are that, as a developer, you will eventually find a plugin that meets your requirements. But on the off chance that a plugin doesn’t exist, creating a plugin yourself is fairly straightforward. Here are some points to remember:
Name your file jquery.[name of plugin].js, as in jquery.debug.js.
All new methods are attached to the
jQuery.fnobject; all functions to the jQuery object.Inside methods,
thisis a reference to the current jQuery object.Any methods or functions you attach must have a semicolon (
;) at the end—otherwise, the code will break when compressed.Your method must return the jQuery object, unless explicitly noted otherwise.
You should use
this.eachto iterate over the current set of matched elements—it produces clean and compatible code that way.Always use
jQueryinstead of$inside your plugin code—that allows users to change the alias for jQuery in a single place.
For more information and examples on creating plugins, you can go to the Authoring page on the jQuery documentation site, or you can skip ahead to Chapter 12 where Mike Hostetler will go into more detail.
3.9. Determining the Exact Query That Was Used
Problem
While writing a plugin or a method that extends jQuery, you need to know exactly what the selection and the context used when calling the method so that the method can be recalled.
Solution
We can use the core properties .selector and .context in conjunction with each other so we can re-create the
original query that was passed through. We need to use both in
conjunction because not all queries to our function or plugin will be
within the default document context:
<!DOCTYPE html
PUBLIC "-//W3C//DTD XHTML 1.0 Transitional//EN"
"http://www.w3.org/TR/xhtml1/DTD/xhtml1-transitional.dtd">
<html xmlns="http://www.w3.org/1999/xhtml">
<head>
<meta http-equiv="Content-Type" content="text/html;charset=UTF-8" />
<title>Chapter 3 - Recipe 9 - Determining the exact query that was used</title>
<script type="text/javascript"
src="http://ajax.googleapis.com/ajax/libs/jquery/1.3.2/jquery.min.js"></script>
<script type="text/javascript">
<!--
(function($){
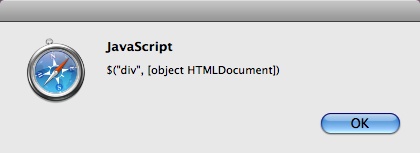
$.fn.ShowQuery = function(i) {
alert("$(""+ $(this).selector + "", " + $(this).context +")");
if (i < 3)
{
$($(this).selector, $(this).context).ShowQuery(i+1);
}
};
$("div").ShowQuery(1);
})(jQuery);
//-->
</script>
</head>
<body>
<div>
This is a div.
</div>
</body>
</html>Figure 3-10 shows the output.
Discussion
In the preceding example, we define a method that can be called
from a jQuery selection, ShowQuery.
Within that method, we alert the query as it was passed in and then
recursively recall ShowQuery again with the same jQuery
selector. The if statement is there
so that we don’t get into a recursive loop.
The core properties .selector
and .context were introduced in
jQuery 1.3, which was released in January 2009. These methods are
geared more toward plugin developers who may need to perform an action
against the original query passed in. A potential use case of using
these methods is to rerun the selection query or to check to see
whether an element is in the selection.
.selector returns as a string
the actual selector that was used to match the given elements.
.selector will return the whole
selector if, say, the selection is broken up where there is a selector
and then the matched set is narrowed with the use of the find() method:
$("div").find("a").selector;

//returns: "div a"
.context will return the DOM
node originally passed in to jQuery(). If no context was set in the
selector, the context will default to the document.