“It is not a question of how well each process works; the question is how well they all work together.” | ||
| --Lloyd Dobens and Clare Crawford-Mason | ||
It’s hard enough keeping track of all of my kids’ names, let alone trying to remember how to use the Pen tool in all of the applications I use to get my work done. So it’s of great comfort for me to find that the Pen tool works in the exact same way in all Adobe applications. This is just a small example of what integration means, and as you begin to use Adobe’s applications more, you’ll appreciate these “little things” to no end.
This chapter discusses many of the things that define integration as it pertains to the Creative Suite applications. As we walk through the applications in this chapter, we talk mainly about Illustrator, Photoshop, InDesign, and Flash. Even though Dreamweaver and Acrobat are a part of the Creative Suite, they don’t share the same interface as the other applications. We cover Dreamweaver in detail in Chapter 10, “Using Adobe Dreamweaver CS3,” and Acrobat in Chapter 11, “Using Adobe Acrobat 8 Professional.”
So you know what each application in the suite is supposed to do. You also have a pretty good understanding of where each application fits in the workflow and when you would use each of them. Now you’ll take a look at how the applications work and how they are used.
As you’ll find out, many tasks and concepts apply to all the applications in the suite. One thing that Adobe does extremely well is make its applications look and feel the same way. The different applications also play very well together. These combined aspects of the Creative Suite are referred to as integration. One of the main benefits of working with the suite is this high level of integration, and we talk about many of these aspects in this chapter.
Before we get to the applications themselves, I want to spend a few moments talking about your computer setup. After all, it’s what you’ll be using to run the Creative Suite.
Adobe puts a list of system requirements on the box, but those should be treated as an absolute bare minimum. What I list here are items that I feel are important for the needs of the graphic designer. Use this only as a guideline, of course—your budget most likely dictates what you have at your disposal.
Computer—. I’m not even going to touch the whole Mac versus Windows issue because I believe that you should use whatever you’re most comfortable with (my own personal preference is a Mac). What’s important, though, is that you have a system that can handle whatever you have to throw at it. Hard-drive space (storage memory) is always important because graphics files tend to be quite large. It would also be wise to have at least 2GB of RAM (working memory) on your machine because that will enable you to run several applications at the same time (instead of having to continually open and close them). If you’re planning to use a digital video camera, you need to get a system with a FireWire (also called IEEE 1394 or iLink) port.
Monitor—. Your monitor is your workspace and can prove to be a very important factor as you design. Remember that, as a user of the Creative Suite, you’ll have several applications running at the same time, and Adobe’s user interface is panel-happy (we talk more about panels later in the chapter); the more screen real estate you have, the better.
Input devices—. No doubt your computer came with a mouse and a keyboard, but depending on what kind of work you’ll be doing, you might want to explore other options as well. Photoshop and Illustrator both have built-in support for pressure-sensitive tablets (such as those offered by Wacom) for such tasks as photo retouching, painting, and drawing. Trackballs offer a different feel than a mouse, and mouse devices are available that offer a scroll wheel, several programmable buttons, and other features (one such example is the Logitech NuLOOQ Professional Series).
Internet connection—. A DSL or cable connection is essential for many reasons. The Internet has much to offer today’s designer. The Adobe Stock Photos service, which enables you to quickly find just the images you’re looking for and use them for comps and to download high-resolution versions instantly, requires a broadband Internet connection. User forums and websites offer a tremendous resource for tips, tricks, or even help. And of course, there are plenty of blogs and podcasts that offer great information as well. If you’re the type who loves fonts, you can purchase just about anything your heart (or client) desires on demand, and more. Most important, with a high-speed connection, you can easily download software updates and patches. A fast Internet connection also makes it easier to email PDF proofs to clients.
Scanner—. A scanner is important for several reasons. You’ll always need to scan photo prints or logos for design jobs. Many people also like to start their designs as sketches on paper (or napkins over a lunch meeting with the client) and might want to scan those in and work from there. Finally, I’ve found that a scanner can be very useful for experimenting with scanning fabrics and materials for interesting backgrounds, or even from other sources (when it’s legal to do so, of course—I’m not advocating copyright infringement). Some scanners require a FireWire connection; most also offer a (slower) USB connection.
Digital camera—. A digital camera can do a lot more than just take pictures of the family. It’s a great way to get quick concepts onto your screen. You can scout out scenery, take photos for comps to show clients and photographers—even take simple product shots. Just about any camera with at least 2 megapixels should work fine for these tasks.
Archiving—. When a job is done, you’ll want to keep it somewhere that’s easy to find and get to (a client will always ask for a small update to a job they did several months ago). I find that copying jobs to CDs or DVDs can be the easiest and cheapest, although there are plenty of other methods. Choose a system that you can be comfortable with and that you can track easily. I like the CD or DVD method because most computers come with drives that can easily record these, the media is cheap enough, and the technology won’t become obsolete anytime soon (remember SyQuest drives?). If possible, it’s also a good idea to keep copies in a separate location, to avoid a catastrophic loss (such as burglary or fire).
Backup—. Nothing could possibly be worse than losing your data just when you need it the most. You’ve invested a lot into your work, and the only way to protect it is with a decent backup system. You’ll find many different solutions out there (DAT, AIT, CD, DVD, and so on), and you should use whatever fits your budget and your work patterns. As an alternative, some companies are offering the capability to back up your files over the Internet. Although it is a bit more expensive, the backups happen automatically and are safely on a server, away from your office. The files are also accessible from anywhere if needed. Check out www.mozy.com and www.carbonite.com for a sampling of these offerings.
Work area—. Sometimes you have no control over where you’ll be working—be it a cubicle in an office, a small desk tucked into the corner of your bedroom, a home office, or a decked-out design studio. But you should take some things into consideration. Bright sunlight can make it difficult to see your computer screen and can make colors look different on a sunny day than on a cloudy one. Desk space is also important. If you can, try to use as large a workspace as possible. Cramped work areas are the main cause for repetitive strain injuries (such as carpal tunnel syndrome), to say nothing of making it harder to find that fax the client sent you yesterday (one of the reasons I fill my fax machine with yellow paper, by the way).
Even though all the applications in the suite were installed at the same time, you still have to launch each one individually. In other words, if you need to do a task in Photoshop only, there’s no need to launch the rest of the applications in the suite.
You launch any of the Creative Suite applications the same way you launch just about any other application. You might want to create shortcuts (or aliases) for your applications on your desktop (on Windows, you can place them in the Quicklaunch toolbar). On a Mac, you might want to put the applications in your Dock so that you can find and launch them easily.
To create a shortcut in Windows, right-click the application’s icon and choose Create Shortcut. On a Mac, drag the application’s icon to the Dock.
So what are we waiting for? Let’s get started by examining some of the Creative Suite applications and learning about the similarities among them.
You bought this book (or “borrowed” it from your friend) because you wanted to learn how to use Adobe Creative Suite 3. It would be a pain if you had to spend time learning how to use a photo-editing program, only to realize that you have to learn a whole new way of using your computer for working in a page-layout application. So it’s of comfort to know that the applications in the suite share a brand new user interface.
In fact, the interfaces of the suite applications are so alike that it’s sometimes easy to forget which application you’re using. Because so many things work the same way in all the individual applications, it’s possible to focus on doing your work rather than trying to figure out how to do it.
The user interface really comprises many things, and we’re going to discuss some of them here, including panels, tools, and more.
If you’ve ever used an Adobe application before, you know what a palette is. Now in Adobe Creative Suite 3 applications, palettes are referred to as panels. Certain functions and tools are always at your disposal, and these “float” on top of your document and are called floating panels. Panels can be shown or hidden, and some panels can expand or contract to show more or less information.
As you’ll quickly find out, there are a lot of panels in each application, and your entire screen can quickly get filled with panels, leaving you with little or no space to view or work with your document. But don’t worry—there are plenty of ways to adjust panels so that you can best take advantage of them.
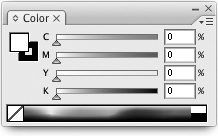
Panels have several attributes. The part where the name of the panel appears is called the tab. On the upper-right corner of the panel is a little icon. Clicking on it opens the panel menu (see Figure 4.1), where you can choose from several additional options or functions. At the bottom of a palette is usually a row of palette buttons that provide more functionality as well.

You can move panels around by grabbing their tabs, and you can resize some of them by grabbing their edges. You’ll notice that panels “snap” to each other and to the edges of your screen.
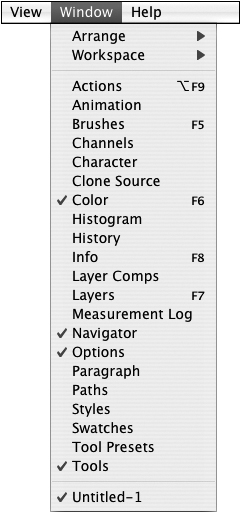
The simplest way of working with panels is showing and hiding them. You’ll find all the panels listed in the Window menu for any of the suite applications. A check mark next to an item means that the panel is open, or showing (see Figure 4.2).
Double-clicking on a panel’s tab collapses the panel so that it takes up less space (see Figure 4.3). Whenever you need the panel again, double-clicking on the tab reveals the contents of the panel.
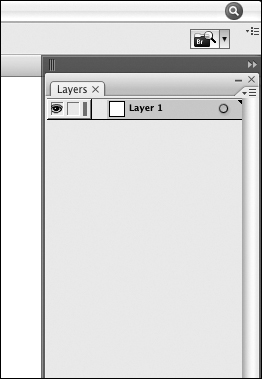
Notice that some panels have little arrows in front of the name in the tab (see Figure 4.4). Those arrows indicate that the panel has multiple states or ways it can be displayed, each showing fewer or more options. Clicking once on the arrows changes the state of the panel. Clicking repeatedly on the arrows cycles through all the states of the panel (see Figure 4.5).

Panels can be manipulated, giving you even more control over how they display (and take up space) on your screen. We discussed before how clicking on and dragging the title bar of the panel lets you move it around your screen. You’ll notice that when you drag it around, you see a “ghost” of your panel.
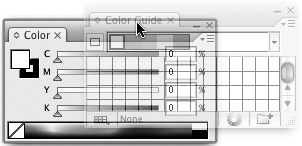
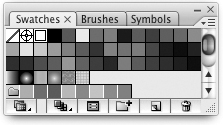
You can drag this ghost into the upper portion of another panel (where the tab appears) to create a group of panels. Notice that as you drag the ghost into another open panel, that panel gets a thick blue outline around it (see Figure 4.6). In a group of panels, clicking once on the palette tab brings that palette into focus. For example, if you have the Swatches, Brushes, and Gradient panels in the same group, clicking on the Swatches panel tab brings that panel to the front (see Figure 4.7). Of course, you can still access the different states of each palette, as mentioned earlier. The benefit of creating a cluster of palettes is that you can have multiple palettes on your screen, but have them take up the screen space of just one palette.
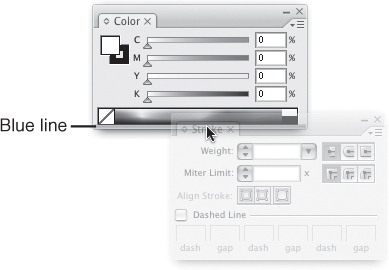
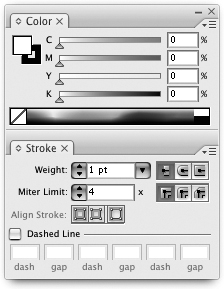
If you drag the ghost of a panel to the very bottom of another panel, you’ll notice that only the bottom of the receiving panel gets a blue outline (see Figure 4.8). This indicates that you’ll be attaching the panels instead of grouping them. Attaching a panel to another makes the two act as one (see Figure 4.9). Double-clicking on the panel tab of the upper panel collapses all the attached panels in one fell swoop. Some panels enable you to use the keyboard to navigate through them. The Color panel is one such panel in which you can enter CMYK values and tab between them. When you have panels attached to each other, you can also tab between the panels. So if you had the Stroke panel attached to your Color panel, you could tab through the CMYK values and then press Tab again to edit the stroke weight value.
Sure, collapsing, grouping, and attaching all of your panels can be fun and even helpful in making room on your screen, but Adobe is always known for making even cooler features—and you won’t be disappointed with this one. It’s called docking, and it really helps you control all of your panels.
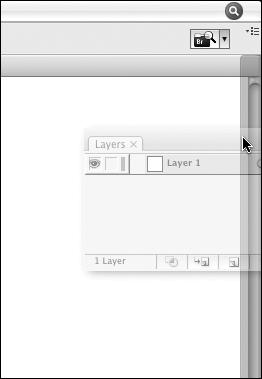
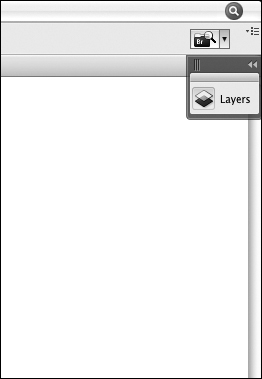
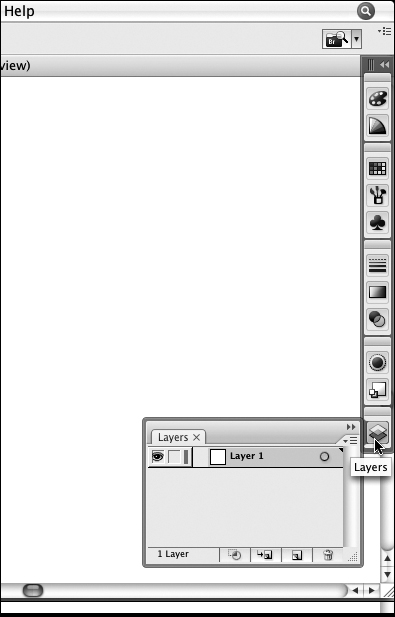
Here’s how this feature works. Grab a panel by its tab and drag it towards the left or right edge of your screen. You’ll notice that as you approach the edge, a bar comes out to meet the panel (see Figure 4.10). When you let go of the mouse, a panel dock is created and the panel appears within it (see Figure 4.11). Click once on the little white arrows that appear at the top of the panel dock and the dock is reduced in size, with each panel displaying as an icon (see Figure 4.12). You can drag additional panels into the dock, and clicking on an icon in the dock displays that panel so you can access it (see Figure 4.13). Click away from the panel and it disappears back into the dock, conveniently getting out of the way. It’s a totally cool way to free up some valuable space on your screen while keeping panels close at hand. You can actually create more than one panel dock, and Flash can even dock panels to the bottom of the screen as well.
I know that you’re having way too much fun right now with panel docks (I’ll admit that it can be quite addictive), but I want to direct your attention to a feature that takes everything you’ve learned about panels so far and brings it to the next level: Custom Workspaces.
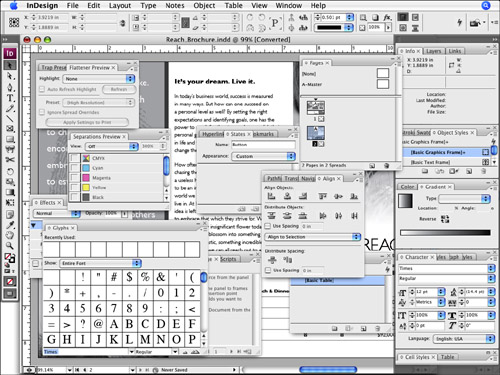
No doubt by now you’re overwhelmed with the plethora of panels in any one of Adobe’s applications. Besides having to understand what each of those panels is for, you can already tell that your screen is going to be a mess of panels. Many people spend precious time moving their cursor around the screen looking for a panel. And when you’re actually working on your document, all those panels can get in the way (see Figure 4.14). Life would be so much easier if there was just a way to control or manage all of these panels.
Luckily, there’s a feature in the suite called Custom Workspaces that enables you to save the position of all your panels and reset your screen to that setting at any time. In fact, you can keep multiple workspaces so that you can easily switch among them.
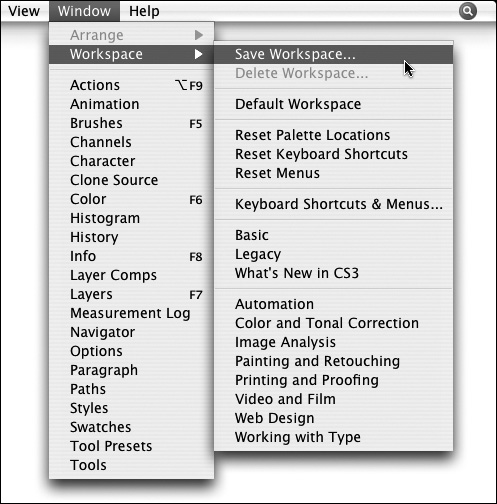
Using this feature is really quite simple. Start by opening the panels you want, and then position them to your liking on the screen. Group them, attach them, dock them—all to your heart’s content. When you have everything perfectly positioned and set up, choose Window, Workspace, Save Workspace (see Figure 4.15), and give your new workspace a name. You can create as many workspaces as you like by repeating the process.
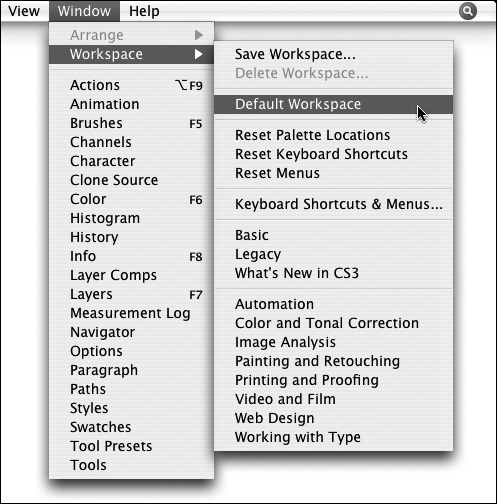
Whenever you want to switch workspaces, all you have to do is choose one from the Window, Workspace submenu, and, like magic, your screen will adjust to the new panel configuration. Just in case you go crazy and define totally wacky workspaces, the kind and thoughtful people at Adobe included a default workspace allowing you to quickly get back to normalcy (see Figure 4.16). Most of the applications in the Suite also ship with a variety of workspaces that are already created, each optimized for specific workflows.
These tools aren’t the kind you buy at the Home Depot, but rather the kind that help you select objects, draw shapes, create graphs, and perform other functions with Adobe Creative Suite. Although each application contains a whole slew of tools, the good news is that many of them are the same across applications. We discuss these tools here, but before we do, let’s first take a look at where the tools live.
Basically a panel on its own, the Tools panel is where you’ll find all the tools for any of the suite applications. With the exception of Dreamweaver (which doesn’t have tools), the Tools panels are extremely alike across the rest of the suite (see Figure 4.17).
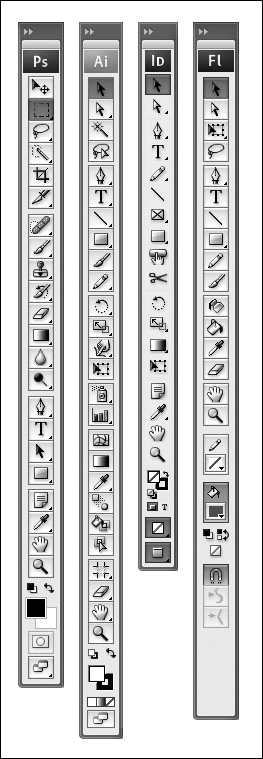
As with other panels, you can grab the Tools panel from the top and position it to your liking. The top part contains a pretty graphic that helps identify which application you’re in (sometimes the apps look so similar that you need to look at this image to tell which of the apps you’re actually in). Some applications also enable you to change the look or format of the Tools panel to make it easier to position on your screen. Double-clicking the white arrows at the top of the Tools panel toggles between a single-column and a double-column configuration of the tools. The single-column view saves a few valuable pixels on your screen, but you should choose whatever is more comfortable for you.
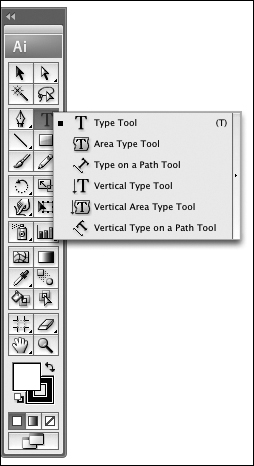
If you take a closer look at the Tools panel, you’ll notice that some of the tools have a miniscule triangle or arrow at the lower-right corner of the tool’s button. This icon indicates that more tools are “hidden” behind that one. As you’ll quickly come to realize, Adobe applications have many tools, and it’s impossible to display all of them at once without taking up a tremendous amount of screen real estate. Instead of trying to display them all, Adobe combined them into logical groups. Consider Illustrator’s Type tool, for example. Hidden under it are five additional tools that are used to work with text. To access these tools, simply click a tool with your mouse and keep the button pressed until the other tools pop up (see Figure 4.18). You can then choose one of the other tools.
Sometimes you’re continually jumping between tools that are grouped together (such as the Symbolism tools in Illustrator), and it can be quite tedious to continually access the hidden tools. Using a feature found in Illustrator (not in the other suite apps), if you look to the far right when you click and hold down the mouse to see all the tools in the group, you’ll see a narrow button with an arrow in it, called Tearoff. When selected, it actually creates a mini Tools panel with all the grouped tools in a row. You can position this anywhere on your screen, as needed (see Figure 4.19).
Back in Chapter 2, “So Many Applications: Which One to Use?” I mentioned the importance of selecting things. I’d like to clarify that here and explain some of the methods of selections in the suite apps.
As you use your computer, you’ll find that you’re basically doing one of two things: creating content, when you’re using tools or functions to add elements to your document; or editing content, when you’re adjusting or modifying elements in your document. Here’s a quick example of what I mean: When drawing a star in Illustrator, first you draw the star itself (creating content), and then you choose a color for it and position it just where you want it (editing content).
To edit content, you need to indicate what exactly you want to edit. This process is called making a selection. Depending on the program, there are many ways to achieve this. For the most part, Illustrator, Flash, and InDesign are object-based programs, so making selections in those programs is very similar. Photoshop has similar selection tools for its vector shapes, but because it’s mainly a pixel-based program, it also has a range of other selection tools specific to selecting pixels themselves. Dreamweaver does enable you to select objects by clicking on them, but it’s also unique, in that you don’t necessarily need any specific tool to select things—it has more of a context-sensitive interface. We discuss each of these methods when we focus on each of the applications, but I wanted to touch on a few important concepts here.
Illustrator, Flash, and InDesign are primarily object-based programs, so you’re usually selecting one of the following:
An object
Part of an object
A group of objects
Text
Illustrator, Flash, and InDesign have two primary selection tools: the black arrow and the white arrow (okay, so that’s what I like to call them; their real names are the Selection tool and the Direct Selection tool; Flash calls the latter the Subselection tool). For the most part, the black arrow is used to select objects and groups of objects. The white arrow is used to select parts of objects. In all applications, the Type tool is used to both create and edit text, so you use the Type tool to select text as well.
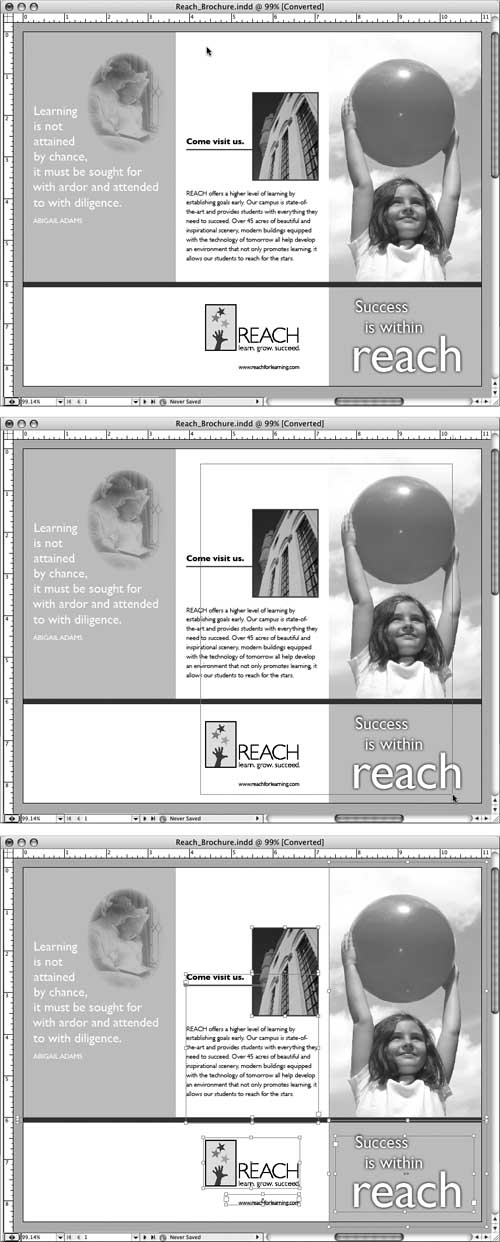
There are two basic ways to select objects (see Figure 4.20) with the arrow tools. You can either click on the object you want to select, or click and drag over an area to select any objects that fall within that area—a method called marquee selection.

Let’s start simple and talk about the first method. Using the black arrow, click once on an object to select it. You can then move the object around using the black arrow as well. Click on any empty space on your screen to deselect the object. Click on it again to select it. To select more than one object, you can press and hold the Shift key while clicking on additional objects (see Figure 4.21). You’ll notice that with each click, you’re adding objects to your selection, and you’ll be able to move all the selected objects together at once. If you Shift-click on an object that’s already selected, that object is deselected.
If you want to select several objects, you can use the marquee method by clicking the mouse button on a blank area of the screen and holding the button down while dragging. As you drag the mouse, you’ll notice a box being drawn (this is the marquee). When you let go of the mouse, whatever objects fall within the boundaries of the marquee become selected (see Figure 4.22).
Sometimes it’s useful to use both methods to make your selections. For example, say you have a group of 10 objects and you want to select them all except for one in the middle. Using the first method, you might try to select one and then Shift-click each of the other eight objects to select the ones you want. However, you could use the marquee method to select them all and then Shift-click on the one object you don’t want, to get the same selection much faster.
Photoshop is primarily a pixel-based program, so most of the selection tools are focused on selected pixels instead of objects. In other words, you can’t just select the “sky” in a photograph because Photoshop doesn’t see it as a single object, but rather as a collection of many individual pixels. The primary selection tools in Photoshop are the Marquee selection tool, the Lasso tool, the Magic Wand tool, and the new Quick Selection tool. I’m sure you’re sitting at home thinking to yourself, “A magic wand? This guy is pulling my leg....” Well, before you put down this book to pick up the latest copy of the National Enquirer instead, let me explain.
The Marquee selection tool selects a range of pixels in much the same way we discussed marquee selections before. You drag a box, and whatever pixels fall inside the box become selected (see Figure 4.23). Several variations of the Marquee tool exist in Photoshop—one for making ellipse-shape selections, one for selecting a single vertical row of pixels, and one that does the same for horizontal rows of pixels. To add to your selection, press the Shift key to marquee more pixels (see Figure 4.24); to remove pixels from your selection, press the (Option) [Alt] key as you draw your marquee.

![As you press the Shift or (Option) [Alt] keys, the cursor indicates whether you are adding to or removing from your selection.](http://imgdetail.ebookreading.net/career_development/career_development_detail1_2/9780672329340/9780672329340__sams-teach-yourself__9780672329340__graphics__04fig24.jpg)
The Lasso tool acts exactly like the Marquee selection tool, with one major difference: It lets you select pixels by drawing a free-form path. Remember that with the Marquee tools, you can select only with rectangular- and elliptical-shape boundaries, but the Lasso tool lets you draw an irregularly shaped path. For example, the Elliptical Marquee tool might be perfect for selecting the sun in a sky, but the Lasso tool would be perfect for selecting branches of a tree (see Figure 4.25). To use the Lasso tool, you simply click and drag to draw a path around the area of pixels you want to select. If you let go of the mouse before you get back to the point of the path where you started, Photoshop draws a straight line from the last point your cursor was to the point where the path started, completing the shape for you.

In addition, Photoshop has a Polygonal Lasso tool, which enables you to mark boundaries by clicking repeatedly (almost like connect the dots), as well as a Magnetic Lasso tool, which “magically” detects edges as you drag along them. We discuss these in detail when we get to Chapter 6, “Using Adobe Photoshop CS3.”
Then there’s the Magic Wand tool. Because of the nature of pixel-based images (photographs), colors are usually painterly, or what we call continuous tone. So if there’s a blue sky in your picture, each blue pixel is probably a slightly different shade of blue. The Magic Wand tool selects regions of the same color, but with a tolerance. That means you can control how close the colors have to match to be selected. For example, you click on the blue sky, as we just mentioned, but you don’t want white clouds selected, right? The Magic Wand tool can differentiate the colors and select just the blue sky (see Figure 4.26). Why the folks at Adobe called this the Magic Wand tool is beyond me.

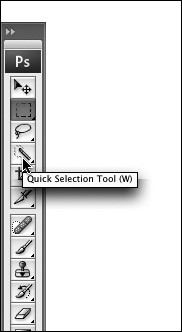
Photoshop CS3 also adds a brand new Quick Selection tool. This tool is based on the Magic Wand tool and is more intuitive and easier to use when making selections. To use the tool, simply click and drag over the areas you want to select. As you drag, the tool detects and selects areas of similar color and composition.
The world of design was forever changed with the introduction of Adobe Illustrator in the late 1980s. Since then, drawing on a computer has become an art form in itself. Illustrator introduced the world to the Pen tool, and since then Adobe applications have added many more such tools, each for specific tasks. Rectangle, Ellipse, Polygon, Star, and Line tools all give users the ability to quickly and easily draw basic shapes. The Pen, Pencil, and Paintbrush tools give users the freedom of creating more free-form and natural renderings. Many of these tools appear across the apps, and they all work in much the same way.
Drawing a rectangle in Photoshop, Illustrator, Flash, or InDesign can be accomplished in exactly the same way. You start by selecting the Rectangle tool, and then you click and drag (see Figure 4.27). We go into specific details about each of these tools when we talk about the applications themselves, but I wanted to point out how learning even one application in the suite can give you the basics on using the other apps as well.

The mouse is a wonderful thing (I’m not referring to the squeaky kind that likes cheese), but it can be inefficient for many tasks. For example, to choose the Print command so that you can print your document, you would move the mouse to the File menu, and then scan down the list of items and choose Print. Printing can be something you do quite often, and having to navigate back to that File menu each time can be time-consuming.
The good news is that there are keyboard shortcuts—or keys you can press on your keyboard to perform specific tasks or functions—that can save a whole lot of time. In the example I gave previously, simply pressing (Cmd-P) [Ctrl+P] invokes the Print command. In fact, there are hundreds of keyboard shortcuts for many different tasks. Power users take advantage of keyboard shortcuts to execute tasks quickly. Keyboard shortcuts can even be used to switch between different tools, enabling you to focus more clearly on the work at hand. You’ll find that as you become more adept at using keyboard shortcuts, switching between tools and performing certain functions will become second nature—almost to the point that you won’t be consciously aware that you are doing it.
Now, obviously, if you consider that each program can have a ton of keyboard shortcuts and there are several applications in the suite, that’s a lot of shortcuts to try to learn and remember. It’s no coincidence, then, that most of the keyboard shortcuts are consistent across the suite applications. This means that you can press the P key in Photoshop, Illustrator, Flash, or InDesign and expect to get the Pen tool.
Clearly, learning even one of the applications in the suite gives you a head start on learning all the others. Even if you’ve never used Flash, simply being familiar with Illustrator or Photoshop serves as an introductory course to using these other tools.
But there’s more....
Adobe realizes that its users are unique and that just about every designer wants a keyboard shortcut assigned to the feature or tool that he personally uses most often. At the same time, there are several hundred menu items, tools, and functions in each application, and there are a limited number of possible key combinations you can use on your keyboard. Above that, certain key commands are reserved for use by functions outside the applications. For example, (Cmd-Tab) [Ctrl+Tab] is a shortcut used by the operating system (both Windows XP and Mac OS X) to switch between open applications.
Photoshop, Illustrator, and InDesign all enable you to customize keyboard shortcuts. That means you can decide to assign your own shortcuts to functions or tools that you use most often.
Customizable keyboard shortcuts is one of those cross-product features that hasn’t been “sweetened” yet (sorry, couldn’t resist the pun), in that the implementation is slightly different depending on which application you’re in.
From Photoshop, InDesign, and Illustrator, choose Edit, Keyboard Shortcuts (see Figure 4.30). You can change or assign keyboard shortcuts to any tool, any menu item, and some panel menus as well. If you try to assign a shortcut that already exists (say, for another tool or function), you’ll get a warning telling you so, with the option to keep the older assignment or to adopt the new one you just defined.
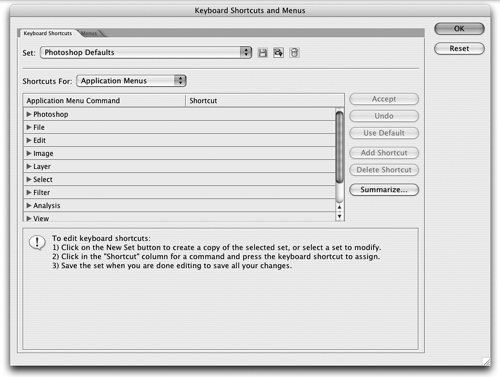
Most important of all, you have the capability to save your custom keyboard shortcut settings as an external file. This means you can secretly change all the keyboard shortcuts on your co-worker’s computer—um, I mean, you can easily distribute custom sets to co-workers or take your own sets with you if you regularly work on different computers or share a different computer with others.
As you use the individual applications in the suite, you’ll realize increasingly that you have to move information between them—and other applications outside the suite as well. There are several ways to do this, each method having its own pros and cons.
One of the quickest ways to move data between applications—be it text, images, or artwork—is via the copy and paste command. But like most things in life, the quicker way isn’t always the best way. In most cases, information is lost when copying and pasting between applications, including text formatting, color information, image resolution, metadata, and more. However, many times a simple copy and paste will save time and provide you with what you need. For example, you might want to draw a shape in Illustrator, taking advantage of the precise drawing tools in that application, and then copy and paste just the path into Photoshop or InDesign.
One example of when copy and paste does work well is between Illustrator and Flash. Adobe has done a lot of work with Flash to make it understand Illustrator information even via copy and paste.
The applications in the suite can both import and export different file formats. Depending on where your files and documents have to go, you can choose from various formats—each with its own particular strength or use. Some of the more common formats used for print workflows are PDF, TIFF, and EPS. Popular web formats are GIF, JPEG, SWF, and SVG. Illustrator also has the capability to save files in Photoshop (PSD) format and contains a Save for Microsoft Office command.
Most applications in the suite can also place or open these formats—along with a long list of other formats, such as Microsoft Word or Excel documents, FreeHand files, and QuarkXPress files—giving you the capability to work with just about any file that might come your way.
Exporting and importing files might seem like an extra step, but the formats are richer and support more file information (including important metadata, in many cases—we cover this topic later in the chapter). It’s also a necessary step when working with other applications that aren’t in the suite (yes, there is a whole other world out there).
One of the strengths of using the Creative Suite in your workflow is that all the suite applications can support the native file formats of each other. This means that you can easily place a native Illustrator file into Photoshop, InDesign, or Flash, and even open it in Adobe Acrobat. Other non-Adobe applications might require that you export a specific file format, such as EPS, from Illustrator.
Of course, this is an extremely valuable benefit. As we discussed back in Chapter 3, “The Game Plan: Developing a Workflow,” this enables you to keep just one version of your file (instead of native files as well as EPS, TIFF, and JPEG versions, and so on) and also enables you to take advantage of the rich format that these file formats support. For example, you can access all the layers in a Photoshop file when you open it inside Illustrator. You can view and hide layers from both InDesign and Illustrator files when you’re in Acrobat. You can access Photoshop layer comps when you place native Photoshop (.psd) files into InDesign and Illustrator.
When possible, it’s best to use native file formats because those file formats retain the most information. An added benefit to this method is that you retain the individual files, making it easy to quickly update different elements in your design. Using the Edit Original command found in each of the applications, you can easily make changes to a graphic—and have that graphic automatically updated throughout all the documents that it is placed in. We discuss how to do that from each of the applications in Part II, “The Applications.”
One of the biggest time-savers the suite offers is the capability to create PDF files directly and consistently. PDF files are commonly used to get client and manager approvals, and to create proofs. PDF files are also accepted by a large majority of printers and service providers, and the format is now accepted by virtually every magazine or newspaper publisher for submitting advertisements.
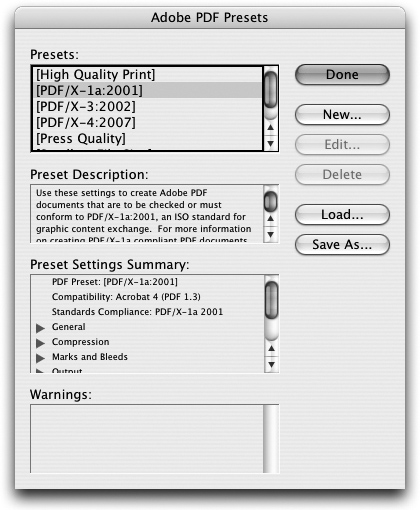
The truth is, many different settings are available when you save a PDF file. For example, you can choose from different compression settings, color settings, print-specific settings (such as crop marks and bleeds), and even password security settings. To avoid having to go through all the settings each time you wanted to create a PDF file, Adobe added PDF Presets, which was a way to save your PDF settings. However, these presets weren’t consistent across applications.
In previous versions, each individual Adobe application had different PDF settings, making it confusing and difficult to get consistent PDF creation across all the applications. For example, a PDF saved from Illustrator could be very different than a PDF saved from InDesign. And because the PDF settings themselves were different, you couldn’t even try to create similar PDF presets yourself within each application.
With Adobe Creative Suite, all applications now share the same PDF presets. This means that you can open Illustrator and save a PDF preset, and then open InDesign and use that very same preset (see Figure 4.31). Settings are now similar, allowing for consistent and reliable PDF creation.
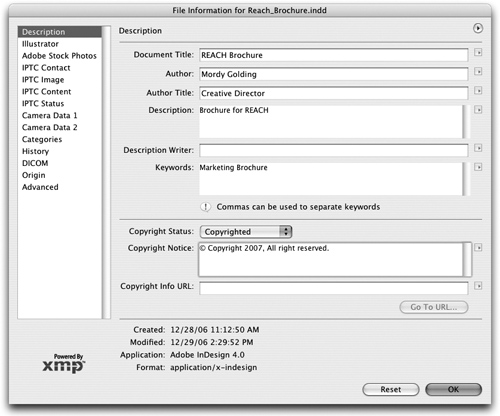
Meta-what? If you’re not familiar with the term, metadata refers to data that resides inside a file that provides extra information about the file itself. For example, a file might contain information about who created the file, when it was created, what client or job number it was created for, and so on. Digital photos might contain copyright information and even data about what kind of digital camera was used and what the camera settings were (called EXIF metadata) when the photo was taken. When you think about it, metadata makes files smart because the files themselves know more about what’s in them.
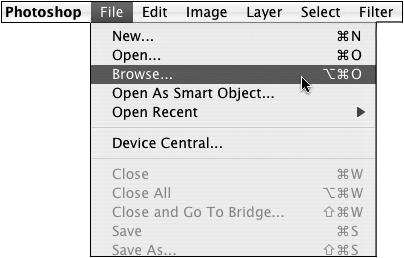
Some metadata is added automatically to every file (such as which application created it), but you can also add your own. In any of the Adobe Suite applications, you can choose File, File Info to access the File Information dialog box, where you can add specific information to your file (see Figure 4.32). In fact, Adobe applications can automatically add metadata to files. For example, when you download comp images using the Adobe Stock Photos service (which we talk about in Chapter 5, “Using Adobe Bridge CS3”), metadata is added so that InDesign knows the image is a low-resolution comp image. When you preflight the file in InDesign, this metadata enables InDesign to alert you that the image isn’t a high-resolution image that’s fit to print at high quality.
Adobe helped to publish an open-standard platform for metadata called Extensible Metadata Platform (XMP), which is basically a way to describe metadata using XML. All Adobe applications write metadata into an XML header in the files they save. This information is available to any application or system that can read it. And although metadata is pretty cool on its own, it takes on a whole new meaning when you consider what Adobe Bridge can do with that information. We’ll talk more about that in Chapter 5 as well.
By now you have a solid understanding of what all the applications are for and when they should be used, along with a general understanding of how they work hand in hand with each other. All you have left to do now is actually learn each of the applications. Have no fear—if you’ve gotten this far, you’re going to do just fine. In the next part of the book, we jump into each of the applications one by one and fully understand the strengths and uses for each of them.