
In this section, you will learn how to effectively work with Excel 2010 and explore the new possibilities.
To quickly create a list of all months of the year, perform the following steps:
Select File/New and click Create to open an empty Excel workbook.
Enter the following text in columns A2 through E2 (see Figure 1-1):
Month (A2)
Purchase (B2)
Sales (C2)
Profit margin (D2)
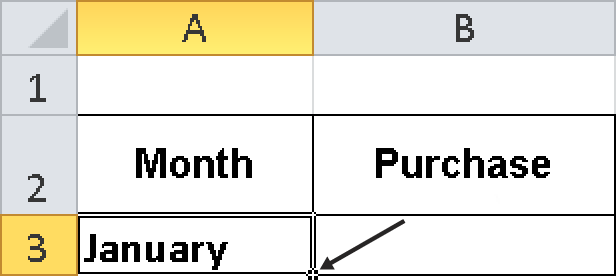
To enter the names of the months, you will use the fill feature. Start by entering January in cell A3.
Select cell A3 and point to the small square in the lower-right corner of the selected cell, the fill handle (see Figure 1-2). The mouse pointer changes to a black crosshair pointer.
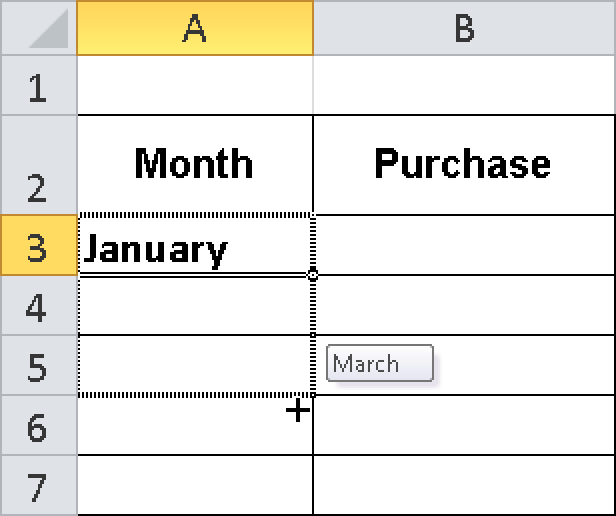
Drag the crosshairs into cell A14. While you drag the crosshairs down, you will see the names of the months in the preview (see Figure 1-3).
Release the mouse button in cell A14 to display all months from January through December (see Figure 1-4).


This feature can be used to fill rows or columns; it works for weekdays, months, and dates. To fill a number series, fill in the first two numbers in the sequence manually, select the two completed cells, and then drag the fill handle. The function can also be useful if you want to create your own data or AutoFill series. For example, if you don’t want to enter a list of sales managers over and over again, you can define your own AutoFill list:
Click the last sheet tab at the bottom of the workbook, which is the one with the new sheet symbol, to open a new sheet. Alternatively, you can press the Ctrl+F11 key combination.
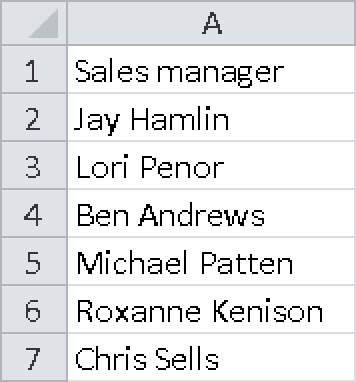
Enter Sales manager in a free cell.
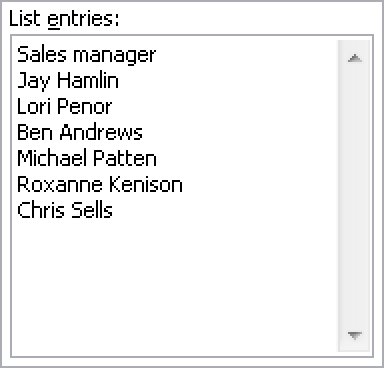
Enter the names of the sales managers in the cells below the Sales manager title (see Figure 1-5).
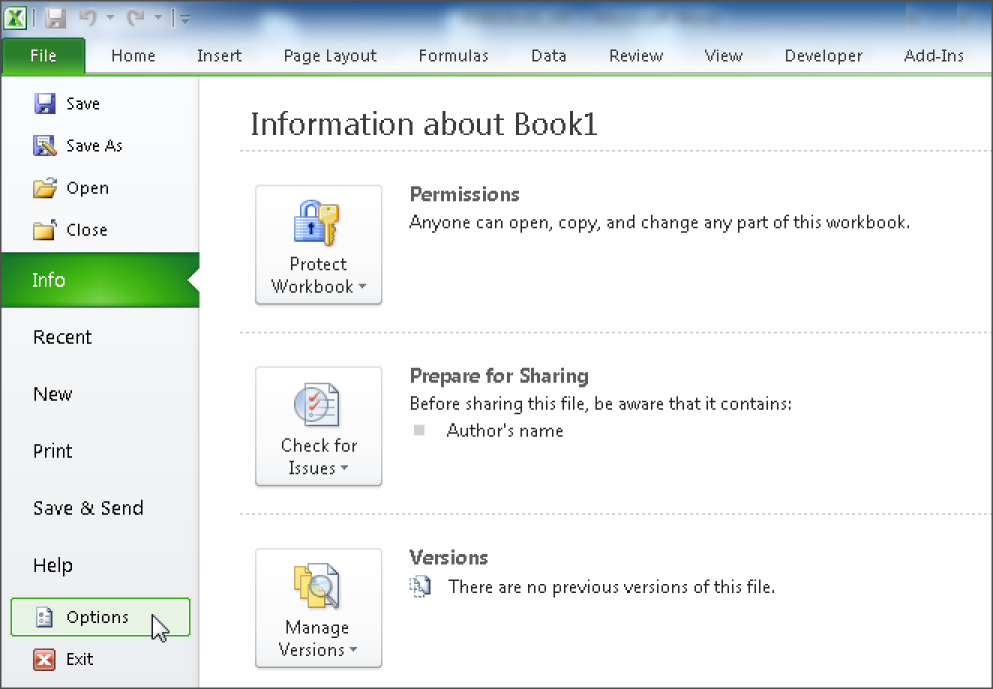
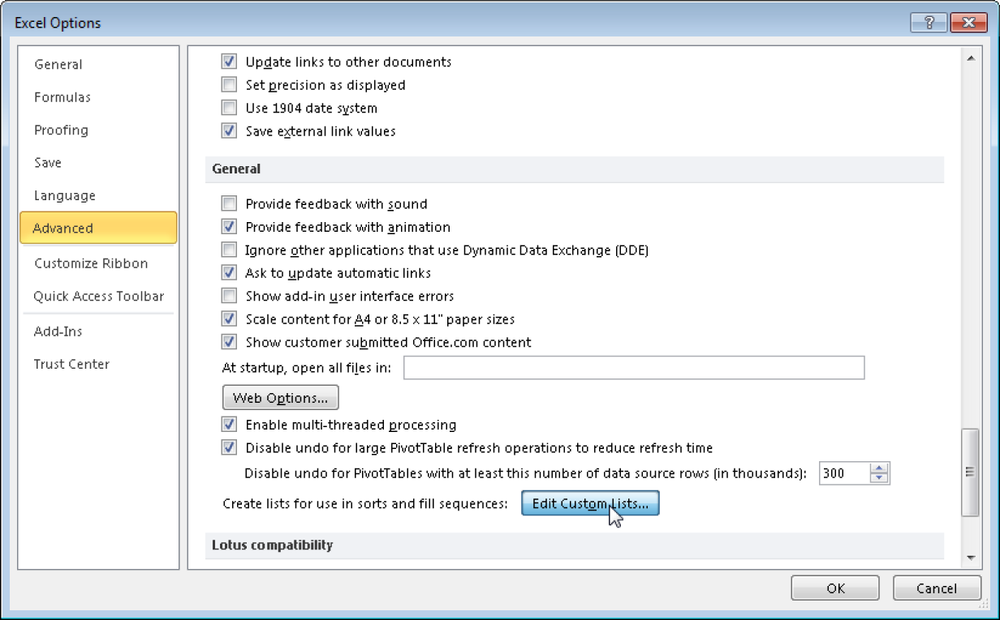
Click the File tab and select Options (see Figure 1-6).
In the Excel Options dialog box, select the Advanced category and click Edit Custom Lists in the General section (see Figure 1-7).
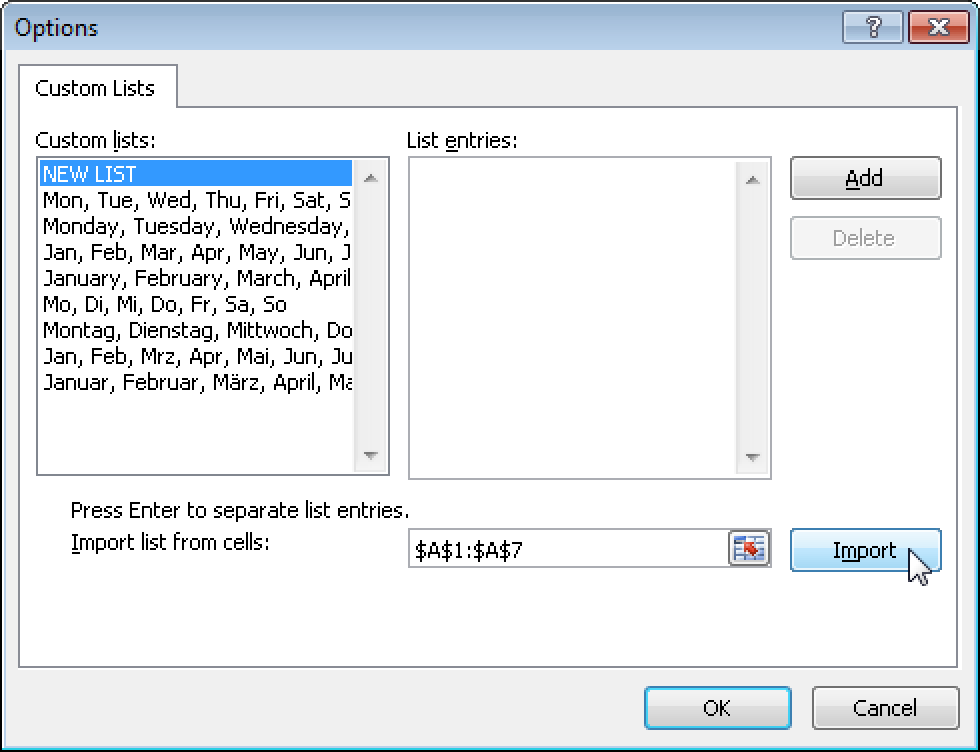
Make sure that the cell reference for the selected list is displayed in the Import List From Cells field, and click Import (see Figure 1-8).
The elements in the selected list are added to the List Entries field (see Figure 1-9).
Click OK twice.
Now you have to enter only the name of one sales manager in a cell and drag the fill handle in the desired direction to generate the list of the sales managers on any spreadsheet. The series is created automatically.
This strategy gives you almost unlimited possibilities for creating a data series.