
Chapter 12. Creating Tables
In this chapter, you will:
If you’ve used a word-processing program before, you’re probably already familiar with the task of creating tables. A table is a grid of rows and columns, the intersections of which form cells. Each cell is a distinct area, into which you can place text, graphics, or even other tables.
HTML handles tables very well, and you can use them to organize and present complex data to your site visitors. For example, you could display your store’s inventory in a table.
Tables can also be used as a page-layout tool. You can create a large table that occupies the entire page, and then place content into the cells to position that content on the page. For example, each of the sections (the masthead, the navigation bar, the body, and the footer) might reside in its own separate table cell.
Note
One Important drawback to using tables for layout is that they make a page less accessible. It is much more difficult for someone using a screen-reading program to access a tabular layout than a division-based one, for example. If accessibility is Important to you, you might want to use division-based layouts for your website.
In this chapter, you’ll learn the basic HTML for creating tables, rows, and cells. You’ll also learn how to specify cell sizes and merge cells to create larger areas. After you master these skills, you’ll put them to work by creating a table-based page layout grid. Then, in the next chapter, you’ll learn how to format tables.
Important
Before you can use the practice files provided for this chapter, you need to install them from the book’s companion content page to their default locations. See Code Samples in the beginning of this book for more information.
Creating a Simple Table
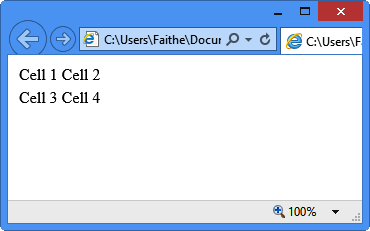
The <table> tag creates an HTML table. Within that tag, you include one or more <tr> tags, which define the table’s rows, and within each <tr> tag, you define one or more <td> tags, which define the cells:
<table>
   <tr>
      <td>Cell 1</td>
      <td>Cell 2</td>
   </tr>
   <tr>
      <td>Cell 3</td>
      <td>Cell 4</td>
   </tr>
</table>
Displayed in a browser, this code creates a table that looks like what’s shown in Figure 12-1.
This table is not very interesting to look at in its default state. And because by default HTML tables have no borders or shading, you can barely even tell it’s a table at all. The text simply appears where it’s supposed to appear according to the table’s specification. (That’s a big hint about how you will use tables for layout later in the chapter.)
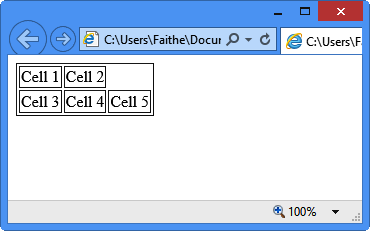
The number of columns within a table is equal to the largest number of <td> tags in any given row. Watch what happens when I add another <td> tag to the second row. I’m also going to add a border=“1” attribute in the <table> tag to make the table borders visible so you can see what’s going on more clearly (see Figure 12-2).
Note
You’ll learn more about that attribute in Chapter 13.
The additions are shown in bold text in the following code:
<tableborder="1"> <tr> <td>Cell 1</td> <td>Cell 2</td> </tr> <tr> <td>Cell 3</td> <td>Cell 4</td><td>Cell 5</td></tr> </table>
As shown in Figure 12-2, notice that because the rows do not have the same number of cells, the browser inserts a blank space in the row that doesn’t include the extra cell. In the section Spanning (Merging) Table Cells on page 215, you will learn how to merge multiple cells into a single cell.
In the following exercise, you will create a simple table.
Create a Table
Create a Table
In Notepad and Internet Explorer, open the products.htm file located in the DocumentsMicrosoft PressHTML5 Start Here12TablesCreatingTable folder.
In Notepad, immediately below the <div id=“main”> tag, create the table, leaving a few blank lines between the opening and closing tags:
<table></table>Within the table, create three rows. Indenting the lines as shown in the following code is optional but recommended:
<table>
<tr></tr><tr></tr><tr></tr></table>Within the first row, create four columns:
<table> <tr>
<td> </td><td> </td><td> </td><td> </td></tr> <tr> </tr> <tr> </tr> </table>Type the text that will display in the first row of the table:
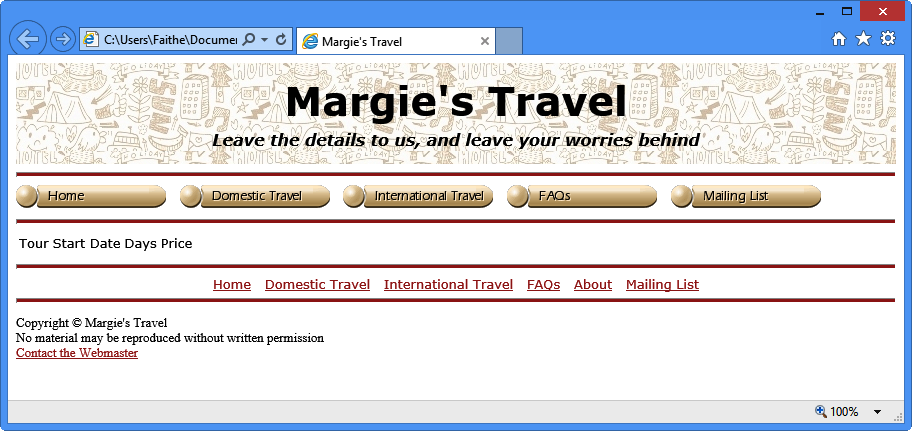
<table>
   <tr>
       <td>Tour</td>
       <td>Start Date</td>
       <td>Days</td>
       <td>Price</td>
   </tr>
   <tr>
   </tr>
   <tr>
   </tr>
</table>
Save the file and then refresh Internet Explorer.
Notice that the browser ignores the two empty rows.
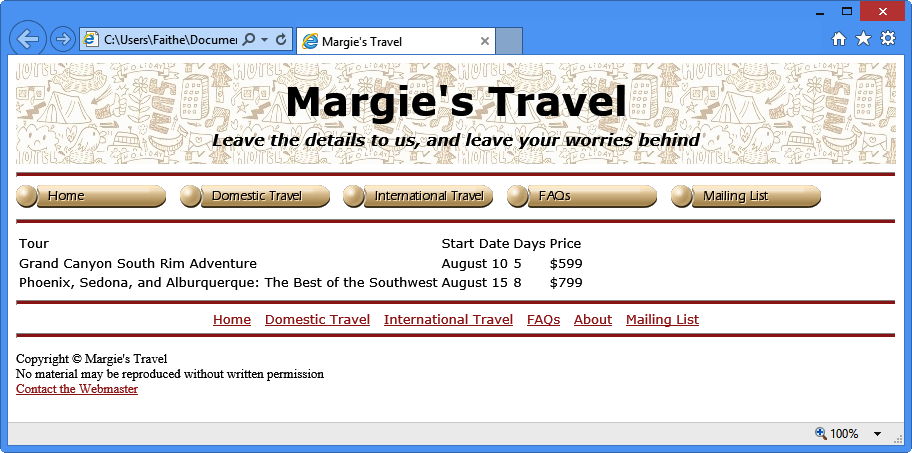
In Notepad, type the information about two tours:
<table> <tr> <td>Tour</td> <td>Start Date</td> <td>Days</td> <td>Price</td> </tr> <tr><td>Grand Canyon South Rim Adventure</td><td>August 10</td><td>5</td><td>$599</td></tr> <tr><td>Phoenix, Sedona, and Albuquerque: The Best of the Southwest</td><td>August 15</td><td>8</td><td>$799</td></tr> </table>Save the file and then refresh Internet Explorer.
Notice that the columns have expanded to accommodate the longest entries.
Close Notepad and Internet Explorer.
Specifying the Size of a Table
By default, a table sizes itself to accommodate all of its cells, and each cell’s height and width changes to accommodate the largest entry in that row or column. The table structure expands or contracts as needed when you add or remove cells or content within cells.
With these default settings, a table can end up looking rather cramped, especially if you don’t use borders between cells (which you’ll learn more about in Chapter 13). In the table from the previous exercise, for example, some extra space would be welcome.
One way to add extra spacing in this instance would be to set the overall size of the table to 100 percent. This forces the table to expand horizontally to fill the available space in the browser window. To do this, add a width attribute to the opening <table> tag:
<table width="100%">
Alternatively, you can place the width specification in a style:
<table style="width: 100%">
To apply the width specification to all tables, place it in a style sheet:
table {width: "100%"}You don’t need to specify 100 percent; you could also set the table’s width to 50, 75, or any other percentage. You can do the same thing with table height, making it expand to fill the entire browser window vertically by using the following:
table (height: "100%")
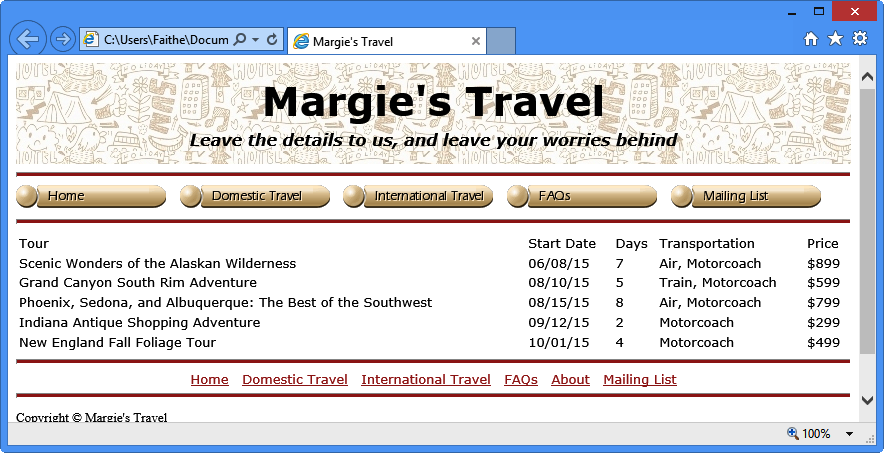
The only drawback to specifying width and/or height by percentage is that you cannot be certain which size browser window the visitors to your site will be using. This example looks great in a moderate-sized window (see Figure 12-3).
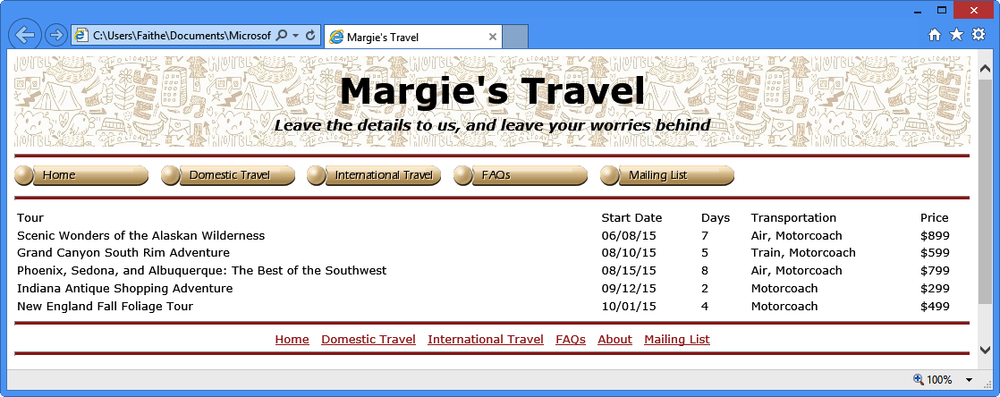
But in a smaller window (see Figure 12-4), it becomes just as cramped as before and the text wraps to multiple lines.

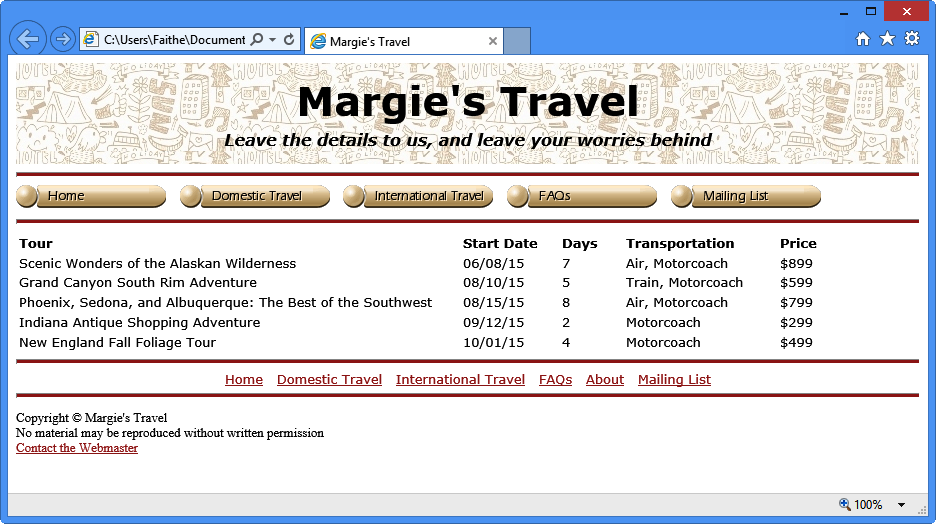
And in a larger window, the extra space between the columns becomes exaggerated (see Figure 12-5).
An alternative approach is to specify a number of pixels for the table’s width. That way, the width the table requires in pixels does not change no matter what the size of the browser window.
For example, to lock the table to a width of 750 pixels, use the following:
<table width="750px">
When a browser renders a fixed-width table in a smaller browser window, a horizontal scroll bar appears in the window. When displayed in a larger window, extra horizontal space displays to the right of the table (assuming the table is left-aligned) rather than being distributed throughout the table.
Although it is less common, there might also be cases where it is useful to set a specific table height, either in percentage or pixels. You do this by using the same method, except you specify height instead. For example, in a tag, use this:
<table height="400px">
To specify height in a style rule, use this:
table (height: 400px}
In the following exercise, you will change a table’s width using two different methods and then check its appearance in various browser window sizes.
Resize a Table
Resize a Table
In Notepad and Internet Explorer, open the products.htm file located in the DocumentsMicrosoft PressHTML5 Start Here12TablesSpecifyingSize folder.
Modify the opening <table> tag to make the table exactly 700 pixels wide:
<table
width="700px">Save the file and then refresh Internet Explorer. Experiment with different browser window sizes and note how the table looks at each size.
Edit the <table> tag to make the table fill the width of the browser window:
<table width="
100%">Save the file and then refresh Internet Explorer. Experiment with different browser window sizes and note how the table looks at each size.
Remove the width attribute from the table tag:
<table>
Create a style rule in the <head> section that sets the default width for all tables to 100 percent of the browser window width:
<style>table {width: 100%}</style>Save the file and then refresh Internet Explorer. It should not have changed from the last time you looked at it.
Add a height attribute to the <table> tag that sets the table height at exactly 250 pixels:
<table
height="250px">Save the file and then refresh Internet Explorer. Extra space has been distributed vertically throughout the table.
To make the heading row of the table stand out, enclose the text in each cell of the first row in <b> tags:
<tr> <td><b>Tour</b>< /td> <td><b>Start Date</b>/td> <td><b>Days</b>< /td> <td><b>Transportation</b></td> <td><b>Price</b></td> </tr>Note
If you use the <th> tag instead of <td> for the cells in heading rows, you don’t have to manually make the content bold in those cells, because most browsers display <th> content in boldface. However, be aware that the <th> tag might also bring with it some unintended formatting consequences. For example, in Internet Explorer 10, <th> cells are centered horizontally.
Save the file and then refresh Internet Explorer to see the bold column headings.
Close Notepad and Internet Explorer.
Specifying the Width of a Column
Setting the overall table size is useful, but for more control, you might prefer to set the width of each column separately. To set the width of a column to a certain minimum amount, specify a width in the <td> tag for any cell within that column. You can use the same method you used for the <table> tag in the preceding section, as shown in the following:
<td width="200px">
To specify the width of a column by using a style, use this:
<td style="width: 200px">
The traditional place to set the column width is in the first row of the table, but that is not a requirement; you can set a width for any cell in any row. The column as a whole will be as wide as the widest cell in that column.
In the following code, specific values are set for the column widths:
<table border="1">
<tr>
<td width="100px"> </td>
<td width="400px"> </td>
<td width="100px"> </td>
</tr>
<tr>
<td> </td>
<td> </td>
<td> </td>
</tr>
</table>This code creates a table that looks like that shown in Figure 12-6.

Tip
The examples shown here use nonbreaking spaces ( ) as placeholders in empty cells. This is optional, but it makes an empty table display as it will when you place content in the cells, which can be important when you are checking your work in a browser window as you build your page.
If you enter some text in one of the cells that exceeds the column’s width, Internet Explorer wraps the text into multiple lines, as needed (see Figure 12-7).

Note
The text-wrapping behavior shown in the preceding example is not universal across all browsers. Some older versions of Internet Explorer, for example, will still expand the first column to fit all the text on one line, as does the current version of Google Chrome. This illustrates the importance of checking your work in multiple browsers.
If you widen the browser window, the text remains wrapped because the column width is fixed.
You can also specify column width in percentages, for different wrapping and resizing behavior at different browser window widths. Suppose in the previous example that you specified 20 percent, 60 percent, and 20 percent for each of the three columns, respectively:
<table border="1">
<tr>
<td width="20%"> </td>
<td width="60%"> </td>
<td width="20%"> </td>
</tr>
<tr>
<td> </td>
<td> </td>
<td> </td>
</tr>
</table>You would start out with a very small table, because the table is only as large as it needs to be to hold its content (see Figure 12-8).

However, when you add text to a cell, the table expands. Keep in mind that the table expands proportionally; the first column will always be 20 percent of the width of the entire table, the second column 60 percent, and so on. The width of the browser window determines how much that first column can expand while still maintaining the proportion. Figure 12-9 shows what the example table looks like in an 800 x 600 browser window, with sample text entered in the first cell, as in the previous example.

However, if you expand the browser window to, for example, 1024 x 768, the table cells stretch out to fill the available space, keeping their 20/60/20 percent proportions (see Figure 12-10).

As you might guess, things can get complicated when you start combining overall table widths with individual cell widths. If a table doesn’t turn out the way you expected, try removing all width specifications from the <table> and <td> tags and all width-related style rules from the style sheet, and then start over.
In the following exercise, you will set specific widths for each column in a table.
Change Table Column Widths
Change Table Column Widths
In Notepad and Internet Explorer, open the products.htm file located in the DocumentsMicrosoft PressHTML5 Start Here12TablesSettingWidth folder.
In Internet Explorer, examine the widths of the columns. Change the browser window to several different widths to see how the columns change.
In Notepad, set the width of the first column of the table to 400 pixels by using a style attribute:
<tr> <tdstyle="width: 440px"><b>Tour</b></td > <td><b>Start Date</b></td> <td><b>Days</b></td> <td><b>Transportation</b></td> <td><b>Price</b></td> </tr>Set the width of the second column to 95 pixels:
<tr> <td style="width: 440px"><b>Tour</b></td> <tdstyle="width: 95px"><b>Start Date</b>< /td> <td><b>Days</b></td> <td><b>Transportation</b></td> <td><b>Price</b></td> </tr>Set the width of the third column to 60 pixels and the fourth column to 150 pixels:
<tr> <td style="width: 440px"><b>Tour</b></td> <td style="width: 95px"><b>Start Date</b></td> <tdstyle="width: 60px"><b>Days</b></td > <tdstyle="width: 150px"><b>Transportation</b ></td> <td><b>Price</b></td> </tr>Save the file and then refresh Internet Explorer.
Experiment with various window widths in Internet Explorer to see how the table’s column widths behave compared to step 1.
Close Notepad and Internet Explorer.
Spanning (Merging) Table Cells
As you have seen in the preceding sections, every cell in a given row must be the same height and every cell in a given column must be the same width. You can’t make individual cells different heights or widths, but you can span (merge) two or more adjacent cells so that one cell spans multiple rows and/or columns. This technique is useful for centering text across several columns. It also comes in very handy when creating table-based page layouts, which you’ll learn about on Key Points.
To merge a cell into adjacent cells to its right, use the colspan attribute and specify the number of columns to be spanned:
<td colspan="3">
To merge a cell into adjacent cells below it, use the rowspan attribute and specify the number of rows to be spanned:
<td rowspan="2">
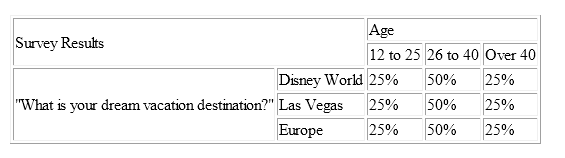
Using those two attributes, you can create sophisticated table layouts. For example, the following table has five columns and five rows, but some of the cells span multiple columns or rows:
<table border="1">
   <tr>
      <td colspan="2" rowspan="2">Survey Results</td>
      <td colspan="3">Age</td>
   </tr>
   <tr>
      <td>12 to 25</td>
      <td>26 to 40</td>
      <td>Over 40</td>
   </tr>
   <tr>
      <td rowspan="3">"What is your dream vacation destination?"</td>
      <td>Disneyworld</td>
      <td>25%</td>
      <td>50%</td>
      <td>25%</td>
   </tr>
   <tr>
      <td>Las Vegas</td>
      <td>25%</td>
      <td>50%</td>
      <td>25%</td>
   </tr>
   <tr>
      <td>Europe</td>
      <td>25%</td>
      <td>50%</td>
      <td>25%</td>
   </tr>
</table>
The preceding code creates the table shown in Figure 12-11.
In the following exercise, you will create two simple column spans.
Change Table Column Widths
Change Table Column Widths
In Notepad and Internet Explorer, open the products.htm file located in the DocumentsMicrosoft PressHTML5 Start Here12TablesSpanningCells folder.
In Internet Explorer, view the products.htm file.
Notice that the table title is not centered over the table and that the note at the bottom of the table is bunched up in the last column.
In Notepad, modify the table title to span all five columns and to be centered:
<tr><b> <tdcolspan="5"style="font-size: 1.2em;text-align: center">Tour Listing</td> <td></td> <td></td> <td></td> <td></td> </b></tr>In the last row of the table, move the cell containing the note to the second position:
<tr> <td></td><td>Note: Prices shown do not include sales tax.</td><td></td> <td></td> <td></td> </tr>Format the note to span four columns:
<tr> <td></td> <tdcolspan="4">Note: Prices shown do not include sale s tax.</td> <td></td> <td></td> <td></td> </tr>Save the file and then refresh Internet Explorer.
Close Notepad and Internet Explorer.

Using Tables for Page Layout
In addition to their value in laying out tabular data, tables are also useful in HTML for their page-structuring capabilities.
It is customary for a webpage to have a navigation bar at the top or on the left side. It is fairly easy to create a horizontal navigation bar with regular paragraphs, as you learned in Chapter 10, but to create a vertical navigation bar, you must somehow break the page into sections. One way to do that is by using divisions, as you learned in Chapter 11. Another way is to use a table.
When using a table for page layout, you might place your navigation hyperlinks in the column farthest to the left and then place the body of your content in the other columns. The table cells act as containers into which you can put anything: paragraphs, lists, headings, graphics, and so on.
Some web designers prefer to place everything in the table and use row and column spans to merge cells where needed. Others place only certain content in a table, letting the rest of the text float around it.
The skills you have learned so far in this chapter will serve you well when creating table-based layouts. You can specify the exact widths of the columns by pixels or their relative width in percentages, and you can create row or column spans as needed.
In the following exercise, you will convert a page with a horizontal navigation bar to one with a vertical bar by using a table.
Build a Table-Based Page Layout
Build a Table-Based Page Layout
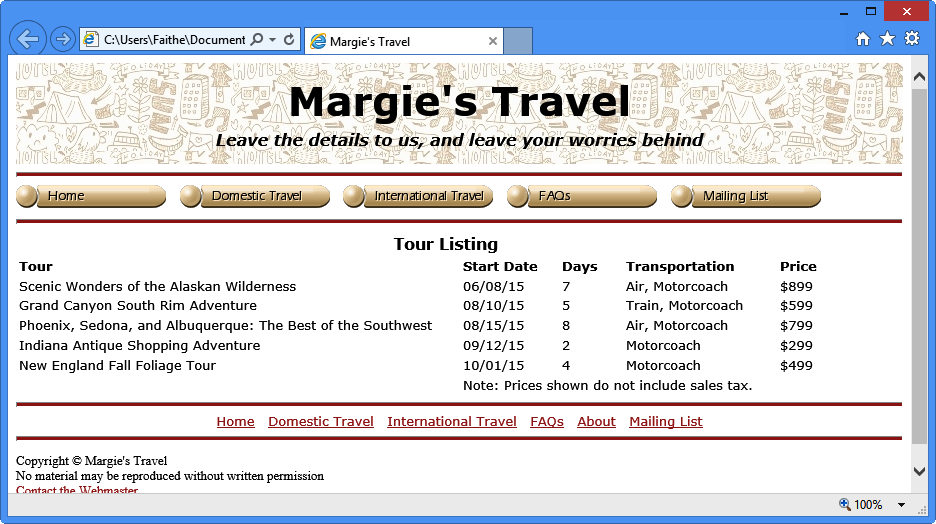
In Notepad and Internet Explorer, open the index.htm file located in the DocumentsMicrosoft PressHTML5 Start Here12TablesBuildingLayout folder.
View the index file in Internet Explorer. Note the navigation bar position.
Delete the <hr> tags before and after the top navigation bar.
Enclose the top navigation bar in a table cell by adding an opening <table>, <tr>, and <td> tag above it and then adding a closing </td> tag below it:
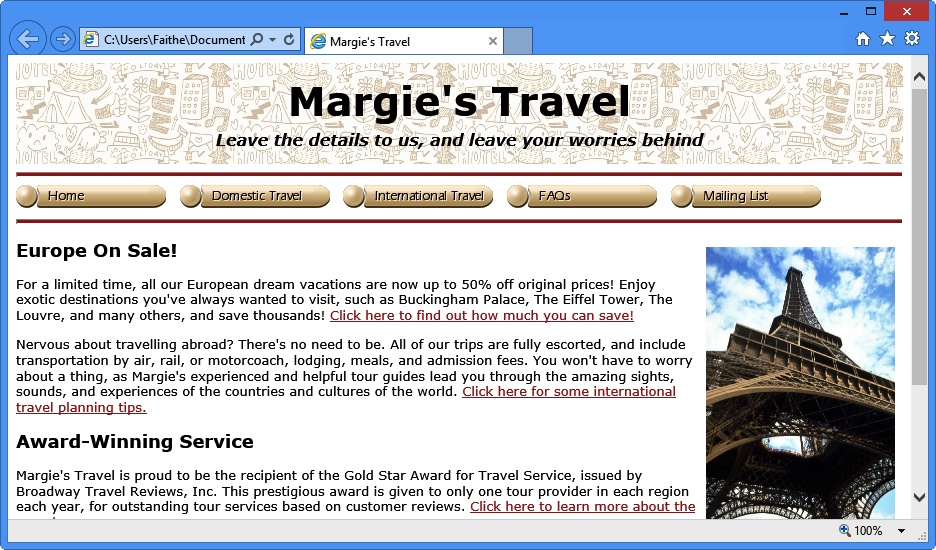
<table><tr><td><nav> <p style="margin:0px"> <a href="index.htm"><img src="images/home.png" style="border: none"></a> <a href="domestic.htm"><img src="images/domestic.png" style="border: none"> </a> <a href="international.htm"><img src="images/international.png" style="border:none"></a> <a href="faqs.htm"><img src="images/faqs.png" style="border:none"></a> <a href="mailing.htm"><img src="images/mailing.png" style="border:none"></a > </p> </nav></td>Enclose the main and aside divisions together in a single <td> tag and then end the row and the table after the aside division:
<td><div id="main"> <img src="images/eiffel.jpg" style="margin: 8px; float: right" height=300px> <h2>Europe On Sale!</h2><td> . . . <aside> <p><b>Unfamiliar Terrain?</b> Run into a travel-related term here on our site that you aren't familiar with? Look it up in our <a href="glossary.htm" target="_blank">Glossary</a>.</p> </aside></td></tr></table>Delete all the codes from the top navigation bar.
Delete the <p> and </p> tags that surround the top navigation bar and then enclose each of the buttons in the top navigation bar in its own separate <p> tag:
<table> <tr> <td> <nav>
<p><a href="index.htm"><img src="images/home.png" style="border: none"></a></p><p><a href="domestic.htm"><img src="images/domestic.png" style="border: none"></a></p><p><a href="international.htm"><img src="images/international.png" style="border:none"></a></p><p><a href="faqs.htm"><img src="images/faqs.png" style="border:none"></a></p><p><a href="mailing.htm"><img src="images/mailing.png" style="border:none"> </a></p></nav> </td>Note
In Chapter 9, you learned how to create extra vertical space between buttons by increasing the line spacing. The previous example takes an alternate approach by making each button a separate paragraph, allowing it to inherit the default spacing between paragraphs.
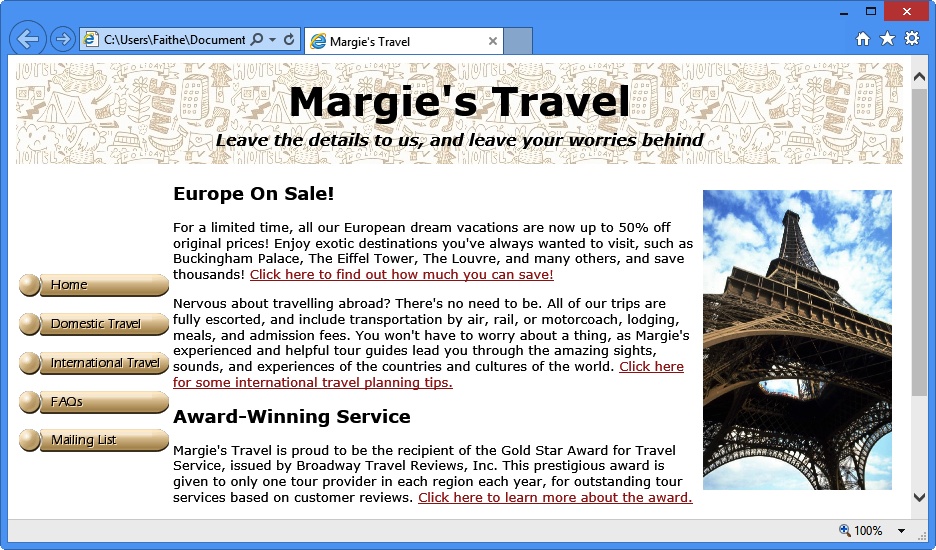
Save the file and then refresh Internet Explorer. It looks all right, except there needs to be more padding between the buttons and the body text and the buttons should top-align vertically rather than being vertically centered in their cells.
Format the first column to be exactly 170 pixels wide and to be vertically aligned at the top:
<table>
<tr>
<td style="width: 170px; vertical-align: top">
<nav>
Note
I’m jumping ahead just a little with the previous example; you don’t officially learn about aligning text in cells until Chapter 13. But the buttons look so much better top-aligned that I thought you might want to make them that way sooner rather than later. See Chapter 13 for more information about vertical and horizontal in-cell alignments.
Save the file and then refresh Internet Explorer.
The navigation buttons are now more attractively spaced and aligned with the top of the text in the main division.
Close Notepad and Internet Explorer.
Key Points
To create a table, use the <table> tag. Enclose each row in a <tr> tag and enclose each cell in each row in a <td> tag.
You can specify table size in either pixels or as a percentage of the page width. Use the width attribute like this: <table width=“400”>.
You can also set width by using a style rule like this: <table style=“width: 400”>.
You can specify the width of each cell, either in percentages or pixels, like this: <td width=“100”> or <td style=“width: 100”>.
To merge (span) multiple cells, place the colspan or rowspan attribute in the cell at the top of or farthest to the left in the range to be spanned like this: <td colspan=“2”>.
You can use tables as containers to facilitate page layout. You can place all or part of the body of a page in a table.