
Chapter 16. HTML and Microsoft Expression Web
In this chapter, you will:
Create a new page using a CSS template
Throughout this book, you’ve been building your HTML knowledge by working directly with the code in Notepad. That’s the best way to understand what is really going on in a webpage.
However, after you achieve basic HTML proficiency, you might decide that using a web-development application such as Microsoft Expression Web makes sense for your situation. Web development software can dramatically cut down on the amount of typing that you need to do and provides you with the ability to both edit and preview your pages within a single application.
In this chapter, you will learn the basics of Microsoft Expression Web, which is one possible application that you might choose for HTML editing. Expression Web is a simple graphical web-design application, sold in retail stores and online. You’ll learn how to create a basic website using Expression Web, how to create a page that uses a CSS-based layout, and how to place and format text and graphics on the pages of your website.
This chapter uses Expression Web 4 for its examples. You can get a free trial of Expression Web 4 at http://www.microsoft.com/download/details.aspx?id=7764. Expression Web 4 provides only limited support for HTML5, but you can manually type in any HTML5 tags as needed. After experimenting in this chapter with Expression Web, you might want to go further with the program, or you might want to try out some other web development applications such as Dreamweaver or Visual Studio.
Important
Before you can use the practice files provided for this chapter, you need to install them from the book’s companion content to their default locations. See the section Code Samples in the beginning of this book for more information.
Exploring the Expression Web Interface
You can purchase Expression Web either as a standalone product or as a part of the Microsoft Expression Studio suite, along with several other development tools. After installing Expression Web on your PC, you can run it from the Start screen (or you can run it from the Start menu if you are using a in Windows version prior to Windows 8), the same as any other application.
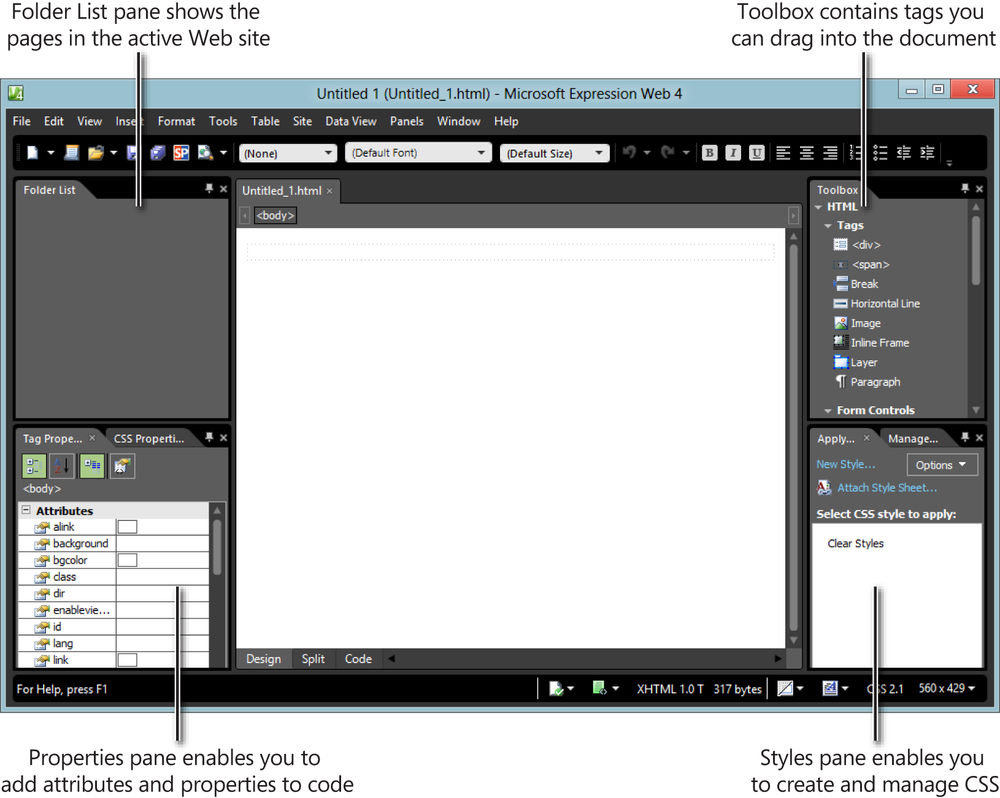
When you open Expression Web, you’ll see a five-pane interface (see Figure 16-1). The large pane in the center is where you will create your webpages; the four smaller panes along the sides provide access to tools and lists. The figures in this chapter show Expression Web running under Windows 8, where the interface is mostly black and gray; if you are using an earlier Windows version, the colors might be different.
In the following exercise, you will open a webpage in Expression Web and view it in several ways.
View a Webpage in Expression Web
View a Webpage in Expression Web
From the Start screen (Windows 8) or Start menu (earlier Windows versions), click Microsoft Expression Web.
Click File | Open.
Navigate to the folder containing the files for this lesson. Double-click the ViewingPage folder and then double-click the index.htm file.
The files to use for this exercise are located in the DocumentsMicrosoft PressHTML5 Start Here16ExpressionViewingPage folder.
The file displays in Expression Web.
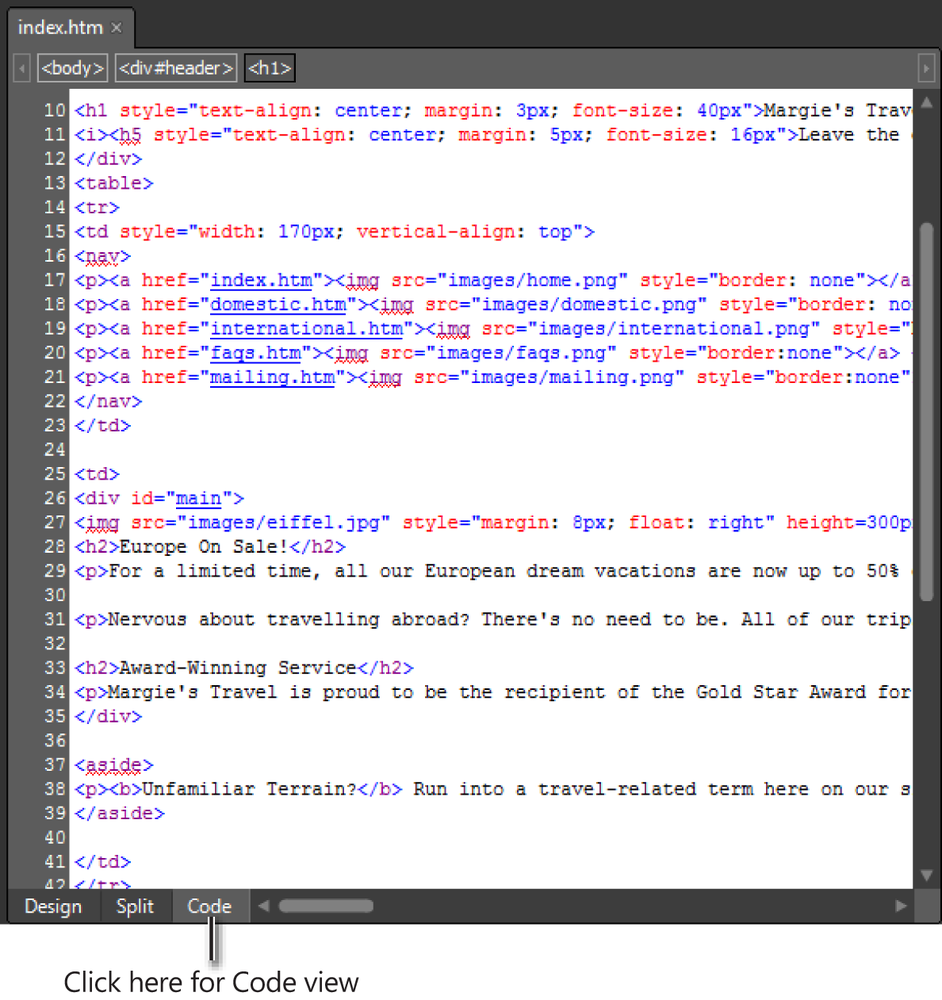
At the bottom of the editing page, click the Code tab.
The page displays as HTML code.
When in Code View, you see the actual HTML tags as if you were working in Notepad; however, Expression Web understands the syntax of HTML elements, so it colors content, tags, and attributes differently, in order to simplify reading the code.
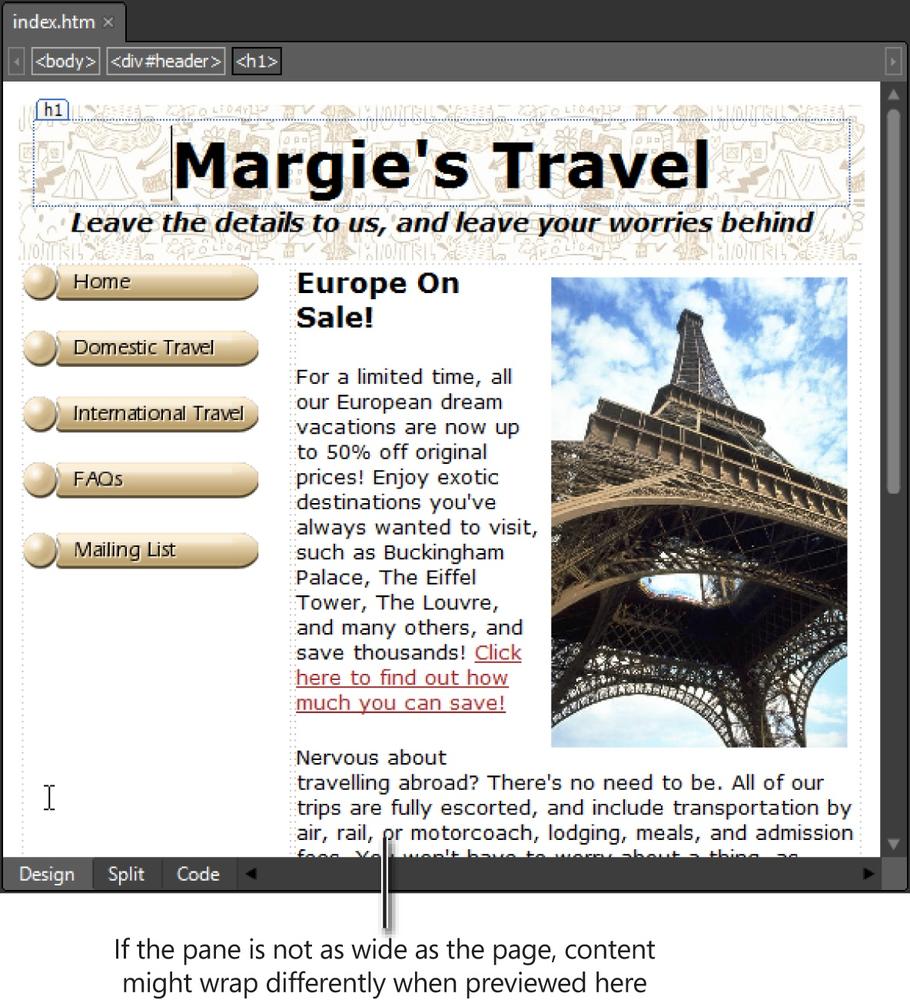
Click the Design tab at the bottom of the window.
The code disappears and the page now displays in what-you-see-is-what-you-get (WYSIWYG) mode, which is similar to previewing it in a web browser window.
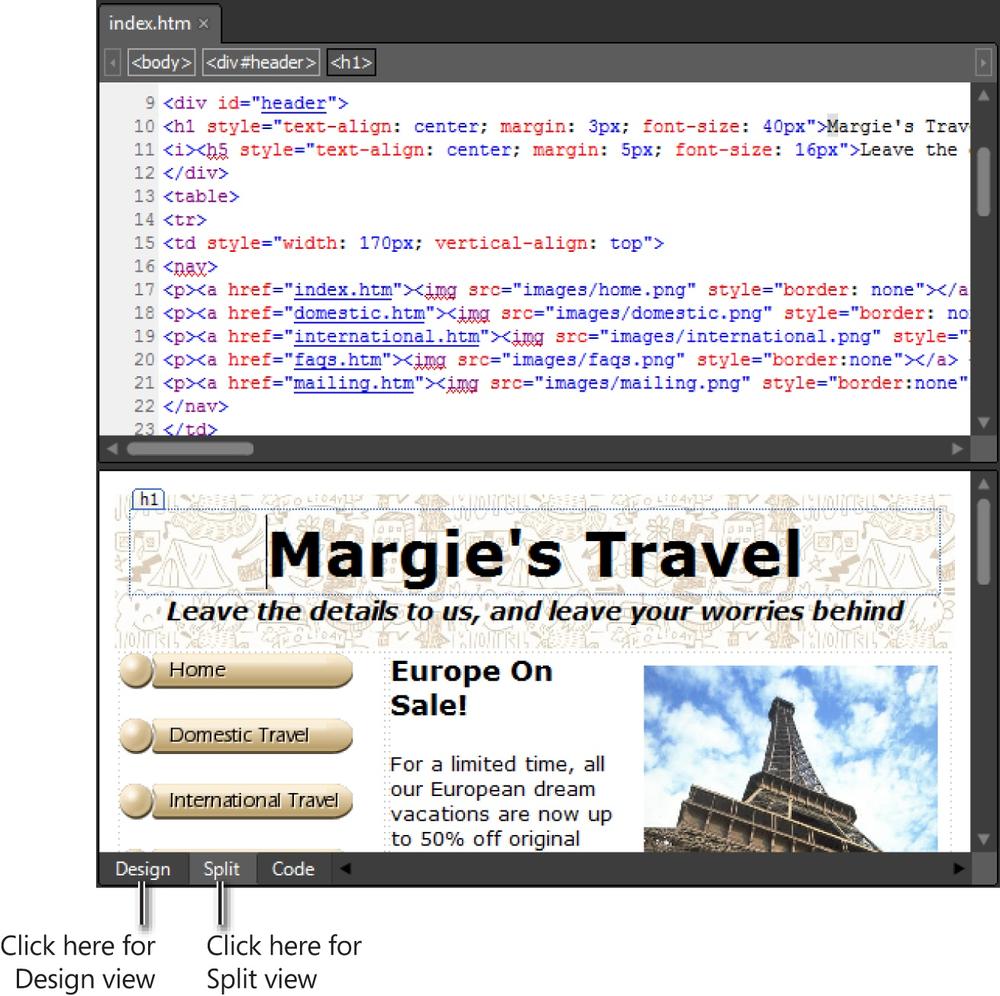
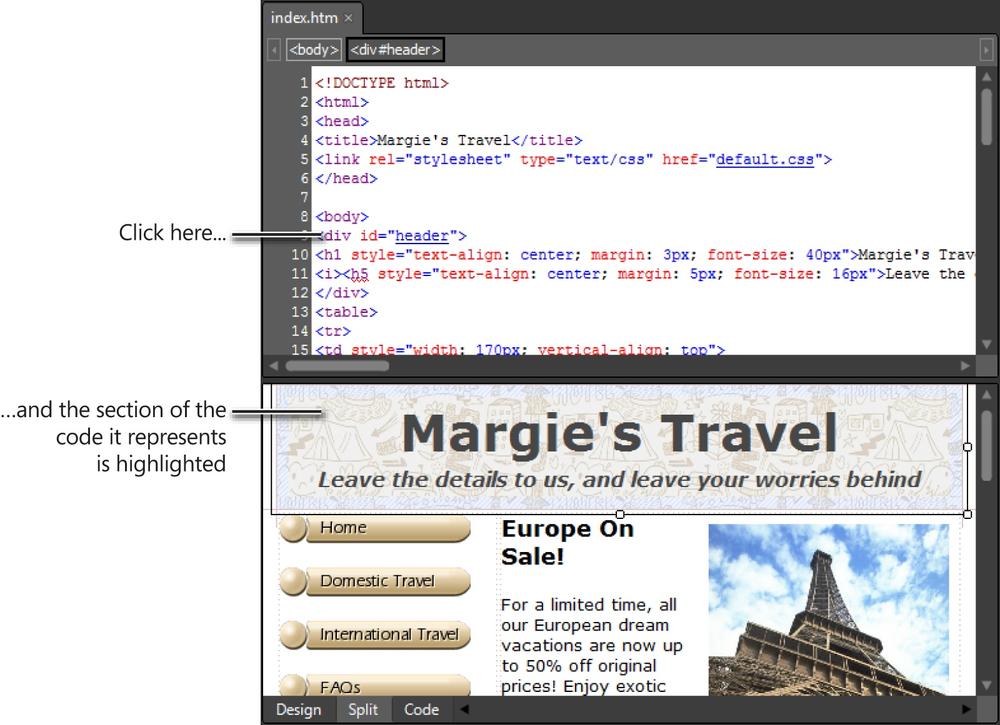
This view provides the best of both worlds. The top half of the screen shows the Code View and the bottom half shows the Design View.
In the lower (Design) pane, change worries to troubles. The word also changes in the upper pane.
In the Code pane, change troubles back to worries. The word also changes in the lower pane.
In the Code pane, in the bar across the top, click <div id=“header”>.
The Design pane shows the entire header division highlighted.
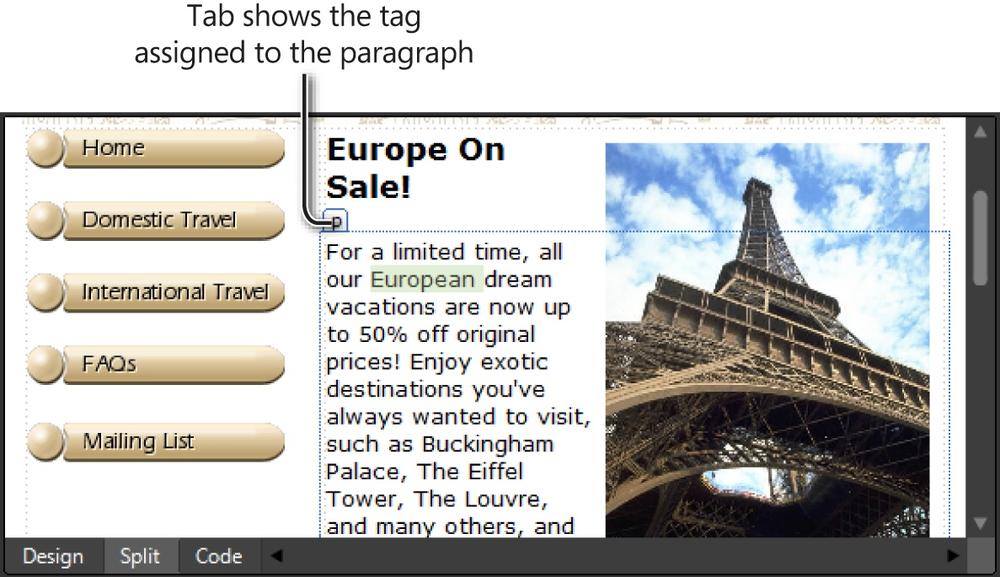
In the Design pane, click in the first body paragraph (the one beginning with For a limited time…).
A border displays around the text, with a small p tab at the top, indicating that it is a paragraph that uses the <p> tag.
Close the file (File | Close).
You do not have to save changes because you did not make any. (Well, you made one change, but then you changed it back again.)
Creating Websites and Webpages
In Expression Web lingo, a website is a folder that contains all the files you need for a set of interconnected Webpages. That folder might reside locally on your own hard disk or remotely on a server. In most cases, you will want to develop the site locally and then upload it to the server when it is ready to be published. (It is called a website even if it is not technically on the web yet.)
To work with websites, use the Site menu in Expression Web. From there you can create a new site or open an existing one. You can also import content from other sites, and manage the publishing settings for a site.
After you have your site established, you can then create new pages or import existing pages into your site.
In the following exercise, you will start a new website and add a new blank page to it.
Start a New Website
Start a New Website
In Expression Web, click Site | New Site.
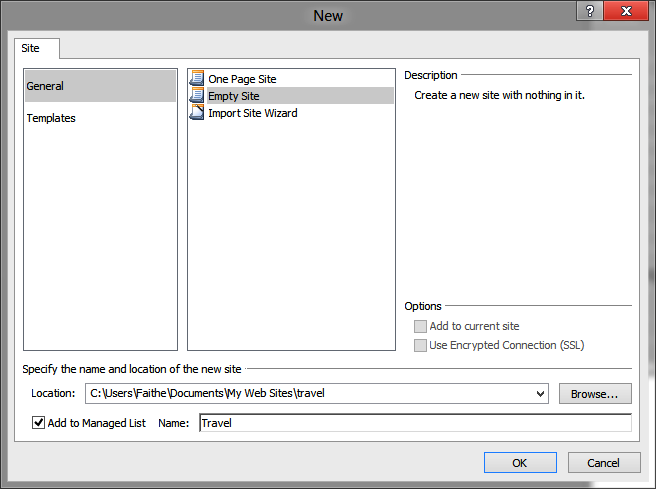
The New dialog box displays.
Click Empty Site.
This creates a site without any pages in it; you’ll add the pages later.
In the Location box, delete the mysite portion at the end of the current path and type ravel in its place.
In the Name box, type Travel.
Click OK.
Expression Web creates the site, including a new folder in the chosen location. The folder displays in the Folder List pane in the upper-left corner of the Expression Web window.
At this point you have a new site, but it has no pages in it yet. Next you’ll add a page.
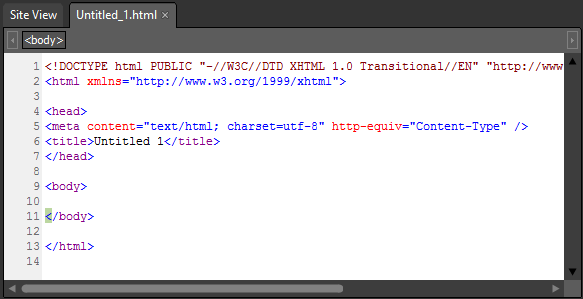
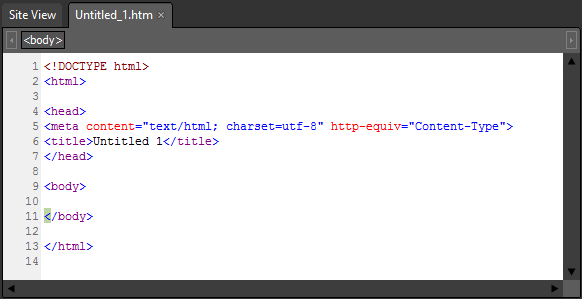
Click File | New | HTML.
A new webpage document displays. As you can see in the Code pane, Expression Web fills in all the basic tags for you automatically. However, notice that the document type is not HTML5, but an earlier type: XHTML Transitional. To use Expression Web for HTML5-compliant code, you must change the document type, as you will learn next.
Click the X on the Untitled_1.html tab to close the unsaved new page. If prompted, do not save your changes.
The New dialog box displays.
Click the Page Editor Options hyperlink.
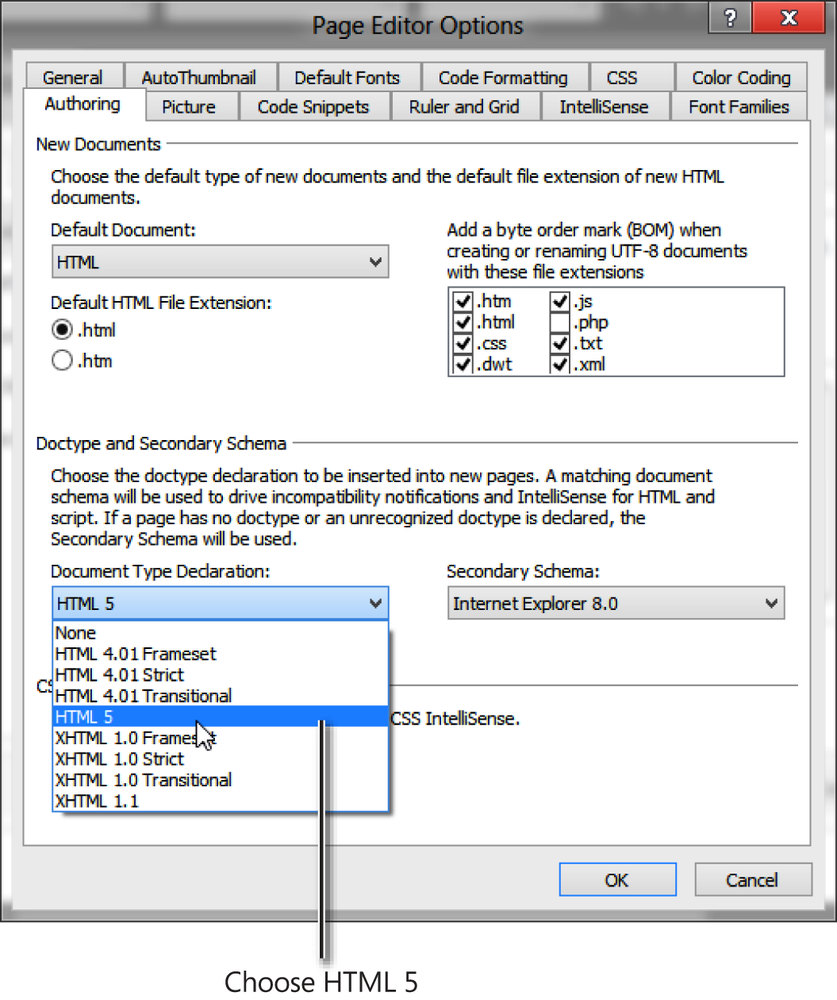
The Page Editor Options dialog box displays.
Open the Document Type Declaration drop-down list and then click HTML5.
In the Default HTML File Extension section, click .htm.
You can use either .htm or .html for your file extensions, but because the rest of this book has used .htm, you might want to continue that convention here.
Click OK to close the Page Editor Options dialog box.
In the New dialog box, ensure that HTML is selected on the General list and then click OK.
Once again, Expression Web creates a new page, but this time with HTML5 as its type.
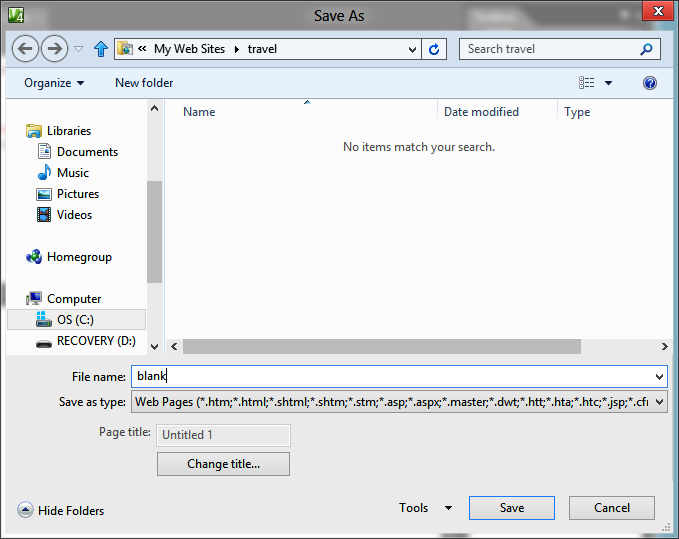
Click File | Save.
The Save As dialog box displays.
In the File Name box, type blank.
Click the Change Title button to open the Set Page Title dialog box. Type Margie’s Travel and then click OK.
Click Save to save the page.
Click the X on the blank.htm tab. If prompted to save changes, click Yes.
Expression Web saves and closes the page. The page now displays in the Folders List pane (in the upper-left corner of the Expression Web window).
Leave the website open for the next exercise.
Create a Page by Using a CSS Template
When creating a new page, you can start with a blank layout (as you just saw) or you can choose one of the templates that come with Expression Web. These templates use CSS layouts, like those that you learned how to create manually in Chapter 11.
In the following exercise, you will create a webpage using one of the CSS templates that ship with Expression Web.
Create a Website Using a CSS Template
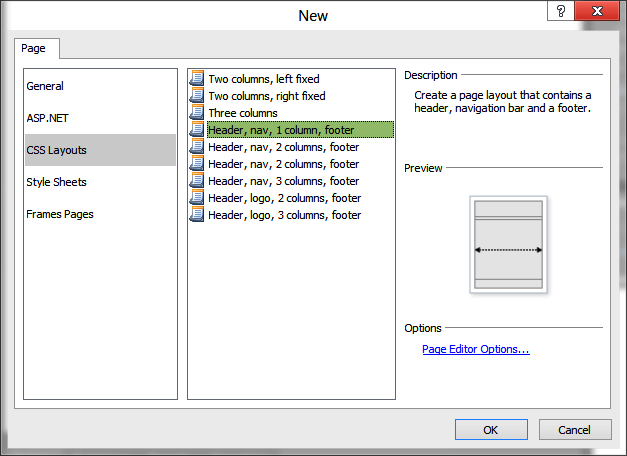
In Expression Web, click File | New | Page.
The New dialog box displays.
Click CSS Layouts.
Click OK.
Expression Web creates your new page. Two separate tabs display at the top of the editing pane: one for the new untitled HTML document and one for the untitled external cascading style sheet.
In the Code pane, edit the document type tag so it shows the following:
<!DOCTYPE html><head>Click File | Save.
The Save As dialog box displays.
In the File name box, type index.
Click Save.
In the File name box, type default.
Click Save.
Notice the following:
In the Code pane, the <link> tag references default.css. Expression Web linked and applied the style sheet without you having to do any manual coding.
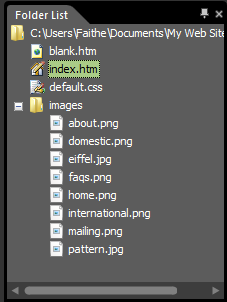
In the Folder List pane, the index and default files appear. The icon for the index.html file displays as a house, indicating it is the home page for the website. Expression Web shows it that way because of its name; index is the standard name given to the main page.
In the Styles pane (bottom-right corner), the #Masthead style is selected because that’s the currently selected division. The red circle next to it indicates that it’s a uniquely named division, as does the number sign (#) sign preceding its name. Other types of document sections and tags have different colors of circles.
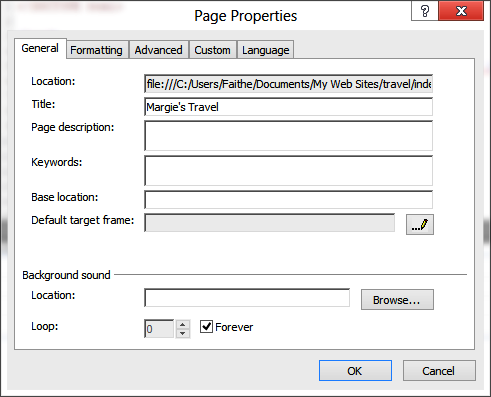
Click File | Properties. In the Page Properties dialog box, in the Title box, type Margie’s Travel.
Click OK.
Notice that in the Code pane, the title displays as follows:
<title>Margie's Travel</title>
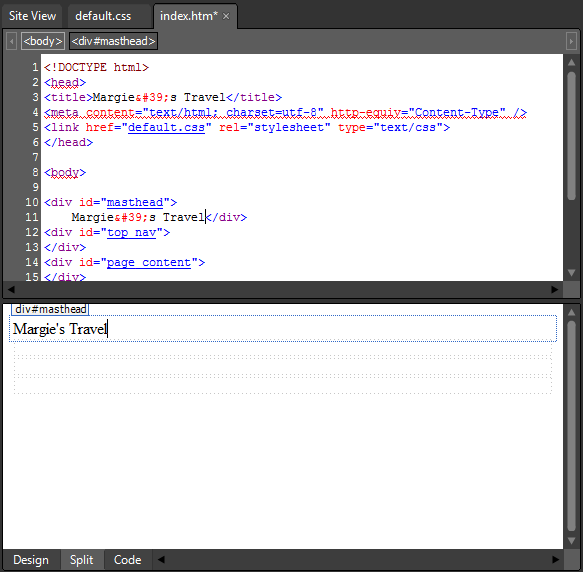
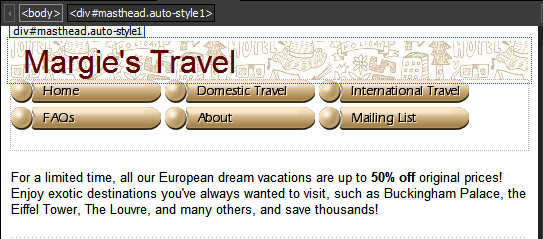
In the Design pane, click in the upper-most box.
A div#masthead tab displays above it. Look in the Code pane and notice that the insertion point there is in the <div id=“masthead”> tag area.
Type Margie’s Travel.
The text displays in both the Design pane and the Code pane.
Leave the page and the website open in Expression Web for the next exercise.
Insert Graphics
When you insert a graphic image on a page, Expression Web automatically creates the <a> tag needed to reference it and makes sure that the graphic’s location is appropriately referenced. That can be a big time-saver compared to manual coding when you have a lot of graphics.
Import an Images Folder
As in the examples in earlier chapters, you will probably want to create a special folder (such as “images”) within your main website folder to store the images you’re using for the site. One easy way to do this is to copy an existing images folder into the website in Expression Web. You’ll learn how to do that in the following exercise.
In the following exercise, you will copy the Images folder from the data files for this lesson into the website that you have created in Expression Web.
Import an Images folder
This exercise starts in File Explorer (Windows Explorer), but Expression Web should also be open, with the website still open from the previous exercise.
In File Explorer (Windows Explorer), navigate to the 16Expression folder for this lesson.
Press Ctrl+V to paste the folder.
The folder and all its images are now accessible from the Folder List pane.
Click the + (plus character) next to the folder.
The folder expands to list all the graphics available.
Leave the page and the website open in Expression Web for the next exercise.
Place Images on a Page
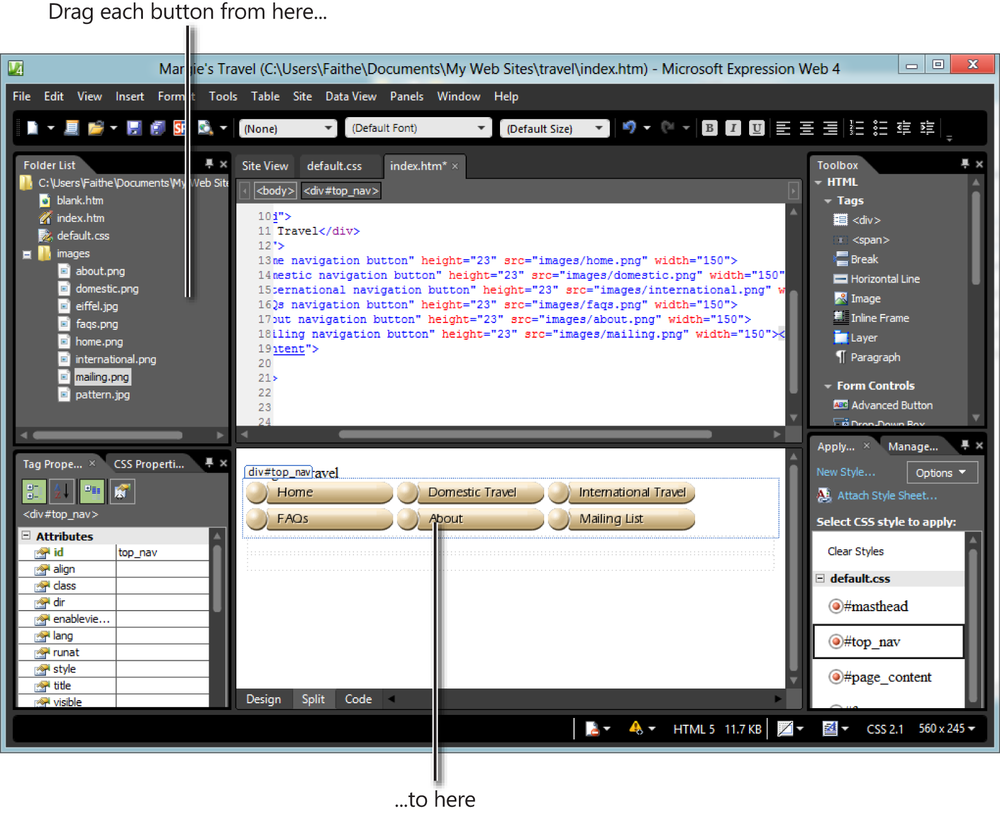
After you have added images to a website, you can easily drag them into the Webpage layout wherever you want them. In the following exercise, you will insert graphics on a webpage.
Insert Graphics
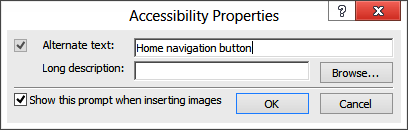
In Expression Web, drag the home.png button from the Folder List pane into the #topnav division in the Design pane (the second division from the top).
In the Alternate Text box, type Home navigation button.
Press the space bar once to add a blank space after the button.
Repeat steps 1–4 for the following buttons, in the order shown, placing each new button to the right of the previous one. You can assign alternate text as appropriate for the button’s name. Depending on the width of the Expression Web window, the buttons might wrap to a second row.
domestic.png
international.png
faqs.png
about.png
mailing.png
Leave the page and the website open in Expression Web for the next exercise.
Add a Background Image to a Division
You can also add graphics as background images to divisions, as you learned in Chapter 6. To do so, select the division and then work in the Properties pane (lower-left corner) to define the CSS style for that division.
In the following exercise, you will apply a background image to a division.
Add a Background Image to a Division
In Expression Web, click in the Masthead division in the Design pane. (That’s the division where the text Margie’s Travel currently displays.)
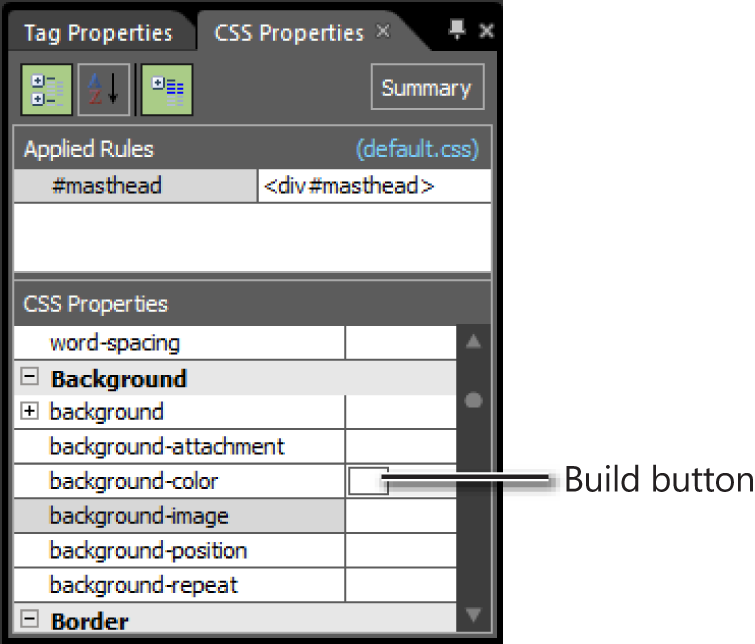
In the Properties pane (lower-left), click the CSS Properties tab if it is not already selected.
Scroll down through the properties and find the Background category. If it is not already expanded, click the + (plus character) to expand it.
Click the background-image property.
A Build button (…) displays to its right.
Click the Build button.
A Select File dialog box displays.
Browse to the exercise files for this lesson, open the Images folder, select the pattern.jpg file, and then click Open.
The image displays as the background for the Masthead division.
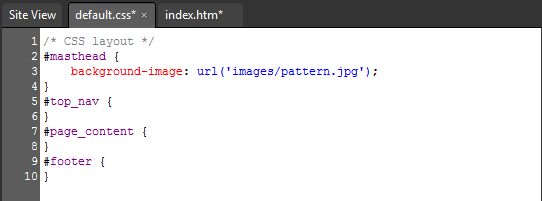
Above the Code pane, click the default.css tab to switch to viewing the associated CSS file. Notice that:
The tab displays as default.css*. The asterisk means that there are unsaved changes to the file.
The code that places the background image in the Masthead division is in the CSS file, not in the HTML document itself. Division-level formatting is placed in the external style sheet by default, if an external style sheet is in use.
Leave the page and the website open in Expression Web for the next exercise.

Formatting Text
As you know from earlier chapters, there are many ways to format text. Here’s a quick review:
You can use direct formatting, in which an individual block of text receives certain formatting. For example, you might make a word bold in a paragraph by using the <b> tag, as follows:
This is a <b>great</b>party.
You can create a span and then apply formatting to the text within the span:
<p>This is a <span style="font-size: 13px">great</span> party.
You can place a style in the opening tag for a certain paragraph or other block of text. For example, you might specify a certain color for a paragraph’s text:
<p style="color: green">This is a great party.</p>
You can create a style that refers to the tag used for that text block. For example, you could create a style for the <p> tag that formats all list items a certain way. This style can be placed in either an internal or external style sheet:
p {font-family: "Verdana", "Arial", sans-serif; font-size: 13px}You can define formatting for a new class in a style sheet:
.tangent {font-family: "Verdana", "Arial", sans-serif; font-size: 13px}And then you can assign the class to certain tags within the document:
<p class="tangent">This is a great party.</p>
When you apply formatting in Expression Web, the application chooses an appropriate formatting method based on its internal rules. These rules take into consideration the type of formatting being applied and the size of the block to which it is being applied. If you don’t like the method that Expression Web selects, you can edit the code manually.
In the following exercise, you will apply text formatting in several ways, resulting in several types of tags and attributes being created in the code.
Format Text
Format Text
In Expression Web, click the index.htm tab.
In the Page Content division, in the Design pane, type the following:
For a limited time, all our European dream vacations are up to 50%offoriginal prices! Enjoy exotic destinations you've always wanted tovisit, suchas Buckingham Palace, the Eiffel Tower, The Louvre, and manyothers, and savethousands!In the Code pane, enclose the paragraph you just typed in <p> and </p> tags:
<p>For a limited time, all our European dream vacations are u p to 50% off original prices! Enjoy exotic destinations you've always wanted to visit, such as Buckingham Palace, the Eiffel Tower, The Louvre, and many others, and save thousands!</p>Select the words 50% off and then click B (the bold button) on the toolbar or press Ctrl+B.
The selected text is enclosed in a <strong></strong> tag pair.
<p>For a limited time, all our European dream vacations are up to
<strong>50% off</strong>original prices! Enjoy exotic destinations you'v e always wanted to visit, such as Buckingham Palace, the Eiffel Tower, The Louvre, and many others, and save thousands!</p>In the Styles pane (lower-right), on the Manage Styles tab, click #page_content to select that division.
In the Properties pane (lower-left), click the CSS Properties tab.
Under the Font heading, click in the box to the right of the font-family property. A drop-down arrow displays. Click that arrow to open a menu and then choose the item named Arial, Helvetica, sans-serif.
Click the default.css tab at the top of the Code pane to view the CSS.
Notice that a style rule has been created for the #page_content division:
#page_content {
    font-family: Arial, Helvetica, sans-serif;
}
Press Ctrl+Z to undo the last action.
Click Back to return to the index.htm tab.
In the Styles pane (bottom-right), click New Style.
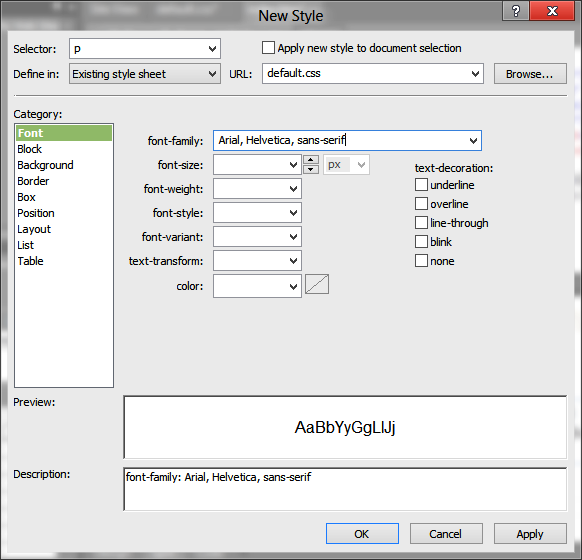
The New Style dialog box displays.
Open the Selector drop-down list and then click p.
Open the Define In drop-down list and then click Existing Style Sheet.
In the URL box, type default.css or select it from the drop-down list.
On the Category list, make sure Font is selected.
Open the Font-Family drop-down list and then click Arial, Helvetica, sans-serif.
Click OK to close the dialog box and create the new style.
Click the default.css tab and confirm that the new style rule for paragraphs displays there, as shown in the following:
p { font-family: Arial, Helvetica, sans-serif; }In the Styles pane, right-click the p style, and then click Modify Style.
The Modify Style dialog box displays. It is just like the New Style dialog box you saw earlier.
Click OK to apply the change and then click the index.htm tab to see the results of the change.
In the #Masthead division, select Margie’s Travel.
On the toolbar, open the Font drop-down list and select the Arial, Helvetica, sans-serif item.
Click the Font Size drop-down list and select xx-large.
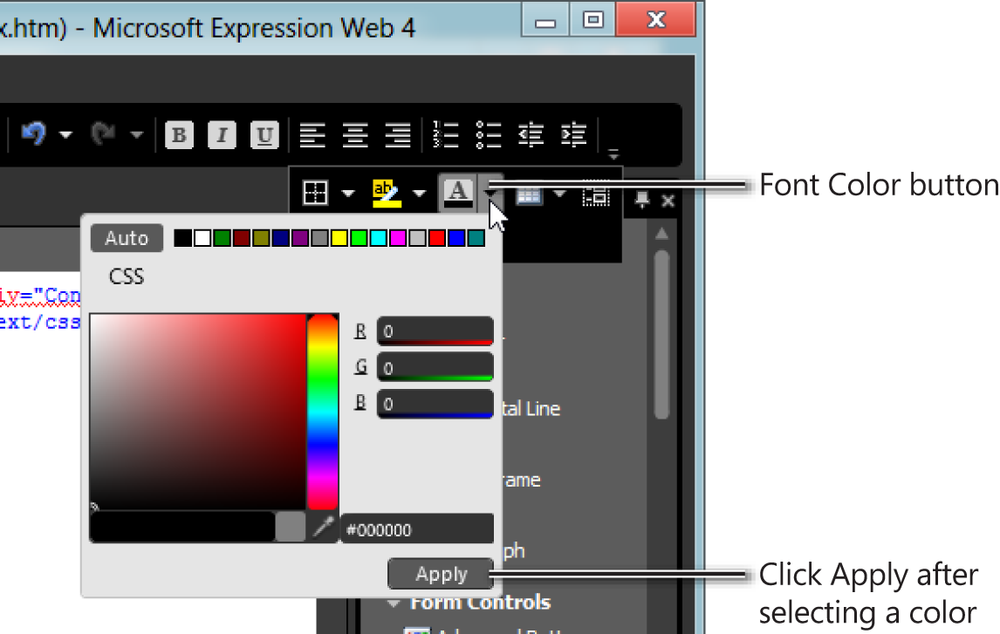
Click the down arrow adjacent to the Font Color to open its drop-down list.
If the Expression Web window is not wide enough to see that button on the toolbar, click the down arrow at the right end of the toolbar to see the additional buttons, and then click it from there.
Click the dark-red square on the top line, setting the color to 128, 0, 0. Then click Apply.
Look in the Code pane. You’ll see that a new class has been created, called auto-style1, and applied to that text:
<div id="masthead" class="auto-style1"> Margie's Travel</div>
Look in the <head> section of the code. Notice that a <style> tag has been inserted, creating an internal CSS style sheet for the document:
<style type="text/css"> .auto-style1 { font-family: Arial, Helvetica, sans-serif; font-size: xx-large; color: #800000; } </style>Press Ctrl+S to save index.htm.
A Save Embedded Files dialog box displays, prompting you to also save the associated style sheet.
Click OK to save both files.
Leave the page and the website open in Expression Web for the next exercise.


Formatting a Division
As you just saw, one way to format text is to apply certain formatting to the division that contains the text. You can also format divisions in other ways, such as specifying certain positions, margins, or padding for them. Making changes such as these is easy in Expression Web; you can resize and reposition a division by simply dragging elements in the Design pane.
In the following exercise, you will apply text formatting in several ways, resulting in several types of tags and attributes being created in the code.
Format a Division
Format a Division
In Expression Web, at the bottom of the editing pane, click Design to display the page in Design view only (not split).
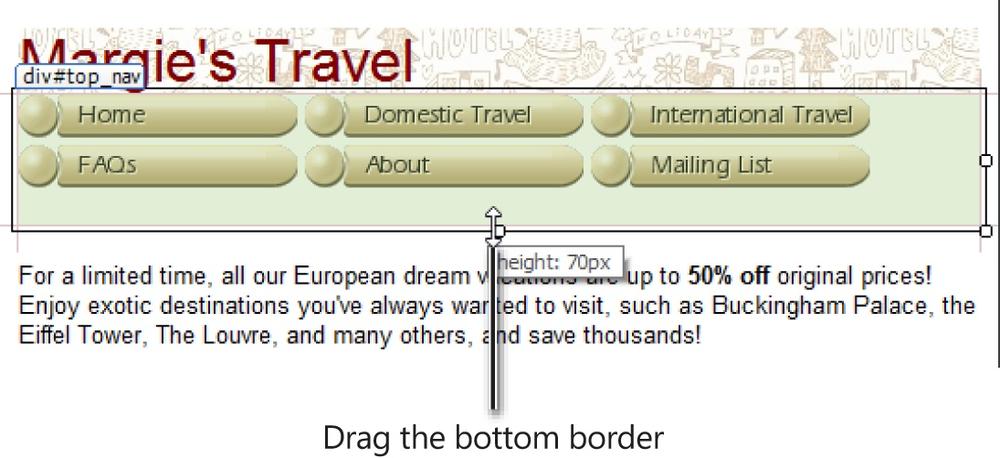
Click in the #Masthead division to select it. (That’s the division with the navigation buttons in it.)
Position the mouse pointer over the bottom of the Masthead division.
White square selection handles appear around the division.
Drag the center bottom selection handle downward to increase the height of the Masthead to 70 pixels in total (a ScreenTip displays as you drag, showing the current measurement).
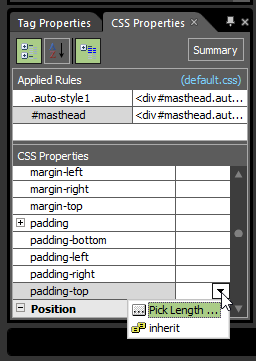
In the Properties pane (bottom-left), make sure #Masthead is selected at the top.
Under the Box category, click in the padding-top property.
Open the drop-down list for the property and click Pick Length.
The Length dialog box displays.
In the Length dialog box, type 3 and then click OK. Expression Web adds 3 pixels of padding to the top of the masthead division.
Repeat steps 6–8 for the padding-left property and add 12 pixels of padding to the left side.
View the default.css file in the Code pane to see what Expression Web added to the style definition for the division.
#masthead { background-image: url('images/leaf-green.jpg'),padding-top: 3px;padding-left: 12px;}Click the index tab and then press Ctrl+S to save index.htm.
A Save Embedded Files dialog box displays, prompting you to also save the associated style sheet.
Click OK to save both files.
Leave the page and the website open in Expression Web for the next exercise.
Inserting Hyperlinks
Expression Web provides an easier way of inserting hyperlinks than typing them manually. You can use the Insert | Hyperlink command or you can press Ctrl+K to open the Insert Hyperlink dialog box; then type the specifications for the hyperlink you want. Alternatively, you can right-click a button or a block of selected text and then choose Hyperlink, which opens the same dialog box.
In the dialog box, you can choose from any of these hyperlink types:
Existing File or Webpage This is the standard type of hyperlink that inserts a reference to another page or file. You would use this for the navigation buttons on a site, for example.
Place in This Document This type of hyperlink is for an anchor point within the current document.
Tip
Review Chapter 5, if you need a refresher on anchor points and how they work.
Create New Document This hyperlink type generates a new document of the type you specify. This type is not frequently used.
E-Mail Address This type inserts a hyperlink that opens the default email application and begins composing a message.
In the following exercise, you will add text hyperlinks and navigation buttons.
Insert Text and Graphical Hyperlinks
Insert Text and Graphical Hyperlinks
In Expression Web, switch the index.htm main editing window back to Split view if it is not already there.
In the Design pane, click the Domestic Travel button to select it.
Choose Insert | Hyperlink.
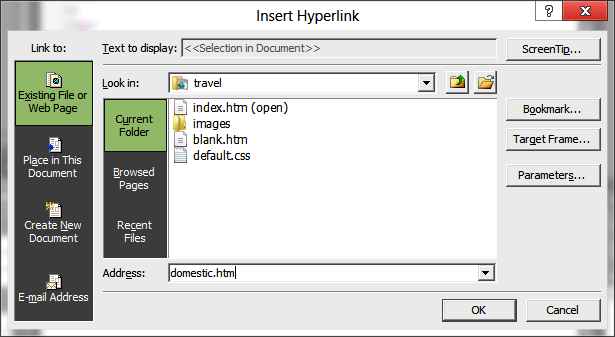
The Insert Hyperlink dialog box displays.
In the Address box, type domestic.htm.
Click the ScreenTip button to display the Hyperlink ScreenTip dialog box. Type Domestic Travel and then click OK.
Click OK.
In the Code pane, check the code that has been added for the hyperlink.
<a href="domestic.htm" title="Domestic Travel">
<img alt="Domestic navigation button" height="23" src="images/domestic.png"
width="150" class="autostyle2">
</a>
Tip
You should recognize these tags from Chapter 6; the <a> tag is the hyperlink itself and it contains the title attribute with the ScreenTip text. The <img> tag shows the button. It is contained within the double-sided <a> tag.
In the Toolbox pane, locate the Paragraph tag on the Tags list and then drag-and-drop it into the Code pane after the <div id=“footer”> tag.
In the code pane, it now looks like this:
<div id="footer">
<p></p>
</div>
Inside the <p> tag, type the following:
<p>
Site Map Contact Us Legal Information</p>Select the Contact Us text in the Design pane and then click Insert | Hyperlink.
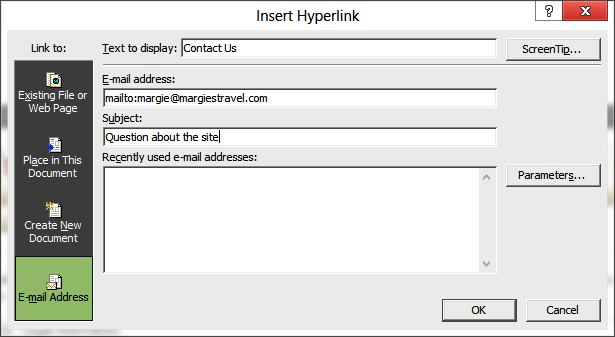
The Insert Hyperlink dialog box displays.
Click E-Mail Address.
In the E-mail Address box, type [email protected]. The application adds mailto: in front of the address you type automatically.
In the Subject box, type Question about the site.
Click OK.
The hyperlink is applied to the text, which appears underlined in the Design pane.
Look at the code in the Code pane to see the hyperlink that was created.
<a href="mailto:[email protected]?subject=Question about
site">Contact Us</a>
Save your changes to all files and then close Expression Web.
Key Points
Expression Web is an application for creating webpages in a graphical, what-you-see-is-what-you-get interface.
The Expression Web interface can show your page in Design view, in Code view, or in Split view (which shows half of each).
To work with web sites, use the Site menu. From there you can create a new site or open an existing ones.
When creating a new page, use the Page Editor Options dialog box to specify that you want to create HTML5-compliant code.
Expression Web includes many CSS templates for creating page layouts. Click File | New | Page and then click CSS Layouts.
To insert graphics, drag them from the Folder List pane onto the page in Design view.
To add a background to a division, set its Background property in the CSS Properties pane to include a reference to a graphic file.
You can format text directly using Expression Web’s toolbar buttons. The code for the formatting is placed either in the individual tags or in the CSS, depending on the type of formatting.
You can change a division’s size by dragging its border in Design view.