
Chapter at a glance
Identify
Identifying new shared features in Office Home and Student 2013

Apply

Insert
Inserting graphics, videos, charts, and diagrams

Search
Searching for online templates
IN THIS CHAPTER, YOU WILL LEARN HOW TO
Identify new shared features in Office Home and Student 2013.
Apply Office themes.
Insert graphics, videos, charts, and diagrams.
Search for online templates.
Present Office documents online.
As noted in Chapter 1, the biggest advantage of Office Home and Student 2013 is the similarities across the applications, which help greatly reduce the learning curve. Along with a common user interface, there are also features that work nearly the same regardless of the application you’re using. For example, after you learn how to insert and work with SmartArt graphics, you can apply that knowledge to all of the applications that support SmartArt.
In this chapter, you’ll get a look at the new shared Office features and learn how to get started with the primary features that are shared across the applications. You’ll learn how to apply Office themes; insert graphics, videos, charts, and diagrams; search for online templates; and present Office documents online.
Practice Files
To complete the exercises in this chapter, you need the practice files contained in the Chapter02 practice file folder. For more information, see Download the practice files in this book’s Introduction.
Each Office release brings new features to help you make short work of otherwise cumbersome tasks, and Office Home and Student 2013 is no different from the rest. Along with new and improved productivity tools, this version of Office also gives you more Internet integration so you can use and access content stored in online locations, referred to as cloud services. Plus, with the addition of Touch Mode, you can work with your files on almost any device that supports touch.
In this section, you’ll learn about new and improved features that are shared across the Office applications.
Tip
The first chapter of each part of this book contains a list of key features that are specific to that Office application. Some of the new features discussed in this section may have previously been included in the Office applications but have been improved or are significantly different.
Microsoft SharePoint Online and Microsoft SkyDrive integration. Now you can open and save files stored in online locations from your Office applications. When your files are stored in the cloud, you can access them from other computers and devices, share them with people outside your school or home network, or work with others on the same file at the same time.
Tip
Cloud locations such as SharePoint Online and SkyDrive require a Microsoft Office 365 account or a Microsoft Account. Other online locations, such as a hosted SharePoint site, can also be accessed from the Office applications.
See Also
For more information on an Office 365 or Microsoft Account, see Chapter 3.
Online templates. New templates offer a wide variety of content for business, school, and home. They range from letters, flyers, brochures, calendars, and newsletters, to industry-specific presentations, sales reports, inventory tracking, and project management, to coordinating sets of templates across the applications and more. There are thousands of templates available to help you get started.
Chart formatting controls. Modify your chart formatting, such as color and style, and add chart elements like titles, legends, and data labels by using new controls that are displayed when a chart is selected. The new chart filter enables you to select which data series or categories you want on your chart.
Rich data labels. You can now format and size chart labels like shapes and you can clone your modifications and apply them to other data labels. Information from other cells can also be included in your labels, and leader lines can be added for almost all chart types.
Online presentation. Share your Office documents with others through the new free Office Presentation Service from your Office application. Meeting participants can view your online presentation on their computers, tablets, or most smartphones through a web browser.
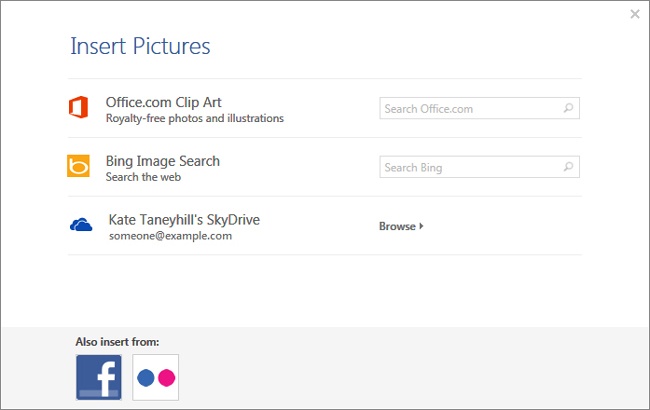
Online pictures. You no longer need to copy or save an online picture to your local or network drive in order to insert it in your Office documents. You can now embed pictures from online locations directly into an Office document. And when you’re signed in to Office with a Microsoft Account, you can access other places such as social networks like Facebook and Flickr.
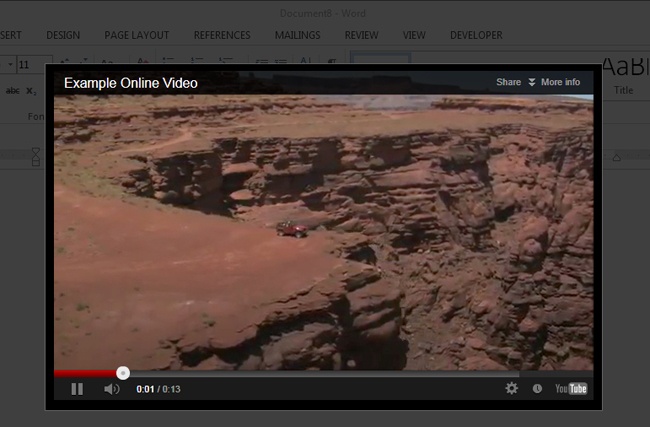
Online video. Add a link to a video from an online location, like your SkyDrive or YouTube, in an Office document and play it without leaving the application.
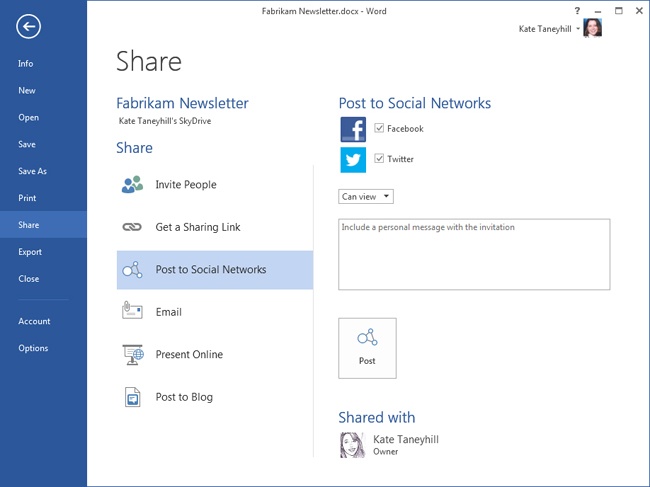
Posting to social networks. You can share your Office documents with your social networks, like Facebook and Twitter, directly from the application. When you set your edit or view permissions, a sharing link will be created and posted on the social networks you select. When others click the link, your shared file will open in the associated Office Web App.
Tip
The Get A Sharing Link option is similar to the Post To Social Networks option. You can generate a link—for viewing only or for editing—that you can share with others through email, a website, or whichever method you choose. Posting to social networks and getting a sharing link is available in Excel, PowerPoint, and Word. You must be signed in to Office with a Microsoft Account and have previously connected your social networks to your Office account, and your Office document must be saved in a shared location, such as SkyDrive, in order for the additional sharing options to be available.
See Also
For more information on Microsoft Accounts and connecting services, see Chapter 3.
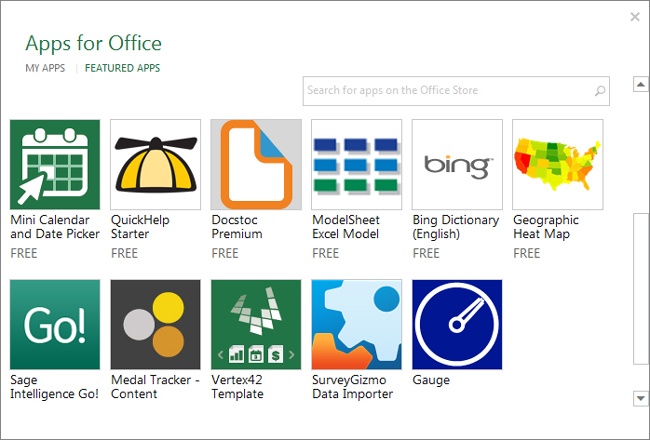
Apps for Office. Insert apps in your Office documents to extend application functionality. Apps range from online dictionaries and application add-ins, such as templates for mailing labels, to interactive apps like Bing Maps, which enables you to map and visualize your geographic data.
Touch Mode. All of the Office applications now support touch. When touch is enabled, the Office user interface is optimized for touch commands. The user interface increases in size, and more space is added between the buttons on the ribbon and Quick Access Toolbar.


Files you create in Access, Excel, PowerPoint, and Word all include a base set of formats called a theme. The theme is what controls the theme colors in the color palettes and the choices in numerous formatting galleries. It also controls the headings and body theme fonts at the top of the font list in most applications. Some applications also support theme effects, which apply to formatting for illustrations, such as pictures, shapes, SmartArt, and charts. Examples of these formats are border style and shadow. And in PowerPoint, formatting for slide masters and slide layouts are also part of the theme.
Files can be formatted by using theme elements, such as theme colors and theme fonts. Then if you choose a different theme from the themes gallery, the formatting will automatically update to match the formatting stored in your selected theme.

You can also start with a theme and then select different theme elements to create a custom theme. For example, you might like the colors of a theme but prefer different theme fonts or theme effects. Along with the themes gallery, which modifies all theme elements, you can modify individual theme elements by using the colors, fonts, and effects galleries.
In PowerPoint and Word, theme commands are located on the Design tab. In Excel, they’re found on the Page Layout tab.
In this exercise, you’ll explore themes and individual theme elements.
Set Up
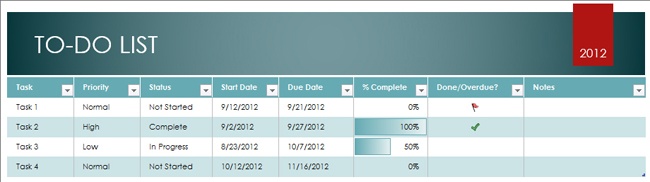
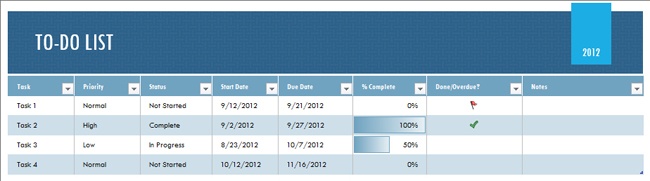
You need the Simple To-Do List workbook located in the Chapter02 practice file folder to complete this exercise. Start Excel, open the Simple To-Do List workbook, and follow the steps.
Examine the Simple To-Do List workbook and take note of the colors and font appearance.
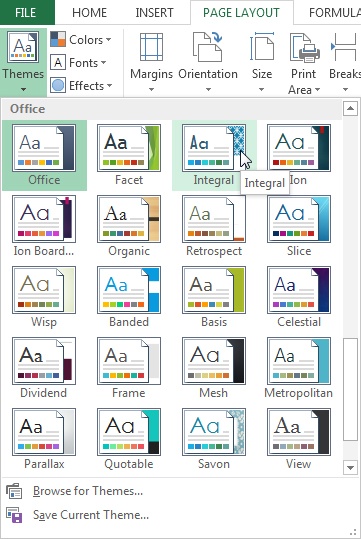
On the Page Layout tab, in the Themes group, click the Themes button.
In the Themes gallery, click Integral.
The fonts and colors automatically update to the Integral theme colors and theme fonts.
Experiment with other themes by applying them to the workbook.
After you’re comfortable with themes, experiment with changing only the theme colors or theme fonts, which are also available in the Themes group. For example, you may like the colors of a theme but prefer to use a different set of fonts.
See Also
For more on themes and to learn how to create a custom theme, see Chapter 12.
Documents have evolved from simple text-based files to those that contain rich images that help convey and illustrate information. For instance, graphics, like pictures or shapes, can be added for visual organization and to help break up large blocks of text. And for a combination of text and graphics, you can use SmartArt to help convey a concept. You can also use it for diagrams, lists of information, or for a collection of captioned pictures.
You don’t need to hire a professional to add these visual elements. After an illustration is inserted, a variety of tools are available to help you create polished graphics and diagrams. And using those tools is much easier than you might think.
In this exercise, you’ll insert a picture, shape, and SmartArt graphic by using features shared across Excel, PowerPoint, and Word. You will also explore basic formatting options that are available to these features.
Set Up
You need the Sample Picture image located in the Chapter02 practice file folder to complete this exercise. Start Word, create a blank document, and follow the steps.
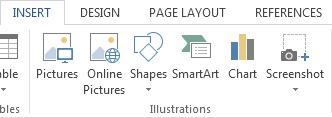
To insert an illustration, click the Insert tab and then locate the Illustrations group.
You are going to insert a picture, so click the Pictures button.
Tip
In PowerPoint, the Pictures button is located in the Images group. You can use the Online Pictures button to insert pictures stored on the Internet, including in places like your SkyDrive or social networks like Facebook and Flicker. Or, if the picture you want to insert is on your screen rather than a stored in a file, use Insert Screenshot to add a picture of an entire window or a screen clipping.
Navigate to the Chapter02 practice file folder and select Sample Picture.
Near the bottom of the Insert Picture dialog box, click the Insert button.
Note the Picture Tools Format tool tab that appears in the ribbon when the picture is selected.
Click in the document away from the picture to deselect the picture and to remove the display of the picture tools.
Click the picture to redisplay the picture tools. Explore the commands on the Picture Tools Format tool tab.
For example, in the Picture Styles gallery, click a picture style or use Live Preview to explore them. Or, in the Adjust group, click Color and apply a color wash to the picture.
When you’re finished checking out the various formatting options, select the picture and press the Delete key to remove the picture from the document.
Next you’re going to insert a shape. On the Insert tab, in the Illustrations group, click the Shapes button, and then click the rectangle shape.
Point to an area in the document, and then click and drag to draw a rectangle.
Explore the Drawing Tools Format tool tab.
For example, in the Shape Styles group, use the Shape Styles gallery to apply different styles, or click Shape Effects and explore preset shadows, reflections, glows, or 3-D effects.
When you’re finished exploring, delete the rectangle.
To insert a SmartArt graphic, on the Insert tab, click the SmartArt button.
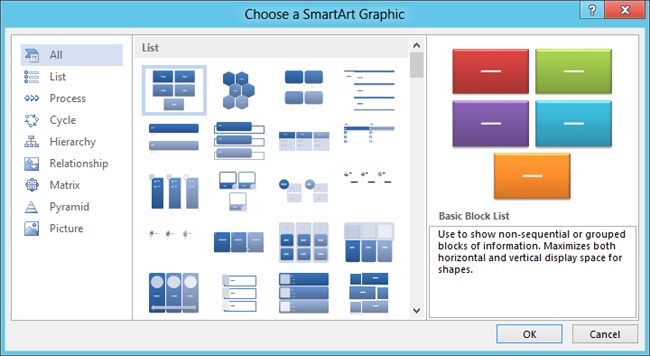
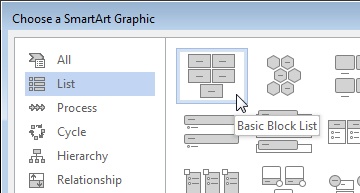
In the Choose a SmartArt Graphic dialog box, select the different SmartArt categories and review the types of graphics that are available for the selected category.
To get more information on a specific graphic, click once on the preview and view the additional details on the right side of the dialog box.
Select the List category and then select Basic Block List.
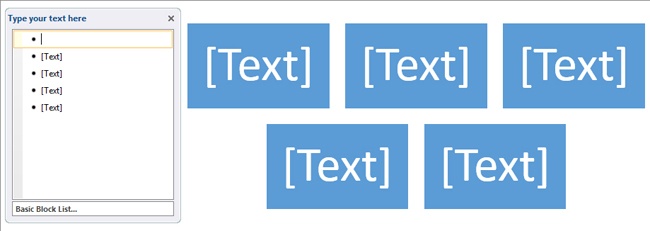
Click OK to insert your SmartArt graphic in the document.
In the text pane, click to the right of the first bullet and enter Word.
Click in the next bullet placeholder and enter PowerPoint.
In the text pane, enter additional text or delete the remaining bullet placeholders to remove the empty shapes.
On the SmartArt Tools Design tool tab, explore the design options.
For example, use the Layouts gallery to switch to a different SmartArt layout, or in the SmartArt Styles gallery, select a different style to change the format of the graphic.
When you’re comfortable with the basic SmartArt formatting options, click the edge of the graphic in your document to select it, and then press Delete.


A chart is often included alongside a list of values to convey how those values relate to each other. Charts help give your information visual meaning and context, and can be comprehended faster than raw data. And as with inserting illustrations, after your chart is inserted, the Chart Tools tool tabs help you create professional-looking charts without a lot of effort.
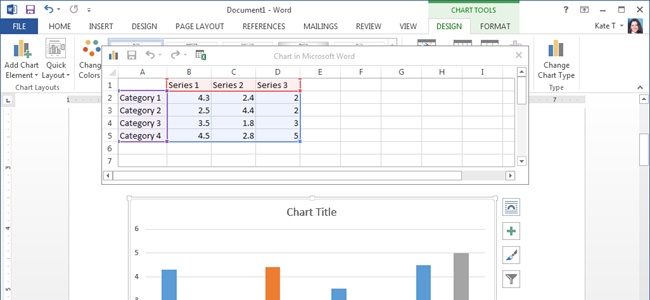
When you insert a chart, you start with a default chart, such as a column, line, bar, or pie chart, and then customize the style, layout, and formatting to fit your needs. In PowerPoint and Word, after you insert a chart, a small Excel window, called a chart sheet, is displayed. You use the chart sheet to replace the placeholder data with your own by entering your data in place of the sample information provided. The chart will update automatically.
In Excel, you first add your chart sheet information to a workbook. Then you select that information and insert your chart. Although the steps to insert a chart may vary between the applications, the tools for working with a chart, such as those for applying formatting and layout features, are shared across the applications.
See Also
For more information on inserting charts in Excel, see Chapter 23.
In this exercise, you’ll insert a default column chart in Word and explore basic formatting options.
Set Up
You don’t need any practice files to complete this exercise. Start Word, create a blank document, and follow the steps.
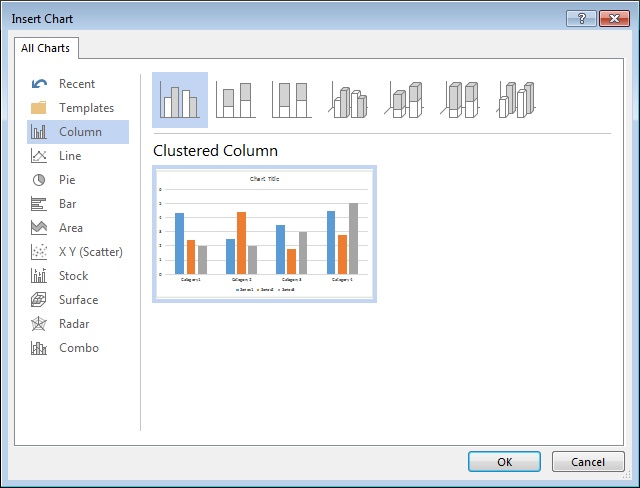
To insert a chart, on the Insert tab, in the Illustrations group, click the Chart button to display the Insert Chart dialog box.
In the Insert Chart dialog box, click the various chart categories and explore the available chart types.
Tip
If you’re not sure which type of chart best represents your data, try the new Recommended Charts feature in Excel. It analyzes your information by looking for patterns in your data arrangement and suggests the most relevant chart types.
See Also
For more information on the Recommended Charts feature, see Chapter 23.
From the Column category, select Clustered Column, and then click OK.
In the chart sheet, click a cell that contains a value, enter another number, and then press Enter to update the chart.
On the chart sheet, click the Close button to remove the chart sheet from the screen.
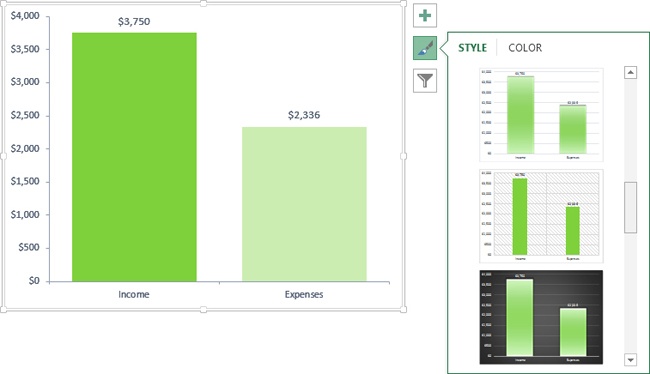
On the Chart Tools Design tool tab, experiment with the various design options.
For example, in the Chart Layouts group, click Quick Layout and select a different layout to add or remove multiple chart elements, such as the legend, titles, or gridlines. Or, in the Chart Styles group, click the Chart Styles gallery and select a different style to modify multiple formats at the same time.
See Also
For more information on formatting charts, see Chapter 23.

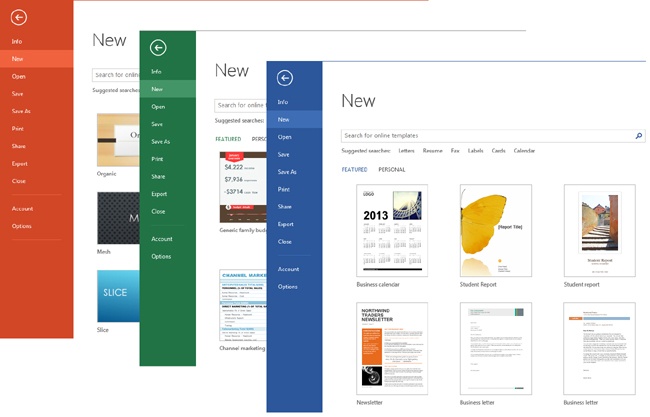
For some tasks, you may know exactly how to begin, including the types of features you need to convey your information. For the times when you’re unsure, don’t stare at a blank file hoping something will magically appear. Turn to the online templates for inspiration. The online templates that appear when you first start almost all Office Home and Student 2013 applications, as well as those available on the New page in the Backstage view, may provide a starting point or give you ideas for how to get started.
The templates that appear first on the application Start screen are featured templates. Typically these templates are new or are those you recently used. You can choose from these templates or search the online templates to find one that is more specific to your needs.
Tip
All of the online templates created for Office Home and Student 2013 are theme enabled. As you learned in the Applying Office themes section earlier in this chapter, this means that the fonts and colors can be modified to match your preferred colors, such as those for a special event or your school colors.
See Also
For more information on creating your own theme, see Chapter 12.
Tip
To use online templates, you must be connected to the Internet. Online templates can be accessed from the New page in the Backstage view in Excel, PowerPoint, and Word. For OneNote, you can find a variety of notebook templates, such as planners, meeting notes, and appointment trackers, in the Templates gallery on Office.com.
In this exercise, you’ll search for online templates by using Word.
Set Up
You don’t need any practice files to complete this exercise. Make sure you’re connected to the Internet, start Word, and follow the steps.
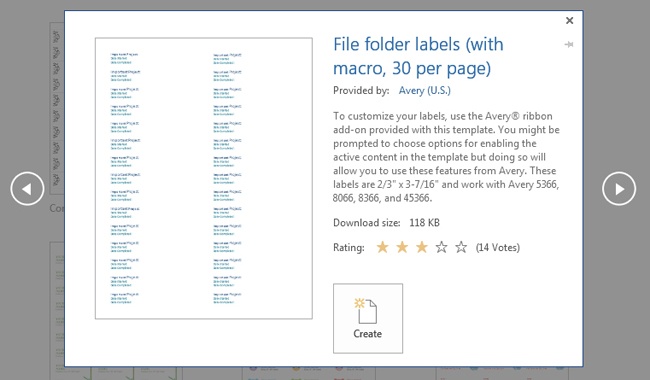
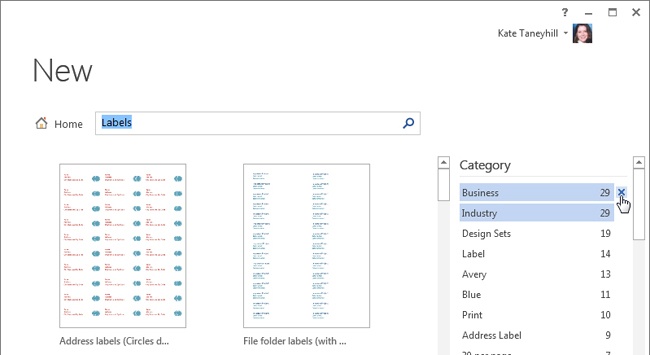
Let’s start by searching for a specific type of template. Next to the list of suggested searches, click Labels.
Point to a template thumbnail to view a ScreenTip, which displays additional details about a template, such as label vendor and product number.
Click once on any template to view more information and a larger preview of the template.
Important
For templates other than Blank Document, double-clicking a template thumbnail creates a new document based on the selected template. Be sure to click one time if you want to view details.
Tip
You can use the arrows that appear to the left and right of the preview to browse the available templates. If the template has multiple views, More Images will display below the preview, along with navigation arrows. And in PowerPoint, if there are additional theme color variations included in the template, they are shown to the right of the template.
Click the Close button in the upper-right corner to close the preview.
In the Category pane on the right, click Business to narrow your search results.
To narrow your search results even further, click Industry.
Both categories will be highlighted at the top of the pane.
To remove the filtered category and return to a broader set of search results, point to the Business category and click the X that appears to the right.
To return to the featured templates, to the left of the Search text box, click Home.
Tip
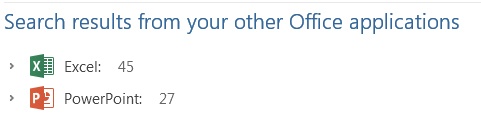
You can also use the Search For Online Templates text box to find specific templates. You can use single words or phrases, but single words will return the most results. After you enter your search string, press Enter to perform the search. For applications with similar functionality, when you search for a template, you may get results for other applications below the template thumbnails. For example, if you search for Calendar, you’ll find results for almost every application.
To view the other templates, click the arrow to the left of the application name to expand the list. When you double-click a template, the application will start, and then a new file is created based on the template.


The templates across the applications include examples of many of the features you’ll learn about in this book. Though some of them may include more advanced capabilities, such as macros used to automate tasks, we’ll introduce you to the tools you’ll need to utilize them so they can be modified to fit your needs.
In Office Home and Student 2013 you can share your documents in real time with a live audience with the free Office Presentation Service. The best part is participants don’t need the application to view your PowerPoint presentation or Word document. They can view it in a web browser on their computer, tablet, or most smartphones.
Tip
If you have notes stored in a OneNote notebook, you can share that notebook with participants during your presentation. Even if you don’t have specific notes, you can use a shared notebook for taking notes, capturing a brainstorming session, or as a whiteboard. For more information about sharing OneNote notebooks, see Chapter 27.
Tip
Presenting online through the Office Presentation Service is applicable to PowerPoint and Word. It requires an Office account and that the presenter and participants have an Internet connection. Saving the presentation in a shared location isn’t required for presenting online. For more information about Office accounts, see Chapter 3.
When you use the free Office Presentation Service, you present your slide show in PowerPoint or your Word document in Word and the participants view it in the corresponding Office Web App. To include audio or video, you’ll need a conference line or an online service, such as Skype.
In this exercise, you’ll present a PowerPoint presentation through the Office Presentation Service.
Set Up
You need the Fabrikam Management Team presentation located in the Chapter02 practice file folder to complete this exercise. Make sure you are signed in to Office, start PowerPoint, open the Fabrikam Management Team presentation, and follow the steps.
Click the File tab to open the Backstage view, and then click Share.
On the Share page, in the Present Online options to the right, make sure Office Presentation Service is selected.
Above the Present Online button, note the Enable remote viewers to download the presentation check box. You can select this option if you want participants to be able to save a copy of your presentation.
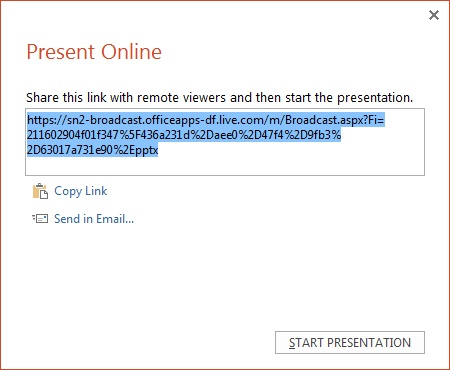
Click the Present Online button to view additional sharing options.
In the Present Online dialog box, click either the Copy Link or Send in Email option to share your presentation.
Click Start Presentation.
To advance to the next slide, press the Enter key.
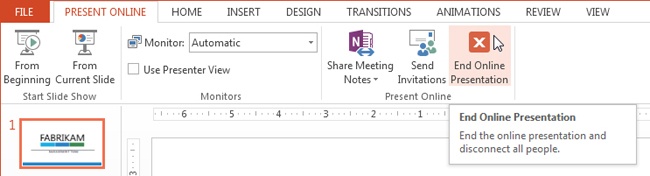
To end the presentation, press Esc to suspend it, and then on the Present Online tab, click End Online Presentation.
In the message box that confirms ending your presentation, click End Online Presentation.

When using the Office Presentation Service, you may want to explore the participant’s view and options. As noted in a tip in this exercise, you can copy the presentation link and paste it in your web browser to view what the participants view while you’re presenting. For instance, they can scroll through the presentation or document on their own, or they can use the Follow Presenter option so their screen changes as the presenter’s screen changes.
In both PowerPoint and Word, you can insert a linked video that’s stored in an online location, like your SkyDrive, Facebook, YouTube, or another website. Note that because online videos are linked, in order to play an online video during a PowerPoint presentation or from a Word document, you must have an Internet connection, and your computer must have access to the website where the video is stored.
To insert an online video, use the Insert tab. In Word, you can then play the video from the document. In PowerPoint, you need to be in Slide Show view to play your video.
In this exercise, you’ll add a link to a video into a Word document and play it after it’s inserted.
Set Up
You don’t need any practice files to complete this exercise. Start Word, create a blank document, and follow the steps.
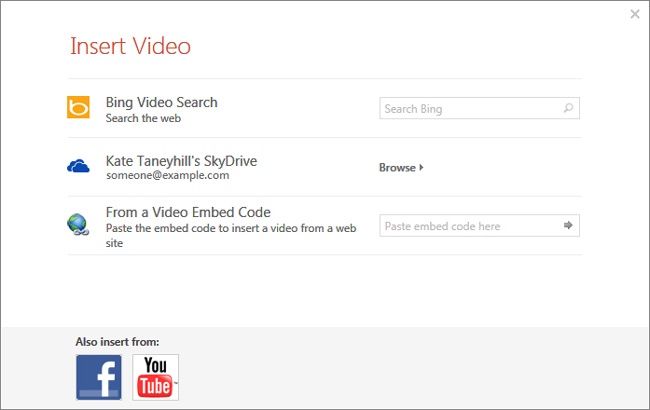
On the Insert tab, in the Media group, click the Online Video button.
Tip
In PowerPoint, on the Insert tab, in the Media group, click Video, and then from the list, click the Online Video button.
Important
In order to access social networking sites like Facebook or YouTube, you need to be signed in to Office with a Microsoft Account. For more information about Microsoft Accounts and signing in to Office, see Chapter 3.
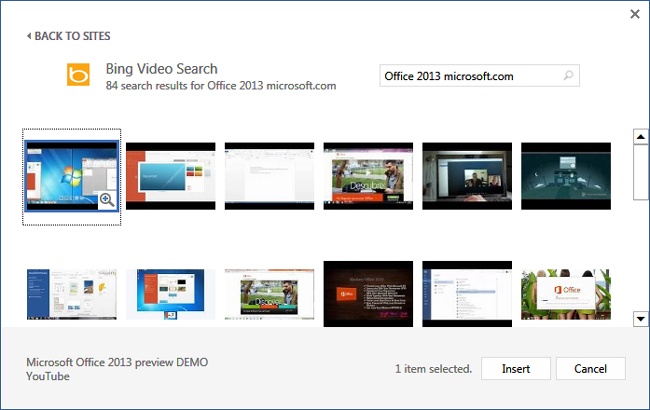
In the Insert Video dialog box, click in the Search Bing text box, enter Office 2013 microsoft.com and then press the Enter key to view your search results.
Click once on any video to select it and display more information about the selected video at the bottom of the dialog box.
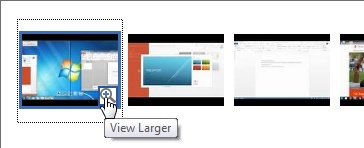
To preview the video, click the View Larger button in the lower-right corner of the video.
In the video preview, click the Play button in the center to play the video.
Click the Close button in the upper-right corner to close the preview.
Next let’s insert a video in the document. Click a video to select it, and in the lower-right corner of the Insert Video dialog box, click Insert.
Click the Play button in the center of the video preview picture to play the inserted video from the Word document. If the video doesn’t begin to automatically play, click the Play button at the bottom of the video.
Click anywhere in the Word document that is outside of the video screen to end the video.


See Also
For more information on working with video in PowerPoint, see Chapter 15.
The Office applications have features that are shared across Office, which means they work almost the same regardless of the application you’re using.
You use the Insert tab to add illustrations, such as pictures, shapes, SmartArt graphics, and charts.
To format illustrations and charts, click the object to select it, and then use the tools that automatically appear in the ribbon for the selected object.
You can share your Office documents with others in real time through the free Office Presentation Service.
When you insert an online video in an Office document, only a link to where the video is stored online and a preview picture are inserted. You need to be connected to the Internet to play the video.