
Chapter 7. SharePoint pages
One of the most fundamental aspects of Microsoft SharePoint or any web-based system, for that matter, is the pages. Pages in SharePoint are an important foundation of the infrastructure and of custom solutions, whether those solutions are farm solutions, sandboxed solutions, or SharePoint apps. Pages are used for a variety of scenarios, for instance, presenting information or hosting logic. Users need pages to display their content, applications need pages to render their UIs, and SharePoint needs pages to render lists, libraries, and so on.
This chapter explains how SharePoint works with pages. It begins with a discussion of the infrastructure and plumbing that is done with Microsoft ASP.NET and Microsoft Internet Information Services (IIS) to build the SharePoint virtual file system. This is an important area to know and can affect how you design and develop your solutions. Next, this chapter explains the different kinds of pages in SharePoint and how SharePoint uses the master page concept. You learn about features such as delegate controls, the Minimal Download Strategy (MDS), and the SharePoint ribbon.
SharePoint and ASP.NET
SharePoint is built on top of Microsoft .NET Framework 4.5 and ASP.NET, and it uses much of the ASP.NET core functionality. SharePoint uses the Web Forms technology and not frameworks such as the ASP.NET Model-View-Controller (MVC) framework. Understanding how SharePoint uses ASP.NET is fundamental if you are aspiring to do advanced SharePoint development. The next few sections review how a SharePoint site is hosted as an ASP.NET application in IIS and how SharePoint uses the ASP.NET framework to build its hierarchies of site collections, sites, and pages.
Learning ASP.NET basics
Before you enjoy the magic of SharePoint and the power of ASP.NET, it’s a good idea to review some ASP.NET basics. Many books are written on this topic, and if you’re not familiar with ASP.NET, you might want to have access to one or two of these books. Having a good understanding of ASP.NET makes your life as a SharePoint developer a lot easier.
Understanding ASP.NET and IIS
ASP.NET is a hugely popular server-side web application framework, based on Microsoft .NET, which you use to create fast, dynamic, and robust web applications. ASP.NET applications are typically hosted on the Windows Server operating system in IIS. One IIS website can contain one or more ASP.NET applications, each one hosted in a virtual directory, and the virtual directories are hierarchal, located within the IIS website. Each virtual directory is usually mapped to the physical path of the web server. The name of the virtual directory becomes a part of the URL of the site. Typically, all virtual directories share the same application pool. An application pool is the process that executes the code (the w3wp.exe process). The IIS website can also contain an application, which is a special form of virtual directory in which a separate or dedicated application pool is used, usually to ensure process isolation. Several IIS websites can share the same application pool and still have application isolation thanks to the .NET AppDomain provided by the .NET Framework.
The configuration for an ASP.NET application is stored in the configuration file called Web.config. This configuration file is very much like any other .NET application .config file, but it contains specific settings for ASP.NET. By default, each virtual directory or application in IIS can have its own Web.config file to override or set location specific settings. You learn more about the Web.config file and SharePoint in just a bit.
Using ASP.NET Web Forms
There are multiple ways to use ASP.NET to serve content and respond to requests. The most conventional way is by using .aspx pages, which is what SharePoint uses, but there are a plethora of alternatives, such as using ASP.NET MVC or the new ASP.NET Razor view engine. In the past, most SharePoint development focused on .aspx pages and the concept called Web Forms. Web Forms are composed of two components: the UI and the code-behind. Each component typically resides in two different files. The UI resides in the .aspx file, and the code-behind resides in .aspx.cs when working with C#, or .aspx.vb when working with Microsoft Visual Basic. The code-behind class contains the implementation of the object for the page, inheriting from the System.Web.UI.Page class.
The UI component of a Web Form consists of typical HTML controls (or tags) and Web Forms controls, also called server-side controls. Example 7-1 shows a typical ASP.NET .aspx page.
<%@ Page Language="C#" AutoEventWireup="true"
   CodeBehind="MyWebForm.aspx.cs" Inherits="Pages.ASPNET.MyWebForm" %>
<!DOCTYPE html>
<html xmlns="http://www.w3.org/1999/xhtml">
<head runat="server">
   <title></title>
</head>
<body>
   <form id="form1" runat="server">
   <div>
       <asp:Label ID="theLabel" runat="server" />
   </div>
   </form>
</body>
</html>
The .aspx page contains a combination of traditional HTML tags and Web Forms controls. The first line contains the page directive, which tells the compiler that this is an ASP.NET page and should be compiled. It also tells the parser the name of the code-behind file and what Page class this file should inherit from.
The elements within the page marked with the attribute runat=“server” are processed and parsed on the server before being sent to the client. In Example 7-1, the Web Forms control asp:Label represented a simple label control. To write dynamic content to this label, you can use the Page object of the page, implemented in the code-behind shown in Example 7-2. The code-behind file is a C# file with the extension .aspx.cs.
namespace Pages.ASPNET
{
   public partial class MyWebForm : System.Web.UI.Page
   {
       protected void Page_Load(object sender, EventArgs e)
       {
           theLabel.Text = "Hello ASP.NET!";
       }
   }
}
The code-behind contains a class for the specific page referenced in Example 7-2, inheriting from System.Web.UI.Page. In this case you use a method—the Page_Load method—to set the value of the label control. This method is added by Microsoft Visual Studio 2012 when you create the page, and is executed when the page is loaded.
If this Web Form was a part of a Visual Studio solution and you chose to publish it, Visual Studio would compile the .aspx.cs file into a .NET assembly. To run the Web Form, you would need to deploy the .aspx file to an IIS site and the assembly file into a folder called /bin on that IIS site. When a user requested this Web Forms .aspx page, the ASP.NET parser would read the .aspx file parse and convert the HTML and Web Forms controls into a control-tree, which represents the hierarchy of the controls. Next, it would create a source file with a new class that derived from the class specified in the page directive. Then it would compile this source file to an in-memory assembly that would be used to execute requests for this specific Web Form. The in-memory assembly lives as long as the IIS application pool is running or until the .aspx file is changed. If the file is changed, or rather the date and time stamp on the file is changed, the ASP.NET runtime will notice that, causing a recompile of the page.
Using ASP.NET master pages
To create a consistent look, feel, and behavior for all the pages in your web application, ASP.NET uses a concept called master pages. A master page defines the outline of a page and contains placeholder controls. These placeholder controls are then used by the pages that are using the master page (known as content pages) to build the complete page. For instance, the master page can define the navigation of the website, the footer, and other common features, whereas the content page defines the actual content and logic for the particular page.
A master page is very similar to a standard .aspx page. Instead of having the .aspx file name extension, however, a master page uses the .master extension. The page directives are replaced by a master directive, which contains one or more content placeholders. Suppose you converted the .aspx page in Example 7-2 to one master page and one content page. Example 7-3 shows the implementation of the master page and Example 7-4 shows the content page.
<%@ Master Language="C#" AutoEventWireup="true"
   CodeBehind="MyMaster.master.cs" Inherits="Pages.ASPNET.MyMaster" %>
<!DOCTYPE html>
<html xmlns="http://www.w3.org/1999/xhtml">
<head runat="server">
   <title></title>
</head>
<body>
   <form id="form1" runat="server">
   <div>
       <asp:ContentPlaceHolder ID="mainContentArea" runat="server">
       </asp:ContentPlaceHolder>
   </div>
   </form>
</body>
</html>
Example 7-3 and Example 7-4 have two main differences from the original .aspx page in Example 7-1. First, there is a master directive at the top instead of a page directive. A master directive works in the same way as the page directive for the .aspx page, and in this case, the master page also has a code-behind page with the extension .master.cs. The second difference is the area in which the label control previously was located. This is now replaced by a ContentPlaceHolder control with the name mainContentArea.
To use this master page file on your Web Form, you need to add a new attribute to the page directive, clear out the redundant controls, and add a Content control, in which you place the label control. Example 7-4 shows the result of the content page.
<%@ Page Language="C#"
   MasterPageFile="~/MyMaster.master" AutoEventWireup="true"
   CodeBehind="MyWebForm.aspx.cs" Inherits="Pages.ASPNET.MyWebForm" %>
<asp:Content ID="Content1" ContentPlaceHolderID="mainContentArea" runat="server">
   <asp:Label ID="theLabel" runat="server" />
</asp:Content>
In the page directive, you added the MasterPageFile attribute and pointed it to the master page in the ASP.NET application root; the rest of the attributes are left intact. All the HTML and ASP.NET controls are replaced by a single content control, in which you added the label control.
You just read a quick introduction to how ASP.NET pages work and how master pages are used to separate the UI from the page logic. SharePoint relies on this ASP.NET Web Forms concept, and it is very important that you understand Web Forms before you develop pages for SharePoint.
Understanding how SharePoint relates to IIS web applications
This section focuses on SharePoint, specifically on how SharePoint relates to ASP.NET and IIS. All content within SharePoint is hosted inside a SharePoint Web Application. Note that a SharePoint Web Application is not the same as an IIS web application. A SharePoint Web Application is a boundary for a lot of configurations such as authentication settings, databases, and security policies. A SharePoint farm has at least one web application, which is the one hosting Central Administration, and most farms have at least two web applications: Central Administration and one or more web applications hosting SharePoint content.
When a web application is created in SharePoint, a new IIS website is also created. This IIS website is the host and entry point for all SharePoint site collections and sites within that web application. All the ASP.NET settings for the IIS website will be used by all sites in the web application. Examples of settings are authentication methods and cache settings. If you’re familiar with ASP.NET, you know that ASP.NET stores a lot of configuration information in Web.config, which is stored in each ASP.NET application. The Web.config file exists in the file system of the server, typically in C:inetpubwwwrootwssvirtualdurectories<id> for SharePoint Web Applications. A SharePoint Web Application can also use multiple IIS websites through a technique called extending SharePoint Web Applications. Extending a SharePoint Web Application is of interest when you need to have different configuration settings for the same web application, because extending a SharePoint Web Application creates an additional IIS website, which has its own set of configurations.
Understanding the Web.config file
As mentioned earlier in this chapter, the configuration for an ASP.NET application is stored in the Web.config file. SharePoint is no different in this aspect. When a new SharePoint web application is provisioned and the IIS website is created, SharePoint creates the Web.config file and adds all the required settings to it so that SharePoint can work. Without a correctly configured Web.config file, SharePoint will not work. Usually you should avoid making changes to Web.config, but there are a few exceptions, which you learn about later in this chapter. Although you might want to modify Web.config, doing so could cause problems in addition to the lack of supportability. For instance, a SharePoint farm typically consists of more than one web server, so any changes made to the Web.config file requires you to make sure that the Web.config files are in sync on all machines. And if you add another web server to your SharePoint farm, SharePoint creates a new Web.config file, ignoring any customizing you might have handled on other machines. ASP.NET developers, and to some degree SharePoint developers, historically have stored configuration data in Web.config, however, this is very risky. There are plenty of other good ways to store configuration settings, such as by using SharePoint lists, property bags on farms, site collections, and site levels, or by using custom configuration objects in SharePoint.
SharePoint actually configures quite a lot in the Web.config file. In addition to using the standard configuration Section groups in Web.config, SharePoint has its own Section group named SharePoint and another called microsoft.sharepoint.client. Example 7-5 shows the different sections that are specific to SharePoint in Web.config.
<configuration>
 <configSections>
   <sectionGroup name="SharePoint">
     <section name="SafeControls"/>
     <section name="RuntimeFilter"/>
     <section name="WebPartsLimits"/>
     <section name="WebPartCache"/>
     <section name="WebPartWorkItem"/>
     <section name="WebPartControls"/>
     <section name="SafeMode"/>
     <section name="MergedActions"/>
     <section name="PeoplePickerWildcards"/>
     <section name="WorkflowServices"/>
     <section name="BlobCache"/>
     <section name="OutputCacheProfiles"/>
     <section name="ObjectCache"/>
     <section name="MediaAssets"/>
     <section name="ApplicationAuthentication"/>
   </sectionGroup>
 </configSections>
 <microsoft.sharepoint.client>
   <serverRuntime/>
 </microsoft.sharepoint.client>
 <SharePoint>
   <SafeMode/>
   <WebPartLimits/>
   <WebPartControls/>
   <SafeControls/>
   <PeoplePickerWildCards/>
   <WorkflowServices/>
   <MergedActions/>
   <BlobCache/>
   <ObjectCache/>
   <OutputCacheProfiles/>
   <MediaAssets/>
   <RuntimeFilter/>
 </SharePoint>
</configuration>
Some of these customizations are of interest because they help you understand how SharePoint actually works; for instance, later in this chapter, we discuss the SafeMode and the SafeControls sections. Most of these sections should be manually configured, but there are a few exceptions. For instance, the SharePoint BLOB cache is handled by the BlobCache section. By default, it is turned off, and to turn it on, you need to modify Web.config. Some of these sections are discussed in more detail later in this chapter, such as the SafeMode and SafeControls section, and some are discussed in other chapters.
Tip
After working with your web application for a while, you might notice that in the IIS virtual directory for the website are many Web.config .bak files, sometimes hundreds. This is normal on a developer’s machine. Every time SharePoint needs to make a change to the Web.config file, SharePoint automatically creates a backup file before making the configuration changes. On your developer machine, you can delete these files.
As a developer, one of the first things you will want to do is configure the Web.config file for debugging and turn off the SharePoint friendly error message page. If you’re using Visual Studio 2012 and start debugging your first farm solution on a web application, Visual Studio will ask you if this should be done automatically. If you choose to opt out or manually debug it yourself, you need to modify the Web.config file in three different places:
The debug attribute of the /configuration/system.web/compilation element should be set to true.
The mode attribute of the /configuration/system.web/customErrors element should be set to off.
The CallStack attribute of the /configuration/SharePoint/SafeMode element should be set to true.
The first modification tells the compiler to compile assemblies in debug mode, and the second modification makes sure that the yellow ASP.NET error page is shown instead of the user-friendly SharePoint error page. The final modification tells SharePoint to propagate any error messages up the call stack.
Understanding the SharePoint virtual file system
When the IIS website receives a user request, it must find out which page to render. This request is sent through the ASP.NET pipeline. The pipeline contains a set of HTTP modules that the request will go through before eventually ending up in an HTTP handler. Each HTTP module subscribes to one or more events in the ASP.NET pipeline and acts on events such as authentication, request mapping, and request execution. The HTTP handlers are responsible for the actual processing of the request, for instance, the request of a Web Forms .aspx page or a web service .asmx file.
SharePoint adds its own set of HTTP modules and handlers when the Web.config is created for a SharePoint web application. Most importantly, SharePoint adds the SPRequestModule. It is in this module that SharePoint does the majority of hooks into the ASP.NET pipeline. This module is also responsible for the SharePoint virtual file system.
The root directory of the IIS website for a SharePoint Web Application does not contain a lot of files. Basically, it consists of the Web.config file and a couple of directories. So where is SharePoint storing all the files and pages in the SharePoint sites? SharePoint is built to host thousands of sites and pages and to handle all this on a large scale and synchronized over a multitude of servers, so these files cannot be stored in the file system. The site collections, sites, lists, list items, and pages are stored in databases, called content databases. Any page within a site will have an entry in one of the content databases. To build a file system with these databases, SharePoint uses an ASP.NET feature called virtual path provider. Instead of using the default ASP.NET virtual path provider, which maps a request to the corresponding file in the file system, SharePoint has its own virtual path provider, implemented in the internal SPVirtualPathProvider class.
This virtual path provider is responsible for finding the correct page among the databases connected to the web application. However, some pages, called application pages, are not served through the content databases, and these reside in the file system. These physical files are stored in the SharePoint root and are served through one of the IIS virtual directories. The most common of these IIS virtual directories is the \_layouts folder, which is mapped to the TemplateLayouts folder in the SharePoint Root. In previous versions of SharePoint, this part was straightforward, but in SharePoint 2013, this mapping is getting a bit trickier. The \_layouts virtual directory is mapped to the SharePoint 2010 TemplateLayouts folder, whereas the \_layouts15 virtual directory is mapped to the SharePoint 2013 TemplateLayouts folder. The reasoning behind this is to not break compatibility when you’re updating a site collection or solution from SharePoint 2010 to SharePoint 2013. This virtual directory is also mapped to the root of each site collection so that the directory can always be reached through ~sitecollection\_layouts. You learn later in this chapter about how to create and deploy application pages.
When the request is handled by the SharePoint module and the SharePoint virtual path provider, the virtual path provider first tries to find out whether the request targets one of the files in the file system, which exists in one of the virtual directories. If the request does, that file will be used when processing the request. If the request does not belong to any virtual directory, it is assumed to exist in one of the content databases, and the SharePoint virtual path provider will locate the file within one of the content databases.
Working with files and folders in SharePoint
SharePoint provides several application programming interfaces (APIs) that can be used to work with pages, files, and folders in the SharePoint virtual file system. The most common ones are the server-side API and the client-side object model (CSOM), introduced in SharePoint 2010. There are also alternatives such as WebDAV and the new Representational State Transfer (REST) APIs. Which model you choose largely depends on what you are building: a server-side component, a SharePoint app, a companion application, and so on.
The server-side object model is the method that gives you the most flexibility when working with files and folders. Creating a new document library on a SharePoint site is a good example of this and illustrates some of the interesting aspects of SharePoint. The following snippet will create a new document library in the current site:
SPWeb currrentWeb = SPContext.Current.Web;
currentWeb.Lists.Add(
   "Specifications",
   "Library for specifications documents",
   SPListTemplateType.DocumentLibrary);
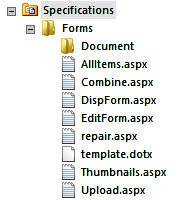
In this preceding code, you’re adding a new list of the type DocumentLibrary; a document library is just a special version of a SharePoint list. When this library is created, SharePoint provisions a folder in the root of the site (SPWeb) with the name as specified in the code. It also provisions a subfolder called Forms and a set of files in that folder. The Forms folder is hidden from the users, but it can be seen in SharePoint Designer, for example, as shown in Figure 7-1. The files in this Forms folder are used by SharePoint when users are uploading, adding, or modifying the properties of those files. There is also one file per public view of the folder. These views are normal content pages on the SharePoint site and can be modified by using the UI, SharePoint Designer, or code. You examine how these content pages works in the Understanding content pages section later in this chapter.
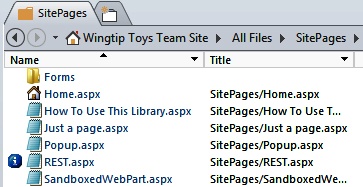
Files and folders within a SharePoint site can exist in a library or outside a library. For instance, when a SharePoint Team site is provisioned, its home page is located in a library called Site Pages at the address /SitePages/Home.aspx, but it also provisions a few files directly at the root of the site. There are a few important differences between files inside a library and files provisioned outside of a library. Files outside of a library cannot have any file properties; these files don’t have versioning and you can’t control permissions.
To work with files and folder by using the server-side object model, you use the SPFile and SPFolder objects. Files are retrieved by using the web relative URL:
SPWeb currrentWeb = SPContext.Current.Web;
SPFile defaultFile = currentWeb.GetFile("default.aspx");
SPFile homeFile = currentWeb.GetFile("SitePages/Home.aspx");
The first retrieved file fetches a file existing directly in the root of the web, which is not in a document library, and the second file fetches a file existing in the Site Pages document library. If you specify a URL to a file that does not exist, you do not get an exception or a null value returned. Instead, a normal SPFile object is returned but with the property Exists set to false.
After you have the SPFile object, you can perform operations on the file, such as read, update, and delete. To delete a file, you use the Delete method, and to retrieve its contents, you use OpenBinary or OpenBinaryStream. You can programmatically add a new file to the site in several ways. You could read a file from the file system, or you could read a file from a memory stream, which could be a result of a file upload, for example. The sample code in Example 7-6 illustrates how to dynamically create an .aspx page in memory and then add it to a document library.
string title = "A dynamically generated HTML page";
StringBuilder sb = new StringBuilder();
sb.Append("<%@ Page %>");
sb.Append("<html>");
sb.Append("<head>");
sb.AppendFormat("<title>{0}</title>", title);
sb.Append("</head>");
sb.Append("<body>");
sb.AppendFormat("<h1>{0}</h1>", title);
sb.Append("</body>");
sb.Append("</html>");

SPWeb web = SPContext.Current.Web;
SPList sitePages = web.Lists.TryGetList("Site Pages");
if(sitePages != null)
{
   sitePages.RootFolder.Files.Add(
       "demo.aspx",
       System.Text.Encoding.UTF8.GetBytes(sb.ToString())
   );
}
The source code of the .aspx page is created by using the .NET object StringBuilder, and in this case you’re just adding an ASP.NET page directive, some HTML, and simple heading text. After the data for the file is created, you retrieve the Site Pages library. To get this library, you first need to get the SPList object of the library. Notice that I use the TryGetList method, which returns null if the list cannot be found and does not throw an exception. You use this list object to retrieve the root folder of the library, the RootFolder property, and then with that folder access the Files collection and use the Add method to add the file. You must specify the URL of the file; in this case, you use the overload of the Add method that takes a byte array so that the StringBuilder object is converted to a string and then to a byte array.
Most of these operations are also accessible when using the CSOM, the REST API, or WebDAV operations, which allow you to work with files and folders in companion applications, such as apps for Windows 8 and Windows Phone 8. It also allows you to access, modify, and provision new files in the host web from a SharePoint app.
Understanding page customization
Suppose you have a page or file that should exist in all or many of your sites in your set of thousands of sites, and the page is not an application page. Having thousands of copies of that page would cause both performance and storage issues in addition to complex upgrade scenarios. SharePoint handles this through a process called page customization. When a page is created in SharePoint as a result of a site being created or a Feature being activated, that page can exist in the physical file system, and only a reference is created in the content database. The file existing in the file system is a template file for the files existing in the sites. In earlier versions of SharePoint, this template file was referred to as a ghosted file. Such a file solves a lot of potential problems. You have only one copy of the file to process, maintain, and update.
Understanding uncustomized pages
A page is called uncustomized, or ghosted, when the actual file (the template file) resides in the file system and is referenced from a site. For instance, when you create a new site collection, a set of files are added to it. One file that is always provisioned is the master page. Because this file is provisioned to every site collection you create, you could have thousands of these; it would be a bad idea to create a new copy of the file and its contents into every site collection. Thus, SharePoint creates a reference in the site collection and the virtual file system that points to the file on the disk. An uncustomized file does not have to be an .aspx file; it can be any kind of file type.
An uncustomized file gives you several benefits, both from a development perspective and from a farm maintenance perspective. As long as the page is uncustomized, any updates in the file on the file system are reflected in the site collections. Assume the opposite: if you had a copy in every site collection or site, any update to that file would have to be done in all the sites, requiring you to create either Feature upgrades or Windows PowerShell scripts, introducing upgrade complexity. Because the file resides only in the file system, the content databases contain fewer BLOBs, which saves you space in the content databases. Uncustomized .aspx pages also have the benefit of being compiled at the first request time, compared to customized pages, which aren’t. Historically, this has been a point of performance discussions, but with current hardware and compilers, this is less of an issue.
Worth noticing here is that uncustomized pages can be created only by using full trust solutions. If you are building a sandboxed solution or SharePoint app, all pages you provision will be customized. Only full trust solutions have access to the file system.
Understanding customized pages
When a page is provisioned from a SharePoint app or a sandboxed solution, or when it is uploaded to SharePoint by the user or programmatically, that page and its contents are stored only in the content database. These pages are called customized (or unghosted). If you modify an uncustomized page, for example, you modify the uncustomized master page of a site collection, and the file becomes a customized page; its contents are from now on stored only in the content database. When building SharePoint apps or sandboxed solutions, all of the assets in your solution will be customized.
Even though it has been changed, a previously uncustomized page will always keep a reference to its template file. As a site owner, you always have the possibility of reverting the page to its original state and discarding all customizations.
Restoring a customized page that has a template file to its uncustomized state can be done programmatically, and you can check the customization status of a page at any time. You can do it by using SharePoint Designer 2013 or by using the server-side API. To revert the file to its uncustomized state by using SharePoint Designer, you select the file, right-click it, and then select Reset To Site Definition. Figure 7-2 shows a file that has been modified from its uncustomized state.
To check a file’s customization state and eventually restore it to its uncustomized state by using the server-side API, you use the following code—for example, in a Web Part or the code-behind of the page:
SPFile file = SPContext.Current.Web.GetFile("SitePages/Home.aspx");
if (file.CustomizedPageStatus == SPCustomizedPageStatus.Customized)
{
   file.RevertContentStream();
}
On the first line of the preceding code, you grab the file from the current SPWeb instance, using the site relative URL. On the second line of the code, the CustomizedPageStatus property is evaluated to determine whether the retrieved page has the status set to Customized. If it does, the RevertContent-Stream method is called on the file object to restore its state to uncustomized. All customizations in the file are lost, and the file contents of the template file are now to be used instead.
Note that the SPCustomizedPageStatus enumeration actually has three values: Uncustomized, Customized, and None. At this point, you might know what the first two enumeration values mean, but what does the third one None mean? A file or page with the CustomizedPageStatus set to None implies that the file has been created dynamically or uploaded to SharePoint and does not have any corresponding template file. This file or page cannot be reverted to its original state. A page added by using SharePoint apps or sandboxed solutions always has this status set to None. For instance, the pages that you dynamically created in Example 7-6 do not have a template file and thus cannot be restored.
Note
When a site collection is updated from SharePoint 2010 mode to SharePoint 2013, the site collection administrator can perform a Health Check, which checks the health of the site collection according to a set of rules. One of these rules checks whether any pages in the site collection are customized and can be restored to their uncustomized state.
Understanding Safe Mode parsing
Earlier in this chapter, you learned that uncustomized pages are compiled the first time they are used, whereas customized pages are not. Recall from the discussion of ASP.NET basics that one of the core features of ASP.NET is that pages are compiled at the first request to improve performance and resource utilization. Uncustomized pages are parsed and compiled in direct mode by the standard ASP.NET parser. The benefit of this is, of course, performance, and only one compiled copy is needed because uncustomized files share the same template file. However, what happens to customized pages then?
You can have hundreds of thousands, if not millions, of customized pages in SharePoint. Compiling every single one of them would cause a huge memory footprint. SharePoint has a concept called Safe Mode parsing, which is used for customized pages or pages without a template file, such as pages supplied by a SharePoint app. These pages are not compiled but instead parsed on every request. They are parsed in Safe Mode, as opposed to direct mode. Customized pages are not required to be compiled because there are a couple of restrictions set on them:
Inline code is not allowed. Having that would require compilation and would introduce severe security holes.
All controls in the page must be registered as safe in the Web.config file. This allows farm administrators to have control over which controls can be used in a web application.
The Safe Mode parsing not only protects your servers from running out of memory but also serves as a security barrier. Only code admitted to the servers by the farm administrators are allowed to run in compiled or direct mode. A site owner cannot upload a file through the UI or modify a file with inline code by using SharePoint Designer and have that file execute on the server. SharePoint Designer is so smart that it does not allow you to save pages containing inline code. However, users can add controls that are registered as safe in these customized pages.
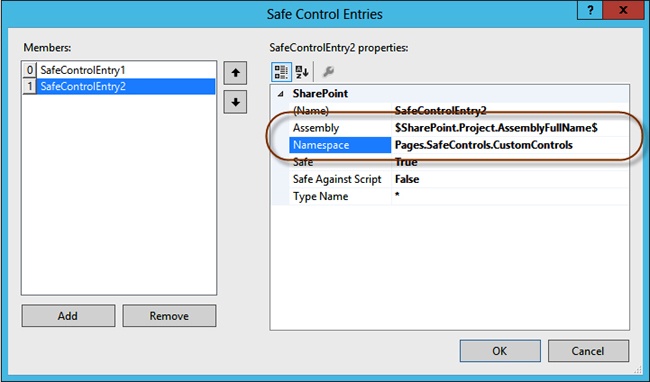
By default, most of the ASP.NET and the SharePoint controls and Web Parts are registered as safe. All controls that are registered as safe can be found in Web.config under the SafeControls element in the SharePoint section. If you’re building your own farm solution and add custom controls or Web Parts, these custom controls or Web Parts must be registered as safe. Visual Studio 2012 will do the work for you in most cases, such as add a Web Part. But if you’re creating a custom control, you need to make sure that it is registered as safe. There are two ways to do this. The preferred option is to either use an existing SharePoint Project Item or add a new empty SharePoint Project Item and then modify its properties. In the SharePoint Project Item Properties window is a collection called Safe Control Entries. To add a new safe control registration, click Add, and then modify the Namespace property of that new safe control, as shown in Figure 7-3. All added safe controls will then be added to the solution manifest file.
You can also add your safe controls directly to the solution manifest file by using the Package Designer in Visual Studio 2012. Open the Manifest tab, and then expand the Edit Options at the bottom. Example 7-7 shows how you can edit the solution manifest file XML to create a custom safe control entry.
<Solution xmlns="http://schemas.microsoft.com/sharepoint/">
 <Assemblies>
   <Assembly
     Location="$SharePoint.Project.AssemblyFileName$"
     DeploymentTarget="GlobalAssemblyCache">
     <SafeControls>
       <SafeControl
         Assembly="$SharePoint.Project.AssemblyFullName$"
         Namespace="Pages.CustomControls"
         TypeName="*"/>
     </SafeControls>
   </Assembly>
 </Assemblies>
</Solution>
The package manifest modification in Example 7-7 adds a new SafeControl entry to the Web.config file for the current project assembly and for all controls existing under the namespace called Pages.CustomControls. Note how the Visual Studio 2012 replaceable tokens are used to avoid entering the full name of the assembly, and also note the option to modify the assembly name and versions without making changes to the package manifest modification.
All custom-added safe control entries are merged with the ones created by the SharePoint Project Item into the solution manifest file. After the solution package is deployed to a web application, the entries are merged with the Web.config. When the solution package is retracted, the retraction process makes sure that any safe control entries in the Web.config file are removed. You do not need to change this manually in the Web.config file.
Note
Safe Mode parsing is controlled in the Web.config file of the web application. In the SharePoint section of the Web.config file is an element called SafeMode. Under this element is another element called PageParserPaths, which can contain exceptions to the Safe Mode parsing. Using PageParserPath elements, you have to option to use direct mode parsing on specific folders or sites and therefore bypass the security imposed by Safe Mode parsing. You can do these overrides for any virtual URL except for pages hosted in SharePoint App Webs. You typically don’t need to and should not modify the Safe Mode parsing settings, because of security risks.
Using pages in SharePoint
The page rendering system in SharePoint is based on ASP.NET Web Forms. This has its benefits and drawbacks. It is a well-known and proven programmable model, but it does not have all of the flexibility of more modern frameworks such as the ASP.NET MVC framework. SharePoint uses and extends the Web Forms pattern, and it is really important to understand how pages are rendered by using master pages. SharePoint pages can be divided into two major categories: site pages and application pages. In this section, you learn about how to create master pages and both site and application pages, and how to package these customizations into deployable solutions.
Understanding master pages
Master pages were introduced with ASP.NET more than a decade ago. As described earlier in this chapter, master pages can best be described as a template with a set of placeholders in which content and logic can be inserted. Master pages allow you to have a similar UI for all pages within a site collection. Note that we said Site Collection here. In SharePoint, master pages are stored on a per–Site Collection basis, in a specific gallery called the Master Page Gallery (/_catalogs/masterpage) in the root web of the site collection. Depending on how you deploy your solution, the master page within a gallery could be a file on the SharePoint sever file system or exist as a customized file in only a specific site collection. Refer to the preceding discussion about customized and uncustomized files.
Understanding SharePoint 2013 default master pages
SharePoint 2013 comes with a set of master pages; some are new to the 2013 version, and some are in the product for compatibility with previous versions. There was a huge difference in the master pages between SharePoint 2007 and SharePoint 2010, and the SharePoint 2010 master pages (v4.master) were built specifically to handle the visual upgrade scenario in which the sites were updated from SharePoint 2007 to SharePoint 2010, but the SharePoint 2007 UI was used. In SharePoint 2013, this visual upgrade option is no longer available. The upgrade mechanism is far better, and you can actually run the whole site collection in SharePoint 2010 mode instead of just emulating the 2010 UI. You can create trial site collections, which essentially are an exact copy of your site collections, and test how they look when upgraded to SharePoint 2013. This allows you to fix the UI and other issues before upgrading the original site to SharePoint 2013.
In SharePoint 2013, two new master pages are provisioned in addition to those provided by SharePoint 2010. These are the default master pages provisioned in sites in SharePoint 2013:
seattle.master. New default SharePoint 2013 master page
oslo.master. New alternative SharePoint 2013 master page
v4.master. SharePoint 2010 default master page
minimal.master. SharePoint 2010 minimal master page
The main differences between the master pages seattle.master and oslo.master are that when you’re using oslo.master, the top navigation pane is replaced with the left navigation pane, and the side bar on the left disappears, giving you more real estate for content on the page. The built-in feature called Change The Look, or Design Gallery, takes advantage of these two master pages. The design you choose determines which master page is used.
Dissecting the seattle.master file
As just described, the default master page in SharePoint 2013 is called seattle.master. The SharePoint 2013 master page is one of the core pieces in the UI and interaction of SharePoint, and you need to understand how it is constructed and works. A poorly crafted custom master page can potentially break the UI in a lot of ways. We recommend that you always start with the seattle or oslo master pages when you’re building a master page that will be used for intranet/collaboration scenarios. If you’re building a public-facing website, it’s a different story—you have much more flexibility.
The best way to understand the SharePoint 2013 master page is by examining it. Example 7-8, which shows parts of seattle.master, highlights some of the features of the master page that you should understand as a SharePoint developer or designer. If you worked with SharePoint 2010, you will find some aspects are familiar and others are new. First, SharePoint 2013 has been built with web standards in mind, and you will find that the generated HTML is much more compliant with modern web browsers. Support for Windows Internet Explorer 7 is not available in SharePoint 2013. But before going further into the details, review the outline shown in Example 7-8.
<%@ Master Language="C#" %>
<!DOCTYPE html PUBLIC "-//W3C//DTD XHTML 1.0 Strict//EN"
 "http://www.w3.org/TR/xhtml1/DTD/xhtml1-strict.dtd">
<SharePoint:SPHtmlTag dir=" ID="SPHtmlTag" runat="server">
 <head runat="server">
   <SharePoint:PageTitle runat="server">
     <asp:ContentPlaceHolder id="PlaceHolderPageTitle" runat="server">
       <SharePoint:ProjectProperty Property="Title" runat="server" />
     </asp:ContentPlaceHolder>
   </SharePoint:PageTitle>
   <SharePoint:AjaxDelta ID="DeltaPlaceHolderAdditionalPageHead"runat="server">
     <asp:ContentPlaceHolder ID="PlaceHolderAdditionalPageHead" runat="server" />
       <SharePoint:DelegateControl runat="server"
         ControlId="AdditionalPageHead" AllowMultipleControls="true" />
     <asp:ContentPlaceHolder ID="PlaceHolderBodyAreaClass" runat="server" />
   </SharePoint:AjaxDelta>
 </head>
 <body>
   <SharePoint:SharePointForm runat="server" >
     <asp:ScriptManager ID="ScriptManager" runat="server"  />
     <div id="suiteBar"> </div>
     <div id="s4-ribbonrow"> <div>
     <div id="s4-workspace">
       <div id="s4-bodyContainer">
         <div id="s4-titlerow"> <div>
         <div id="contentRow">
           <div id="sideNavBox"> </div>
           <div id="contentBox">
             <div id="notificationArea"></div>
             <SharePoint:AjaxDelta runat="server">
               <asp:ContentPlaceHolder ID="PlaceHolderMain" runat="server" />
             </SharePoint:AjaxDelta>
           </div>
         </div>
       </div>
     </div>
   </SharePoint:SharePointForm>
 </body>
</SharePoint:SPHtmlTag>
One of the things you might have noticed when looking at the code in Example 7-8 is that the standard HTML tags <HTML>, <TITLE>, and <FORM> that were used in previous master pages for SharePoint (v4.master) are now replaced with SharePoint-specific web controls: SPHtmlTag, PageTitle, and SharePointForm, respectively. The latter two are required because of MDS.
You might also have noticed that the master page contains a lot of content placeholders, which you learned about earlier. The content placeholders are paramount, and there are a total of 34 of them in the seattle.master, though only a few are shown in Example 7-8. When building your custom master page, you must not forget to include all of these content placeholders, because various features in SharePoint are dependent on them, and omitting one might break your whole site. If you do not want to show the content placeholder and its content, just add the Visible attribute to the control and set its value to false, or place the placeholder in a control or an element that has its Visible attribute set to false. The content placeholders make it easy for page developers to insert their own content and controls into the pages.
Using delegate controls
What if you want to insert something on all pages in the farm or in just one site? SharePoint has the answer for that: delegate controls, which are declared by using the DelegateControl control. Delegate controls allow you to add one or more web controls to a specific location in all pages on a farm, in a web application, in a site collection, and at the site level. Delegate control locations and characteristics are specified in the master page. A delegate control can allow only one control to be rendered or multiple controls to be rendered by using the AllowMultipleControls property. There are several predefined delegate controls in the SharePoint 2013 master pages, some of which existed in SharePoint 2010. SharePoint itself uses delegate controls heavily.
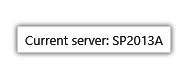
To add a custom control to a delegate control, you need to create a feature in a SharePoint solution, the scope of which determines where the delegate control should be applied. One of the most common delegate control locations to use is the AdditionalPageHead delegate control location. This location is in the head element definition of the master page, and it allows multiple controls. This delegate control could be used to insert a client-side script on all pages, perhaps based on some server-side condition. To understand this, you will build a quick delegate control that shows the name of the current server as a SharePoint notification message. First, you need to create a new Visual Studio SharePoint 2013 farm solution. Note that delegate controls can be used only by farm solutions. The control that you’re going to add is created as an ASP.NET WebControl and is implemented as shown in Example 7-9.
public class ServerNameControl: WebControl
{
 protected override void OnPreRender(EventArgs e)
 {
   string script = string.Format("SP.UI.Notify.addNotification('Current server: {0}'),",
     System.Environment.MachineName);
   ScriptManager.RegisterStartupScript(this.Page, typeof(ServerNameControl),
     "currentServer", script, true);
 }
}
All this custom web control does is create a JavaScript string that uses the SP.UI.Notify.addNotification method to show the name of the current machine. This script is then registered with the ScriptManager. To connect this control to the delegate control AdditionalPageHead in the master page, you need to add an Empty element SharePoint Project Item to the solution and add the following Collaborative Application Markup Language (CAML):
<Elements xmlns="http://schemas.microsoft.com/sharepoint/">
 <Control Id="AdditionalPageHead"
   ControlAssembly="$SharePoint.Project.AssemblyFullName$"
   ControlClass="Pages.DelegateControl.DemoControl"
   Sequence="100"/>
</Elements>
This elements manifest contains a Control element that uses the Id attribute to tell SharePoint which delegate control to connect to. In this case, you’re using a web control, and you need to specify the control assembly and class name. Finally, the Sequence attribute is used to tell SharePoint in which order to add the controls. For delegate controls, which allow only one single control, the control with the lowest sequence number is chosen. The Control element also supports using a control template (.ascx file) instead of a web control. To use a control template, you need to specify the ControlSrc attribute instead of the ControlAssembly and ControlClass. When the empty element SharePoint Project Item was added, Visual Studio automatically added a feature to the solution with the scope set to Web. You can change this scope to the scope of your choice.
You need to do one final task before you can deploy and test this delegate control: make the web control a safe control, as discussed earlier in this chapter, in the Understanding Safe Mode parsing section. Right-click the SharePoint Project Item you created, and then click Safe Control Entries. Add a new entry and modify the namespace so that it matches the namespace where you created the control.
Now it’s time to test the delegate control. Deploy the solution and browse to the site where you deployed it. When browsing between pages, you should see a notification message displaying the name of the current server, as shown in Figure 7-4.
Referencing master pages in SharePoint
You’ve learned how to reference master pages in ASP.NET by using the MasterPageFile Page directive and the name of the master page file. If you review the source code of a SharePoint page, you might notice that it is not referencing a master page by its name directly. Instead SharePoint uses dynamic tokens to specify the master page file:
<%@Page MasterPageFile="~masterurl/default.master" %>
The ~masterurl/default.master is a dynamic token that during runtime is replaced with the default master page of the site. The default master page URL is stored in the MasterUrl property of the SPWeb object as a server relative full path to the master page. There is also another secondary master page dynamic token called ~masterurl/custom.master. This token is mapped to the CustomMasterUrl of the SPWeb object. The custom master URL is not used by content pages by default in SharePoint, except when using publishing sites, and you are free to use it if you need an alternative master page for your customizations and pages. Both the MasterUrl and CustomMasterUrl are by default using the seattle.master and have the value of /_catalogs/masterpage/seattle.master.
Understanding MDS
Another control that makes the master page even more interesting is the AjaxDelta control. This is a brand new control in SharePoint 2013, and it is used to mark regions in the master page that can be updated dynamically when using MDS. You could say that it resembles ASP.NET UpdatePanels, but the AjaxDelta control is smarter.
SharePoint 2013 has been optimized for performance in several ways. One of the focus areas has been client-side code and perceived performance, specifically the way in which SharePoint 2013 renders pages. The order and way that JavaScripts and other client-side assets have been optimized gets users working with the UI faster. Second, the introduction of MDS improves the interface so that subsequent page reloads after the first page is rendered are much faster. This speed is achieved by a combination of client-side JavaScript and server-side code that calculates which parts of the page have changed so that only those changed pieces are sent back to the client. We will now walk through how MDS works, and explain how you can take advantage of it and what you need to think of as a developer when working with sites using MDS.
Improving performance with MDS
If you’ve worked with SharePoint 2013, you might have noticed that the page URLs on team sites is very different from page URLs in previous versions of SharePoint. When browsing to a site by using MDS, users are redirected to a page at /_layouts/15/start.aspx:
http://wingtiptoys/_layouts/15/start.aspxThis is a page requiring very few calculations and renders fast. It will, while displaying a friendly “Working on it” message, load the real home page of the site being visited. The Home page is loaded dynamically by using a JavaScript object called the DeltaManager, implemented in start.js. This JavaScript object makes an asynchronous call to the actual page requested by using an extra set of query string parameters. The HTTP request could look like this:
http://wingtiptoys/SitePages/Home.aspx?AjaxDelta=1&isStartPlt1=1365200007233The AjaxDelta=1 parameter tells SharePoint that this is an MDS request, and only the delta parts of the page should be returned. The second parameter is the current time stamp and indicates that this is the initial MDS request sent. When the result of the MDS request is returned, the DeltaManager updates the delta parts of the page and, at the same time, changes the URL and appends the relative path to the current page:
http://wingtiptoys/_layouts/15/start.aspx#/SitePages/Home.aspxThe DeltaManager not only handles content updates in the delta parts, it also loads and executes any new JavaScripts sent back in the MDS response. The perceived performance by the user is improved because of faster page transitions and because the used bandwidth is reduced as a result of only the deltas sent over the wire. The MDS response could also result in a full reload of the page if any incompatibles with MDS are found in the page, and you learn more details about later in this section.
More Info
For more in-depth information about the MDS request and response, go to the following blog post by Wictor Wilén: http://www.wictorwilen.se/sharepoint-2013---introduction-to-the-minimal-download-strategy-mds.
Understanding the MDS feature
MDS is implemented as a web-scoped SharePoint Feature and can be enabled or disabled on sites. The Feature is called Minimal Download Strategy, and its folder name is MDSFeature. By default, it is enabled on team sites, wiki sites, blog sites, and elsewhere, as shown in Figure 7-5. It is not enabled and will not work on any publishing sites.

The enabled MDS feature turns on or off a property on the SPWeb object called EnableMinimalDownload. When that property is set to true, SharePoint tries to use MDS when browsing between pages.
Working with MDS requirements and compliance
You’ve examined the outline of the default SharePoint 2013 seattle.master master page, and you should have seen the presence of the AjaxDelta controls. These controls are one of the requirements for MDS. They mark the areas where content can be changed dynamically—that is, during a page transition, the contents of the AjaxDelta controls can be replaced, whereas the markup that is not in an AjaxDelta control is persistent between page navigations.
All pages that are requested by using MDS must be derived from the SharePoint DeltaPage class. This base class is a requirement for doing the necessary delta calculations, and most of the default SharePoint pages inherit from this class. Pages not inheriting from this class force a full reload of the page. Not only are the pages required to derive from this base class, but all controls present on the requested pages must be MDS-compliant. Being MDS-compliant means that the controls or Web Parts have been explicitly marked with the MdsCompliantAttribute and the IsCompliant property set to true. If the DeltaPage detects any control without this attribute or with the IsCompliant property set to false, it returns a message to the client DeltaManager that a full page reload is required. The MdsCompliantAttribute can be set on classes or on an assembly, making all controls within that assembly compliant or not compliant. The attribute is used as follows:
[MdsCompliant(true)]
public class MdsCompliantWebPart: WebPart {
 ...
}
The client DeltaManager object always sends information about the current master page and its version in the MDS request. The DeltaPage uses this information to determine if the master page has been changed, which requires a full reload of the page.
A special control called PageRenderMode can be inserted on any page to control the MDS status. It can be used to disable MDS for a specific page if required. This control is, for instance, inserted into master pages that are converted as a result of using the Design Manager. To prohibit a page from being rendered by using MDS, insert the following snippet into any page or master page:
<SharePoint:PageRenderMode runat="server" RenderModeType="Standard"/>
Understanding content pages
Up until now, you’ve focused on master pages and how pages are rendered. Now it’s time to review the most common type of page in SharePoint: content pages, also known as site pages. As you learned earlier in the chapter, content pages are pages where the actual content of the website resides; they are editable by the site owners and members by using either a browser or SharePoint Designer. Content pages can be created by users, but many are automatically created when a site is created. For instance, as shown earlier, the view, edit, and add forms for lists and libraries are created for you. They are normal content pages and can be customized as such. This section explains how to create a new content page and how to package it into a solution for deployment.
Creating a content page
You are going to build a simple content page by using the default SharePoint 2013 master page, based on the knowledge you’ve gathered so far. This is how you would create a simple content page by using one of the content placeholders in the master page:
<%@Page MasterPageFile="~masterurl/default.master"%>
<asp:Content ContentPlaceHolderId="PlaceHolderMain" runat="server">
<h1>This is the simplest Content page ever</h1>
</asp:Content>
You specify the default master page dynamic token to give you the default master page on the site, which is seattle.master unless changed. Next, you specify one asp:Content control with the attribute ContentPlaceHolderId set to PlaceHolderMain. This control contains some simple HTML markup that will be replaced in the specified content placeholder in the master page. This page can now be added to a SharePoint site as previously done. You can create the page directly in SharePoint Designer 2013, or you can even create it in Notepad and upload it to a document library. You will also learn how to provision a page by using a SharePoint feature, which is the preferred way of adding content pages.
Deploying a content page
So far, you’ve learned how to use the server-side API to add a new file, and you’ve learned that pages can be added by using SharePoint Designer 2013 or by uploading them to a library. Most often you will want to package your solution into a SharePoint solution package (a WSP file), or if you’re building a SharePoint app, you will want to create an app package. Both of these ways of packaging solutions use basically the same approach when deploying pages. In this section, you build a WSP package by using Visual Studio 2013, add a custom content page to the solution, and then finally deploy the page to SharePoint. You start doing this by using a farm solution and then later explore what it looks like in a sandbox solution and an app scenario.
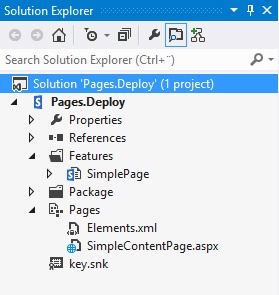
Create a new, empty SharePoint 2013 project and choose to deploy it as a farm solution. After the project is created, add a Module SharePoint Project Item and name it Pages. When the Module SharePoint Project Item is added to the project, it includes one elements manifest file (Elements.xml) and one sample file (Sample.txt). You cannot add a content page to a Module SharePoint Project Item with any out-of-the-box feature and template in Visual Studio, but you can either copy the file you created in the previous example into this SharePoint Project Item or just rename the sample file to a desired file name for the content page. For instance, rename it to SimpleContentPage.aspx. Visual Studio displays a warning when you edit the file name extension, but you can ignore this because you want to edit the file name extension. Then all you need to do is copy and paste the contents from the simple page in the previous sample into the file. Note that if you had the file open before changing the extension of the file, you need to close and reopen the file so that Visual Studio can load the correct editor.
Now consider the elements manifest file, which controls how the page should be deployed and provisioned in the site. The manifest file uses CAML to describe what you want to do. In this case, the Module element is used to specify which files to provision to a site, how to provision them, and where they should be provisioned. After adding the simple page or renaming the default sample file, the CAML should look like Example 7-10.
<Elements xmlns="http://schemas.microsoft.com/sharepoint/">
 <Module Name="Pages">
   <File Path="PagesSimpleContentPage.aspx"
      Url="Pages/SimpleContentPage.aspx" />
 </Module>
</Elements>
You can tell from the code that Visual Studio has automatically updated the File element with the name of the content page. Also notice that the relative path to the pages contains a reference to a folder with the name of the Module SharePoint Project Item. To change the target location of the deployed file, update the Url attribute of the File element. For instance, to deploy the file to the root of the site, change the File element:
<File Path="PagesSimpleContentPage.aspx" Url="SimpleContentPage.aspx" />
When you added the Module SharePoint Project Item to the Visual Studio project, Visual Studio automatically created a SharePoint Feature for you under the Features node in Solution Explorer. You can rename the Feature name and you can modify the Feature’s properties by double-clicking it. You should give the Feature a more appropriate name than the one generated by default. The default scope of the Feature is Web, which means that this Feature can be enabled on any website and the file will be provisioned on the sites where it’s enabled. For a Module element, you could also set the scope to Site, which allows you to deploy this module only to a site collection and the page to be provisioned on the root web of that site collection. Your Solution Explorer should look something like the one in Figure 7-6 after you rename the Feature.
Tip
For full CAML references and more about the options for the Module and File elements, go to the MSDN website and look at the SharePoint Features schema: http://msdn.microsoft.com/en-us/library/ms414322.aspx.
If you now deploy this solution to SharePoint either by using the F5 debugging method or the Deploy Solution method, you can browse to the site and the URL you specified as the target URL for the content page, and you should be able to get there. Because this is a farm solution, you can also browse to any other site and enable the Feature and see the page being provisioned. The SharePoint solution that you’ve just built does not contain any artifacts that require server-side code, and you can easily change this solution into a sandboxed solution by selecting the Project node in Solution Explorer and then switching to the Properties Window by pressing F4. In this window, change the Sandboxed Solution property to True to make the project a sandboxed solution, which you can deploy to a specific site collection on your on-premises farms or in a cloud service, such as Microsoft Office 365 and Microsoft SharePoint Online.
When you deployed the solution as a farm solution and activated the Feature on a site, the page was provisioned as an uncustomized page. When you deploy by using a sandboxed solution, the page is provisioned as a customized page. If you’re building a SharePoint app and deploying pages to the app web, the same syntax and methodology is used.
Note
When you inactivate the Feature, any files provisioned by using the Module element will remain provisioned. If you retract the solution from SharePoint, any uncustomized pages provisioned through the Module element will throw an exception. The template file is removed from the file system, but the content page still remains in the site. To fix this, you should programmatically implement code that cleans this up when the Feature is deactivated. A similar sample of this is provided in Chapter 8.
Creating a Web Part page
A specific type of content page, called a Web Part page, is perhaps the most common type of content page in SharePoint. The Web Part page allows the users to add content to the pages directly in the web UI. The content can be Web Parts or wiki content. To create a Web Part page, you need to perform some modifications to the page directive. You might have noticed in the previous sample (Example 7-10), that if you browse back and forth between the simple page and other pages in a team site, the simple page does not use MDS and requires a full page reload. This is because the page does not have a base class; specifically, it does not have a base class that derives from the DeltaPage class. To build a Web Part page that can use MDS, you need to choose the correct base class and specify it in the page directive. SharePoint 2013 has two base classes for Web Part pages:
WebPartPage
WikiEditPage
Both of these page classes exist in the Microsoft.SharePoint.WebPartPages namespace. The WebPartPage class is the base class for all content pages. It’s a page type specifically created for hosting Web Parts, which you learn about in Chapter 8. The WikiEditPage inherits from the WebPartPage and has support for handling wiki content. The default team site Start page is based on the WikiEditPage. The WikiEditPage can be used only in libraries that have the content type Wiki Page enabled because it is storing the wiki content in a field called Wiki Content. The WebPartPage is used by the forms for lists and libraries. Both of these two page types inherit from the DeltaPage, which was discussed in the section “Minimal Download Strategy requirements and compliance” earlier in this chapter. There are many more page classes defined in the various SharePoint assemblies that are specifically built to handle different scenarios. Publishing pages are one of those page classes and are discussed later in the chapter, in the Understanding publishing pages section. Depending on your needs, you can also create your own custom page class and make that inherit from any one of these base classes.
If you want to use the WikiEditPage as the base class and the standard SharePoint 2013 master page, the page implementation would look like this:
<% @Page Language="C#" MasterPageFile="~masterurl/default.master" Inherits="Microsoft.SharePoint.WebPartPages.WikiEditPage, Microsoft.SharePoint,
Version=15.0.0.0, Culture=neutral, PublicKeyToken=71e9bce111e9429c" %>
<asp:Content ContentPlaceHolderId="PlaceHolderMain" runat="server">
 <h1>This is the simplest MDS Content page ever</h1>
</asp:Content>
You need to deploy this wiki-based Web Part page into a document library with the Wiki Page content type. The default team site template has a library called Site Contents that has this Wiki Page content type enabled by default. To properly deploy the file, you could use an elements manifest like this:
<Elements xmlns="http://schemas.microsoft.com/sharepoint/">
 <Module Name="Pages" Url="SitePages">
   <File Path="PagesSimpleContentPage.aspx"
     Url="SimpleContentPage.aspx" Type="GhostableInLibrary" />
 </Module>
</Elements>
In the preceding elements manifest are two changes to the previous sample, which are apparent in Example 7-10. The first change is the addition of a Url attribute to the Module element. This allows you to specify a base URL for all files within that Module, and all Url attributes on the File elements are relative to that base URL. The second change is a new attribute on the File element called Type, with the value GhostableInLibrary. This attribute tells SharePoint that you would like to make the file that is added to the library an uncustomized file.
If you now deploy this solution to a site, you will note that it looks exactly the same as the simple page that was built in the “Deploying a content page” section, but browsing to and from the page reveals that the page uses MDS. This page can’t still be edited in the UI, because there’s just static content within it.
To make the page a real Web Part page that can be edited in the UI, you must add one or more Web Part zones and/or a wiki field. A Web Part zone is a container control that allows users to dynamically add controls into it. These controls must be Web Parts, which are discussed more in Chapter 8 along with the zones. Web Parts are also configurable by the user in the web interface. Each Web Part has a set of properties and optionally a set of custom properties that can be changed. The Web Part zone is responsible for persisting the Web Parts added to a zone and its properties. The wiki zone is a special form of control that allows HTML markup to be mixed with Web Parts. The wiki zone can be used only on pages inheriting from the WikiEditPage because it requires some extra plumbing.
To create a new Web Part page and define two zones, add a new file to the Module element in the previous sample, and make sure that Type is set to GhostableInLibrary and that the new file is deployed to the Site Pages library or to a document library. Example 7-11 shows a page inheriting from the WebPartPage class, which contains HTML markup and two Web Part zones, one on the left side and one on the right side.
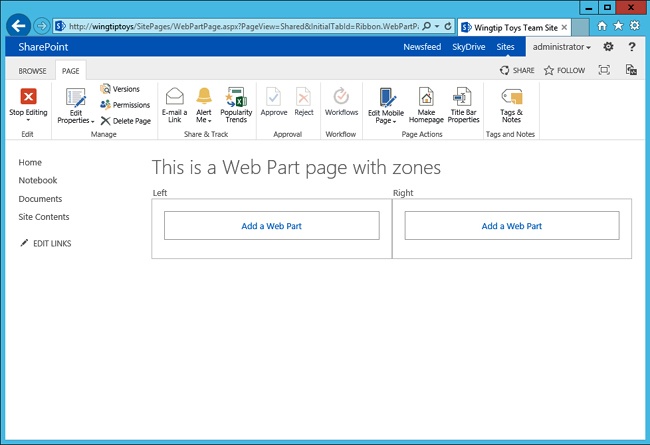
<% @Page Language="C#" MasterPageFile="~masterurl/default.master"
 Inherits="Microsoft.SharePoint.WebPartPages.WebPartPage, Microsoft.SharePoint,
   Version=15.0.0.0, Culture=neutral, PublicKeyToken=71e9bce111e9429c" %>
<%@ Register Tagprefix="WebPartPages"
 Namespace="Microsoft.SharePoint.WebPartPages"
 Assembly="Microsoft.SharePoint,
 Version=15.0.0.0, Culture=neutral, PublicKeyToken=71e9bce111e9429c" %>
<asp:Content ContentPlaceHolderId="PlaceHolderMain" runat="server">
<h1>This is a Web Part page with zones</h1>
<div>
 <div style="float:left;width:50%">
   <WebPartPages:WebPartZone ID="left" Title="Left" runat="server">
   </WebPartPages:WebPartZone>
 </div>
 <div style="float:right;width:50%">
   <WebPartPages:WebPartZone ID="right" Title="Right" runat="server">
   </WebPartPages:WebPartZone>
 </div>
</div>
</asp:Content>
When the updated solution with the new Web Part page is deployed, you can browse to the page and click the Edit button on the ribbon. In edit mode are the two Web Part zones, which can be used to add Web Parts, as shown in Figure 7-7.
You should now be familiar with the concept of content pages and how you create, package, and deploy them. Most of the methods discussed work in all deployment models: farm solutions, sandboxed solutions, and even SharePoint apps. If you need to further customize the content pages, you can create your own base classes as long as they derive from the WebPartPage class or at least the System.Web.UI.Page class. This option is available only in farm solutions but provides many possibilities for customizing your pages.
Understanding publishing pages
For more advanced scenarios, when you require even more control of the content and layout in the pages, you can use the SharePoint Server 2013 set of Features. Use the Publishing Features in SharePoint Server to create content pages, called publishing pages, by using templates, called page layouts. These are more advanced content pages than those discussed earlier in this chapter, but all the content pages share the same base classes—the WebPartPage class and the DeltaPage class. Although the publishing pages inherit from the DeltaPages, they do not take advantage of MDS, because none of the publishing controls are marked as MDS-compliant. In Chapter 15, the Publishing Features of SharePoint are discussed in more detail.
Creating a custom branding solution
One of the most common customizations of any SharePoint installation is branding of the UI. This customization might be simple, such as a custom cascading style sheet (CSS) file that overrides the default SharePoint style sheets, or something more advanced, such as a heavily customized master page and lots of design artifacts. In the next sections, you learn how you to create a reusable solution that deploys a custom master page.
Creating a custom master page
To create a custom master page, you have several options ranging from using a copy of the default master pages to starting with a blank solution and building your own master page. Which approach you take often varies depending on your requirements. For instance, if you’re building a collaborative intranet solution, it is often a good idea to start from one of the default master pages and customize that to your needs, whereas if you’re building a public-facing Internet site, you often start from an HTML mockup and convert that into a master page. SharePoint Server 2013 introduces a new feature called Design Manager that can help you do this automatically. It’s a very interesting feature that allows you to convert an ordinary HTML page into a SharePoint master page.
In the following sample, you deploy a copy of the default seattle.master page. You also create a scoped site collection Feature that modifies the default master page to the custom master page when activated, and then when deactivated, restores the original master page settings.
Start by creating a new farm solution project, and add a Module element named SiteBranding. Visual Studio 2012 automatically creates a Feature for you when the SharePoint Project Item is added, so make sure to change the scope of that Feature from Web to Site. To add the default seattle.master to the module, you copy and paste the original file from the SharePoint root into the SiteBranding SharePoint Project Item, and then rename it to something appropriate. You then need to make sure that this module deploys the files to the Master Page Gallery by setting the Url attribute of the Module element to _catalogs/masterpage. You also need to set some properties of the master page file. To tell SharePoint that it is a master page, you set the content type of the item to the master page content type id, and to make the master page available to the SharePoint 2013 UI, you set the UIVersion to 15. Finally, you set the title of the page by using the Title property. Example 7-12 shows the required modifications to the elements manifest.
<Elements xmlns="http://schemas.microsoft.com/sharepoint/">
 <Module Name="SiteBranding" Url="_catalogs/masterpage">
   <File Path="SiteBrandingCustomBranding.master"
     Url="SiteBranding/CustomBranding.master"
     Type="GhostableInLibrary">
     <Property Name="ContentTypeId" Value="0x010105" />
     <Property Name="UIVersion" Value="15" />
     <Property Name="Title" Value="Custom Branding master page" />
   </File>
 </Module>
</Elements>
Adding a feature receiver
The project now deploys only the master page to the Master Page Gallery with the correct set of properties, but to make this master page the default master page, you need to write some code. This activation code will be implemented as a Feature receiver on the site collection–scoped Feature. Example 7-13 shows the feature activation, which sets the master page on all the sites within the site collection.
public override void FeatureActivated(SPFeatureReceiverProperties properties)
{
   SPSite site = properties.Feature.Parent as SPSite;
   if (site != null)
   {
       SPWeb rootWeb = site.RootWeb;
       string masterurl = rootWeb.ServerRelativeUrl;
       if (!masterurl.EndsWith("/"))
       {
           masterurl += "/";
       }
       masterurl += "_catalogs/masterpage/SiteBranding/CustomBranding.master";
       // iterate through all the webs in the site collection
       foreach (SPWeb web in site.AllWebs)
       {
           web.Properties["OldMasterUrl"] = web.MasterUrl;
           web.MasterUrl = masterurl;
           web.Update();
           web.Dispose();
       }
   }
}
The FeatureActivated method is called when the Feature is activated on a site collection, and it builds a URL to the custom master page, which is deployed into the Master Page Gallery of the root web of the site collection. The method then goes through all the sites in the site collection and sets the MasterUrl property of the SPWeb object to the URL of the custom master page. At the same time, the code is also storing the old value of the MasterUrl property into the property bag of the SPWeb object so that the old value can be used when you deactivate the Feature and restore the settings of the site. Also note that you’re using the AllWebs property of the SPSite object, which requires properly disposing of all the SPWeb objects to avoid memory leaks.
When the Feature is deactivated, you need to restore the master page settings on all the sites. Example 7-14 shows the FeatureDeactivating method of the Feature receiver.
public override void FeatureDeactivating(SPFeatureReceiverProperties properties)
{
   SPSite site = properties.Feature.Parent as SPSite;
   if (site != null)
   {
       // iterate through all the webs in the site collection
       foreach (SPWeb web in site.AllWebs)
       {
           if(!String.IsNullOrEmpty(web.Properties["OldMasterUrl"])) {
               web.MasterUrl = web.Properties["OldMasterUrl"];
               web.Update();
           }
           web.Dispose();
       }
   }
}
The FeatureDeactivating method looks very similar to the FeatureActivating method. It will go through all the subwebs and reset the master page to the original value.
Working with application pages
SharePoint not only has content pages, which as you know are mainly used for users to consume and work with, but also has another page type called application pages. These differ from content pages in several ways. Content pages lives in the sites and in the content databases, as previously discussed, whereas the application pages live outside the content databases and in the IIS virtual directory called _layouts, which is one of the reasons application pages are called layout pages. The main purpose of application pages is for administration, and they have no customization options. For instance, the Home page of a site can be different from one site to another, but settings pages should look exactly the same independent of the site you’re in, except for the actual settings values. This IIS virtual directory called _layouts exists in the root of each site collection, thanks to the virtual file system, but all of these virtual _layouts folders are mapped to the same physical file location, TEMPLATELAYOUTS under the SharePoint root.
Understanding application page anatomy
Application pages are just like content pages based on the DeltaPage base class, which means that they can use MDS. Application pages have two specific derived base classes:
UnsecuredLayoutsPageBase
LayoutsPageBase
These two base types are defined in the Microsoft.SharePoint.WebControls namespace. The LayoutsPageBase inherits from the UnsecuredLayoutsPageBase, and the main difference between the two is that the LayoutsPageBase has built-in logic for checking permissions. The UnsecuredLayoutsPageBase has a set of overridable methods and properties that, for example, allows you to configure whether the application page permits anonymous users. All custom applications should derive from one of these two base types, and typically LayoutsPageBase is used.
Creating an application page
Application pages can be deployed through custom solutions and are often used to provision administrative pages. Because deploying application pages involves adding files to the file system, they are available only in farm solutions. All application pages are also deployed to all sites and site collections, so there is no granularity.
Visual Studio 2013 and the SharePoint tools contain an item template for application pages that can be used to create new application pages. To add a new application page, select the Project node in Solution Explorer, right-click Add, and then click New Item. In the Add New Item dialog box, select the Application Page (Farm Solution Only) template, name it, and then click Add. Visual Studio adds the required references to your project, adds a new SharePoint Mapped folder to the Layouts folder if it is not already present, and then creates a subfolder within that mapped folder to which it adds your custom application page, as shown in Figure 7-8.
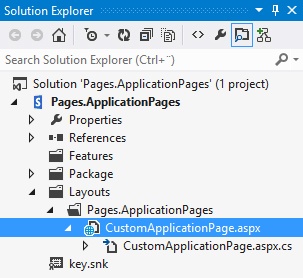
The custom application page has one .aspx file and a code-behind file. The code-behind file specifies that the custom application page inherits from LayoutsPageBase. Notice that the Page directive in the .aspx file does not have a typical MasterPageFile attribute. Instead, it has another attribute called DynamicMasterPageFile. This attribute allows you to use the dynamic tokens to specify master pages, ~masterurl/default.master or ~masterurl/custom.master, which you learned about earlier in this chapter. Another and perhaps more important aspect of Application pages is that SharePoint has a built-in safeguard for specific application pages that makes sure the pages are rendered even when the master page fails to render. It does this by falling back on the default master page (seattle.master). To protect an application page, you set the RequiresHighAvailablilty property, inherited from UnsecuredLayoutsPageBase, to true in the constructor of the custom application page.
Now you will modify this custom application page so that it renders some information about the current site collection. In the .aspx, Web Forms page controls and markup are added to the content placeholders. The item template defines four of the content placeholders by default, but you can add or remove them as necessary. This is how the markup looks for a sample custom application page that shows some more details of the site collection:
<asp:Content ID="Main" ContentPlaceHolderID="PlaceHolderMain" runat="server">
<fieldset>
 <legend>Site Information</legend>
 Content database name: <asp:Label ID="contentDatabase" runat="server" />
 <br />
 Is Evaluation site: <asp:Label ID="isEvalSite" runat="server" />
</fieldset>
</asp:Content>

<asp:Content ID="PageTitle" ContentPlaceHolderID="PlaceHolderPageTitle" runat="server">
Site Information
</asp:Content>

<asp:Content ID="PageTitleInTitleArea" ContentPlaceHolderID="PlaceHolderPageTitleInTitleArea"
 runat="server" >
Site Information
</asp:Content>
The content placeholder PlaceHolderMain is used for the body of the page. It contains two Label controls that are set in the code-behind. You use PageTitle and PageTitleInTitleArea to display the name of the page. The code-behind for the page looks like this:
public partial class CustomApplicationPage : LayoutsPageBase
{
 protected void Page_Load(object sender, EventArgs e)
 {
   contentDatabase.Text = SPContext.Current.Site.ContentDatabase.Name;
   isEvalSite.Text = SPContext.Current.Site.IsEvalSite.ToString();

 }
}
In the Page_Load method, the two Label controls are set with values from two site collection properties: one displays the name of the content database in which the site collection is stored, and the other one shows whether the site is an upgrade evaluation site. After the project is deployed, you need to browse to the page. The only way to get to the page is to manually enter its URL into the browser, but you’ll fix this. The URL to the page is the name of the site or web, to which you append _layouts/15, and then append the name of the folder created by Visual Studio and the name of the application page. The page should look like Figure 7-9.
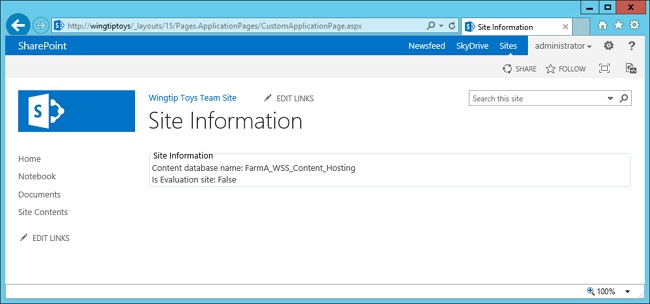
Securing the application page
A user who knows the actual URL of the application page and is a visitor to the site has access to application pages, unless the site has been configured otherwise. More specifically, the permission level called View Application Pages is required to give users access to application pages, and the Visitors group has that permission level by default. You cannot set permissions on application pages as you can do on content pages in document libraries. Fortunately, the built-in logic in LayoutsPageBase allows you to specify required permissions for the application page.
The LayoutsPageBase has a Boolean property called RequireSiteAdministrator. By default, this property is set to false, and if it is set to true, only site collection administrators are allowed to view the page. If you want more fine-grained permissions, you use a property called RightsRequired that specifies a SPBasePermissions object with the required permissions. If you want only users who have the permission level View Web Analytics Data to be able to access the application page, you need to override the RightsRequired property:
protected override SPBasePermissions RightsRequired
{
 get
 {
   return SPBasePermissions.ViewUsageData;
 }
}
After redeploying the solution, users without the View Web Analytics Data permission level will get the Access Denied page for the site. To view this page, users need both the View Web Analytics Data permissions and the View Application Pages permissions. The property RequireDefaultLayoutsRights has the default value set to true. This means that the permissions check that is done will use the permissions specified in RightsRequired and View Application Pages. To use only the RightsRequired permissions, you need to override the RequireDefaultLayoutsRights and make sure it returns false.
You should be aware of one more aspect regarding permissions for application pages. By default, the permission check is done in the ASP.NET event OnLoadComplete. You can change this to either handle the check in the OnPreInit event or not do the check at all. This is configured by using the RightsCheckMode property, which is an enumeration of type RightCheckModes.
Adding navigation support to the application page
Application pages are not part of the navigation unless you make them available. There are several ways to accomplish this, and your approach depends on what you need. For instance, one application page might be accessible through a link in a custom Web Part, or another might be accessible through the ribbon (you examine this later in the chapter, in the “Customizing the ribbon” section). Most often, application pages are configured so that they are a part of the site settings navigation.
To make the custom application page a part of the site navigation, you use a custom action, which is an extension to the UI. Custom actions are defined declaratively by using CAML in an elements manifest file. Custom actions are very versatile and configurable and can be used to add links, scripts, menu items, and so on. In this scenario, where you want to add a link into site settings under the Site Collection Administration group, you start by adding a new empty Element SharePoint Project Item to the solution. In the elements manifest file, Elements.xml, the following CAML is added to create the link:
<Elements xmlns="http://schemas.microsoft.com/sharepoint/">
 <CustomAction Title="Site Information" Id="CustomSiteInformation"
   Location="Microsoft.SharePoint.SiteSettings" GroupId="SiteCollectionAdmin"
   Rights="ViewUsageData">
   <UrlAction Url="~site/_layouts/15/Pages.ApplicationPages/CustomApplicationPage.aspx"/>
 </CustomAction>
</Elements>
The CustomAction element defines the custom action and is given a Title, which is what will be displayed as the link. The location of the link is determined by the Location and GroupId attribute. In this case, you specify the location of the Site Settings page, and the group is Site Collection Administration. (For a full reference of the possible Location and GroupId values, refer to the Microsoft MSDN website at http://msdn.microsoft.com/en-us/library/bb802730.aspx.) Even though specifying the required permissions is not required, you do the check in the application page. Hiding the link from users who cannot access the page is a good convention. You do this by using the Rights attribute, in which you specify the same permissions you implemented in the preceding code-behind. Finally, you need to specify the URL for the application page by using the UrlAction element. Note that the URL is specified with ~sitecollection, which indicates that you should use the current site collection as the base for the URL. If you wanted to refer to site-scoped properties, you would use the ~site token instead.
Customizing the ribbon
The ribbon menu introduced in Microsoft Office 2007 made its way into SharePoint 2010 and has continued to evolve in SharePoint 2013. The ribbon menu is customizable and, in many cases, is the preferred location for UI customizations because the ribbon is available on most pages, accessible, adapted for touchscreen-enabled interfaces, and gives the users a great user experience.
The SharePoint ribbon can be customized by using custom actions, and the customization can be done by using farm solutions, sandboxed solutions, and SharePoint apps. Using farm solutions gives you the most flexibility and allows you to add everything from custom contextual tabs to new groups and even remove controls and groups. Sandboxed solutions allows you to add new controls to existing groups, and SharePoint apps allows you to customize the ribbon on both the host and app web.
Understanding the anatomy of the SharePoint ribbon
Before you dive into customizing the ribbon, it is essential to know its different components, all of which are customizable. Figure 7-10 shows the different parts of the ribbon.
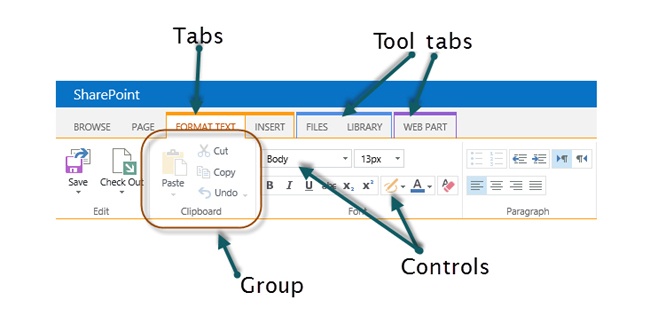
The tabs are the top-level element of the ribbon, and each tab has one or more groups. Tabs can be contextual and only appear when a specific Web Part or other component is selected. For instance, if you’re working on a Publishing page and choose an image, the Image tool tab will appear. Each group contains one or more ribbon controls. These are some of the available controls:
Button
CheckBox
ComboBox
DropDown
FlyoutAnchor
GalleryButton
Label
SplitButton
TextBox
ToggleButton
Each tab, group, and control can be associated with one or more actions. For instance, the ToggleButton control has one action that is executed when the control is loaded, which can be used to set its state, and another action that is fired when the user clicks the control. The events are implemented as JavaScript functions.
The SharePoint ribbon also adapts to the size of the screen, just as the Office ribbon does. Each group and control has an associated group template that defines how it should scale. If you are building your own tabs, you must define your own group template and scalings. But if you are adding a group or control to an existing tab, you should use the template defined by that tab.
The default ribbon components are defined in the Cmdui.xml file that is located in the SharePoint root in the TemplateGlobalXML folder. If you’re going to customize the ribbon, we recommend that you take a look at this one but do not modify it.
Adding a custom ribbon control
There are several ways to customize the ribbon. You can use the server-side object model, which is available only for farm solutions, and you can use CAML and a declarative approach. Custom ribbon controls most often also involve a lot of JavaScript code, especially if you’re using some of the more advanced controls such as the GalleryButton or ComboBox.
You are going to create a simple ribbon extension that will contain a Button control that will report the customization status of the current page. First you need to find out the location, and specifically the ID, of the Ribbon group where you want to place the Button control. The easiest way to do this is to use the Internet Explorer Developer Tools and locate the element ID of the group (see Figure 7-11). You use this ID for two tasks: first, you use it in the elements manifest to specify the location; and second, you use it to find out which template alias to use. The template alias is connected to the group template and defines how the control should handle rendering when the ribbon is resized. To get the correct template alias, you open the Cmdui.xml file and search for a Group element with the ID equal to the ID located by using the Internet Explorer Developer Tools. Review any of the child controls of that Group element and inspect the TemplateAlias attribute. The group might use multiple different template aliases. You have to test to find out which one suits your needs.

In this case, you want to add a custom button to the Page Actions group. Using the Internet Explorer Developer Tools, you can tell that that group has an ID of Ribbon.WikiPageTab.PageActions. Using the Cmdui.xml file, you learn that the controls of the Page Actions group are using a template alias called o2. Now you have the necessary information to proceed and build the button.
In a new or existing project, which could be a farm solution or a sandboxed solution, add a new Empty element. You will use this elements manifest and declare a new CustomAction, but instead of adding an UrlAction element as you did previously, you will add another element called CommandUI-Extension. Another difference from the previous sample shown in the “Adding navigation support to the application page” section, is that you specify the Location attribute of the CustomAction to CommandUI.Ribbon. It takes quite a few lines of CAML to construct and define the ribbon control, as illustrated in Example 7-15.
<Elements xmlns="http://schemas.microsoft.com/sharepoint/">
 <CustomAction Location="CommandUI.Ribbon" Id="CustomRibbonExtension" Sequence="1000">
   <CommandUIExtension>

     <CommandUIDefinitions>
       <CommandUIDefinition Location="Ribbon.WikiPageTab.PageActions.Controls._children">
         <Button Id="CustomRibbonButton" Alt="Page information" Sequence="1000"
           Command="CheckPageInfo" LabelText="Page information" TemplateAlias="o2"
           Image16by16="/_layouts/15/images/sytelshs.png"
           Image32by32="/_layouts/15/images/styleshh.png"/>
       </CommandUIDefinition>
     </CommandUIDefinitions>
     <CommandUIHandlers>
       <CommandUIHandler Command="CheckPageInfo" CommandAction="javascript:
function checkPageInfo() {
 var context = SP.ClientContext.get_current();
 var list = context.get_web().get_lists().getById(
   new SP.Guid(_spPageContextInfo.pageListId));
 var item = list.getItemById(_spPageContextInfo.pageItemId);
 var file = item.get_file()
 context.load(file)
 context.executeQueryAsync(function() {
   switch(file.get_customizedPageStatus()) {
     case SP.CustomizedPageStatus.none:
       alert('Page has never been cached'), break;
     case SP.CustomizedPageStatus.uncustomized:
       alert('Page is cached and not customized'), break;
     case SP.CustomizedPageStatus.customized:
       alert('Page is cached and customized'), break;
   }
   },function() {
     alert('An error occurred')
 })
}
checkPageInfo();
"/>
     </CommandUIHandlers>
   </CommandUIExtension>
 </CustomAction>
</Elements>
As revealed in the preceding CAML, the CommandUIExtension element has two child elements: CommandUIDefinitions and CommandUIHandlers. CommandUIDefinitions contains the definition of the UI, such as tabs, groups, and controls, and CommandUIHandlers contains the commands that the different controls act upon. In this case, you’re adding only one definition element, CommandUIDefinition, and you specify the location in the ribbon for that element by using the Location attribute. Here you use the ID that you previously extracted by using the Internet Explorer Developer Tools, and because you want to add a button as a child to the group, you must append Controls._children to that ID to specify the location.
Next you define the actual Button control. Each control requires a unique ID, a sequence, and a template alias; some controls have additional required attributes. For this Button control, you specify a label, alternative text, and two images that will be used at different scalings, and you add the template alias that you found in the Cmdui.xml file. Finally, you add a command to the control. The value of the Command attribute should point to a CommandUIHandler element, defined in CommandUIHandlers. This tells SharePoint to trigger the handler when a user clicks the button.
The handler is defined in a CommandUIHandler element. In this case, you define one handler that has a Command attribute equal to the Command attribute of Button control, and then you specify a block of JavaScript in the CommandAction attribute. CommandAction could also contain a URL, which would redirect the user to the specified URL instead of executing JavaScript. If you’re building a SharePoint app and adding a ribbon extension to it, you must specify a URL here; you cannot use JavaScript.
The JavaScript in the handler uses the JavaScript client-side object model and retrieves the customization status of the current page. If it succeeds, it displays a JavaScript alert box with the current status of the page.
When this project is deployed to SharePoint, either as a farm solution or sandboxed solution, and you browse to a wiki page, the button is displayed, as shown in Figure 7-12. Clicking the button should report the customization status of the current page.

You’ve completed the ribbon sample. Ribbon customizations can be far more advanced; you can declare custom tabs, and Web Parts can have contextual tabs. If you need to create more advanced client-side code by using JavaScript, you can use the Ribbon Page Components model, which allows for very dynamic ribbon extensions.
Summary
This chapter provided a quick ASP.NET recap and discussed the details of the SharePoint virtual file system. You learned how to create and deploy different kinds of pages in SharePoint, and you learned how to create a quick ribbon extension. The chapter covers the basic knowledge a SharePoint developer needs, whether you are a professional developer or are building custom solutions by using SharePoint Designer. Any kind of project will contain some form of deployed pages, for example, SharePoint-hosted apps. You will use a lot of what you learned in this chapter in Chapter 8, which focuses on Web Parts—one of the original cornerstones of SharePoint.