
Chapter at a glance
Search
Search for an app by category, page 251

Install
Install an app, page 257
Use
Use an app, page 258
Rate
Rate an app, page 262
IN THIS CHAPTER, YOU WILL LEARN HOW TO
You know about apps. You’ve explored the apps on the Start screen that come as part of Windows 8.1, including Music, People, Internet Explorer, and others. You can easily obtain more apps from the Windows Store.
In this chapter, you’ll learn how to access the Windows Store, browse and install apps, search for an app by name, automatically update the apps you obtain, and more. Note that as the Windows Store evolves, more categories, apps, and other items will likely be added. What you see here is what was available as of this writing.
Tip
Microsoft has complete control over the apps that are available in the Windows Store and requires developers to write apps to certain criteria. This helps to ensure that they are safe and functional and do not contain adware or spyware, among other things.
Practice Files
You do not need any practice files to complete this chapter. For more information about practice file requirements, see the section “Using the practice files” in the Introduction of this book.
To enter the Windows Store, you simply click its tile on the Start screen. If you’re connected to the Internet and have logged on with a Microsoft account, you’ll be taken to the landing page of the Windows Store. This is also referred to as the Windows Store’s “Home,” and you can access it at any time by right-clicking the screen and then, from the charms that appear, clicking Home.
Tip
Any time you see a number on a tile on the Start screen, it means new data that affects you is available. A number on the Windows Store tile means updates for apps you own are available. If you’ve configured the Windows Store to install updates automatically, you might never see this.
After you enter the Windows Store, you can explore what’s shown initially, which includes the categories, Picks For You, Trending, New & Rising, Top Paid, and Top Free. You might also see a category that represents your computer manufacturer that lists apps you might enjoy based on your specific machine. Use your mouse and the scroll bar that appears across the bottom of the screen to navigate. There is also a Search box in the upper-right corner.
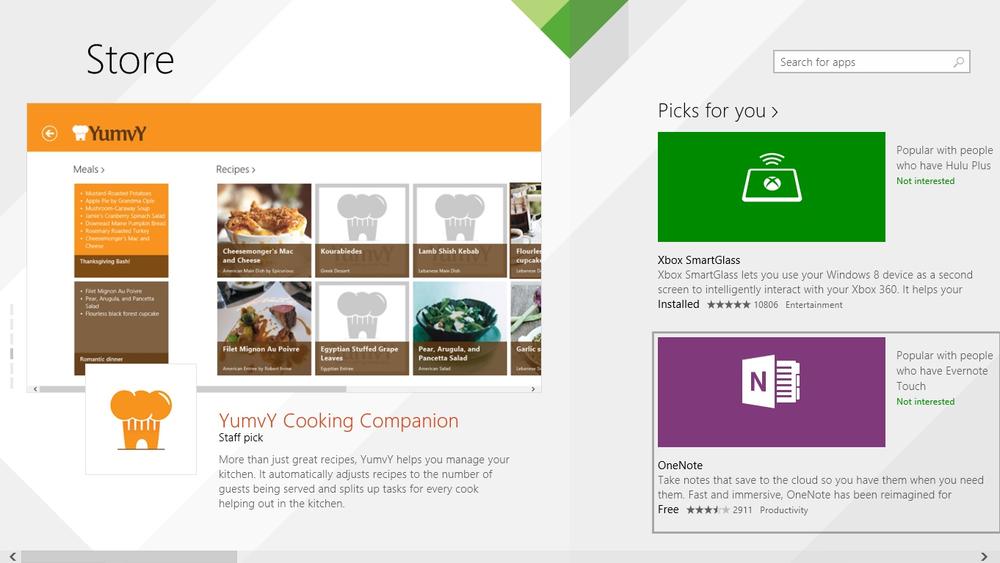
To see more apps, scroll to the right to access Top Paid or Top Free, among other options. These apps have been purchased and/or downloaded many times by other users and offer ratings under the app title. You can also click Top Free to see everything in that category. Note the Back arrow that appears when you are in the Top Free view.
However you navigate to an app you’d like to explore, if you click its tile you’re taken to the app’s listings page, which you’ll learn about later in this chapter. The listings page offers more information about an app. When exploring apps in this way, you can use the Back arrow that appears in the upper-left corner to return to the previous screen.
You can also right-click the screen to sort the available apps by category. You’ll see the five categories listed earlier on the far left, but to the right of that are categories that you can explore by type. Some of the categories are listed here:

Games. This category offers games for kids (and adults) of all ages.
Social. This category offers apps for social networking websites.
Entertainment. This category presents apps that are related to entertainment (such Netflix and YouTube).
Photo. This category offers apps for photo-sharing sites, apps that work with a built-in webcam, and apps with which you can fix your photos by removing red-eye, cropping, and so on.
Music & Video. This category offers apps for listening to Internet radio, learning song lyrics, listening to podcasts, and more. This isn’t the Xbox Music store; what you’ll find here are music-related apps.
Sports. This category offers apps for keeping up with your favorite sports teams and learning more about the sports you play or watch.
Books & Reference. This category offers apps such as third-party eReaders and dictionaries, bibles, and similar reference books.
News & Weather. This category offers apps that involve news and weather, often from well-known national entities.
Health & Fitness. This category offers apps that can help you stay or get fit, lose weight, keep track of diet and exercise, and so on.
Food & Dining. This category offers apps for cookbooks and finding restaurants, reading restaurant reviews, and more.
Lifestyle. This category offers apps that help you to sell a car, keep a journal, participate in an auction, and so on. If you don’t see Lifestyle, click the right-facing arrow that appears next to News & Weather to access this and other categories.
Shopping. This category offers apps that make it easy to shop by using an app. Look for apps from popular auction sites, phone directories, and shopping sites.
Travel. This category offers apps about travel, including hotel locations, maps, and more.
Finance. This category offers apps to help you manage your finances, review stock prices, and so on.
Productivity. This category offers apps to help you be more productive. Here you’ll find online storage solutions, note-taking apps, among others.
Tools. This category presents apps that you can use to compress files, connect your cell phone, manage computer resources, and more.
Security. This category presents apps with which you can protect your computer or device and keep your data secure.
Business. This category presents business apps, including apps that help you to look for a job, create presentations, and so on.
Education. This category offers apps related to education, including those to help you learn about planets, learn to spell words, and so on.
Government. This category offers apps related to governing and government entities.
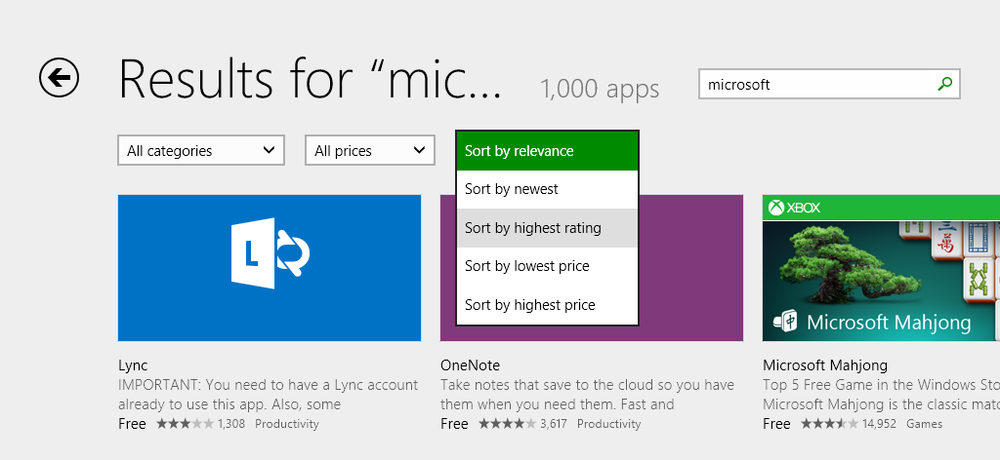
Browsing the Windows Store by scrolling and clicking the default titles such as Top Free might work fine for you, at least for now, but as more apps become available, browsing by what’s trending or by a specific category will become cumbersome. It won’t be long before there are hundreds of thousands of apps to navigate! With this in mind, note that there is an option to search the Windows Store for a specific app. You can also sort results you find by category, price, or rating, among other options.
To use the Search window from the landing page, type something about the app for which you’re looking. Then, in the results, use the sorting options to refine the results. If you see an app you want, click it; if you don’t see it, click the Back arrow and try again.
Tip
If you don’t know what kind of app you might want or the name of any specific app, you can type the name of a publisher or other criteria.
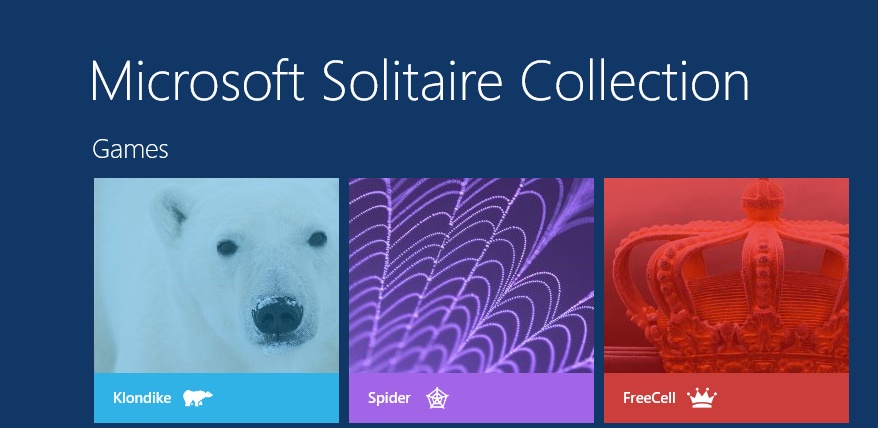
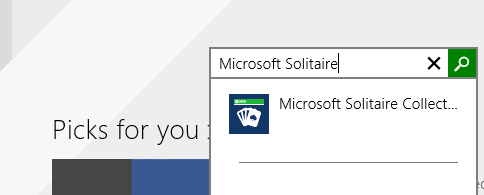
In this exercise, you’ll use the built-in Search box to find the Microsoft Solitaire app in the Windows Store.
Set Up
If you are not on the Start screen, position your mouse in the lower-left corner of the screen and then click the Start button that appears. You do not need any practice files to complete this exercise.
On the Start screen, click Store.
If necessary, click any Back arrows(s) to return to the landing page.
In the Search For Apps box, type Microsoft Solitaire, and then, on the keyboard, press Enter.
Search results and culling options appear.
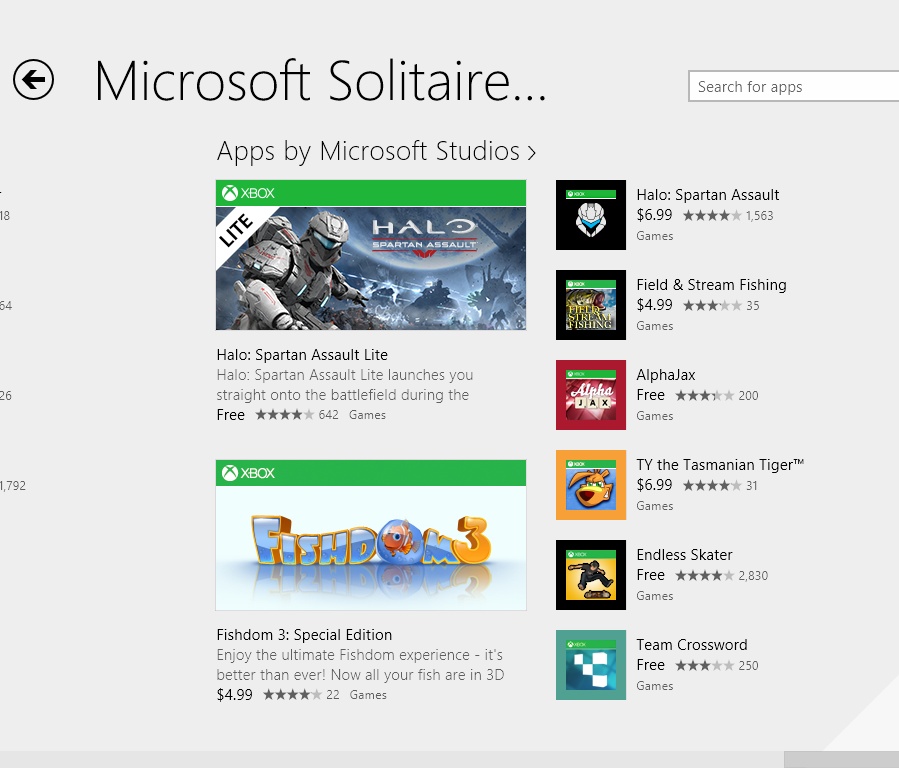
From the available lists, click the down arrow adjacent to All Prices, and then click Free.
Click Microsoft Solitaire Collection to go to its listing page.

Because Microsoft requires all new apps to pass its certification process successfully before they can be listed in the Windows Store, you probably won’t run across apps that don’t work or that cause your Windows 8–based computer or tablet to freeze or fail. However, it never hurts to read the reviews of apps, just in case. You might find that the app is not all that you expected it to be, or that to access all features of an app, you must purchase the full version of it.
There are many other types of information on an app’s listing page beyond reviews. You can also get an overview and details about the app and learn what permissions it needs to work properly. For example, a weather app will certainly need permission to access your location. Other apps might want to access your Pictures library or other areas of your computer. You can use all this information to decide whether the app is right for you.
You can access this information and more on every listing page. Here’s some of what you will find from each of the available tabs on an app’s listing page:
Description. The first items listed for an app are its full description, a list of features, and the content rating.
Ratings And Reviews. Scroll right on the listings page to access user reviews and ratings; click Ratings And Reviews to sort those reviews by Newest, Oldest, Highest Rated, Lowest Rated, and Most Helpful or by how many stars the rating was given. If you move away from the listings page and want to return to it, simply click the Back arrow to return to it.
Details. From the app’s listings page, scroll right to access the details of the app. Here, you can view the release notes, supported processors (x86, x64, ARM), supported languages, and more.
Related Apps. Scroll to the far right of the listings page to see related apps.
Many of the apps from the Windows Store are free. However, paid apps start at $1.49 and run to $999.99. Apps can also have a trial window ranging anywhere from 24 hours to 30 days.
In this exercise, you’ll obtain a free app.
Set Up
If you are not on the Start screen, position your mouse in the lower-left corner of the screen and then click the Start button that appears. You do not need any practice files to complete this exercise.
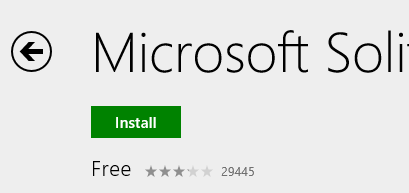
Locate an app to install by using any method introduced so far. Click the app name to access its listing page.
On the listing page, click Install.
You can follow the progress in the upper-right corner of the screen.
When the installation is complete, return to the Start screen, and then click the down arrow to open the Apps view.
Click the app to open it.
The first time you open an app, you might be prompted to do something. You might need to log on with an existing user name and password, click Play to start a game, or click an icon to view the various app options. You might be prompted to let the app access personal information such as your Microsoft Xbox LIVE information. Whatever the case, when the app is ready, you’ll have access to its features.
An app might ask for something that makes you uneasy, such as access to your location. If you want to use the app appropriately you might need to grant that permission. For instance, if you want a new weather app to offer information regarding the town in which you live, you’ll be best served by allowing it to learn your location. At times, though, you might encounter an app that asks for permissions you feel are unnecessary, and you might want to block permissions for such an app.
After you’ve worked past any logon screens, granted permissions, or otherwise reviewed information about an app, you’re ready to use it. It’s up to you to learn how to use a specific app, and many come with instructions. If you don’t see what you need, try right-clicking the app’s landing page. If that doesn’t work, with the app open, click the Settings charm. You might see items there such as About, Options, Credits, Permissions, Rate And Review, and so on.
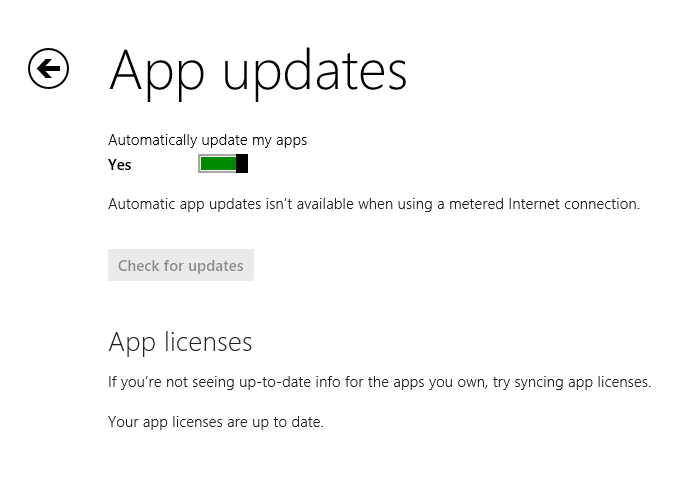
App developers are constantly creating apps and updating the apps they’ve already released. App updates might fix bugs, add new features, and offer additional data or options. By default, apps update themselves when updates become available. You can also turn this feature off and check for updates manually, if you like.
In this exercise, you’ll review the app updates options and check for updates and install them if necessary.
Set Up
If you are not on the Start screen, position your mouse in the lower-left corner of the screen and then click the Start screen button that appears. You do not need any practice files to complete this exercise.
On the Start screen, click Store.
Click any Back buttons to return to the landing page of the Windows Store.
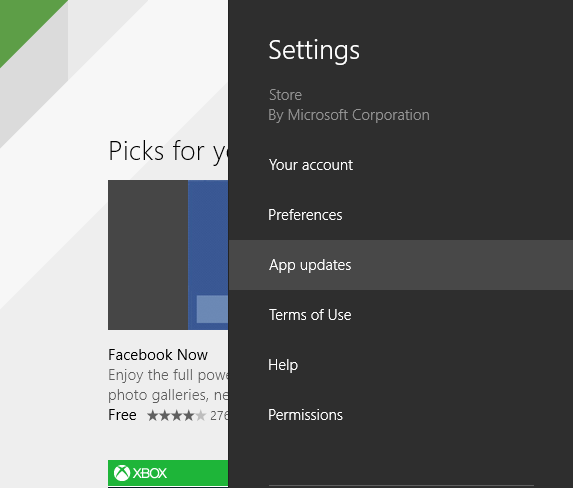
Position the cursor in the lower-right corner of the screen to display the charms, and then click the Settings charm.
The Settings options appear.
To check for updates manually, in the Automatically Update My Apps section, move the slider from Yes to No, and then click Check For Updates.
You can uninstall apps that come with Windows 8.1 as well as apps that you acquire from the Windows Store directly. You just right-click the app (either on the Start screen or in the Apps view) and then, on the menu that appears, click Uninstall. You can also unpin the app if it’s on the Start screen, which is a better choice if you think you’ll use the app again at a later date. By using this option, you can pin it again, if desired. However, if you’ve actually uninstalled apps and now decide you want them back, you can reacquire them from the Windows Store.
To reacquire an app, use any search method to locate it in the Windows Store. From the app’s listing page, choose Install. If you think you uninstalled an app but really didn’t, you won’t see the Install option. Instead, you’ll see the date the app was last updated.
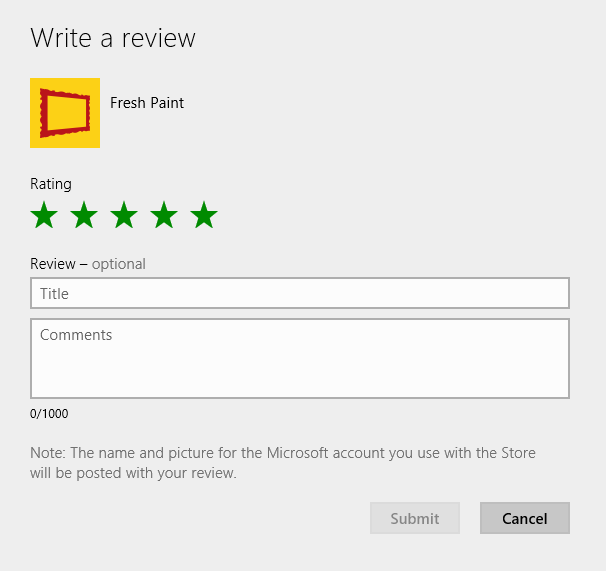
You can write reviews for apps you own. You’ll see the option on the app’s listing page. You can also rate and review an app by using the Settings charm while in an app. One of the easiest ways to find an app and write the review is to do it from within the Windows Store.
In this exercise, you’ll write a review for an app you own.
On the Start screen, click Store.
From any location within the Windows Store, right-click the screen, and then, on the menu that appears, click Your apps.
Click the tile for an app you own; locate the options to Rate This App and Write A Review.
Click the applicable number of stars to apply a rating.
Click Write A Review.
In the Title box, give your review a name, and then, in the Comments box, write your review. Click Submit.


Some apps include options that offer in-app purchasing and subscriptions. In-app purchases are those you make while using an app. For instance, consider a game for which you might need to purchase fruit or farm animals to reach the next level or to beat an opponent. You can also subscribe to a particular app; for example, a newspaper or magazine. Be careful with subscriptions, though; many will self-renew monthly or yearly.
The Windows Store offers apps that are sorted by what is popular and by category, such as Games and Music & Videos.
You can browse for apps in the Windows Store based on their categories or by the top free apps, or you can search for an app by name.
You can sort apps in a category in many ways, including by ratings and release date.
The listing page for an app offers information, reviews, and the option to install the app, among other things.
You can reinstall apps you’ve previously uninstalled.
You can update apps you own and write reviews, as applicable.