
Chapter at a glance
Find
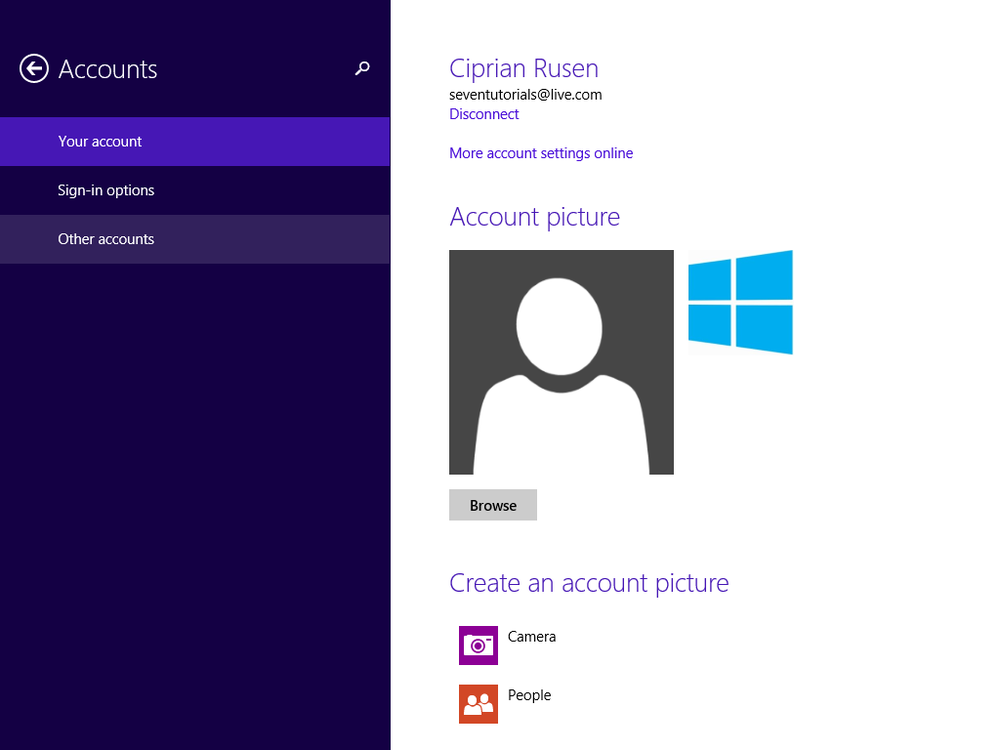
Find the settings related to your user account in the new Accounts pane, page 337
Add
Add a Microsoft account, page 342
Create
Create a picture password to use instead of your normal password, page 356
Delete
Delete a user account, page 371
IN THIS CHAPTER, YOU WILL LEARN HOW TO
In a typical family, there might be only one person who uses one or more computers. For these computers, you need only the user account you created when you first started using them. However, you might have a computer that more than one person uses; it can be a computer your children, your parents, or the whole family uses. If that’s the case in your home, it is best to create a user account for each person, so that settings, files, and folders don’t become mixed up, which can be frustrating for everyone.
In this chapter, you’ll learn what user accounts are, understand how many you need to have on a computer, and learn how to manage and configure them.
Practice Files
To complete the exercises in this chapter, you need the practice files contained in the Chapter12 practice file folder. For more information, see the section “Download the practice files” in the Introduction of this book.
User accounts make it possible for multiple people to share a computer, with each person having his or her own private Documents folder, email inbox, Windows settings, and so on. When you have your own account, you can do all the customization you want to your Windows 8.1 environment without affecting other user accounts. Other users will have their own visual customization, their own app settings, and so forth.
You can use multiple types of accounts in Windows. You can use your Microsoft account (formerly known as a Windows Live ID) across multiple computers with Windows 8 or Windows 8.1, whereas you can use a local account only on your local computer. These accounts can then have administrator permissions (the word “Administrator” is specified near their name). A user account that is not an Administrator account is considered a standard user account and has limited permissions. A third type of user account is the Guest account.
The administrator has full access to all user accounts. He can create and delete user accounts and change the name, password, and account types for other accounts. The administrator can also install software and hardware and configure every aspect of the operating system. As a rule, every computer must have at least one administrator.
A user with standard privileges has access to apps that have already been installed on the computer and cannot install other software without the administrator password. A standard user can change her password but cannot change the account name or type without the administrator password.
The Guest account is a special type of limited user account that has the following characteristics and restrictions:
It does not require a password.
The user can’t install software or hardware.
The user can’t change the account type.
The user can’t create a password for the account.
When you install Windows 8.1 or when you use it for the first time (as is the case with devices that have Windows 8.1 installed already), you are prompted to create a default user account. That user account always has administrator permissions. You should create a new account when another person needs to work on the same computer.
For example, if you are a parent sharing the computer with your child, it is best to have two user accounts: one for you with administrator permissions and one for your child with standard user permissions. By doing this, you ensure that your child can use the computer but cannot change important configuration aspects.
Tip
If children use a computer, consider using Family Safety. If you want to know more about Family Safety, read Chapter 16.
If you have temporary guests who need to use one of your computers to browse the Internet, check their email, and perform other light computing activities, it is best to set up a Guest account for them to use.
A major change that was first implemented in Windows 8, is the introduction of the Microsoft account and its mandatory use for working with features such as synchronizing your settings across the many computers you use or accessing the Windows Store to purchase apps. In addition, each time you create a user account, Windows 8.1 first asks for a Microsoft account.
The Microsoft account is an ID composed of an email address and password, which you can use to log on to most Microsoft websites, services, and properties such as Hotmail, Outlook.com, Xbox Live, and all Microsoft services (including SkyDrive and Skype). You also use it in Windows 8.1 for synchronizing your computer settings, using the Windows Store to purchase apps, and other activities.
How do you know whether you have a Microsoft account? If you are already using any of these services—Hotmail, Outlook.com, SkyDrive, or Xbox Live—you already have a Microsoft account. Use the same email address and password in Windows 8.1.
If you don’t have a Microsoft account, you can easily create one in Windows 8.1 or on the Microsoft websites.
Using this account in Windows 8.1 is highly recommended, particularly if you want to access all the features it has to offer without problems or limitations. In addition, a Microsoft account gives you access to almost all Microsoft products, services, properties, and websites. The Microsoft account will also be useful in the following scenarios:
You want to use any of the tools included in the Windows Essentials suite.
You want to use devices such as Microsoft Xbox consoles, Surface tablets or Windows Phones.
You need a free email account from Microsoft on Outlook.com.
You want to purchase and use an Office 365 subscription.
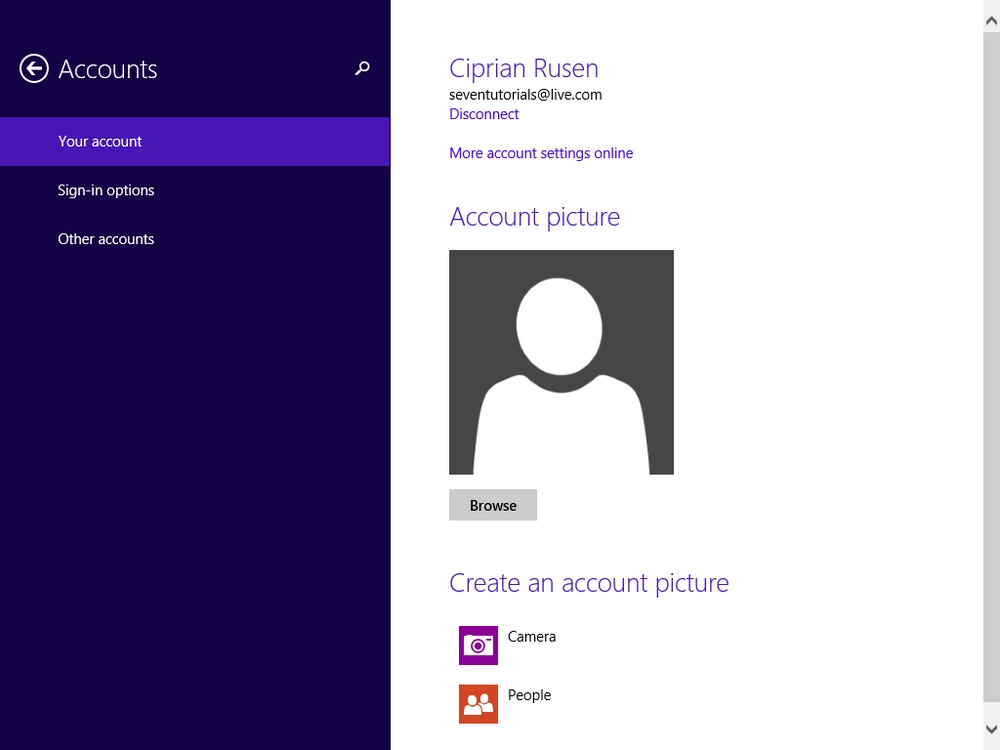
Windows 8.1 offers two places from which you can manage user accounts on your computer. In PC Settings, in the Accounts section, you can manage settings related to your user account (the account picture, your password, picture password, and PIN), the password policy used when waking your computer from sleep, add new user accounts and edit them.
In Control Panel, you can manage other existing user accounts, change your account type, or configure the settings for User Account Control (UAC).
Tip
If you want to know more about the UAC and how it works, read the dedicated section in Chapter 14.
In this exercise, you’ll learn how to access both methods for managing user accounts, starting with the one in Control Panel and ending with the one in PC Settings.
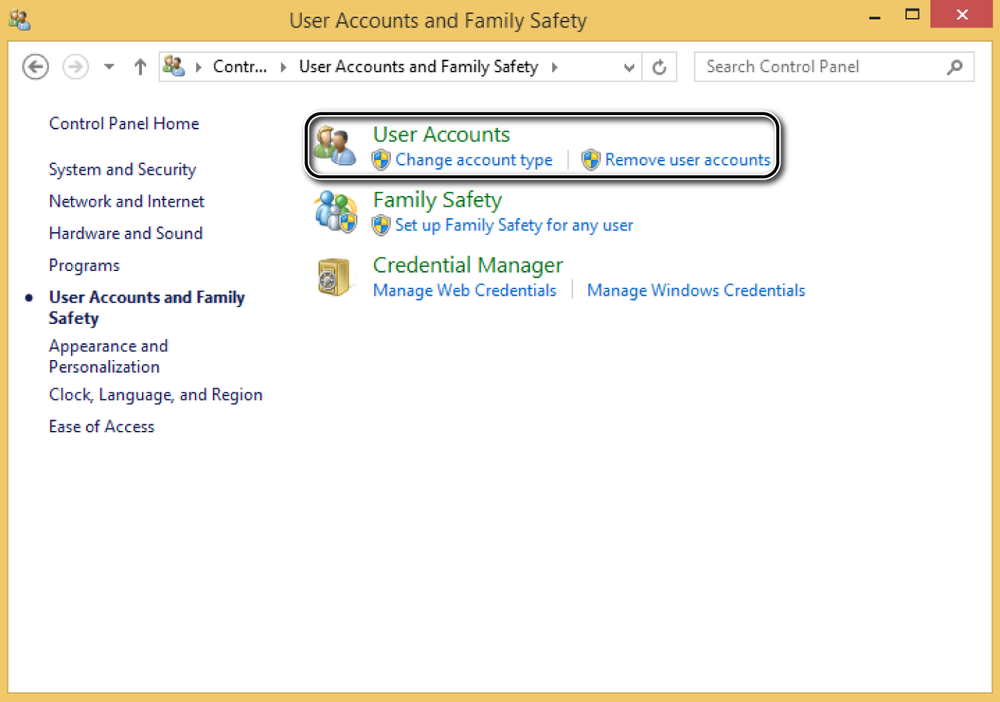
Click User Accounts and Family Safety.
Click User Accounts.
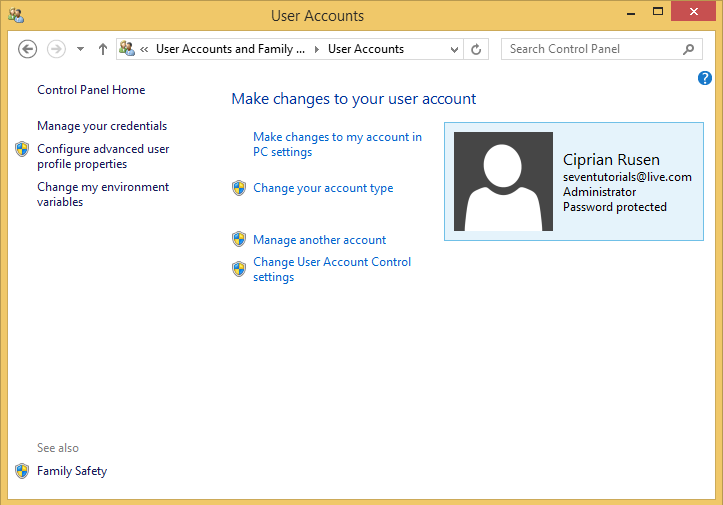
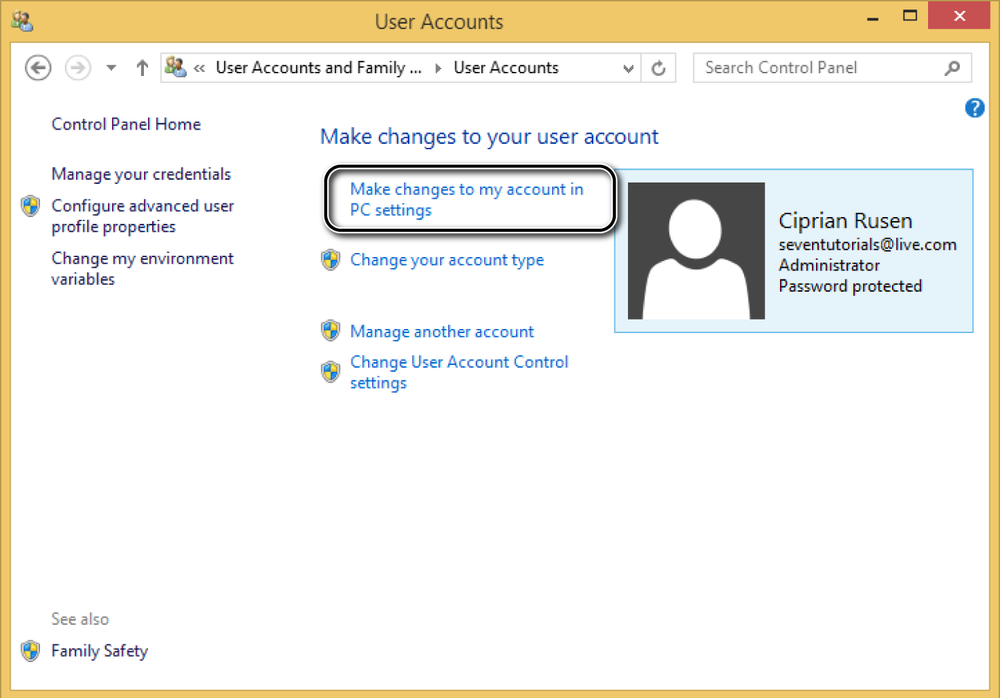
The User Accounts window, with settings related to your user account, opens.
Click Make Changes To My Account In PC Settings.
The Accounts pane in PC Settings opens.
Browse through the available sections (Your Account, Sign-in Options, Other Accounts) to become familiar with the options included in each of them.
You can open the Accounts section in PC Settings directly, without going first to Control Panel and following the steps in the preceding procedure. This exercise was meant to familiarize you with each panel and its location before you learn how to manage the user accounts defined on your computer.
Anyone with administrator permissions can add a user account via PC Settings. When you add a user, Windows 8.1 first asks for a Microsoft account. If one is provided, the user is immediately given access to the computer and can log on by using the password associated with that Microsoft account. Keep in mind that when you add a user, you must have an active Internet connection. This also applies when the user logs on for the first time.
After the user account is created, a new folder with the new account name is created in the C:Users folder, where all the personal files of the new user are kept. No users except administrator(s) and the newly added user have access to this folder.
In this exercise, you’ll learn how to create a new user account on your Windows 8.1 computer or device, using a Microsoft account.
Set Up
Log on as a user who has administrator permissions. Ensure that your Internet connection is working correctly, so that the procedure works smoothly. Then, open PC Settings
In PC Settings, click Accounts.
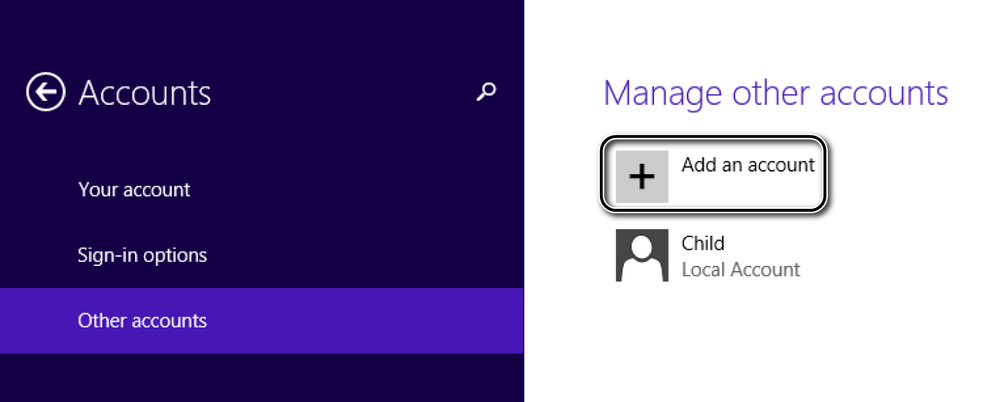
In the Accounts pane, click Other Accounts.
Click Add An Account.
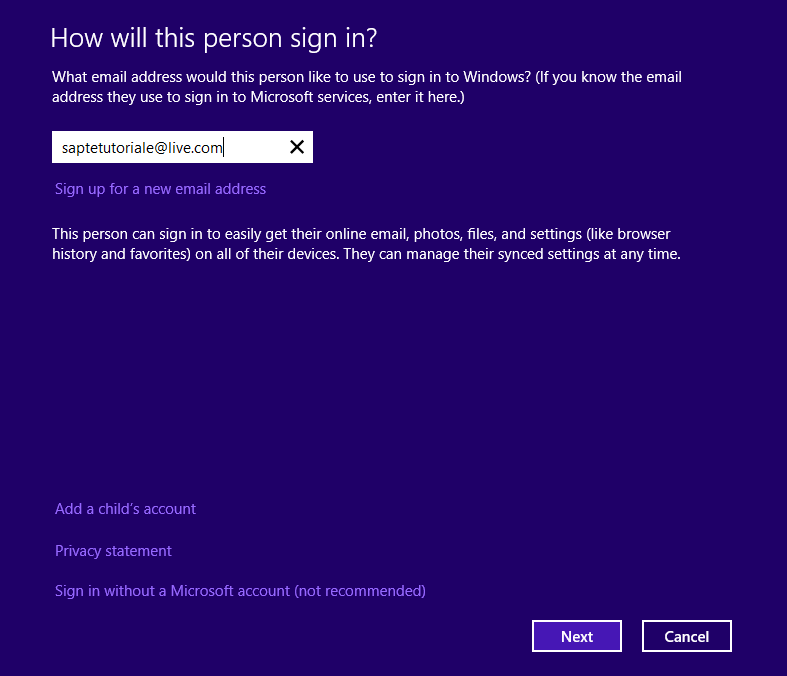
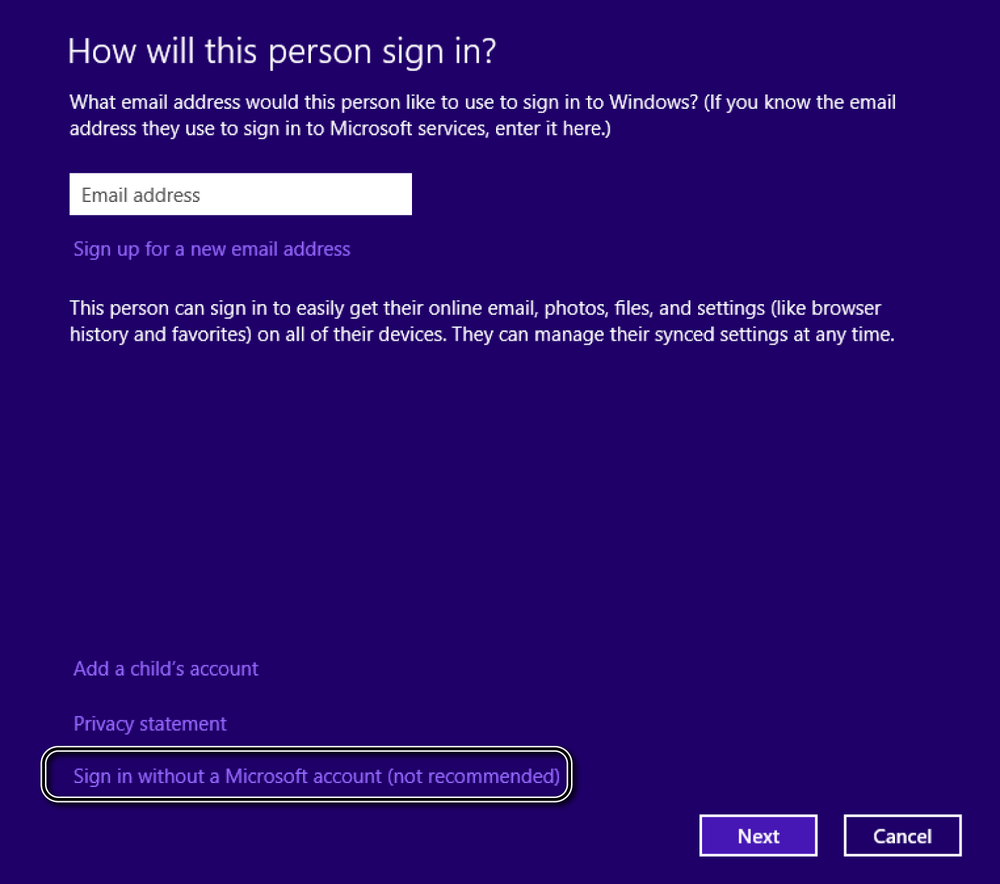
A wizard opens, asking how the new person will sign in.
Type the email address associated with her Microsoft account, and then click Next.
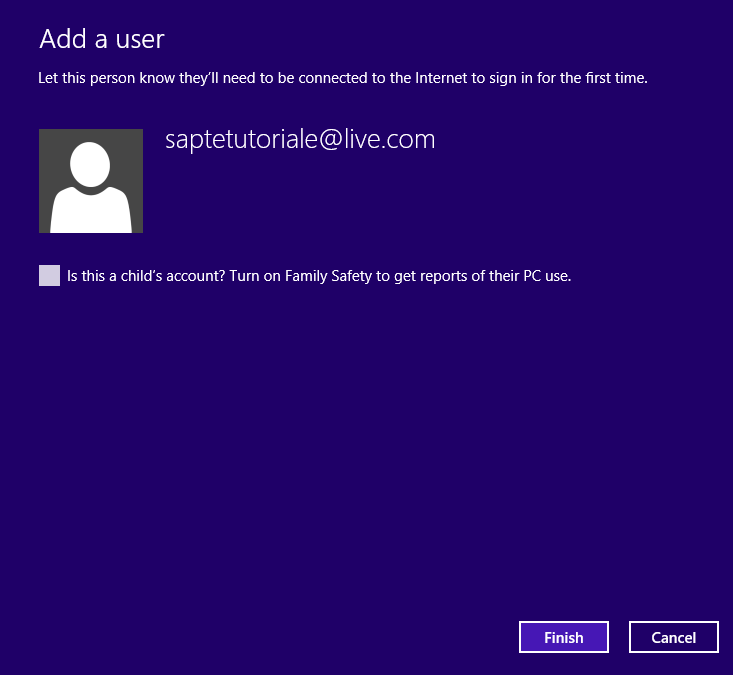
The Add A User page opens, informing you that the user has been added.
Click Finish.
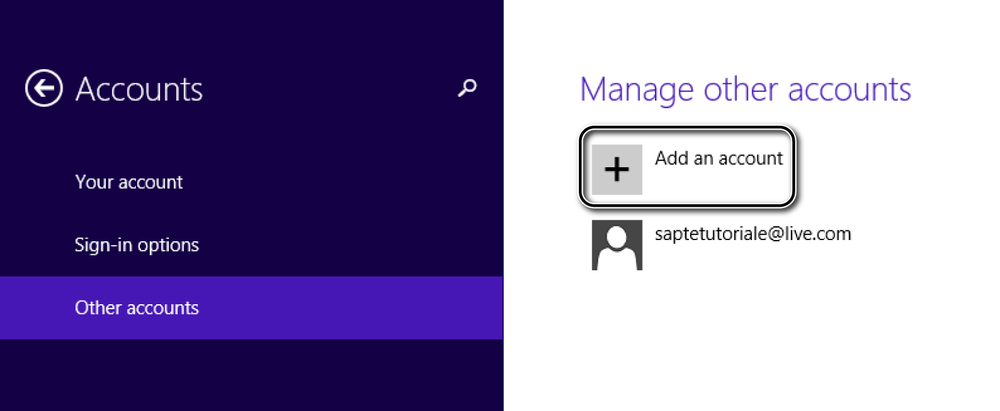
Windows returns you to the Accounts pane in PC Settings.
Clean Up
Close PC Settings, sign out and ask the person you have added to sign in by using their Microsoft account password.
The user account has been created and the first time that person logs in, she will go through a brief configuration wizard, plus the Windows 8.1 introductory tutorial. This is prior to being able to use your computer or device.
If you are not interested in using a Microsoft account, you can create a local account, which is created on your local computer, and with which a user can log on and use Windows 8.1. However, the user of this account will not be able to use any synchronization features provided by Microsoft for Windows 8.1 and won’t be able to make purchases in the Windows Store unless a Microsoft account is associated with it later. Another important difference is that a local account can have a blank (empty) password, whereas a Microsoft account does not allow blank passwords. Further, a local account does not need an active Internet connection to log on for the first time or for subsequent logons.
After the user account is created, a new folder with the new account name is created in the C:Users folder, where all the personal files of the new user are kept. No users except administrator(s) and the newly added user have access to this folder.
In this exercise, you’ll learn how to create a new local user account on your computer.
In PC Settings, click Accounts.
In the Accounts pane Other Accounts.
Click Add An Account.
A wizard opens, asking how the new person will sign in.
Toward the bottom of the page, click the Sign In Without A Microsoft Account (Not Recommended) link.
You are shown more information about the options for adding a user.
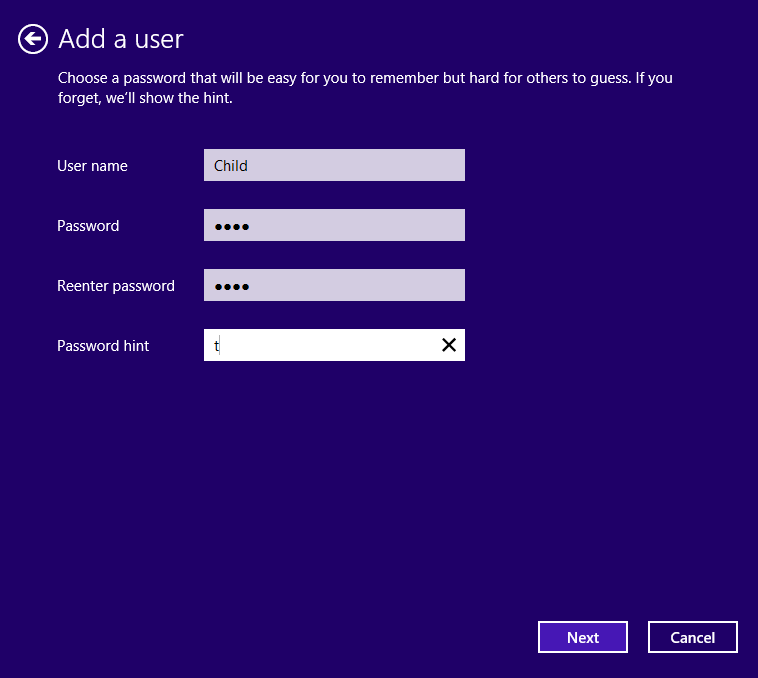
Click Local Account.
You are asked to type the user name, password, and password hint.
Complete all the fields and then click Next.
You are informed that the user you created will be able to sign in to your computer.
Click Finish.
Windows returns you to the Accounts pane in PC Settings.
The user account is created using the password you provided. When the new user signs in for the first time, he will be shown the Windows 8.1 introductory tutorial, prior to being able to use your computer or device.
Creating a Microsoft account
You can create a Microsoft account several ways. One way is to do it from Windows 8.1 during the procedure for adding a new user account.
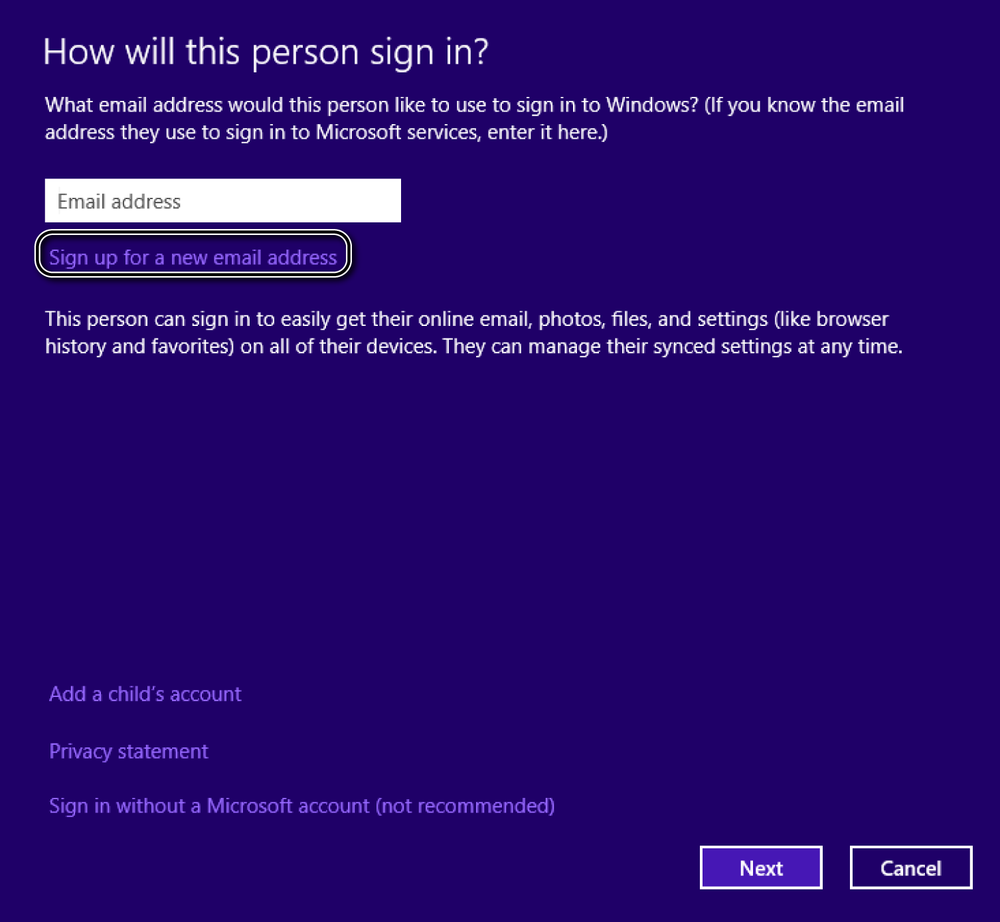
If Windows has a connection to the Internet, it will ask for all the required details for creating the account, send them to Microsoft to confirm your details, and allow the newly created account to log on to your computer or device.
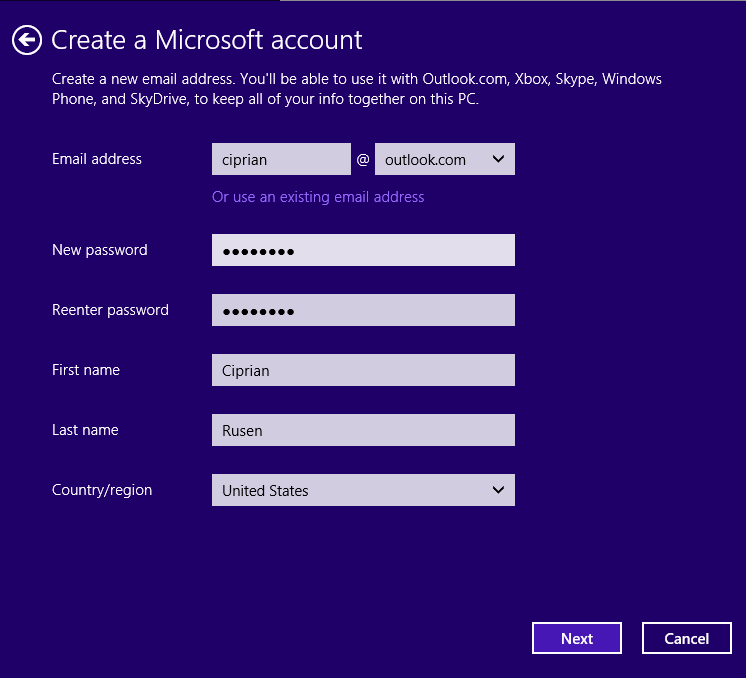
As an alternative, using any web browser, visit https://signup.live.com, and enter all the details requested.
When you switch between user accounts, you leave the current user account logged on (with all running apps) and log on to a separate user account. You can switch back and forth between user accounts whenever you want. The user account from which you switched remains active with all apps running, and you can switch back to it at any time by entering its password, PIN, or picture password. This can be useful if you need to work on multiple accounts at the same time.
In this exercise, you’ll learn how to switch between two user accounts. This is possible only if you have two or more user accounts on your computer.
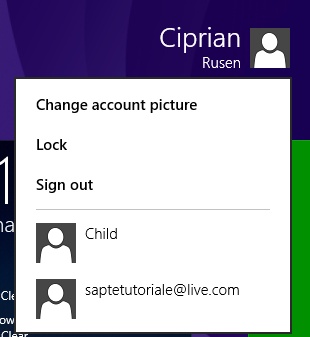
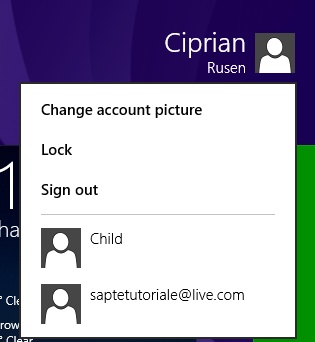
In the upper-right corner of the screen, click the icon that represents your user account.
A contextual menu with several options opens.
Click the user account to which you want to switch.
You are asked to complete logon details for the selected user.
Type the password for the selected user account and then click the Submit arrow.
You are now logged on to the selected user account.

The owners of every user account except Guest can change the password for their account. Making the change doesn’t require any administrator permissions as long as you do not want to change the password of a user account other than your own.
If you are using a user account associated with a Microsoft account, the password change is applied to both your Windows-based computer and all Microsoft services that account uses. If you are using a local user account, the password change applies only to the user account defined on your local computer.
Tip
To keep your account safe, it is recommended that you use strong passwords. Strong passwords contain a combination of letters, numbers, and special characters (such as @, #, or &). Ideally, the password should be something that is easy for you to remember but difficult for anyone else to figure out.
In this exercise, you’ll learn how to change the password of a user associated with a Microsoft account.
Set Up
Log on to Windows 8.1 by using the user account whose password you want to change. Then, open PC Settings.
In PC Settings, click Accounts.
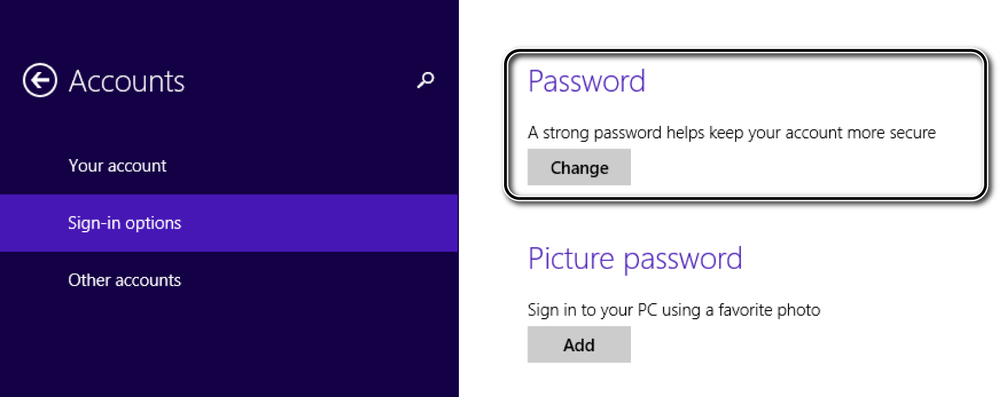
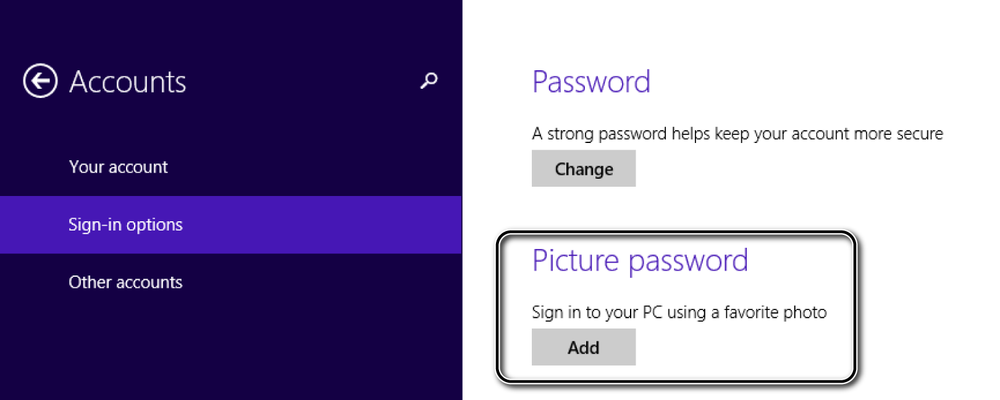
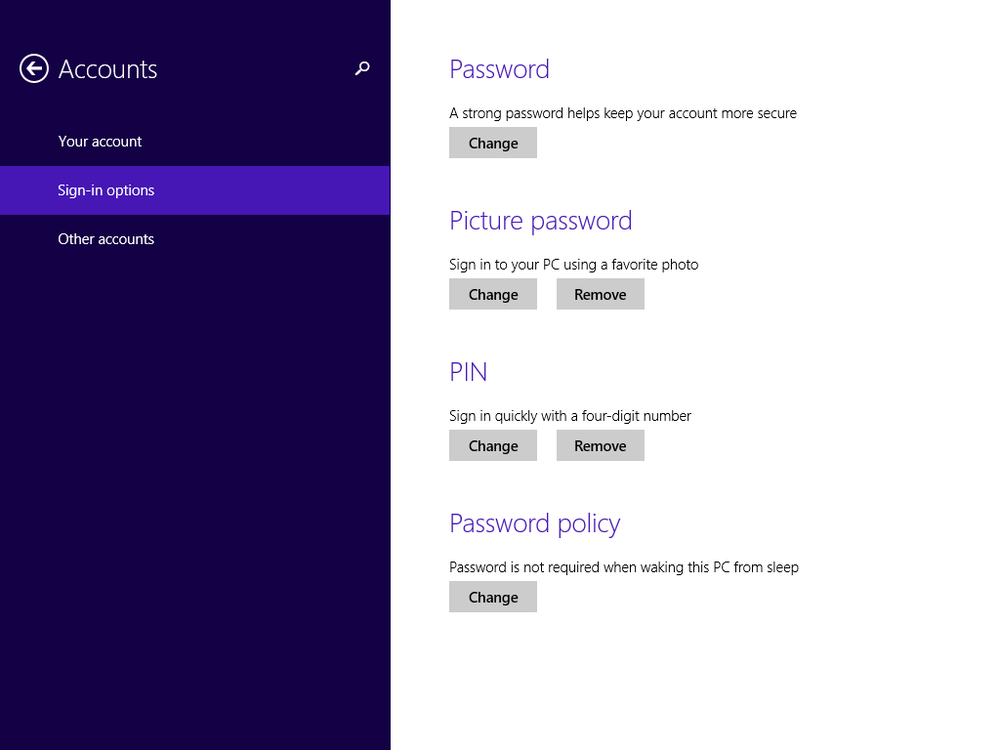
In the Accounts pane, click Sign-In Options.
Several password-related options are shown.
In the Password section, click the Change button.
The wizard for changing your password opens.
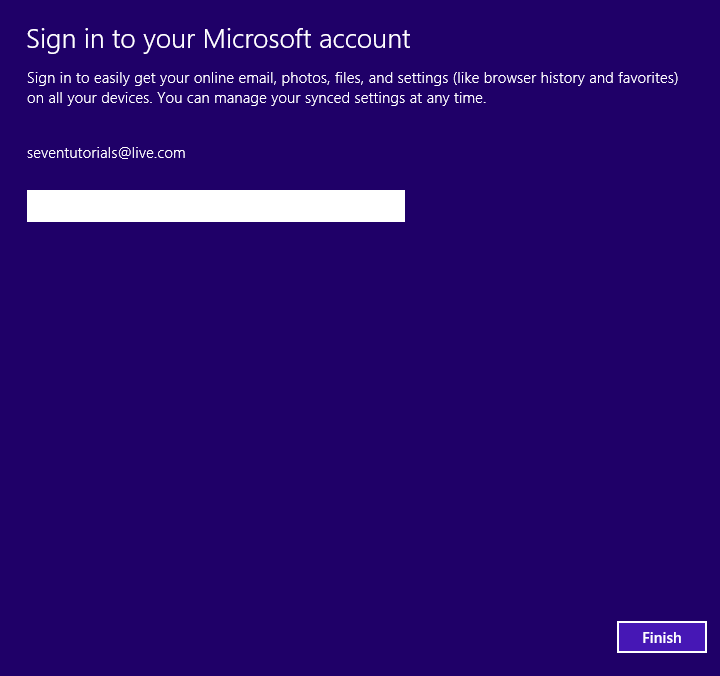
Type your current password and then click Finish.
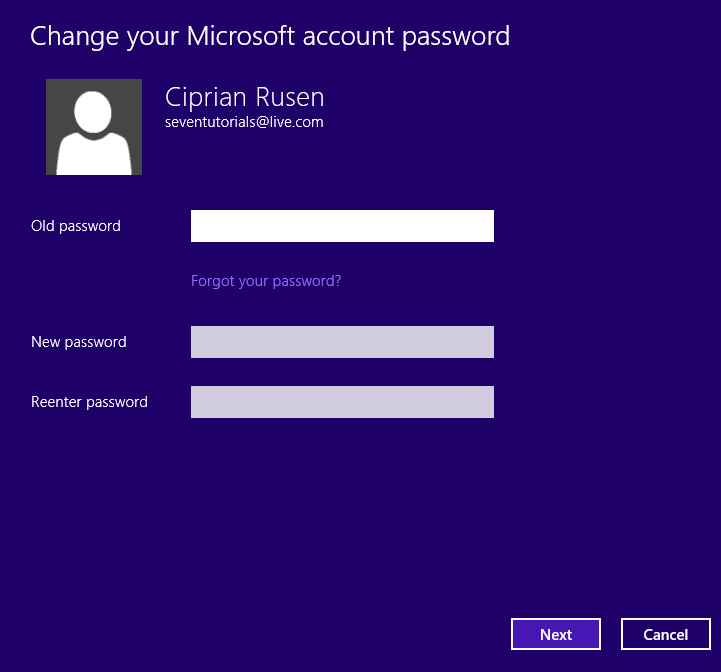
You are asked to enter your current password again as well as the new password for your Microsoft account.
In the Old Password box, type the existing password that you want to change.
In the New Password box, type the new password, and then, in the Reenter Password box, type the new password again.
Click Next.
You are informed that you have changed your password.
Click Finish.
One of the features first introduced by Windows 8 is the use of picture passwords. This concept entails using a specific picture on which you draw gestures. These gestures can be simple taps or clicks, circles, or lines. If your user account is using a Microsoft account with a complicated password, creating a picture password to be used as a complement can be a good way to make it easy to log on to your Windows 8.1–based devices.
Even though this feature is particularly recommended for use on touch-enabled devices such as tablets, you can also employ it on a desktop computer by using a mouse.
In this exercise, you’ll learn how to create a picture password for your user account. To make things fast and easy, the exercise will use only taps or clicks.
Set Up
To complete this exercise, you need the PictureA.jpg file, which is in the Chapter12 folder in your practice files. When you have this file available, open PC Settings.
In PC Settings, click Accounts.
In the Accounts pane, click Sign-In Options.
Several password-related options are shown.
In the Picture Password section, click Add.
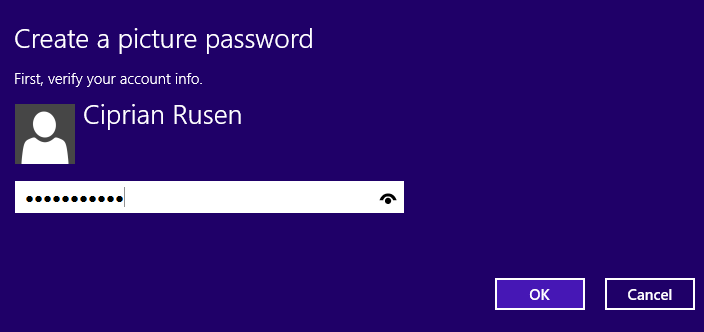
You are asked to first verify your account information.
Type your user account password and then click OK.
You are informed about picture passwords.
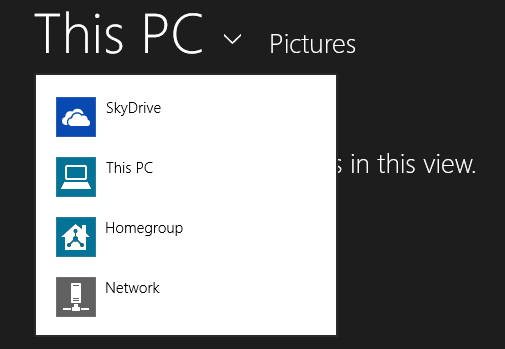
Click Choose Picture.
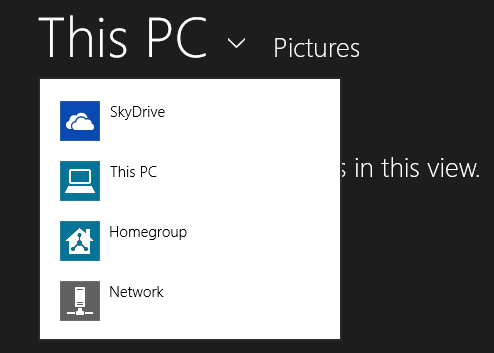
A browsing window opens.
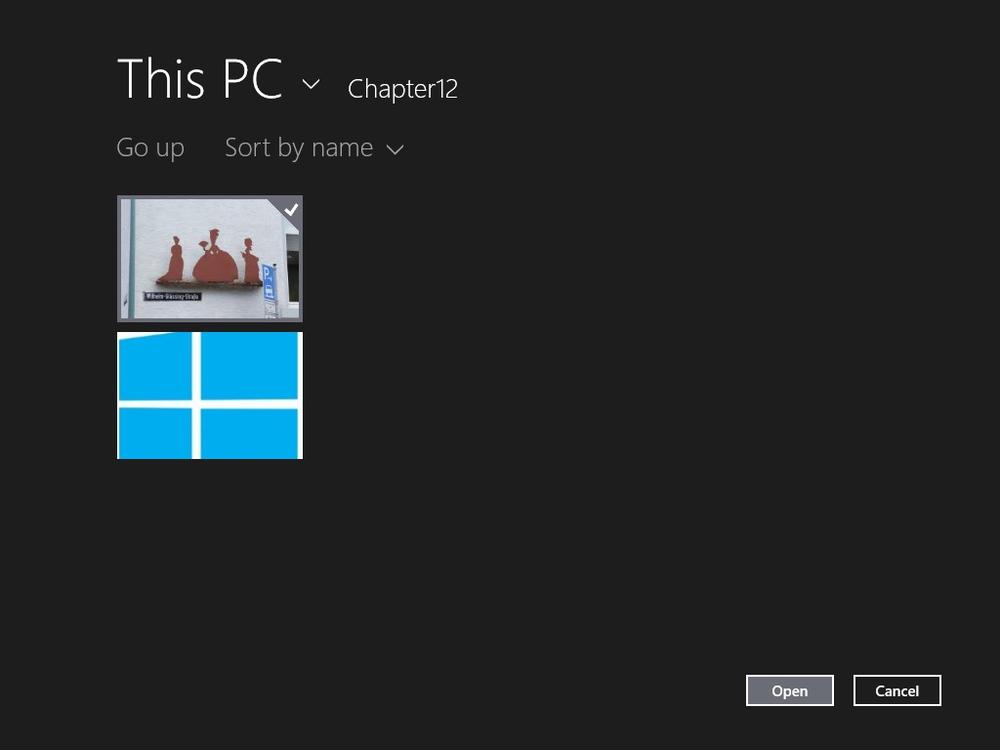
Click This PC and navigate to where you stored the PictureA.jpg practice file.
Select PictureA.jpg and then click Open.
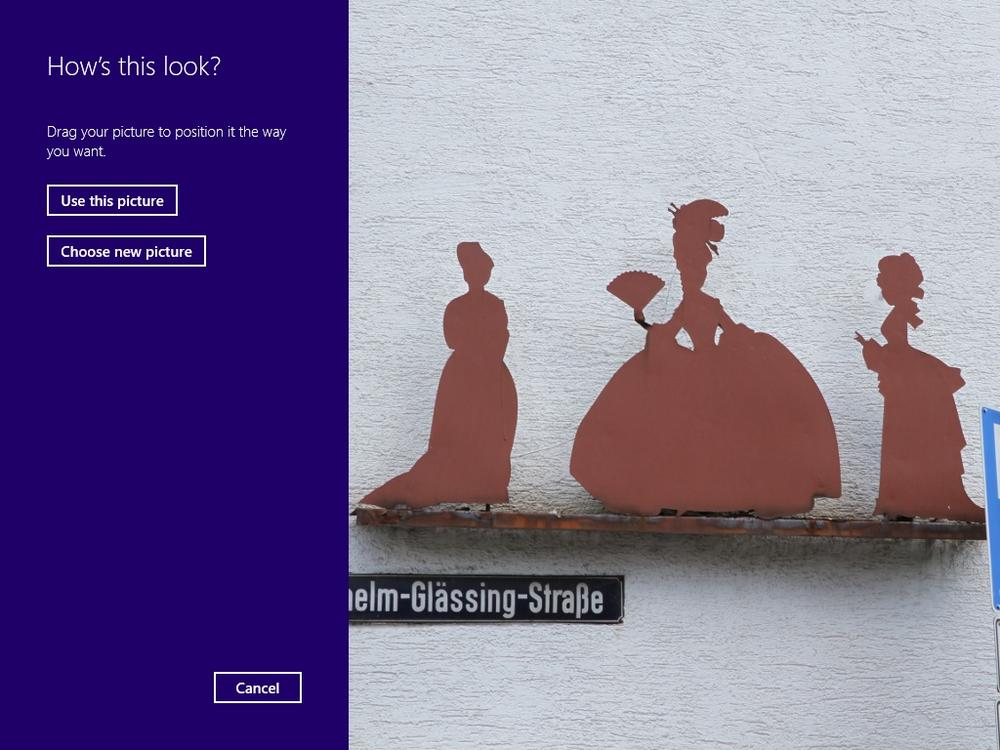
You are asked whether to use the picture as is or position it another way.
Click Use This Picture.
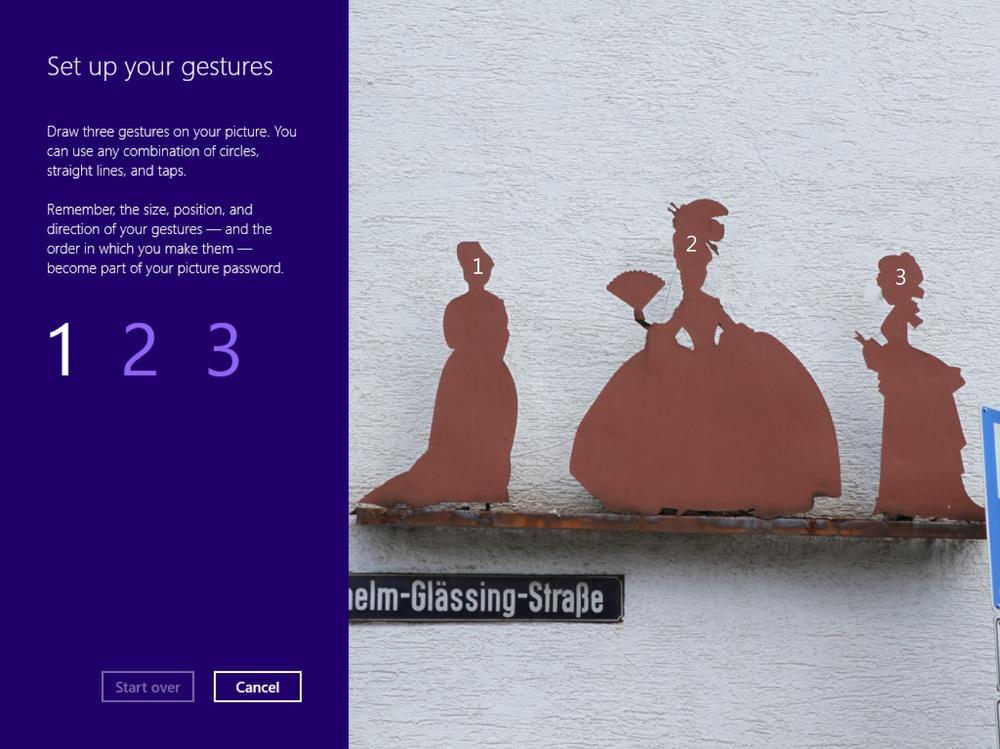
You are asked to set up the three gestures that will serve as your picture password.
Click or tap the picture as highlighted in the following screen shot, on the head of each figure, one by one.
You are immediately asked to confirm your gestures.
Click or tap the picture again as you just did, on the head of each figure, one by one.
You are informed that the picture password has been created successfully.
Click Finish.
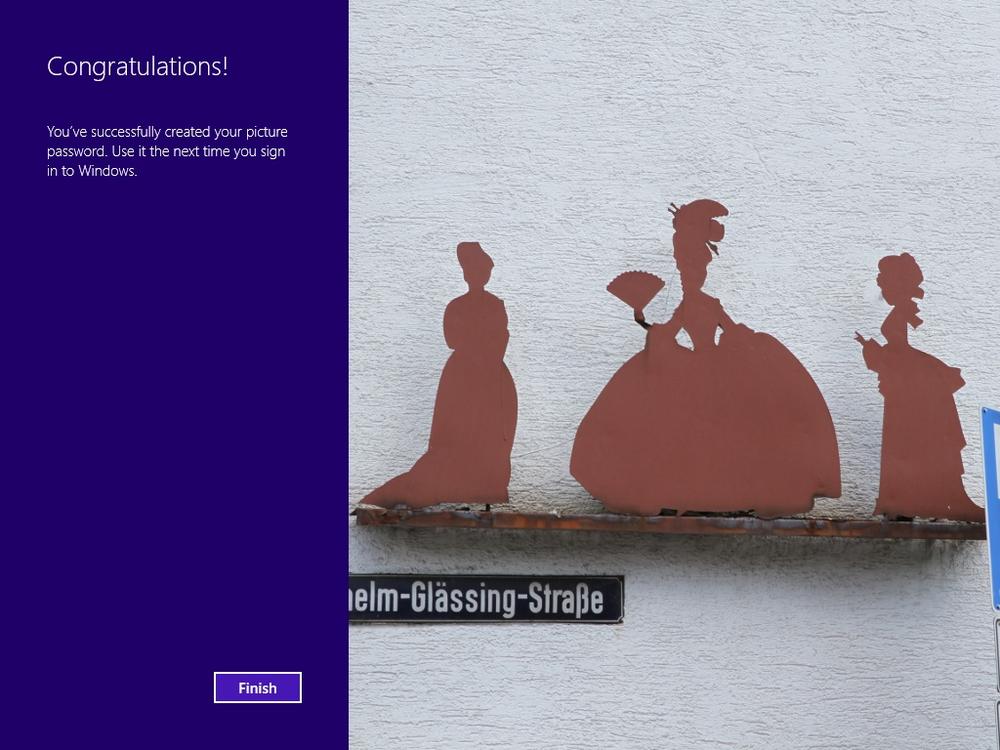
The picture password is now set, and you can use it instead of your normal user account password each time you log on to your computer.
To further simplify the way you log on to your computer, especially if you are using a Microsoft account with a long password, Windows 8.1 allows the creation of a four-digit PIN associated with your user account. After you create a PIN, you can use it to log on quickly to your user account.
In this exercise, you’ll learn how to create a PIN for your user account.
In PC Settings, click Accounts.
In the Account pane, click Sign-In Options.
Several password-related options are shown.
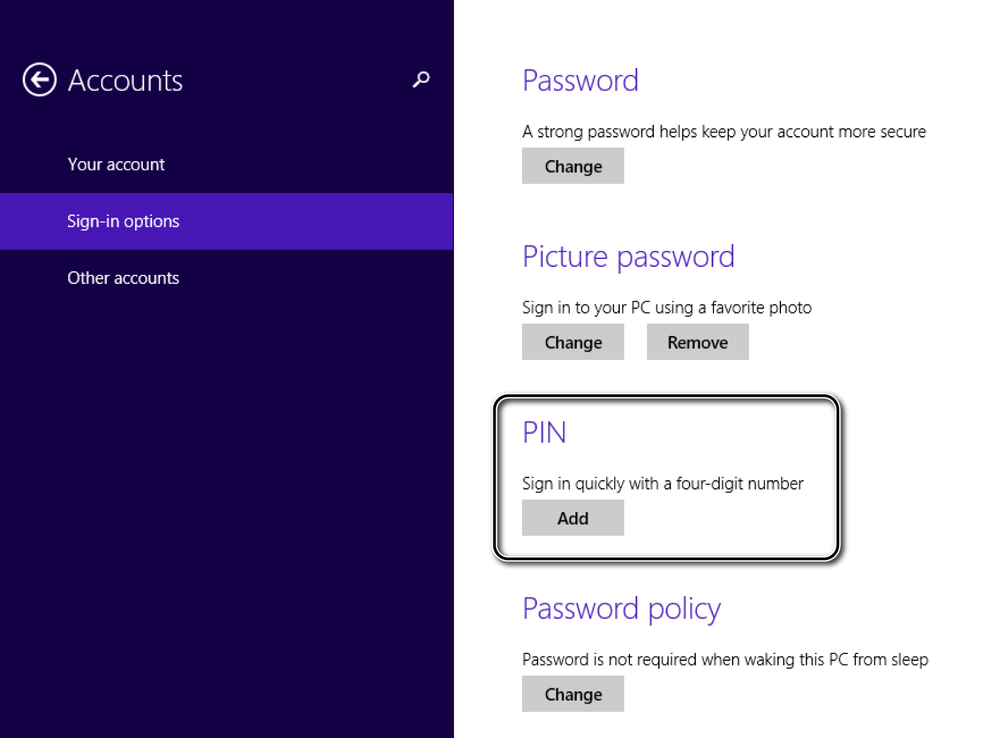
In the PIN section, click Add.
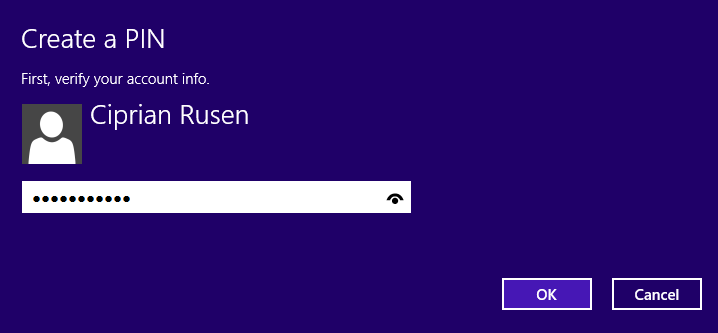
You are asked to first verify your account.
Type your user account password and then click OK.
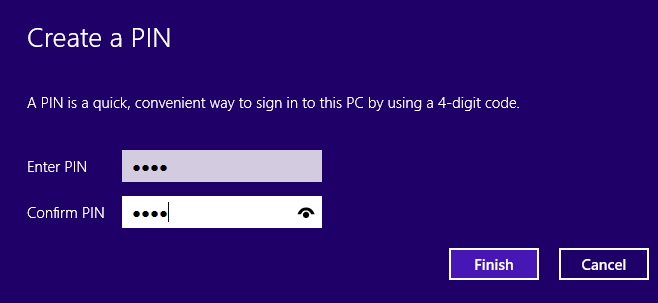
You are asked to enter the 4-digit code you want to use as your PIN.
Type the same PIN in the Enter PIN and Confirm PIN boxes.
Click Finish.
You can now use the PIN you just set instead of your password to log on to your user account.
Changing the picture password or the PIN
You can change both your picture password and PIN if you decide to use these features. The change process is always started in the Accounts pane, in the Sign-In Options section.
Windows 8.1 first asks you to type the current password associated with the user account and then allows you to change the picture password and the PIN. From here on, the procedures for changing them are the same as for creating them.
As with any earlier version of Windows, you can change the picture for your user account at any time. The procedure involved is not complicated.
In this exercise, you’ll learn how to change a user account picture.
Set Up
To complete this exercise, you need the PictureB.jpg file, which is in the Chapter12 folder in your practice files. When this file is available, open the Start screen.
In the upper-right corner of the screen, click the icon that represents your user account.
A contextual menu with several options opens.
Click Change Account Picture.
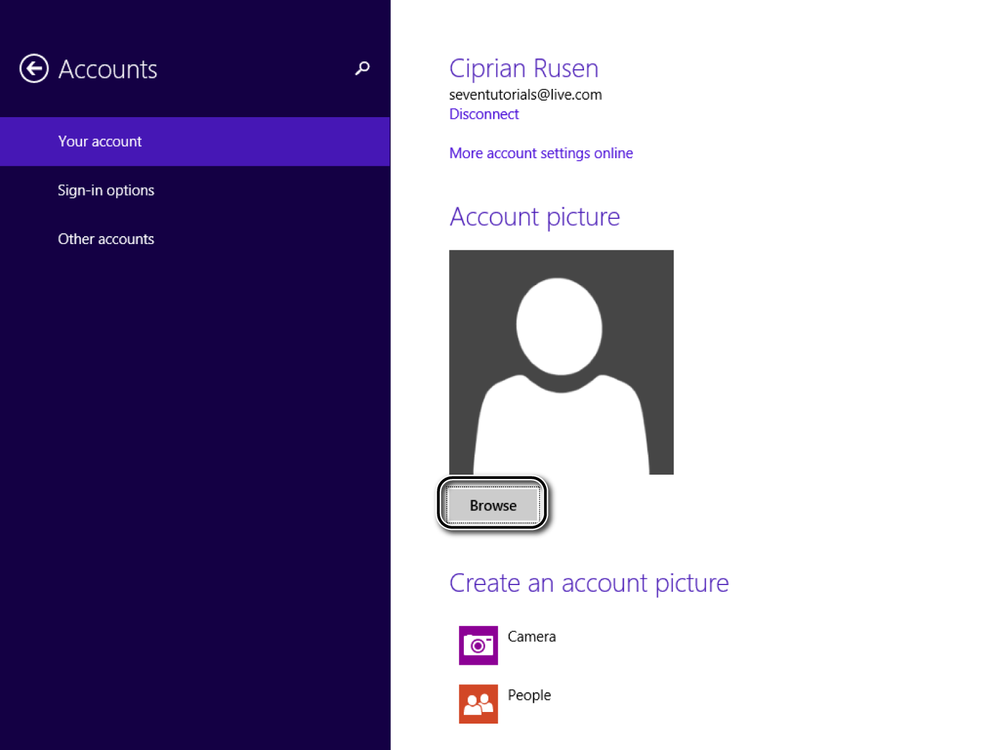
The Accounts pane in PC Settings opens.
Under Your Account, in the Account Picture section, click Browse.
A file browsing window opens.
Click This PC and navigate to where you stored the PictureB.jpg practice file.
Select PictureB.jpg and then click Choose Image.

Your user account picture has been changed.
In Windows 8.1, changing the name of a user account is possible only for local accounts. You cannot change Microsoft account names from Windows. It is best to make this change from another user account with administrator permissions.
In this exercise, you’ll learn how to change the name of a local user account.
Set Up
Log on by using a user account that has administrator permissions. In Control Panel, open the User Accounts window by clicking User Accounts And Family Safety, and then click User Accounts.
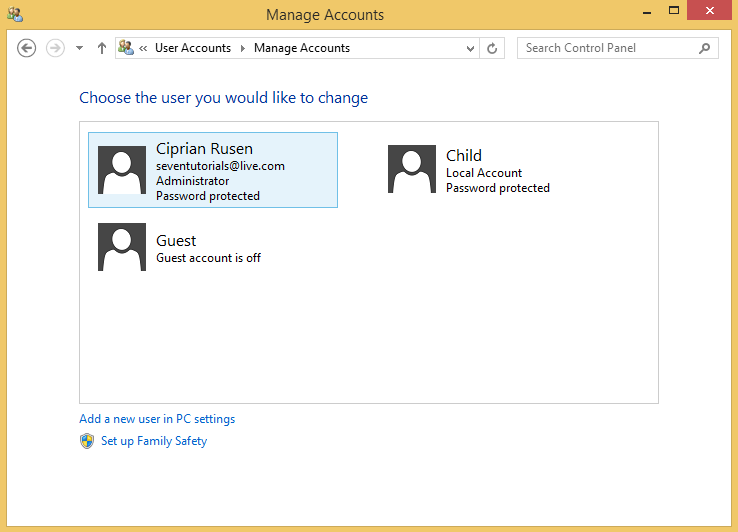
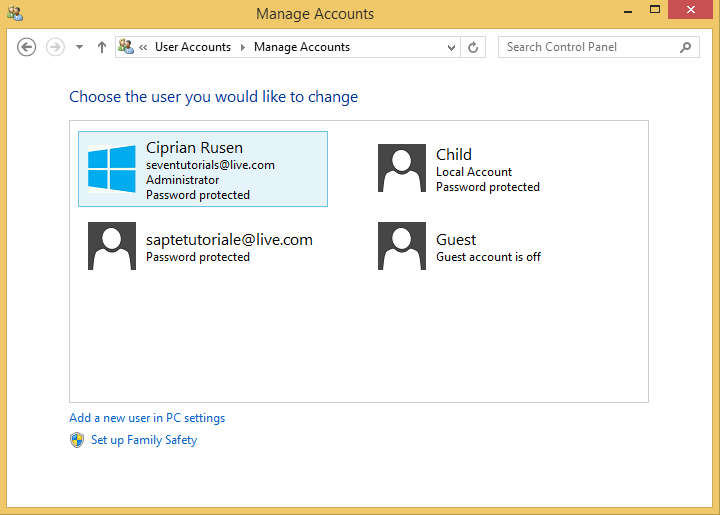
Click Manage Another Account.
A list of all the existing user accounts opens.
Click the user account whose name you want to change.
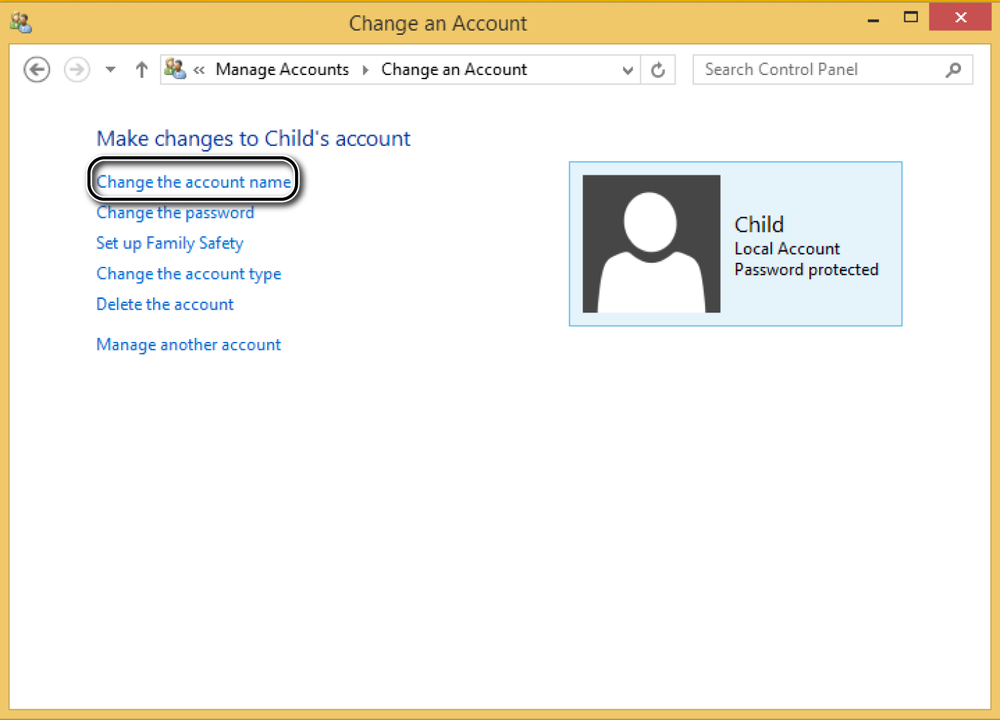
The Change An Account window opens.
Click Change The Account Name.
The Rename Account window opens.
Type the new name that you want to use for that user account.
You return to the Change An Account window, where you can see that the selected user account has been renamed.
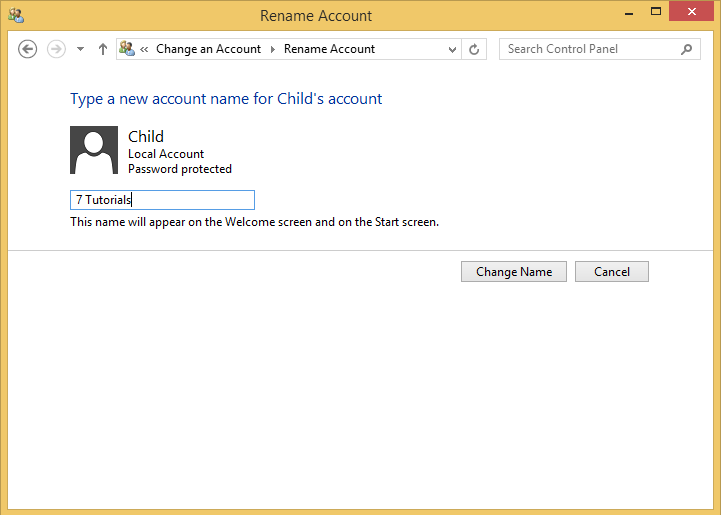
The name of the selected user account is now changed.
All users except Guest can change their user account type. However, making the change requires administrator permissions. If you are trying to change the type for a user account with standard permissions, you need to know the password of the Administrator account or have someone log on by using the Administrator account and change the account type.
You must have at least one user account with administrator permissions on your Windows 8.1–based computer. If you have only one such user account, you can’t change its type to standard user. However, you can change any number of standard user accounts to Administrator.
In this exercise, you’ll learn how to change the type of a user account from standard to Administrator.
Set Up
Log on by using a user account that has administrator permissions. In Control Panel, open User Accounts window by clicking User Accounts And Family Safety, and then click User Accounts.
Click Manage Another Account.
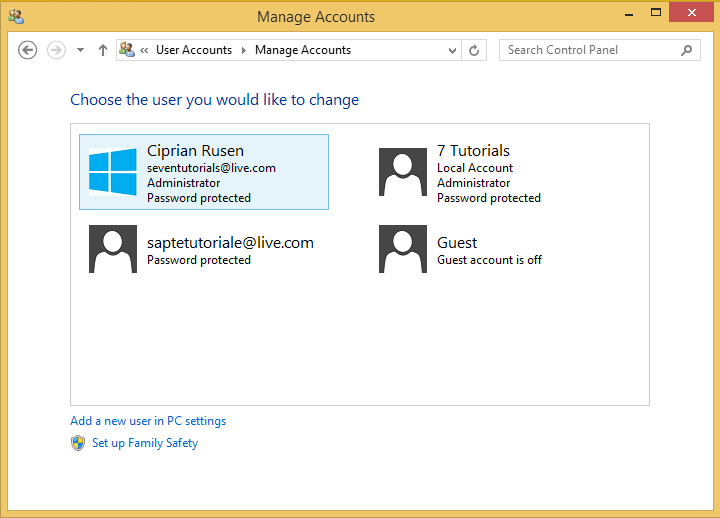
A list of all the existing user accounts opens.
Click the user account whose type you want to change.
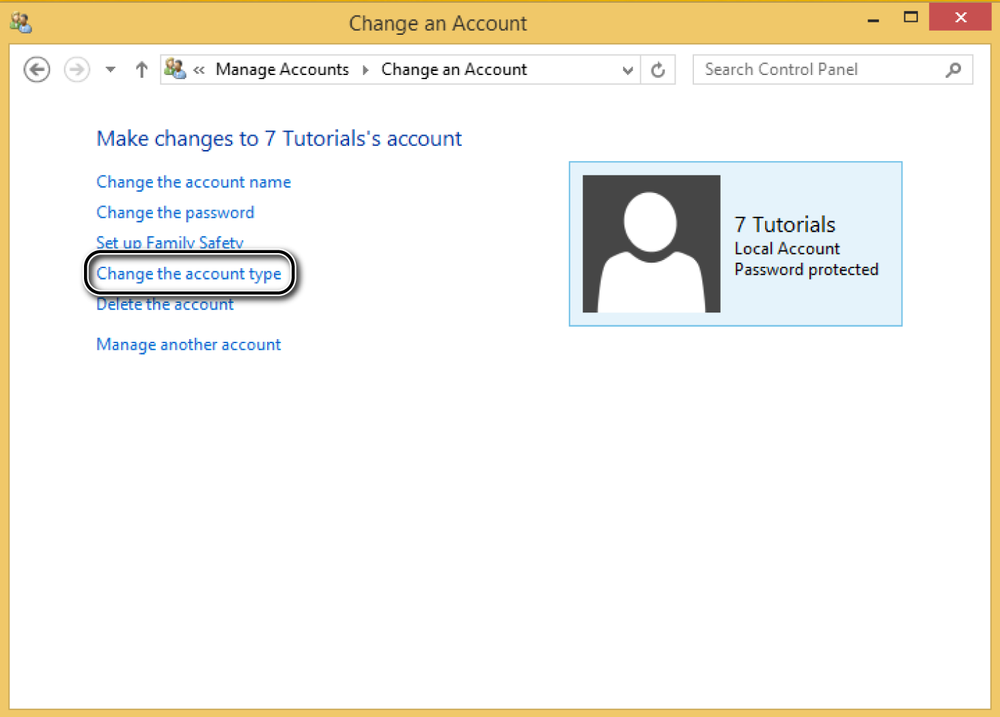
The Change An Account window opens.
Click Change The Account Type.
Select the new account type that you want to use, in this case, Administrator.
Click Change Account Type.
You return to the Change An Account window.


The type of the selected user account is now changed.
Deleting user accounts is a task that only administrators can do. When an account is deleted, all the settings and files belonging to that user account are also deleted. This activity is best done by logging on to another user account and making the deletion from there. Ensure that the user account you are about to delete is not logged on when executing the deletion.
Before you delete a user account, back up all the important files created in its user files and folders so that they can be used later.
In this exercise, you’ll learn how to delete a user account.
Set Up
Log on by using a user account that has administrator permissions. In Control Panel, open the User Accounts window.
Click Manage Another Account.
A list of all the existing user accounts opens.
Click the user account that you want to delete.
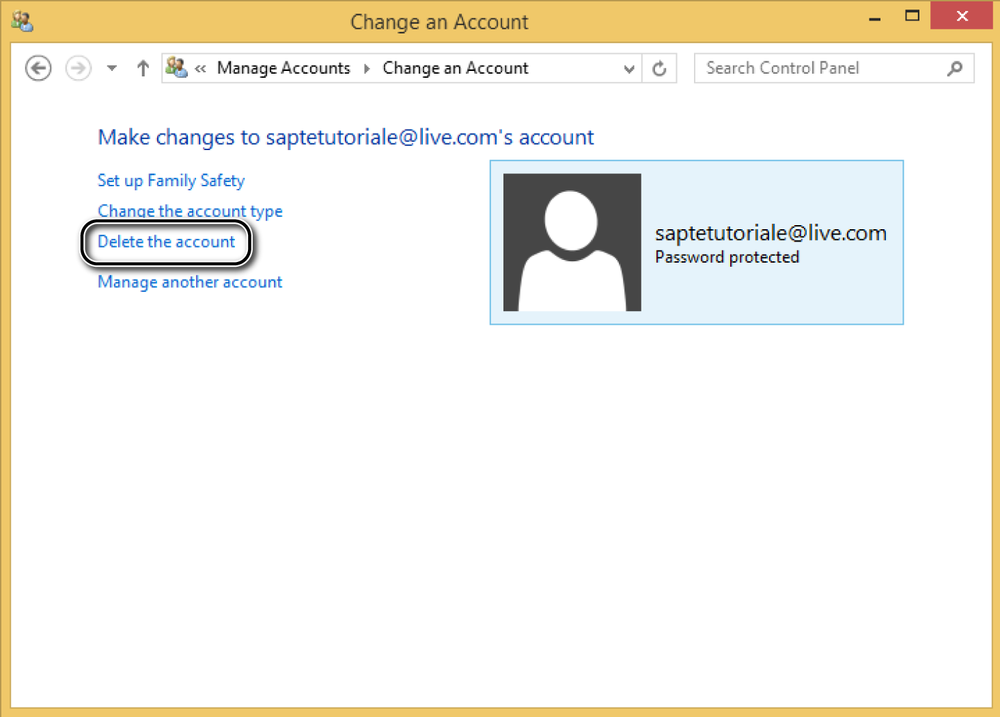
The Change An Account window opens.
Click the Delete The Account link.
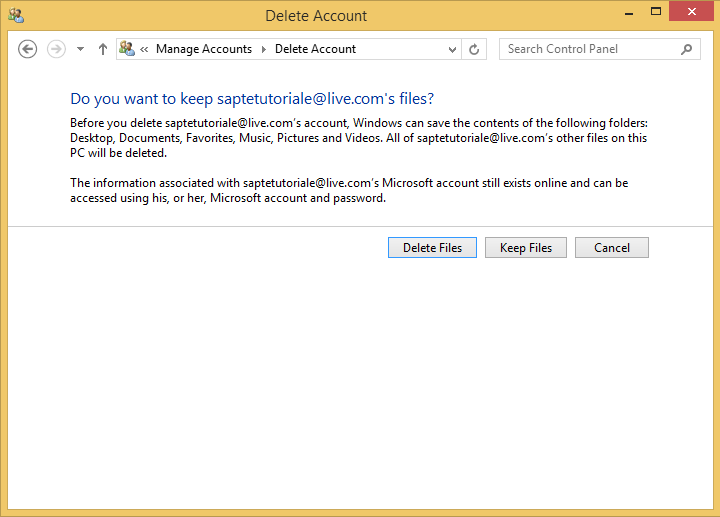
The Delete Account window opens.
Click Delete Files.
You are asked to confirm the deletion.
Click Delete Account.
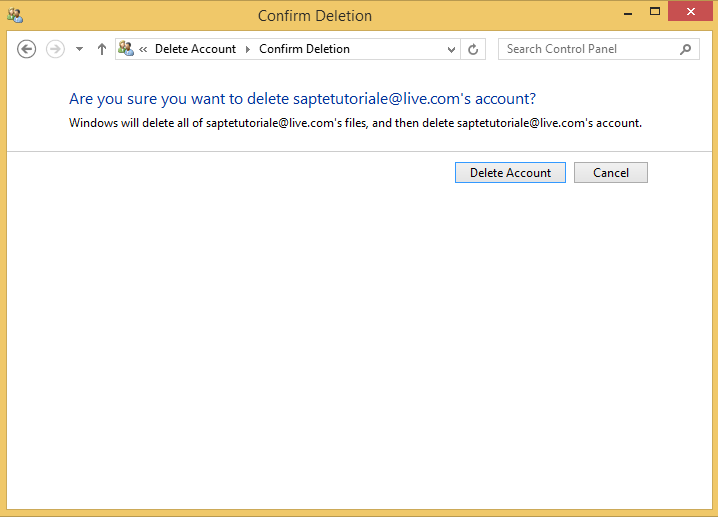
The selected user account is now deleted.
If more than one person is using a computer, it is best to create a separate user account for each person.
Windows 8.1 allows you to use Microsoft accounts as user accounts on your device.
With a Microsoft account, you can use all the features included in Windows 8.1, including the Windows Store.
Any user can create picture passwords or PINs for quicker logon procedures.
To create a user account, change user account names or types, and delete user accounts, you need administrator permissions.
The deletion of a user account is best done from another user account and only after you have backed up all the important files created by that user.