AN Easy bin for beginners
You do not need any previous DIY skills to make this simple chicken wire and cardboard bin. If you want to be really eco-friendly, try to source used materials from friends and neighbors, salvage yards, and freecycle websites. The bin also makes excellent use of the cardboard packaging you may have at home, and has an even lower carbon footprint than sending it for curbside recycling, which entails transportation and processing. The whole project should not take more than a couple of hours to finish.
First things first
The wooden posts and chicken wire used for the main structure of this compost bin will last for many years and may be difficult to move, so find a good location for it before you start building (see Siting a Heap or Bin).
Decide how wide and tall you want your bin to be—this heap is for a large garden that produces plenty of waste to fill it, but you can simply buy shorter wooden posts and make a smaller structure to fit your space. When using recycled materials, check that the wood is from an FSC certified source and has not been treated with toxic chemicals such as creosote. You could use sturdy tree prunings instead of buying wood—ask a local tree surgeon if they can spare some if you do not have a tree. If you are new to DIY, you may also be able to save money by borrowing the tools needed for the job from friends or neighbors.
TOP TIP If making a shorter bin, you can add a fourth side to this construction and fill it from the top. This would provide extra insulation which may speed up the composting process.
Homemade bins can produce nutrient-rich, crumbly compost within a few months if they are large enough and situated in a sheltered spot.
YOU WILL NEED String and pegs • Rubber mallet • 4 wooden posts (those used here are 5ft/1.5m long) • Chicken wire, approx. 4 x 8ft (1.2 x 2.5m) • Fencing staples • Hammer and wire cutters • Cardboard box packaging • Waterproof material for cover
Making Compost | AN EASY BIN FOR BEGINNERS

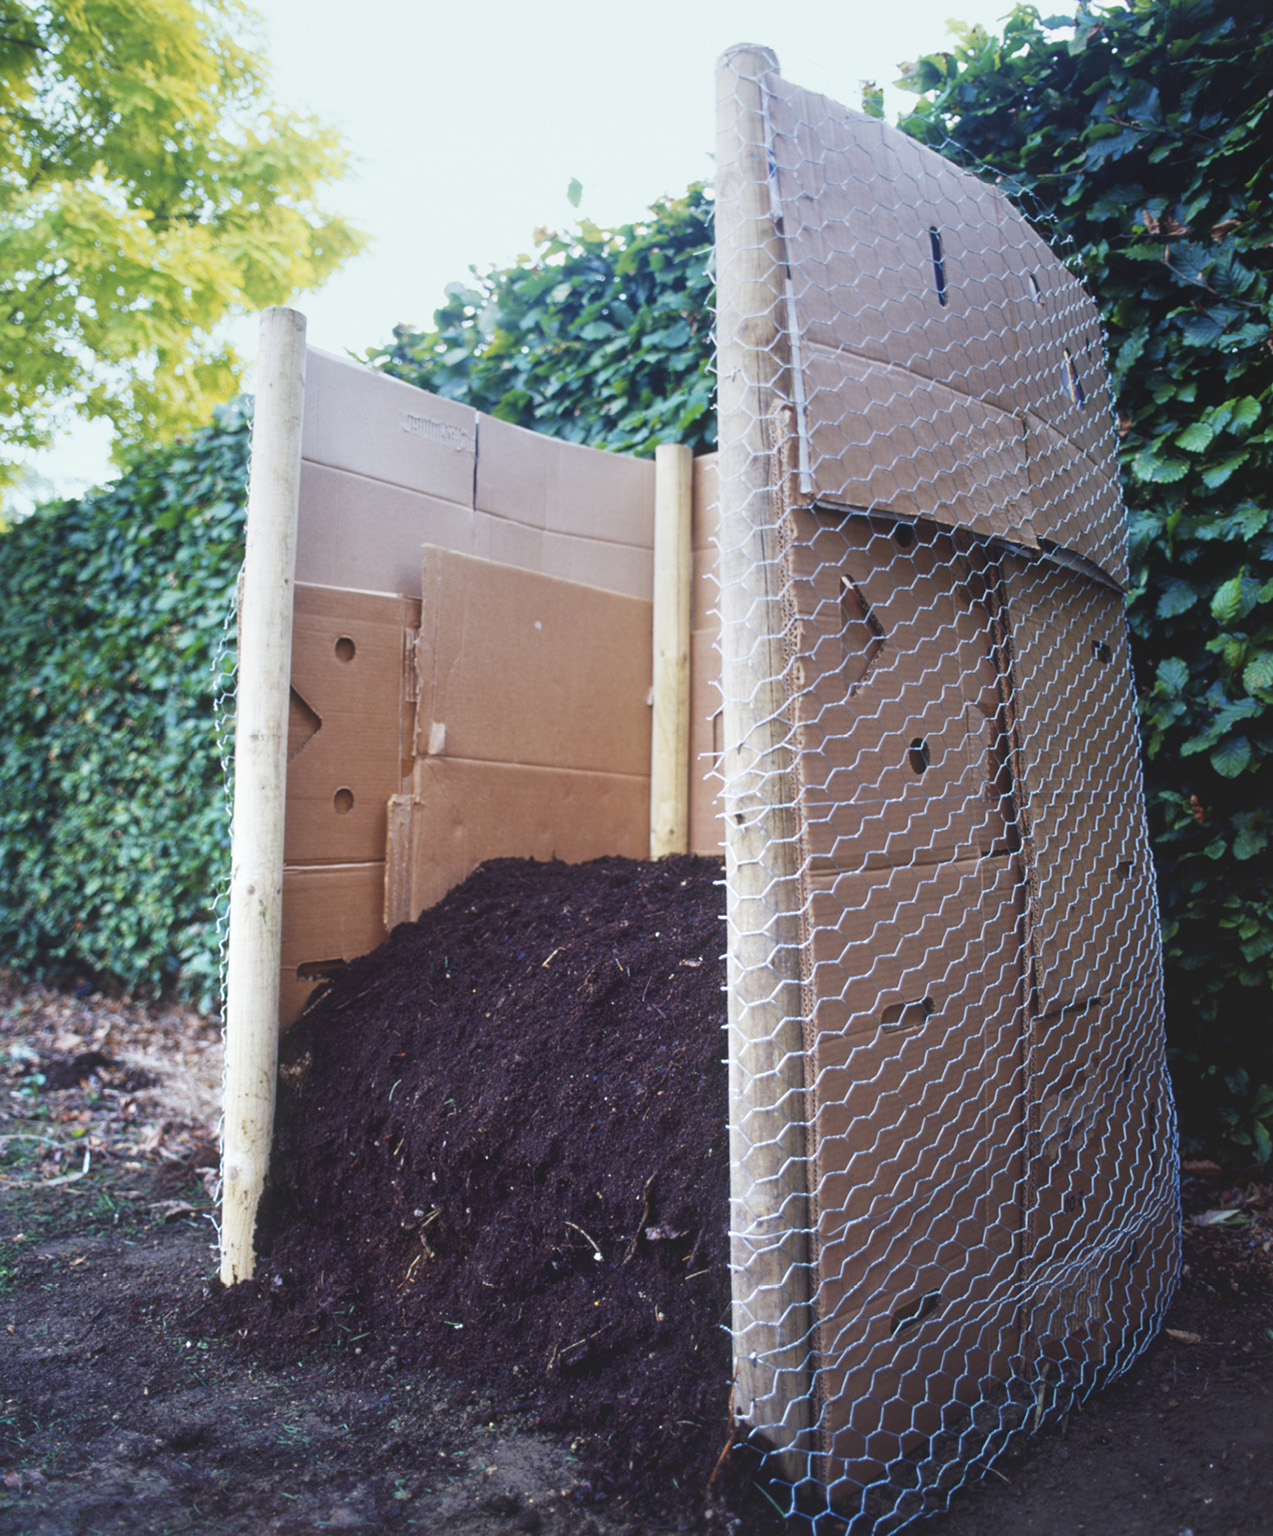
1 Measure the size of the bin you want to create with string and pegs; this one is about 21⁄2ft (75cm) square. Using the mallet, drive each post about 12in (30cm) into the ground at the corners. Wrap the chicken wire around the posts, cutting it to size if necessary.
Making Compost | AN EASY BIN FOR BEGINNERS

2 Secure the chicken wire to the posts by hammering in fencing staples at three or four points along their length. Snip off any excess wire using wire cutters, making sure there are no sharp edges that may cause injury. If making a tall bin such as this, leave one side open to allow you to fill it.
Making Compost | AN EASY BIN FOR BEGINNERS

3 Flatten your cardboard and use it to line the inside of the structure. To keep it in place, have some composting material on hand and add a layer of twigs to the base, then more green and brown waste on top (see Recipes for Success). You may need to staple the top sections to the posts.
Making Compost | AN EASY BIN FOR BEGINNERS

4 Keep filling up the bin as you accumulate garden and kitchen waste, layering it as described in the method you wish to use (see Traditional Hot Composting). The large size of this bin would lend itself to fast hot composting if you had enough material to fill it up in one shot.
Making Compost | AN EASY BIN FOR BEGINNERS

5 If you accumulate a large quantity of green waste such as grass clippings, make sure you include it in thin layers or add plenty of brown waste such as shredded prunings, cardboard, and scrunched paper to balance it out.
Making Compost | AN EASY BIN FOR BEGINNERS
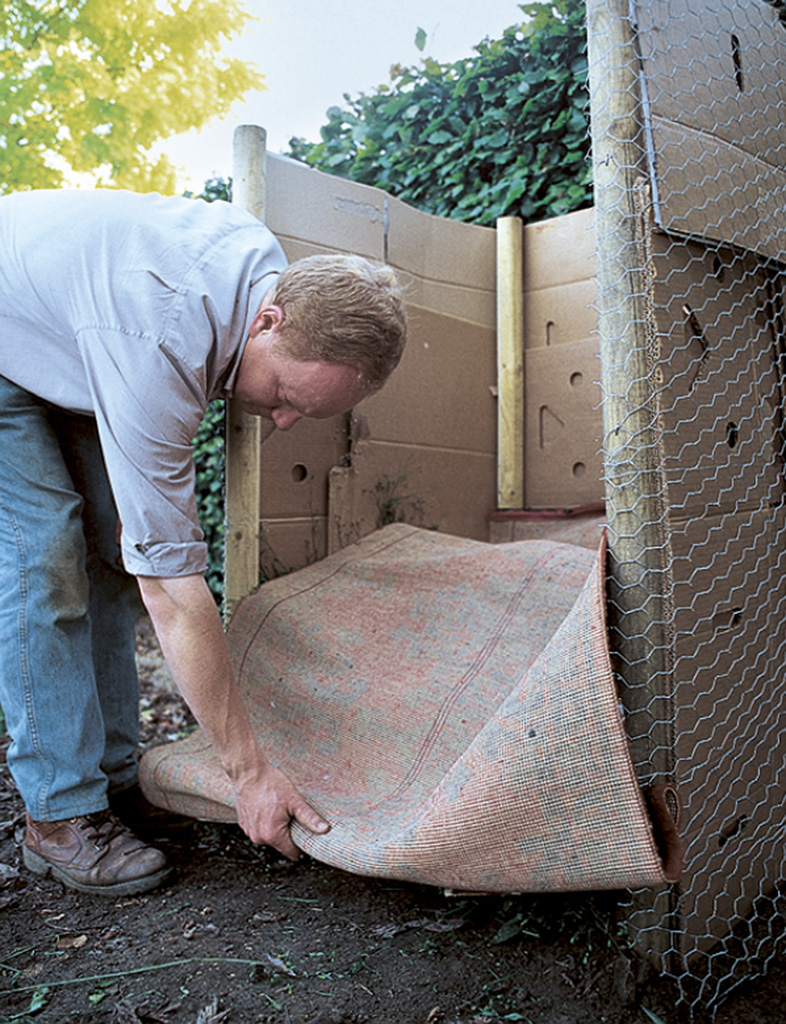
6 Each time you add to the heap, remember to partially cover the contents, using insulating material such as an old rug or plastic sheet.