
Chapter 10. HTML 101
HTML is the common language of the web. It is the programming language of every web page on the Internet. To do anything on the web you need a solid grounding in how HTML works and how others use it.
HTML stands for HyperText Markup Language. “HyperText” means there are hyperlinks between documents and within documents. Linked pages are what allow the web to constantly expand and become more interconnected. A markup language uses tags to mark up the text to apply formatting and structure. A tag is essentially a text marker that signifies the start and the end of a particular kind of formatting.
HTML was created by Tim Berners-Lee, a researcher at a scientific think tank called CERN in Switzerland, in 1991. He wanted to create a simple system of document organization that allowed for simplicity and cross referencing. When other people began using HTML, it took off, and the Web as we know it was born.
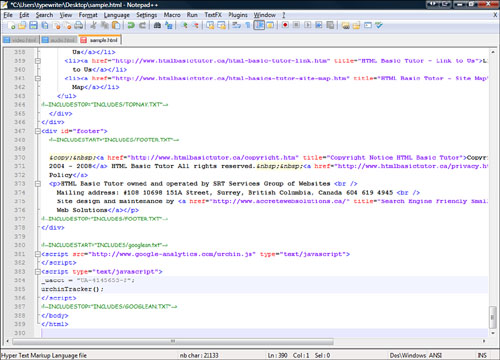
If you’ve never done any type of programming, you’re probably thinking it’s much too difficult to pick up in one chapter (see Figure 10.1). On the contrary, HTML is really easy if you understand the basics and keep it simple. My background is not in math or engineering. Like millions of other people, I learned HTML by reading about it and trying things out. HTML is a great sandbox in which to learn things.
This chapter covers the basics of how HTML works, common HTML tags, and HTML editors. All these things will help you create web pages and understand what other people have created.
Your first look at the underlying code of a web page can be baffling. Why? Because without an understanding of how HTML works, it’s difficult to interpret what’s going on. So the first step in figuring this all out is learning the basic parts of HTML.
As mentioned previously, HTML is a mark-up language. You use tags to “mark up” text. These tags are then interpreted by a browser and the correct formatting and structures are displayed on the web page. The web browser doesn’t display the code, but rather the coded content, based on the HTML you created.
A tag is a text label applied to a block of text. A tag has three parts:
![]() The opening tag—The beginning of a tag is signified with a
The opening tag—The beginning of a tag is signified with a < sign. This is then followed by the tag name and a >. For example, <bold>.
![]() The text affected by the tag—Anything contained within the tag has the formatting or structure applied to it.
The text affected by the tag—Anything contained within the tag has the formatting or structure applied to it.
![]() The closing tag—This ends the tag affecting the text. It is made up of the
The closing tag—This ends the tag affecting the text. It is made up of the < and then a / to signify closure, the tag name, and then a >. For example, </bold>.
For example, take this block of text:
The quick brown fox jumped over the lazy dog.
This is just plain text. Add the tags and it looks like this:
The <bold>quick</bold> brown fox jumped over the lazy dog.
tip
Notice how the tags add no spaces to the displayed text. It is as if they are not there. Keep this in mind when creating your HTML.
Viewed in the browser, the text becomes
The quick brown fox jumped over the lazy dog.
Tags can be nested within each other, also. For example,
The <italics><bold>quick</bold> brown fox</italics> jumped over the lazy dog.
produces text that looks like this:
The quick brown fox jumped over the lazy dog.
The italics tag is applied to all the text within the tag, including the bold text.
This is the same for any tag, or set of tags. What is between the tag has the formatting for the tag applied to it.
The next section covers the most commonly used tags—what they do and how to use them.
It is important to familiarize yourself with a few commonly used HTML tags. The following list contains these commonly used HTML tags, organized into categories. Each tag is accompanied by a description, an example of the code, and an example of the result where appropriate.
The following sections describe the tags that make up the structure and frame of your web page.
All other HTML tags must be contained in this tag. This should be the first and last tag in your document.
This tag defines the structure of the header of the HTML document. It never appears in the browser but contains title information, scripting, and other formatting information.
This is the web page title. This text appears on the title bar of your browser. This should appear within the Header tag.
This is the entire body of your web page. Anything you want to show up on the page must be contained in a body tag.
This tag enables you to document your code. Documenting means adding notes in your code that explain what different parts of the code do. Developers use this to communicate with the people reading their code or as notes for their own reference. This makes it easy to make sense of large HTML documents. Always try to document your code as much as possible. This will never be displayed on your web page but helps in the editing process. For example,
<!-- This is the body section of my web page -->
This tag assigns divisions to the body of the web page, and formatting can be applied to these divisions. The <div> tag does not show up in the browser but the effects of it do. Use it to apply formatting to different division of your web page. For more information on the <div> tag consult Chapter 13, “Using HTML to Build a Site.”
These tags affect the text in the body of your page.
caution
Don’t use any old font face you have on your computer in this tag. It might work correctly on your machine, but you don’t know what your visitors have on their machines. If the font is not on the visitor’s machine, the browser will display the default font of the browser and the page might not display as you intended.
This tag defines the size, color, and typeface contained in the tag. Each of these specific details is defined within the start tag. For example, if you want Arial text, size 8, and red, the tag would be
<font face="arial" color="red" size="8"></font>
This tag bolds text. It makes text appear darker and slightly larger than regular text.
For example, The <bold>quick</bold> brown fox. produces
The quick brown fox.
This tag italicizes text. It makes text appear slanted to the right.
For example, The <italic>quick</italic> brown fox. produces
The quick brown fox.
This tag creates strikethrough text, which means there is a line running through the text.
For example, The <strike>quick</strike> brown fox. produces
The quick brown fox.
This tag underlines text. A line appears under all the text.
For example, The <u>quick</u> brown fox. produces
The quick brown fox.
Text that appears below the line of other text.
For example, The <sub>quick</sub> brown fox. produces
The quick brown fox.
Text that appears above the line of other text.
For example, The <sup>quick</sup> brown fox. produces
The quick brown fox.
Centers text.
For example, <center>The quick brown fox. </center> produces
The quick brown fox.
This formats the text contained within the tag into one of six headings. These headings are used to organize your text in the same way you would see in a typical document. The headings correspond to hierarchical levels, so for example H1 is larger and more prominent than H2, and so on.
For example, <h1>The</h1><h2>quick</h2>brown<h3>fox.</h3> produces

This tag defines a paragraph and includes formatting and spacing of the paragraph.
For example, <p>The quick brown fox jumps over the lazy dog.</p> produces
The quick brown fox jumps over the lazy dog.
A horizontal rule runs across the page.
For example, The quick brown fox. <hr> produces
The quick brown fox.
This tag breaks a line of text. You might want to use this to have lines of text line up and break how you want them instead of letting the browser break them up by default.
For example, The quick <br>brown fox. produces
The quick
brown fox.
Lists in HTML come in two flavors: unordered (that is, with bullets) or ordered (that is, with numbers). The first thing you need to do is define text as a list and then define the elements of that list. Each of these things has its own unique tag that works with the other tags to create the list. First, I will cover the tags and then how to put them together.
Tables are like lists. They combine several tags to make one table, just as several tags make one list. Tables are made up of rows and columns. The table can also have a header row that acts like a title row. Again, I will describe the table tags and then put them together in code.
This tag surrounds the table and defines its limits. Properties of the table are also defined within this tag—things like border, alignment, and width.
This defines a row as a header and is displayed in bold type.
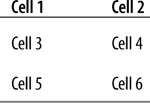
So to create a table that has three rows and two columns, the HTML code would look like this:
<table border="1">
<tr>
<th>Cell 1</th>
<th>Cell 2</th>
</tr>
<tr>
<td>Cell 3</td>
<td>Cell 4</td>
</tr>
<tr>
<td>Cell 5</td>
<td>Cell 6</td>
</tr>
</table>
This creates a table that displays like this:
Tables can get much more complicated than this. You can nest tables within tables to create very complex structures for displaying information.
Hyperlinks are defined as anchors and references in HTML. An anchor is the hyperlinked text or graphic, and a reference is where you are taken when you click on the hyperlink. Text and graphics can serve as anchors. References can be within an HTML document or to another document.
A hyperlink is made up of these parts: an anchor tag, a reference, and the text or image that is hyperlinked. For instance:
Follow this <a href="http://www.flickr.com">link</a>
This creates a hyperlink for the word “link” that goes to http://www.flickr.com.
To open the link in a new window, add a target in the anchor tag:
Follow this <a href="http://www.flickr.com" target="_blank">link</a>
The link now opens a new window.
In the browser, the hyperlinked text appears blue and underlined by default. If it is an image, it is outlined in blue. When you put your mouse over a hyperlink it turns from an arrow to a small hand.
Images do not appear in HTML code. What appears are references to files. These references might be on the local web server or elsewhere on the web. For example:
<img src="angry.gif" />
This displays the image file angry.gif if the file is in the same directory as the HTML file.
tip
Do not reference files on your hard drive. This can sometimes happen when you’re using a WYSIWYG editor. Always refer to the image file location in reference to the page you are on. If the image is in the same directory just use the name of the file. Be very careful what references you make. References are a common source of error, so double-check them carefully.
Now that you understand the basics of HTML, you’ll want to begin creating and editing HTML code. You can use a number of free HTML editors, and they fall into two categories: text editors and WYSIWYG editors. A text editor edits HTML code directly; a WYSIWYG editor builds HTML code for you.
Text editors enable you to work directly in the HTML code. This makes it easy for you to search the text document, find exactly what you’re looking for, and quickly make your edits. With a WYSIWYG editor, the code you want to change can sometimes be hard to find. I prefer to edit HTML code using a text editor. Here are some common text editors:
![]() Notepad (Windows)—This comes standard with the Windows operating system.
Notepad (Windows)—This comes standard with the Windows operating system.
![]() Notepad ++ (Windows, Linux)—http://notepad-plus.sourceforge.net/uk/site.htm
Notepad ++ (Windows, Linux)—http://notepad-plus.sourceforge.net/uk/site.htm
![]() TextWrangler (Mac)—http://www.barebones.com/products/textwrangler/index.shtml (see Figure 10.2)
TextWrangler (Mac)—http://www.barebones.com/products/textwrangler/index.shtml (see Figure 10.2)

![]() XEmacs (Windows, Linux, UNIX)—http://www.xemacs.org/index.html
XEmacs (Windows, Linux, UNIX)—http://www.xemacs.org/index.html
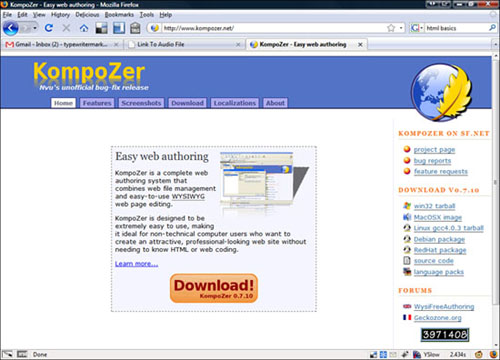
These editors build web pages graphically and build the code for you. This means you build the web page as it will be seen in the browser and the WYSIWYG browser creates the code for you. They make doing things such as creating complex tables incredibly simple. Unfortunately, they can also fill your HTML with needless tags, but they are ideal for beginners. Here are a few major ones:
![]() Kompozer (Windows, Mac, Linux)—http://www.kompozer.net/ (see Figure 10.3)
Kompozer (Windows, Mac, Linux)—http://www.kompozer.net/ (see Figure 10.3)
![]() Quanta Plus (Windows, Linux)—http://quanta.kdewebdev.org/
Quanta Plus (Windows, Linux)—http://quanta.kdewebdev.org/
![]() bluefish (windows, Mac, Linux)—http://bluefish.openoffice.nl/
bluefish (windows, Mac, Linux)—http://bluefish.openoffice.nl/
![]() OpenLaszlo (Windows, Mac, Linux)—http://www.openlaszlo.org/
OpenLaszlo (Windows, Mac, Linux)—http://www.openlaszlo.org/
This chapter just scratches the surface of HTML. There is so much more to learn, and the more you learn, the more you can do with your websites.
Here are some resources to further your understanding of HTML:
![]() W3 Schools (http://www.w3schools.com/)—Probably the best, most concise HTML teaching tool on the Internet (see Figure 10.4). Bookmark this site because you will return to it many times.
W3 Schools (http://www.w3schools.com/)—Probably the best, most concise HTML teaching tool on the Internet (see Figure 10.4). Bookmark this site because you will return to it many times.

![]() webmonkey Web Basics (http://www.webmonkey.com/tutorial/tag/web_basics)—This is another excellent site for beginners.
webmonkey Web Basics (http://www.webmonkey.com/tutorial/tag/web_basics)—This is another excellent site for beginners.
![]() If you know nothing about HTML, this is where you start (http://www.htmlgoodies.com/primers/html/article.php/3478131)—The title says it all. This is an excellent collection of HTML primers.
If you know nothing about HTML, this is where you start (http://www.htmlgoodies.com/primers/html/article.php/3478131)—The title says it all. This is an excellent collection of HTML primers.
![]() HTML Basic Tutor (http://www.htmlbasictutor.ca/)—This site is like having your very own HTML tutor.
HTML Basic Tutor (http://www.htmlbasictutor.ca/)—This site is like having your very own HTML tutor.